

Whirlpool RF356BXD User Manual
UseAndCare
Table of Contents
(complete)
A Note to You . . . . . . . . . . . . . . . . . 3
Your Range . . . . . . . . . . . . . . . . . . . . 7
. . . . . . . . . . . . . . . . . . . 2
PART NO. 3190502
Using Your Range
Using the Self-
Cleaning Cycle . . . . . . . . . . . . . 22
Caring for Your
Range
Troubleshooting
or Service
Index . . . . . . . . . . . . . . . . . . . . . . . . . . . . . 35
Warranty . . . . . . . . . . . . . . . . . . . . . . . 36
. . . . . . . . . . . . . . . . . . . . . . . . . . . .
. . . . . . . . . . . . . . . . . . . . . 31
1-800-253-I 301
Call us with questions or comments.
SELF-CLEANING ELECTRIC RANGE
MODEL RF356BXD
. . . . . . . . . 8
26
. . . . . . . . . . 29
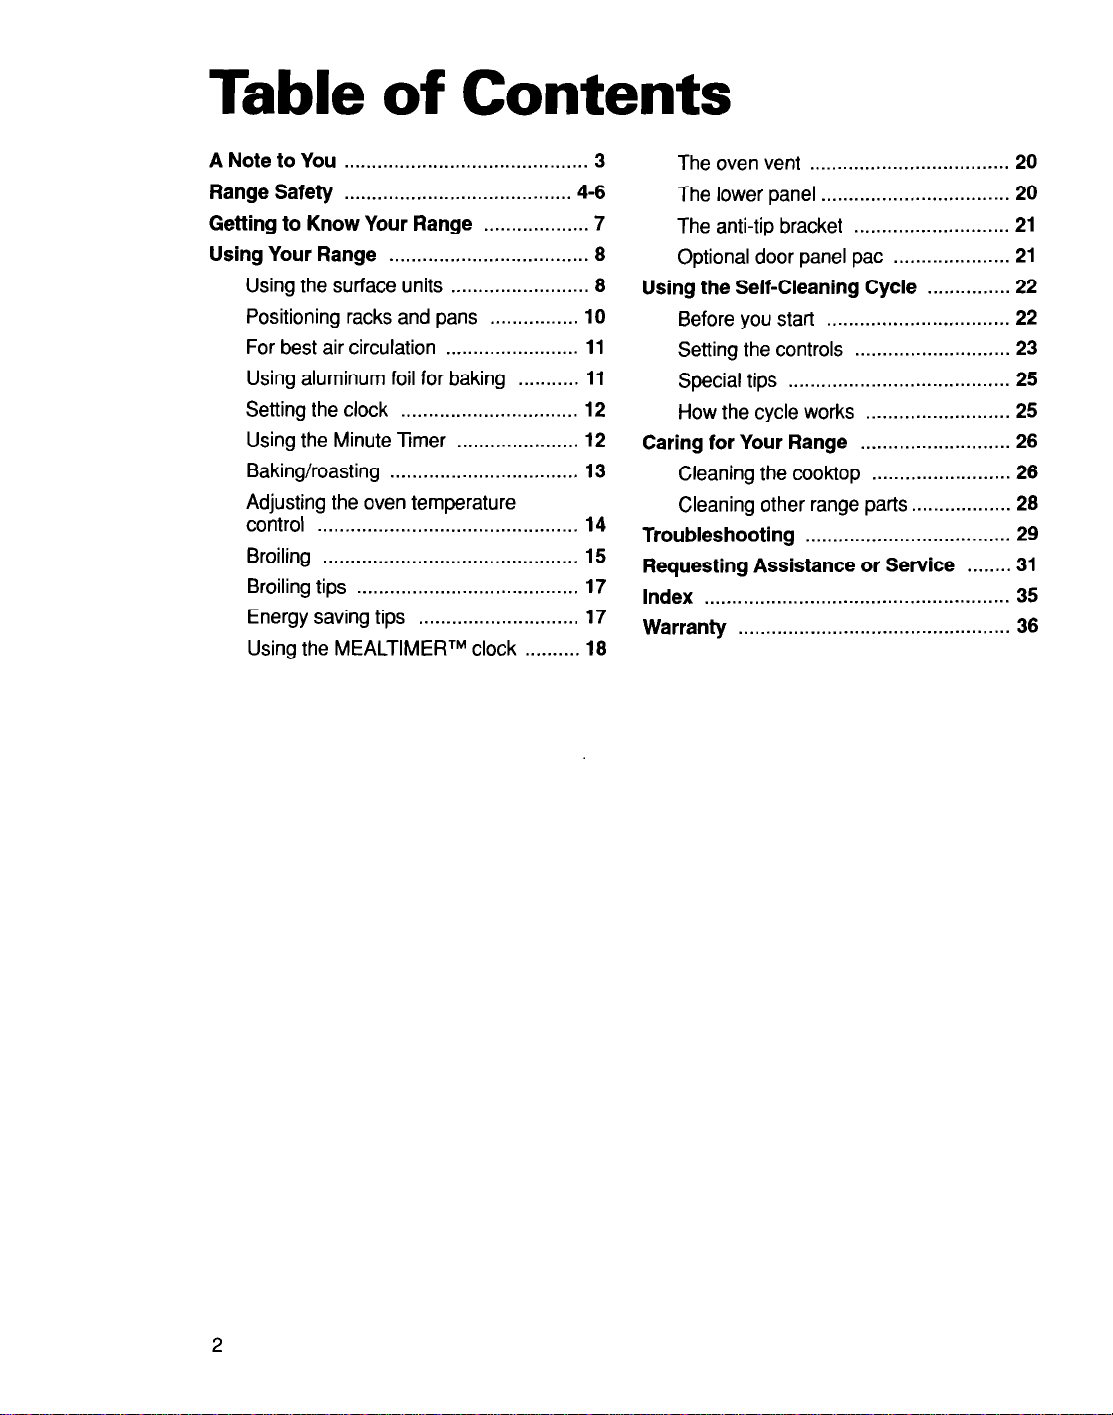
Table of Contents
A Note to You
Range Safety
............................................
.........................................
Getting to Know Your Range
Using Your Range
Using the surface units
Positioning racks and pans
For best air circulation
Using aluminum foil for baking
Setting the clock
Using the Minute Ttmer
Baking/roasting
Adjusting the oven temperature
control
Broiling
Broiling tips
Energy saving tips
Using the MEALTIMERTM clock
...............................................
..............................................
....................................
.........................
........................
................................
......................
..................................
........................................
.............................
4-6
...................
................
10
11
..........
11
12
12
13
14
15
17
17
18
...........
3
7
8
8
The oven vent
The lower panel
The anti-tip bracket
Optional door panel pat
Using the Self-Cleaning Cycle
Before you start
Setting the controls
Special tips
How the cycle works
....................................
..................................
................................. 22
........................................
Caring for Your Range
Cleaning the cooktop
Cleaning other range parts
Troubleshooting
.....................................
Requesting Assistance or Service
Index
Warranty
.......................................................
.................................................
............................
.....................
............... 22
............................
..........................
...........................
.........................
.................. 28
.......
20
20
21
21
23
25
25
26
26
29
.31
35
36
A Note to You
Thank you for buying a WHIRLPOOL@ appliance.
Because your life is getting busier and more complicated, WHIRLPOOL ranges are easy to
use, save time, and help you manage your home better. To ensure that you enjoy years of
trouble-free operation, we developed this Use and Care Guide. It is full of valuable information about how to operate and maintain your appliance properly and safely. Please read
it carefully.
Also, please complete and mail in the Ownership Registration Card provided with your
appliance. The card helps us notify you about any new information on your appliance.
Please record your model’s information.
Whenever you call to request service for
your appliance, you need to know your
complete model number and serial number.
You can find this information on the model
and serial number plate (see diagram on
page 7 for location of plate).
Please also record the purchase date of
your appliance and your dealer’s name,
address, and telephone number.
Keep this book and the sales slip together in a safe place for future reference.
Model Number
Serial Number
Purchase Date
Dealer Name
Dealer Address
Dealer Phone
Our Consumer Assistance Center
number is toll-free 24 hours a day.
I
1-800-253-1301
I
3
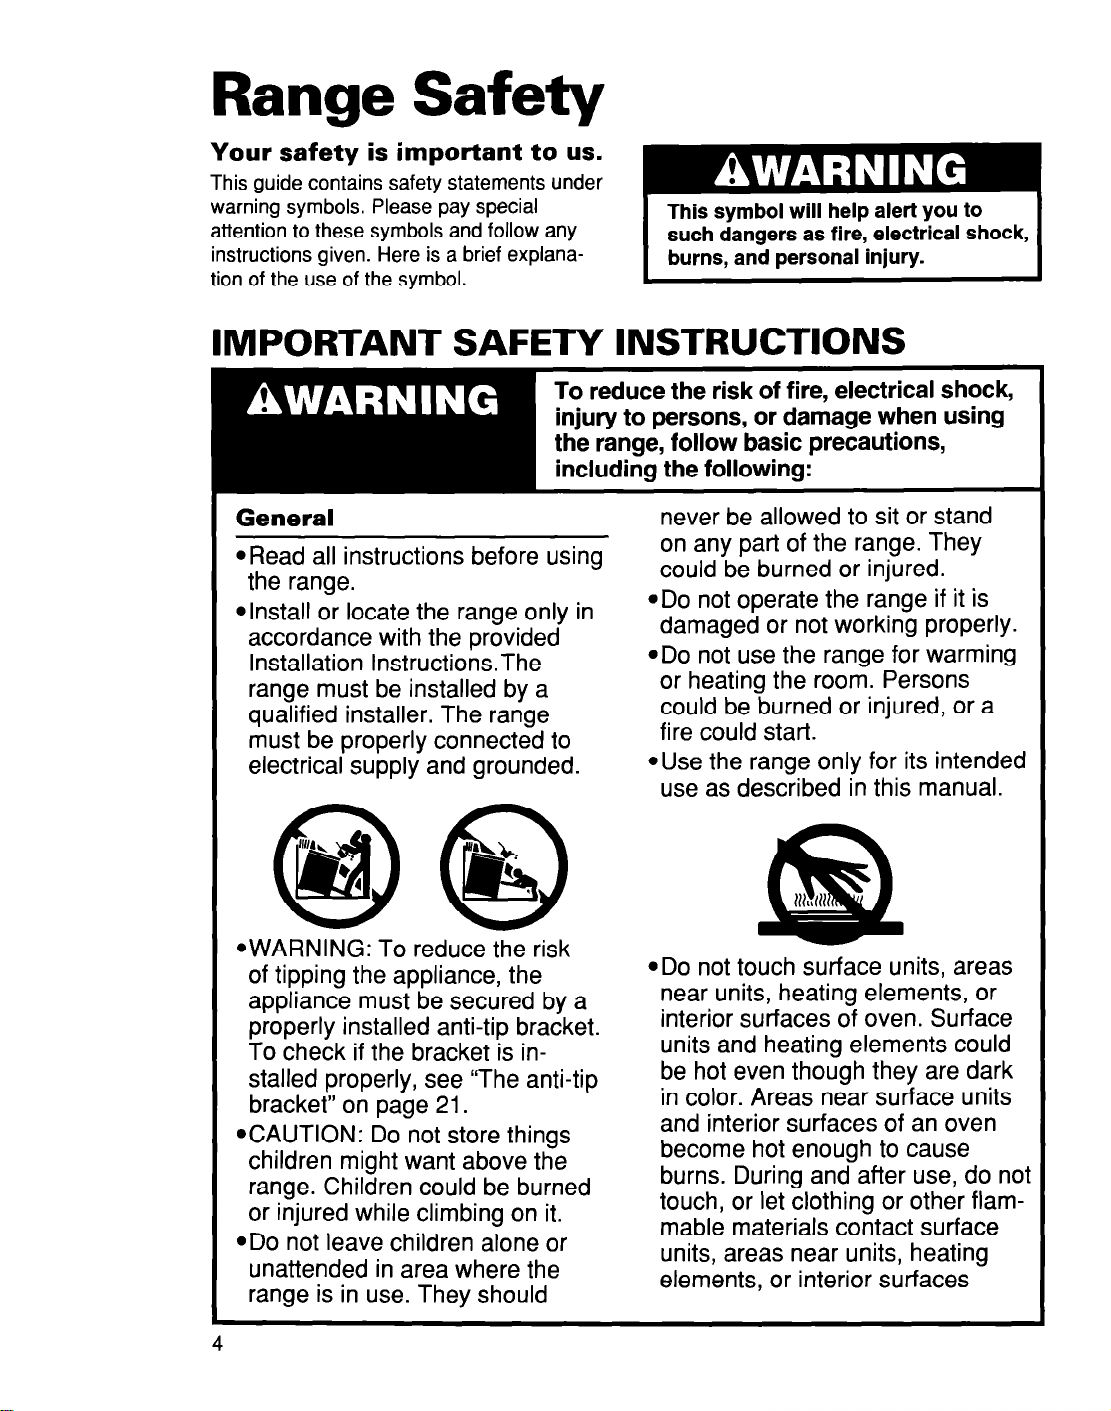
Range Safety
Your safety is important to us.
This guide contains safety statements under
warning symbols. Please pay special
attention to these symbols and follow any
instructions given. Here is a brief explanation of the use of the symbol.
IMPORTANT SAFETY INSTRUCTIONS
To reduce the risk of fire, electrical shock,
injury to persons, or damage when using
the range, follow basic precautions,
including the following:
I
This symbol will help alert you to
such dangers as fire, electrical shock,
burns, and personal injury.
General
@Read all instructions before using
the range.
l
Install or locate the range only in
accordance with the provided
Installation Instructions.The
range must be installed by a
qualified installer. The range
must be properly connected to
electrical supply and grounded.
never be allowed to sit or stand
on any part of the range. They
could be burned or injured.
.Do not operate the range if it is
damaged or not working properly.
~DO not use the range for warming
or heating the room. Persons
could be burned or injured, or a
fire could start.
*Use the range only for its intended
use as described in this manual.
@g)(g) $&
@WARNING: To reduce the risk
of tipping the appliance, the
appliance must be secured by a
properly installed anti-tip bracket.
To check if the bracket is installed properly, see “The anti-tip
bracket” on page 21.
l
CAUTION: Do not store things
children might want above the
range. Children could be burned
or injured while climbing on it.
ADO not leave children alone or
unattended in area where the
range is in use. They should
.Do not touch surface units, areas
near units, heating elements, or
interior surfaces of oven. Surface
units and heating elements could
be hot even though they are dark
in color. Areas near surface units
and interior surfaces of an oven
become hot enough to cause
burns. During and after use, do not
touch, or let clothing or other flammable materials contact surface
units, areas near units, heating
elements, or interior surfaces
4
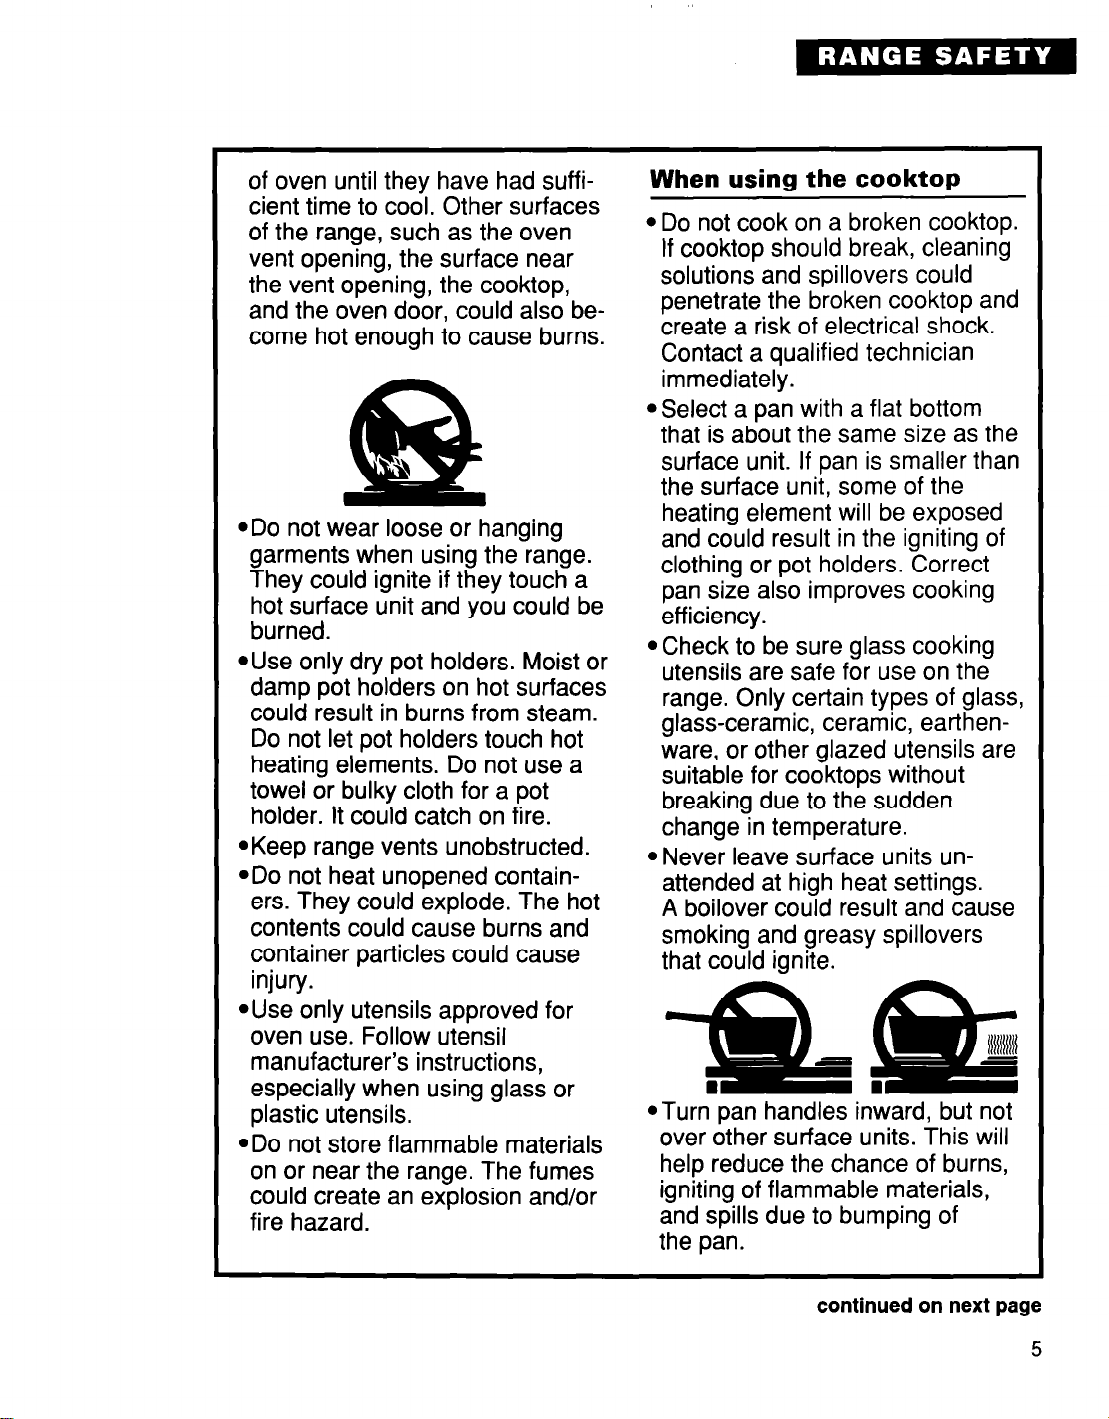
of oven until they have had suffi-
cient time to cool. Other surfaces
of the range, such as the oven
vent opening, the surface near
the vent opening, the cooktop,
and the oven door, could also become hot enough to cause burns.
‘!
e
@Do not wear loose or hanging
garments when using the range.
They could ignite if they touch a
hot surface unit and you could be
burned.
*Use only dry pot holders. Moist or
damp pot holders on hot surfaces
could result in burns from steam.
Do not let pot holders touch hot
heating elements. Do not use a
towel or bulky cloth for a pot
holder. It could catch on fire.
l
Keep range vents unobstructed.
@Do not heat unopened contain-
ers. They could explode. The hot
contents could cause burns and
container particles could cause
injury.
*Use only utensils approved for
oven use. Follow utensil
manufacturer’s instructions,
especially when using glass or
plastic utensils.
.Do not store flammable materials
on or near the range. The fumes
could create an explosion and/or
fire hazard.
When using the cooktop
*Do not cook on a broken cooktop.
If cooktop should break, cleaning
solutions and spillovers could
penetrate the broken cooktop and
create a risk of electrical shock.
Contact a qualified technician
immediately.
.Select a pan with a flat bottom
that is about the same size as the
surface unit. If pan is smaller than
the surface unit, some of the
heating element will be exposed
and could result in the igniting of
clothing or pot holders. Correct
pan size also improves cooking
efficiency.
aCheck to be sure glass cooking
utensils are safe for use on the
range. Only certain types of glass,
glass-ceramic, ceramic, earthenware, or other glazed utensils are
suitable for cooktops without
breaking due to the sudden
change in temperature.
@Never leave surface units un-
attended at high heat settings.
A boilover could result and cause
smoking and greasy spillovers
that could ignite.
@Turn pan handles inward, but not
over other surface units. This will
help reduce the chance of burns,
igniting of flammable materials,
and spills due to bumping of
the pan.
continued on next page
5
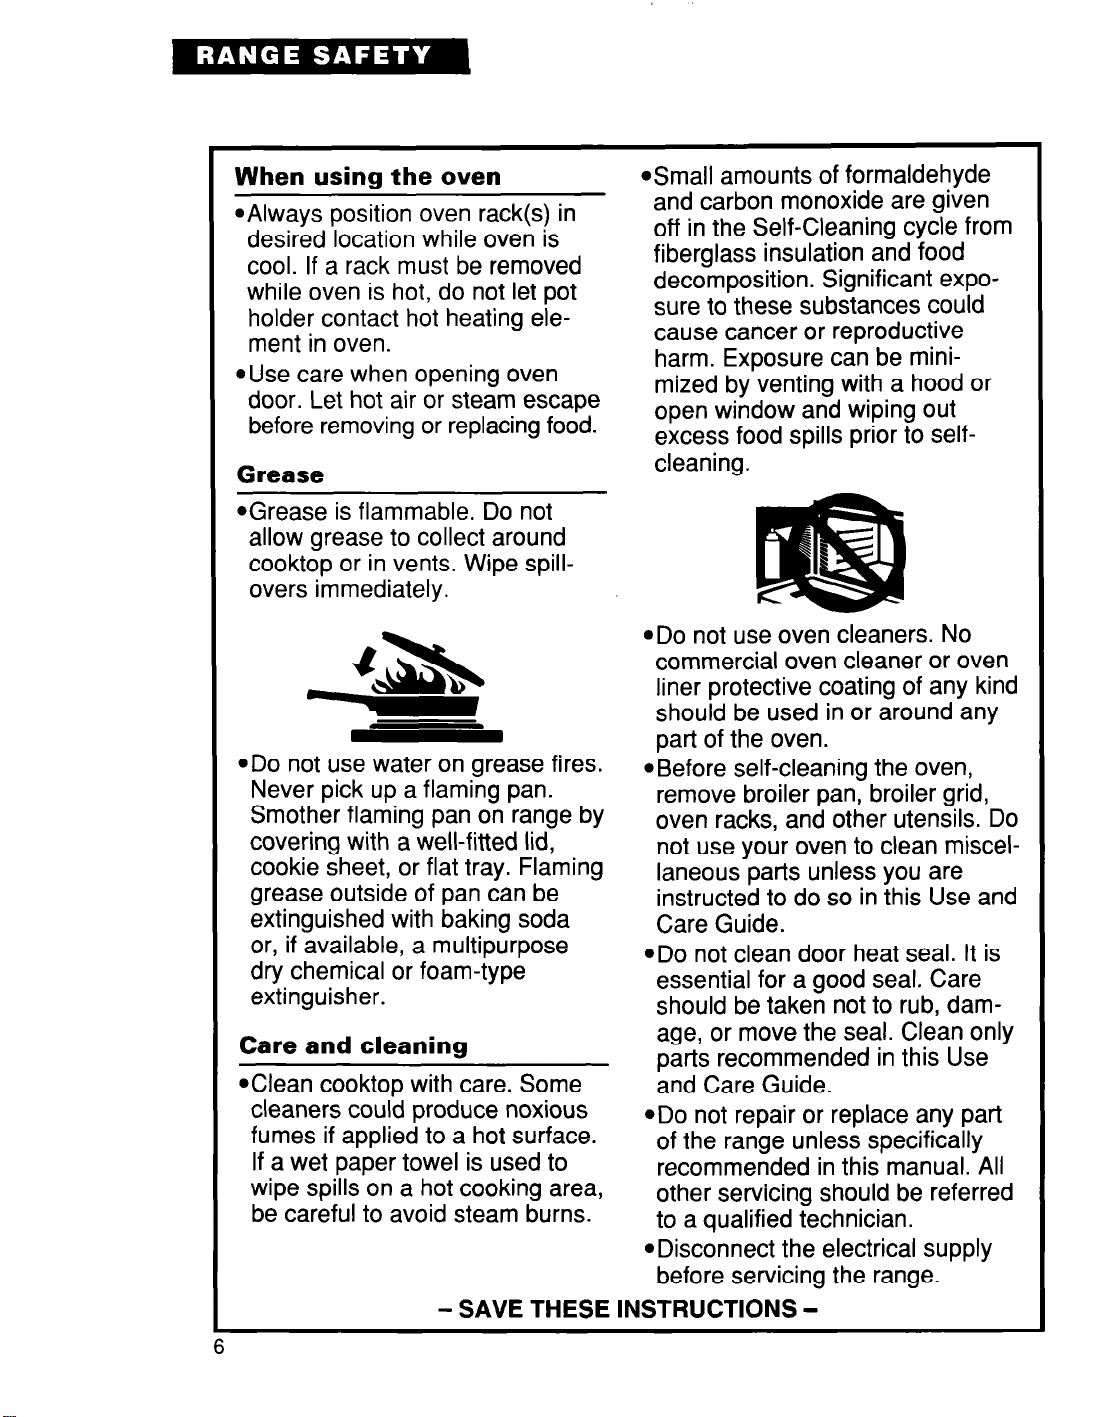
When using the oven
@Always position oven rack(s) in
desired location while oven is
cool. If a rack must be removed
while oven is hot, do not let pot
holder contact hot heating ele-
ment in oven.
@Use care when opening oven
door. Let hot air or steam escape
before removing or replacing food.
Grease
@Grease is flammable. Do not
allow grease to collect around
cooktop or in vents. Wipe spillovers immediately.
@Do not use water on grease fires.
Never pick up a flaming pan.
Smother flaming pan on range by
covering with a well-fitted lid,
cookie sheet, or flat tray. Flaming
grease outside of pan can be
extinguished with baking soda
or, if available, a multipurpose
dry chemical or foam-type
extinguisher.
Care and cleaning
@Clean cooktop with care. Some
cleaners could produce noxious
fumes if applied to a hot surface.
If a wet paper towel is used to
wipe spills on a hot cooking area,
be careful to avoid steam burns.
- SAVE THESE INSTRUCTIONS -
l
Small amounts of formaldehyde
and carbon monoxide are given
off in the Self-Cleaning cycle from
fiberglass insulation and food
decomposition. Significant exposure to these substances could
cause cancer or reproductive
harm. Exposure can be minimized by venting with a hood or
open window and wiping out
excess food spills prior to selfcleaning.
@Do not use oven cleaners. No
commercial oven cleaner or oven
liner protective coating of any kind
should be used in or around any
part of the oven.
@Before self-cleaning the oven,
remove broiler pan, broiler grid,
oven racks, and other utensils. Do
not use your oven to clean miscellaneous parts unless you are
instructed to do so in this Use and
Care Guide.
@Do not clean door heat seal. It is
essential for a good seal. Care
should be taken not to rub, dam-
age, or move the seal. Clean only
parts recommended in this Use
and Care Guide.
@Do not repair or replace any part
of the range unless specifically
recommended in this manual. All
other servicing should be referred
to a qualified technician.
@Disconnect the electrical supply
before servicing the range.
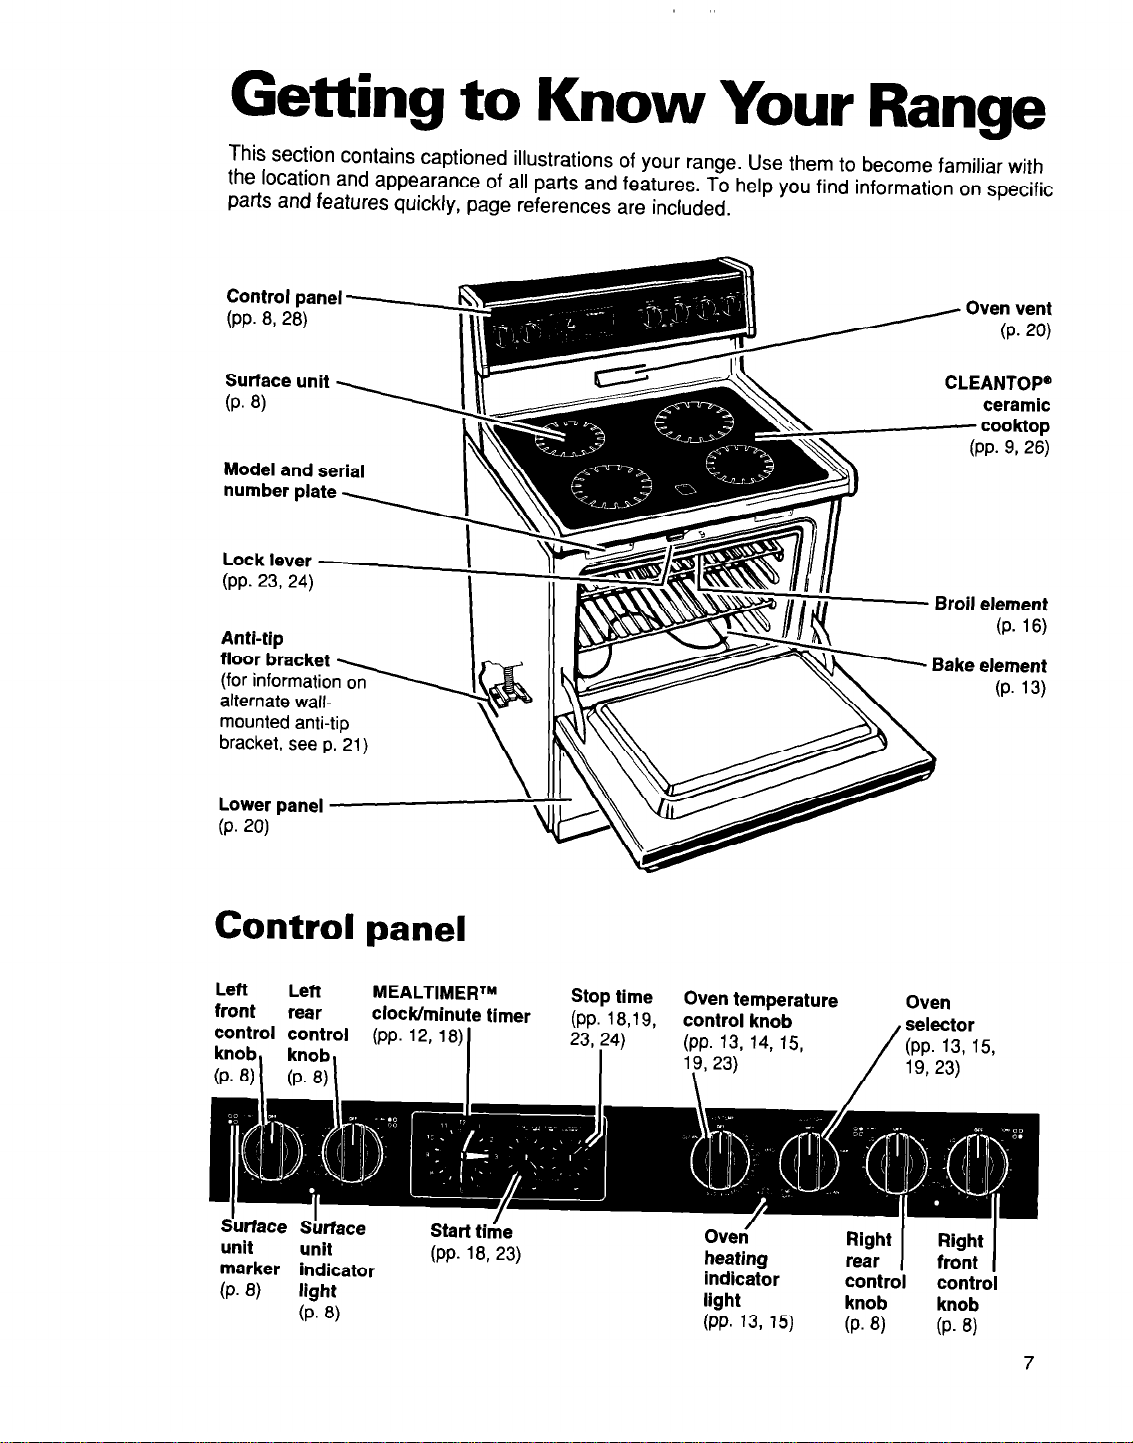
Getting to Know Your Range
This section
contains captioned illustrations of your range. Use them to become familiar with
the location and appearance of all parts and features. To help you find information on specific
parts and features quickly, page references are included.
Control panel
(PP. 8, 28)
Model and serial
Oven vent
(P. 20)
CLEANTOP”
f-srsmir
Broil element
(P. 16)
Anti-tip
Bake element
(P. 13)
alternate wallmounted anti-tip
bracket, see p. 21)
Lower panel
(P. 20)
Control panel
Left
front
;;;b’“l ;m’aol (PP. 12,18)
(P. 8) 1
&face &face
unlt
marker indicator
(P. 8)
Left MEALTIMERTM
rear
clock/minute timer
(P. 8) \
unit
light
(P. 8)
Start t&e
(PP. 18, 23)
,
~-
OveY
heating
indicator
light
(PP. 13, 15)
Right
rear
control
knob
(P. 8)
Right
front
I I
control
knob
(P. 8)
7
Using Your Range
To obtain the best cooking results possible, you must operate your range properly. This
section gives you important information for efficient and safe use of your range.
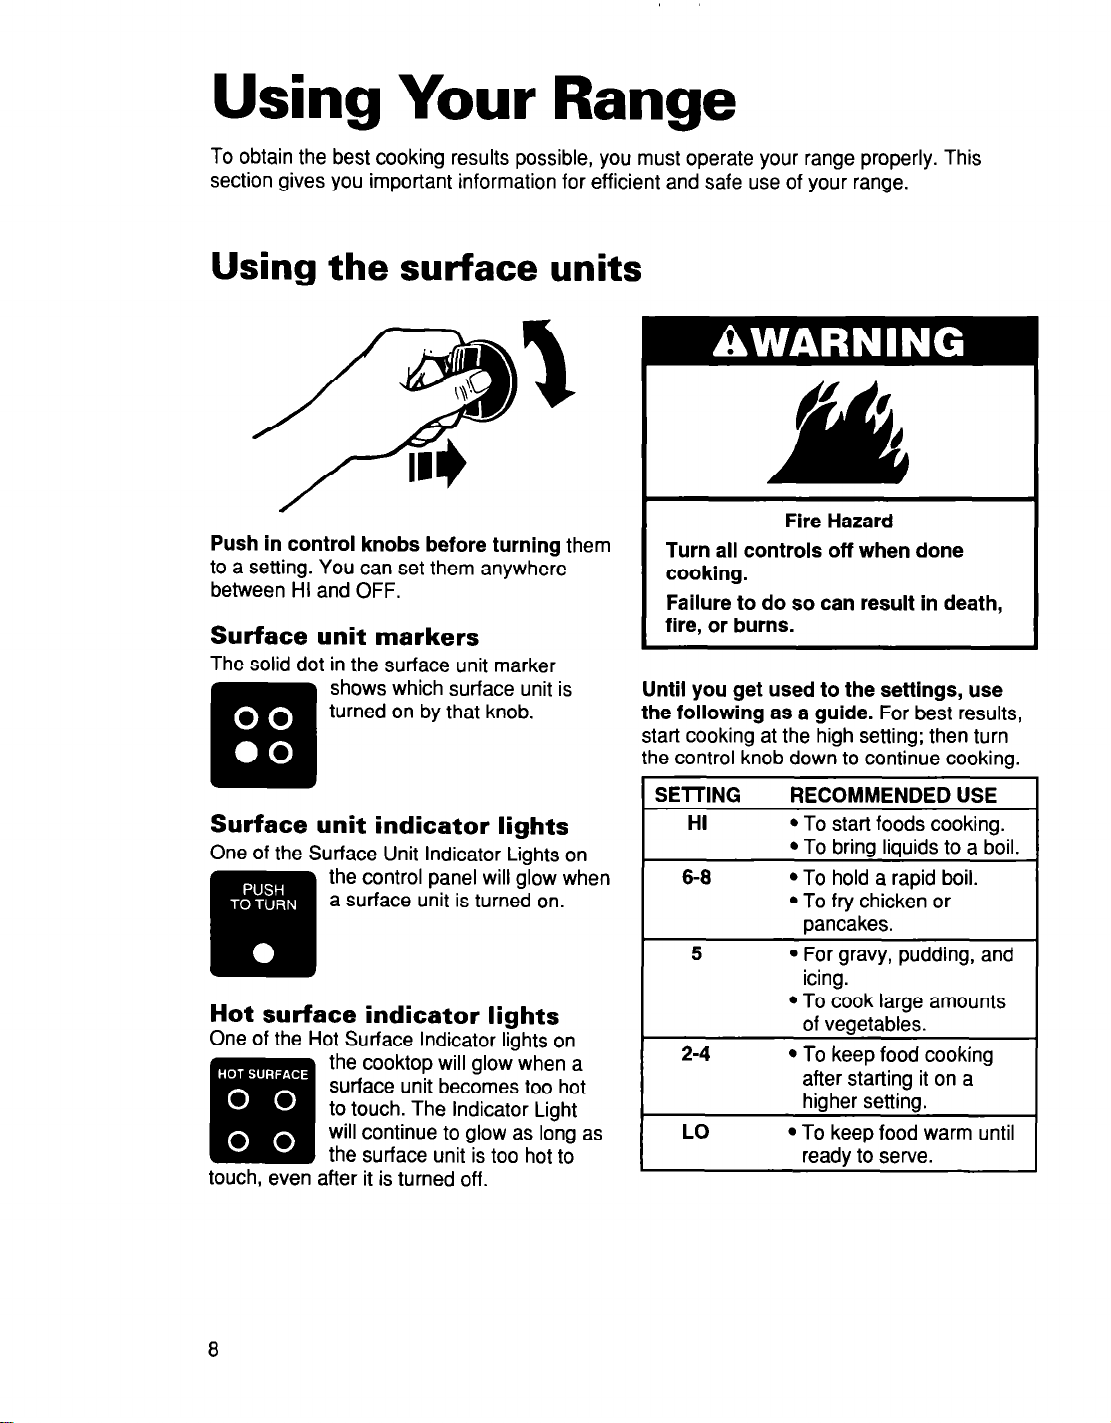
Using the surface units
Fire Hazard
Push in control knobs before turning
to a setting. You can set them anywhere
between HI and OFF.
Surface unit markers
The solid dot in the surface unit marker
them
Turn all controls off when done
cooking.
Failure to do so can result in death,
fire, or burns.
Until you get used to the settings, use
the following as a guide.
start cooking at the high setting; then turn
the control knob down to continue cooking.
For best results,
Surface unit indicator lights
One of the Surface Unit Indicator Lights on
Hot surface indicator lights
One of the Hot Surface Indicator lights on
the cooktop will glow when a
surface unit becomes too hot
to touch. The Indicator Light
will continue to glow as long as
the surface unit is too hot to
touch, even after it is turned off.
SElTlNG
HI
6-8
5
2-4
LO
RECOMMENDED USE
l
To start foods cooking.
l
To bring liquids to a boil.
l
To hold a rapid boil.
l
To fry chicken or
pancakes.
l
For gravy, pudding, and
icing.
l
To cook large amounts
of vegetables.
l
To keep food cooking
after starting it on a
higher setting.
l
To keep food warm until
ready to serve.
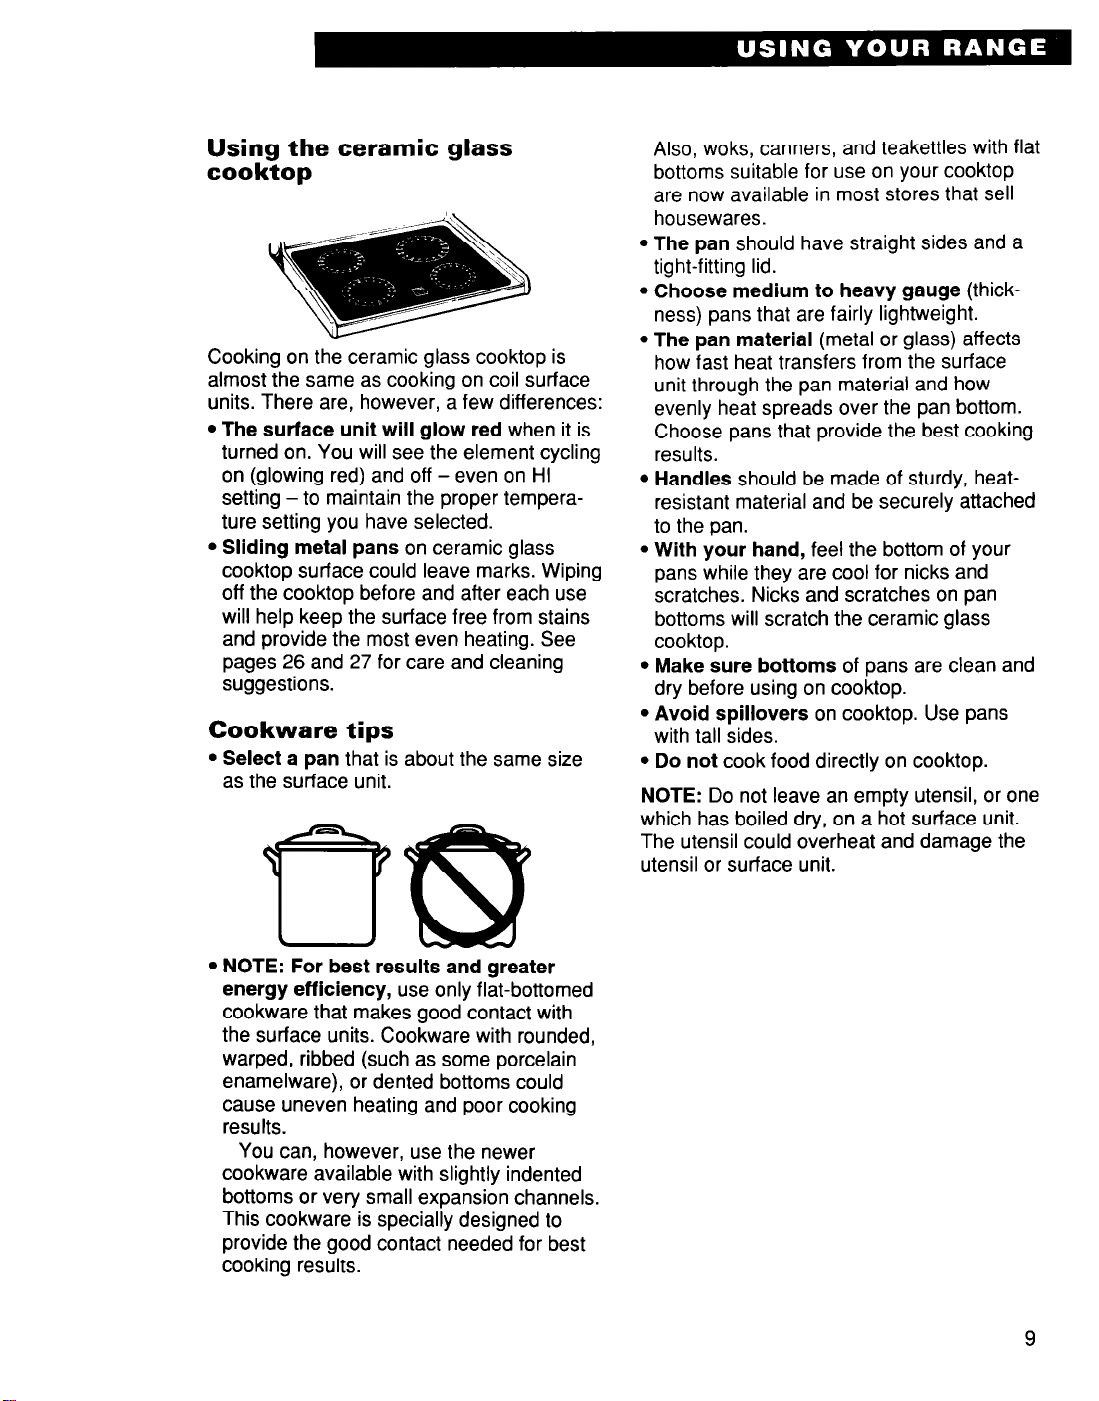
Using the ceramic glass
cooktop
Cooking on the ceramic glass cooktop is
almost the same as cooking on coil surface
units. There are, however, a few differences:
l
The surface unit will glow red
when it is
turned on. You will see the element cycling
on (glowing red) and off - even on HI
setting -to maintain the proper temperature setting you have selected.
l
Sliding metal pans
on ceramic glass
cooktop surface could leave marks. Wiping
off the cooktop before and after each use
will help keep the surface free from stains
and provide the most even heating. See
pages 26 and 27 for care and cleaning
suggestions.
Cookware tips
l
Select a pan
as the surface unit.
that is about the same size
Also, woks, canners, and teakettles with flat
bottoms suitable for use on your cooktop
are now available in most stores that sell
housewares.
l
The pan
should have straight sides and a
tight-fitting lid.
l
Choose medium to heavy gauge
(thick-
ness) pans that are fairly lightweight.
l
The pan material
(metal or glass) affects
how fast heat transfers from the surface
unit through the pan material and how
evenly heat spreads over the pan bottom.
Choose pans that provide the best cooking
results.
l
Handles
should be made of sturdy, heatresistant material and be securely attached
to the pan.
l
With your hand,
feel the bottom of your
pans while they are cool for nicks and
scratches. Nicks and scratches on pan
bottoms will scratch the ceramic glass
cooktop.
l
Make sure bottoms
of pans are clean and
dry before using on cooktop.
l
Avoid spillovers
on cooktop. Use pans
with tall sides.
l
Do not
NOTE:
cook food directly on cooktop.
Do not leave an empty utensil, or one
which has boiled dry, on a hot surface unit.
The utensil could overheat and damage the
utensil or surface unit.
l
NOTE: For best results and greater
energy efficiency,
use only flat-bottomed
cookware that makes good contact with
the surface units. Cookware with rounded,
warped, ribbed (such as some porcelain
enamelware), or dented bottoms could
cause uneven heating and poor cooking
results.
You can, however, use the newer
cookware available with slightly indented
bottoms or very small expansion channels.
This cookware is specially designed to
provide the good contact needed for best
cooking results.
9
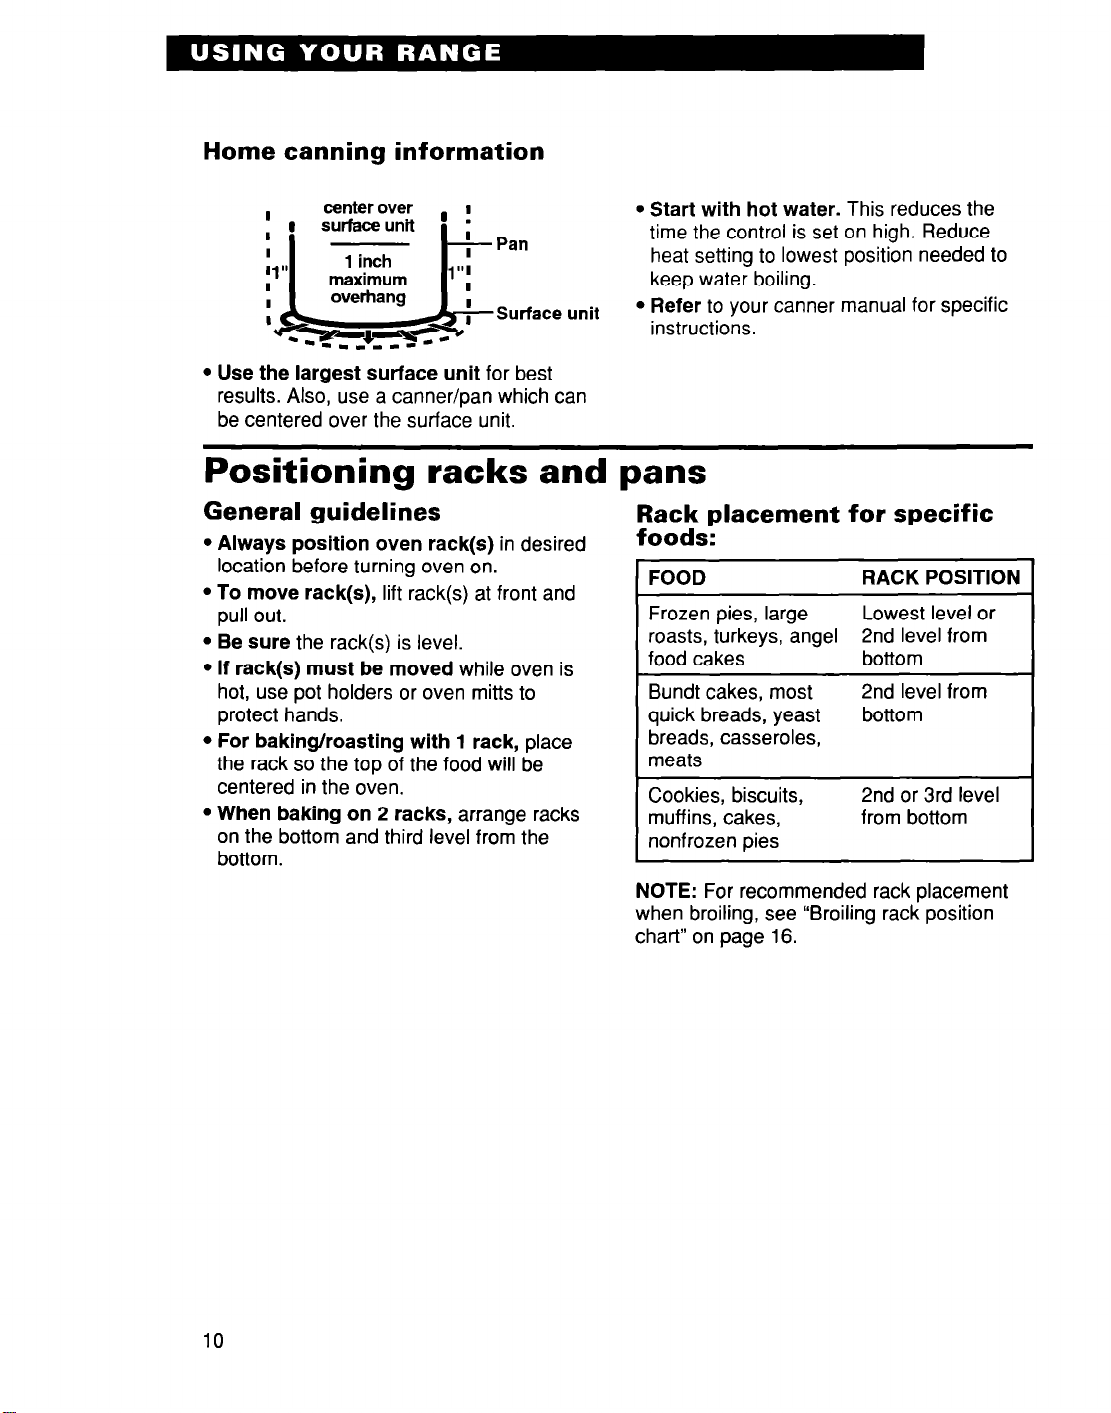
Home canning information
l
Start with hot water.
Pan
time the control is set on high. Reduce
heat setting to lowest position needed to
keep water boiling.
l
Refer
instructions.
l
Use the largest surface unit
Surface unit
for best
results. Also, use a canner/pan which can
be centered over the surface unit.
Positioning racks and pans
This reduces the
to your canner manual for specific
General guidelines
l
Always position oven rack(s)
location before turning oven on.
l
To move rack(s),
pull out.
l
Be sure
l
If rack(s) must be moved
hot, use pot holders or oven mitts to
protect hands.
l
For baking/roasting with 1 rack,
the rack so the too of the food will be
centered in the oven.
l
When baking on 2 racks,
on the bottom and third level from the
bottom.
the rack(s) is level.
lift rack(s) at front and
in desired
while oven is
arrange racks
place
Rack placement for specific
foods:
1 FOOD-
Frozen pies, large
roasts, turkeys, angel
food cakes
Bundt cakes, most
quick breads, yeast
RACK
Lowest level or
2nd level from
bottom
2nd level from
bottom
breads, casseroles,
meats
NOTE:
For recommended rack placement
when broiling, see “Broiling rack position
chart” on page 16.
POSITION
10
 Loading...