

Whirlpool RB270PXK User Manual
Whirlpool 30-INCH BUILT-IN SELF-CLEANING &
'continuous-cleaning electric ovens
Model RB270PXK
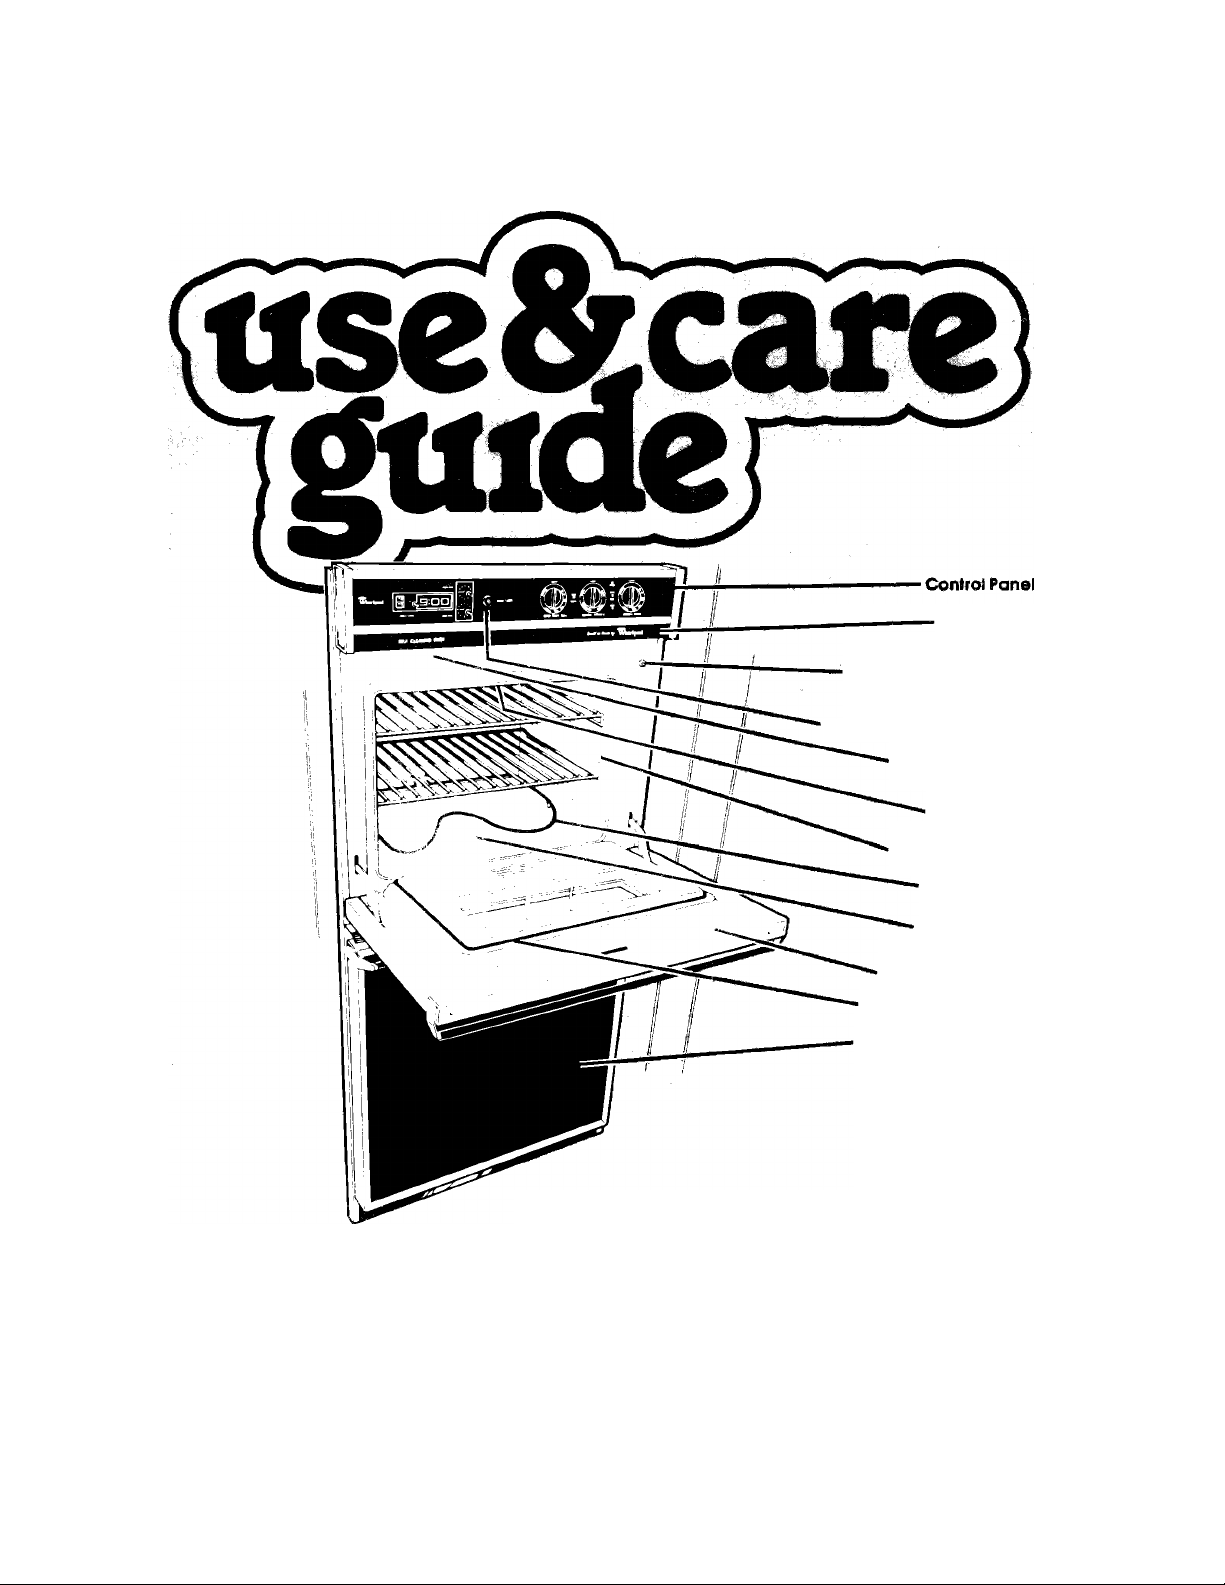
Lock Lever
Cover Panel
Automatic Upper Oven
Manual Oven Light Switch
Light Switch
Copy Your Model and Serial Numbers Here
I’ yOu nee
informoiior (■
1 Complete Model and Sena! Numbers (from the plate
just behinc trie upper oven door).
2 Purchase rn nstallation date from your sales slip
Copy this ir'.tormafion ir these spaces Keep this book,
your warranty and the saies slip together in a handy
place
nee or : ni with a question have this
See the “Cooking Guide”for important safety information.
Model and Serial
Number Ptate
Broil Element
Oven Rack Guide
Bake Element
Self-Cleaning
Upper Oven
Air Flow Oven Door
Fiberglass Heat Seal
Continuous-Cleaning
Lower Oven
Modei Nun-.ter
SeriOi NuTib9'
Purchase lnsta!latior> Dare
Service Company and Phone Number
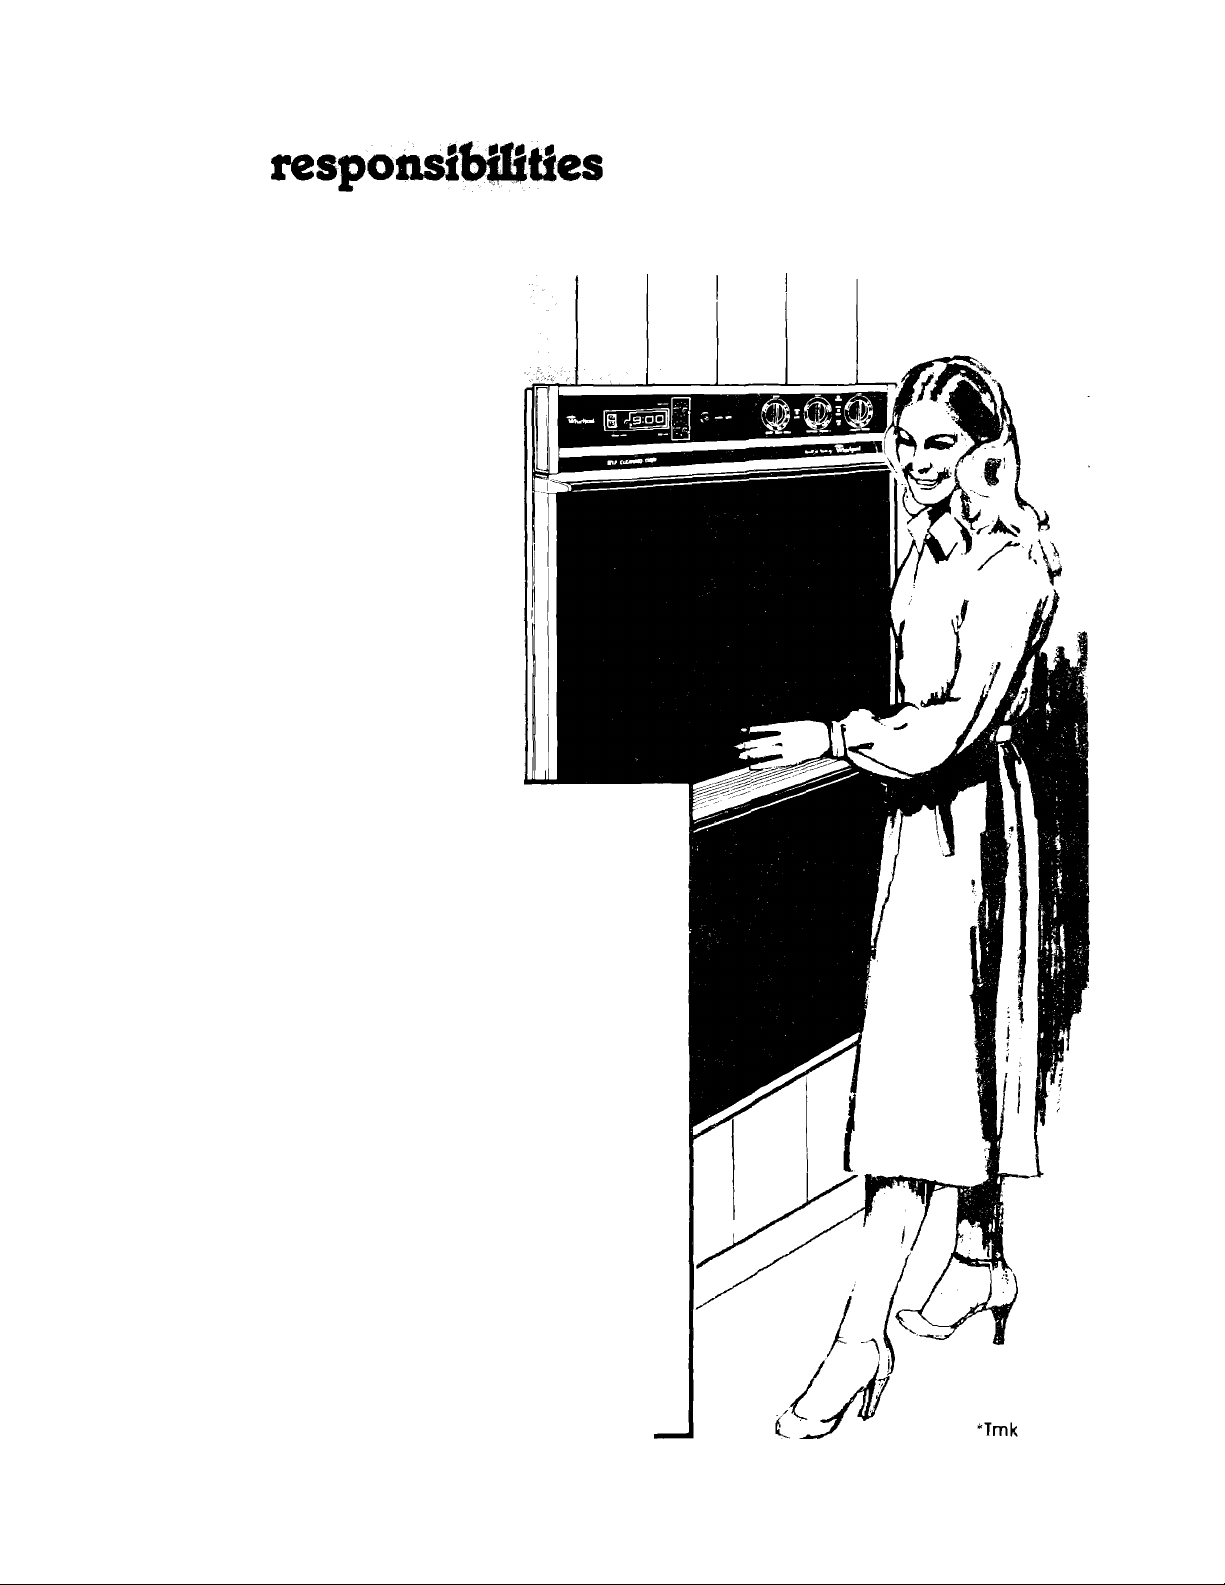
Proper ItYstallation and safe useof the oven are your personal
responsibilities. Read this "OSè ond Care Guide’’ and the "Cooking
Gulde”carefully forlmpodant úse and safety information.
Xnstallatioii
You must be sure your ovm Is...
• indalled and leveled In a won
or cablnetthat will hold the
weight;
• installed In a well-venWdted
area protected from thè
weather
• property connected to the cor- '
rect electric supply and
grounding, jsee "Installation
kwtructions.") .
Proper ttse
You must be sure your oven b...
• used only for jobs expected of
home ovens;
• used only by people who can
Offrale It properly;
• properly maintained.
• • •
Contents
Your Respônsibilities
Installation
Proper Use
Sotety . 3
Using Your Ovens
Baking in the UpperOven....................................... 4
Baking in the LowerOven ...................................... 4
Resetting Oven Temperature Control
Broiling in the UpperOven ...................................... 5
Broiling in the LowerOven
Oven Raok Positions ................................................. 6
Clock and Minute Timer ............................................ 7
Using the Automatic MEALTIMER* Clock ............... 7
Oven Vents.................................................................. 8
Optional Rôtisserie
Oven Lights................................................................. 9
Cleaning and Caring for YourOven
Control Panel and Knobs ...................................... 10
Cleaning Chart
Oven Door .............................................................. 11
The Self-Cleaning UpperOven
The Continuous-Cleaning LowerOven
If You Need Service or Assistance.......................... 17
1. Before Calling for Assistance
2. If You Need Assistance
3. If You Need Service.......................................... 18
4. If You Have a Problem
...............................................................
...............................................................
..................................................
......................................................
..................
....................................
.....................................................
..........................
.......................................................
.............................
...............
...........................
.....................................
......................................
Page
12
15
2
2
2
4
5
5
8
10
10
17
17
18
1*1
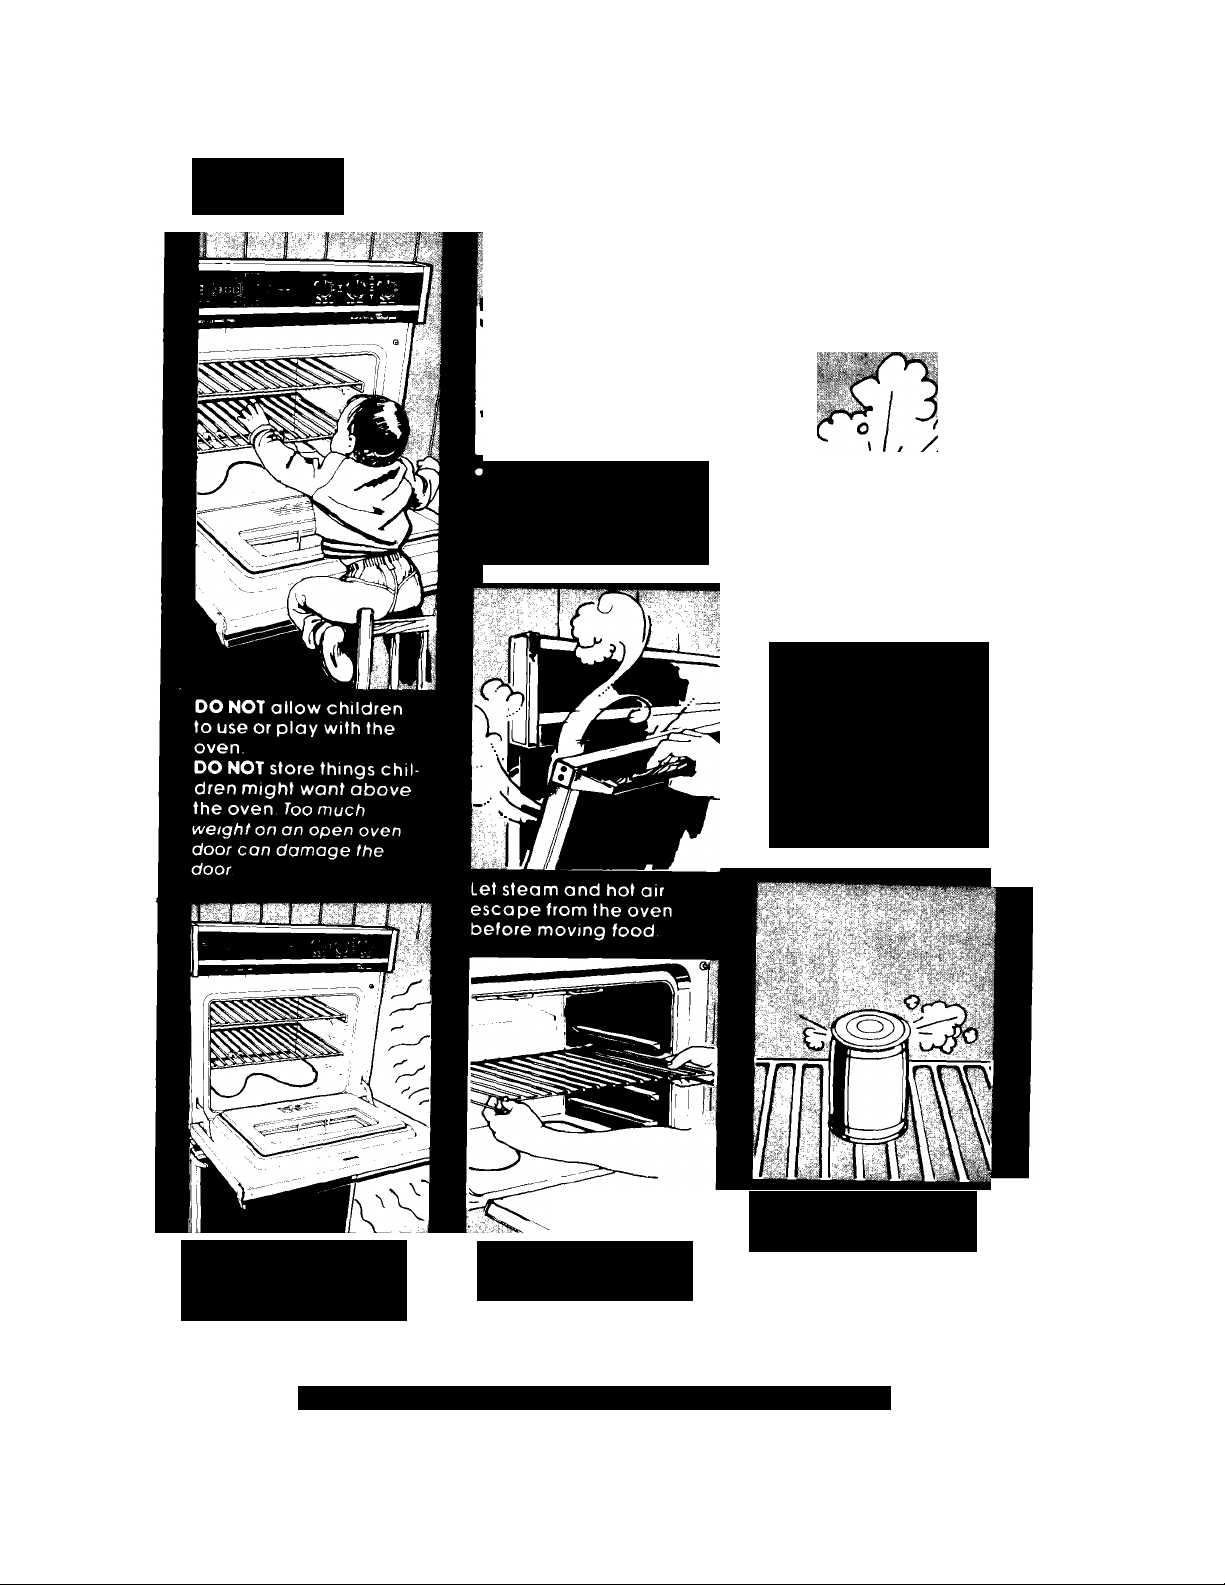
Safety
Don't touch any port of
the oven, especiolly
heating elements, until
you know they are
completely cool
DO NOT use wet potholders They can
cause steam burns
DO NOT wear loose
clothing while using
the oven, or use bulky
towels or cloths tor
potholders They can
catch fire if they touch
a hot element
The oven frame, walls,
racks and parts of the
door can get hot
enough to cause burns
Remove the Consumer Buy Guide Label before using your oven.
Put oven racks where
you want them before
turning on the oven.
DO NOT heat unopened
containers They can
explode
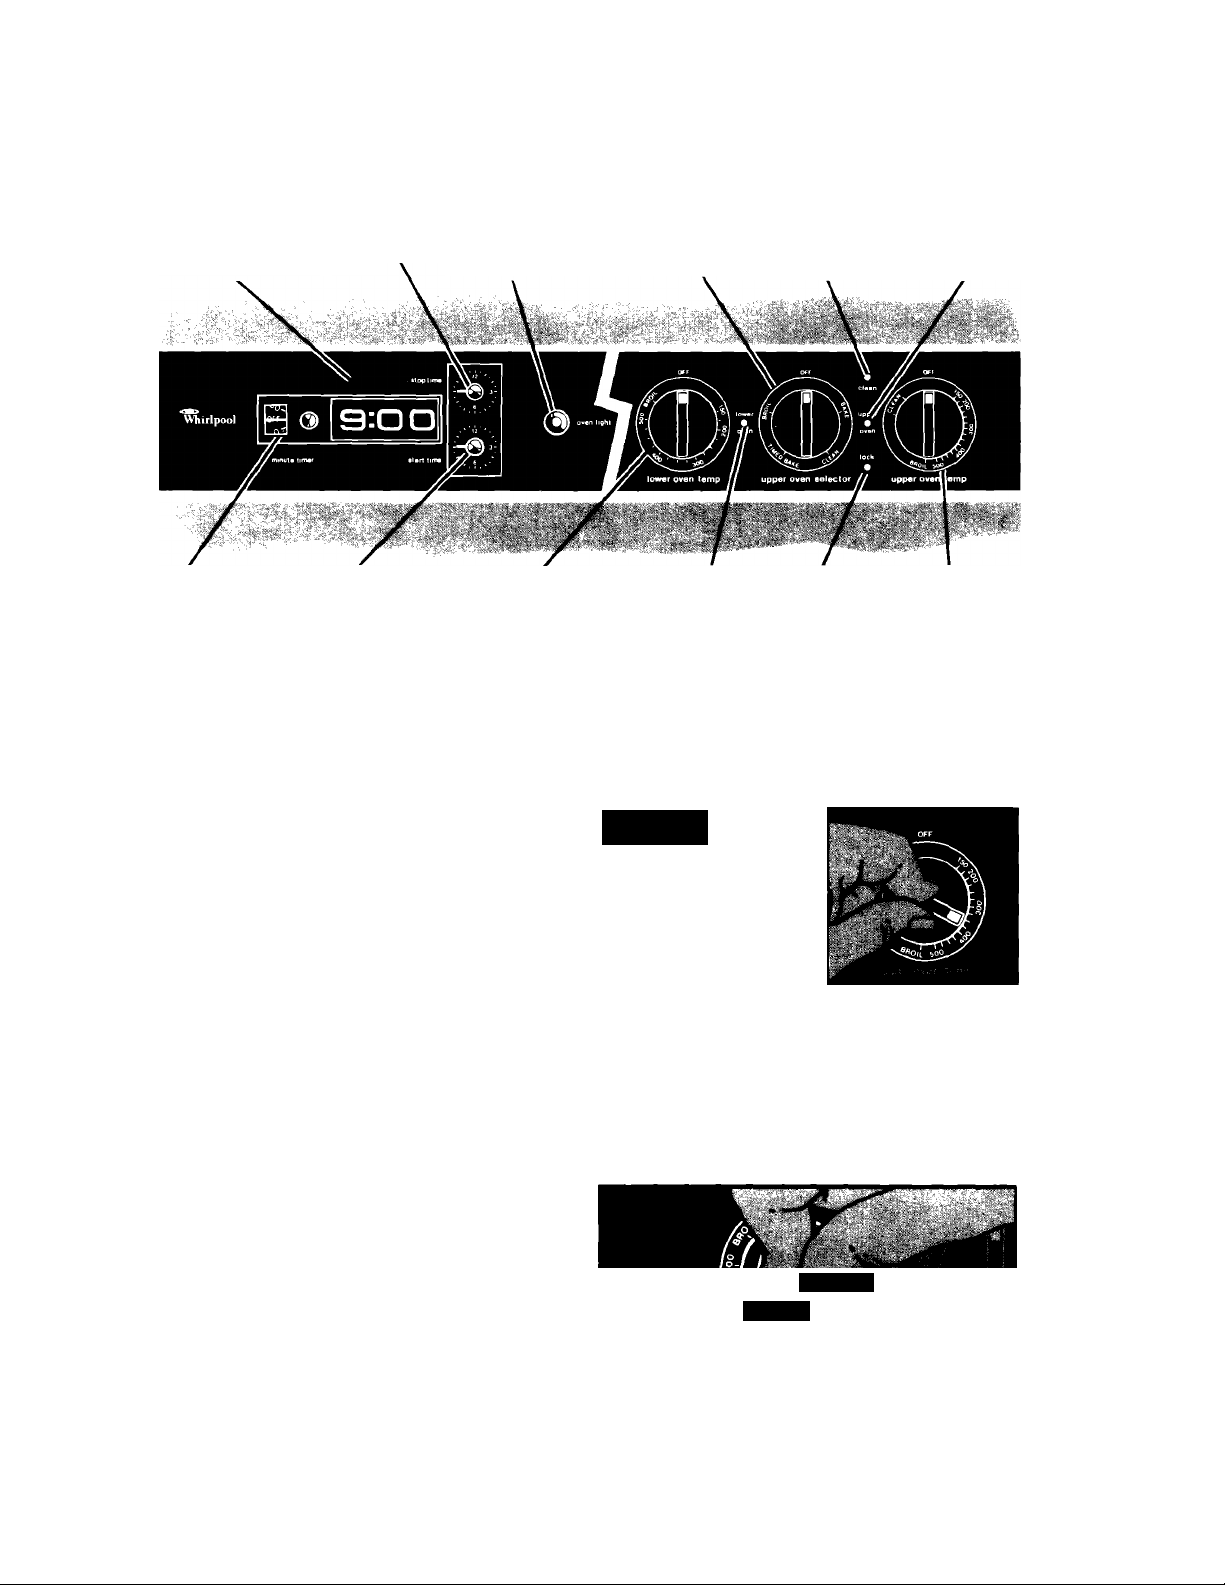
Using your ovens
Automatic
MEALTIMER- Clock
Minute Timer Start Time Adjustable Lower Lower Oven Upper Oven Adjustable Upper
Stop Time
Knob
Knob Oven Temperature Signal Light Lock Light Oven Temperature
Manual Oven
Light Switch
Control Control
Upper Oven
Selector
Upper Oven
Clean Light
Upper Oven
Signal Light
SETTING THE CONTROLS
BAKING IN THE UPPER OVEN
1. Put oven racks where you want them.
(See page 6 for suggestions.)
2. Set Upper Oven Selector to BAKE.
3. Set Upper Oven Temperature Oontrol to
the baking temperature you want.
4. Let the oven preheat until the Upper Oven
Signal Light goes off,
5. Put food in the oven.
6. When done baking, turn both knobs to OFF.
li':
During baking, the elements will turn on
and off to help hold the oven temperature at
the setting. (The top element will never turn
red, but will be hot.) The Signal Light tor the
oven(s) being used will turn on and otf with
the elements.
BAKING IN THE LOWER OVEN
1. Put the oven rack where you want it.
(See paged for suggestions.)
2. Set the Lower Oven Temperature Control to
the baking temperature you want.
3. Let the oven preheat until the Lower Oven
Signal Light goes oft.
4. Put food in the oven.
5. When done baking, turn the control to OFF.
»'/-SI
' Tmk
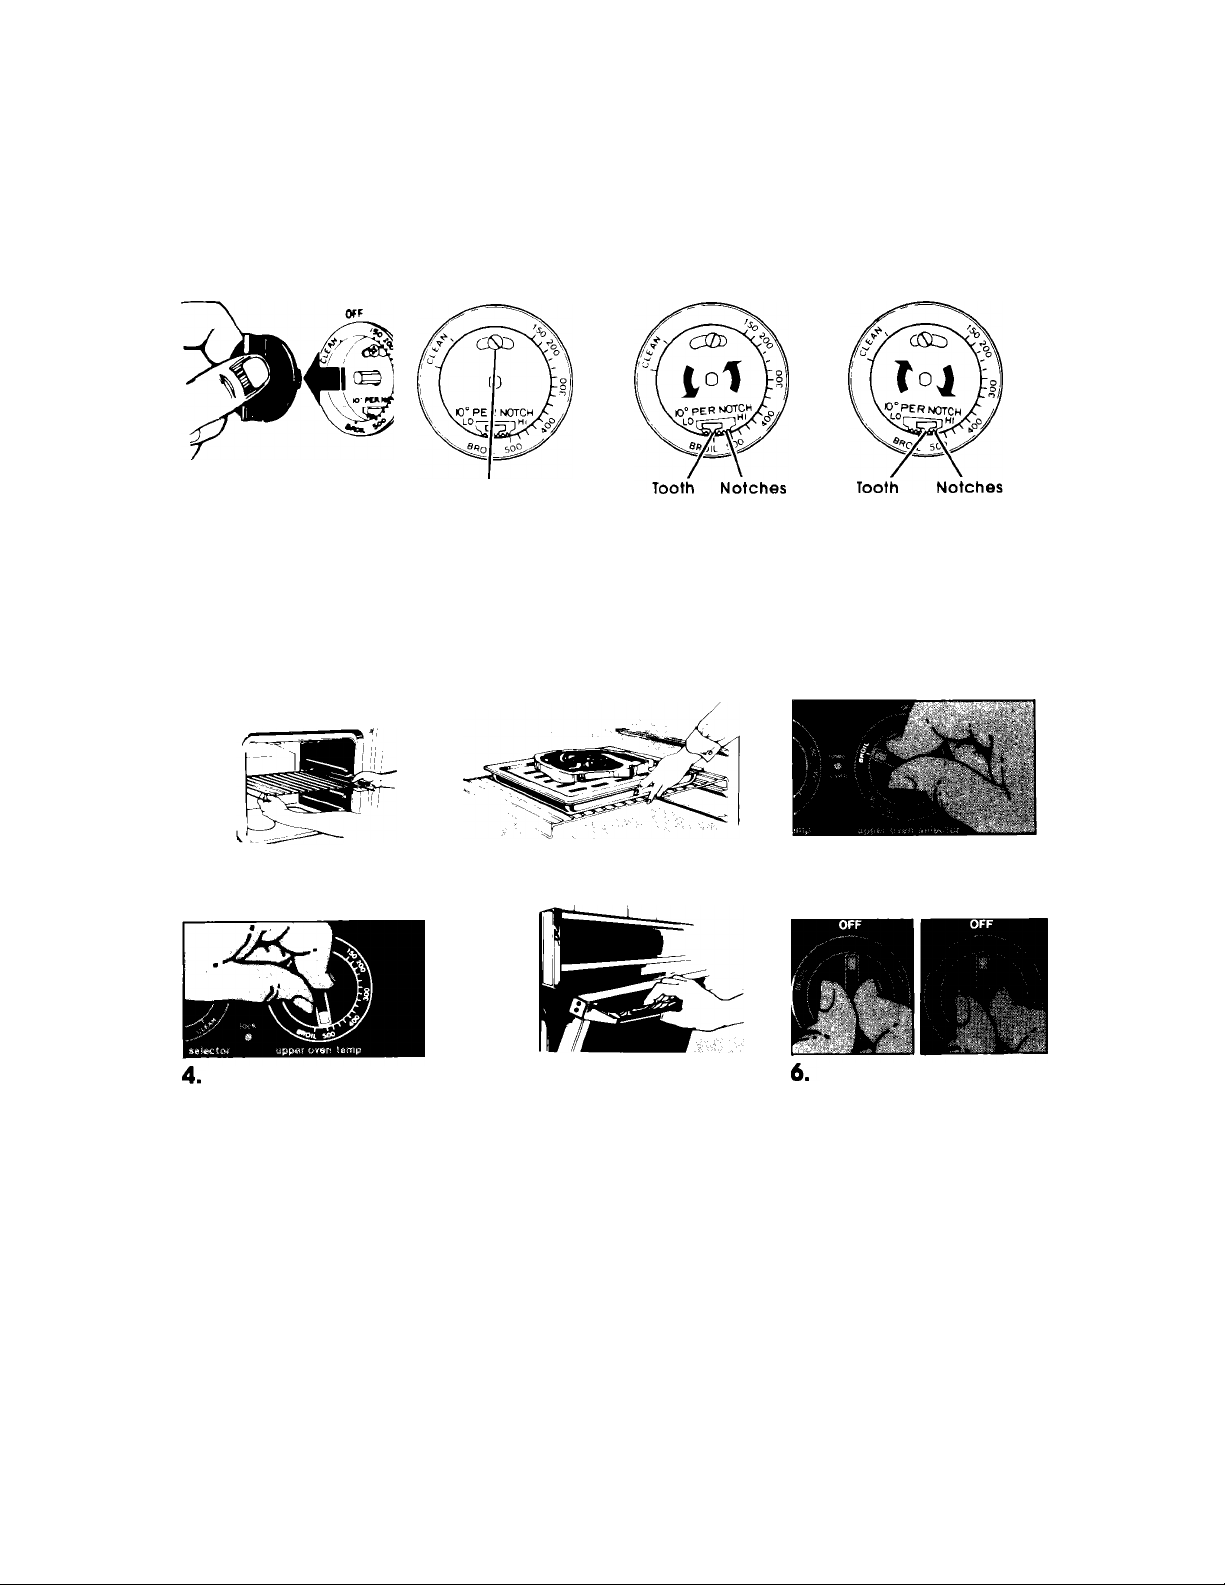
RESETTING THE OVEN TEMPERATURE CONTROLS
Does either oven seenn to be hotter or oolder than your old oven at the same
settings? The temperature setting in your old oven may have ohanged gradually
over the years. The aocurate setting of your new ovens can seem different. It you
think either or both oven temperatures need adjusting, follow these steps:
OFF
Locking Screw
1. Pull out the center
of either or both
Oven Tempera
ture Controls.
2.
Loosen the lock
ing screw.
Tighten the locking screw. Replace the knob.
BROILING IN THE UPPER OVEN
1. Place rack where you
want it tor broiling. (See
page 6 tor suggestions.)
2. Put broiler pan and food
3.
on the rack.
OFF
To lower the tern- 4.
perature, move black
ring so tooth is
closer to LO. Each
notch equals
about 10°F (5 C).
3. Set Upper Oven Selector
OFF
To raise the tem
perature, move black
ring so tooth is
deserto HI. Each
notch equals
about 10°F (5°C).
to BROIL.
Set Upper Oven Tempera
ture Control to BROIL. (Set
on a lower temperature
for slower broiling. See
below.)
Brciling can be slewed (upper oven only) by setting the Upper Oven Tempera
ture Control to a setting lower than BROIL. When it’s on BROIL, the broil element
is on all the time. When it's on a temperature, the element turns off and on. The
lower the temperature setting, the shorter are the times when the element is on.
The Oven Selectcr must be cn BROIL and the deer partly
5. During broiling the oven
epen far all brciling temperatures.
BROILING IN THE LOWER OVEN
Place rack where you 3.
want it for broiling. (See
page 6 for suggestions.) 4.
2.
Put broiler pan and food
on the rack.
door must be partly open.
A built-in stop will hold it
there.
Set Lower Oven Tempera
ture Control to BROIL.
During broiling the oven
door must be partly open.
A built-in stop will hold it there.
When broiling is done,
turn both knobs to OFF.
5. When broiling is done,
turn the control to OFF.
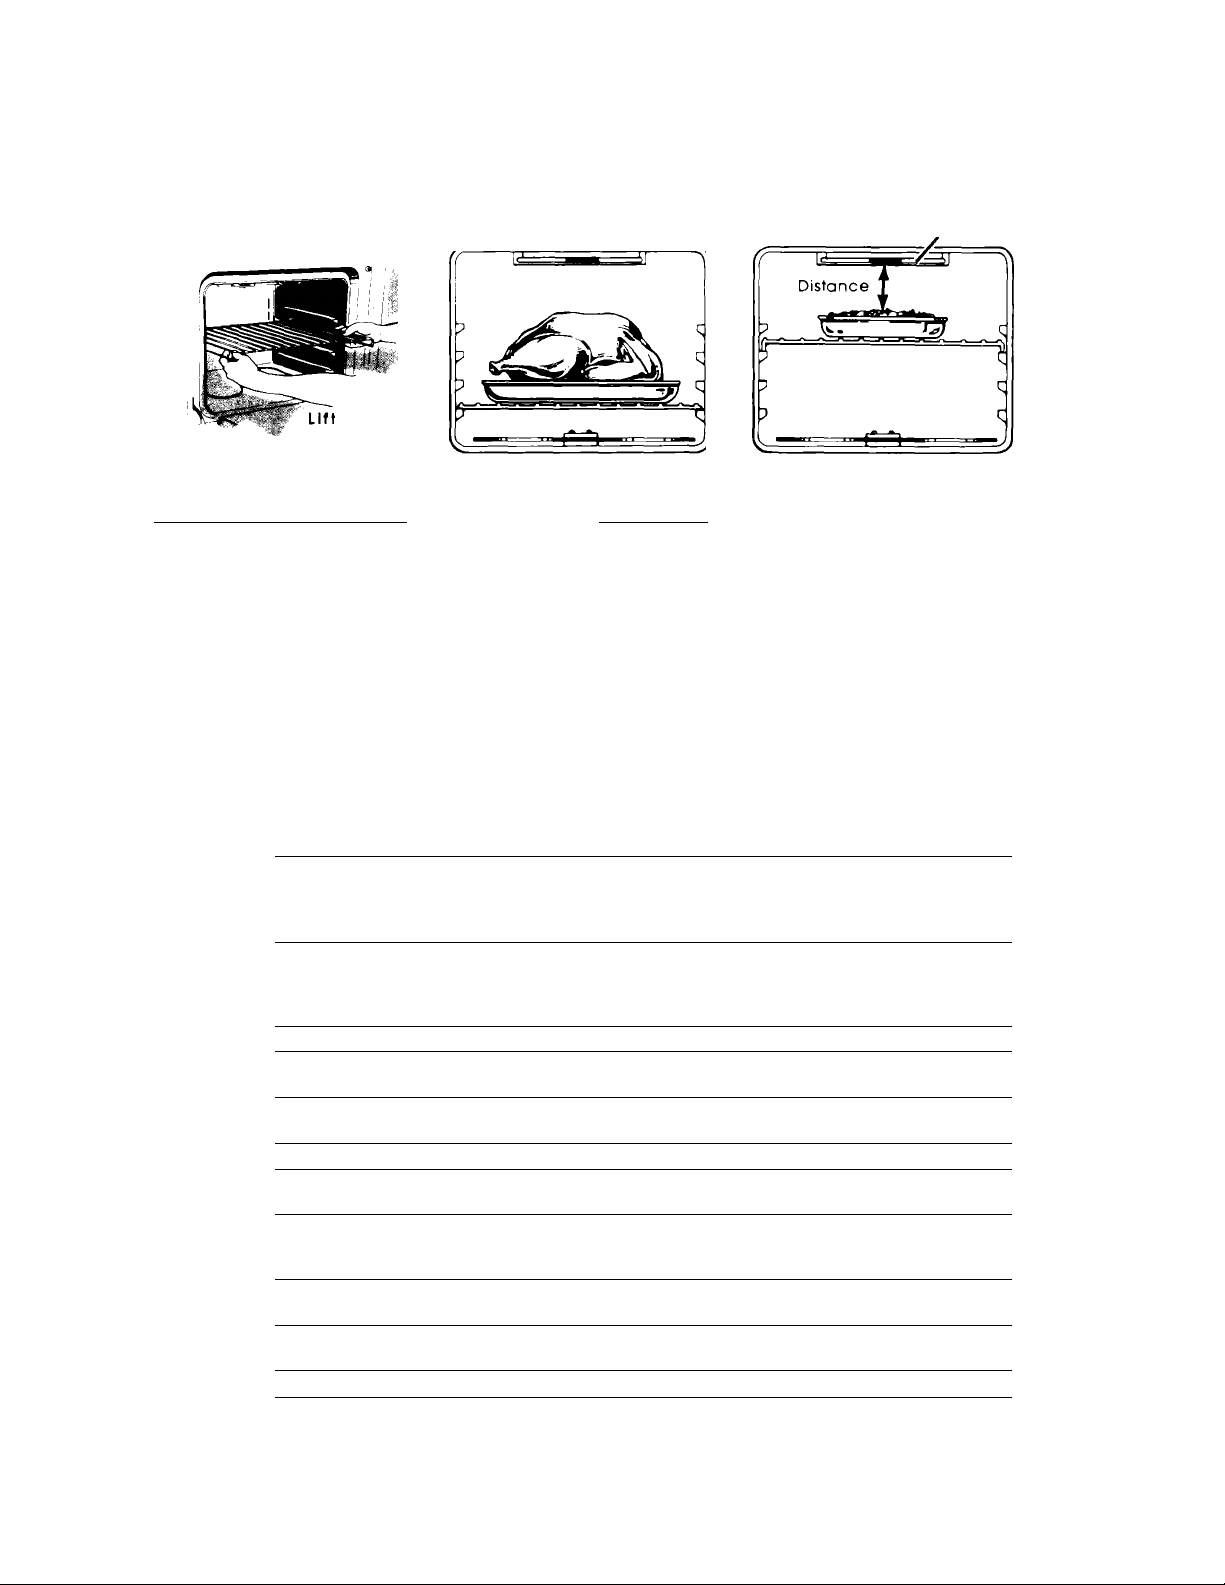
OVEN RACK POSITIONS
Position racks before turning on an oven.
rack at
front and pull
out.
BAKING OR ROASTING
Food for baking or roasting shouid be
piaced in the center of the oven.
Aiways ieave at ieast I'/z to 2 inches
(4-5 cm) between the sides of a pan and the
oven waii and another pan. For more informa
tion, see the "Cooking Guide."
Suggested oven
different kinds of
Food
Beef Steaks
Rare 1" (2.5 cm) 3' (8 cm) 7-9
Medium 1 (2.5 cm) 3 (8 cm)
Well done
Beef Steaks
Rare
Medium
Well Done
Hamburgers
Lamb Chops
Medium
Ham slice, precooked '/¡"-I"
or tendered (1-2.5 cm)
Canadian Bacon
Pork Rib or Loin Chop
Well done
Chicken
Fish
Liver
Frankfurters
rack positions and broiiing times for meats.
Description
1 (2.5 cm) 3 (8 cm)
1 ’/2 (4 cm) 4 -5 (10-13 cm)
1 '/2" (4 cm) 4 -5 (10-13 cm) 17-19
IV2 ' (4 cm) 4 -5 (10-13 cm) 19-21
Vz (1 cm)
1 (2.5 cm)
’/2" (1 cm)
3/,"-1"
(2-2.5 cm)
2-3 lb.
(1-1.5 kg)
cut in half
whole
fillets 3 (8 cm)
’/2"-%"
(1-2 cm)
Broil Element
BROILING
Adjust the rack so the food to be broiied is
at a suggested distance from the broii eiement. (See beiow.) ALWAYS broii with the
door open to the broii-stop.
Approximate Minutes -
Inches f^cm) from top
of food to Broil Element
3 (8 cm)
3 (8 cm)
3 (8 cm)
3 (8 cm)
4 -5 (10-13 cm) 15
7 -9 (18-23 cm)
3 (8 cm)
3 (8 cm)
4 -5 (10-13 cm)
Selector set to BROIL
1st side 2nd side
9-11
11-13 5-7
13-15
14-16
6-8 4-5
6-8 4-5
6-8
6
10
25-30 10-12
11-16 9-14
7-8 5-7
3
6-7 4-5
3-5
4-7
6-8
8-10
4-5
4
3
 Loading...