

Whirlpool RB220PXV Use & Care Manual
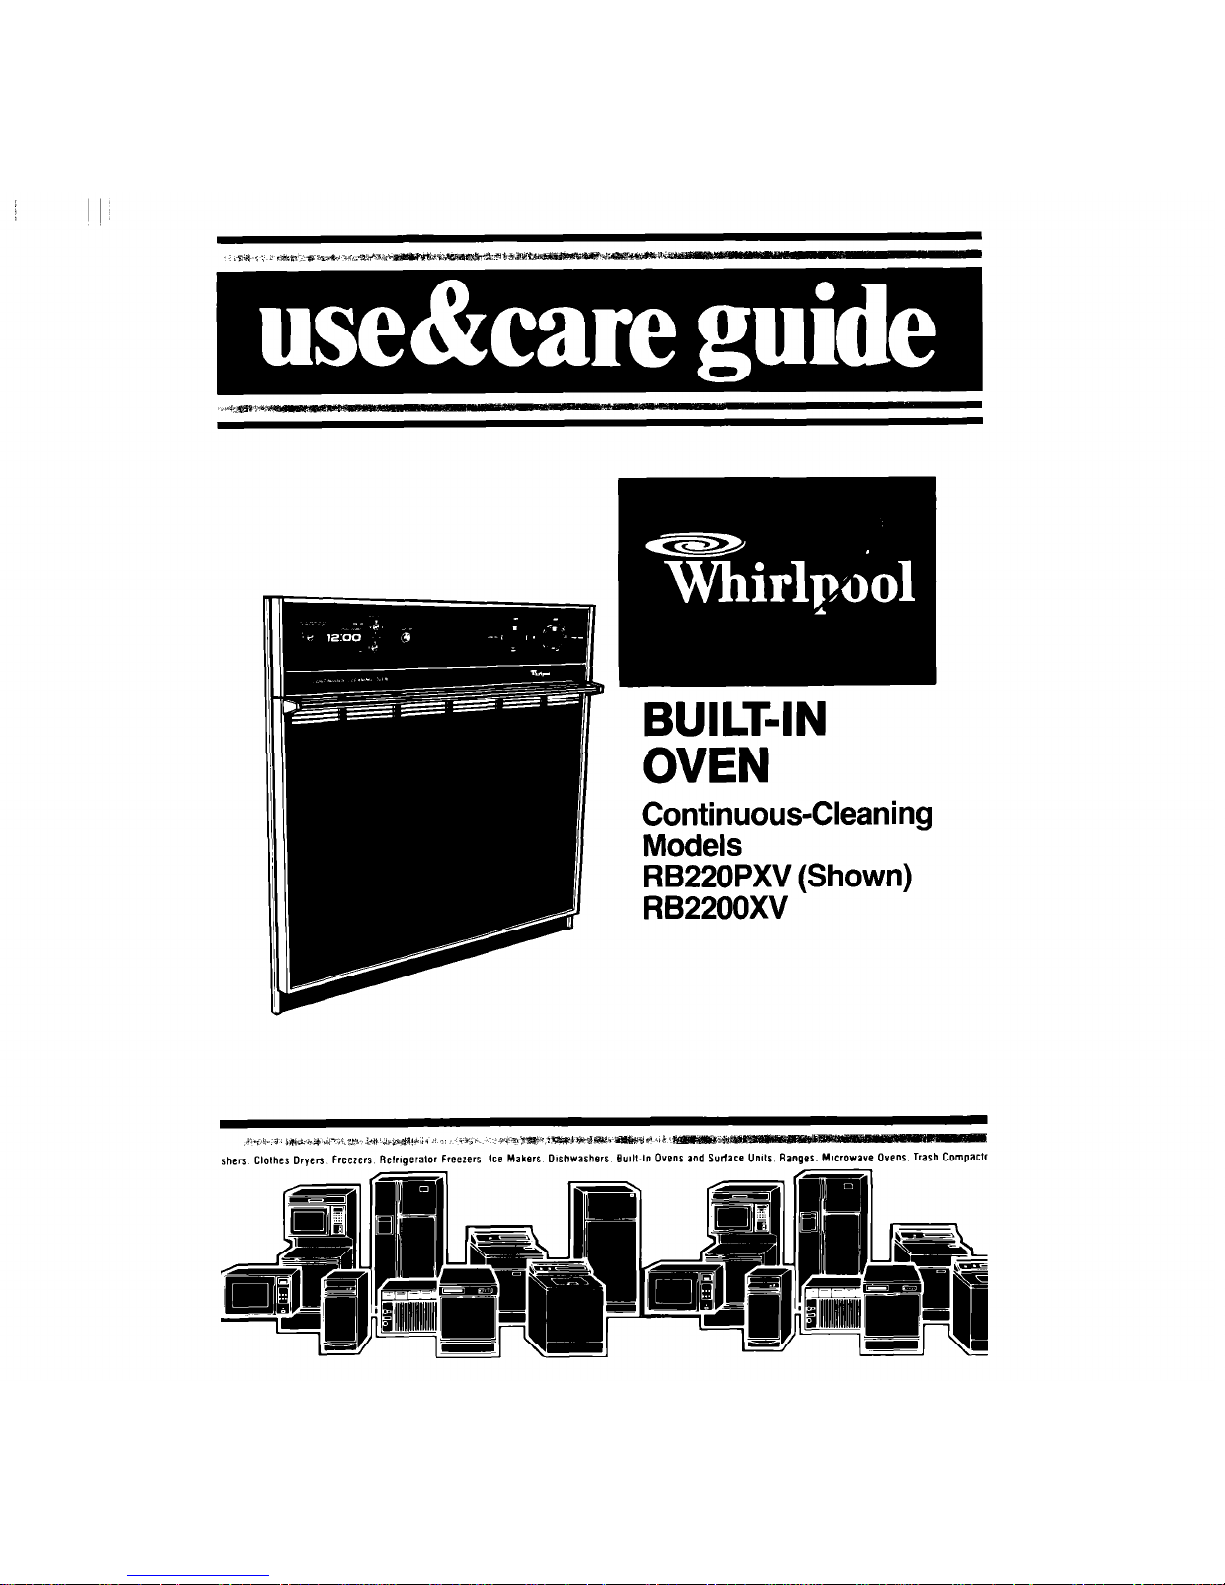
BUILT-IN
OVEN
Continuous-Cleaning
Models
RB220PXV (Shown)
RB2200XV
Contents
BEFORE YOU USE YOUR OVEN.
IMPORTANT SAFETY
INSTRUCTIONS
PARTS AND FEATURES
USING YOUR OVEN
Using the Surface Units
Setting the Clock
Using the Minute Timer
Using the Oven Controls
Baking
Broiling
Using the Automatic
MEALTIMER’ Clock
Page
2
10
Page
Oven Vent 11
Optional Rotisserie 11
Optional Door Panel Pat 11
CARING FOR YOUR OVEN..
12
Control Panel and Knobs 12
Oven Door 12
Oven Window 13
Continuous-Cleaning Oven 14
Cleaning Chart 16
Oven Light 17
IF YOU NEED SERVICE OR
ASSISTANCE
18
WHIRLPOOL OVEN WARRANTY. 20
‘Tmk.
01988 Whirlpool Corporation
Before you use your oven
Read and carefully follow the lnstallatlon Instructions packed with
your oven.
Read this Use & Care Guide and the Cooking Guide carefully for important
use and safety information. Store this literature in a convenient place for
future use.
It Is your personal responslblllty and obllgatlon to be sure your oven:
l
Has been installed where it is protected from the elements.
l
Has been installed and leveled in a wall or cabinet that will hold the weight.
l
Has been properly connected to electrical supply and grounded.
(See Installation Instructions.)
l
Is not used by anyone unable to operate it properly.
l
Is properly maintained.
l
Is used only for jobs expected of a home oven.
See Cooklng Gulde for Important safety and use informatlon.
I
I’
‘*
,
IMPORTANT
SAFETY INSTRUCTIONS
1.
DO NOT
allow children to use or
l
Let steam and hot air escape
play with any part of the oven, or
from the oven before removing
leave them unattended near it.
food to prevent burns.
They could be burned or injured.
4.
DO NOT
use the oven to heat a
2.
DO NOT
store things children
room. Persons in the room could
might want above the oven. Chil-
be burned or injured, or a fire
dren could be burned or injured
could star-t.
while climbing on the door and
the door could be damaged.
5.
DO NOT
wear loose or hanging
aarments when usina the oven.
3. KEEP
children away from the
They could ignite if they touch a
oven when it is on. The oven walls,
heating element and you could
racks and door can get hot
be burned.
enough to cause burns.
l
Put oven racks where you
want them before turning on
the oven. Heated racks
could cause severe burns.
6.
DO NOT
heat unopened containers, they could explode. The
hot contents could burn you
and container particles could
cause iniurv
l
Do not touch any part of the
_ .
oven, especially the heating
7. When adding or removing food.
elements, until you know they
MAKE SURE
to open the oven
are completely cool. Dark ele-
door all the way to prevent burns.
ments can still be hot enough
to cause severe burns.
l
FOR YOUR SAFETY
l
DO NOT STORE OR USE GASOLINE OR OTHER FLAMMABLE VAPORS AND
LIQUIDS IN THE VICINITY OF THIS OR ANY OTHER APPLIANCE. THEY COULD
IGNITE CAUSING EXPLOSION AND/OR FIRE.
- SAW THESE INSTRUCTIONS -
Thank you for buying a Whirlpool appliance. Please complete and mail
the Owner Reglstratlon Card provided with this product.
Then complete
the form below. Have this information ready if you need service or call with
a question.
l
Copy model and serial numbers
Model Number
from plate (behind the oven door
on the oven frame) and purchase
date from sales slip.
Serial Number
l
Keep this book and sales slip together in a handy place.
Purchase Date
Service Company Phone Number
3
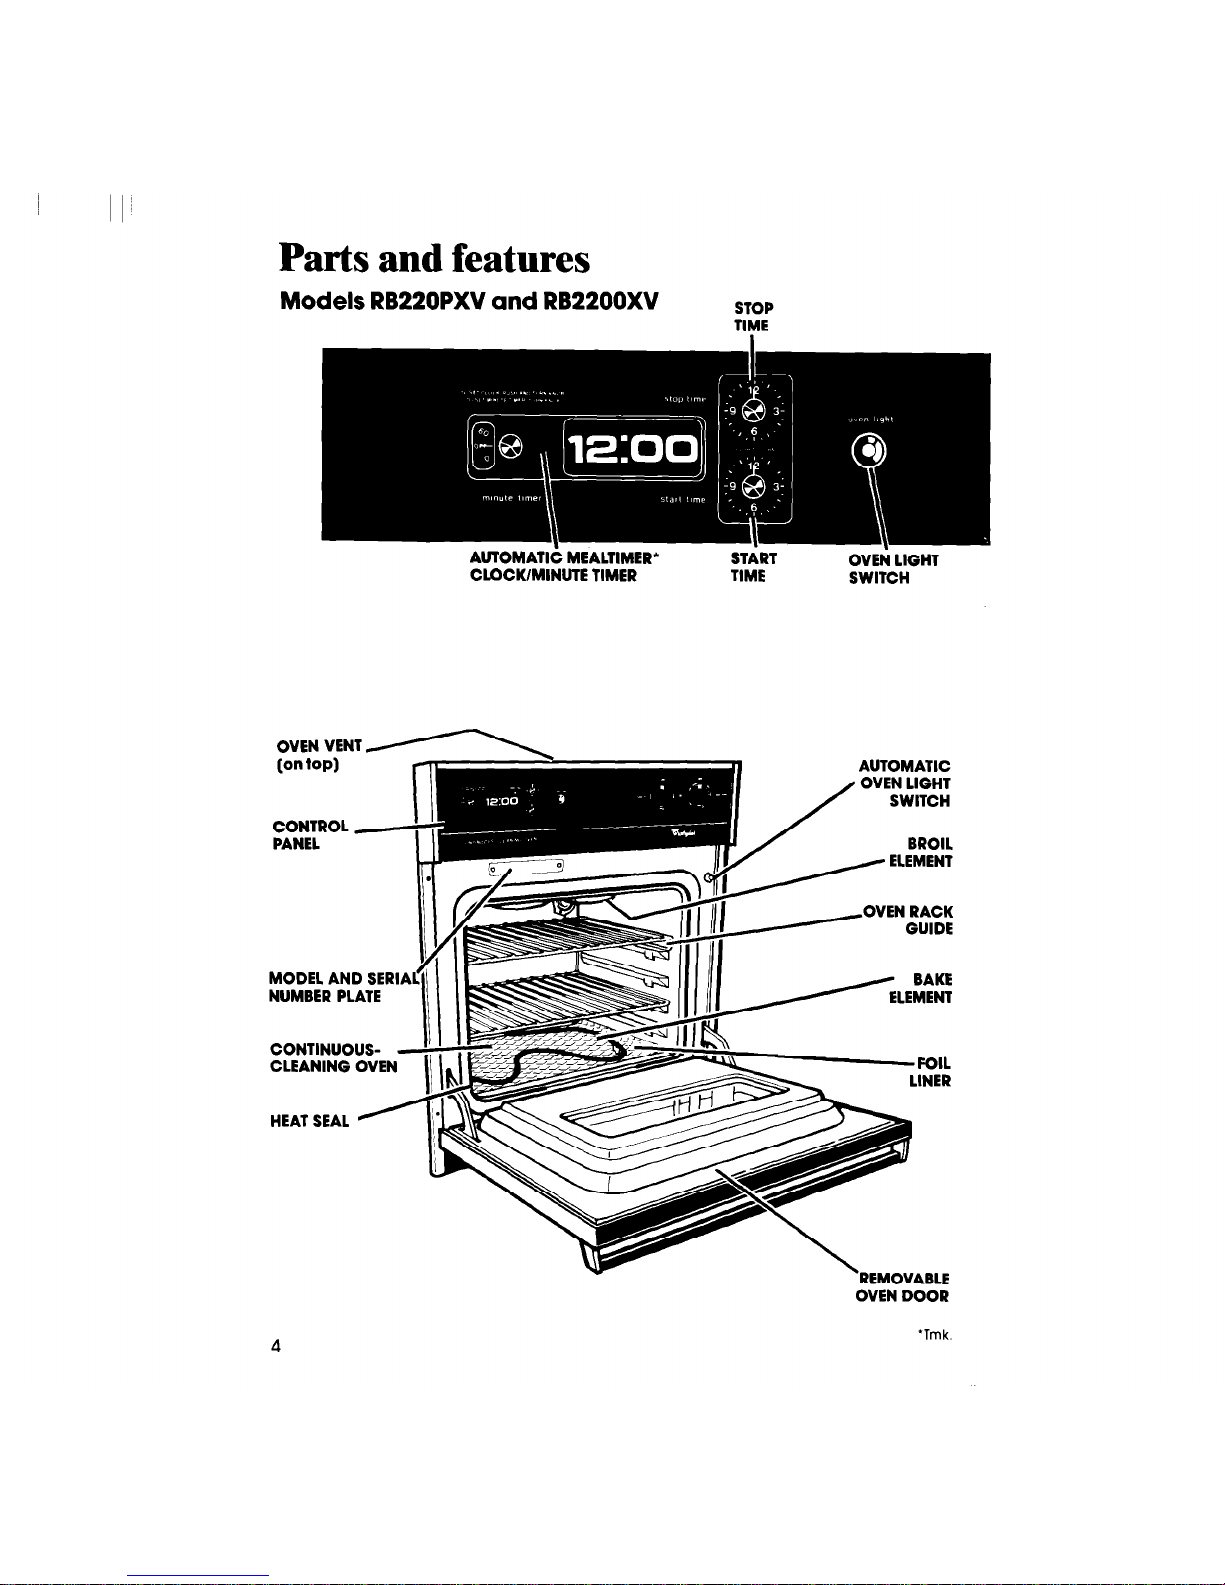
Parts and features
Models RB220PXV and RB2200XV
STOP
OVEN VENT A
I
CONTROL ,
-OVEN RACK
NUMBER PLATE
CONTINUOUSCLEANING OVEN
HEAT SEAL
MODEL AND SERIA
‘REMOVABLE
OVEN DOOR
4
‘Tmk.
I
I’
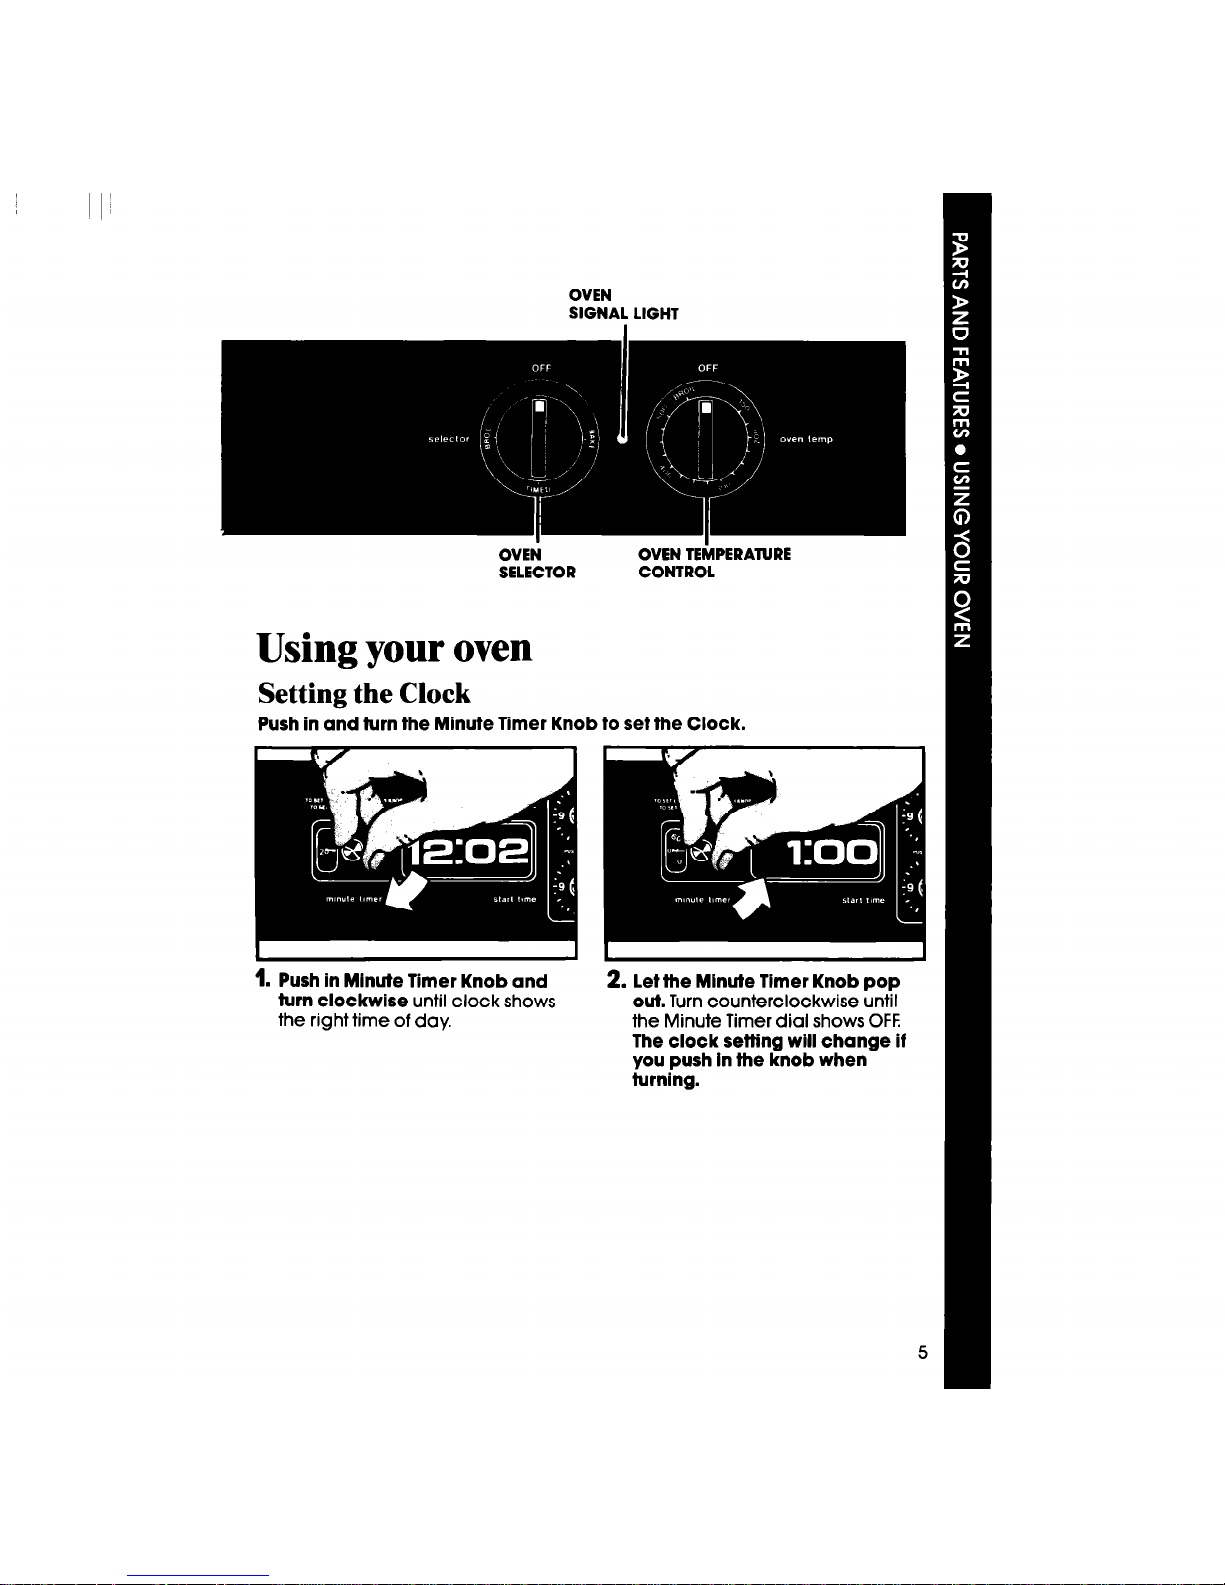
OVEN
SIGNAL LIGHT
OVEi
OVEN TEhPERATURE
SELECTOR
CONTROL
Using your oven
Setting the Clock
Push in and turn the Minute Timer Knob to set the Clock.
t
1 I
1
I L
I
1.
Push in Minute Timer Knob and
2. let the Mlnute Timer Knob pop
turn clockwise
until clock shows
out. Turn counterclockwise until
the right time of day. the Minute Timer dial shows OFF.
The clock setting will change if
you push In the knob when
turning.

I I I’
Using the Minute Tier
The Minute Timer does not start or stop the oven. It works like a kitchen timer.
Set it in minutes up to an hour. You will hear a buzzer when the set time is up.
DO NOT PUSH IN THE KNOB
when setting the Minute Timer.
1.
Without pushing it in,
turn the
Minute Timer Knob until the dial
passes the setting you want.
2. Without pushing it in,
turn the
knob back to the setting you want.
PUSHING IN AND TURNING THE MINUTE TIMER KNOB CHANGES THE CLOCK
SETTING.
6
 Loading...