

Whirlpool RB170PXL4, RB170PXL3, RB170PXL5 Use & Care Manual
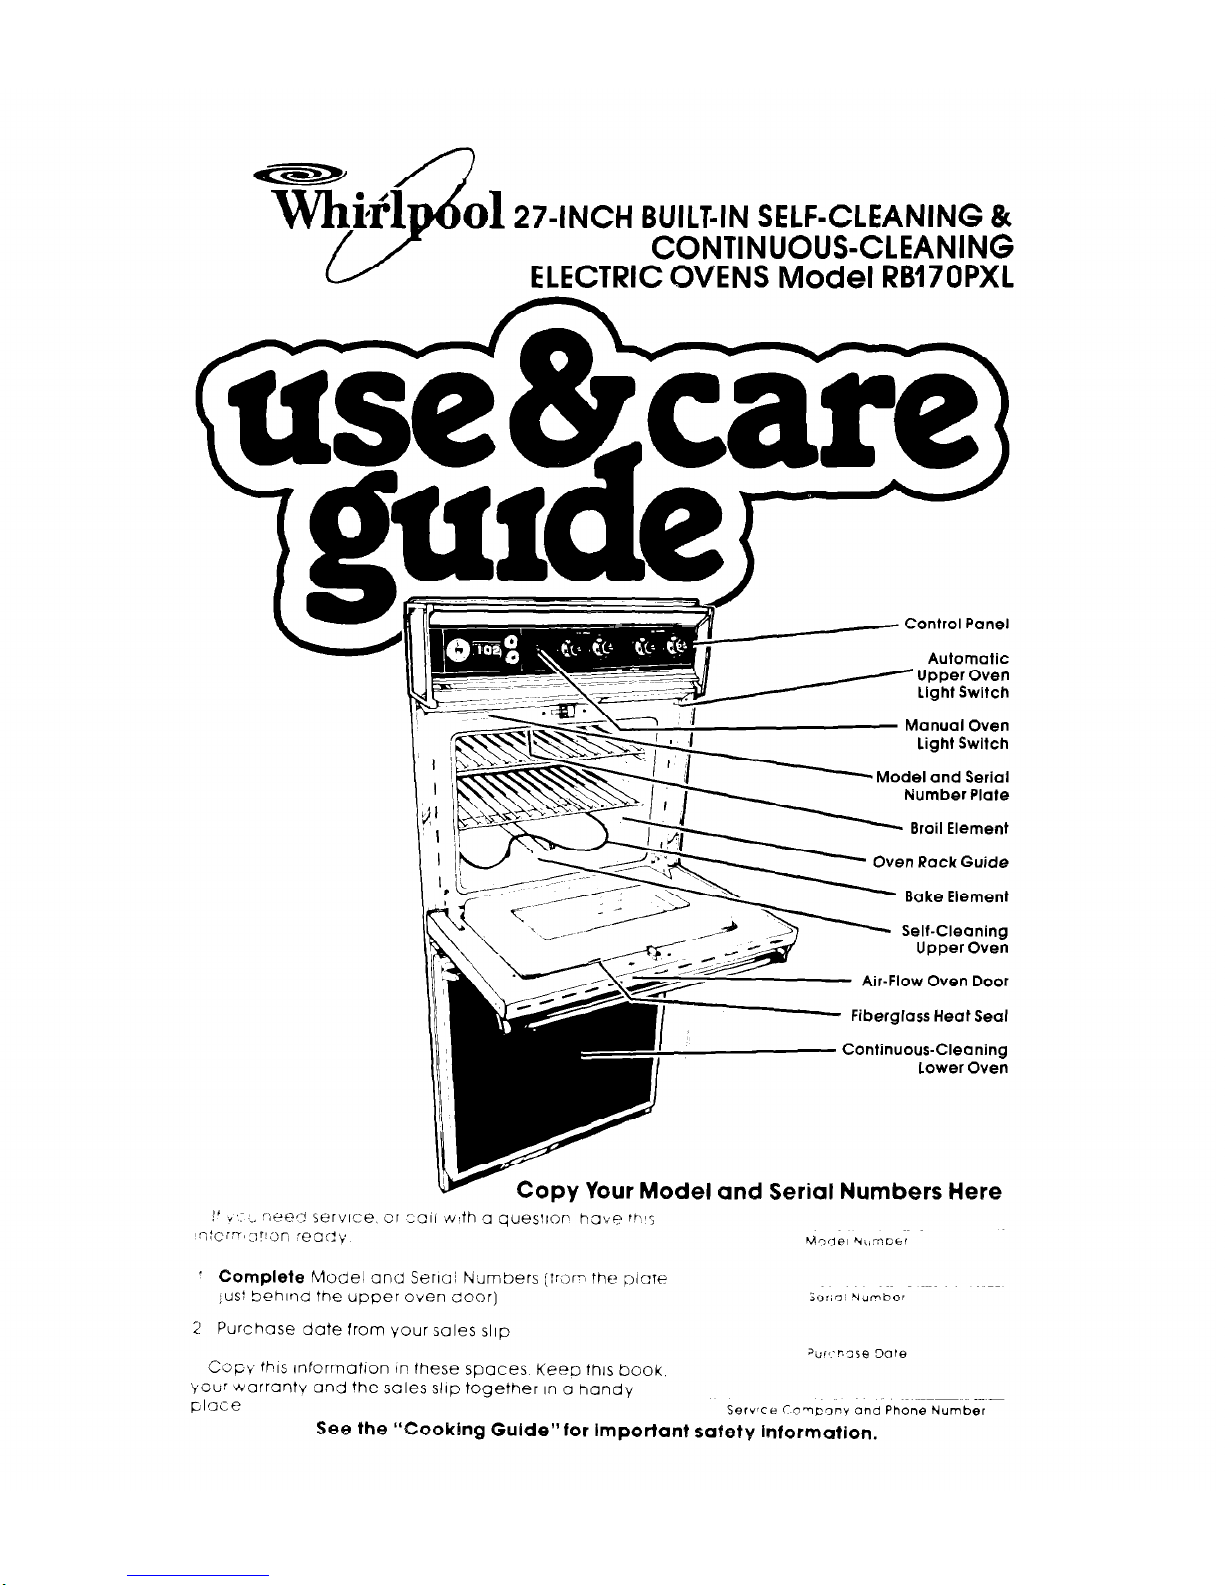
0127~INCH BUILT-IN SELF-CLEANING &
CONTINUOUS-CLEANING
ELECTRIC OVENS Model RB47OPXL
Manual Oven
light Switch
Upper Oven
Air-Flow Oven Door
i
II
II
Fiberglass Heat Seal
Continuous-Cleaning
Lower Oven
v
Copy Your Model and Serial Numbers Here
’ Complete Model ant Serlai Numbers (lrL)r-t the plare
iust behlnd the upper even dcmr)
2 Purchase date from your sales slop
Co~v this InformatIon In these spaces Keeo fhls book,
you; warrantv and the sales slop together In a handy
place
Servce To~c?ony and Phone Number
See the “Cooking Guide”for important safety information.
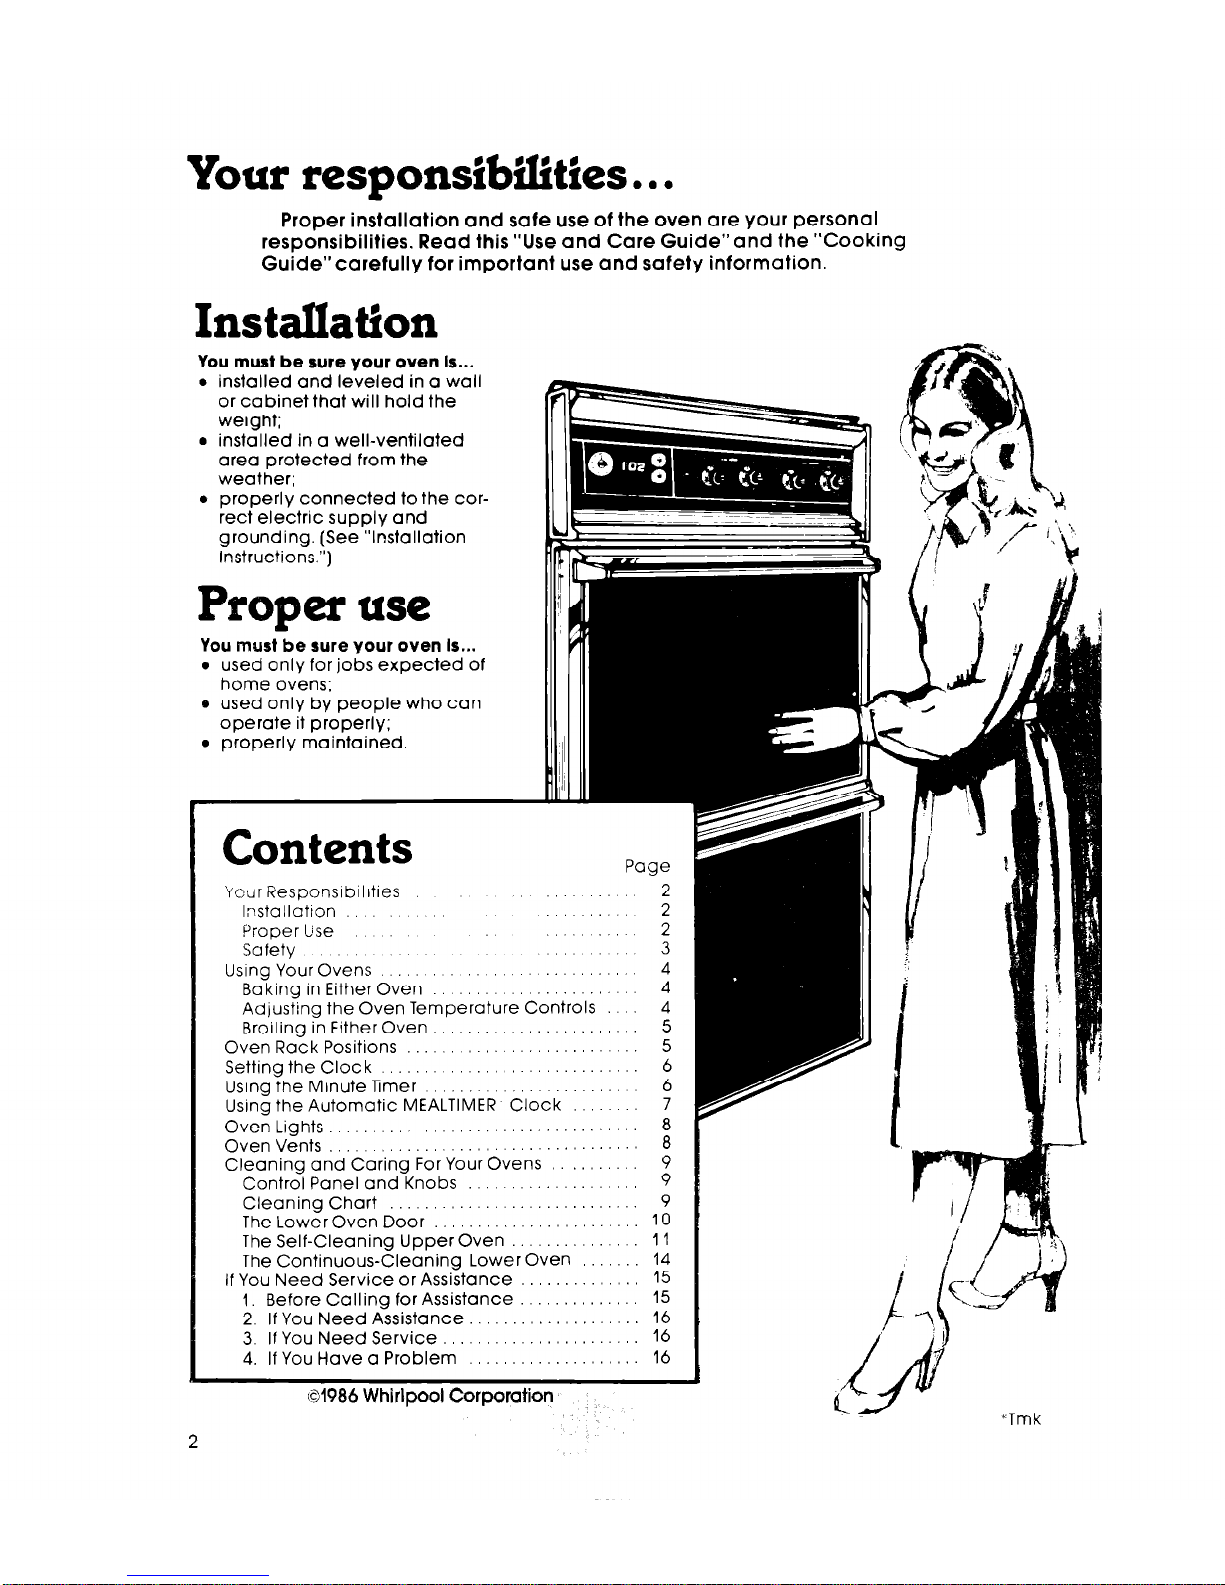
Your responsibilities. l .
Proper installation and safe use of the oven are your personal
ESDOnSibilitieS. Read
this “Use and Care Guide”and the “Cooking
G&te”carefully for important use and safety information.
Installation
You must be sure your oven Is...
l
installed and leveled in a wall
or cabinet that will hold the
weight;
l
installed in a well-ventilated
area protected from the
weather;
l
properly connected to the correct electric supply and
grounding. (See “Installation
Instructions.“)
Proper use
You must be sure your oven Is...
l
used only for jobs expected of
home ovens;
@ used only by people who can
operate it properly;
l
properly maintained.
Contents
Yotir Responsibilities
...
lnstallatlon
....
Pioperbse
Safety
.......
Using Your Ovens
...................
Baking in Either Oven
.................
Adjusting the Oven Temperature Controls
Broiling in Either Oven
...................
Oven Rack Positions
.....................
Setting the Clock
..........
Using the Minute limer
....................
Using the Automatic MEALTIMER Clock
Oven Lights
............................
Oven Vents
...............................
Cleaning and Caring For Your Ovens
.....
Control Panel and Knobs
...............
Cleaning Chart
........................
The Lower Oven Door
...................
The Self-Cleaning Upper Oven
..........
The Continuous-Cleaning Lower Oven
If You Need Service or Assistance
.........
1. Before Calling for Assistance
.........
2. If You Need Assistance
...............
3. If You Need Service
..................
4. If You Have a Problem
...............
61986 Whirlpool Corporation
2
*Tmk
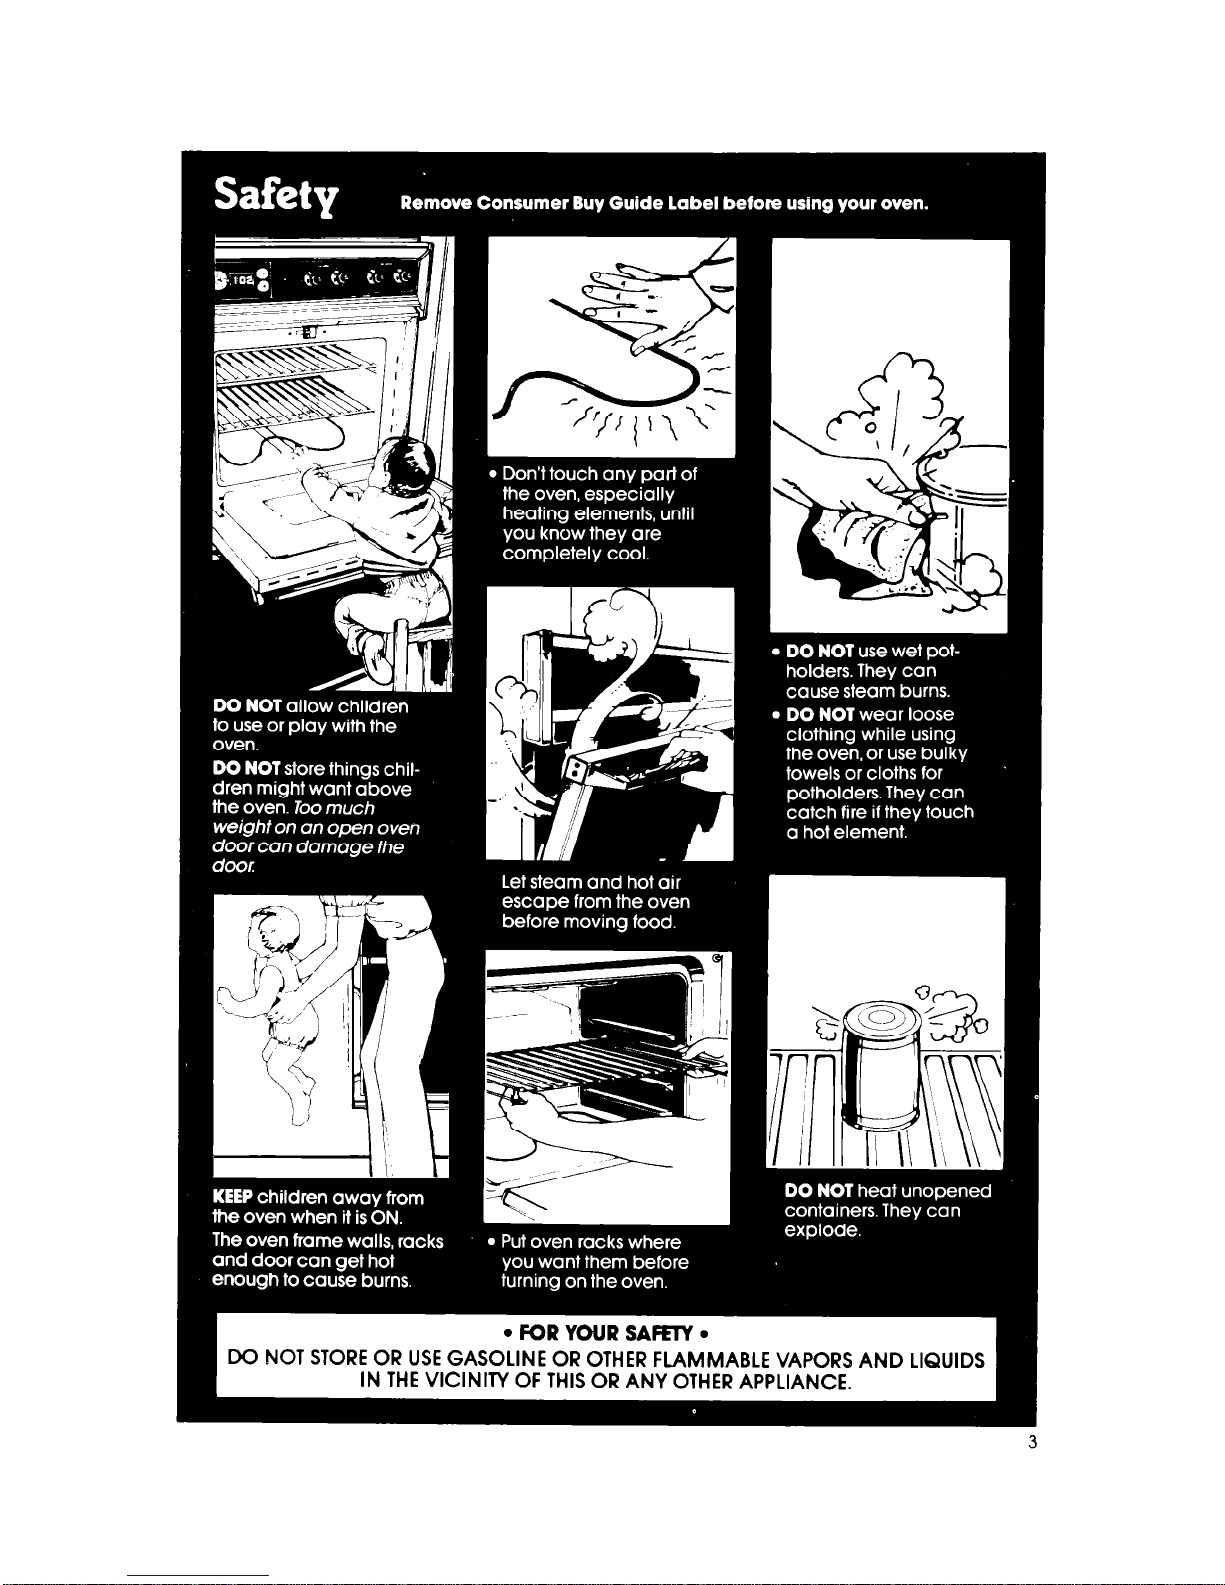
l FOR YOUR SAFETY.
.INE OR
OF THIS
OTHER FlAMh
OR ANY OTHI
IABLE VAPORS AND LIQUIDS
IR APPLIANCE.
3
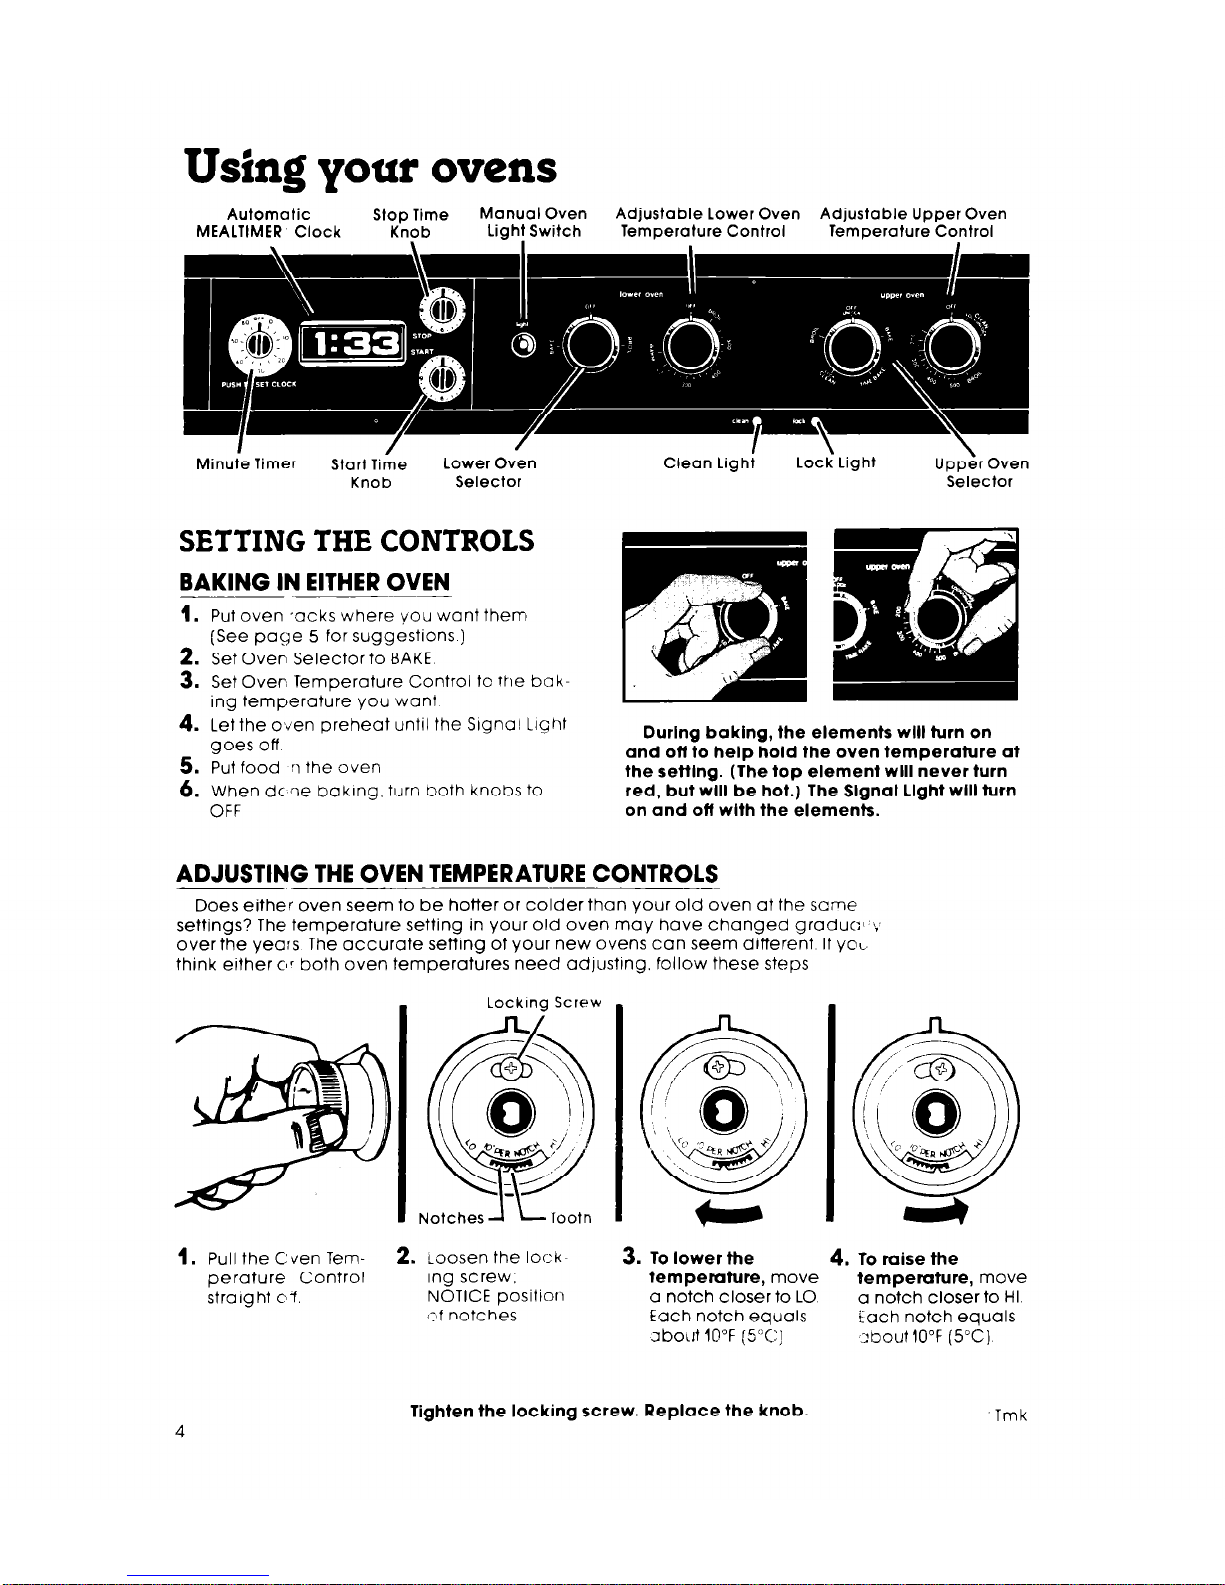
Using your ovens
Automatic Stop Time
Manual Oven Adjustable Lower Oven
Adjustable Upper Oven
MEALTIMER Clock Knob
Light Switch Temperature Control
Temperature Control
I
/
/
I \
Minute Timer Start Time
Lower Oven
Clean Light
Lock Light
\
Upper Oven
Knob
Selector
Selector
SETTING THE CONTROLS
BAKING IN EITHER OVEN
1.
Put oven ,acks where you want therrt
(See page 5 for suggestions )
2. Set Oven Selector to BAKE
3. Set Oven Temperature Control tc the baking temperature you want
4. Let the oven preheat until the Signal Light
goes off
5. Put food n the oven
6. When dc ?e baking, turn both knobs to
OFF
During baking, the elements will turn on
and ofl to help hold the oven temperature at
the settlng. (The top element will never turn
red, but will be hot.) The Slgnal Light will turn
on and off with the elements.
ADJUSTING THE OVEN TEMPERATVRE CONTROLS
Does either oven seem to be hotter or colder than your old oven at the same
settings? The temperature setting in your old oven may have changed gradual :’
over the yea:s The accurate setting of your
new ovens can seem different If yoc.
think either cl’ both oven temperatures need adjustlng. follow these steps
Locking Screw
Notches 1 L lootn
1.
Pull the Cven Tern-
2. Loosen the Locke
3.
To lower the
4.
To raise the
perature Control
Ing screw, temperature, move
temperature, move
straight of.
NOTICE position
a notch closer to LO
a notch closer to HI.
:?f notches
Each notch equals tach notch equals
Jbout 10°F (5°C)
,2bout 10°F (5°C)
Tighten the locking screw. Replace the knob.
Tmk

BROILING IN EITHER OVEN
1.
Place the rack where
LOU
2. Put broiler pan and focd
want It loi brorlrng (See
on the rack
below to suggestions I
4. Set Over Temperature
5. Dbring broiling the oven
Control t: J BROIL [Set c:~“ Q door must be partly open
lower tel lperature fc: A bull+-!n stop
will
hold It
slower b-olllng See
there
below )
3.
Set Oven Selector to
BROIL.
6. When broiling is done,
turn both knobs to OFF
Broiling can be slowed by setting the Oven Ternperature Control to a setting
lower than BROIL When it’s on BROIL, the broil element is on all the time. When it’s
or’ a temperature, the element turns off and on The lower the setting, the shorter
tht-- times when the element is on.
The Oven Selector must be on BROIL and the door partly
open for all broiling temperatures.
OVEN RACK POSITIONS
Position racks before turning on the oven.
There are two racks in the upper oven and one rack in the lower oven
The racks can be used in either oven.
Brorl Element
BAKING OR ROASTING
BROILING
Food for baking or roasting should be
Adjust the top rack so the food to be broiled is
placed in the center of the over-i
at a suggested distance from the broil element,
Always le\.lve at least 1’ I to 2 Inches
(4-5 cm) be+,ween the slues of a ban and the?
isee page 6). ALWAYS broil with the door open
to the broil-stop.
oven wall a.id another p, in For more Infor,-:a-
tlon see the Cooking Griiae
5
 Loading...