

Whirlpool GLA7900XK User Manual
Model GLA7900XK
REGULAR CAPACITY
Whirlpool AUTOMATIC WASHER
Use & Care
Guide
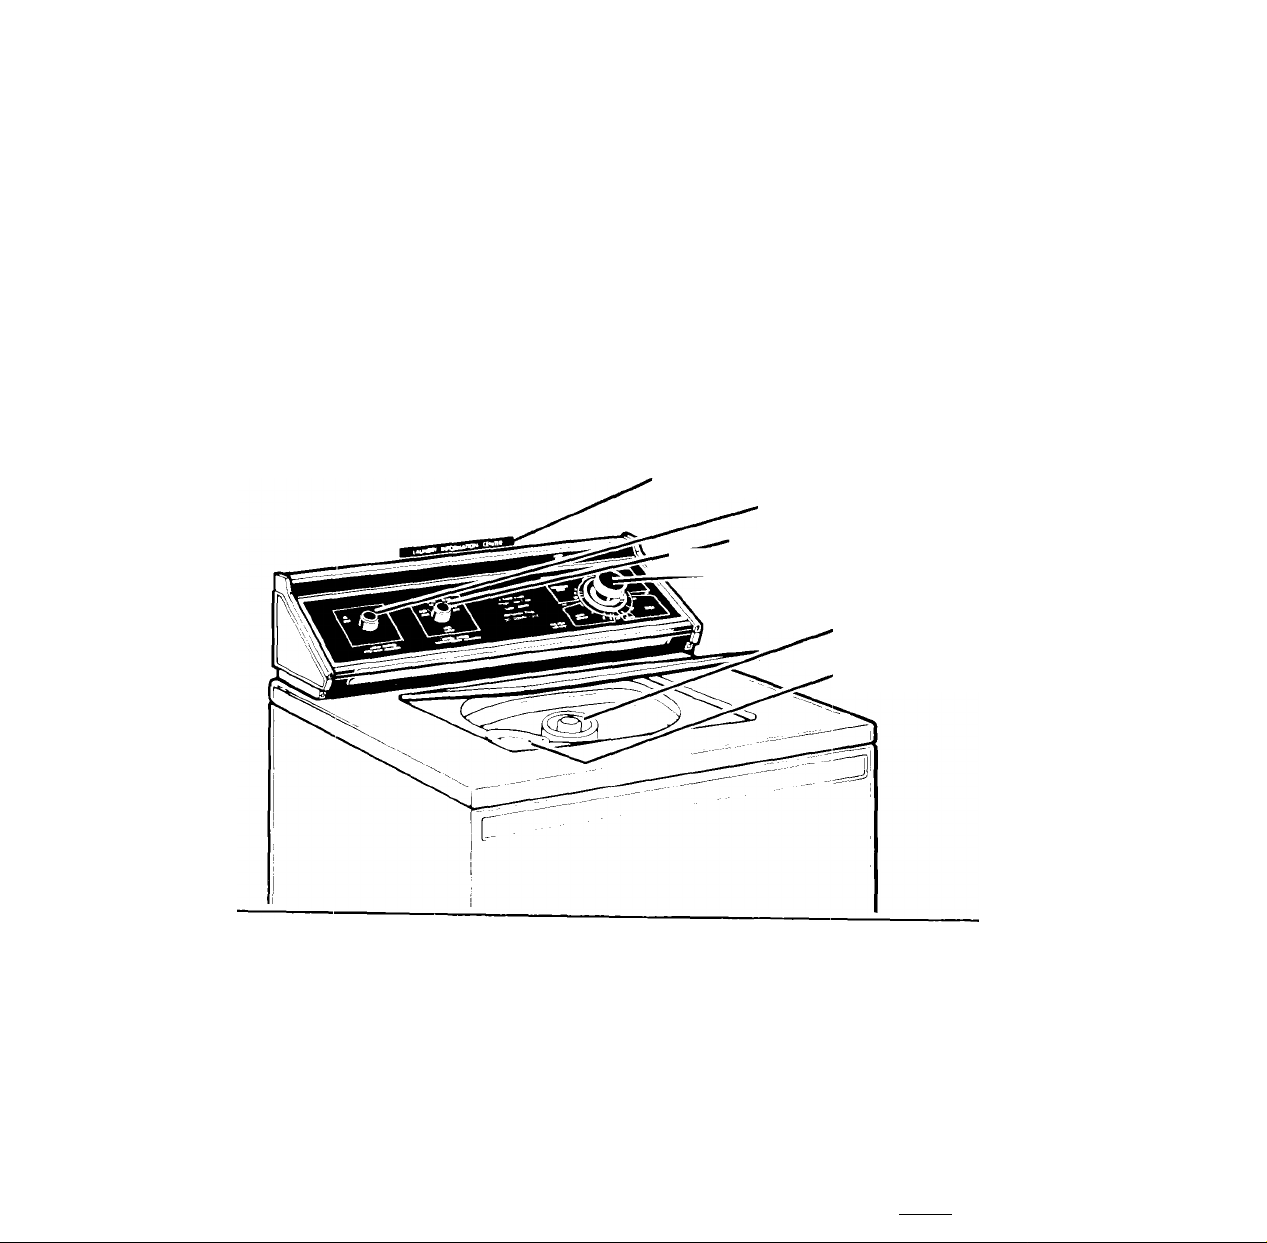
LAUNDRY INFORMATION CENTER
LOAD SIZE SELECTOR
TEMPERATURE SELECTOR
\
_____
— CYCLE CONTROL KNOB
FABRIC SOFTENER
LIQUID BLEACH
DISPENSER
DISPENSER
Copy Your Model and Serial Numbers Here
Wien you need service, or coil
with a question, have this information
ready
1 Complete Model and Sériai Numbers
(from the plate under the lid near the
hinge]
2 Purchase date from saies slip (or date
installée)
Copy this information in these
spaces Keep this book in the Laundry
Informc'ion Center with your Loundry
Guide sales slip and w'arranty
I tf"' r

Before using
your Washer
Please read this booklet to be
sure your washer is ir^stalled and used
properly. It will help you get the best
results and longest life your washer was
designed to give.
You are personally responsi
ble for making sure that your
washer...
• Is installed by a qualified installer,
• Is properly installed and leveled on a
floor that can support the weight.*
• Is connected to the right kind of outlet,
electric supply, water supply and drain.*
• Is properly electrically grounded *
• Is used only for jobs normally
expected of home automatic washers
• is properly maintained
• Is protected from the weather,
• Is not run by children or anyone
unable to operate it properly.
Remove the Consumer Buy
Guide label. It will be easier to remove
before the washer is used.
You may want to wipe out the
basket with a damp cloth before using
to remove dust from storing or shipping
SPECIAL INSTRUCTIONS; See the
Laundry Guide for tips on deter
gents, other laundry aids and
instructions for washing special
Items.
*See the Installation Instructions for
complete information
SAFETY FIRST
Do not permit children to operate
or play with the washer
CAUTION: Store laundry deter
gent and additives in a cool, dry
place where children can’t
reach them.
SPINNING SAFETY
If the lid is opened while the bas
ket is spinning, the basket will
automatically stop in a few sec
onds
DO NOT ADD OR REMOVE
ITEMS UNTIL THE BASKET STOPS
COMPLETELY.
SPECIAL CAUTION
Flammable gases may build up in
hot water pipes and heater. This
can happen when hot water
hasn't been used tor
ally two weeks or more).
To prevent injury or damage,
allow any gases to escape by
running hot water from the faucet
nearest the washer tor several
minutes. Don't smoke near the
faucet while it is open, and turn
oft any open flame.
a while (usu
Contents
Before Using Your Washer...................... 2
Loading Your Washer
Understanding Your Washer
Lint Filter ....................................................... 3
Using Your Washer
Water Levels and Load Sizes
Important Detergent Information 6
Liquid Bleach Dispenser
Fabric Softener Dispenser ...................... 7
For Rinsing Only
For Spinning Only....................................... 7
Cycle Operation
SHORT
PERMANENT PRESS
REGULAR HEAVY ................................... 8
SOAK CYCLE
PRE-WASH
If You Need Service or Help
Before Calling for Service.................... 10
if You Have a Problem
.......................................................
................................................
...............................
................
....................................
.................
...........................
........................................
.........................................
..............................
............................................
..................
.........................
3
3
4
5
6
7
8
8
8
10
10
10
12

Loading your
Understanding
Washer
For best washing results and
energy savings, sortthe laundry
carefully.
1. Sort the Laundry into Loads.
• Group the laundry into loads that
can be washed and dried together.
See the Laundry Guide for informa
tion and samples of typical loads.
• Try to mix large and small items for
best movement in the washer.
2. Measure Detergent; Add to
Washer Basket.
• See detergent information on page
6 and in Section IV of the Laundry
Guide.
• Add dry bleach or water condi
tioner (not fabric softener) if used.
Follow the package directions
carefully.
3. Load the Washer.
• Spread the load evenly. (Don't put
all the towels on one side and a few
wash cloths on the other.) An unbal
anced load can cause the washer to
shake during spinning.
• Load without packing so items can
move freely for best cleaning and
least wrinkling.
4. Pour Liquid Bieach into the
Dispenser.
• See page 5 and the "Laundry
Aids” section of the Laundry Guide for
more information.
5. Pour Diluted Fabric Sottener into
the Fabric Sottener Dispenser.
• See page? and the laundry aids
section of the Laundry Guide for more
information.
your Washer
This automatic washer has five
cycles. Each is designed for a fabric
type.
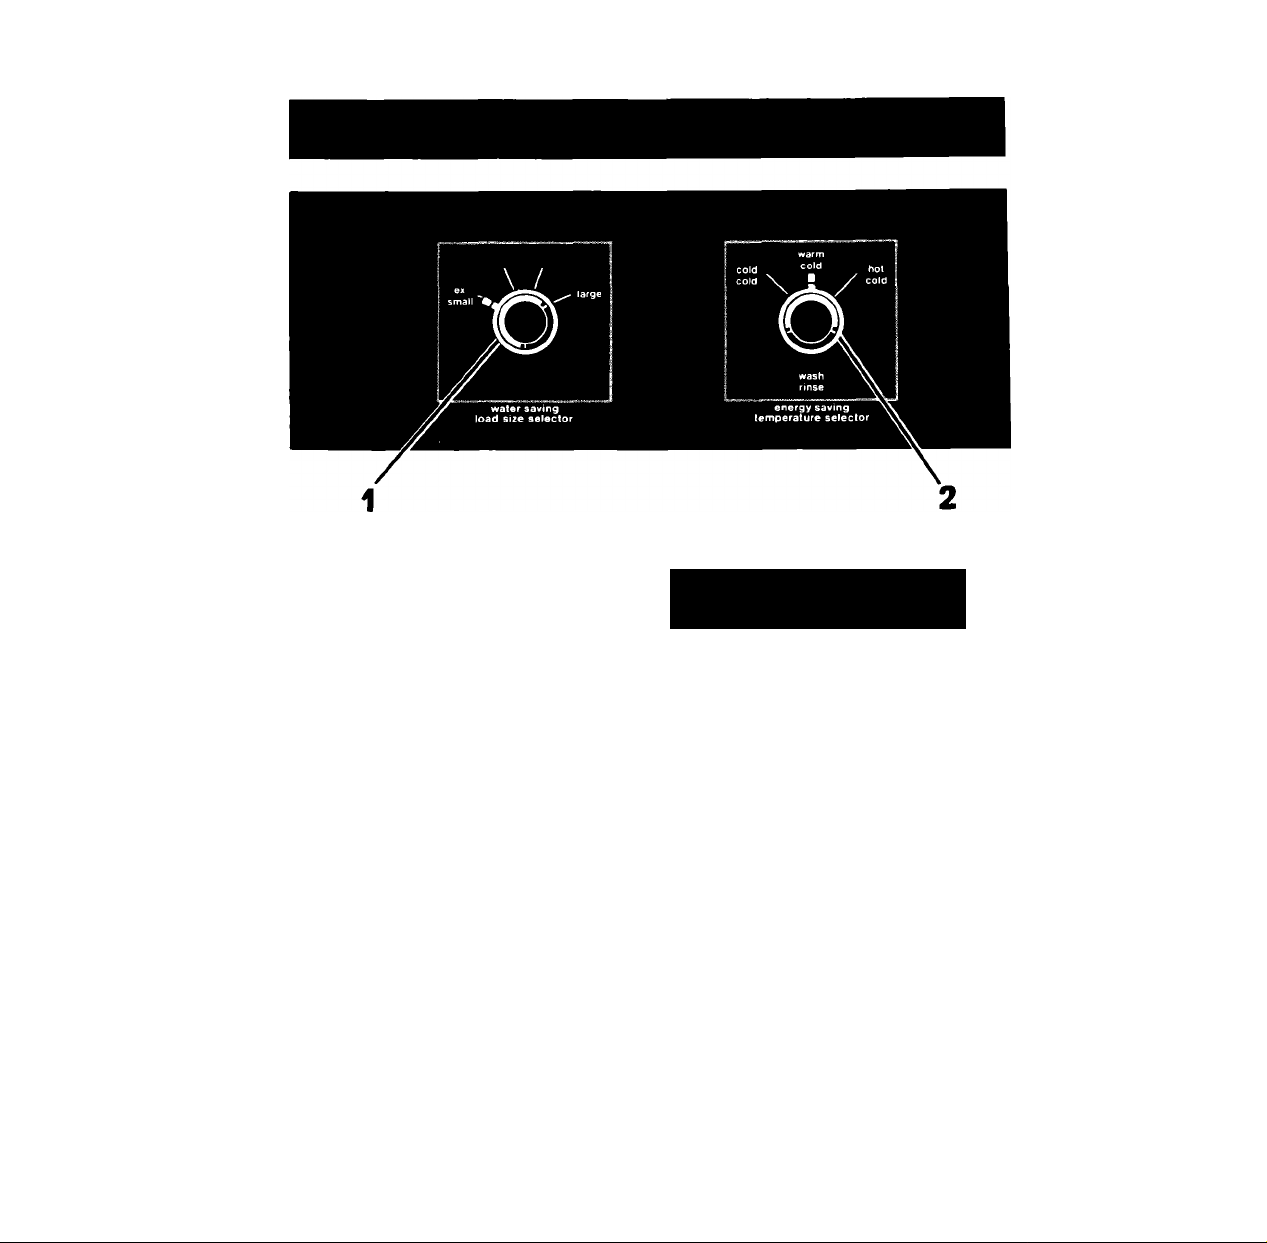
The washer has a LOAD SIZE
SELECTOR thaf iets you adjust the water
level to match the size of the load.
It has a TEMPERATURE SELECTOR.
You can select the wash water temper
ature best for the amount of soil and
fabric type in each load.
Sections in this Use & Care Guide
go into detail on the "what and why"
of each setting. Read this and the Laun
dry Guide carefully to get the best
cleaning results.
MAGIC CLEAN®
lint filter
• The lint filter on your washer is self
cleaning and operates at all water
levels. It filters the water used in your
washer during the wash and deep rinse.
The filter is cleaned automatically dur
ing the drain periods and the lint or fuzz
collected in it is carried away.
• If your washer drains into a laundry
tub, check the drain strainer for lint
accumulation after washing a linty type
load. A lint accumulation may prevent
proper drainage and cause the tub
to overflow.
Using your Washer
Your automatic washer is easy to
use. To make it even easier, read the
foilowing steps before starting your first
load.
Start your washer after you put in
detergent, the load, and any other
laundry aids according to information
on page 3 and page 6
1. Set the LOAD SIZE SELECTOR.
• Select the water level that matches
the size of the load. See page 5 for
more information.
IMPORTANT: For the best cleaning
results with the least wrinkling, make
sure the load has enough water for
items to move freely.
2. Set the TEMPERATURE SELECTOR.
• Match the wash and rinse water tem
peratures to the type of fabrics and soils
being washed. Seethe instructions
under the washer lid and on page 14 in
your Laundry Guide.
Cold water rinses save energy
and help prevent wrinkles from
setting into fabrics.
3> Select a Cycle and Start the
Washer.
• Push the Cycle Control Knob in and
turn it to the right [clockwise).
• Stop when the pointer is on the num
ber of minutes of washing you want
in the cycle you want.
• Instructions for which cycles to use for
each fabric type are under the lid.
• To start the washer, pull the Cycle
Control Knob out. When the cycle is
over, the washer will stop.
• To stop the washer at any time
during a cycle, push the Control
Knob in. Pull it out to restart the washer,
• To change a setting, push the Con
trol Knob in to stop the washer. Then turn
the Control Knob to the right [clockwise)
to the setting you want. Pull the knob
out to start the washer.
• Pages 8-11 show what happens in
each cycle.
 Loading...