

WHIRLPOOL AWIC 10914 Installation Instructions

GB INSTALLATION GUIDE
- Noise, excessive vibrations and water leakages can be caused
by incorrect installation.
- Never move the appliance by carrying it at the worktop.
- Installation of the washing machine requires at least 2
persons.
• Read this “INSTALLATION GUIDE” before operating.
• Keep this “INSTALLATION GUIDE” for future reference.
• Read the general recommendations about disposing of packaging in the Instructions for Use.
F MANUEL D’INSTALLATION
- La présence de bruits, de vibrations excessives et de fuites
d’eau peut être le résultat d’une installation incorrecte.
- Ne déplacer jamais la machine en la tenant par le plan de
travail.
- Deux personnes au moins sont nécessaires pour installer
l’appareil.
• Lisez le présent “GUIDE D’INSTALLATION” avant d’utiliser la machine.
• Conservez le présent “GUIDE D’INSTALLATION” pour référence future.
• Lisez les recommandations générales relatives à la mise au rebut de l’emballage figurant
dans la Notice d’utilisation
.
1
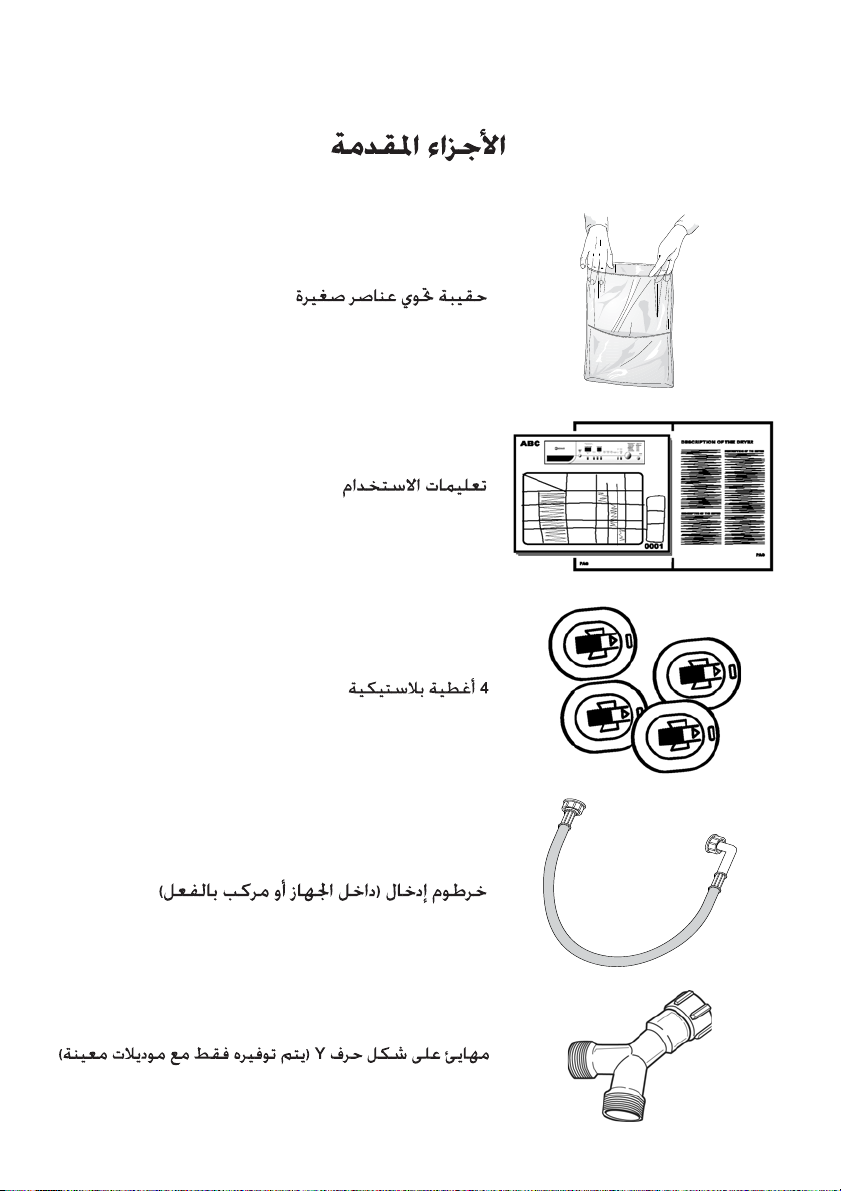
Bag with small items
Sac contenant les petites pièces
Instructions for Use
Notice d’utilisation
4 plastic caps
4 bouchons en plastique
PARTS SUPPLIED
PIÈCES FOURNIES
Inlet hose (inside the machine or already installed)
Tuyau d’arrivée d’eau (à l’intérieur de la machine ou
déjà installé)
Y-adapter (only supplied for certain models)
Adaptateur en Y (selon modèle)
2
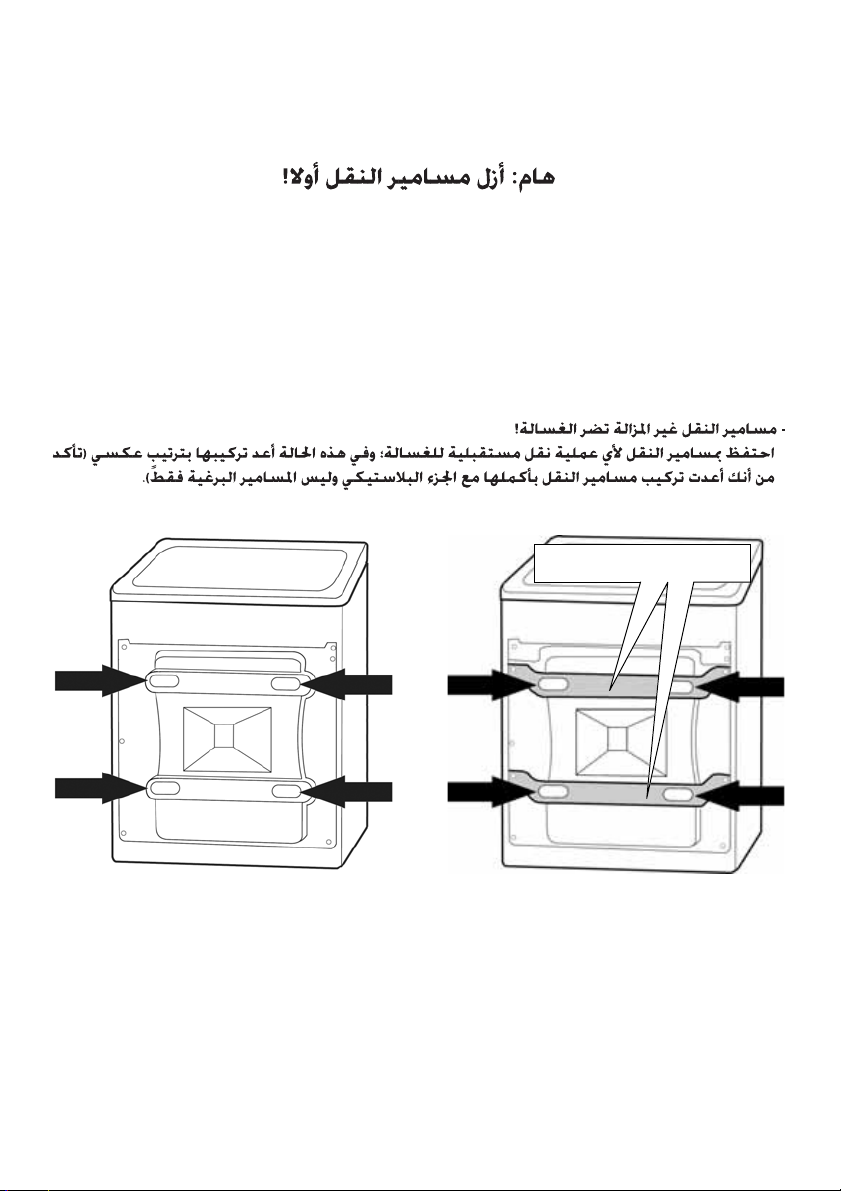
IMPORTANT: FIRST REMOVE TRANSPORT BOLTS!
depending on the
model
Do not remove the metal
braces!
REMARQUE IMPORTANTE : RETIREZ EN PREMIER LIEU LE
BRIDAGE DE TRANSPORT !
- Not removed transport bolts cause damages to the washing machine!
Keep the transport bolts for further transporting of the washing machine; in this case refit
them in reverse order (take care that you refix the whole transport bolt, with the plastic
part, and not only the screw).
- Le non-retrait du bridage de transport provoquerait l’endommagement du lave-linge !
Conservez le bridage de transport en vue d’un éventuel déplacement futur du
lave-linge. Le cas échéant, réinstallez le bridage de transport en inversant les
étapes de la procédure de dépose (veillez à réinstaller le bridage de transport
dans son intégralité, avec la pièce en plastique, pas seulement la vis).
3
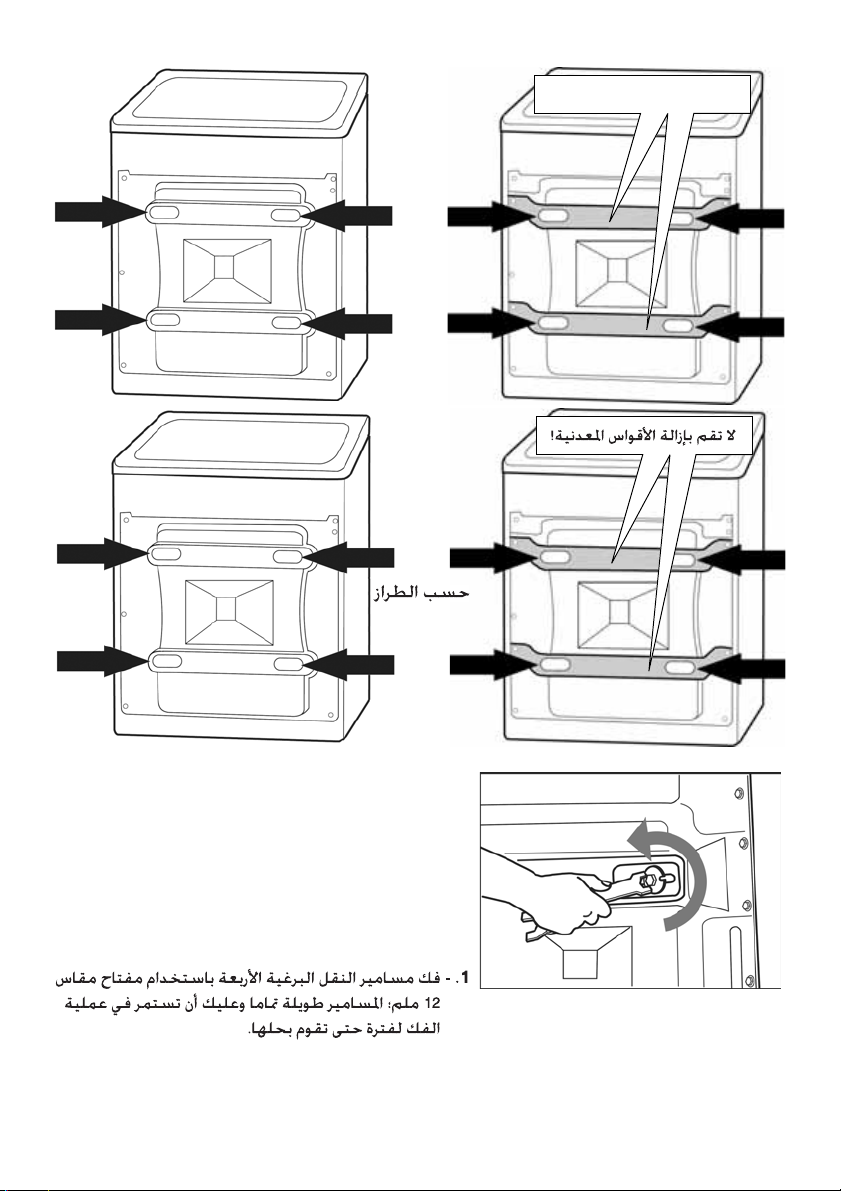
selon modèle
Ne retirez pas les traverses
métalliques !
1. - Unscrew the 4 screws of the transport bolts
with a 12 mm wrench; the screws are quite
long and you have to screw a while until you
can release them.
1. - Dévissez les 4 vis du bridage de transport à
l’aide d’une clé de 12 mm ; les vis sont
longues et doivent être dévissées pendant
un certain temps avant de pouvoir être
retirées.
4
 Loading...