

Whirlpool AKM 888/WH/01, AKM 896 IX, AKM 611/NB, AKL 378/01 WH, EKV 3482 User manual
...
1gb59055.fm5 Page 9 Monday, November 11, 2002 6:54 PM
CONTENTS GB
BEFORE USING THE GLASS CERAMIC HOB
INSTALLATION
ELECTRICAL CONNECTION
ENERGY SAVING TIPS
PROTECTING THE ENVIRONMENT
DECLARATION OF CONFORMITY CE
PRECAUTIONS AND GENERAL
RECOMMENDATIONS
COOKTOP ACCESSORIES
CARE AND MAINTENANCE OF THE
GLASS-CERAMIC COOKTOP
PAGE
PAGE
PAGE
PAGE
PAGE
PAGE
PAGE
PAGE
PAGE
10
10
11
12
12
12
12
13
13
TROUBLESHOOTING GUIDE
AFTER SALES SERVICE
PAGE
PAGE
13
14
9
1gb59055.fm5 Page 10 Monday, November 11, 2002 6:54 PM
BEFORE USING THE GLASS CERAMIC HOB
• To make the most of your new appliances read t he
users instructions carefully and keep them on
hand for consultation in the future.
INSTALLATION
Cooktop
• The cooktop must be set into a worktop
between 20 mm and 50 mm thick. There must
be nothing between the cooktop and the oven
(cross rails, brackets, etc.).
• If the cooktop is to be installed next to a
column unit, leave a distance of at least
100 mm from the edge of the cooktop to the
side of the column unit.
• Cut an opening in the worktop of the dimensions
shown in the Product Description Sheet supplied
separately.
N.B.: Remove the protective film before installing the
cooktop.
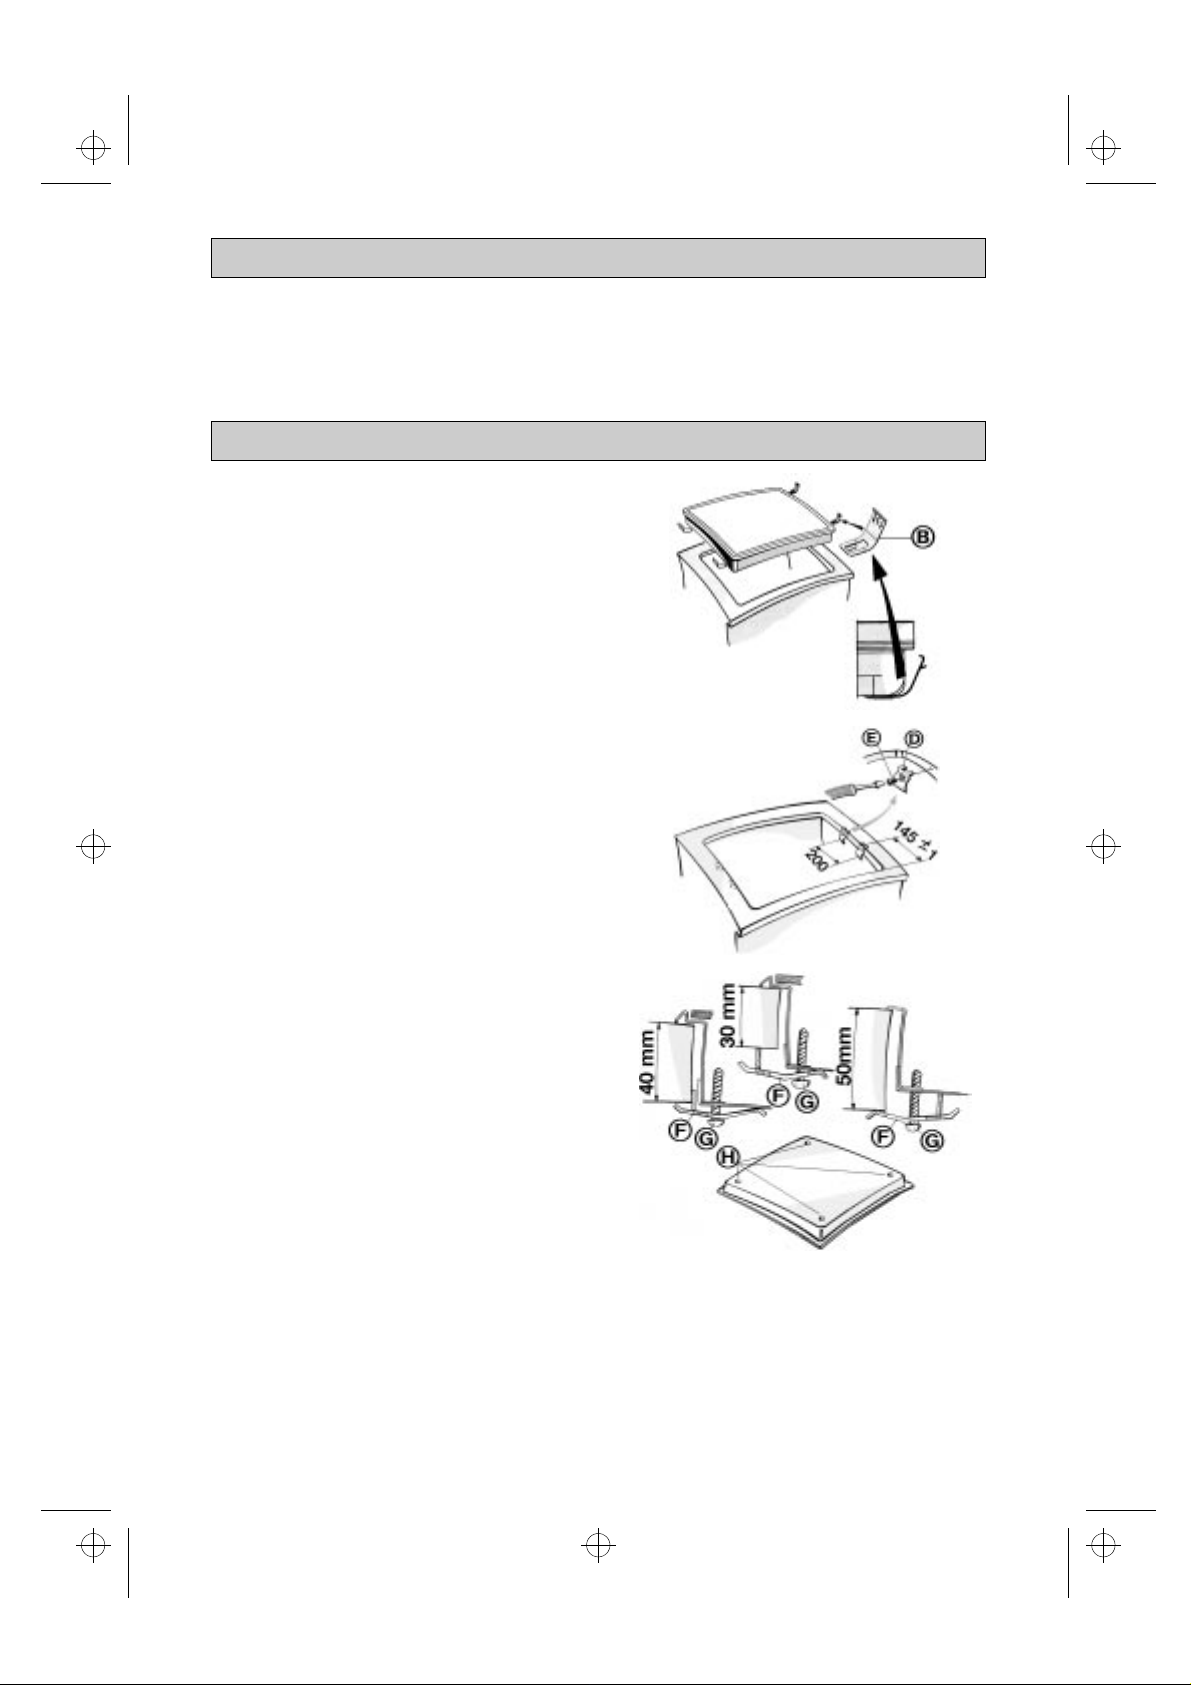
• If the worktop is made of wood, use the supplied
spring clips and screws.
1. Position the 4 clips (D) as shown and at the
specified dimensions
2. Secure the clips using screws (E).
3. Fit the cooktop into the worktop.
• If the worktop is made of marble, ceramics,
natural stone, etc., the cooktop must be secured
with brackets (F) code 4819 404 78697 (to be
requested from After-Sales Service).
1. Fit the cooktop into the worktop.
2. Position the 4 brackets (F) as shown in the figure,
in accordance with the thickness of the worktop.
3. Fix the 4 screws (G) in holes (H).
10
 Loading...