

Whirlpool Ak2500xz0, Ak2500xz, Ak2500xv1, Ak2500xn0, Ak2500xv0 Owner's Manual
...
Contents
Parts and features . .
Before using your dehumidifier.
Install properly
Electrical requirements . . . . . .
Using your dehumidifier . . .
To operate
01989 Whirlpool Corporation
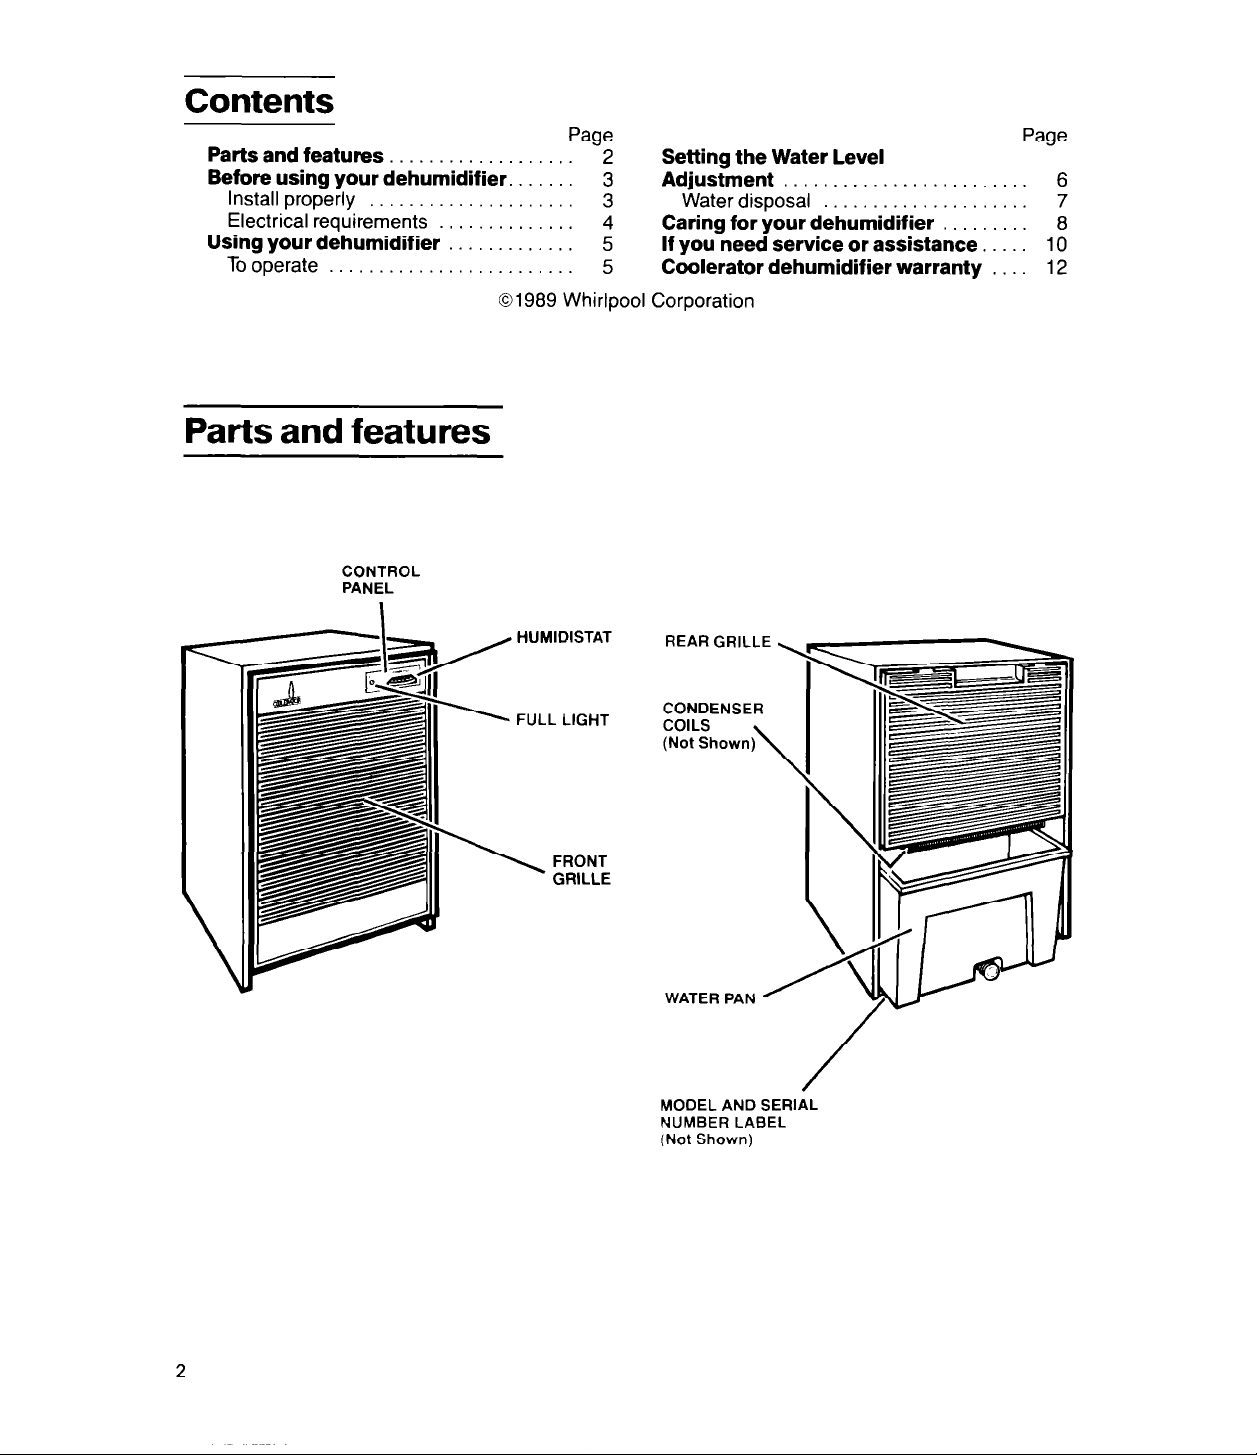
Parts and features
CONTROL
PANEL
Page
2
3
3
4
5
5
Setting the Water Level
Adjustment . . .
Water disposal
Caring for your dehumidifier
If you need service or assistance.
Coolerator dehumidifier warranty .
Page
6
7
8
10
12
HUMIDISTAT
REAR GRILLE,
CONDENSER
COILS
(Not Shown)
\
WATER PAN
MODEL AND SERIAL
NUMBER LABEL
(Not Shown)
Before using your dehumidifier
-s
This booklet tells you how to install your dehumidifier, use it and
clean it. Treat your new dehumidifier with care. Use it only to do what
home dehumidifiers are designed to do.
Copy your model and serial numbers here...
If you need service or call with a question,
have this information ready:
1. Complete model and serial numbers
(from the label under the water pan on the
base of the unit.)
2. Purchase date from sales slip.
Copv this information in these spaces.
Keep-this book and your sales slip together
in a handy place.
Thank you for purchasing a Whirlpool
Model Number
Serial Number
Purchase Date
Service Company Name and Telephone Number
product. Please complete and mail the
Owners Registration Card furnished with this
product.
It is your responsibility to make sure your dehumidifier:
l
l
Has been properly installed on a floor that is
reasonably level.
l
Is the right size for the area you want to
dehumidify.
l
Is connected to the right kind of outlet, with
the proper electrical supply and grounding.
(Refer to your “Electrical Requirements.“)
l
Is used only for jobs expected of home
Is not used by children or anyone not able to
operate it properly.
l
Is properly maintained.
l
Is used in an area where the room tempera-
ture will not fall below 65°F (18.3”C).
l
Do not remove Tech Sheet which is inside the
cabinet. Your service technician needs this
information.
dehumidifiers.
Install properly.. .
1. There are two rollers under your
dehumidifier to help you move it more easily.
Remove the water pan. Tilt unit forward
and roll to another position.
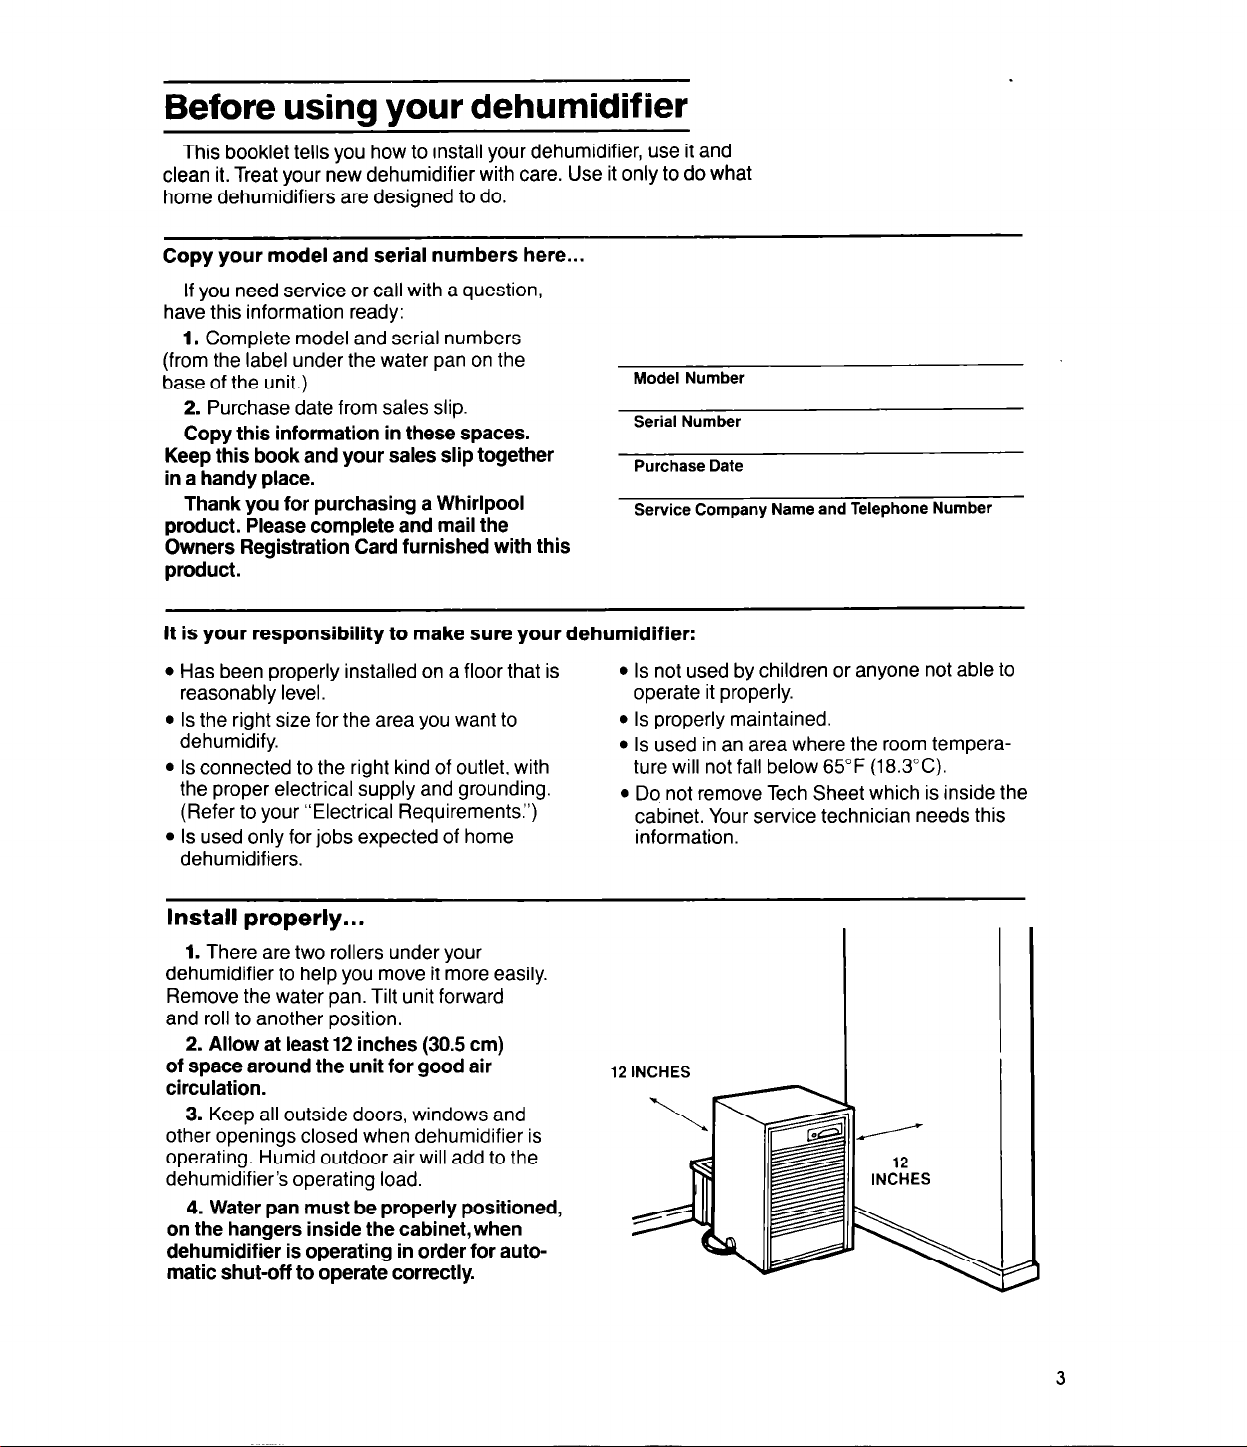
2. Allow at least 12 inches (30.5 cm)
of space around the unit for good air
circulation.
3. Keep all outside doors, windows and
other openings closed when dehumidifier is
operating. Humid outdoor air will add to the
dehumidifier’s operating load.
4. Water pan must be properly positioned,
on the hangers inside the cabinet,when
dehumidifier is operating in order for automatic shut-off to operate correctly.
3

Electrical requirements
OBSERVE ALL GOVERNING CODES AND ORDINANCES.
Electrical ground is required on this appliance.
A 115 volt, 60 Hz., AC only, 15 or 20 ampere fused electrical supply
is required. (Time delay fuse or circuit breaker is recommended.) It is
recommended that a separate circuit serving only this appliance be
provided. Do not use an extension cord.
DO NOT UNDER ANY CIRCUMSTANCES. REMOVE THE POWER
SUPPLY CORD GROUND PRONG.
RECOMMENDED GROUNDING METHOD
For your personal safety, this appliance
must be grounded. This appliance is equipped
with a power supply cord having a 3-prong
grounding plug. To minimize possible shock
hazard, the cord must be plugged into a mating
3-prong grounding type wall receptacle,
grounded in accordance with the National
Electrical Code and local codes and ordinances. If a mating wall receptacle is not available, it is the personal responsibility and
obligation of the customer to have a properly
grounded 3-prong wall receptacle installed by
a qualified electrician.
3PRONG
GROUNDING PLUG
I
3-PRONG GROUNDING
TYPE WALL RECEPTACLE
POWER SUPPLY CORD
TEMPORARY GROUNDING METHOD
If changing and properly grounding the wall
receptacle is impossible and where local
codes permit (consult your electrical inspector), a temporary adaptor may be plugged into
the existing 2-prong wall receptacle to mate
with the 3-prong power supply cord. THIS
HOWEVER, IS NOT RECOMMENDED.
If this is done, you must connect the grounding eyelet on the adapter to the wall receptacle
cover plate screw and from this same screw,
you must connect a separate copper ground
wire (#14 minimum) to a grounded cold water
pipe.* Do not ground to a gas supply pipe.
Do not connect to electrical supply until
appliance is permanently grounded.
‘Cold water pipe must have metal continuity to electrical
ground and not be interrupled by plastic, rubber or other
electrical insulating connections (including water meter or
pump) without adding a jumper wire at these connections.
ELECTRICALLY
GROUNDED METAL
COLD-WATER PIPE
(REMOVE PAINT. ETC.)
GROUNDING
\
PLUG
POWER SUPPLY CORD
GROUND ASSEMBLY
PTER
GROUND PRONG
WALL
RECEPTACLE
 Loading...