

Westinghouse MT80 User Manual
Installation and Assembly:
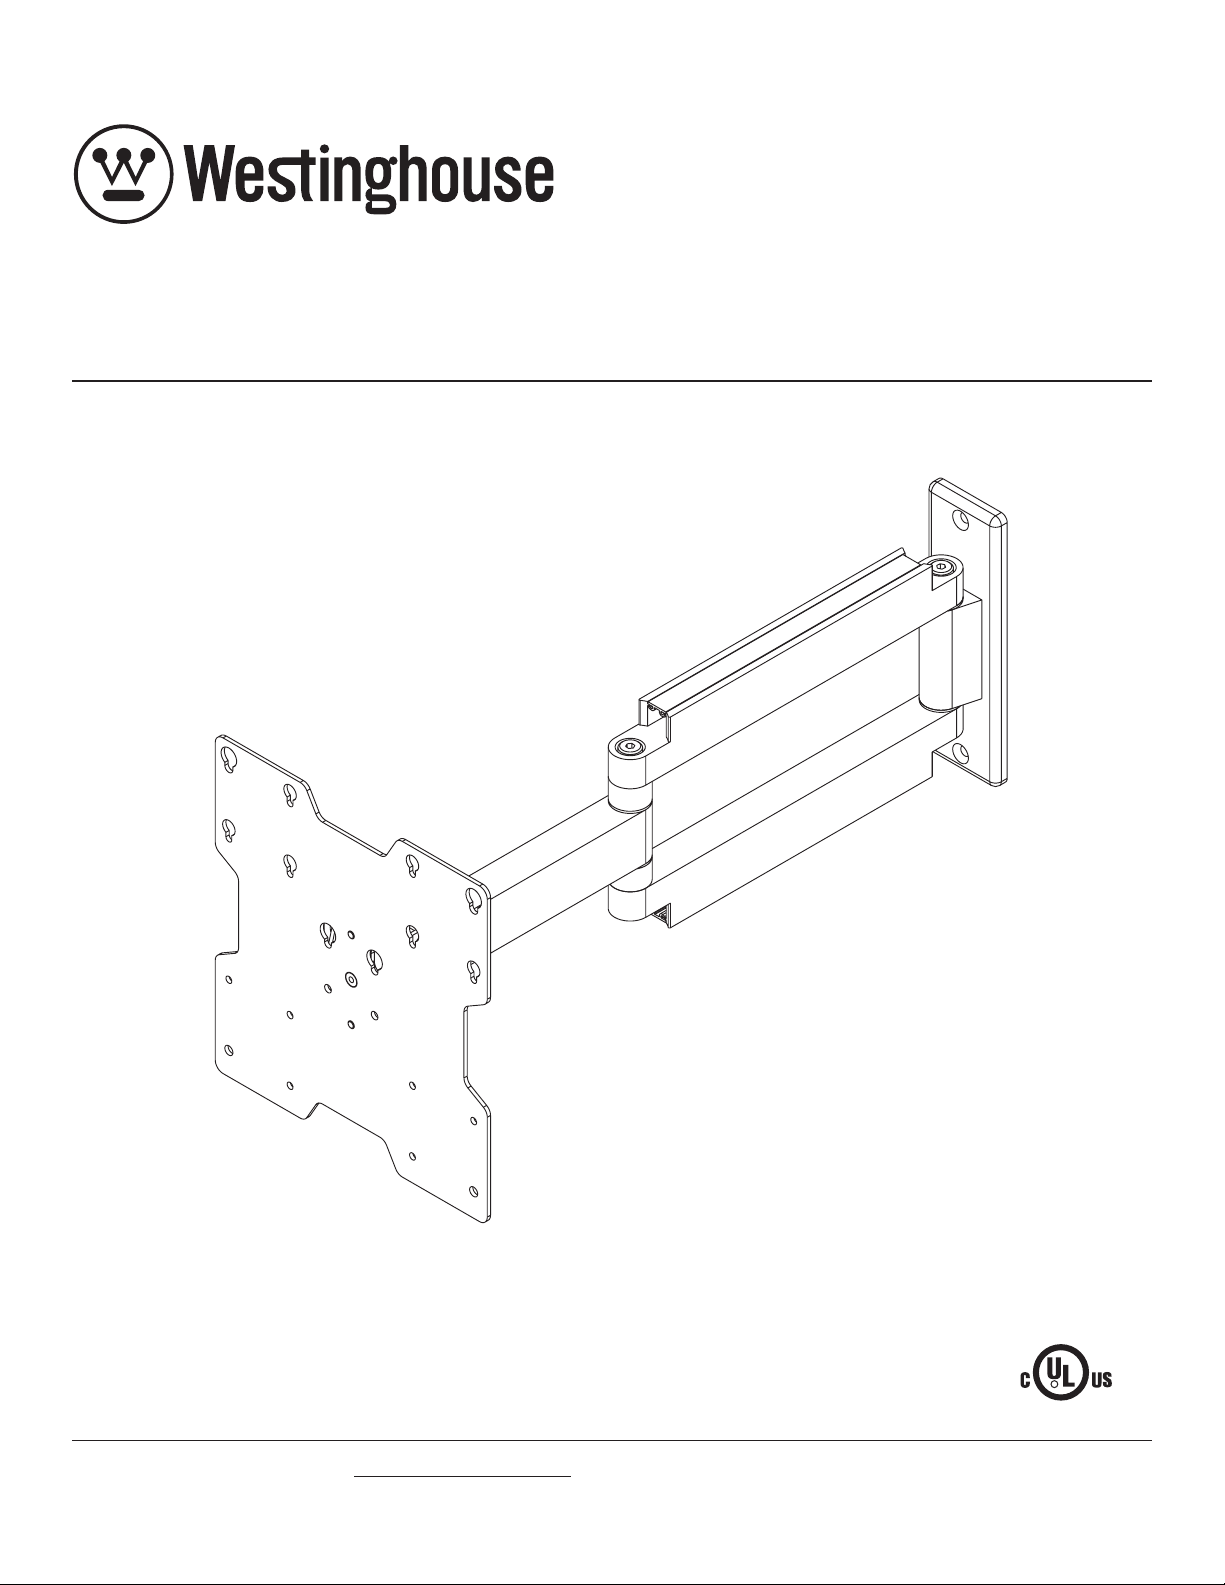
Universal Articulating Wall Mount for 20" - 42" Screens
Model: MT80 ARM20
Features:
• Universal design for 20" - 42" flat panel screens
• Three tensionable pivot points for extensive adjustment of viewing angle
• VESA® 100/200/200 x 200 compatible
• Frees up space by folding flat against the wall
• Keeps electronic wires routed internal to reduce clutter
Visit the Westinghouse Web Site at www.westinghousedigital.com For customer care call 1-866-287-5555.
Max UL Load Capacity: 80 lb (36.3 kg)
ISSUED: 01-17-06 SHEET #: 202-9094-1
R

Note: Read entire instruction sheet before you start installation and assembly .
WARNING
• Do not begin to install your Westinghouse product until you have read and understood the instructions and warnings
contained in this Installation Sheet. If you have any questions regarding any of the instructions or warnings, call
customer service at 1-866-287-5555.
• This product should only be installed by someone of good mechanical aptitude, has experience with basic building
construction, and fully understands these instructions.
• Make sure that the supporting surface will safely support the combined load of the equipment and all attached
hardware and components.
• Never mount this product to a metal stud wall construction unless the stud can be verified to be constructed of 25
gauge steel minimum, the drywall is 1/2" thick minimum and you obtain and use the accessory kit for metal studs.
• Never exceed the Maximum UL Load Capacity .
• If mounting to wood wall stud wall construction, make sure that mounting screws are anchored into the center of the
studs. Use of an "edge to edge" stud finder is highly recommended.
• Always use an assistant or mechanical lifting equipment to safely lift and position equipment.
• Tighten screws firmly, but do not overtighten. Overtightening can damage the items, greatly reducing their holding
power. See suggested torque values where applicable within these instructions.
Tools Needed for Assembly
• stud finder ("edge to edge" stud finder is recommended)
• phillips screwdriver
• drill with 1/4" and 5/32" drill bits
Accessories
• Metal S tud Wall Plate (WSP models) (Not evaluated by UL)
Table of Contents
Parts List.............................................................................................................................................................................. 3
Installation to Wood Stud Wall ............................................................................................................................................. 4
Installation to Solid Concrete and Cinder Block ....................................................................................................................5
For customer care call 1-866-287-5555.
2 of 10
ISSUED: 01-17-06 SHEET #: 202-9094-1

Parts List
De scrip tion Qty. Part #
wall mount 1 095-0345
A
All i gat or® anchor 2 590-0097
B
.198" ID x . 313" OD x . 437" H ret aining spacer 4 590-5003
C
3/16" all en wrench 1 560-9713
D
M4 x .7 x 12 mm phil l ips sc rew 4 504-2013
E
M4 x .7 x 20 mm phil l ips sc rew 4 504-2014
F
M6 x 1 x 12 mm phil li ps screw 4 520-2039
G
#14 x 2-1/2" flat head wood screw 2 520-2165
H
1/4-20 x .5" flat head phill i ps screw 2 520-2178
I
M6 x 1 x 20 mm phil li ps screw 4 520-2040
J
M6 x 1 x 30 mm phil li ps screw 4 520-2042
K
B
C
A
E
G
F
J
H
K
I
D
3 of 10
ISSUED: 01-17-06 SHEET #: 202-9094-1
 Loading...