

West Bend 35C Owner's Manual
WATER BATH CANNER
Instruction Manual
Register this and other Focus Electrics products through our website:
www.registerfocus.com
Water Bath Canning At A Glance ............................................................................ 2
Using Your Canner .................................................................................................. 3
Processing Times .................................................................................................... 4
Cleaning Your Canner ............................................................................................. 5
Warranty .................................................................................................................. 6
SAVE THIS INSTRUCTION MANUAL FOR FUTURE REFERENCE
2010 Back To Basics®, a Brand of Focus Electrics, LLC.
www.focuselectrics.com
To prevent personal injuries, read and follow all instructions and warnings.
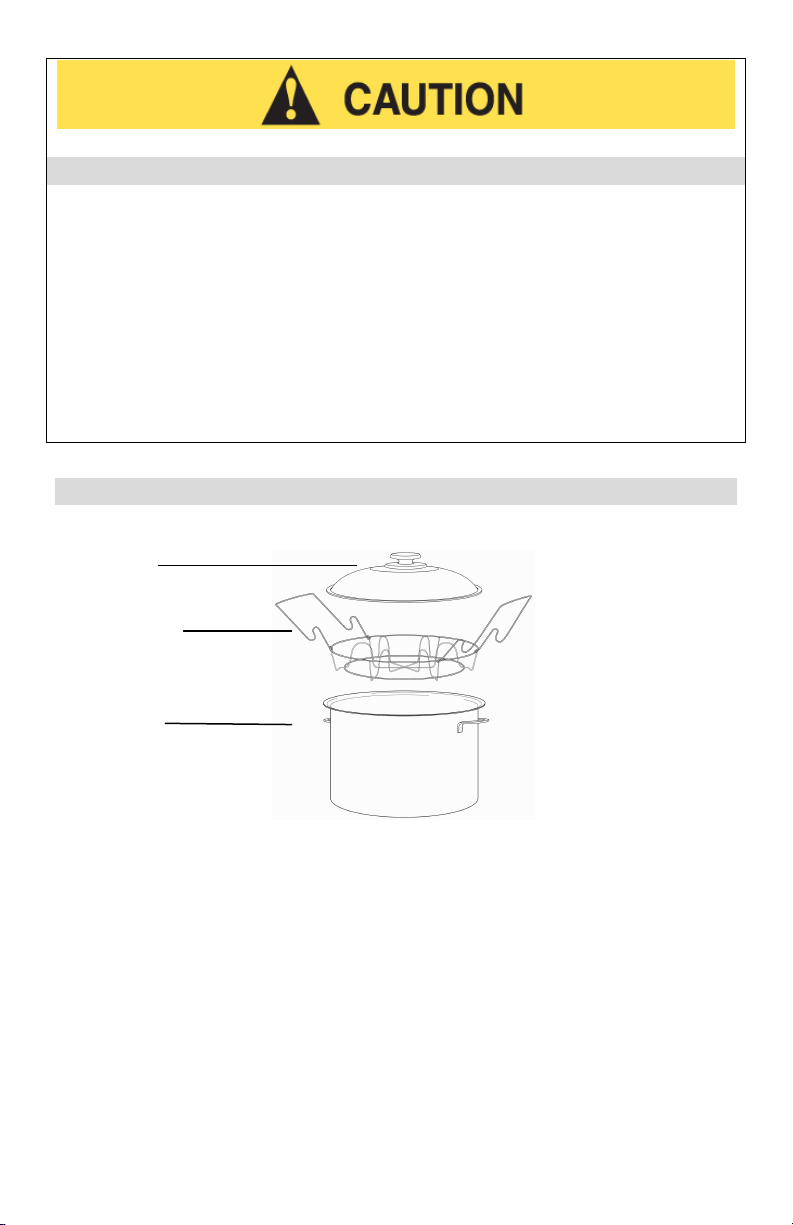
Cover
Jar Rack
O
PERATING PRECAUTIONS
• The steam is scalding hot, use extreme caution!
• Close supervision is necessary when this appliance is used by or near children.
• Do not leave unattended.
• Rubber or heat resistant gloves are recommended when handling the hot
canner.
• Never let the pan boil dry. If excessively overheated, like most cookware, the
bottom may warp or melt. Should melting occur, do not attempt to remove the
water pan from the burner until it has cooled.
• Be extremely cautious of steam when removing cover. Lift cover slowly,
directing steam away from you and let water drip into canner.
W
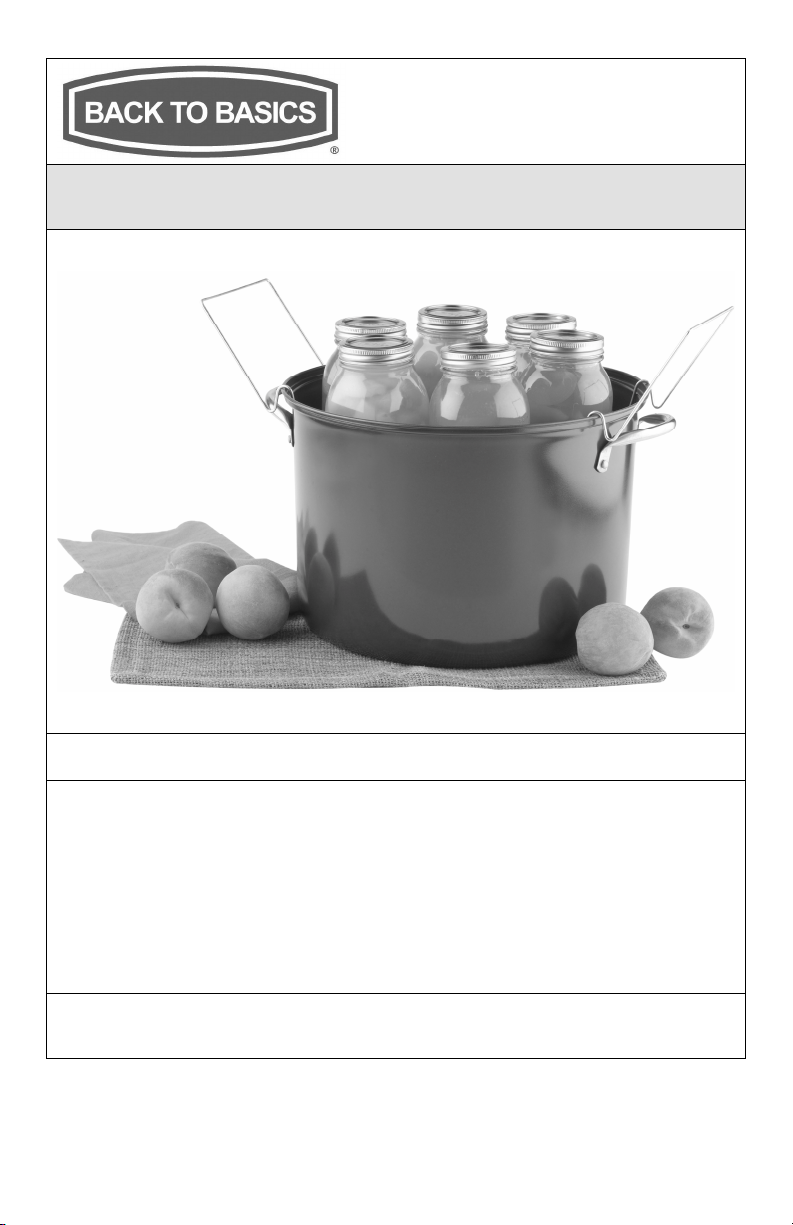
ATER BATH CANNING AT A GLANCE
Water Pan
Keep your work area, all equipment and utensils clean. Your new canner should be
washed in warm, soapy water. Do not scour or use abrasive cleansers. Wash your
jars and check for nicks and cracks. Discard questionable jars. Use only clean lids
and rings. Follow the lid manufacturer’s directions.
Always use fresh produce as desired: peel, core, chop, dice or puree. Remove
bruises or spots that may cause spoilage. Work quickly and prepare smaller batches
to prevent discoloration. If desired, soak fruits that darken easily, such as apples or
peaches, for approximately 10 minutes in a lemon juice bath of 5 tablespoons of
lemon juice per gallon of cold water.
2

Two methods are commonly used for packaging jars: Cold Pack (raw pack) and Hot
Pack.
Cold packing is simple, fast and easy to clean up. Firmly pack clean, unheated jars
with raw produce. Fill the jars with boiling hot water or sugar syrup about one inch
from the jar top. Remove air bubbles by gently running a non-metallic spatula,
chopstick or plastic knife between the produce and the jar. Add more liquid if
necessary, but do not overfill. Clean the jar rims with a damp cloth. Secure clean
lids and rings on the jar tops, and tighten firmly, but DO NOT OVER TIGHTEN.
To hot pack, place the prepared fruit or tomatoes in a large pan, and cover with
water, sugar syrup or juice. Bring to a boil and simmer. Simmer tomatoes for 5
minutes, fruit for 3 minutes. Preheat the jars in a 200°F (93.3°C) oven for 15
minutes. Pack the jars loosely and fill with hot juice or syrup to ½ inch from the jar
top. Remove air bubbles with a non-metallic instrument. Add more liquid if
necessary, but do not overfill. Clean the jar rims and secure the clean lids and rings.
Tighten the rings firmly, but DO NOT OVER TIGHTEN.
U
SING YOUR CANNER
MAKING SUGAR SYRUP
1 cup boiling water to ¼ cup sugar for thin syrup.
1 cup boiling water to ½ cup sugar for medium syrup.
1 cup boiling water to ¾ cup sugar for heavy syrup.
Add only dissolved solutions to the jars. For a healthier syrup, try substituting half
the sugar with a mild-flavored honey, or replace the syrup with unsweetened fruit
juice. Fruit may be processed using water only, but sugar syrups help preserve
color, flavor and texture.
1. Fill the water pan of the way full with water and place on a large stovetop
burner.
2. Set the jar rack in the water pan with the rack handles hooked over the rim and
turn the heat to medium or medium high. Cover and bring the water to a gentle
boil.
3. Fill the jars with fruit and hot syrup or water.
4. Add the lids and turn the rings on firmly, but DO NOT OVER TIGHTEN.
5. As you fill each jar, place it in the rack. After the desired number of jars are in
the rack, lower the rack into the water and add hot water until all the jars are an
inch below the water surface.
6. When the water begins to boil again, start counting the processing time. Follow
the processing times given in this manual, or other reliable guides for water bath
canning. Note: Remember to add the altitude adjustment if necessary.
7. Maintain an even medium boil.
8. When the processing time is finished, turn off the heat and let stand for 2 to 3
minutes.
9. Use hot pads to remove the cover. Carefully lift the cover so that the hot steam
escapes away from you. Place the jars on a dry towel, cloth or cake rack in a
draft-free area and let cool for 24 hours.
10. After cooling time is complete, remove the rings and check the seals by
depressing the center of the canning lid. If it pops back, the seal is bad.
Reprocess or refrigerate and eat the contents within a few days. Store the jars
with the good seals in a cool, dark room.
3
 Loading...