

Page 1
Light Source
Light Source Menu
Service Manual
®
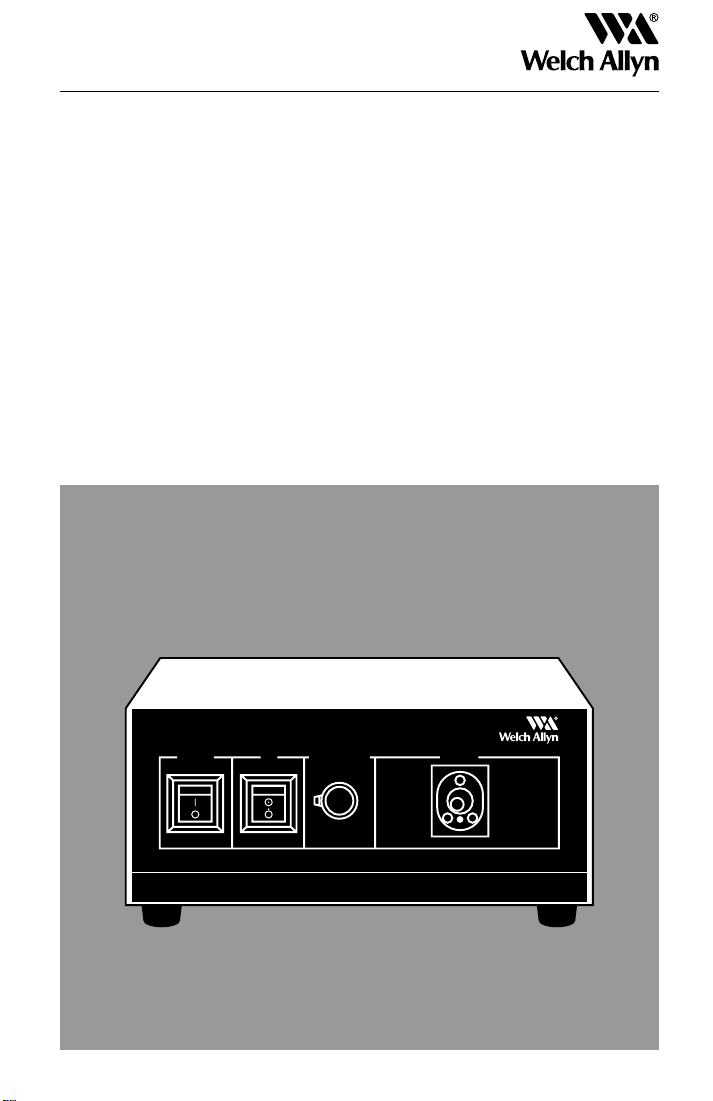
LX-150
POWER AIR BRIGHTNESS OUTPUT
®
LX- 1 50
(International)
Operating
Instructions
+-
Page 2

Thank you for purchasing the Welch Allyn LX-150® Light Source. The
operating and maintenance instructions found in this manual should be
followed to ensure many years of accurate and reliable service. Please
read these instructions thoroughly before using your new LX-150 Light
Source.
Warning
The user of this equipment should be thoroughly trained in the medical procedures appropriate to the instrumentation. Furthermore, time
should be taken to read and understand these instructions before performing any procedures. Instructions for other equipment used in conjunction (e.g. electrosurgical generators, suction machines, etc.) should
also be read and understood. Failure to do so may result in injury to
the patient and/or damage to the instrument.
Specifications
Illumination Lamp Voltage 21 VAC
Lamp Type 150w Halogen (#04050)
Lamp Life 50 Hours
Brightness Adjustment Continuous Diaphragm
Cooling Method Forced Air
Air Feeding Pump Type Electromagnetic Vibrator
Capacity 6.6 p.s.i. Max.
Max. Flow Rate 7.2 L/Min.
Control Independent Air Switch
Dimensions (W)11" x (H)51⁄2" x (D)91⁄2"
(W)28cm x (H)14cm x (D)24cm
Weight 17.5 lbs. (7.95kg)
Supply Voltage 220, 230, 240 VAC
Circuit Frequency 50—60Hz
Current 1A
Fuse T 1A, 250 V
IEC 127/DIN 41662
Classification Class I. IEC type B
Ambient
Temp 10—40°C
Relative
Humidity 30—85%
Page 3
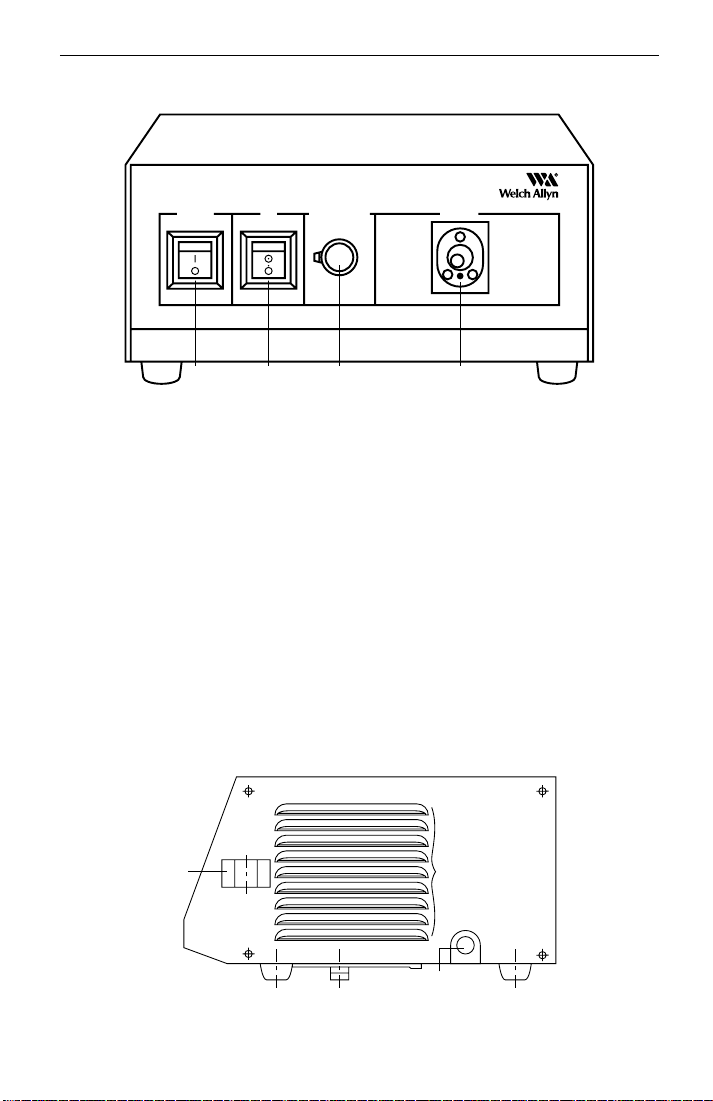
Nomenclature
®
LX-150
POWER AIR BRIGHTNESS OUTPUT
+-
21 3 4
Front View
1. Main Power Switch—controls all power into light source.
Without activation, all other controls will not function.
2. Air Feed Switch—activates flow of air at air output connector
(on right side of box).
3. Illumination Control—controls intensity of light output at
endoscope connector port.
4. Endoscope Connector Port—accepts endoscope connector
terminal of endoscope to complete illumination pathway.
5. Water Bottle Bracket—couples water bottle to light source.
6. Air Output Connector—couples to air input hose on water
bottle.
7. Lamp Access Door—opens to allow for lamp replacement.
5
VENT
6
Right View
1
Page 4

CAUTION:
ALLOW LAMP TO COOL
BEFORE REPLACING.
FOR CONTINUED PROTECTION
7
AGAINST FIRE HAZARD
REPLACE ONLY WITH
W. A. LAMP NO. 04050
Bottom View
CAUTION: Lamp becomes extremely hot even after short periods of
operation. Allow lamp ample time to cool prior to replacing.
CAUTION
ELECTRIC SHOCK HAZARD,
DO NOT DISASSEMBLE
INSTRUMENT. REFER
SERVICING TO QUALIFIED
SERVICE PERSONNEL.
T
1.0 A 250 V.~
1EC 127 / DIN 41662
MODEL NO. 45260
LIGHT SOURCE
FOR SERVICE SHIP TO:
4341State Street Rd.
Skaneateles Falls, NY
13153-0220
220-240V.~50/60 Hz.
1.0 A
IEC 601-1
DISCONNECT SUPPLY
BEFORE SERVICING
COUPER L’ALIMENTATION
AVANT L’ENTRETIEN
ET LE DEPANNAGE
Rear View
CAUTION: Electric shock hazard. Do not attempt to service unit.
Return to an authorized Welch Allyn service center for repair.
WARNING: Disconnect power supply prior to replacing lamp.
: Degree of protection against electric shock, IEC type B.
2
Page 5

8
9
Water Bottle
8. Air Input Hose—couples to light
source air output connector.
9. Air/Water Output—couples to dual
lumen air/water line of flexible
sigmoidoscope (FX-100).
10. Mounting Bracket—couples to water
bottle bracket on light source to
support bottle.
10
Water Bottle
3
Page 6

Prior to Initial Use
General Precautions
• The cabinet of this unit should always be grounded correctly and
securely during use. Do not disable the line cord ground connection.
• LX-150® should not be used in the presence of any flammable gas.
• The LX-150 and connected endoscope should not be used with
electrosurgical instruments that exceed safety leakage current or
whose safety in linkage is not guaranteed.
• Immediately stop using the light source if liquid enters the cabinet.
• Do not look directly into endoscope connector port when it is emitting light.
Preparation for Use
• The light source should be set upon a firm, horizontal surface. Care
must be exercised to keep both sides of the illuminator free of obstructions to permit efficient circulation of air.
Connection to Supply Source
• Check to verify that the power switch is OFF.
• Couple the supply cord to a hospital grade receptacle that meets
the input ratings on the rating plate.
Connecting Endoscope
• Insert the endoscope connector terminal into the endoscope connector terminal port. (Note: Endoscope alignment pin should point
toward the bottom of the light source).
• Push the terminal firmly into the port until it “clicks” into place.
Connecting Water Bottle
• Remove cap and fill the water bottle with clean tap water until 3⁄4 full.
• Replace cap and tighten firmly.
• Hook water bottle to bracket on right side of light source. (Note: DO
NOT attempt to fill water bottle while it is connected to light source.)
• Couple air output connector hose to air output connector on
light source.
• Couple dual lumen air/water line to top of water bottle. Connect
remaining fittings to corresponding air/water input connectors on
endoscope.
4
Page 7

Inspection
Prior to every examination, the equipment should be pre-tested
following the procedures outlined below. If an abnormality is detected
or suspected, contact Welch Allyn Customer Service for assistance.
Activating Light Source
• Switch power switch to “ON”.
• Set brightness knob midway between ( + ) and ( - ) settings.
• Check the distal tip of endoscope to verify that light is being emitted
from distal light guides.
• Verify that internal cooling fan is operating by listening to whirring
noise from light source.
• If unit does not power up, contact Welch Allyn Customer Service
(315) 685-4560.
• If fan is activated but no light is emitted, lamp is defective or not properly seated. Refer to maintenance section for replacement procedure.
Adjusting Light Intensity
• Light emitted from the distal tip of the endoscope will increase as the
brightness knob is rotated toward the ( + ) and conversely the intensity will diminish when rotated toward ( - ).
Air/Water Feed
• With power switch “ON”, turn on the air switch.
• Verify that air and water flow normally from distal tip of endoscope
when corresponding valves are depressed.
NOTE: If air/water flow falls below normal, contact Welch Allyn Customer Service.
Storage
• Disconnect and empty the water bottle. Wash with mild soapy water
and rinse.
• Disconnect power cord from receptacle.
• Wipe external surface of source and power cord with gauze moistened in alcohol.
• Store in a clean, dust-free environment at room temperature. Avoid
direct sunlight and areas of high temperature/humidity.
• Do not wind power cord so tightly that it will crush, twist or bend.
5
Page 8

Maintenance
Lamp Replacement
1. Turn power switch to “OFF” position and unplug power cord from
receptacle.
2. Uncouple air input hose and remove water bottle from bracket.
3. Flip the light source 180° and place top face down on a horizontal
surface.
4. Open lamp access door by inserting a coin in slot and turning
release latch 1⁄4 turn counterclockwise. (Note: before touching
lamp, allow for sufficient time to cool.)
5. After lamp has cooled, pull the lamp holding lever toward the back
of the unit until the lever reaches an almost vertical position.
6. Remove expired lamp from the lamp holder.
7. Prior to installing new lamp, remove protective cap.
8. Return the lever to its original position. The new lamp may then be
inserted into the holder and advanced until it “snaps” into place.
(Note: lamp must be fully inserted to assure proper contact).
9. Close and secure lamp access door.
(Note: Use replacement lamp #04050)
Service
For service, ship light source to:
Welch Allyn, Inc.
4341 State Street Road
Skaneateles Falls, NY 13153-0220
Attention: Repair Department
Unit Conforms to
I.E.C. #601-1
Printed in U.S.A.
Part No. 451602-2
 Loading...