

Page 1

Page 2

TABLE OF CONTENTS
Warranty………………………………………………………………….… 2
Accessories.……………………………………………………………….. 10
Trouble Shooting.…………………………………………………………. 11
®
two years from the date of purchase, Original Power, at its sole discretion,
to validate the warranty period. This warranty does not cover normal
wear items such as the spool, guard, cutting line, and batteries. For
section of this manual.
To obtain warranty services or questions please call (800) 540-5688.
This warranty applies only while this line trimmer/edger is used in the
Page 3

WARNING TO CALIFORNIA RESIDENTS:
the cord.
WARNING TO CALIFORNIA RESIDENTS
The batteries in this product
– in no circumstances should you attempt to open the batteries. Avoid excessive
WARNING:
When using this tool, basic safety precautions should always be
followed to reduce the risk of fi re, electric shock, and personal injury, including
the following:
To reduce risk of injury:
ATTACH LINE GUARD –
will void the warranty.
– The line trimmer
AVOID DANGEROUS ENVIRONMENTS
and weather conditions when using
this tool.
– All visitors should be kept at a safe distance from
work area.
– It will do the job better and with less likelihood of a
– Do not use the tool for any job except that for which it is
WARNING: KEEP HANDS AND ALL BODY PARTS AWAY
from the line and line
– Do not wear loose clothing or jewelry. They can be caught
working outdoors. Wear protective hair covering to contain long hair and long
– Maintain proper footing and balance at all times.
– Always wear proper eye protection, and use face or
– Keep the unit clean for best performance and to
Page 4
– Don’t hold the switch area while carry the line
trimmer. The unit is shipped partly charged, and may start inadvertently during
– If the line trimmer experiences a hard impact,
– Watch what you are doing. Use common sense. Do not operate
the tool when you are tired.
– Do not attempt to remove cut material or hold
when clearing or changing line.
To reduce risk when using charger:
use charger outdoors or in wet conditions; use inside only.
This unit and its charger are designed to work together.
charge the line
trimmer
with any other charger and
use this charger with any other
yard tool or appliance.
The charger is designed to operate on 120 volts.
attempt to use it at
the wall charging rack.
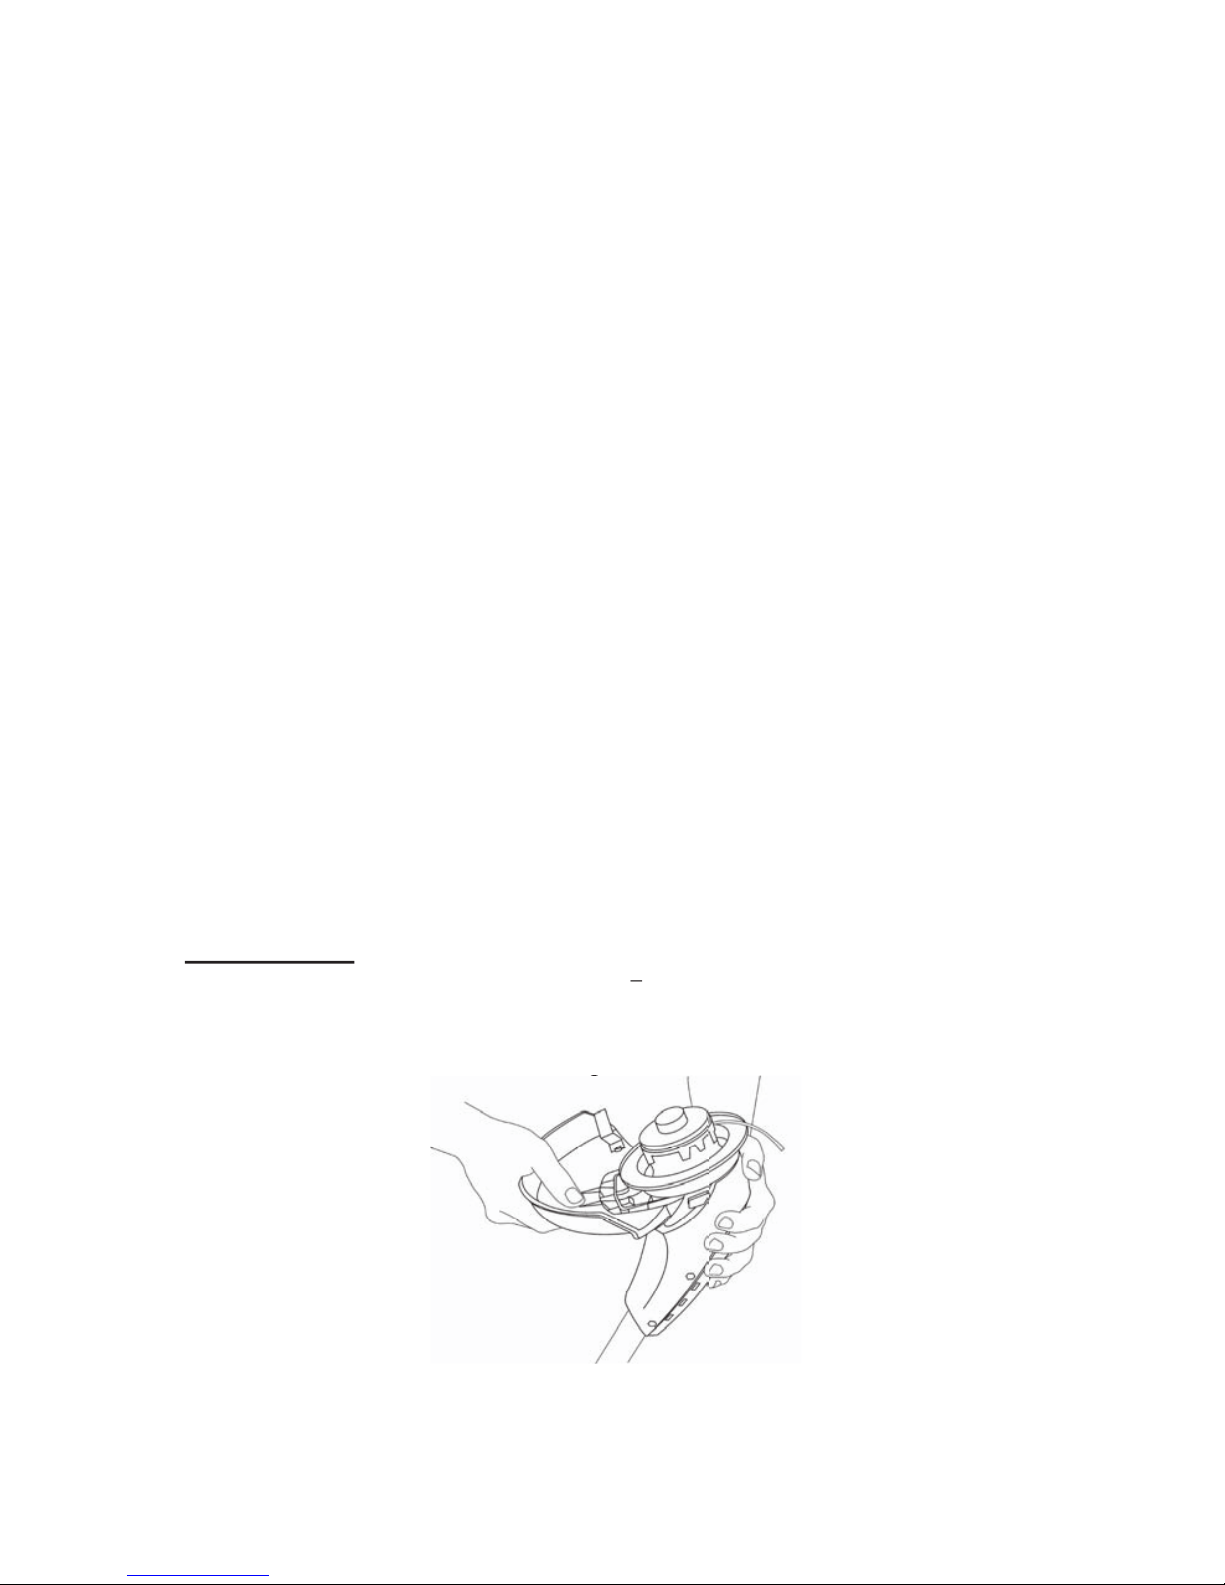
ATTACH LINE GUARD PRIOR TO USE
Attach the line guard to the trimmer
from this blade before initial use. The line is shipped taped in place to the line
Page 5

– The line trimmer
– Overnight charging of about 16 hours is suffi cient to replenish
the battery to a full charge. Initial use, long periods of inactivity, or storage at
WALL CHARGE BRACKET
– Before charging the unit, make sure the charge
To Charge Battery:
The charger can only be used with 60 cycle, 120 VAC only
The charger unit plugged into the AC outlet will normally become warm to
touch during charging.
– The charger utilizes a two-step charger with end of charge
trickle maintenance, which is the safest way to charge a battery. The unit will not
To turn tool ON,
slide the thumb switch on top of the handle FORWARD. While
to start the unit. See Figure-3 and Figure-4. You may release the thumb switch
To turn tool OFF,
Page 6

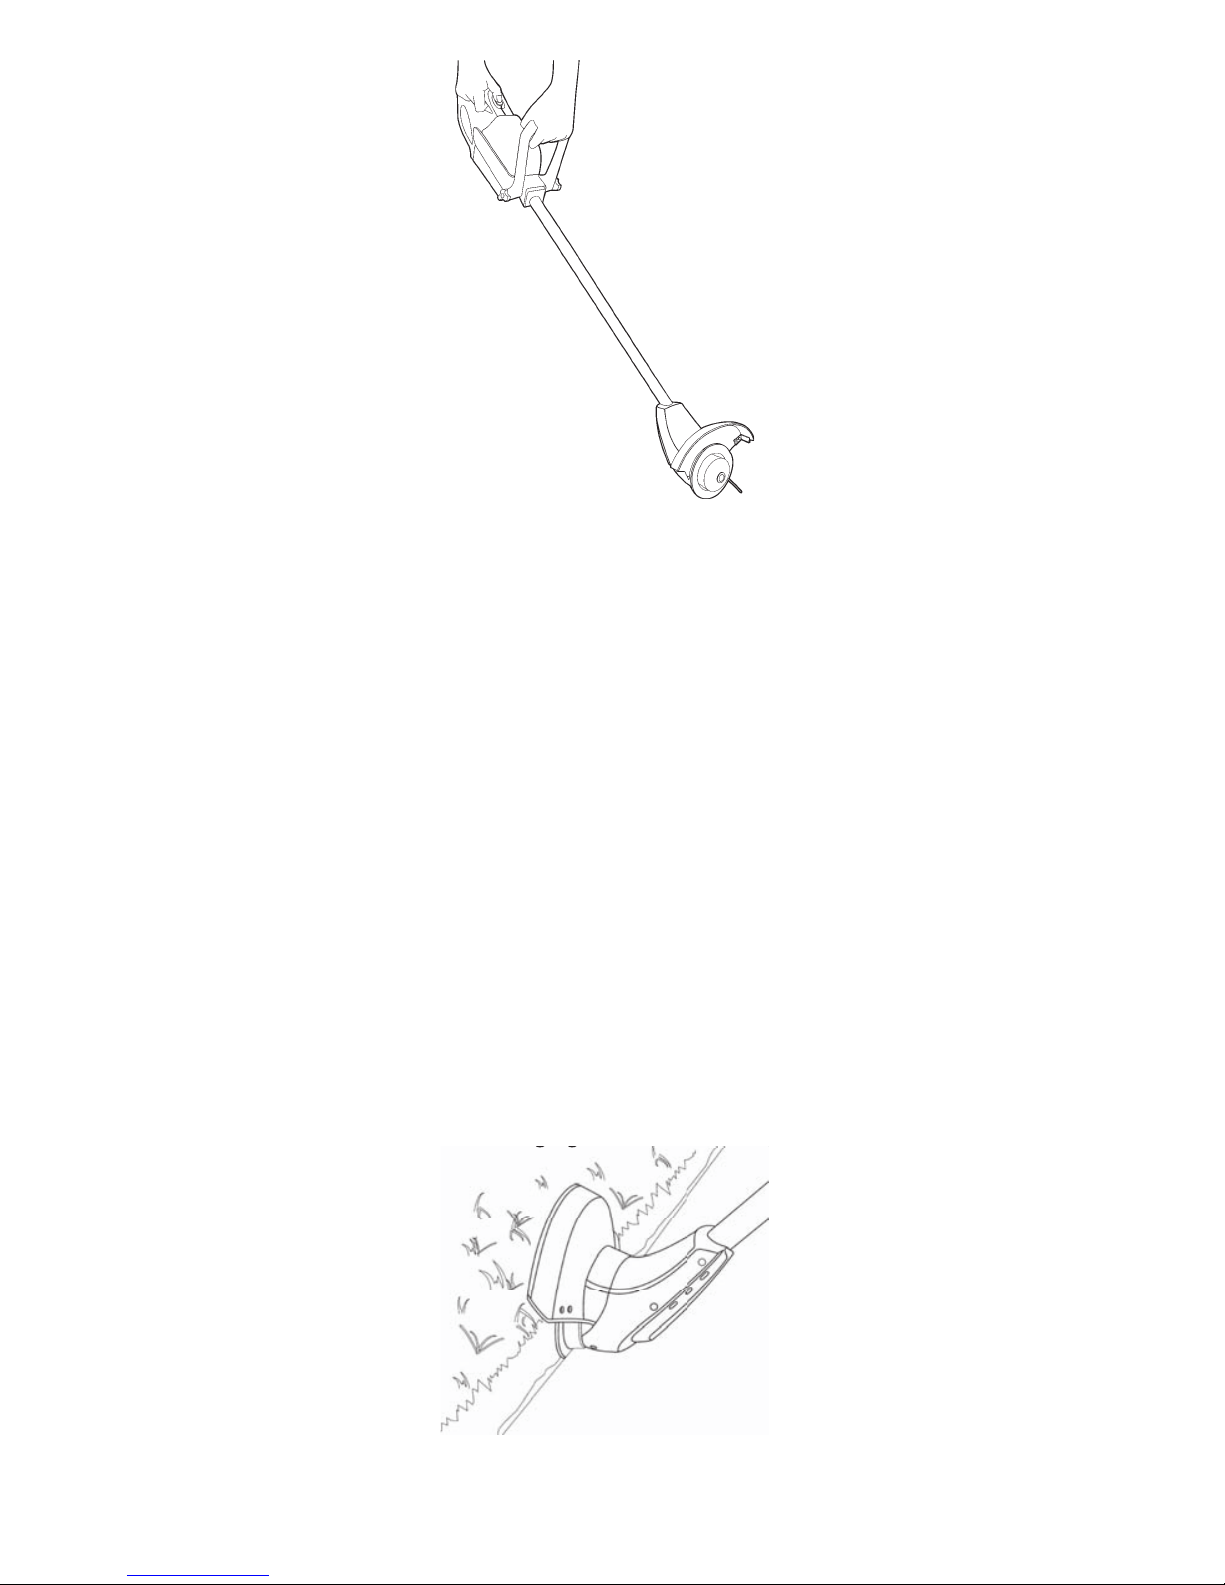
TRIMMING TECHNIQUES
WEED AND LAWN TRIMMING
The unit works best with dry grass, but it can be used safely in wet grass due to
the low voltage design.
A long sweeping cutting motion will get the greatest amount of trimming per
Watch out for foreign objects in the grass. Avoid trimming near wiring or other
Always inspect area to be trimmed for objects that could be damaged or tangled
Advance (bump feed) the cutting line
– While the unit is running,
To lengthen the life of the string spool, do not bump feed by tapping the line
Page 7
The line trimmer edging feature works best when used on a
When using the line trimmer to edge an area for the fi rst time, it is recommended
that you use the trimming feature of the unit fi rst to trim back excess growth to
the desired edge line
You may encounter diffi culty in initial edging with the line trimmer due to
formed. To limit the breaking of string, frequently advance the line while forming
the groove. After the groove is formed, regular edge maintenance is quick and
While holding the front accessory handle,
wheel supporting the weight of the unit. Stop periodically to advance the cutting
Page 8
Watch out for foreign objects.
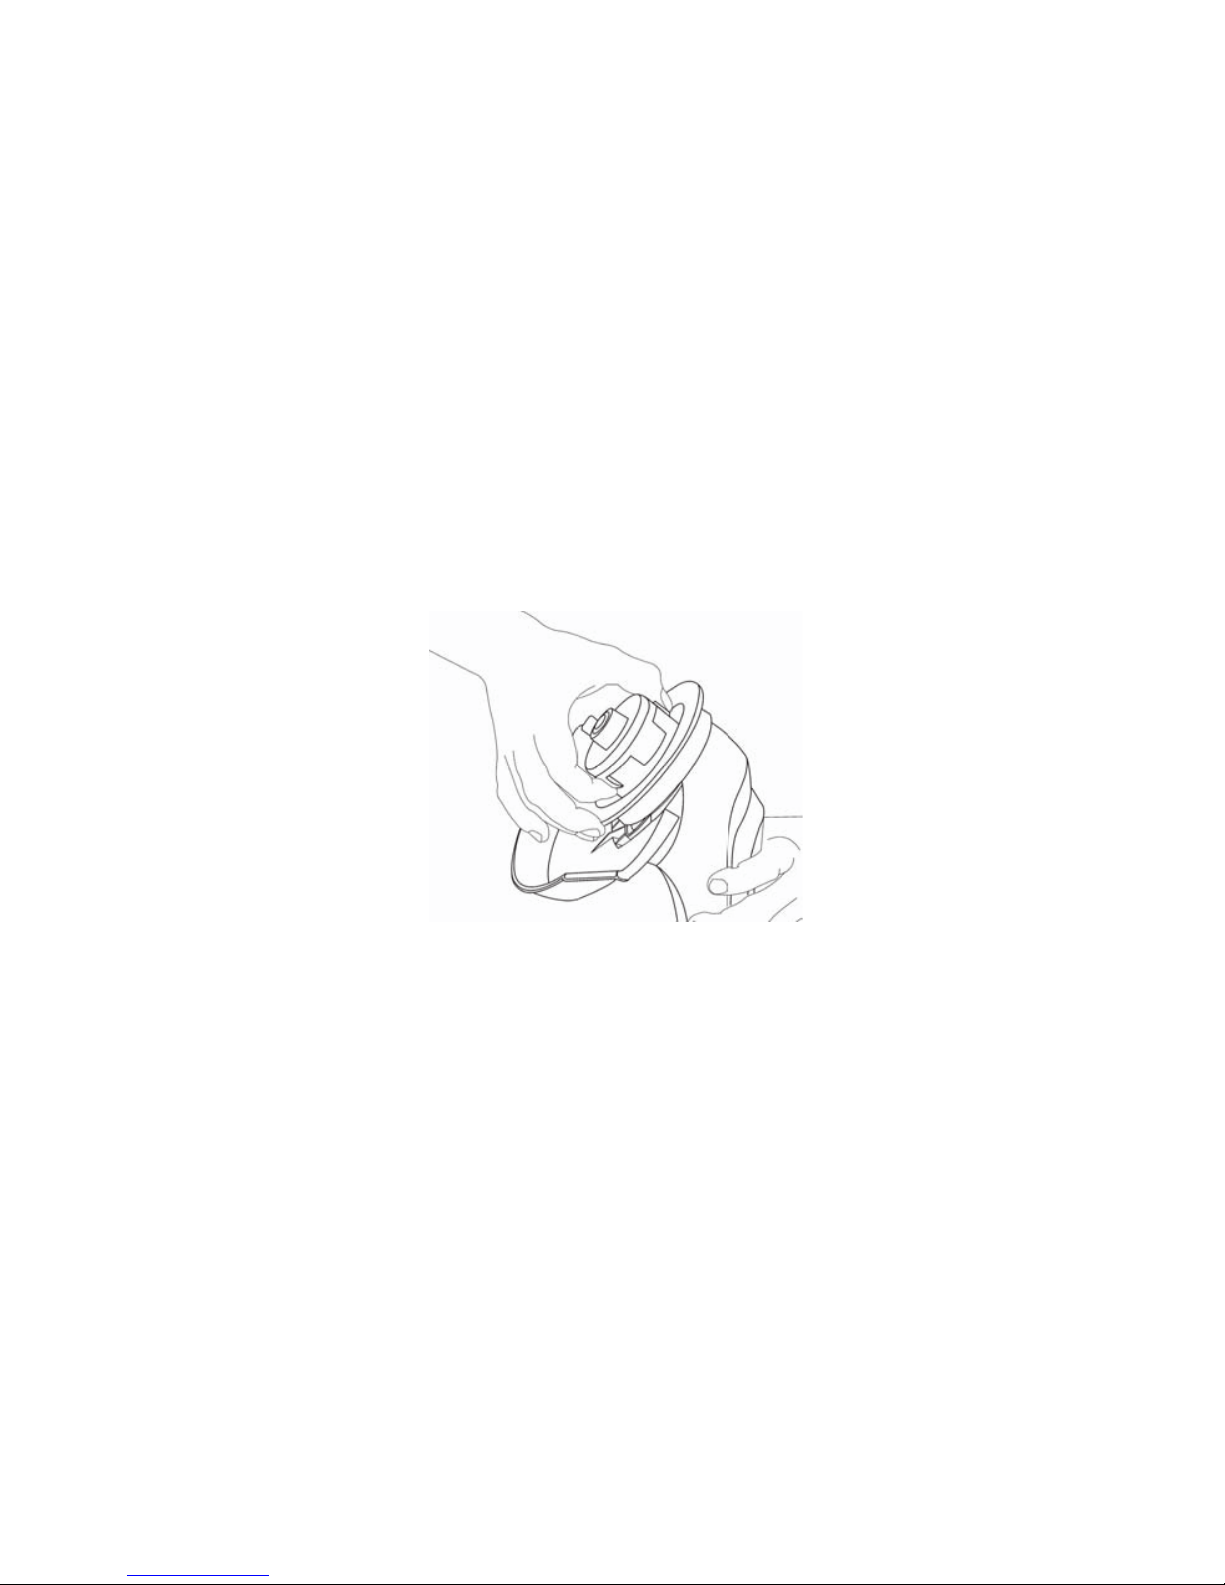
To Change Line
that the tool is not accidentally turned ON. Place the unit on a fl at surface or upside
WARNING:
To prevent injury, keep hands away from triggers during reloading.
the place of purchase of your line trimmer.
Tabs are located on each side of the line spool cover. Press both tabs on the line
the spool.
the spool. Please refer to Figure-7.
Page 9

To prevent injury, keep hands away from trigger while clearing of jams
the line will advance.
– No periodic lubrication of the line trimmer bearings or other
– Use only a dry brush or a cloth with warm
water and mild soap to clean plastic parts. Many household cleaners contain
thinner or similar fl uids. Never spray-wash tool or immerse in water. Water or liquid
The unit is equipped with a fuse (15 Amp) that will protect from
fuse holder, remove its cover and replace fuse. Please refer to fi gure-8.
Page 10

– For maximum battery performance, it is recommended that
you always keep the unit stored on its charging stand with the charger plugged in.
The unit’s charger is designed to insure that the batteries are properly maintained.
TEMPERATURE -
Temperature extremes limit the useful life of the battery. The best
– Fertilizers and other garden chemicals contain
ACCESSORIES
– For optimum cutting results and top performance, it is
®
replacement line, spools, and accessories
®
accessories are available where you purchased
your line trimmer or direct by calling 1-800-540-5688.
WARNING:
The line trimmer is designed to only be used with .080” or less sized
your warranty.
– To preserve natural resources, please recycle or dispose
your local waste authority for information regarding available recycling and/or
– When replacing the batteries, both batteries should
WARNING:
When replacing the batteries, the proper polarity or direction must
Page 11

WARRANTY
- Your line trimmer offers a two year warranty against failure due to
warranty-period. Proof of purchase is required to validate warranty period.
The warranty does not cover components that are subject to normal wear, such as
the bump guard on the spool head, cutting line, and batteries. Replacement line
from or by calling us at (800) 540-5688.
the battery.
– If you drop the unit, carefully inspect it for any damage
TROUBLE SHOOTING
fault (GFCI) circuits to prevent electrical shock from moisture. Make sure the
The LED on the unit’s charger should turn green after approximately 15
After periods of long storage (without charging the unit) it may be necessary
to “awaken” the unit’s battery. This can be done by turning the unit on and
while using the unit as an edger or when trimming up against hard surfaces.
You should be able to tap the bump head with the palm of your hand and
Page 12

trimmer/edger may then be used to maintain the edge.
The line trimmer should operate for approximately 30 minutes under a full
for charging details.
There is no need to keep this switch engaged while using the product.
with a standard fi le. Replacement guards with new blades are available by calling
Page 13

ADVERTENCIA A RESIDENTES DE CALIFORNIA:
ADVERTENCIA A RESIDENTES DE CALIFORNIA:
Las baterías de
tratar de abrirlas. Evite el manejo excesivo de las baterías.
ADVERTENCIA:
Cuando use esta herramienta debe siempre seguir las
Antes de todo uso, asegúrese que todos los usuarios de este producto eléctrico
Antes de usar, conecte el protector
®
de este manual.
Page 14

– La cortadora de bordes
y cuando arme el protector del cordel.
cuando use la herramienta.
– Todos los visitantes deben mantenerse a
– Cuando no las use, las
– Hará el trabajo mejor y con menos riesgo de
– No use la herramienta para ningún
trabajo que no sea para el cual fue diseñada.
ADVERTENCIA: ALEJE LAS MANOS Y EL CUERPO
del cordel y del cabezal. El
VISTA APROPIADAMENTE
– No use ropas sueltas o joyas. Éstas podrían
– Siempre manténgase en equilibrio y apoyado.
– Siempre use protección ocular adecuada, y use
– Mantenga la unidad limpia para mejor
– No transporte la cortadora de bordes
– Si la cortadora de bordes
– Esté pendiente a lo que hace. Use el sentido común.
– No trate de remover material
cargue la
use este cargador con otro aparato.
use ningún otro voltaje.
Page 15

– La cortadora de bordes
TIEMPO DE CARGA
– 16 horas de carga de un día a otro son sufi cientes para
– Antes de cargar la unidad, verifi que que
viga en la pared, o use anclaje de pared #8 o mayor.
Page 16

El cargador solo se puede usar en tomas eléctricas de 60Hz
– El cargador utiliza una técnica de carga de dos pasos
(ON) la unidad, deslice el interruptor de pulgar que se halla
ADELANTE apriete el gatillo bajo el mango para encender la unidad. Vea la Figura-
– solo necesita uno de los juegos para manejar la unidad.
(OFF) la herramienta, simplemente suelte el gatillo. El interruptor
TÉCNICAS DE RECORTE
Page 17

– Mientras la unidad esté en marcha,
y aumentar la efectividad del bordeado de mantenimiento con la cortadora de
.
Mientras sostiene el mango delantero de
Page 18

y golpee para alimentar el cordel.
Asegúrese de mantener las manos lejos del gatillo y del interruptor de seguridad
ADVERTENCIA:
Para evitar una lesión, aléjese de los gatillos mientras repone el
Page 19

través del agujero revestido localizado en el armazón del cabezal del cordel.
Para evitar lesiones, mantenga las manos alejadas del gatillo
– No necesita relubricar periódicamente ninguna de las piezas de
– Use solamente un cepillo seco o un trapo
Page 20

favor vea la Figura-8.
– Para rendimiento máximo de la batería, se recomienda
TEMPERATURA
– Los extremos de temperatura limitan la vida útil de la batería.
– Los fertilizantes y otras sustancias químicas de jardín
ACCESORIOS
– Para resultados óptimos cuando recorte y el mejor
y accesorios Original Power. Los accesorios genuinos Original Power están
ADVERTENCIA:
– Para preservar los recursos naturales, por favor
Page 21

– Cuando reemplace las baterías, debe reemplazar
ADVERTENCIA:
Cuando reemplace las baterías, debe observar
Su cortadora de bordes ofrece una garantía de dos años contra
fallos debidos a defectos de materiales o manufactura. Si usted experimenta
tales problemas, Original Power, a su discreción única, reparará o reemplazará
– Si deja caer la unidad, inspecciónela
fuera de la casa están protegidas por un interruptor de corto circuito (GFCI)
Page 22

Asegúrese de alimentar el cordel con frecuencia mientras en uso. Esto es
) (hogar y camino de entrada incluidos
Verifi que que la unidad esté completamente cargada – vea la sección de
Page 23

Page 24

AVERTISSEMENT AUX RÉSIDENTS DE LA CALIFORNIE :
AVERTISSEMENT AUX RÉSIDENTS DE LA CALIFORNIE :
Les batteries
AVERTISSEMENT :
Lors de l’utilisation de cet outil, des précautions
Afi n de limiter le risque de blessure :
Avant toute utilisation, s’assurer que tout utilisateur de ce produit électrique a lu
®
dans
Page 25

FIXATION DU CARTER DU FIL –
Avant toute utilisation, fi xer le carter du fi l
– La tondeuse à fi l de coupe est
– Tous les visiteurs doivent rester à une
– Il donnera de meilleurs
– Ne jamais utiliser l’outil pour un travail ne
AVERTISSEMENT : GARDER LES MAINS ET LE CORPS À L’ÉCART
AVOIR UNE TENUE VESTIMENTAIRE APPROPRIÉE
– Ne pas porter de
vêtements amples ou de bijoux. Ils pourraient être happés par les pièces en
– Maintenir une assise adéquate et un bon équilibre en permanence.
– Toujours porter des lunettes de
– Le maintien de l’unité propre
– Ne pas transporter la tondeuse à fi l de coupe
VÉRIFIER QU’AUCUNE PIÈCE N’EST ENDOMMAGÉE
– Si la tondeuse à
fi l de coupe est soumise à un choc important, vérifi er qu’aucune pièce n’a été
Page 26

– L’utilisateur doit faire attention à ce qu’il fait, utiliser son
– Ne pas chercher à enlever
Afi n de limiter les risques lors de l’utilisation du chargeur :
utiliser le chargeur à l’extérieur ou dans un environnement humide, ne
utiliser ce
AVANT TOUTE UTILISATION, FIXER LE CARTER DU FIL DE COUPE
Fixer
la tondeuse en alignant les onglets latéraux
Une lame de coupe automatique est incorporée au carter du fi l de
Page 27

– La tondeuse à fi l n’est pas
vendue totalement chargée. Avant l’utilisation de l’unité, il convient de charger
– Une durée de charge pendant la nuit d’environ 16
– Avant de charger l’unité, s’assurer que le
4. La DEL témoin sur la partie du chargeur branché à la prise murale est rouge
ATTENTION :
Le chargeur ne peut être utilisé qu’avec du courant de 60 cycles,
– Le chargeur utilise un procédé de charge à deux
faire glisser le bouton poussoir sur le dessus
Page 28

faire fonctionner l’unité.
verrouillage de sécurité se mettra aussitôt en place pour empêcher le commutateur
faible tension.
Au cours du fonctionnement normal le fi l de coupe s’usera et devra être réajusté
– Pendant que l’unité est en fonctionnement,
jusqu’à la lame de coupe automatique. Le morceau de fi l en excès sera
Page 29

vers l’avant au fur et à mesure que le sillon se forme. Quand le sillon est formé,
Tout en tenant
Page 30

AVERTISSEMENT :
Pour éviter les blessures, garder les mains à l’écart des
fois. Quand les onglets ont été repoussés, sortir l’enrouleur de son logement.
4. De façon égale et en serrant, embobiner l’enrouleur dans le sens illustré à
Page 31

ATTENTION :
Pour éviter les blessures, garder les mains à l’écart du commutateur
4. Tout en tirant délicatement sur le fi l de coupe, appuyer sur l’enrouleur jusqu’à
– Aucun graissage périodique n’est requis pour les roulements de la
– N’utiliser qu’une brosse sèche
L’unité est équipée d’un fusible (15 A) de protection contre une
Page 32

– Pour tirer le maximum des batteries, il est recommandé
– Les engrais et autres produits
ACCESSOIRES
®
®
Weed Eater
®
®
sont disponibles à l’endroit où a été achetée la tondeuse à fi l ou en
AVERTISSEMENT :
– Pour protéger les ressources naturelles, ces
Page 33

– Lors du remplacement des batteries, les
AVERTISSEMENT :
Lors du remplacement des batteries, l’orientation de la
– La tondeuse à fi l est garantie pendant deux ans contre toute panne
– En cas de chute de l’unité, l’inspecter soigneusement pour
Après une période d’entreposage de longue durée (sans charger l’unité), il peut
Page 34

(maison et
Page 35

Page 36

 Loading...