

Page 1
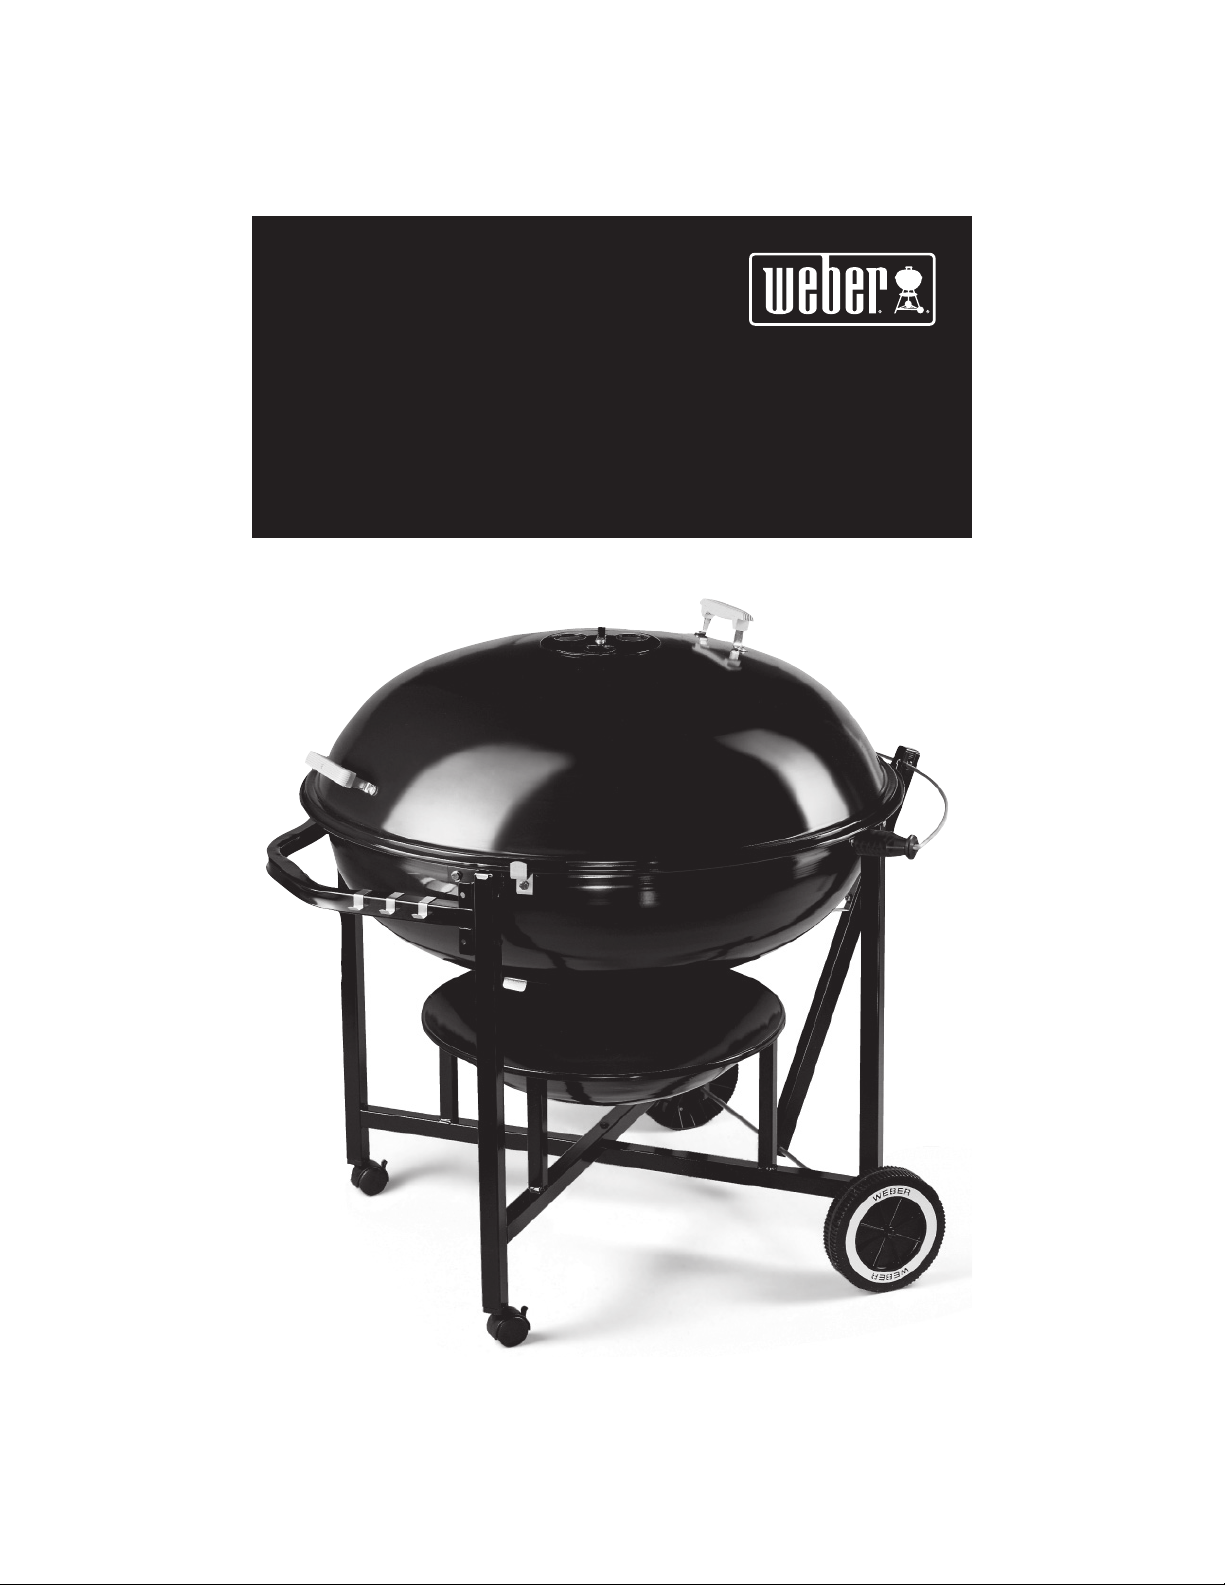
RANCH® KETTLE
443⁄4 inch
(114 cm)
39950
Page 2
2
®
®
®
®
®
®
®
ASSEMBLY
DANGER
This kettle is designed for outdoor use only. Toxic fumes may accumulate
and cause bodily injury or death if used indoors.
WARNING: Do not use gasoline, alcohol, or other highly volatile fluids
to ignite charcoal. Use a commercially prepared firestarter and make sure
that, if using lighter fluid, any fluid that may have drained through the
bottom vents is removed before lighting the charcoal.
WARNING: Never use kettle unless all parts of the unit are in place.
Make sure ash catcher is set properly on the vertical supports underneath
the bowl of the kettle.
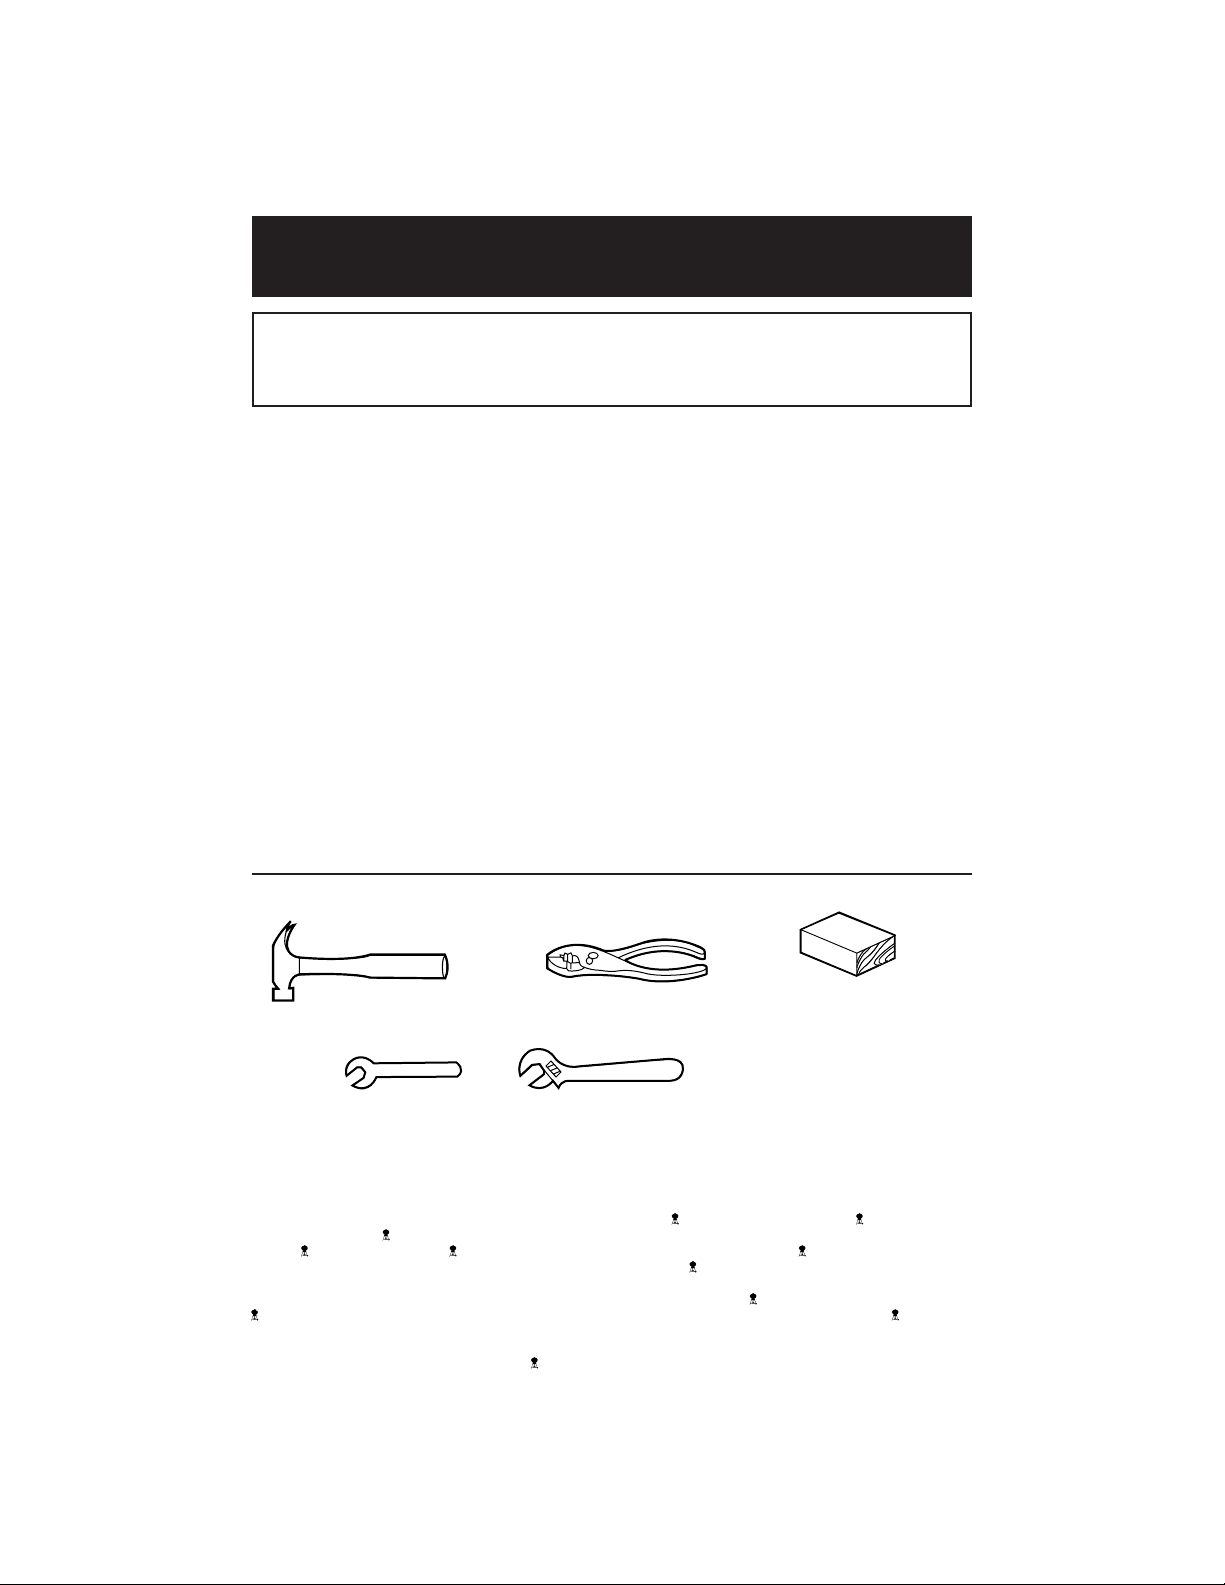
ASSEMBLY INSTRUCTIONS
Check Package Contents. You should have received the parts shown below.
In the event a part is missing or damaged, do not return the unit. Contact:
WEBER-STEPHEN PRODUCTS CO.
Customer Service Center
1890 Roselle Road, Suite 308 Schaumburg, IL 60195
1(800) 446-1071 www.weber.com
®
ASSEMBLY TOOLS NEEDED
Block of wood
7/16 inch, 1/2 inch open-end or an adjustable wrench
©2006 The following trademarks are registered in the name of Weber-Stephen Products Co., an Illinois corporation, located at 200 East Daniels
Road, Palatine, Illinois 60067 U.S.A. Australia; Smokey Joe, Weber, Kettle Silhouette
Benelux; Kettle Silhouette
Silhouette
, Denmark; Kettle Silhouette®, Smokey Joe, Weber, Finland; Smokey Joe, France; Kettle Silhouette®, Smokey Joe, Weber, One-Touch,
Germany; Smokey Joe, Weber, One-Touch, Greece; Smokey Joe, Ireland; Kettle Silhouette
Joe, Weber, Korea; Smokey Joe, Weber, New Zealand; Weber, Smokey Joe, Nigeria; Weber, Norway; Smokey Joe, Weber, Portugal; Weber, South
Africa: Smokey Joe, Weber, Kettle Confi guration, Spain; Smokey Joe, Weber, Sweden; Kettle Silhouette
, Smokey Joe, Weber, United Kingdom; Smokey Joe, Weber, Weber One-Touch, U.S.A..; Kettle Confi guration, Kettle Silhouette®, Smokey Joe,
Weber, One-Touch, Firespice, Go-Anywhere, U.S.A.;Kettle Confi guration, Kettle Silhouette, Genesis, Flavorizer, Crossover, Flamgo, Performer,
Rapidfi re, Tuck ‘N Carry, Jumbo Joe, Bar-B-Kettle, Master-Touch, Spirit, Grill Out, Summit, Platinum, 1-800-Grill-Out, Ranch, Matchless Flame,
Zimbabwe; Weber, Kettle Confi guration, Kettle Silhouette
, Smokey Joe, Weber, Compact Grill Confi guration, Botswana; Weber, Canada; Smokey Joe, Genesis, China; Kettle
.
, Genesis, Austria; Kettle Silhouette®, Smokey Joe, Weber,
, Smokey Joe, Italy; Smokey Joe, Weber, Japan; Smokey
, Smokey Joe, Switzerland; Kettle Silhouette
Page 3

Top Frame Assembly
PARTS
3
Charcoal grate
Tuck-Away frame support
Bottom Frame Assembly
Lid Assembly
Bowl Assembly
Ash Catcher
Axle
Frame handle
Wire lid holder assembly
Tuck-Away support bracket
Hinged cooking grate
Two lid tabs
Page 4
4
PARTS
Three tool holders
Plastic tubing plug
Four aluminum tubing plugs
R
R
E
E
W
W
B
B
E
E
E
E
B
B
W
E
W
E
R
R
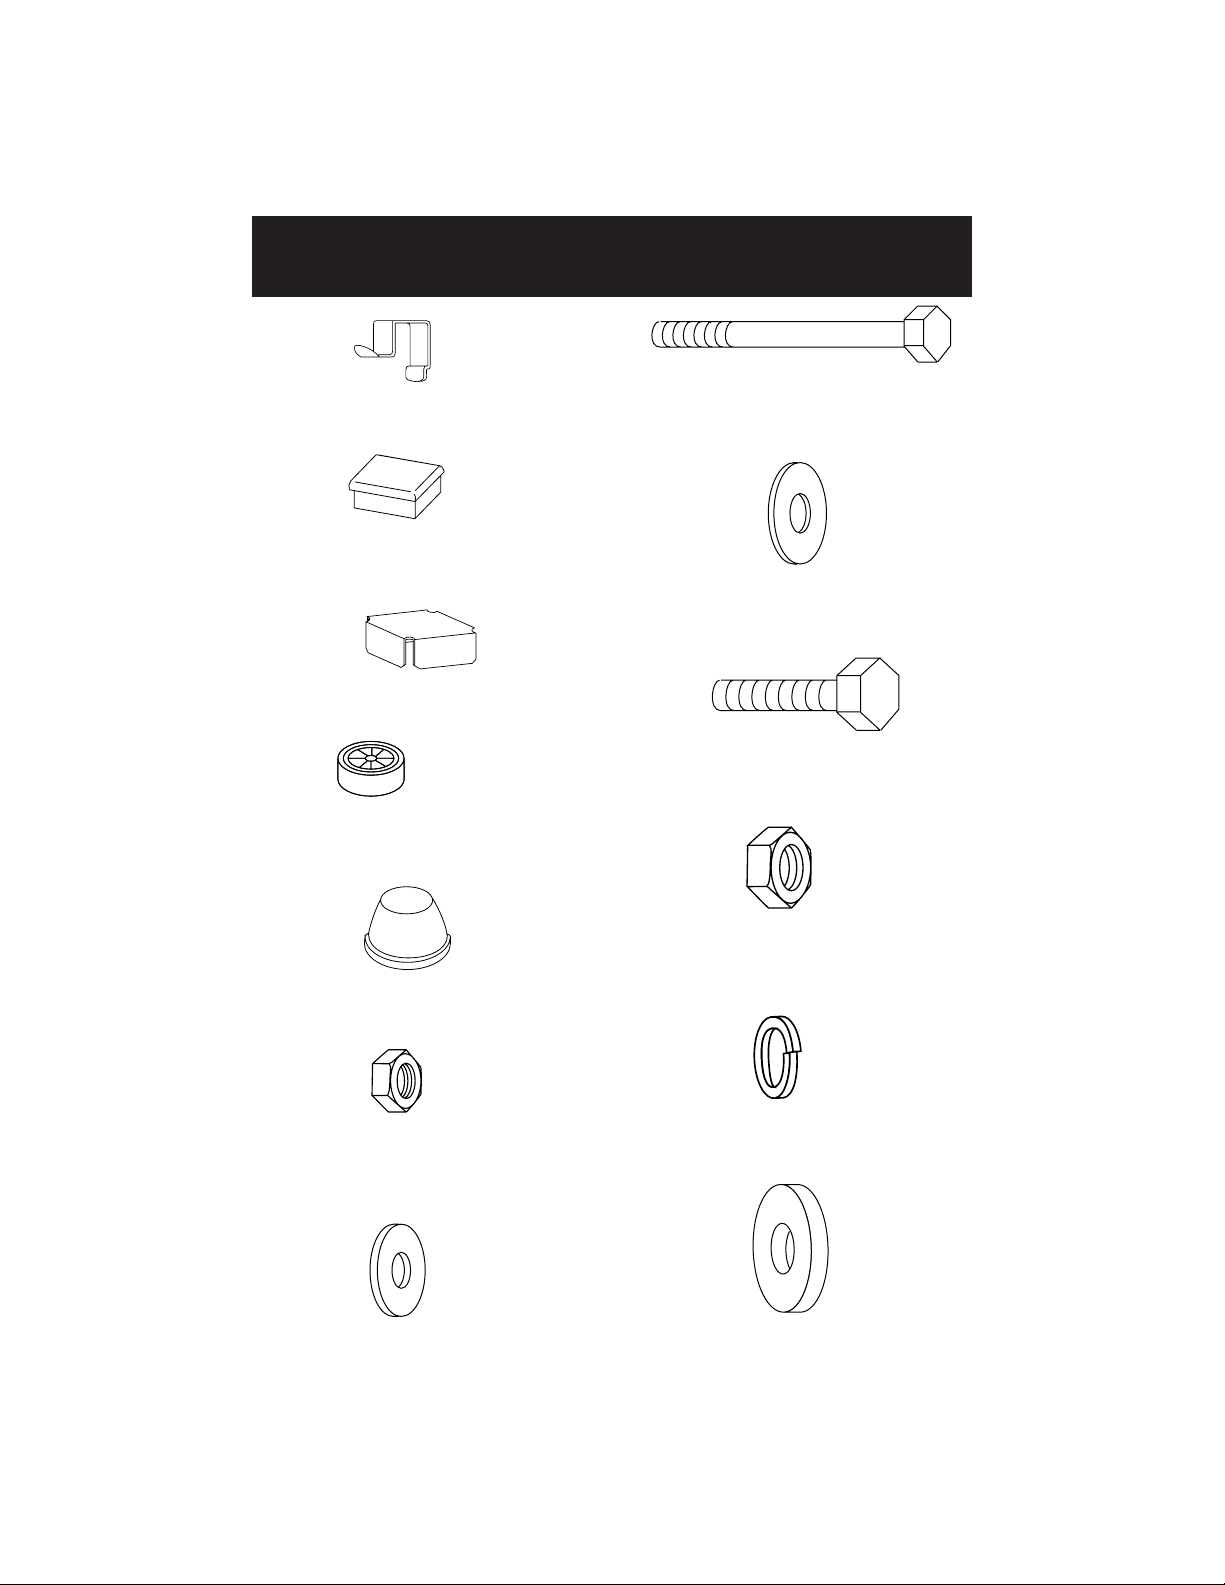
Two wheels
Five 1/4-20 x 1 3/4 inch
bolts (actual size)
Six 5/16 inch steel washers
(actual size)
Six 5/16-18 x 7/8 inch
bolts (actual size)
Eight 5/16-18 hex nuts
(actual size)
Two wheel hubcaps
Five 1/4-20 hex nuts
(actual size)
Ten nylon washers
(actual size)
Eight 5/16 inch lock washers
(actual size)
Six 7/8 inch aluminum washers
(actual size)
Page 5

ASSEMBLY
ASSEMBLE FRAME
2
You will need: Top Frame Assembly (1), Bottom Frame Assembly (2), 7/16 inch open-end or an
adjustable wrench and pliers.
Remove hex nut and bottom washer (3) from the bolt that is preinstalled in the Top Frame Assembly.
Do not remove top bolt and washer from Top Frame Assembly. Stand up the Bottom Frame Assembly
with the caster toward you.
(1)
5
(3)
Place the Top Frame Assembly (1) with the bolt and washer, on top of the Bottom Frame Assembly
(2). Make sure the caster of the Top Frame Assembly is toward your right.
Line up the bolt coming through the Top Frame Assembly with the Bottom Frame Assembly until the
bolt can drop through the hole in the Bottom Frame Assembly. Add the washer, hex nut (3) and finger
tighten.
(1)
(2)
(3)
(2)
Note: If the top frame assembly legs do not touch the ground, it has been assembled wrong.
Page 6

6
CONTINUE FRAME ASSEMBLY
3
You will need: Frame assembly, two wheels, two hubcaps, axle, Tuck-Away frame support, hammer, a
block of wood, pliers and a 7/16 inch open-end or an adjustable wrench.
Place one end of axle on block of wood (or other protected surface). Tap on one hubcap. Put one
wheel on axle, WEBER side toward hubcap (1).
ASSEMBLY
(1)
Slide axle through the frame, Tuck-Away frame support, [make sure slot is facing up (2)], and
through other end of frame. Add other wheel (WEBER side toward the hubcap) and tap on hubcap.
Finish tightening bolt in center of frame assembly.
(2)
Page 7

ASSEMBLY
ASSEMBLE FRAME HANDLE
4
You will need: Frame assembly, frame handle, four 1/4-20 x 1 3/4 inch bolts, eight nylon washers,
four 1/4-20 hex nuts, 7/16 inch open-end or an adjustable wrench and pliers.
Hold frame handle (1) between caster legs. Place a washer (2) on bolt (3), insert through frame
assembly, then through frame handle. Add washer (2), hex nut (4) and tighten.
7
(3)
(2)
(1)
INSTALL ASH CATCHER AND ALUMINUM TUBING PLUGS
5
You will need: Ash catcher, four aluminum tubing plugs and a hammer.
Set ash catcher (1) on the four vertical supports (2) in center of frame assembly. Insert aluminum
tubing plugs (3) into top ends of frame legs. To fully seat the plugs, you may have to tap them lightly
with a hammer.
(2)
(4)
(2)
(3)
(1)
Page 8

8
INSTALL BOWL ASSEMBLY
6
You will need: Bowl assembly, four 5/16-18 x 7/8 inch bolts, four 5/16 inch steel washers, four 7/8
inch aluminum washers, four 5/16-18 hex nuts, four 5/16 inch
lock washers, 1/2 inch open-end or an adjustable wrench and pliers.
Set bowl in frame. Place a steel washer (1) on bolt (2) and insert through frame assembly and bowl.
Place aluminum washer (3), lock washer (4) and hex nut (5) on bolt and tighten. Install the other
bolts in locations shown.
ASSEMBLY
(5)
(4)
(3)
(1)
(2)
INSTALL LID TABS
7
You will need: Two lid tabs, two 5/16-18 x 7/8 inch bolts, two 7/8 inch aluminum washers, two
5/16-18 hex nuts, two 5/16 inch lock washers, 1/2 inch open-end or an adjustable wrench and
pliers.
Insert bolt (1) through lid tab (2), frame assembly and bowl on outside of caster legs. Place
aluminum washer (3), lock washer (4), then hex nut (5) on bolt and tighten.
(5)
(4)
(3)
(2)
(1)
Page 9

ASSEMBLY
INSTALL WIRE LID HOLDER ASSEMBLY
8
You will need: Wire lid holder assembly and a 1/2 inch open-end or an adjustable wrench.
Remove 5/16-18 hex nut (1), 5/16 inch lock washer (2) and 7/8 inch aluminum washer (3) from each
end of wire lid holder. Finger tighten remaining 5/16-18 hex nut (4).
Note - Bushings (5) should roll freely on wire lid holder.
Insert ends of wire lid holder through frame assembly and bowl on outside of wheel legs. Place 7/8
inch aluminum washer (3), 5/16 inch lock washer (2) then 5/16-18 hex nut (1) on each end of the
wire lid holder and tighten.
(4)
(5)
9
(1)
(2)
(3)
INSTALL TUCK-AWAY FRAME SUPPORT
9
Swing Tuck-Away frame support up and set wire lid holder, with tabs centered (1), into slots in frame
support.
(1)
Page 10

10
INSTALL TUCK-AWAY SUPPORT BRACKET
10
You will need: Tuck-Away support bracket, plastic tubing plug, 1/4-20 x 1 3/4 inch bolt, two nylon
washers, 1/4-20 hex nut, 7/16 inch open-end or an adjustable wrench and pliers.
Insert tabs of support bracket through slot in Tuck-Away frame support (a).
Place a nylon washer on bolt, insert through Tuck-Away frame support and support bracket. Add
another nylon washer, hex nut and tighten (b).
Insert plastic tubing plug (1) into top of Tuck-Away frame support. You may have to tap the plug
lightly to fully seat it.
(a) (b)
ASSEMBLY
(1)
Page 11

ASSEMBLY
FINAL ASSEMBLY
11
You will need: Charcoal grate, hinged cooking grate, three tool holders and lid assembly.
Set charcoal grate, then cooking grate in bowl. Add lid. Hook tool holders (1) over frame handle.
11
(1)
WARRANTY
Weber-Stephen Products Co., (Weber) hereby warrants to the ORIGINAL PURCHASER of this Weber® One-Touch® Silver,
One-Touch® Gold, One-Touch® Platinum, Smokey Mountain Cooker™, and Ranch® grills, that it will be free from defects in material and
workmanship from the date of purchase as follows:
Cooking / Charcoal grates 1 year
Stainless Steel One-Touch™ Cleaning System (One-Touch® Platinum) 10 years
Bowl and lid against rust / burn-through 10 years
Nylon handles 10 years
Thermoplastic/Thermoset Parts(One-Touch® Platinum) 10 years excluding fading
When assembled and operated in accordance with the printed instructions accompanying it. Weber may require reasonable proof of your date of purchase.
THEREFORE, YOU SHOULD RETAIN YOUR SALES SLIP OR INVOICE AND RETURN THE WEBER LIMITED WARRANTY REGISTRATION CARD IMMEDIATELY.
This Limited Warranty shall be limited to the repair or replacement of parts which prove defective under normal use and service and which on examination
shall indicate to Weber’s satisfaction they are defective. If Weber confirms the defect and approves the claim, Weber will elect to repair or replace such parts
without charge. If you are required to return defective parts, transportation charges must be prepaid. Weber will return parts to the purchaser, carriage or
postage prepaid.
This Limited Warranty does not cover any failures or operating difficulties due to accident, abuse, misuse, alteration, misapplication, vandalism,
improper installation or improper maintenance or service, or failure to perform normal and routine maintenance. Deterioration or damage due to severe
weather conditions such as hail, hurricanes, earthquakes or tornadoes, discoloration due to exposure to chemicals, either directly or in the atmosphere, is
not covered by this Limited Warranty.
There are no other express warranties except as set forth herein, and any applicable implied warranties of merchantability and fitness are limited in duration
to the period of coverage of this express written Limited Warranty. Some regions do not allow limitation on how long an implied warranty lasts, so this
limitation may not apply to you.
Weber is not liable for any special, indirect or consequential damages. Some regions do not allow the exclusion or limitation of incidental or consequential
damages, so this limitation or exclusion may not apply to you.
Weber does not authorise any person or company to assume for it any other obligation or liability in connection with the sale, installation, use, removal,
return or replacement of its equipment; and no such representations are binding on Weber.
All remaining parts 5 years
Page 12

PARTS LIST
12
All items are single quantities unless otherwise specified. Parts can be ordered from Weber-Stephen
Products Co. by phone or mail.
Note - Do not return parts to Weber-Stephen Products Co. without first contacting the Customer Service
Center by phone or mail. Returning the part may not be necessary.
1. #8-16 x 5/8 inch screw
2. Nylon lid handle (top)
3. Nylon lid handle (bottom)
4. 1/4-20 x 5/8 inch screws (4)
5. 1/4 inch flat washers (5)
6. Lid damper
7. 1/4-20 acorn nuts (4)
8. Lid
9. Hinged cooking grate
10. Charcoal grate
11. Wire lid support
12. 5/16 inch steel washers (6)
13. 5/16-18 hex nuts (8)
14. Bushings (2)
15. 7/8 inch aluminum washers (12)
16. 5/16 inch lock washers (8)
17. Bowl
18. Bowl dampers (3)
19. 1/4-20 hex nuts (6)
20. Nylon washers (12)
21. 1/4-20 x 1 3/4 inch bolts (5)
22. Frame handle
23. Tool holders (3)
24. Aluminum tubing plugs (4)
25. 5/16-18 x 7/8 inch bolts (6)
26. Ash catcher
27. Top frame
28. 1/4-20 x 3 inch bolt
29. Lid tabs (2)
30. Plastic tubing plug
31. Tuck-Away support bracket
32. Tuck-Away frame support
33. Bottom frame
34. Caster inserts (2)
35. Casters (2)
36. Axle
37. Wheels (2)
38. Wheel hubcaps (2)
1
2
3
4
5
6
7
8
9
10
17
11
12
13
14
15
16
13
7
5
18
4
19
20
21
22
23
24
25
12
15
16
13
26
27
28
20
19
13
16
15
29
25
30
19
20
31
20
21
32
33
34
35
36
37
38
Printed in U.S.A. 39950 4/11/05
 Loading...