

Page 1

myMET Pro Manual V 1.00 — English
!
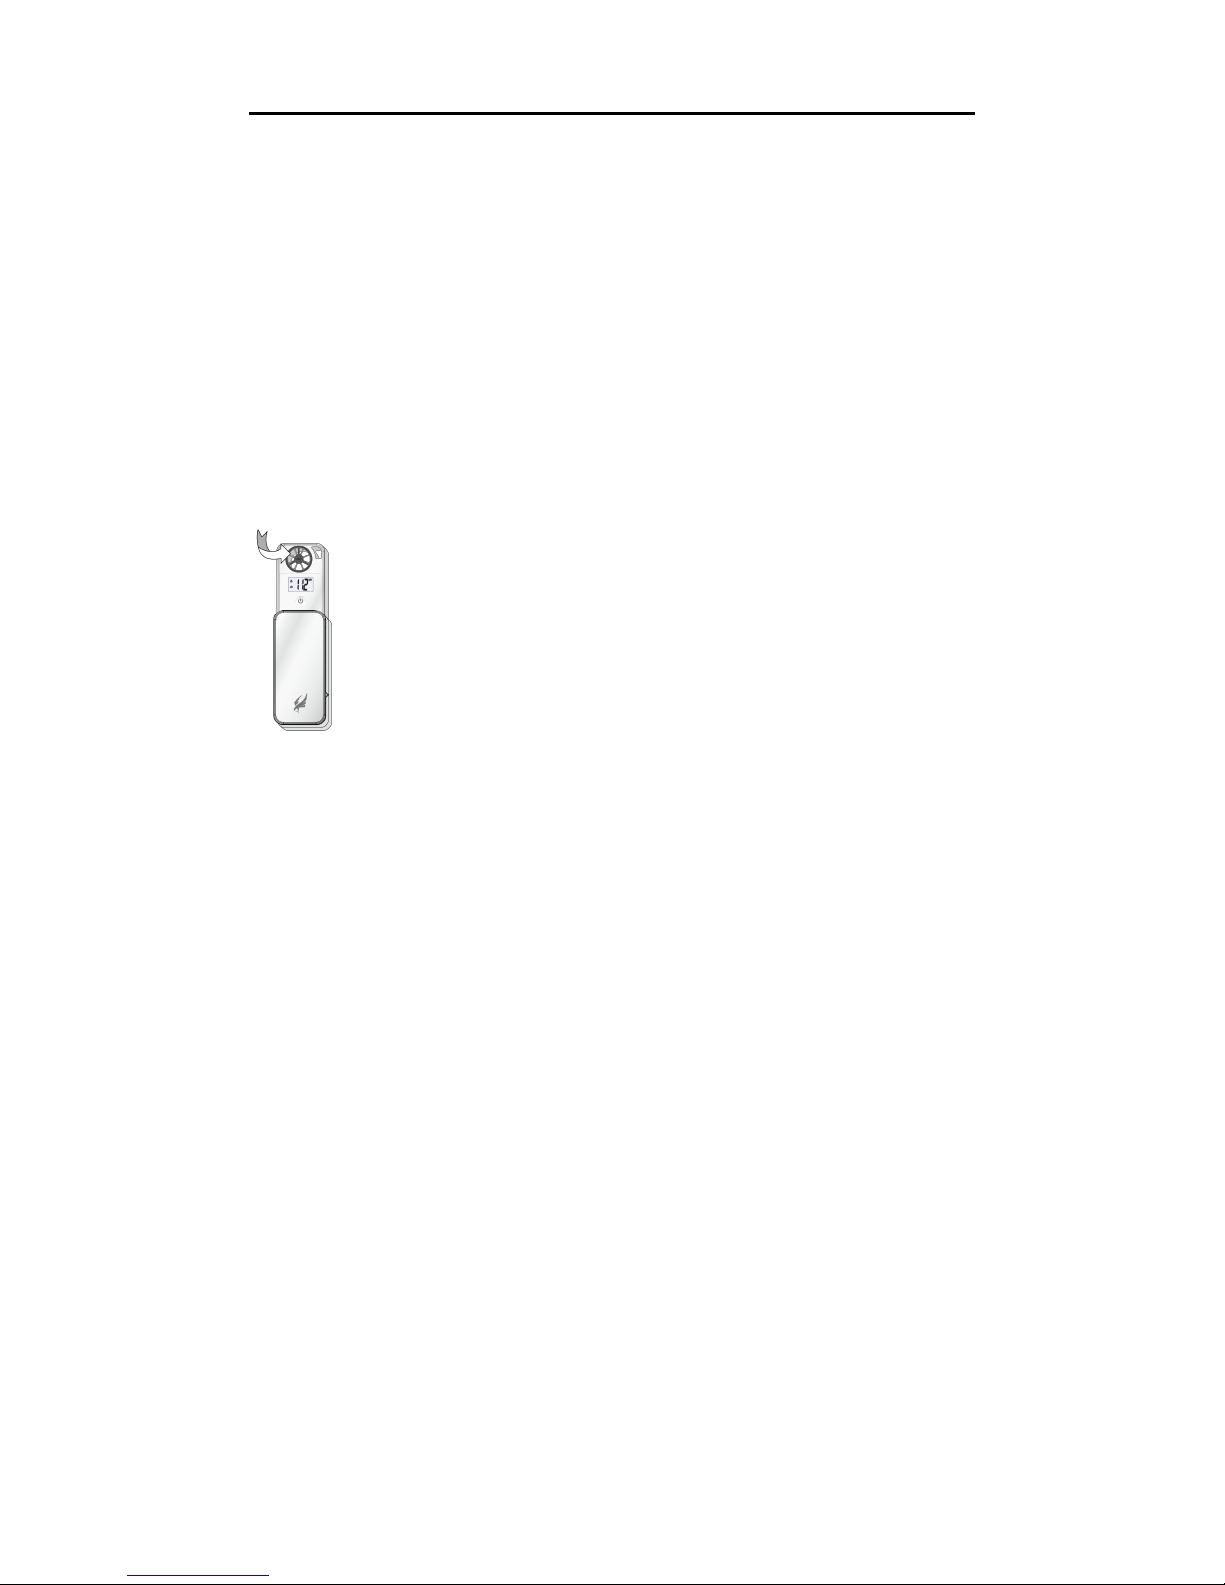
Product Description
Your myMET Pro Hand Held Wind Meter measures wind speed, air temperature, humidity, compass, pressure
and calculates wind chill. It then displays that information on the integral LCD, and transmits the information in
real-time to a BLE iOS or Android device within range using the myMET Pro app. All the information can be
tagged with an image and transmitted, using the methods available to the mobile device. NOTE: iPhone 4S or
later, iPad2 or later, and Android 4.2 or later devices are supported.
!
!
!
Getting Started
Your myMET Pro Hand Held Wind Meter package contains a myMET Pro, two Lithium CR2032 batteries
(installed), and a lanyard. BATTERIES: The batteries are factory installed. LANYARD: To install the lanyard,
feed the small loop through the hole at the bottom corner of the case, and then feed the lanyard through the loop.
myMET Pro USE: Extend myMET Pro to the fully opened position. If using a tripod, attach it at the bottom of
the case. NOTE: The optional wind vane accessory will align myMET Pro with wind direction when it is tripod
mounted and properly leveled. Hold myMET Pro at the bottom of the case, away from your face and body, to
avoid getting false readings. Your myMET Pro sensors are sensitive. For good measurements, it is
important that you do not touch, or obstruct, the sensors.
Page 2
!
Operating*Modes:*
Turn myMET Pro on by extending the meter. To turn off myMet Pro, push the wind meter back into the case.
With the myMET Pro extended you can also turn the myMET Pro off. Press the power button for 2 seconds
until “off” appears on the LCD and then release the power button. Press the power button to turn back on. The
power button is also used to scroll the display to the desired measurement. The displayed sequence is wind
speed, humidity, temperature, wind chill, pressure and compass.
Compass calibration, Disabling the Power Save mode, Changing the Units of Measure & Adjust
backlight mode
Calibrate the compass whenever new batteries are installed. To get accurate compass reading, it is also
suggested to do a calibration before use.
When the myMET Pro is first turned on, it is defaulted to power off in 5 minutes; all units are in imperial scale;
and the red backlight is always ON. These settings are adjustable on the device in the settings menu (“SET”
mode). The selectable functions in SET mode are: 1. Compass calibration ! 2. APO on/off ! 3. Units ! 4.
Backlight on/off.
To do the compass calibration and/or enter the settings menu, power on the device first, then, press and hold the
power button for 5 seconds until “SET” appears on the LCD and then release the power key. When “CAL”
appears on the LCD, the device is in compass calibration mode. Press the power key for 1 second to start the
compass calibration. A 30 second count down will appear on the LCD. Rotate the meter slowly according to
the direction as shown in drawing below, each turn should take 15 seconds. After 2 turns (30 seconds), the LCD
shows “End” to indicate the calibration is completed.
!
!
To skip the compass calibration, press power key for 4 seconds when “CAL” appears on the LCD to enter APO
on/off mode and press for 1 second to adjust. Again, press power key for 4 seconds to enter unit mode and press
Page 3

for 1 second to adjust. Finally, you can press power key 4 seconds to enter backlight on/off mode and press for
1 second to adjust. If the keypad is inactive for 5 seconds, the device will auto save whatever you changed and
will return to the normal measuring display.
!
Units of Measure:
myMET Pro measures wind speed in 2 different units of measure: Miles per Hour (mph) & Meters per Second
(m/s). To switch between units of measure, please see the “Changing the Units of Measure” section for
instructions.
Wind speed:
Wind speed is only shown in the selected unit of measure to the first decimal place.
Ambient Temperature:
Displays the temperature in Fahrenheit or Celsius. If Metric Units of Measure are selected for wind, then
Celsius will be displayed for temperature.
Wind-Chill:
Temperature is displayed as Wind Chill when WCT is displayed on the LCD. Wind Chill is the effective air
temperature on human skin, when wind speed is considered.
Humidity:
Humidity is displayed as % RH
Compass:
Shows the degree and direction.
Barometric:
Displays the barometric in inHg or hpa. If Metric Units of Measure are selected for wind, then hpa will be
displayed for barometric
Battery indicator:
The battery icon in the lower right corner of the LCD indicates the battery level.
Wireless signal:
The wireless icon in the upper left corner of the LCD indicates that the BT4.0 module is functioning.
Backlight
A red backlight provides illumination at night, while preserving night vision. To turn the backlight off, see
compass calibration section above for instructions.
Impeller Replacement:
To replace the impeller, use sharp pliers, or a pin, to remove the gray colored rubber plug, exposing the impeller
screw. Loosen the screw, but do not remove it. Rotate the impeller by twisting the impeller assembly clockwise
(viewed from the back of the wind meter). Install the new impeller and twist the impeller assembly counterclockwise. Tighten the screw and replace the gray colored rubber plug.
Page 4

!
Battery:*
To!replace!the!battery,!turn!the!compartment!cover!in!a!clockwise!direction!to!remove!it.!!The!battery!will!be!
visible!in!the!battery!compartment.!!Insert!2!new!CR2032!lithium!battery!“+”!side!facing!you.!!C R 2 0 3 2 !batteries
can be purchased anywhere batteries are sold. NOTE: Different modes have different effects on the battery
life.!!
 Loading...