

Page 1
I@STRUCTION
MANUAL
WziI
VlDEO TECHNOLOGY ENGINEERING LTD.
@
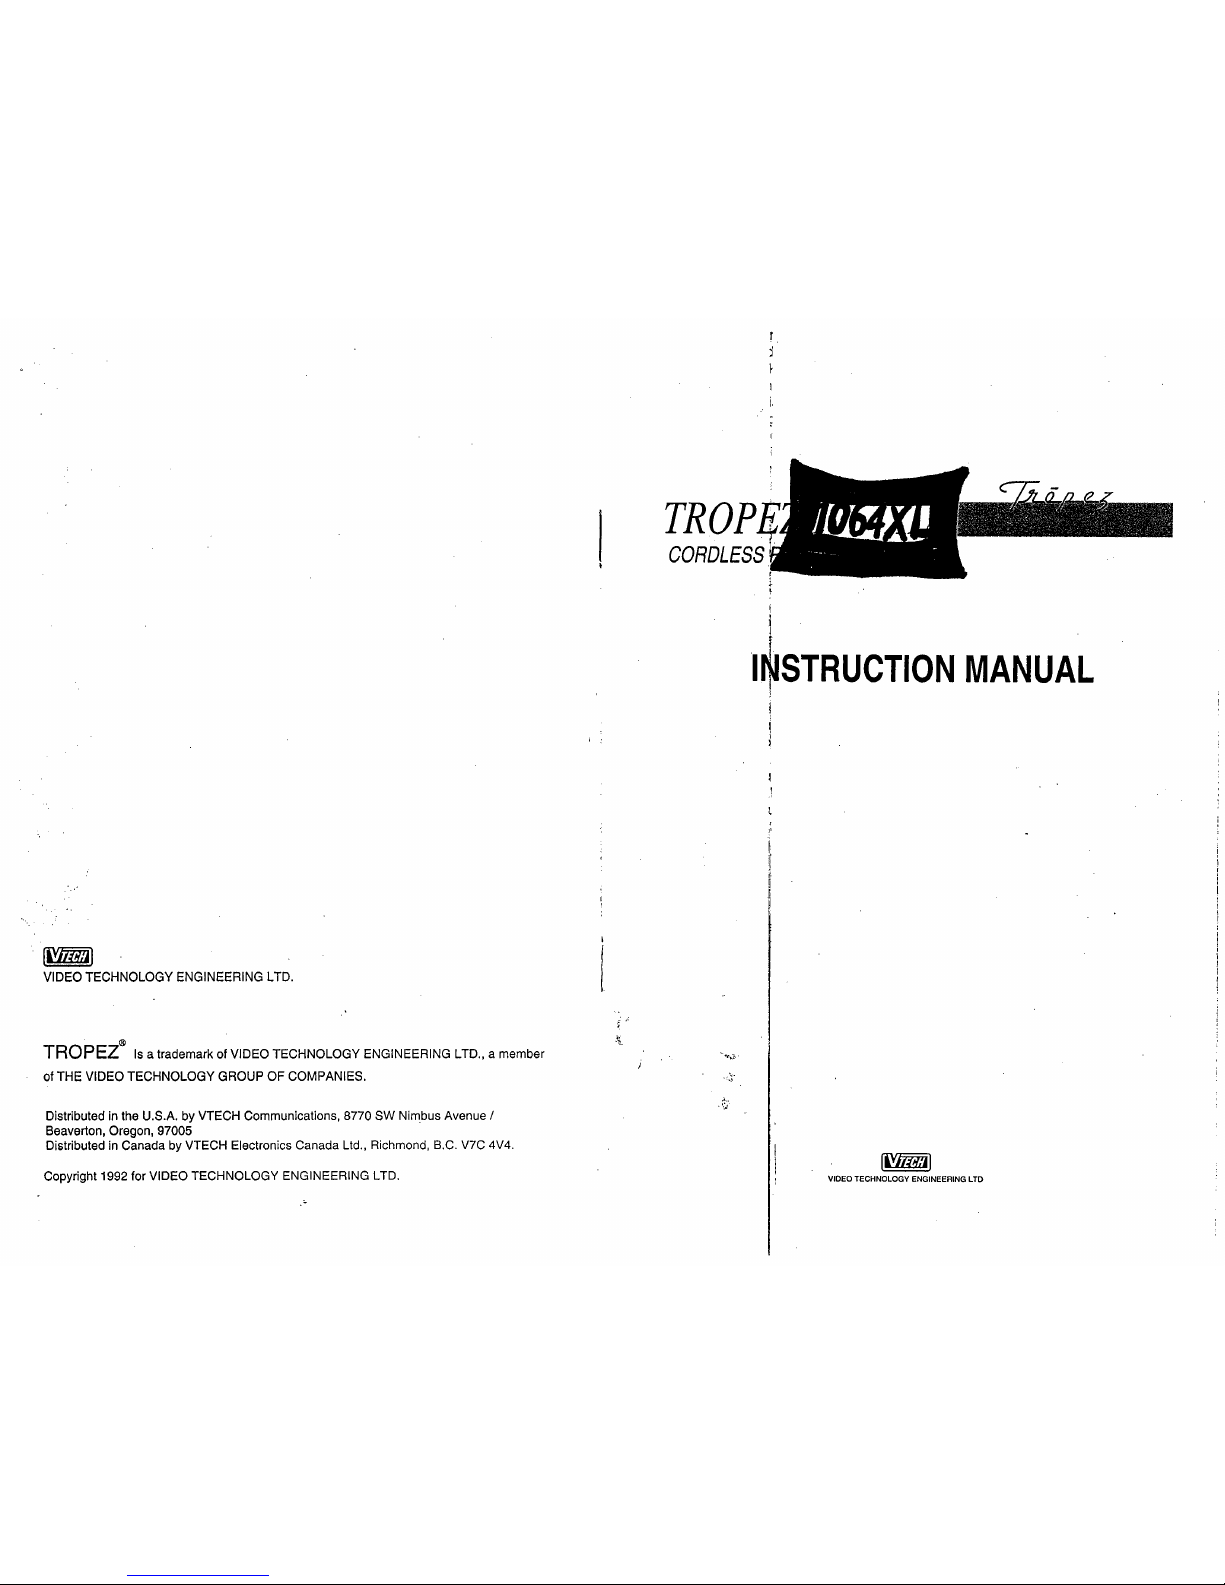
TROPEZ
Is a trademark of VlDEO TECHNOLOGY ENGINEERING LTD., a member
of
THE VlDEO TECHNOLOGY GROUP OF COMPANIES.
Distributed in the U.S.A. by VTECH Communications, 8770
SW
Nimbus Avenue
/
Beaverton, Oregon, 97005
Distributed in Canada by VTECH Electronics Canada Ltd., Richmond, B.C. V7C 4V4.
Copyright 1992 for VlDEO TECHNOLOGY ENGINEERING LTD.
I
1
.
VIDEO TECHNOLOGY ENGINEERING LTD
Page 2

When using your telephone equipment
,
indicated on the marking label. If
basic safety precautions should always
be followed to reduce the risk of fire,
electric shock and injury to
perl
including the following:
I
1.
Read and understand all
instructions.
I'
2.
Follow all warnings and instk-
-
tions marked on the product.
3.
Unplug this product from the wall
outlet before cleaning. Do not
use liquid cleaners or aerosol
cleaners. Use a damp cloth for
cleaning.
4.
Do not use this product near
water, for example, near a bath
tub, wash bowl, kitchen sink, or
laundry tub, in a wet basement,
or near a swimming pool.
5.
Do not place this product on an
unstable cart, stand, or table.
The product may fall, causing
serious damage to the product.
6.
Slots and openings in the cabinet
and the back or bottom are
.
provided for ventilation, to protect
it from overheating, these openings must not be blocked or covered. The openings should never
be blocked by placing the product
on the bed, sofa, rug, or other
similar surface. This product
should never be placed near or
over a radiator or heat register.
This product should not be placed
in a built-in installation unless
proper ventilation is provided.
7.
This product should be operated
only from the type of power source
you are not sure of the type of
power supgly to your home,
pnr-r~lt
jealer or local
:any.
-
-
-
-
with a grounded type
'
~g)
---
This product
*4,h a three wire
-
-amuLii~mg~ype plug, a plug
having a third (grounding) pin.
This plug will only fit into a
grounding type power outlet.
This is a safety feature. If you
are unable to insert the plug into
the outlet, contact your
electrician to replace your obsolete
outlet. Do not defeat the safety
purpose of the grounding type
plug.
(If provided with a polarized
attachment plug)
---
This product
is equipped with a polarized line
plug (a plug having one blade
wider than the other). This plug
will fit into the power outlet only
one way. This is a safety
feature. If you are unable to
insert the plug fully into the outlet
try reversing the plug. If the plug
should still not fit, contact your
electrician to replace your
obsolete outlet. Do not defeat
the safety purpose of the polariz-
ed plug.
9. Do not allow anything to rest on
the power cord. Do not locate
this product where the cord will
be abused by persons walking
on it.
10.
Do not overload wall outlets and
extension cords as this can result
in the risk of fire or electric shock.
11. Never push odjects of any kind
into this produdt through cabinet
slots as they
~y touch dangerous voltage points or short out
parts that could result in a risk of
fire or electric ghock. Never spill
liquid of any
kied on the product.
12.
To reduce the risk of electric
shock, do not disassemble this
product, but take it to a qualified
serviceman when some service
or repair work is required. Opening or removing covers may
expose you to dangerous voltages or other risks. Incorrect
reassembly ca cause electric
shock when th appliance is subsequently use
.
13.
Unplug this pr duct from the wall
outlet and refe
1
servicing to
the product.
I
C.
If the prod ct has been ex-
posed to rain Jr water.
I
D. If the prodyct does not
operate normally by following the
operating instructions. Adjust
E.
If the product has been dropped or the cabinet has been
damaged.
F.
If the product exhibits a
distinct change in performance.
14.
Avoid using a telephone (other
than a cordless type) during an
electrical storm. There may be a
remote risk of electric shock from
lightning.
15. Do not use the telephone to re-
port a gas leak in the vicinity of
the leak.
SAVE THESE
INSTRUCTIONS
Page 3
1.
Automatic Security Code Reset
One of more than 65 thousands
possible digital security codes is
randomly selected every time
when the handset is placed in the
base unit. The handset and base
unit can then recognize each
other based on this security code
which minimizes the chances of
other cordless phone using your
telephone line.
When the base unit is first power
up, the CHARGE LED will flash
to signal the user to initialize the
handset. The CHARGED LED
will stop flashing once
initializsa-
tion is completed.
2.
Automatic Free Channel
Selection
An unoccupied channel out of 10
possible channels is selected
every time when the handset is
placed in the base unit. A
channel button is available to
switch channel to yet another
unoccupied channel if interference occurs during phone
conversation.
3.
Memory Dial and Last Number
Redial
10
telephone numbers up to 16digit each can be programmed in
memory and recalled later for
automatic dialing. Last number
redial is also available.
4.
Tone l Pulse Dialing Capability
Tropez 1064XL can be selected to
generate either tone or pulse
dialing sequence compatible with
your telephone line.
5.
Battery Saver and Low Volt
The handset is equipped with a
battery saving feature in standby
mode
,
so that you can use the
handset for a longer periods
without charging. The handset
will also alarm the user for
recharging when the battery
voltage is low.
6.
Speakerphone
The speakerphone plus the extra
keypad allow the user to initiate
or answer a phone conversation
without using the handset. This
makes the base unit function like
an extra phone unit. Tropez
1064XL also allows switching
phone conversation between the
handset and the base, or holding
phone conversation with both the
handset and the base.
7.
Two Way Intercom
This feature allows conversation
between the handset and the
base unit. The handset and the
base can page each other to
initiate a conversation.
8.
Out of Range Indicator
When the handset is operated
beyond its operating range, the
LOW
BAT
LED will flash to
warn the user with the IN
USE
LED on.
9.
Privacy
This feature enables the handset
to disconnect the speakerphone
from listening or speaking while
the handset is engaged in a
phone conversation.
10. Hold
Release1
This feature epables the telephone,line beipg put on hold by
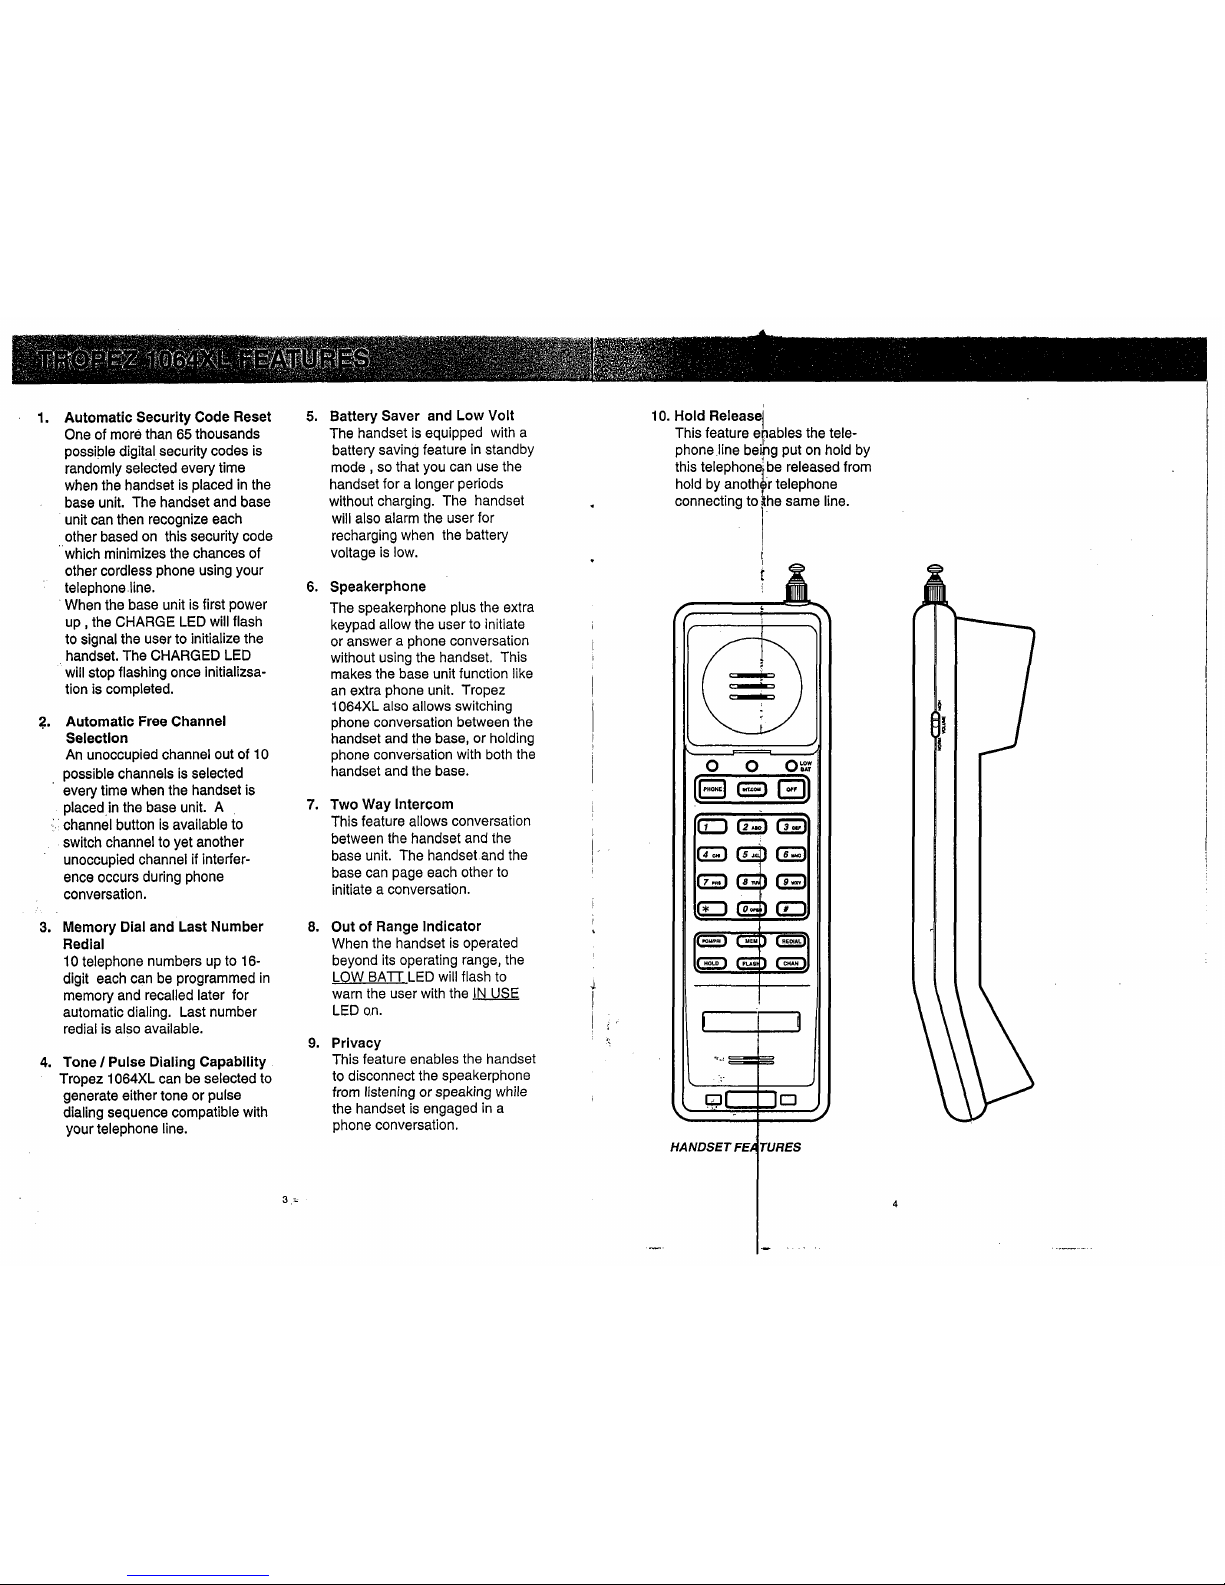
HANDSET
FE
Page 4

SPECIAL FUNCTION BUTTONS:
PHONE -To make or answer a call.
INTCOM
-
To page the base or
answer
a
page from the
base.
OFF
-
To end a call or discon-
nect a line.
t
-
Used as a pause code in
programming a call in
memory.
PGMI
-
To programme a phone
p~l number when the phone
is idle.
Toodisable the speakerphone feature when the
phone is in use.
MEM
-
To recall a phone number
for memory dialing.
REDIAL
-
To redial the last number.
HOLD
-
To hold a telephone line.
FLASH
-
To switch between
2
telephone lines when call-
alert or call-waiting
'
service is available.
CHAN
-
To change the current
channel to another one.
SWITCH:
VOLUME
-
To control the volume of
the earpiece. This is a
two positions slide switch
for high or low volume.
LEDS:
TALK
INTCOM
LO BAT
-
To indicate connection to
the base unit when
steady on. To indicates
the phone line is on hold
when flashing at a rate
of
1
sec. To indicate the
phone is in PROGRAM
mode when flashing at a
rate of
2
sec.
-
To indicate the phone is
in INTERCOM mode
when steady on. To
indicates the base is
currently paging when
flashing.
-
To indicate low battery
condition and charging
IS
necessary.
-
To indicate out of range
condition.
b
SPECIAL FUNCTI N BUTTONS:
!
MEM - To recall
answer a page from
I
the qase.
MUTE
-
To mute the microphone in
the basel
SPEAKERPH~NE~-
To enable the
speakerphone.
FLASH
-
To switch between 2 tele-
phone lides when call-alert
loudness of
the speakerphone.
LEDS:
IN USE
-
To indicate ringing or tele-
phone line connection.
CHARGE
-
To indicate the handset
is charging.
HOLD
-
To indicate the phone is on
hold (flashing only).
INTERCOM -To indicate the base is
in INTERCOM mode
when steady on. To
indicate the base is
paging the handset
when flashing.
MUTE
-
To indicate the microphone
in the base is muted when
on.
SPEAKERPHONE
-
To indicate the
speakerphone
status.
Page 5

NOTES:
1.
All button keys will be referred
hereafter by their names within
square brackets
([...I)
[PHONE] is always active.
[PGMIPRI
I
is active only in
'
standby mode only.
All other keys are active in
PHONE/TALK mode only.
2.
All switches will be referred hereafter by their names in capital
letter.
3.
All LEDs will be referred hereafter
by their names underlined.
BASE UNIT FEATURES
7
.-
2.
Plug the
l2V,
C
adaptor into a
/1
wall outlet,
120i
AC.
1
3,
lnsert a modular plug of the tele-
4
phone cable inlo a wall telephone
jack.
I
!
4.
lnsert the other plug of the telephone cable into the modular telephone jack of the base unit.
?
5.
Wall Mounting (optional)
Choose a conbfenient location
preferably neat
a
wall AC outlet
and a telepho~ jack. Note the
mounting screws should be
screwed into arwall stud for
secure mounting.
CAUTION:
I
1
locations.
Never touch u insulated tele-
phone wires o terminals unless
t.
the telephone .line has been
disconnected at the network
interfa&
1
Page 6

1.
Set the TONUPULSE switch
Set this switch according to your
phone line dialing system. For
touch tone phone line, set switch
to TONE. For dial pulse (rotary)
phone line, set switch to Pulse.
Please check with your local telephone company
if
you are not
sure.
2.
Set the RINGER switch
Set this switch to ON, the handset
and the base will ring. When the
switch is set to OFF, the handset
and base will not ring. Note that
the TALWPROG led on the
handset, and the
IN
USF
LED on
the base will always flash
when ringing is detected.
3.
Fill the telephone number card
(handset)
Use a sharp or pointed object to
gently pry up the plastic window
until it pops out. Write your telephone number on the card and
replace the window.
4.
Power Up
Every time when the base unit is
power up, the CHARGE LED will
flash to signal the user to
initialize the handset. It will
continue to flash until the
handset is placed in the cradle.
Once'the handset is initialized,
the LED will stop flashing and the
phone is ready to use if the
batteries is charged.
5.
Charge the handset batteries
Place the handset in the base
unit for charging for
16
hours
before using. The CHARGE led
will light to indicate the battery
is being charged.
6.
Check dial tone
After the batteries are fully
charged, pick up the handset and
extend both antennas fully. To get
a dial tone, press [PHONE] until
you hear a beep. The TALK
I
PROG led will turn on to indicate
the phone line is connected. You
should hear a dial tone now.
IMPORTANT
EVERYTIME WHEN THE BASE
UNIT IS POWER UP, THE CHARGE
LED WILL FLASH TO INDICATE AN
INCORRECT
SEC,URITY CODE
CONDITION. PLACE THE HANDSET
ON THE
CRADLE~FOR
A FEW
SECONDS TO REPET THE
SECURITY CODE:
IN ORDER TO EN URE A KEY IS
PRESSED CORR CTLY, A KEY
MUST BE PRESS D DOWN
FIRMLY
TILL THE HANDSET
BEEPS.
i
1.
MAKING CAL
S
F
You can makeballs by using the
handset or the jspeakerphone at
the base.
j
I
1
.I
MAKING CALLS FROM THE
HANDSET
j
i
Manual Dial
f
Press [PHONtj] . When you hear
a dial tone,dial. the number.
If
The IN-.USE I in the base will
turn on to indi ate the phone is
connected. T e TALWPROG led
will turn on to ndicate the hand-
set is now rea y for dialing.
T
If the communication link between
the handset and the base unit
cannot be established properly,
the handset will beep as a
warning signal and will not turn
the TALWPROG led on.
If you are far away from the base
,
walk closer and try again. If you
are close to the base, place the
the handset in the base for a few
seconds to reset the security
code and try again.
Redial
To redial the last phone number
you dialed, press [PHONE] to get
dial tone then press[REDIAL].
Memory Dial
To dial a phone number in
memory, Press [PHONE] to get
dial tone then press[MEM] and a
digit key(0-9). You can store
10
phone numbers in memory(see
PROGRAM PHONE NUMBER).
A
warning tone is generated if
[
* ] or
[ # ] is pressed. The
phone will then exit from memory
dialing and return to normal
manual dialing mode.
1.2
Making calls on the
speakerphone
Manual Dial
Press [SPEAKERPHONE].
When you hear a dial tone, dial
the number. If you make a mistake, press [SPEAKERPHONE]
to hang up and then [SPEAKERPHONE] again to get dial tone.
Remember you must hear the
dial tone before you dial.
Page 7

The M USE led in the base will
turn on to indicate the phone line
is connected. The SPEAKER-
PHONE led will turn on to
indicate the base is now in
speakerphone mode.
Redial
To redial the last phone number
you dialed, press [PHONE] to get
dial tone then press [REDIAL].
Memory Dial
To dial a phone number in
memory, Press [PHONE] to get.
dial tone then press [MEMORY]
and a digit key
(0 to
9).
2.
ANSWERING CALLS
When you receive a call, the
handset and the base unit will ring
when the RINGER switch is set
to ON position. However, the
handset will not ring if it is placed
on cradle. To make sure your
phone rings when the handset is
away from the base, please keep
both antennas fully extended.
USE and TALWPROG leds
flash whenever a call comes in.
2.1
Answering calls using the
handset
To answer a call when the hand-
set is in the base, just pick up the
handset.
To answer a call when the hand-
set is away from the base, just
press [PHONE].
Both IN USE and TALWPROG
leds will be on steady when the
call is answered.
2.2
Answering calk on the
speakerphone
To answer a call, press
[SPEAKERPHONE] on the base
unit, and speak toward the
microphone. You can use the
speakerphone regardless whether
the handset is on the cradle or not.
Both
JN
USE and SPEAKER-
PHONE leds will turn on.
3.
FLASH
If your phone line has call-alert or
call-waiting service, you will hear a
tone when
a
second party call
comes in while you are talking on
the phone. You can answer the
second caller and put the first
caller on hold.
Press [FLASH] button on the
handset or on the base will place
the first call on hold and answer
the second call. Press [FLASH]
again will enable you to talk to the
first caller and place the second
caller on hold.
4.
THREE-WAY CONFERENCE
Three-way conference is referred
as a phone conversation between
the handset, the speakerphone,
and the line.
While the handset is engaged in a
phone conversation, the speakerphone can join the phone conver-
sation by
pressing [SPEAKERPHONE]. However, the handset
can prohibit thei speakerphone
from entering the conversation by
pressing [PGMIPRI] button after a
call has been set up. By pressing
[PGMIPRI] again during phone conversation or hanging up, the phone
will go back to its default condition
which allows
th,e speakerophone
to enter three-way conference.
This feature allgws privacy for
the handset
during
a
phone
conversation.
/
The handset cintinue after a
speaker phon6 conversation
5.
ON HOLD
I
Pressing [HO Dl either in the
handset or in he base will put a
call on HOLD The HOLD LED
in the base a d the TALWPROG
LED in the ha
1
dset will flash at a
rate of every sec. This HOLD
'.:
status can only be released by
pressing [PH NE] in the handset
or [SPEAKE PHONE] in the
base,
oi off-h oked by another
telephpne co necting to the
same telepho e line.
f
6.
HANG
UP
I
During a thre -way conference,
I
the handset and speakerphone
can be independently discon-
nected from the line. To end the
conference, both handset and
speakerphone. must be turn off
independently. The base will
then disconnect the phone line
and the
lN
USE led will turn off.
6.1
Hanging up from the handset
(not in 9way conference)
If you are near the base unit, you
can simply place the handset
back on the base unit to hang
UP.
If you are away from the base
unit, press [OFF] to hang up. A
warning tone is generated if the
hang up is not successful. Press
[OFF] again.
6.2
Hanging up on the speaker-
phone
(not in 9way conference)
Press [SPEAKERPHONE] to
end a call. SPEAKERPHONE
and IN USE LEDs will turn off.
7.
PROGRAM PHONE NUMBER
Your phone has memory to store
10 up to 16-digit phone num-
bers. You must use the handset
to program phone memory. To
enter the PROGRAM mode, the
handset and the speakerphone
MUST be in OFF (standby)
mode.
Press
[PGMIPRI]. When the
phone is in PROGRAM mode,
the TALWPROG LED flashes.
12
Page 8

Then press a numeric key from 0
to
9.
Pressing [MEM], or[PHONE] key will cause the
phone to terminate PROGRAM
mode.
Enter a phone number up to 16
digits.
Use
[*I
or
[#]
to add a3.5
seconds pause between digits
during dialing. Note a
[ * ] or
[
#
]
is considered as a digit in
memory.
Press [MEM] to complete programming.. If number is more
than 16 digits, the phone will
generate a warning tone and
terminate PROGRAM mode
automatically (TALWPROG LED
off). To erase a stored number,
press
[PGMIPRI], a numeric key
(1 to lo), and [MEM].
All memory is stored in the base
unit. A power loss in Base Unit
will cause phone memory lost.
8.
BATTERY LOW
LOWBAT will turn on steady in
TALK mode.
9.
INTERCOM
You can useTropez 1064XL as a
two-way intercom between the
base and the handset. This does
not tie your telephone line. While
you are using the intercom.The
LED will flash when an incoming call is received. There
will be no indication in the
handset. To answer the call,
simply pressing
[SPEAKERPHONE] or [PHONE].
The phone will exit from intercom
mode automatically.
13
:
To page the base unit, press
[INTCOM] on to handset. The
handset INTCOM LED will flash
and the base will sound and flash
the INTERCOM LED. The base
can answer the page by simply
pressing [INTERCOM] on the
base. If the base does not
answer within
5
page alarm, the
phone will cancel the page.
To page the handset, press
[INTERCOM] on the base. The
base INTERCOM LED will flash
and the handset will sound and
flash the INTCOM LED. The
handset can answer the page by
simply pressing [INTCOM] on the
handset. If the handset does not
answer within
5
page alarm, the
phone will cancel the page.
When the handset or the
speakerphone is engaged in a
phone conversation, its paging
function ([INTCOM] on handset,
[INTERCOM] on the speakerphone is disabled. If you wish to
page the other end, you must put
the phone on hold first before its
paging function is enabled again.
However, the paging function of
the one that is not engaged in a
phone conversation is still en-
abled. When the other end
receives a paging signal, it will
sound once only instead of
5
times.
10. OUT OF RANGE
During a phone conversation, the
handset will continue to monitor
the base transmitting signal
strength.
Whqn this signal
strength is
below a certain level,
the handset will flash the
LOW
BATT
LED to signal an out of
range condition. The channel
switching feature is disabled.
I
Page 9

Tropez 1064XL operates at maximum
transmitting power allowed by the
Federal Communication Commission
(FCC). This means the operating
range of the handset and the base unit
is limited over a certain range which
depends on the location of the base
unit, your home construction, the
weather, local interfering sources etc.
For best performance, make sure
both antennas are fully extended
especially when the handset is away
from the base unit. Try to place the
base unit in different locations in your
home in order to optimize the operating range.
If you hear increasing noise and static
when you walk further away from the
base unit. Move closer to the base
unit will improve your reception.
When you walk out of the range, the
handset will not be able to get a line,
disconnect
a
line, or receive a call.
Move closer to the base unit.
If you are not out of the range and
you hear a lot of noise and static,
press [CHAN] to switch to another
channel.
1.
Remove the batteries cover by
pressing on the lines and sliding
downward.
2.
Lift out the battery pack and unplug it from the handset.
,
.
3.
Plug the new battery pack into the
connector correctly and firmly.
Place the battery pack inside the
battery compartment nicely.
4.
Replace the cover by sliding it
on its track up until it is firmly in
place.
5.
For best performance, make sure
to charge the new battery for 10
hours before using.
CAUTION:
To Reduce the Risk of Fire or Injury to
Persons, Read and Follow these
Instructions:
Use only VTECH Battery
PIN:
29-1007;
tions.
Page 10

1. Frequency Control:
Phase Locked Loop (PLL)
2. Transmit Frequency:
Handset
-
49.67 MHz to 49.97
MHz (1 0-channel)
Base Unit
-
46.61 MHz to 46.97
MHz (1 0-channel)
3. ' Receive Frequency:
Handset
-
46.61 MHz to 46.97
MHz (1 0-channel)
Base Unit
-
49.67 MHz to 49.97
MHz (1 0-channel)
4. Modulation:
FM (Frequency Modulation)
5.
Nominal Effective Range:
Maximum power allowed by FCC.
Actual operating range may vary
according to the environmental
conditions at the time of use.
However, automatic channel
selection is used to minimize this
effect.
6. Microprocessor Controlled
7. Size:
Handset
-
2lcm(L) x 6.5cm(W)
x 4.5cm(H)
Base Unit
-
21.5cm(L) x 14cm(W)
x 5cm(H)
9. Power Requirements:
Handset
-
Self-contained
Nickel-Cadmium
rechargeable battery
Base Unit
-
120V 60Hz AC
+
12V DC, 200mA
adaptor
I
NOTE: Specifications are typical
and may change without
notice.
'8.
Weight:
Handset
-
Approx. 29Og (incl.
batteries)
Base Unit
-
Approx. 6OOg
Page 11

IMPORTAN
CHANGES TO THE
OPERATING
MANUAL
OF
YOUR
TROPEZ
1064
CORDLESS TELEPHONE.
MAKE SURE THE TROPEZ
1064
CORDLESS TELEPHONE IS
OFF
BEFORE YOU PROGRAM THE MEMORY DIAL FUNCTION.
STEP
1:
PRESS
THE "PROG"
KEY.
STEP
2:
ENTER THE WHOLE PHONE NUMBER
TO
BE
STORED IN MEMORY. MAKESURE
TO
INCLUDE
THE AREA AND LONG DISTANCE CODES IF
'
NECESSARY.
STEP
3:
PRESS
"MEM"
KEY,
FOLLOWED
BY
THE DIGIT
KEY
(
1,2,3,4,
OR
5)
WHERE THE NUMBER IS TO
BE
STORED..
e-.
IF THE NUMBER
WAS
PRO~R~MMED
PROPERL?,
YOU WILL
,
HEAR
A
3
LEVEL
TONE.
-,
.
8.
.
.
P
w.:
4
.&'
t
IF
YOU
STILL
HAVE
PROBLEMS
PROGRAMIN~
YOUR
TELE-
,
i
PHONE, PLEASE CALL OUR
CUSTOMER SERVICE DEPART-
i
I
MENT
AT
1-800-624-5688.
1
June
1,1994
 Loading...