

Page 1
®
USER'S MANUAL
© VTECH
Printed in China
91-01143-000
Page 2

Dear Parent:
At VTech
®
we know that children have the ability
to do great things. That’s why all of our electronic
learning products are uniquely designed to develop
a child’s mind and allow them to learn to the best
of their ability. Whether it’s learning about letters,
numbers, geography or algebra, all VTech
®
learning
products incorporate advanced technologies and
extensive curriculum to encourage children of all
ages to reach their potential.
When it comes to providing interactive products
that enlighten, entertain and develop minds, at
VTech
®
we see the potential in every child.
34
Page 3

CONTENTS
INTRODUCTION .............................................. 1
PREPARATION .............................................. 2
MOUSE CONNECTION ..............................................................2
PRINTER CONNECTION ............................................................2
POWER LINK CONNECTION ....................................................2
POWER SOURCE ......................................................................2
BATTERY INSTALLATION ........................................................... 2
BATTERY NOTICE .....................................................................3
BACKUP BATTERY INSTALLATION ............................................ 3
AC ADAPTOR CONNECTION ....................................................3
ADAPTOR OFFER .....................................................................4
ON/OFF SWITCH ......................................................................4
AUTOMATIC SHUT-OFF ............................................................. 4
CONTRAST SWITCH ..................................................................4
VOLUME SWITCH .....................................................................4
MOUSE .....................................................................................5
EARPHONE JACK .....................................................................5
KEYBOARD ..............................................................................6
SPECIAL KEYS ...................................................................... 6-8
SELECTION BUTTONS ........................................................... 8-9
SYSTEM SETUP .........................................................................9
30
Page 4

DESCRIPTION OF ACTIVITIES .................... 10
GENERAL DISPLAY.................................................................11
WORD GAMES ................................................................ 11-12
SYNONYMS............................................................................................ 11
ANTONYMS............................................................................................ 11
SPELLING ............................................................................................... 11
WORD CORRECTION ............................................................................. 11
TENSES................................................................................................... 11
PARTS OF SPEECH ................................................................................ 11
GRAMMAR ............................................................................................. 12
SENTENCE SHUFFLE ................................................................................ 12
WORD SEARCH...................................................................................... 12
CROSSWORD ......................................................................................... 12
MATHEMATICS................................................................... 12-14
ADDITION .............................................................................................. 12
SUBTRACTION ........................................................................................ 12
MULTIPLICATION ..................................................................................... 12
DIVISION ............................................................................................... 13
ALGEBRA ............................................................................................... 13
FRACTIONS............................................................................................. 13
COORDINATES ....................................................................................... 13
GEOMETRY ............................................................................................ 13
STORY PROBLEMS ................................................................................. 13
GRAPHS ................................................................................................. 14
BALANCE ................................................................................................ 14
CALCULATOR .......................................................................................... 14
TRIVIA .............................................................................. 14-15
WORLD CUSTOMS ................................................................................. 14
SCIENCE AND TECHNOLOGY ................................................................. 14
ENTERTAINMENT .................................................................................... 14
31
Page 5

ANIMAL.................................................................................................. 14
SPORTS .................................................................................................. 15
LOGIC & MUSIC ....................................................................15
MUSIC MAKER ....................................................................................... 15
FENCES................................................................................................... 15
SHAPE PUZZLE ....................................................................................... 15
3D MATCH............................................................................................. 16
TREASURE HUNT .................................................................................... 16
TIC TAC BOX ......................................................................................... 16
COMPUTER SKILLS .................................................................16
SPELL CHECKER ...................................................................................... 16
WORD PROCESSOR............................................................................... 16
FILE ................................................................................................... 16-18
EDIT ....................................................................................................... 18
TOOLS .............................................................................................. 18-19
SHORTCUT KEYS .................................................................................... 19
CHART MAKER ....................................................................................... 19
HOMEWORK LABTM................................................................................ 20
TYPING CHALLENGE .............................................................................. 21
CALENDAR.............................................................................................. 21
DAY PLANNER ....................................................................................... 21
TELEPHONE BOOK ................................................................................ 21
MEMORY BANK ..................................................................... 22
SYSTEM SETUP .........................................22
PRINTER SETUP ................................................................ 22-23
TROUBLESHOOTING FOR PRINTER ERROR .........................23
ICON SETUP ...........................................................................23
32
Page 6

NUMBER ENTRY .....................................................................23
DATE FORMAT .......................................................................23
SCREEN SAVER.......................................................................24
VTECH POWER LINK ........................................................ 24-25
HOW TO USE
AN EXPANSION CARTRIDGE ..................... 25
EXPANSION CARTRIDGE ........................... 25
READING COMPREHENSION ..................................................25
FOREIGN LANGRUAGE ................................................... 25-26
SCORING ................................................. 26
SCORING CODE ............................................................... 26-27
POWER ZONE™ ACTIVITIES ............................................ 27-28
CARE AND MAINTENANCE ........................ 28
33
Page 7
INTRODUCTION
Thank you for buying the VTECH®POWER ZONETMlearning unit! VTECH®is committed
to providing the best possible products to entertain and educate your child. Should you
have any questions or concerns, please call our Consumer Services Department at 1-800521-2010 in the U.S. or 1-800-267-7377 in Canada.
POWER ZONE
a wide range of exciting and educational activities for fun learning! The unit's 48 builtin activities encourage learning through fun play. Included in this package are READING
COMPREHENSION and FOREIGN LANGUAGE expansion cartridges.
TM
is a talking, electronic learning aid with a color enhanced display. It offers
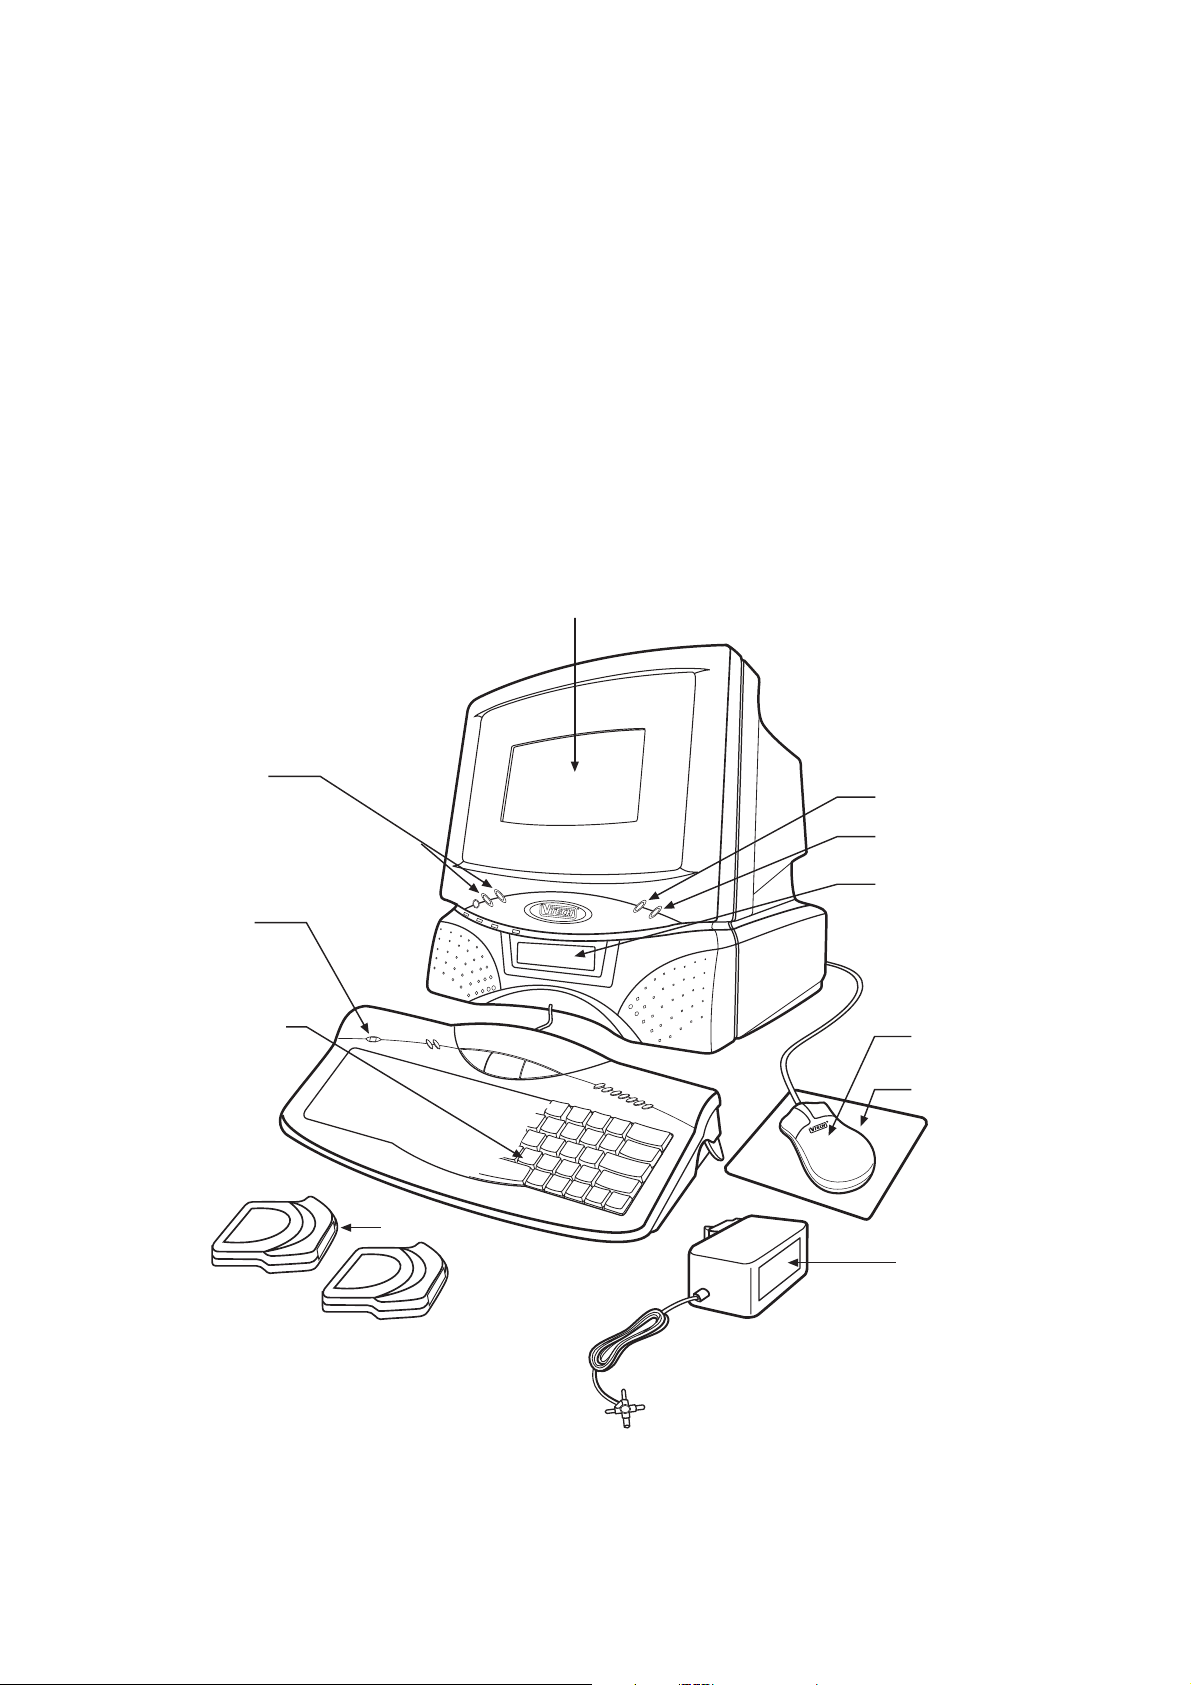
LCD DISPLAY
ON/OFF
BUTTON
LED
TYPING
KEYBOARD
CONTRAST
SWITCH
VOLUME
SWITCH
CARTRIDGE
DOOR
MOUSE
MOUSE
PAD
CARTRIDGE
ADAPTOR
1
Page 8

PREPARATION
MOUSE CONNECTION
1. Make sure the unit is OFF.
2. Locate the mouse jack on the back of the unit.
3. Plug the mouse into the unit's mouse jack.
4. Turn the unit ON.
PRINTER CONNECTION
1. Make sure both the POWER ZONETM learning product and the printer are OFF.
2. Locate the printer port on the back of the POWER ZONETM learning toy.
3. Insert the printer plug into the printer port.
4. Turn ON the POWER ZONETM unit, then turn ON the printer.
Please refer to the printer list included in the packaging for the print drivers that POWER
ZONETM supports.
VTECH POWER LINKTM CONNECTION
1. Make sure the POWER ZONETM learning product is OFF.
2. Locate the printer port on the back of the POWER ZONETM learning product.
3. Insert the VTECH POWER LINKTM connector into the printer port.
4. Connect the VTECH Power LinkTM unit to the personal computer. Please refer to
the user’s manual of the VTECH POWER LINKTM for information regarding connection
to the personal computer.
5. Turn ON the computer.
6. Turn ON the POWER ZONETM learning product.
NOTE: The Power LinkTM is sold seperately.
POWER SOURCE
The POWER ZONETM learning product can be operated by using 4 "C" size batteries or
the standard 9V 300mA AC center-positive adaptor.
BATTERY INSTALLATION
1. Make sure the unit is OFF.
2. Locate the battery cover on the back of the unit.
3. Open the battery cover.
4. Insert 4 "C” batteries, as illustrated.
DO NOT USE RECHARGEABLE BATTERIES in this unit.
5. Close the battery cover.
2
Page 9
BATTERY NOTICE
• When installing batteries observe the polarity signs to avoid leakage.
• Do not mix old and new batteries.
• Do not use different types of batteries.
• Remove batteries from the unit when you are not going to use the unit for a long time.
• Do not dispose of batteries in fire.
• Do not short-circuit supply terminals.
• Do not attempt to recharge ordinary batteries.
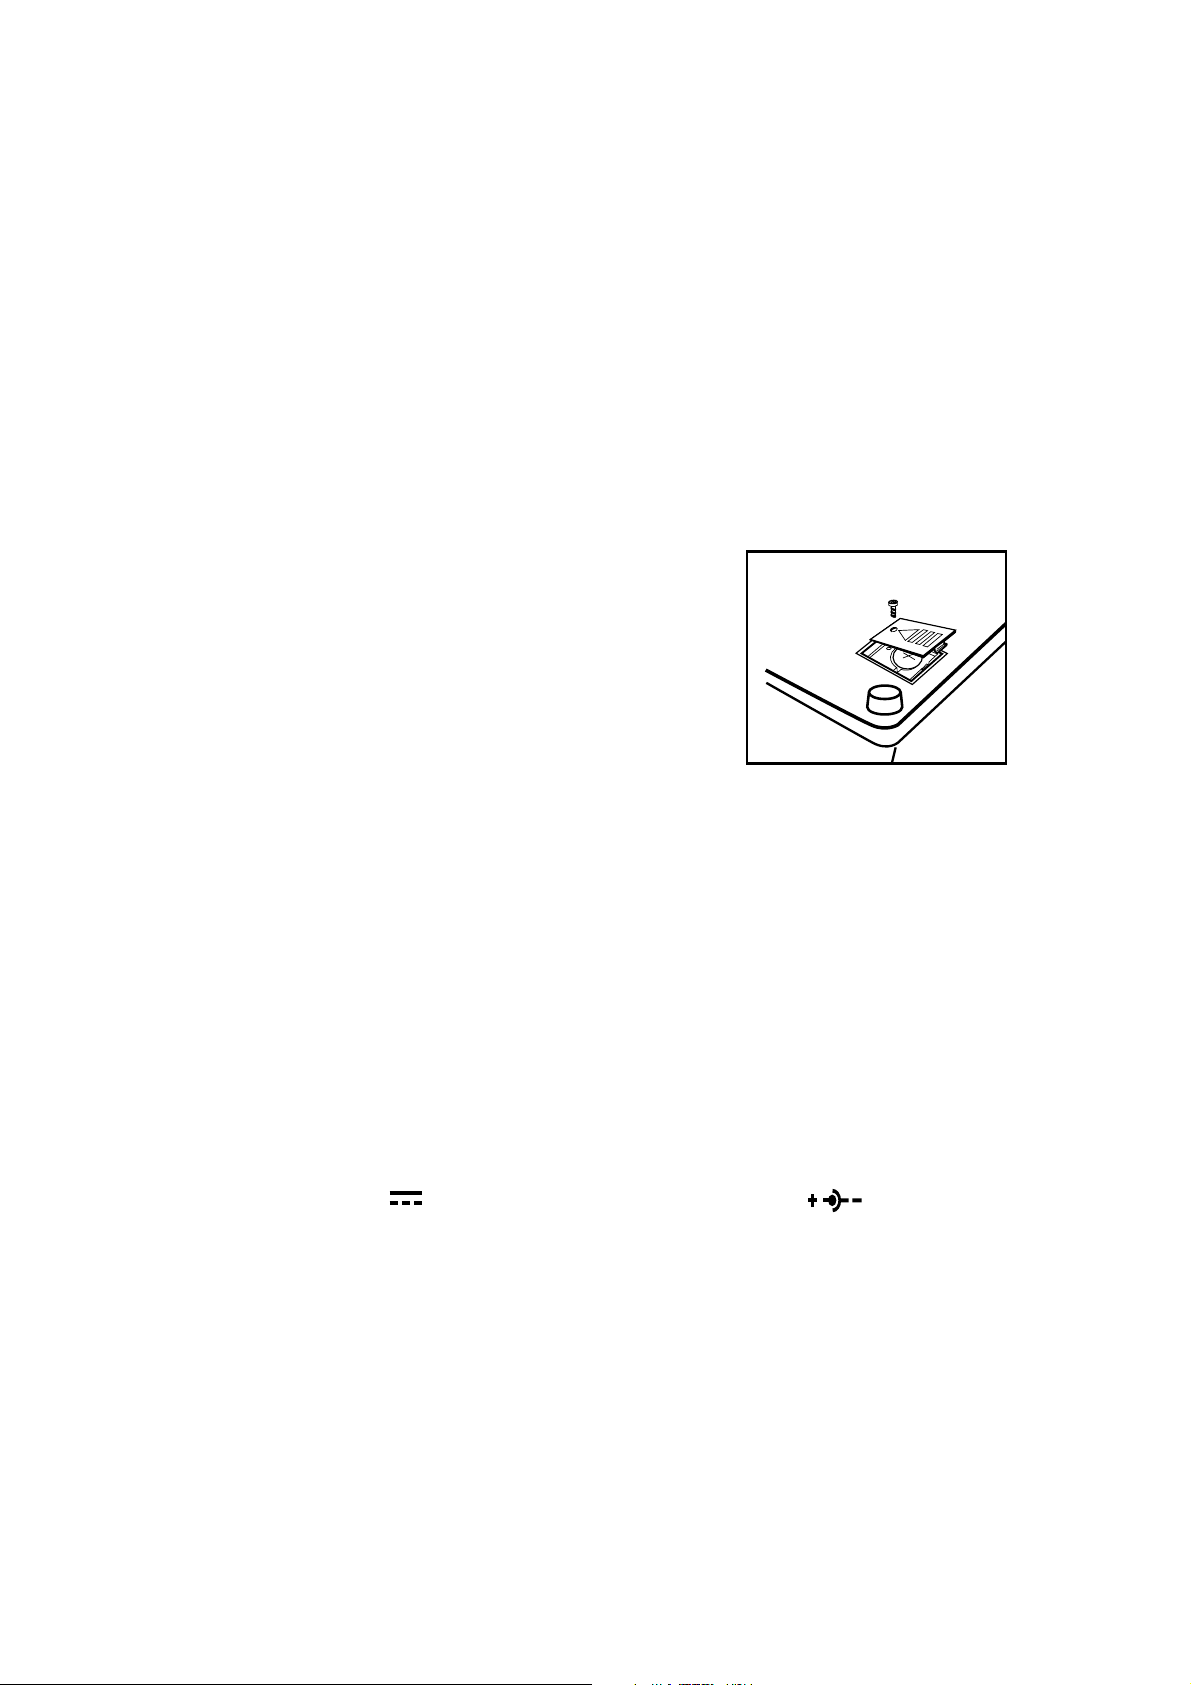
BACKUP BATTERY INSTALLATION
• Make sure the unit is OFF.
• Locate the backup battery cover on the bottom of the
unit and open it.
• Insert 1 CR 2025 lithium battery as illustrated.
• Replace the battery cover.
•Turn the unit ON.
NOTE: While replacing the backup battery, the 4 "C" size batteries must be kept in the
unit or the unit must be connected to the 9V adaptor while the adaptor is plugged
in. If not, you will lose all the information stored in the following activities:
•Word Processor • Music Maker
• Calendar • Homework Lab
• Day Planner • Memory Bank
•Telephone Book
In addition to these activities, players’ names and scores will also be lost.
NOTE: If the unit suddenly stops working or the sound becomes weak, turn the unit OFF
for 15 seconds, then turn it back on. If the problem persists, it may be caused
by weak batteries. Please install a new set of batteries and try again.
TM
AC ADAPTOR CONNECTION
Use the standard 9V 300mA AC - DC adaptor with polarity that comes with
the POWER ZONETM learning unit.
1. Make sure the unit is OFF.
2. Locate the adaptor jack on the back of the unit.
3. Plug the adaptor into the unit’s adaptor jack.
4. Plug the adaptor into a wall outlet.
5. Turn the unit ON.
NOTE: Do not leave the adaptor plugged in for long periods of time if the unit is not
in use.
3
Page 10
If your AC adaptor is lost many retailers carry this type of adaptor. You can also order a replacement
by calling our Consumer Services Department at 1-800-521-2010 or send $15.00 (includes shipping
and handling) to:
ADAPTOR OFFER
c/o VTECH® Industries, LLC.
101 E. Palatine Road
Wheeling, IL 60090-6500
(Illinois residents please add 8.25% sales tax. Please do not send cash.)
ON/OFF SWITCH
Turn ON your POWER ZONETM by pressing the button located on the base unit below
and to the left of the screen. The unit will play an opening animation and then you can select
an activity. Turn the unit OFF by pressing the button located next to the ON button.
AUTOMATIC SHUT-OFF
If there is no input into the POWER ZONETM learning product for about 8 minutes, the
unit will automatically shut off to save power. After the auto power off is activated, you
need to press the ON button again. We recommend that you turn the unit OFF when
not playing with it. If the POWER ZONETM learning product is not going to be used for
a long period of time, remove the batteries and unplug the adaptor.
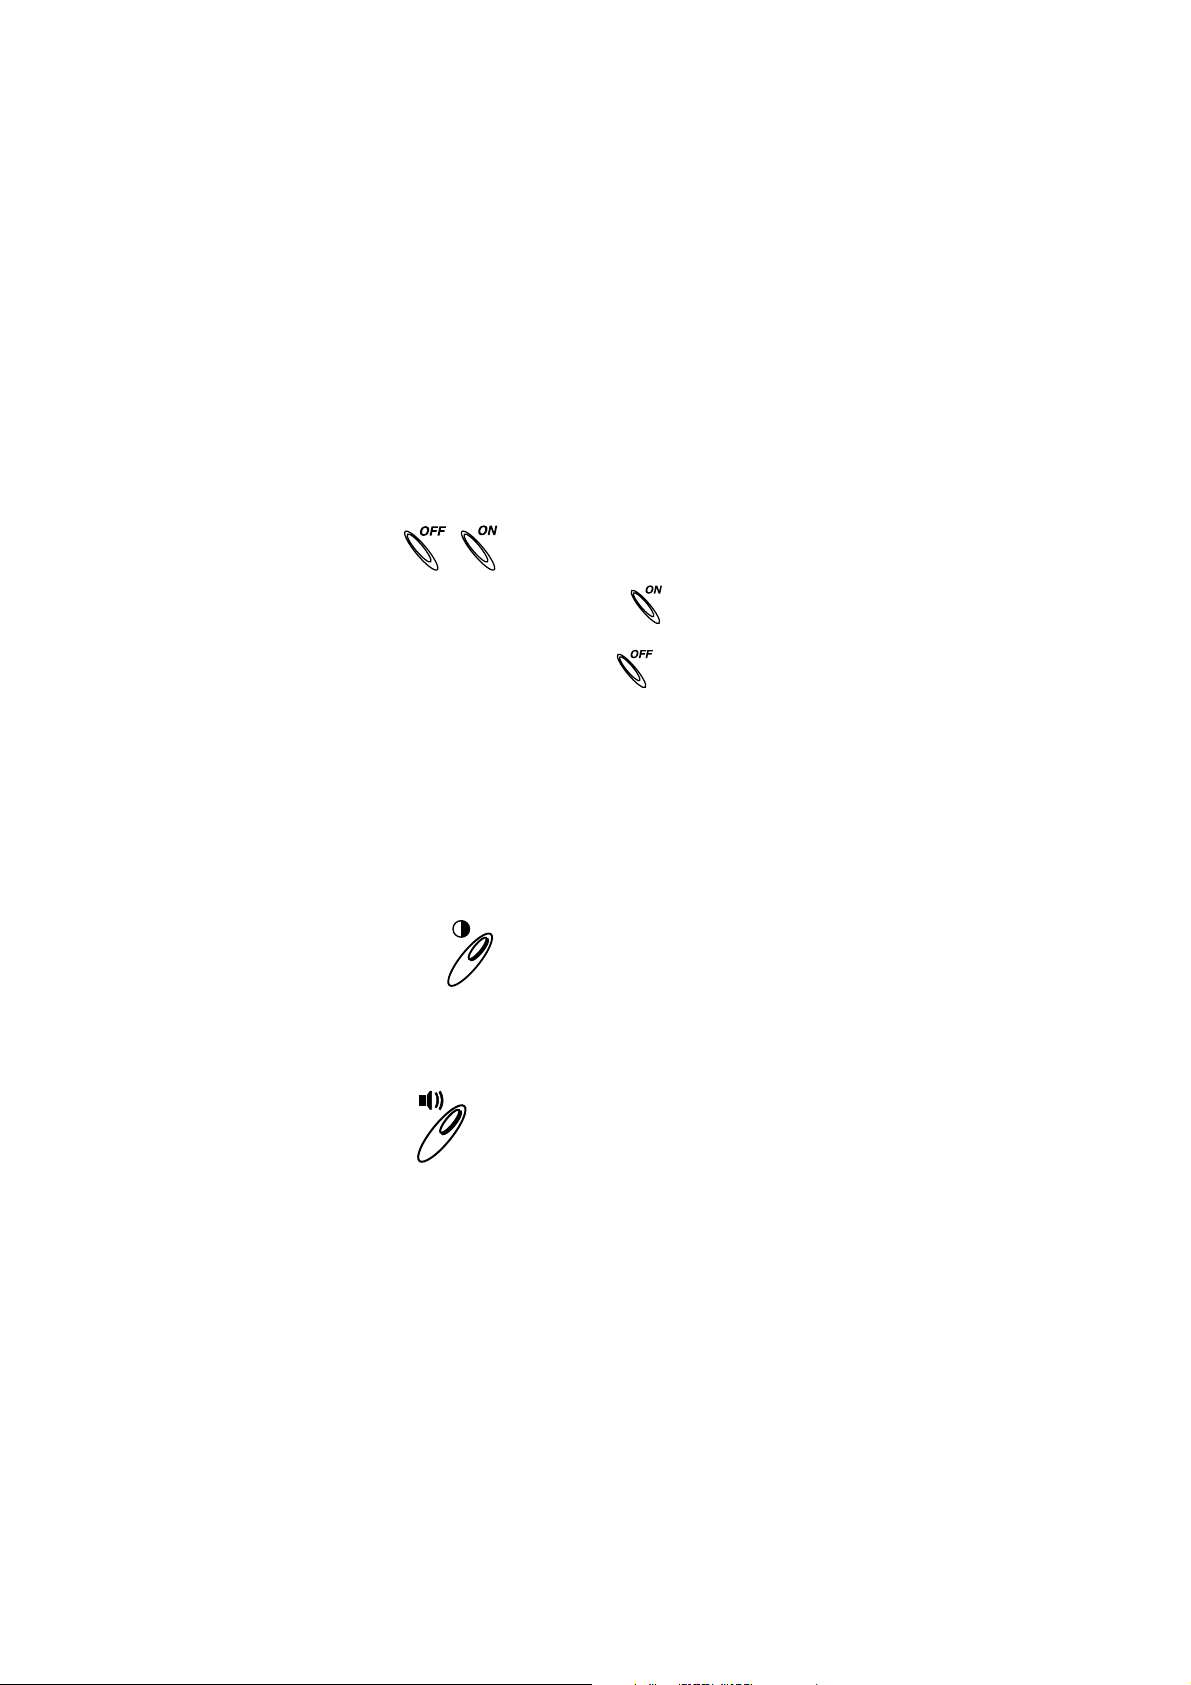
CONTRAST SWITCH
Adjust the image on the screen by sliding the Contrast Switch to the upper right for higher
contrast and to the lower left for lower contrast.
+
-
+
VOLUME SWITCH
-
Adjust the volume by sliding the Volume Switch to the upper right to raise the volume
and to the lower left to lower the volume.
4
Page 11
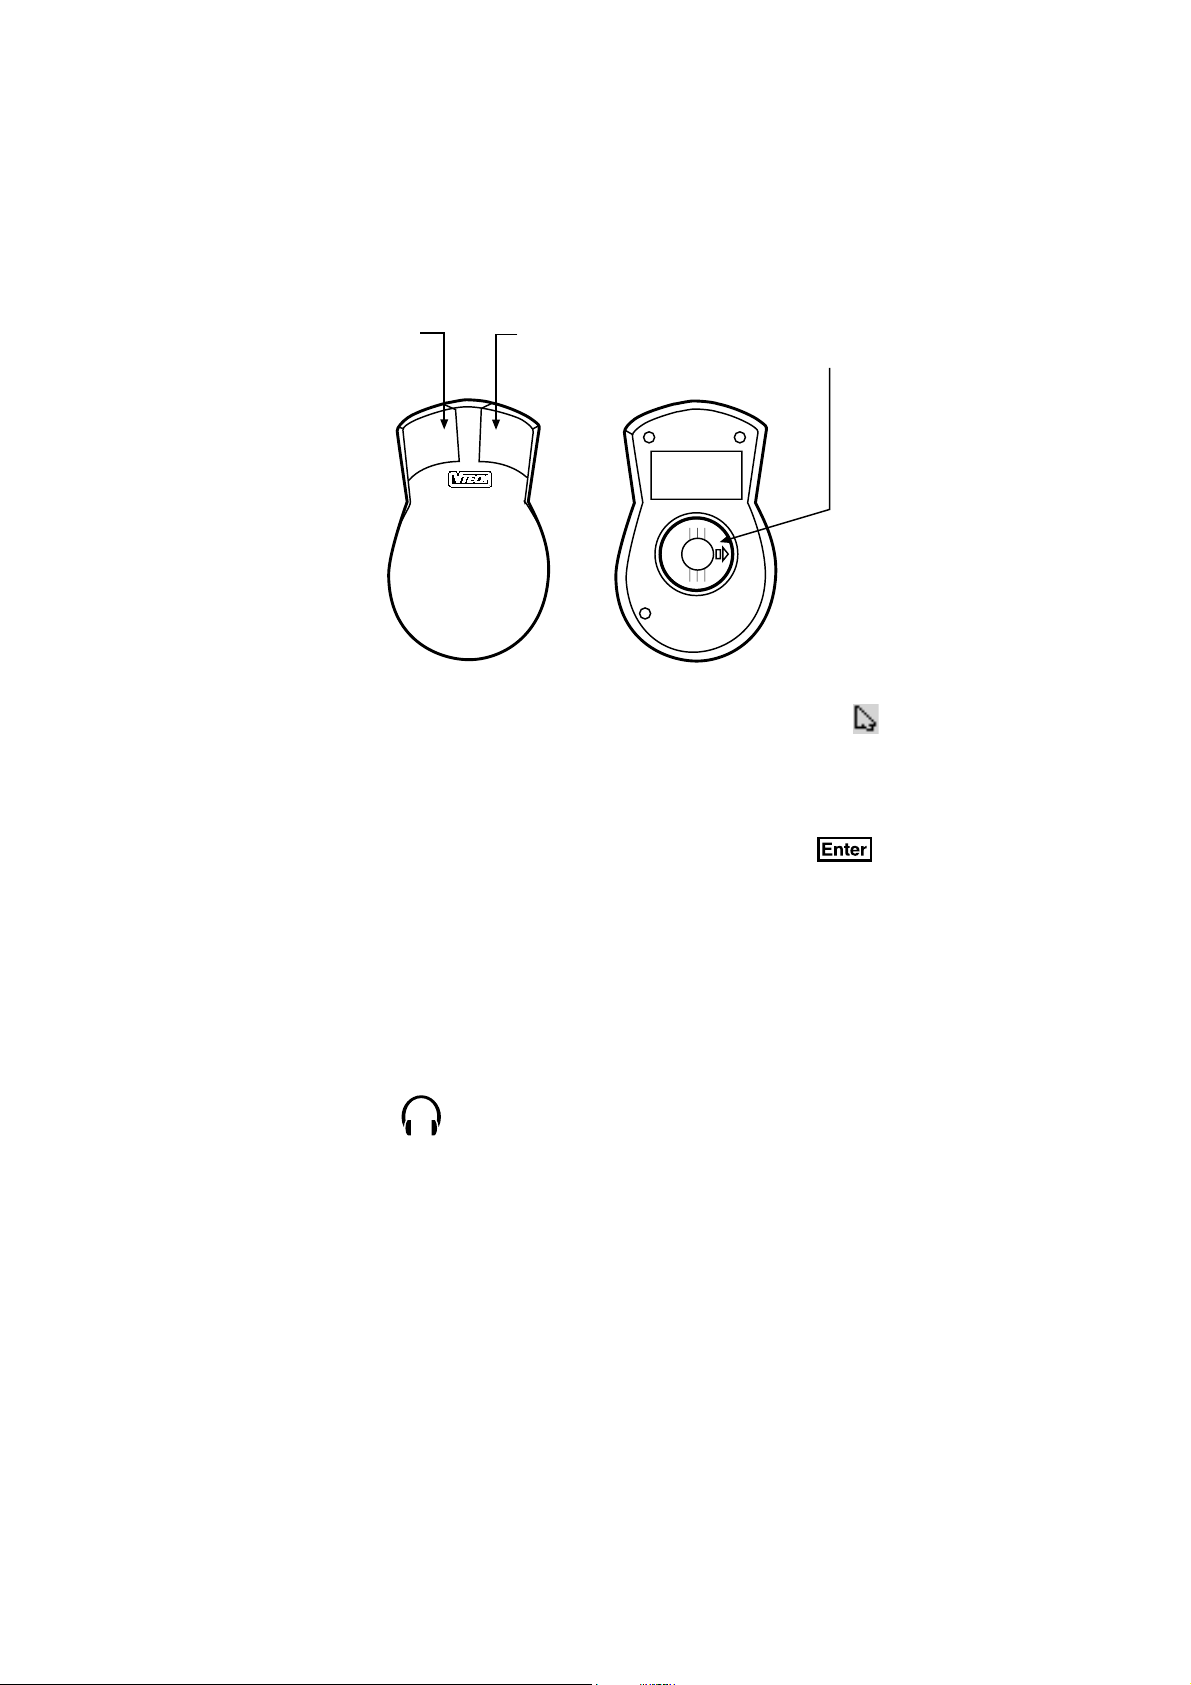
MOUSE
Left Mouse
Button
®
Right Mouse
Button
Cover
To use the mouse, push it in the direction that you would like the pointer on the screen
to move. To move the pointer to the right side of the screen push the mouse to the right.
To move the pointer to the left side of the screen, push the mouse to the left. To move the
pointer to the top of the screen push the mouse away from you. To move the pointer to the
bottom of the screen pull the mouse towards you.
Pressing the left mouse button will have the same effect as pressing . In the Shape
Puzzle and Word Search activities, the right mouse button serves as a flip key.
To clean the mouse, you need to open the cover on the bottom of the mouse. The arrow
indicator on the cover shows the unlocking direction. Once the cover is removed, the
mouse ball should be taken out, and the contents inside the mouse should be cleaned
with a dry cloth. The mouse ball should also be cleaned with a dry cloth. Once you have
finished cleaning the mouse, place the mouse ball back into the mouse, place the cover
back on the mouse and lock the cover by pushing the cover in the opposite direction
of the arrow indicator.
EARPHONE JACK
The POWER ZONE
earphones (sold separately) into the earphone jack, you can play with the POWER ZONE
unit without disturbing others.
TM
learning product has an earphone jack. By plugging any set of standard
TM
5
Page 12

KEYBOARD
The POWER ZONETM learning product has a QWERTY keyboard with 64 keys.
SPECIAL KEYS
In addition to the alphanumeric keys, there are some special function keys:
Esc key:
The Esc key allows you to exit the current activity. By repeatedly pressing the Esc key
you can go back to the main menu.
Help key:
When you are not sure about the answer, press the HELP key. HELP will give you hints,
but at the same time, you will lose a chance to answer a question. Press this key to receive
hints in some of the activities. For multiple choice activities, it will reveal one of the incorrect
answers. In activities like Synonyms, it will show one of the letters in the answers as a
hint. The
Help
key has slight variations among different activities, so for detailed usage,
please refer to the description of the activities.
Caps Lock key:
Press this key to make everything you type appear in capital letters.
Symbol key:
Press the symbol key to see a symbol menu which contains several pages of symbols . Use the
keys to select a symbol. Then press the key or the left mouse button
to confirm the selection.
Repeat key:
Press this key to repeat the instructions and the question (the unit will repeat the question
if the question on the screen is only partially visible).
6
Page 13

Add to Memory bank:
Answer
Press Shift key and the answer key together in Synonyms, Antonyms, Spelling, Word
Correction, Tenses, Part of Speech, Grammar, Word Search, Crossword, Addition, Subtraction, Multiplication, Division, Story Problems, World Customs trivia, Science and Technology
Tr ivia, Entertainment Trivia, Animal Trivia and Sports Trivia to store questions and problems
in Memory Bank activity to review later.
Answer key:
Answer
If a player is not able to answer a question, the player should press the key and
it will reveal the answer.
NOTE:
In the two-player mode, the key cannot be used during the first player's turn.
Enter key:
Press this key after typing each answer so the unit registers your input. In activities like
Word Processor, Telephone Book and Day Planner, this key will place the cursor at the
beginning of the next line for information input.
Backspace key:
To correct an answer before it has been confirmed, press the key to delete the
last character typed in.
Alt key:
Press this key together with an alphanumeric key to have the character on top right hand
corner shown on keys.
Directional keys:
These four keys will move the cursor up, down, left, and right.
Press the key and any of arrow keys together to move the cursor pointer in the
same manner as the mouse.
To move the pointer up the screen, press key and key.
To move the pointer to the bottom of the screen, press key and key.
To move the pointer to the left side of the screen, press key and key.
To move the pointer to the right side of the screen, press key and key.
7
Page 14

The key and the key can be used to simulate the left mouse button.
The key and the .; key can be used to simulate the right mouse button.
Space key:
In normal text editing, the space key acts as a character but when the repeat function is
in use, the space key is able to pause the display while the timer is still running. This pause
function gives readers more time to read the whole question before the answer appears.
Left Player/Right Player keys:
In the 2-player mode of some activities, the players are in head-to-head competition. When
a question is asked, the first person to press his or her appropriate left or right player button
will get the opportunity to answer the question first.
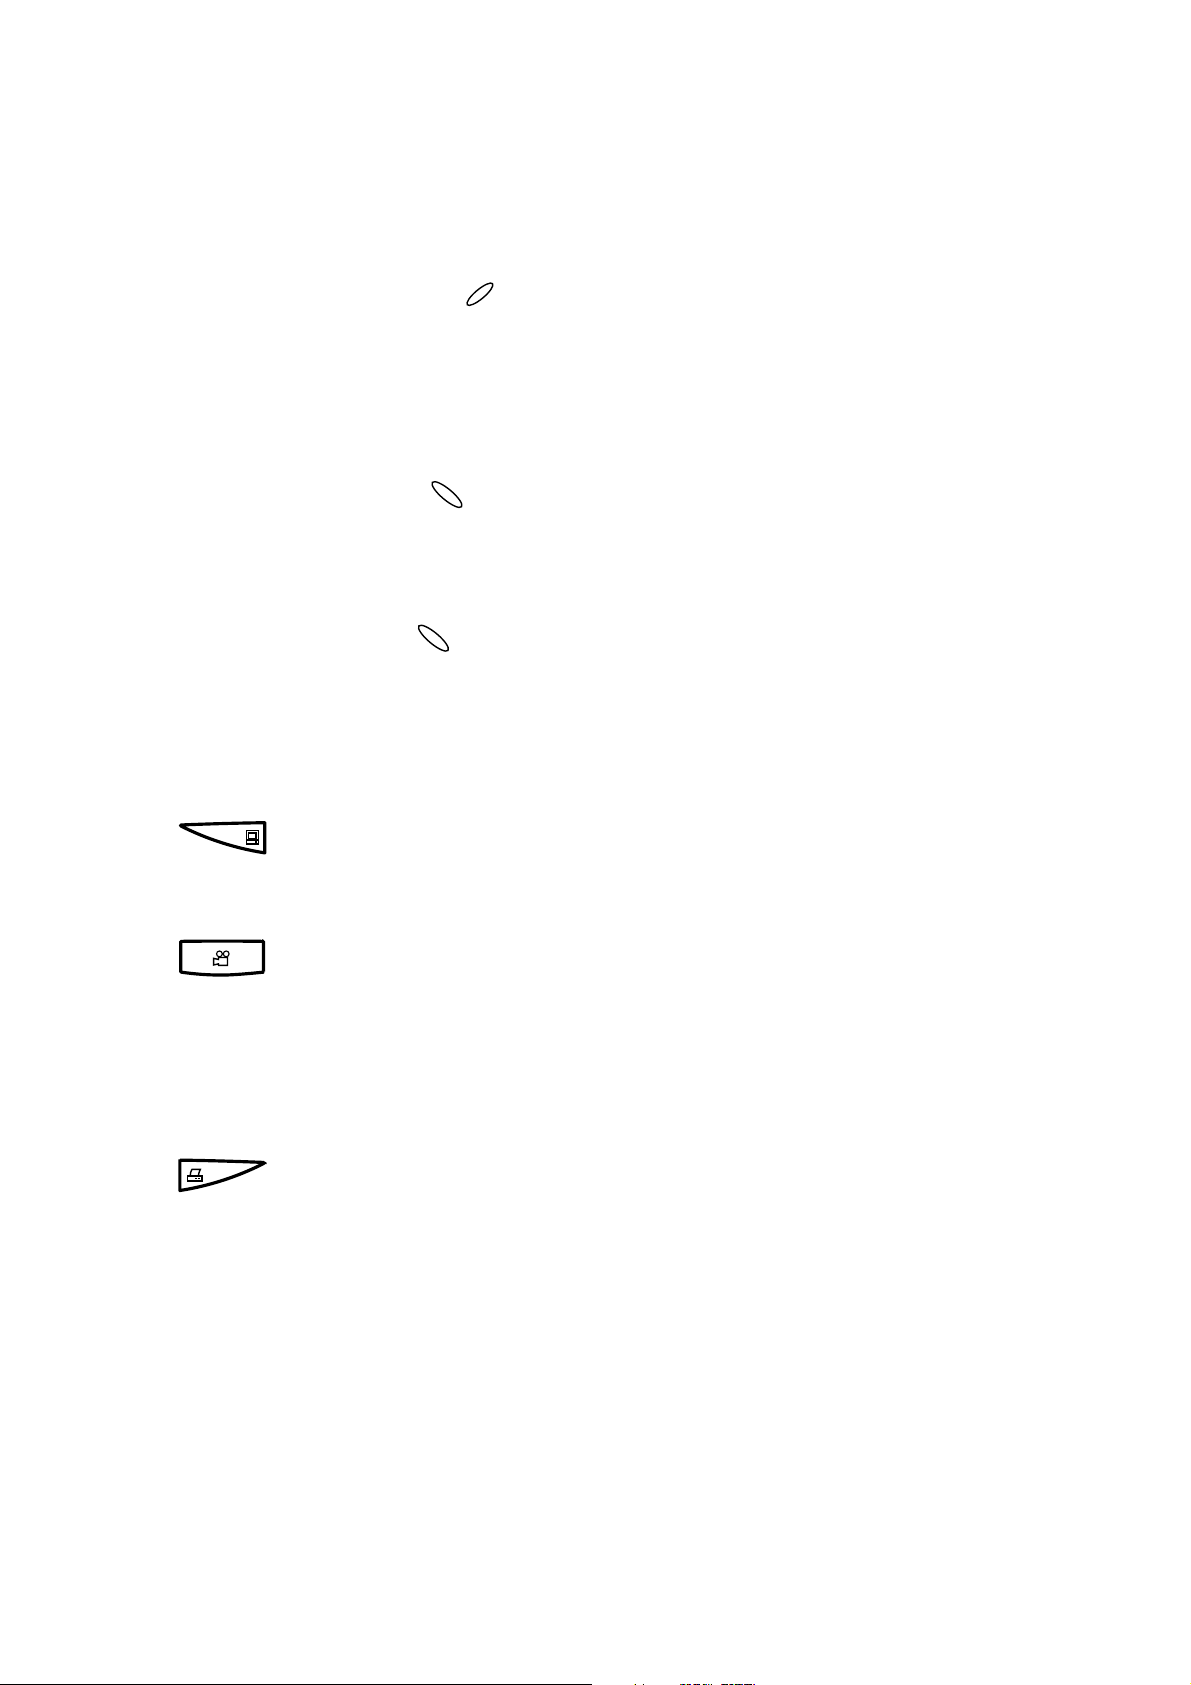
SELECTION BUTTONS
M
CapsLock
Player
Level
System Setup
Demo
Print Screen
rd Games
Wo
Mathematics
Trivia
Logic & Music
Computer Skills
Homework Lab
Cartridge
T
There are 48 activities in the POWER ZONE™ and they are divided into five activity groups.
Press the additional activity selection buttons on the keyboard to go directly to the groups
of activities or other special buttons to manipulate functions on the unit.
TM
Games
rd
Wo
Mathematics
Trivia
Logic & Music
Computer Skills
Homework Lab
Group activity selection buttons:
Cartridge
Activity selection buttons are available to go directly to the selected group activities for Word
Games, Mathematics, Trivia, Logic & Music and Computer Skills.
TM
Homework Lab
TM
button:
Homework Lab
When the Homework Lab™ button is pressed the unit will go directly to the Homework Lab™
activity.
8
Page 15
Cartridge button:
When the cartridge key is pressed the unit will run the activity(ies) on the cartridge. If
there is no cartridge in the door, the unit will show an error message.
NOTE: When inserting or taking out a cartridge or plugging in or removing the mouse,
please make sure the unit is turned OFF.
Player
Cartridge
Player button:
Press this button and the status window will pop up which allows a player to choose the
1-player or 2-player mode in the activities that have a 2-player mode.
Level
Level button:
Press this button and the status window will pop up which allows a player to change the level
of difficulty in some of the activities. There are six levels, with the first level being the easiest
and sixth level being the most difficult.
SYSTEM SETUP
System setup key:
Press this key and the system setup screen will pop up. For details in setting, please
refer to SYSTEM SETUP pages 22-25.
Demo key:
The demo key is available at any time to demonstrate the activity(ies) to the user. The
demo key will demonstrate five randomly selected activities and then return to the main
menu. When the demo key is pressed again, another five activities will be demonstrated
randomly. lf the demo key is pressed when a player is in an activity, it will demonstrate
that particular activity. Once the demonstration is done, it will return to either the menu
or the activity.
Print Screen key:
This key is used to print anything that appears on the screen. Press the print screen key to
send the current screen to printer (when connected to a printer) or a personal computer (when
VTECH POWER LINK™ is connected). If the unit is connected to a personal computer (using
the VTECH POWER LINK™ unit), a preview will be printed on the connected personal computer
monitor. Please refer to the VTECH POWER LINK™ utilities section for further details.
9
Page 16
DESCRIPTION OF ACTIVITIES
POWER ZONETM Activities
After turning the power ON, you will see the opening animation and the main activity
menus. Activities are grouped into five categories. Select a category first and then
select an activity by using the directional keys or the mouse to move the pointer onto
the desired activity. Press Enter or the left mouse button to start the activity. The following
is a description of levels and modes of play.
Level and Two-Player Mode
ACTIVITY LEVEL TWO-PLAYER MODE
Word Games 1-6 YES
Mathematics Games 1-6 YES
Trivia Games 1-6 YES
Music Maker NO NO
Fences 1-6 YES
Shape Puzzle 1-6 YES
3-D Match 1-6 YES
Treasure Hunt 1-6 YES
Balance 1-6 YES
Tic Tac Box NO YES
Chart Maker NO NO
Typing Challenge NO YES
Calendar NO NO
Day Planner NO NO
Telephone Book NO NO
Calculator NO NO
Spell Checker NO NO
Word Processor NO NO
Foreign Language Cartridge NO YES
Comprehension Cartridge 1-6 YES
Homework Lab
TM
NO YES
10
Page 17
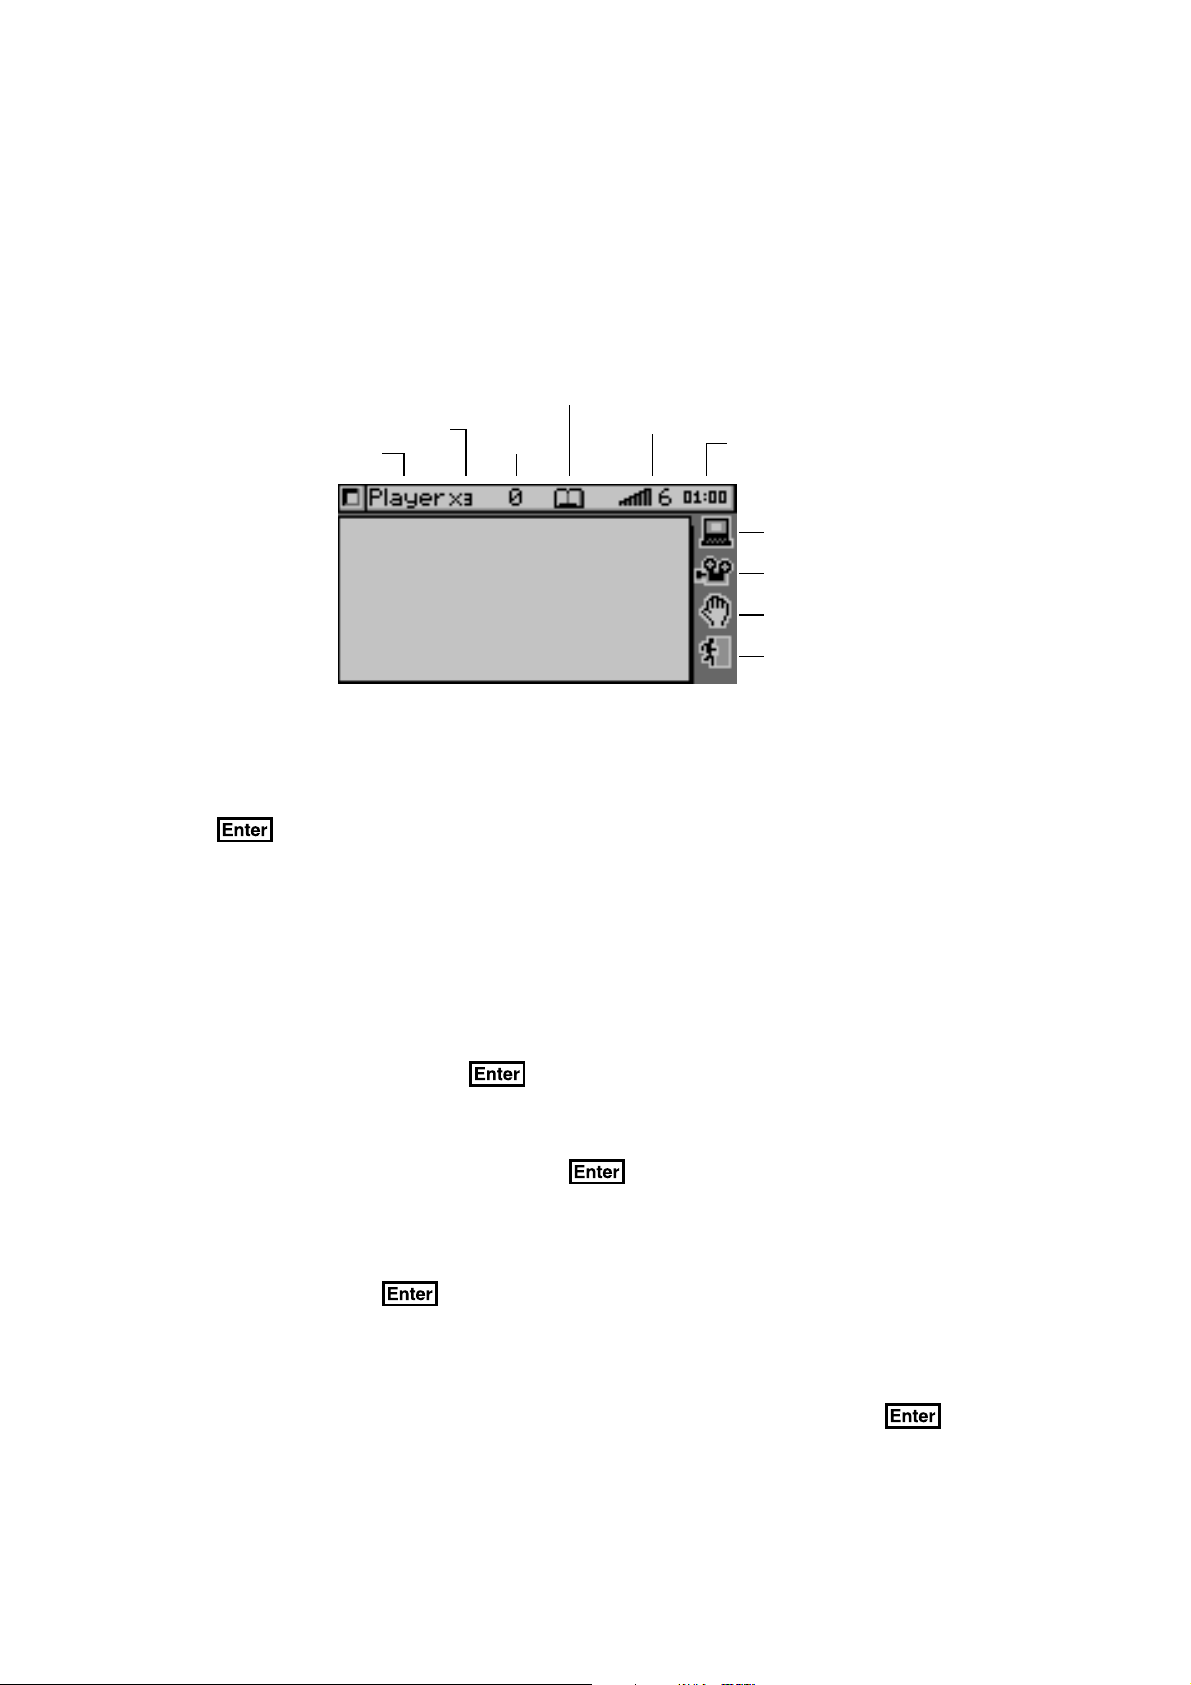
GENERAL DISPLAY
In most of the activities, you will see a status display with information, as well as icons
and a working window. The status information includes the player's name or players' names,
the number of chances remaining and the score for each player. It also shows the level
and the time left in the game.
Add to memory icon
Number of chances
remaining
Name
Score
Level of play
Time left in the game
System setup
Demo
Help
Exit
WORD GAMES
SYNONYMS
A word is displayed on the screen. Type in a word with the same meaning and press
the key. The unit provides the first letter of the word and the number of letters
in the word to help you answer the question.
ANTONYMS
This activity functions in the same way as SYNONYMS except you need to enter a word
with the opposite meaning of the word shown on the screen.
SPELLING
This activity helps you to practice your spelling. An animation will appear and the
POWER ZONETM will ask for the spelling of the word. Type in the correct spelling
of the word and press the key.
WORD CORRECTION
The unit shows a misspelled word and the POWER ZONETM will ask for the correct word.
Type in the correct word and press the key.
TENSES
This activity teaches three basic tenses. They are present, past and past participle. Two
of the three tenses of the word are given and one tense is missing. Type in the missing
tense and press the key.
PARTS OF SPEECH
A sentence is displayed with a highlighted word. Choose what the correct part of speech
is for the highlighted word. You are given three parts of speech to choose from. Type
1, 2, or 3 for the answer or move the pointer to answer. Then press the key or
the left mouse button.
11
Page 18
GRAMMAR
First a sentence with one word missing is shown, then word choices will appear. You can
select the answer by typing 1, 2, or 3 or you can move the pointer to answer. Then press
the key or the left mouse button for the answer that will make the sentence
grammatically correct.
SENTENCE SHUFFLE
First you are shown the correct sentence, then the words of the sentence are put into random
order. You are expected to reconstruct the original sentence.
To select a word, move the cursor or the pointer on to the desired word and then press the
left mouse button. If you make a mistake select the icon and the word return to the
top line. Once you have completed the sentence, press the icon.
WORD SEARCH
This activity shows a 16 x 7 letter matrix with 10 words hidden. You have to locate all
10 words in the puzzle.
To locate a word use the arrow keys or the pointer to highlight the word that you want,
and then press the key or the left mouse button. You can select a word from
a horizontal, or vertical direction. To change the direction of the cursor from vertical to
horizontal use the flip icon. The enables you to switch back and forth between
the horizontal and vertical position.
CROSSWORD
In this activity, you have to solve a crossword puzzle by guessing all 10 words based on
the clues given.
First, choose a highlighted area where a word is missing, and then press the key
or the left mouse button. The clue will then be provided. Input the correct word, and then
press the key or the left mouse button. To proceed repeat the steps stated above.
MATHEMATICS
ADDITION
An addition problem will appear on the screen. Input the correct answer using the number
keys or number pad and then press the key or press the icon.
SUBTRACTION
A subtraction problem will appear on the screen. Input the correct answer using the number
keys or number pad and then press the key or press the icon.
MULTIPLICATION
A multiplication problem will be displayed on the screen. Answer the problem using the
number keys or number pad and then press the key or press the icon.
12
Page 19
DIVISION
A division problem will be displayed on the screen. Answer the problem using the number
keys or number pad and then press the key or press the icon.
ALGEBRA
An algebra question will appear on the screen. Input the correct answer using the number
keys or number pad to find the unknown X and then press the key.
If you want the tool for calculation, press the icon. The calculator will allow you to
perform mathematical functions that will help you solve the value of X. To switch backto
the algebra screen, press the icon. For further information about the calculator, refer
to the calculator
you one turn.
section. If you need additional help, press the icon, but it will cost
FRACTIONS
In this activity, you will see a question involving fractions and you are expected
to find the missing numbers. Answer the problem using the number keys or number
pad and then press the key.
If you want the tool for calculation, press the icon. The calculator will allow you to
perform mathematical functions that will help you to solve the value of the fraction. To
switch backto the fraction screen press the icon. For further information about the
calculator refer to the calculator section.
COORDINATES
This activity shows a coordinate plane and you will be asked to give the coordinates
of a point, plot a point, find a slope of 2 points or plot 2 points by using the slope
that is given. To input the coordinates of each point use the arrow keys or the
pointer . Then press the key or press the icon.
To plot a point use the cursor pointer or the mouse to move the point to the area which
you would like to select and then press the key. To plot two points with a given slope,
plot the two points one at a time. If you need additional help, press the icon, but it will
cost you one turn.
GEOMETRY
A 2-D or 3-D object appears and you will be asked to find the area, perimeter, volume
or surface area of the object. Input the correct answer by using the number keys and
then press the key.
If you need additional help, press the icon. This will display the formula you need
fo solve the problem, but it will also cost you one turn.
STORY PROBLEMS
A mathematical question with multiple choices will appear. Find the answer by typing in
1, 2 or 3 or you can move the pointer to the correct answer. Then press the key
or the left mouse button.
13
Page 20
GRAPHS
A graph appears first and then the unit will ask you a question related to the graph with
multiple choices. You can type in 1, 2 or 3 or you can move the pointer to the correct
answer. Press the
key or the left mouse button.
Enter
BALANCE
In this activity, you will see numbered blocks and a balance with two trays. You have
to balance the blocks on the trays within the time limit.
To move a numbered block, select the block with the mouse, and then press the left mouse
button. Next, move the numbered block with the mouse on to the tray that you want,
and then press the left mouse button. Select the icon when you are done balancing.
CALCULATOR
The POWER ZONE™ has an eight digit fully functional calculator for addition, subtraction,
multiplication and division. You can move the cursor to click on the calculator buttons or
use the keys from the keyboard to perform a calculation.
Please press the AC button to clear the calculator before carrying out each calculation.
TRIVIA
WORLD CUSTOMS
This challenging trivia game tests your knowledge of World Customs. You are asked
a question, and you are given three answers to choose from. You can select your
answer by typing in 1, 2 or 3 or you can move the pointer to the correct answer
and press the
key or the left mouse button.
Enter
SCIENCE AND TECHNOLOGY
This game functions the same way as World Customs Trivia, except it tests your knowledge
of Science and Technology. Multiple choices are given and you can select the answer
by typing in 1, 2, or 3 or you can move the pointer to the correct answer and press the
key or the left mouse button.
Enter
ENTERTAINMENT
This game tests your knowledge of TV shows, movies and music and functions the same
way as World Customs Trivia. Multiple choices are given and you can select the answer
by typing in 1, 2, or 3 or you can move the pointer to the correct answer and press the
key or the left mouse button.
Enter
ANIMAL
This game tests your knowledge of Animals and functions the same as World Customs Trivia.
Multiple choices are given and you can select the answer by typing in 1, 2, or 3 or you can
move the pointer to the correct answer and press the key or the left mouse button.
14
Page 21
SPORTS
This game functions the same way as World Customs Trivia, except it tests your knowledge
in Sports. Multiple choices are given and you can select the answer by typing in 1,2,
or 3 or you can move the pointer to the correct answer and press the
left mouse button.
Enter
key or the
LOGIC & MUSIC
MUSIC MAKER
There are six built-in songs to play or you can create your own songs to edit and save.
You are also able to recall a song you created from the selection menu.
To select a type of music, select any of the musical icons displayed and then press
the left mouse button. You can choose Musical Instruments, Pop Music, Rock 'n
Roll, Musicals, Classicals, Composers, or a personal song. The unit will then play
the music that you have selected.
To select a different instrument to play the song, select any one of the musical instrument
icons and then press the left mouse button. You can choose any one of the following
musical instruments: trumpet, drum, guitar, or piano. Once you have selected the instrument,
select the icon to hear the song played by the chosen musical instrument.
To change the pitch of the music or a specific note, you can select one of the
icons from a sharp , a natural , or a flat . Point to selected
not and press the
key. To hear the song in the new pitch select .
Enter
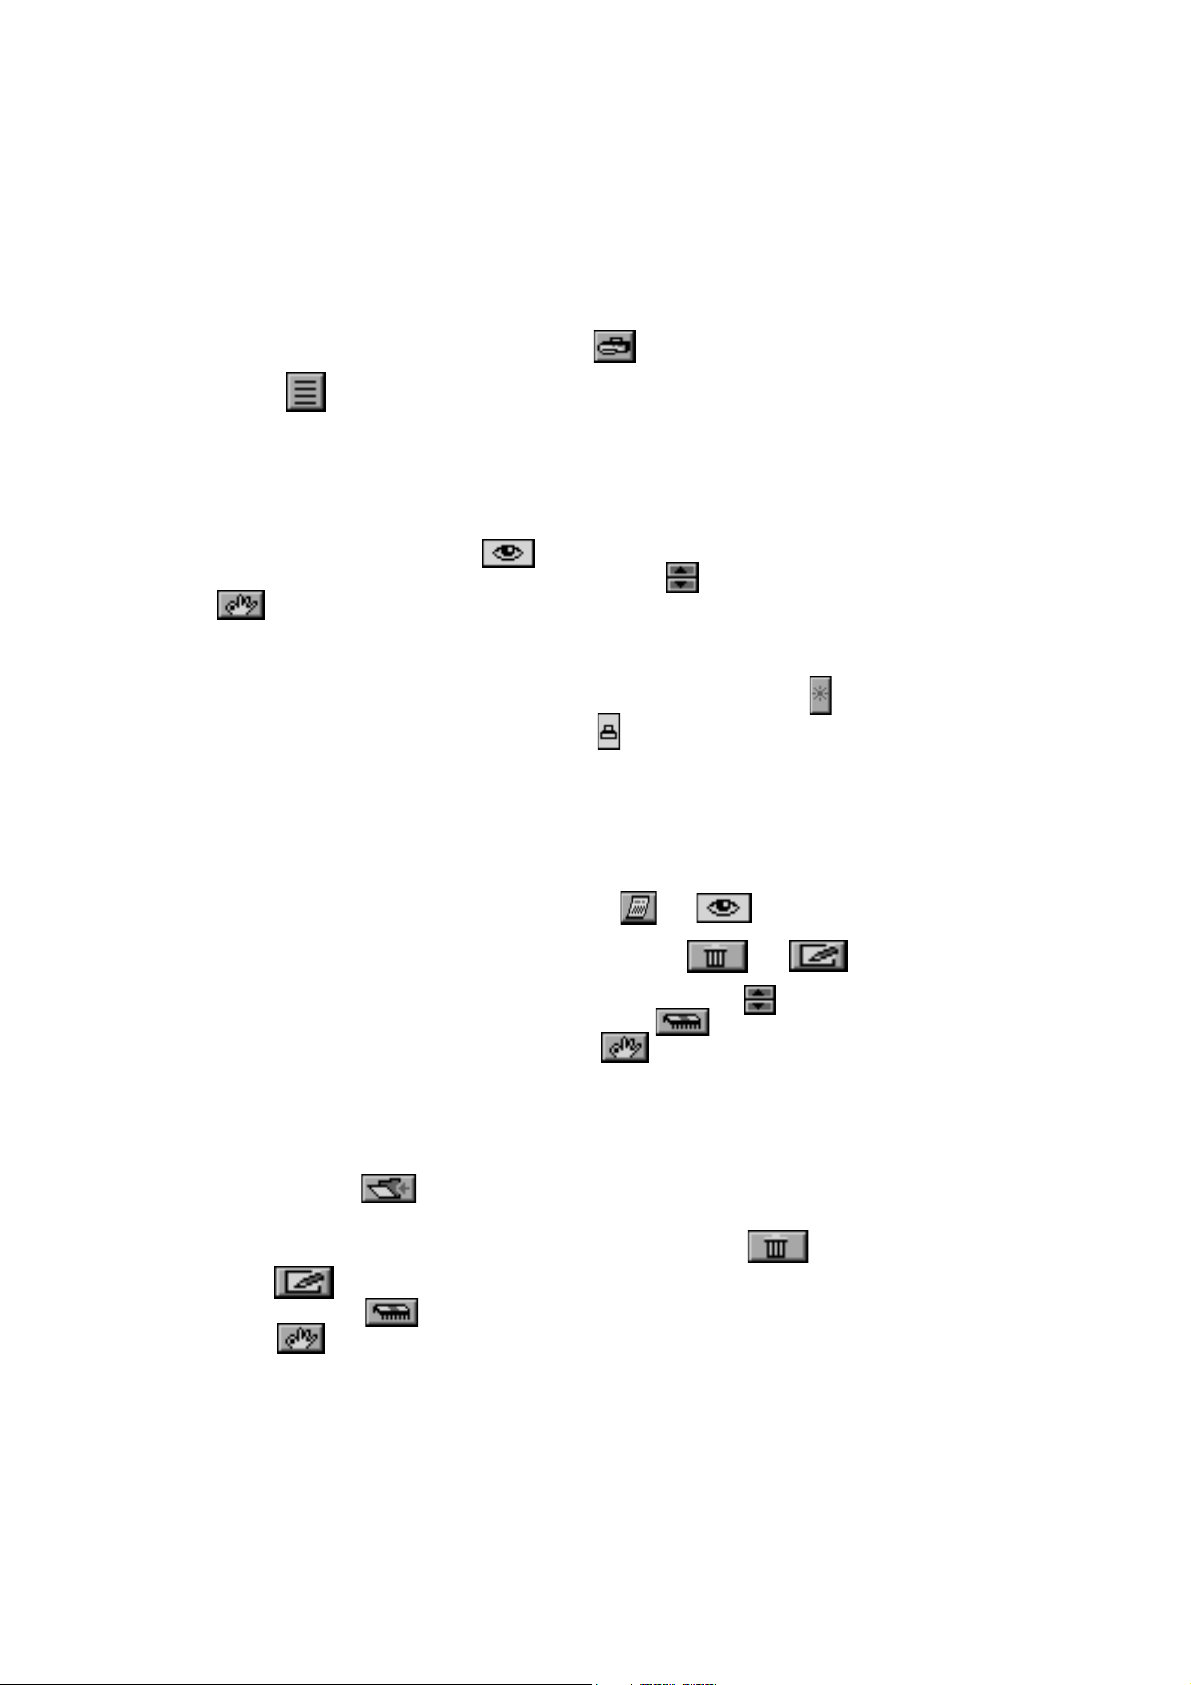
To save one of your edited songs, select the icon. To undo any of your editing select the
icon. To delete any of your editing select the icon. To rewind the music select the
icon. To advance the music select the icon. To stop the music select the
icon. To pause the music select the icon.
FENCES
The unit will display a grid with two different colors, each color representing a player. This
is a 2-player game, you can either play with a partner or the with the computer. Each
player takes turns connecting pairs of dots in their respective colors in an attempt to build
a fence from one side of the board to the other. To connect pairs of dots, first determine
the two dots that you want to connect. Once the cursor is in the middle of the two dots,
press the left mouse button.
SHAPE PUZZLE
The unit will display a figure and you have to use the 7 shapes to fill in the figure. To select
a shape, choose one of the shapes provided in the shape box using the mouse. Once you
have selected the shape move the shape to the area that you think it should be located and
press the left mouse button.
You can use the icon or right mouse button to change the direction of the shape
in order to fit properly within the picture. To use this icon, move the selected object to
the and hit the left mouse buttons. You can also use icon to undo placement
of shapes. Once you have completed the shape puzzle, place the pointer on the
icon and press the left mouse button.
15
Page 22
3D MATCH
The unit will display 3-D objects and you will need to select the one that differs from the
other two objects. Type in 1, 2 or 3 or select one of the graphics with the mouse and
press the key or the left mouse button.
TREASURE HUNT
The unit will display a grid. The mission of this game is to find all of the treasure in the
grid. The grid also contains enemies and bonus points. Select a tile on the grid to look
for the treasure and then press the left mouse button.
To find clues on how many treasures there are in a selected row or column, press the
icon, and then press the left mouse button.
TIC TAC BOX
In this game you can either play with a partner or the computer. The object of this game
is to complete as many boxes as possible by connecting the dots.
To connect the dots, first select the two dots that you want to connect by using mouse.
Once the pointer is in the middle of the two dots you would like to select, press the left
mouse button.
COMPUTER SKILLS
SPELL CHECKER
This activity is used to check the correct spelling of words. Type a word you want to check
and press the key to confirm. If the word is spelled correctly, the unit will advise
you that the word is correct, but if the word is not in the dictionary, it will advise you that
the word cannot be found, and the unit will offer you a suggested list of words.
WORD PROCESSOR
The POWER ZONETM offers you one of the most important applications found in
computers- processing. With the word processor documents can be created, edited,
saved and printed.
The word processor activity has three menu icons along the top left corner
of the screen. They will give you a clear understanding of the primary functions of the
word processor activity.
FILE
Load load a file from the optional RAM cartridge or the VTECH POWER LINKTM*
New create a new file
Save save the file onto the optional RAM cartridge or the VTECH POWER LINKTM*
Delete delete a file from the optional RAM cartridge or the VTECH POWER LINKTM*
Print print the current file
• This command is available when the RAM cartridge is inserted or the VTECH
POWER LINKTM is hooked up to a personal computer.
16
Page 23
Note: For information on how to order the optional RAM cartridge or the VTECH POWER
LINK™ please consult your retailers or our Consumer Services Department.
Load
Load is the command used to retrieve an existing file from the optional RAM cartridge
or personal computer. Select Load from the FILE menu and it will show a loading menu.
Then select the icon to load a file from the RAM cartridge or the icon to load
a file from the personal computer (please refer to the VTECH POWER LINK
TM
utilities
section for further details). After you select the source, it will list all the files. Select
the file you want to retrieve and press the key, or the left mouse button. The
chosen file will then appear on the screen.
New
Every time you enter the Word Processor activity, it will show the last file you worked on.
New is the command to create a new file. Select New from the FILE menu and it will
ask whether you want to quit the current document. If you type "Y", it will clear the memory.
If you type "N", it will return you to the document.
Save
Saving a file is a very important option in Word Processing because if you forget to save
the file, you will not have the ability to retrieve the file and continue to work on it.
In order to save a file, select Save from the FILE menu and it will show a save menu.
Then select the icon to save a file to the RAM cartridge or select the icon to
save a file to the personal computer (please refer to the VTECH POWER LINK
TM
utilities
section for further details). After you select the source, it will prompt you with the
file name. You need to type in a name, and then press the key to save the
file or revise the name before pressing the key to confirm. Please note that the filename
can be a maximum of eight characters long.
Delete
When you no longer need a file, erasing it is a good idea. Select Delete from the FILE menu
and it will show a delete menu. Then select the icon to delete a file from the RAM cartridge
or the icon to delete a file from the PC (please refer to the VTECH POWER LINK
TM
utilities
section for further details). After you select the source, it will list all the files. Select the file you
want to delete and press the key or the left mouse button to confirm. A message will
ask you for confirmation. Alert! When files are deleted, they will be gone permanently.
Print
In order to use the print feature, you must connect the unit to one of the printers which
works with the POWER ZONETM. Please see the Printer Setup section within System Setup.
It is wise to save your file before printing. Select Print from the FILE menu icon and it
will print the file.
17
Page 24
If the unit is connected to a personal computer (using the VTECH POWER LINK
a preview of your file will be shown on the connected personal computer monitor. Please
refer to the VTECH POWER LINK
TM
utilities section for further details.
TM
unit),
EDIT
Cut cut a block of text
Copy copy a block of text
Paste paste a block of text
Most simple editing can be accomplished by using the and the
When you need to manipulate larger blocks of text, use the block editing features. The
EDIT menu is for editing blocks of text.
Defining a Block
The first step in block editing is to define or mark a block of text. To define a block, place
the cursor at the first character of the block you want to edit and hold down the left mouse
button. When the pointer is at the end of the area you want to mark as a block, release
the left mouse button. After a block of text is defined, use one of the three block editing
tools, cut block, copy block or paste block.
Cutting a Block
To cut a block of text, first define the block and select the icon from the EDIT menu.
The block will be removed from its current position and will be placed in memory. You
can now paste the block in any location in the document.
Del
Ins
keys.
Copying a Block
To copy a block of text, first define the block and select the icon from the EDIT
menu. The block will be placed in memory. You can now add a copy of the block into
any position within the text.
Pasting a Block
After you have used the Cut or Copy option, move the cursor to the position where you
want the block of text to be pasted. Select the icon from the menu and
the block of text you defined will be pasted to the selected location.
Tools
Spell check Spell check of a word
Symbol Insert symbols
Spell Check
The spell check feature checks a word to see if it is spelled correctly. To check the spelling
of a word, move the cursor to the beginning of the word and select Spelling from the
TOOLS menu. If the word does not exist in the dictionary, it will give you a list of possible
words for reference. You are also able to select one of the suggested words for replacement.
Press the key to return to the document.
18
Page 25
Symbol
Symbol gives you a list of useful characters which you can use in your documents. Select
Symbol from the TOOLS menu icon to get a list of characters and symbols for input. Press
the keys to locate a symbol and press the key or the left mouse
button to confirm. Press the key to return to the document.
SHORTCUT KEYS
In order to provide a better user interface, shortcut keys are introduced in Word Processor.
The shortcut keys are used to access a function quickly without moving the mouse around
to select the function. Functions and their corresponding shortcut keys are listed below.
To access a function you must first access the menu. Please see the table below on how
to access these menus.
Menu Function Shortcut Keys
File Alt-F
Load Alt-L
New Alt-N
Save Alt-S
Delete Alt-D
Print Alt-P
Edit Alt-E
Cut Alt-U
Copy Alt-C
Paste Alt-P
Tools Alt-T
Spelling Alt-S
Symbol Alt-B
(For example: to use shortcut keys to Print, you must press Alt-F to get the FILE menu
and then press Alt-P to print).
CHART MAKER
The unit will ask you to input some information in order to make your own chart. First,
select one of the chart icons and then press the left mouse button. You can make a pie
chart , bar chart or pictograph .
Next, select how many sections you want in your chart and then press the left mouse
button. You can have up to five sections in a chart.
To change the values of a section of the chart use the and . Select the once
you have completed your chart .
19
Page 26

HOMEWORK LAB
TM
Homework LabTM allows you to input information and have the unit test you on it. This
will be helpful if you are trying to learn a list of words from a foreign language, states
and their capitals or even chemical symbols. Since you can input any information you
want, the uses are unlimited.
When you start the activity you will be given two choices: Input Data or Knowledge
Challenge .
INPUT DATA
When entering this activity you will first be asked to “Input the original word or phrase.”
Type in the first part of the word or phrase that you want to be tested on. Then press
. For example you could input “Hello”. The unit will then ask you to “Input the
corresponding word or phrase.” Type in the second part of the word or phrase that you
want to be tested on. Then press . For example you could input “Hola” as the
corresponding phrase to “Hello.”
You have now inputted the first set of data. The unit will display the original screen and
ask you to “Input the original word or phrase.” for the second set of data. Follow the directions
as described above. Continue this process until you have entered the entire list.
EDITING DATA
Adding Records
Choose the icon when you want to add another set of data into your existing list.
The record will be added at the end of the list.
Deleting Records
Choose the icon when you want to delete records from your existing list. Before
you choose this icon be sure that you are on the correct record, because you will not
be able to retrieve the information once it has been deleted.
Finding Records
Choose the icon when you want to find a record to review, delete or edit. The
unit will only search for the words or phrases which have been set-up as original words
or phrases. Choose the icon and type in the word or phrase you want to find. Then
press . If the unit locates the record it will display it on the screen. If the record
cannot be found the first record of the list will display.
Editing Records
Use the icon to find the record you want to edit then choose the icon. Choose
the word you want to edit. When you are done editing, press the key to confirm.
KNOWLEDGE CHALLENGE
In Knowledge Challenge the unit will test you on the information you entered. When entering
this activity, you will be given the option to test yourself on either the original word/phrase
list or the corresponding word/phrase list. After the unit displays the word/phrase, type
in the correct answer and press to confirm.
20
Page 27
TYPING CHALLENGE
The unit will display a paragraph. Begin typing the letters displayed in the paragraph. Once you
have finished typing the paragraph, the unit will tell you the speed and accuracy of your typing.
To print a report of your results, select the icon. To start a new typing challenge,
select the icon.
CALENDAR
This activity is a calendar which goes from the year 1900 up to the year 2099. You can
view any monthly calendar between 1900 to 2099.
To select the month on the year that you want the calendar to display, press the box that
displays the month year or the icon. A box will appear with the day, month, and
year. To change the day, month, or the year use the and the left mouse button. Select
the icon once you have completed your selection.
To select a specific date, move the cursor over the date that you want and press the left
mouse button.
To mark a day as a holiday select the date and then select the icon.
To print your personalized calendar, select the icon, and then press the left mouse button.
To input a schedule of a particular date, double click the date.
DAY PLANNER
This activity keeps track of your personal schedule. The Day Planner will start by showing
you the first record (records are sorted in chronological order).
To select a specific day or month, select the or icon.
To delete or edit any mistakes you make select the or icon.
To search for your file once it has been saved select the icon. To check and see
if there is enough memory in the unit select the icon. Once you have completed
inputting your personal information select the icon.
TELEPHONE BOOK
This activity helps you keep track of personal information on your friends and relatives.
The Telephone Book starts by showing the first record (sorted alphabetically by names).
To begin, select the icon and then type in the person’s name, phone number, birthday,
and home address in the specified rows.
To delete or edit any error that you have made, select the icon for deleting, and
select the icon to edit your mistakes. To check and see if the unit has enough
memory select the icon. Once you have completed inputting your personal information,
select the icon.
21
Page 28

MEMORY BANK
You can use the memory bank to store questions from the following activities: Synonyms,
Antonyms, Spelling, Word Correction, Tenses, Part of Speech, Grammar, Word Search,
Crossword, Addition, Subtraction, Multiplication, Division, Story Problems, World Customs
Trivia, Science and Technology Trivia, Entertainment Trivia, Animal Trivia, Sports Trivia.
To store a question or problem in the memory bank choose the icon or press the
key and .
You are then asked if you want to add the question or problem into the memory bank.
If you answer "Y" you need to assign a code to the question or problem.
When you enter the Memory bank activity you need to choose which stored question or
problem you want to answer. Highlight the question you would like to answer and then
press key. If no question or problem has been stored in the Memory bank activity
you can not operate this activity.
SYSTEM SETUP
System Setup is available during the use of any activity. Press the icon to enter
System Setup. Inside the System Setup, you are able to choose the following items:
Printer Setup
Icon Setup
Power Link
Date Format
Number Entry
Screen Saver
TM
Setup
PRINTER SETUP
There are a number of printers which POWER ZONETM is compatible with. Please refer
to the printer list included in the packaging for more details on compatible printers. Printer
Setup allows you to select any one of the printers that POWER ZONETM supports.
After selecting a printer model, you can print a document from Word Processor or print
a screen. Word Processor has a print command within the activity. When you want to
print what you see on the POWER ZONETM screen press the button. When
using a color printer the unit will print in color.
NOTE:
1. When using a COLOR PRINTER that only holds one cartridge, using a black
cartridge may result in a printing error. Please select the generic version of the
printer model to avoid receiving an error message.
2. The POWER ZONETM may also work with other models from the manufacturers
that where included on the printer list. The unit has not been tested with printers
that are not listed.
22
Page 29

3. Many printers can be configured to work like a different model. Please refer to
your printer manual for different configurations.
TROUBLESHOOTING FOR PRINTER ERRORS
When a Printer Error message appears, you may have encountered one or more of the
following errors:
1. The power cable is not plugged into the electrical outlet properly.
2. The printer cable is not securely connected between the printer and the unit.
3. The printer is not turned on.
4. The paper has jammed in the printer.
5. The printer has run out of paper.
6. The paper did not feed in time.
Please check for these faults and once you have solved the problem, reset the printer or follow
the Printer Connection instructions in the Preparation section in this manual to try printing again.
If you have any other problem with your printer, please refer to your printer’s manual for details.
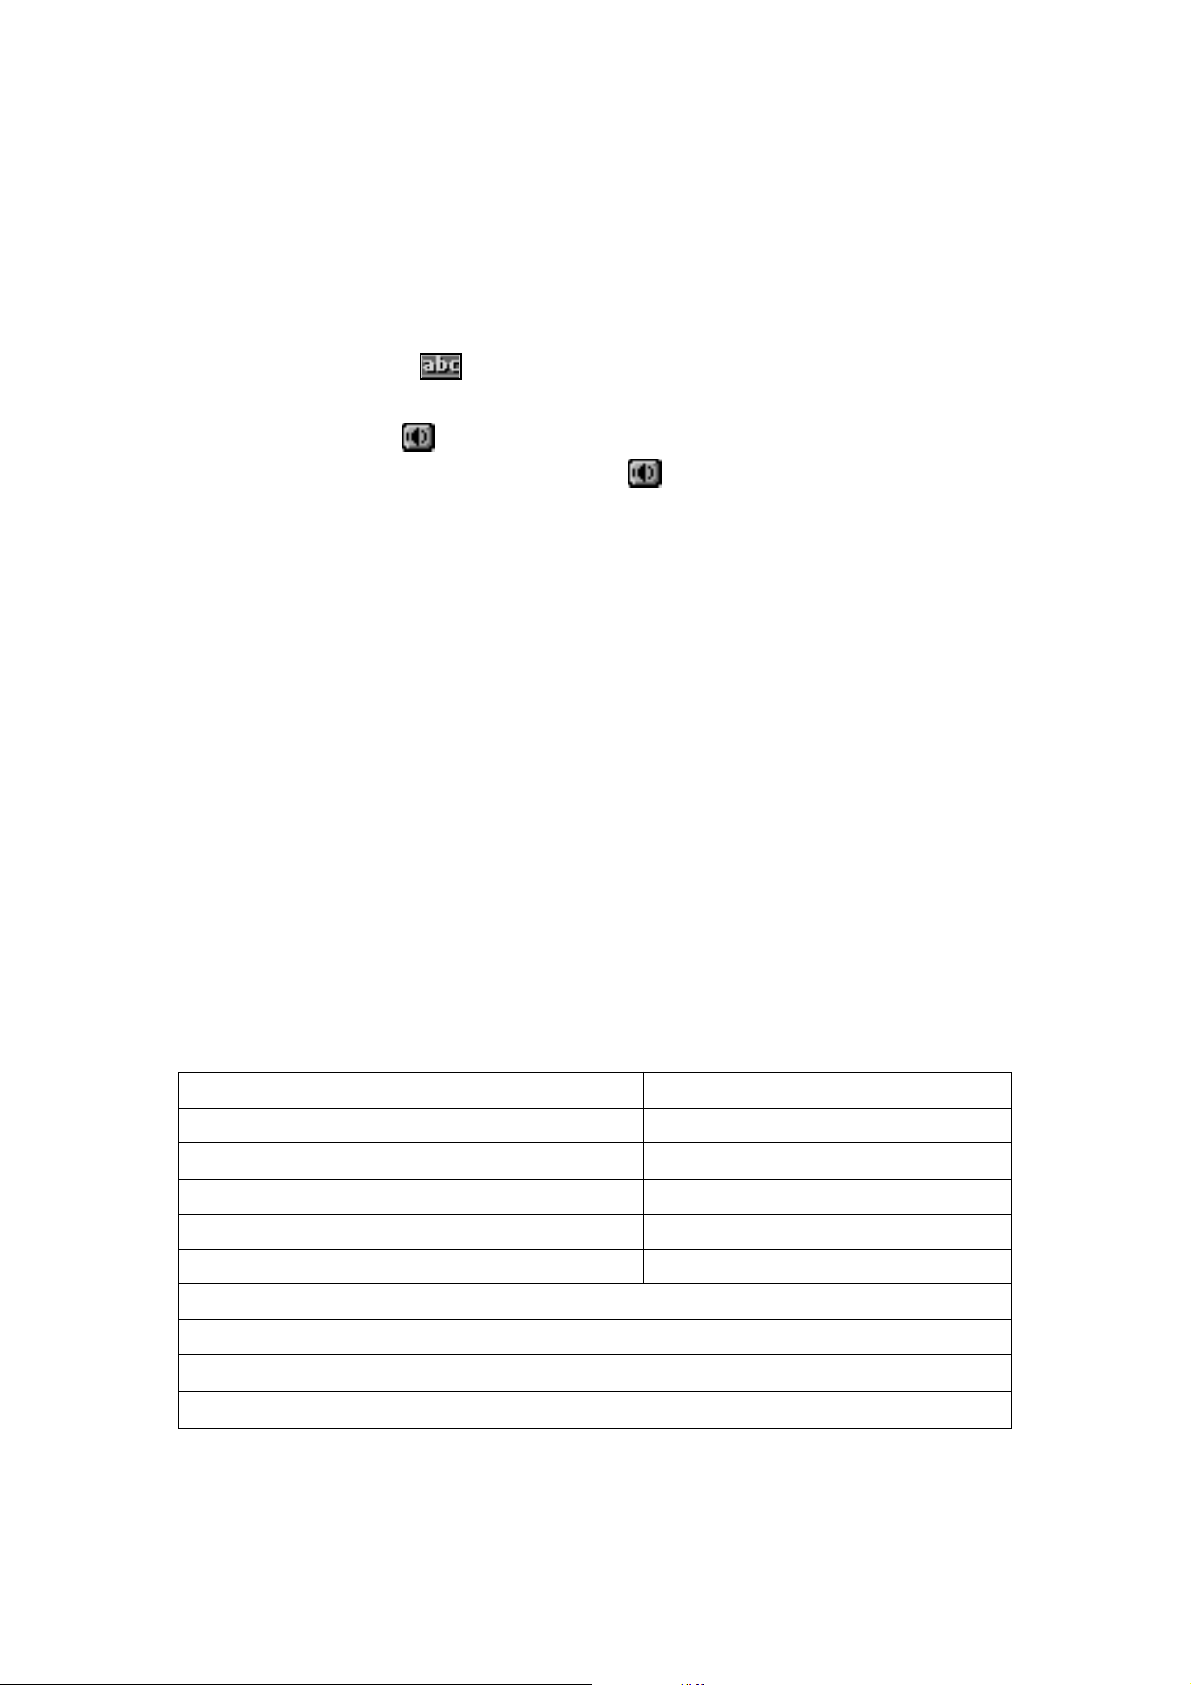
ICON SETUP
The POWER ZONETM learning unit has the ability to show you descriptions of different
icons and functions. When the bubble function is ON, a bubble containing the name of
the icon will pop up when you place the cursor over an icon. To select the bubble ON
function, press the icon from the bubble setup menu. You can also turn OFF this
function by selecting the icon.
NUMBER ENTRY
When answering addition or subtraction questions, different people have different methods for
inputting their answers. Some people prefer to input from left to right, while others prefer from
right to left. The unit lets you set the input direction to the way that you prefer. Just select
the Number Entry icon from the System Setup menu. Press for inputting data
from right to left or choose for inputting data from left to right.
DATE FORMAT
The POWER ZONETM learning toy is a product which is sold worldwide. Different
places have different formats for writing the date. In order to accommodate this,
the POWER ZONETM learning unit lets you set the date format that you are
comfortable with. There are two types of formats setup in the unit:
U.S. Format January 1, 1997
European Format 1 January 1997
23
Page 30

SCREEN SAVER
The POWER ZONETM learning unit offers you a feature that can be found on many personal
computers, the screen saver function. When the unit is first turned on, the screen saver
is ON and you can go into the System Setup to disable the screen saver function by
selecting . When screen saver is ON and the unit has been idle for two minutes,
the cursor will change into one of five icons . The icon
will move around the screen to protect it from any permanent damage. The unit will resume
if any key is pressed.
VTECH POWER LINK
The POWER ZONETM learning unit offers you a feature called VTECH POWER LINKTM (sold
separately). VTECH POWER LINKTM offers the following functions:
1. Save File to the personal computer from the Word Processor Activity. This function allows
the user to save a currently editing Word Processor file to the connected personal computer.
2. Load File from the personal computer into the Word Processor Activity.
This function allows the user to load a previously stored Word Processor file from the
connected personal computer to the Word Processor activity.
3. Delete File stored on the personal computer in the Word Processor Activity.
This function allows the user to delete a previously saved Word Processor file in the
connected computer.
4. Print Preview your Word Processing file on your personal computer.
When the unit is connected to a personal computer, this function previews a printout
of the current word processor file on the computer screen.
5. File Upload/File Download
The upload function allows the user to transfer a file between the RAM cartridge and
the personal computer.
To upload a file, click .
To download a file, click .
6. Screen Dump
TM
This function allows the user to display the current POWER ZONETM screen on the
PC monitor. While connected to a personal computer, press the SHIFT key and the
Print Screen key on the POWER ZONETM keyboard to dump the current screen to the
PC monitor.
7. Trivia PC View
This function allows the user to view activities on the personal computer monitor. The
following is a list of activities that work with the PC View feature:
• World Customs Trivia • Science and Technololgy Trivia • Entertainment Trivia
• Animal Trivia • Sports Trivia • Foreign Language
• Parts of speech • Grammar • Story Problem
• Homework Lab
8. Trivia PC Log
24
TM
Page 31

This function allows the user to create a trivia activity log record on the personal computer.
Note:* The file stored in the personal computer will be listed on the personal computer screen.
Please use the following keys on the POWER ZONETM keyboard to select a file.
Keyboard Operation Computer Screen Response
Up Move file selection cursor up
Down Move file selection cursor down
Alt+Up Move file list up one page
Alt+Down Move file list down one page
HOW TO USE AN EXPANSION CARTRIDGE
The POWER ZONETM learning unit offers optional expansion cartridges.
To use a cartridge, follow these steps:
1. Turn the unit OFF.
2. Insert a cartridge into the slot located in the front of the unit with the
label facing up. You should feel the cartridge click into place.
3. Turn the unit ON.
4. Press the button on the keyboard and the cartridge activities will be accessed.
NOTE: For information on purchasing cartridges, call our Consumer Services Department
at 1-800-521-2010 in the U.S. or 1-800-267-7377 in Canada. A service representative will be happy to help you.
EXPANSION CARTRIDGE:
READING COMPREHENSION
A paragraph will appear first. Read the paragraph and remember the important facts. Questions
related to the paragraph with multiple choice answers will be given. Type in 1, 2 or 3 for the
answer or select the answer with the pointer. Then press the key or the left mouse button.
Please refer to HOW TO USE THE EXPANSION CARTRIDGES for further details.
FOREIGN LANGUAGE
In this activity you will learn foreign language phrases and vocabulary words. The three
languages you will learn about are Spanish, French and German. In the Language Learning
mode you will be introduced to simple foreign language words and phrases. In the Language
Testing mode you will be tested on those words and phrases.
When you start the activity, the unit will ask you what language you want to use for
the on screen text: This will determine the language for all the instructional phrases.
NOTE: You only need to select the instruction language when you first enter the cartridge
mode. The language you select become the defalt language. If you want to reset
the default language you need hit key until you get back to the screen
The unit will then ask you to select either Learning Mode or Testing Mode .
25
Page 32
LANGUAGE LEARNING MODE
In Language Learning mode you will learn the translation of many words and phrases.
First, choose a word or phrase that you want translated from the list by selecting it with
the cursor. You can scroll up and down the list to find the word you want. Next, choose
one of the language icons to pick the language you want the word or phrase translated
to.
NOTE: A speaker icon after the word or phrase means that the Power Zone will say that
word or phrase. Click the speaker icon to hear the word or phrase.
LANGUAGE TESTING MODE
In the Language Testing mode you will be asked to find the translation of a word. The
unit will put a word on the first line of the testing screen. In the bottom part of the testing
screen, three answers will come up. Choose the answer which has the same meaning
as the word in the first line.
SCORING
The following table lists how the scoring is done for each of the activities that keep score
in the POWER ZONETM.
Note: The following activities do not have scoring or a two-player mode.
Music Maker Telephone Book
Chart Maker Calculator
Calendar Spell Checker
Day Planner Word Processor
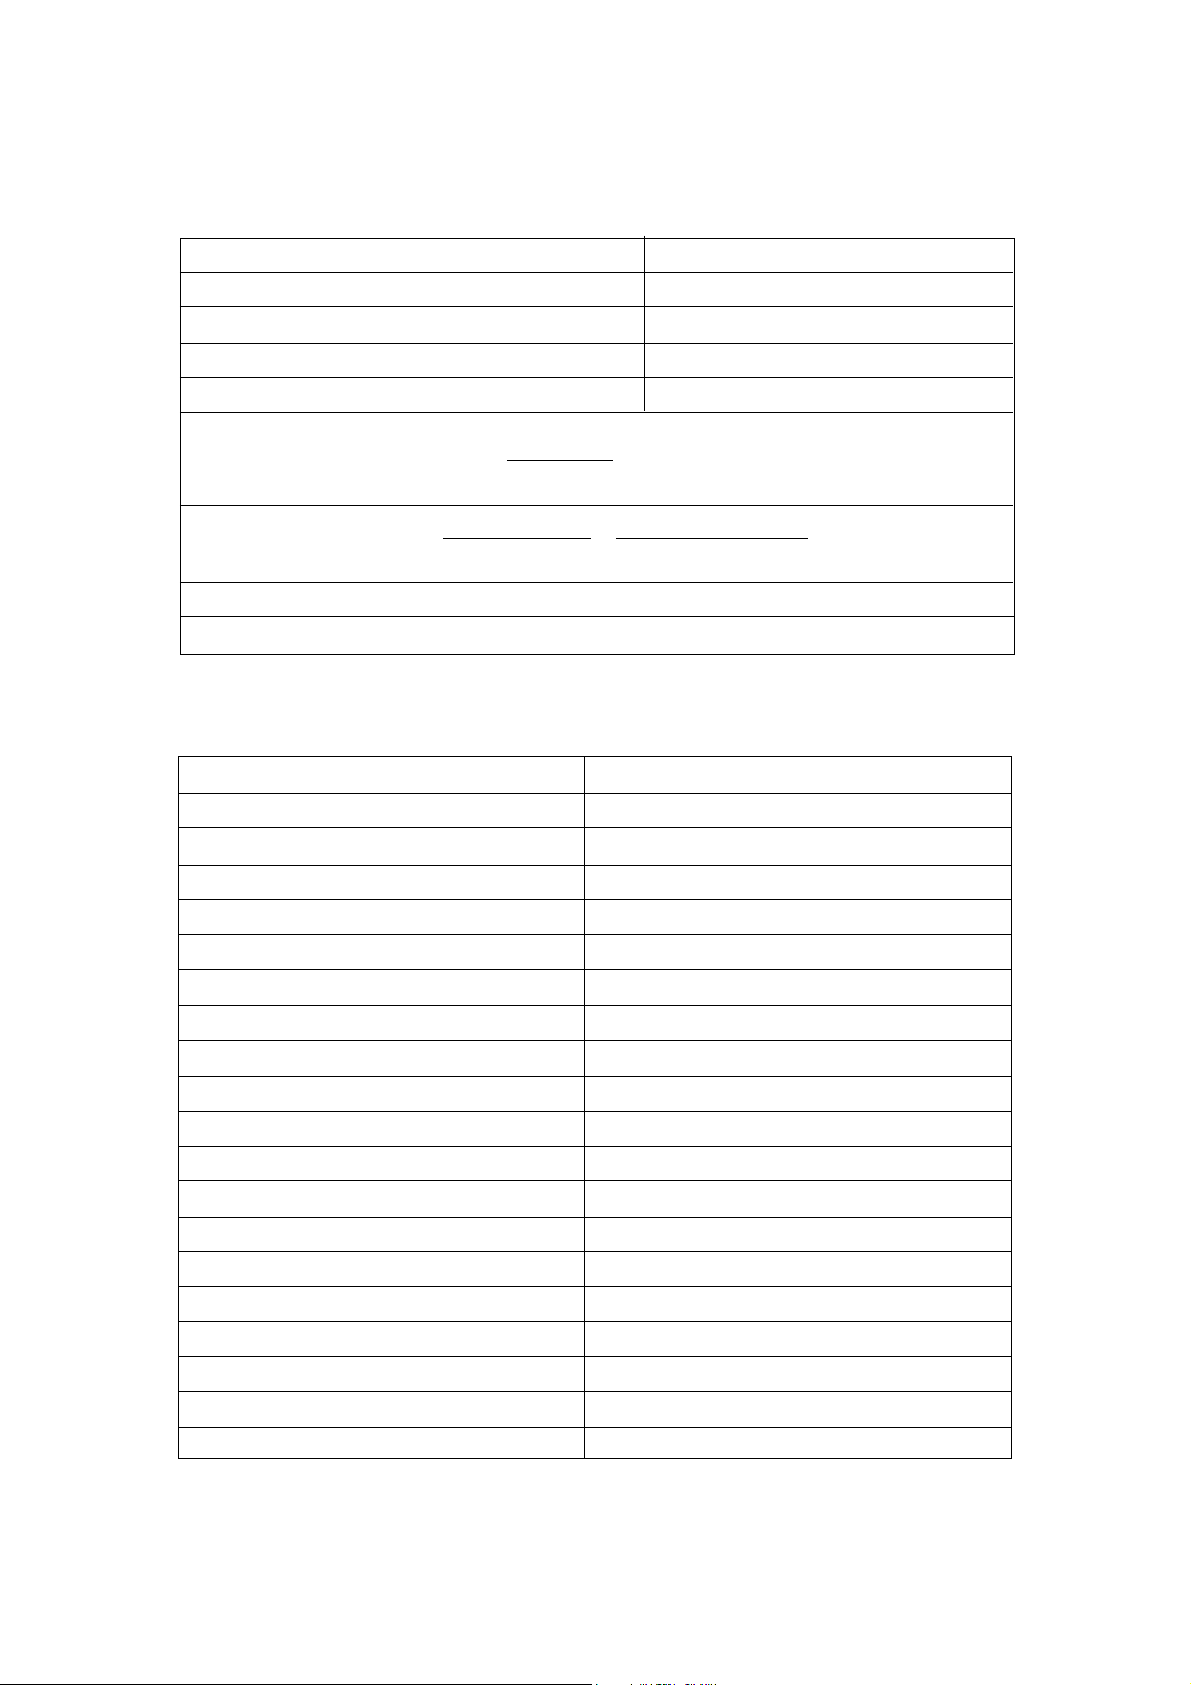
SCORING CODE
Code 1-Player Mode 2-Player Mode
1 Question per round 5 Question per round 5
Correct answer on 1st try 20 Starting Score 100
Correct answer on 2nd try 10 Correct answer
Correct answer on 3rd try 5 1st player 20
2nd player 10
2Words per round 10
Correct answer 10
3 Each second remaining is equivalent to one point.
(i.e. 1min 35 second left will earn 95 points)
26
Page 33
4 Starting Score 150 Enemy -5
Item 20
Bonus 10
Empty 0
Hint -5
5
accuracy= x100%
speed= x
time(second)
6
For Tic Tac Box, every time a box is finished by the player, the player will receive 10 points.
7
For Shape Puzzle and Blance the score is based on the time it takes the player to solve the problem.
POWER ZONETM ACTIVITIES:
Activity Scoring Code
Synonyms 1
Antonyms 1
Spelling 1
Word Correction 1
Tenses 1
Parts of Speech 1
corrected
total
letters
60 seconds / min
6letters / word
Grammar 1
Sentence Shuffle 1
Word Search 2
Crossword 2
Mathematics Games 1
Trivia 1
Music Maker NO
Fences NO
Shape Puzzle 7
3-D Match 1
Treasure Hunt 4
Balance 7
Tic Tac Box 6
27
Page 34
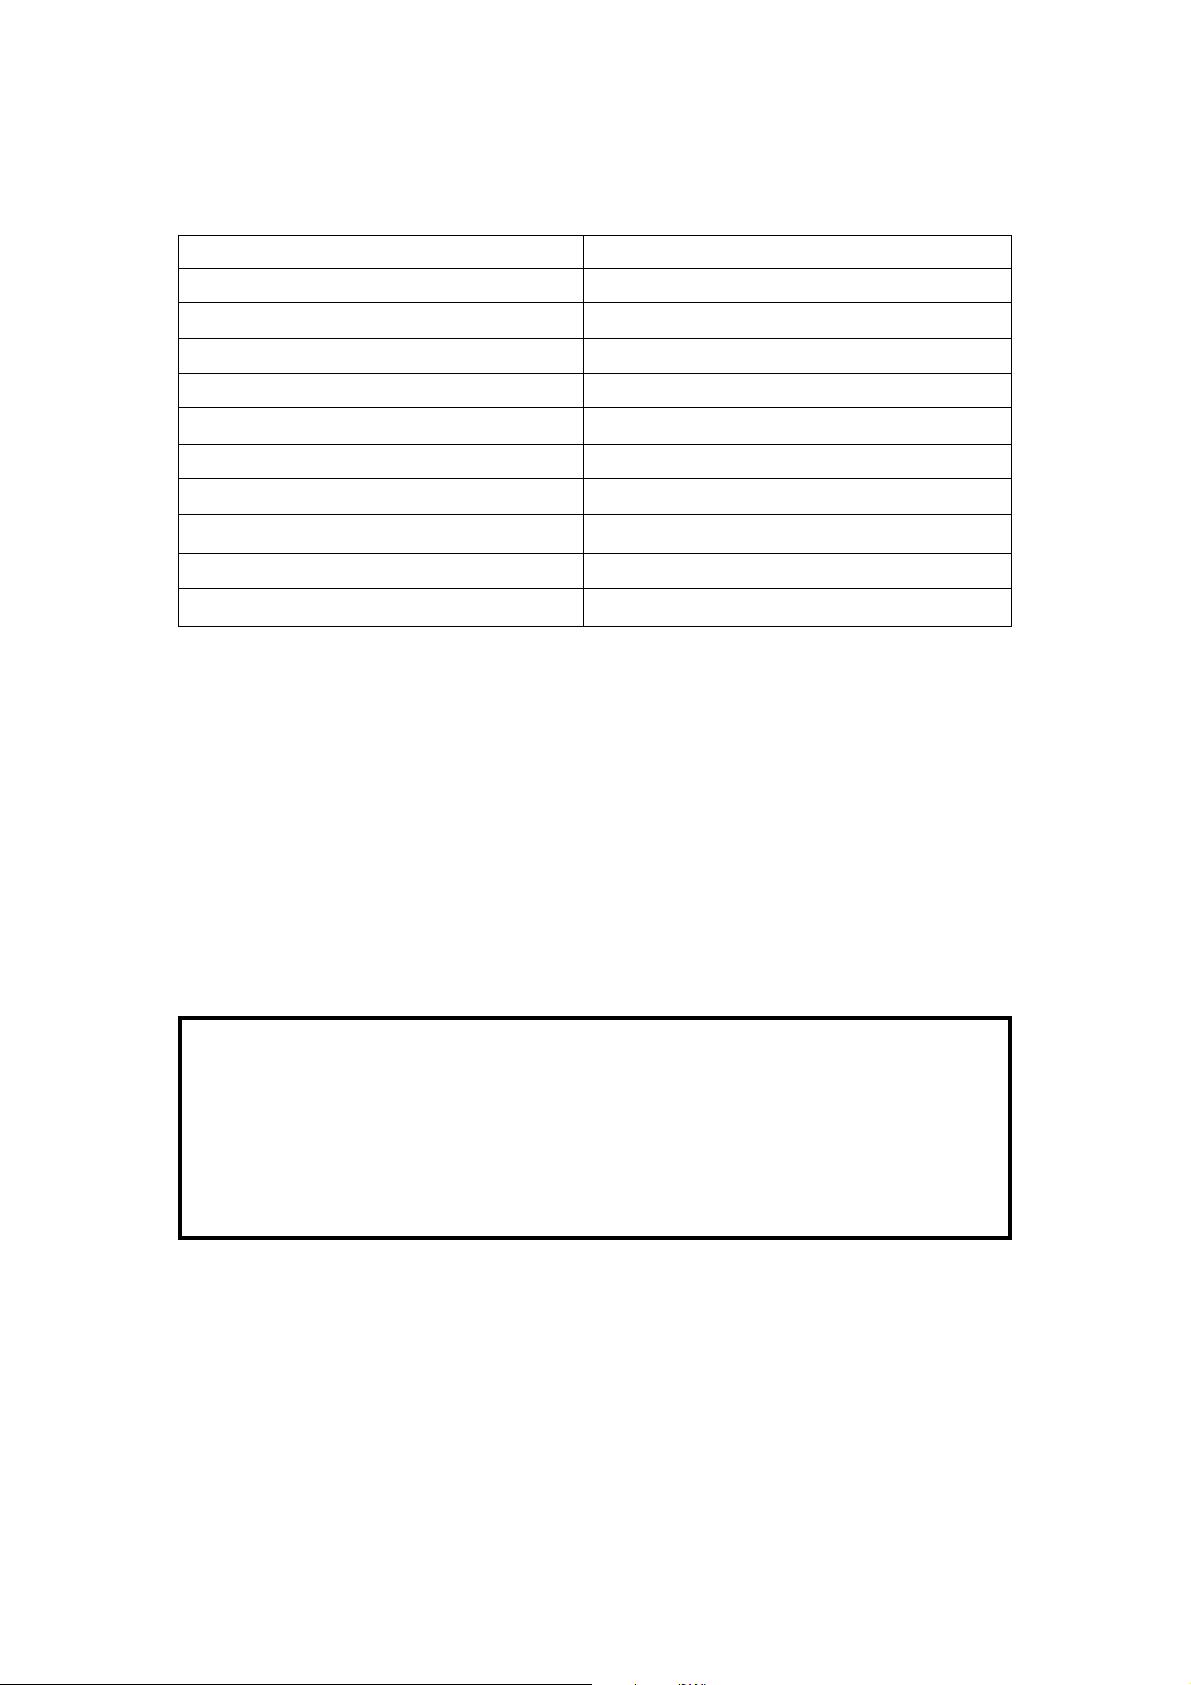
Chart Maker NO
Typing Challenge 5
Homework lab
Calendar NO
Day Planner NO
Telephone Book NO
Calculator NO
Spell Checker NO
Word Processor NO
Reading Comprehension 1
Foreign Language NO
TM
1
CARE AND MAINTENANCE
1. Keep the POWER ZONETM clean by wiping it with a slightly damp cloth.
2. Keep the POWER ZONETM unit out of direct sunlight and away from heat.
3. Do not drop the POWER ZONETM unit on hard surfaces or try to dismantle it.
4. Unplug the AC adaptor when the unit is not in use.
5. Do not expose the unit to moisture or get it wet.
IMPORTANT NOTE :
Creating and developing learning aids is a responsibility that we at VTECH® take very
seriously. We make every effort to ensure the accuracy of the information which forms
the value of our products. However, errors can sometimes occur. It is important for you
to know that we stand behind our products and we encourage you to call our Consumer
Services Department at 1-800-267-7377 in the U.S. or 1-800-521-2010 in Canada with
any problems and/or suggestions that you might have. A service representative will be
happy to help you.
28
Page 35

Note : This equipment generates and uses radio frequency energy and if not installed and used
properly, that is, in strict accordance with the manufacturer’s instructions, it may cause
interference to radio and television reception. It has been type tested and found to comply
within the limits for a Class B computing device in accordance with the specifications
in Sub-part J of Part 15 FCC Rules, which are designed to provide reasonable protection
from such interference in a residential installation. However, there is no guarantee that
the interference will not occur in particular installation. If this equipment does cause
interference to radio or television reception, which can be determined by turning the
equipment off and on, the user is encouraged to try to correct the interference by one
or more of the following measures:
. reorient the receiving antenna
. relocate this product with respect to the receiver
. move this product away from the receiver
CAUTION-ELECTRIC TOY FOR TOY TRANSFORMER
- Not recommended for children under 3 years of age. As with all electrical products,
precautions should be observed during handling and use to reduce the risk of electric shock.
Input: AC120V 60Hz 6W
Output: DC9V 300mA 2.7VA
- The adaptor should be periodically examined for conditions that may result in the risk
of fire, electric sock, or injury to persons (such as damage to the output cord, blades, housing,
or other parts) and that, in an event such conditions, the transformer should not be used
until proper repaired.
29
 Loading...