

Page 1

®
User’s manual
w w w.v t e chp h one s .c o m
Models:
DS6421-2/DS6421-26/
DS6421-3/DS6421-4
BC
Page 2

Congratulations
T
Compatible with
Hearing Aid T-Coil
TIA-1083
on purchasing your new VTech product. Before using this telephone, please
read Important safety instructions on page 107 of this manual.
This manual has all the feature operations and troubleshooting necessary
to install and operate your new VTech telephone. Please review this manual
thoroughly to ensure proper installation and operation of this innovative and
feature rich VTech product. For support, shopping, and everything new at
VTech, visit our website at www.vtechphones.com. In Canada, please visit
www.vtechcanada.com.
Telephones identified with this logo have reduced noise and
interference when used with most T-coil equipped hearing aids and
cochlear implants. The TIA-1083 Compliant Logo is a trademark of
the Telecommunications Industry Association. Used under license.
The ENERGY STAR® program (www.energystar.gov) recognizes and
encourages the use of products that save energy and help protect our
environment. We are proud to mark this product with the ENERGY
STAR® label indicating it meets the latest energy efficiency guidelines.
Register online to get an additional 3-month warranty!
Visit www.vtechphones.com.
Registration
Register your product online for enhanced warranty support.
Product news
Learn about the latest VTech products.
The Bluetooth® word mark and logos are registered trademarks owned by
Bluetooth SIG, Inc. and any use of such marks by VTech Holdings Limited
is under license. VTech Holdings Limited is a member of Bluetooth SIG, Inc.
Other trademarks and trade names are those of their respective owners.
Page 3

Table of contents
Getting started ...........................1
Parts checklist ............................. 1
Installation ................................... 2
Telephone base and
charger installation .................. 3
Battery installation ...................... 4
Battery charging .......................... 5
Installation options ...................... 6
Tabletop to wall
mount installation .................... 6
Wall mount to tabletop
installation ................................ 7
Handset layout ............................ 8
Telephone base layout ................ 11
Handset main menu .................... 13
Bluetooth ....................................15
Introducing Bluetooth .................. 15
Glossary of terms ....................... 16
Bluetooth setup ........................... 17
Add a cell phone ......................... 17
Add a headset ............................. 19
Auto connection .......................... 20
Connecting devices ..................... 21
Review the device list .................. 21
Connect/Disconnect an
active device ............................ 21
Remove a device ......................... 22
Rename a device ........................ 23
Replace an active device ............ 24
Bluetooth connection from
idle mode ................................. 24
Download directory ..................... 25
Interruption to directory
download .................................. 27
View the directory download
information ............................... 27
Change PIN ................................. 28
Telephone settings ....................29
Handset settings ........................ 29
Ringers ........................................ 29
Ringer volume ............................. 29
Ringer tone .................................. 30
Set date and time ........................ 31
Settings ....................................... 32
LCD language ............................. 32
Display alerts ............................... 33
CID time synchronization ............ 36
Rename handsets ....................... 36
Key tone ...................................... 37
Dial mode .................................... 37
Caller ID announce ..................... 38
Website ....................................... 39
Home area code .......................... 39
Cell area code ............................. 40
Telephone base settings ............. 41
Answering system settings ......... 41
Telephone operation ..................42
Make, answer or end
a home call .............................. 42
Call waiting on the home line ...... 43
Make, answer or end
a cell call ................................. 44
Call waiting on the cell line .......... 44
Answer a cell call while on
a home call ............................... 45
Cell phone voicemail ................... 45
Answer a home call while on
a cell call .................................. 45
Conference home and
cell calls ................................... 46
Using the home and cell
lines together ........................... 46
Handset speakerphone ............... 47
Volume control ............................ 47
Silence the ringer ........................ 47
Mute ............................................ 47
Temporary tone dialing ............... 48
Hold ............................................. 48
Handset locator ........................... 48
Equalizer ..................................... 49
Transfer a call .............................. 49
Chain dialing ............................... 50
Redial list ..................................... 51
Review the redial list ................... 51
i
Page 4

Table of contents
Dial a redial entry ........................ 51
Save a redial entry to
the directory ............................. 52
Delete a redial entry .................... 52
Multiple handset use .................53
Share an outside call................... 53
Intercom ...................................... 53
Answer an incoming call
during an intercom call ............ 54
Transfer a call using intercom .......55
Push-to-talk (PTT) ...................... 56
PTT on/off ................................... 56
PTT to a single handset .............. 57
PTT to multiple handsets ............ 58
Answer a PTT call ....................... 59
Change a one-to-one PTT to
intercom call ............................. 59
End a PTT call ............................. 60
Answer an incoming call
during a PTT call...................... 60
Make an outgoing call
during a PTT call...................... 60
Directory .....................................61
About the directory ...................... 61
Create a new entry in the
home directory ......................... 62
Review the directory ................... 63
3-character
alphabetical search .................. 63
Dial a directory entry ................... 64
Edit a directory entry ................... 64
Edit the type of
a directory entry ....................... 65
Delete a directory entry ............... 65
Remove a downloaded
directory ................................... 65
Speed dial ................................... 66
Assign a speed dial slot .............. 66
Reassign a speed dial slot .......... 66
Dial a speed dial entry ................ 66
Delete a speed dial entry ............ 67
Caller ID .......................................68
About caller ID ............................. 68
Information about caller ID
with call waiting ........................ 68
Caller ID history ........................... 69
Memory match ........................... 69
Review the caller ID log ............. 70
View dialing options .................... 71
Dial a caller ID log entry ............. 71
Save a caller ID log entry
to the directory ......................... 72
Delete from the caller ID log ....... 73
Caller ID log display screen
messages................................. 73
Answering system settings ......74
Answer on/off .............................. 74
Announcement ............................ 75
Play your announcement ............ 75
Record your
own announcement ................. 75
Delete your announcement ......... 76
Answering system setup ............. 77
Call screening ............................. 77
Number of rings ........................... 78
Remote access code .................. 79
Message alert tone ..................... 80
Recording time ............................ 80
Answering system operation ....81
Answering system and
voicemail indicators ................. 81
Using the answering system
and voicemail together............. 81
Message capacity ....................... 82
Voice prompts ............................. 82
Call screening ............................. 82
Call intercept ............................... 82
Temporarily turning off the
message alert tone .................. 83
Message playback ...................... 83
Delete all old messages .............. 85
Record and play memos ............. 85
ii
Page 5

Table of contents
Message window displays .......... 86
Remote access ........................... 87
Appendix .....................................88
Display screen messages ........... 88
Handset and telephone
base indicators ......................... 93
Expand your
telephone system ..................... 95
Add and register a handset ......... 95
Deregister handsets .................... 96
Troubleshooting ........................... 97
Important safety instructions ....... 107
Battery ......................................... 108
Precautions for users
of implanted
cardiac pacemakers ................. 108
Operating range .......................... 108
Maintenance ................................ 108
About cordless telephones ......... 109
The RBRC® seal .......................... 109
FCC, ACTA and IC regulations ......110
California Energy Commission
battery charging
testing instructions ................... 112
For C-UL compliance only .......... 113
Limited warranty .......................... 116
Technical specifications .............. 118
Index ............................................119
iii
Page 6
Getting started
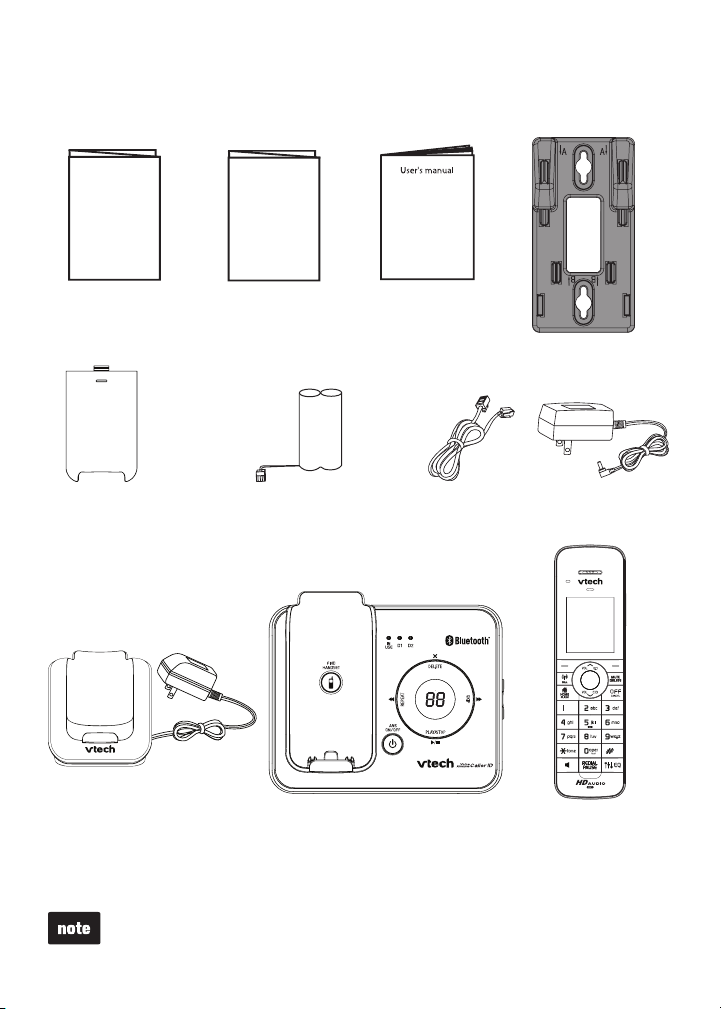
Parts checklist
Your telephone contains the following items. Save your sales receipt and
original packaging in the event warranty service is necessary.
Quick st art guide
Quick star t guide
Battery
compartment covers
(2 for DS6421-2/DS 6421-26)
(3 for DS6421-3)
(4 for DS6 421-4 )
Bluetoot h
quick st art guide
Bluetooth
quick start guide
Batteries
(2 for DS6421-2/DS 6421-
26)
(3 for DS6421-3)
(4 for DS6 421-4 )
User’s manual
Telephone
line cord
Wall mount bracket
Telephone base
power adapter
Charger and
power adapter
(1 f or DS6421-2/ DS6421-26 )
(2 for DS6421-3)
(3 for DS6421-4)
To purchase a replacement battery or power adapter, visit our website at
www.vtechphones.com or call 1 (800) 595-9511. In Canada, go to
www.vtechcanada.com or dial 1 (800) 267-7377.
Telephone base
1
Handsets
(2 for DS6421-2/ DS64 21-2 6)
(3 for DS6421-3)
(4 for DS6 421-4 )
Page 7

Getting started
Installation
Install the telephone base close to a telephone jack and a power outlet not
connected to a wall switch. For optimum range and better reception, place
the telephone base in a central and open location.
When using a Bluetooth wireless technology enabled cell phone with this
telephone, make sure the cell phone is within 15 feet of the telephone base to
maintain a reliable connection between the cell phone and telephone base.
This product may be shipped with protective stickers covering the handsets
and telephone base displays. Remove them before use.
Avoid placing the telephone base too close to:
Communication devices such as personal computers, computer routers,
•
television sets, VCRs, wireless routers (wireless broadband, Wi-Fi, or
802.11) or other cordless telephones.
Excessive heat sources.
•
Noise sources such as a window with traffic outside, motors, microwave
•
ovens, refrigerators, or fluorescent lighting.
Excessive dust sources such as a workshop or garage.
•
Excessive moisture.
•
Extremely low temperature.
•
Mechanical vibration or shock such as on top of a washing machine or
•
work bench.
2
Page 8
Getting started
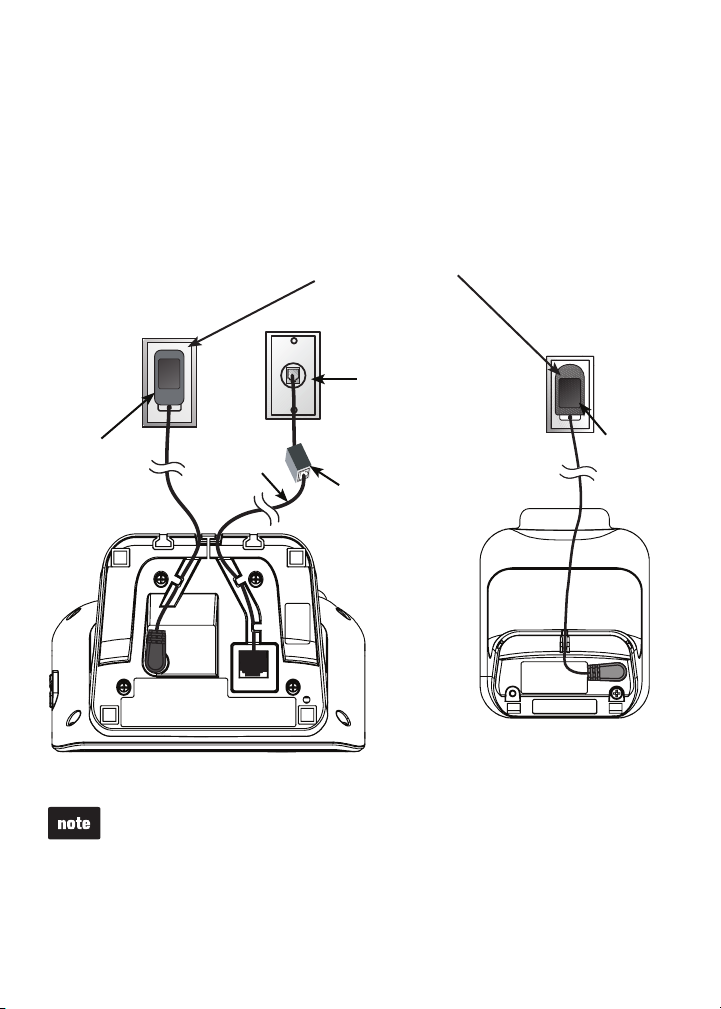
Telephone base and charger installation
Install the telephone base and charger(s) as shown below.
Make sure that the electrical outlet is not controlled by a wall switch.
If you subscribe to digital subscriber line (DSL) high-speed Internet service
through your telephone line, you must install a DSL filter between the
telephone line cord and the telephone wall jack. The filter prevents noise and
caller ID problems caused by DSL interference. Contact your DSL service
provider for more information about DSL filters.
Electrical outlet
not controlled
by a wall switch
Telephone
wall jack
Telephone
base power
adapter
•
•
Telephone
line cord
A DSL filter
(not included)
is required
if you have
DSL high
speed Internet
service
Charger
Telephone base
Use only the power adapters supplied with this product. To order a
replacement, visit our website at www.vtechphones.com or call
1 (800) 595-9511. In Canada, go to www.vtechcanada.com or dial
1 (800) 267-7377.
The power adapters are intended to be correctly oriented in a vertical or
floor mount position. The prongs are not designed to hold the plug in place
if it is plugged into a ceiling, under-the-table or cabinet outlet.
Power
adapter
3
Page 9

Getting started
2
Battery installation
Install the battery as shown below.
Plug the battery connector securely into the socket inside the handset
1.
battery compartment, matching the color-coded label.
Place the battery with the label THIS SIDE UP facing up and the wires
2.
inside the battery compartment.
Align the cover flat against the battery compartment, then slide it towards
3.
the center of the handset until it clicks into place.
Charge the handset by placing it in the telephone base or charger. The
4.
CHARGE light is on when the handset is charging.
1
3
If the handset will not be used for a long time, disconnect and remove the
•
battery to prevent possible leakage.
To purchase a replacement battery, visit our website at
•
www.vtechphones.com or call 1 (800) 595-9511. In Canada, go to
www.vtechcanada.com or dial 1 (800) 267-7377.
4
CHARGE light
2
4
Page 10

Getting started
Battery charging
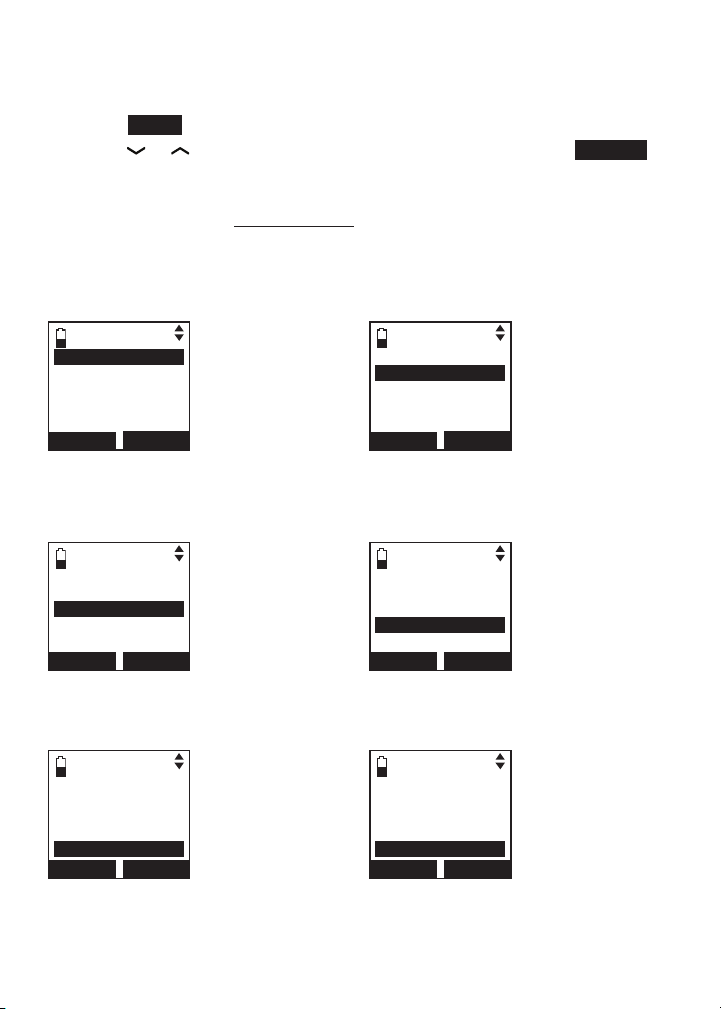
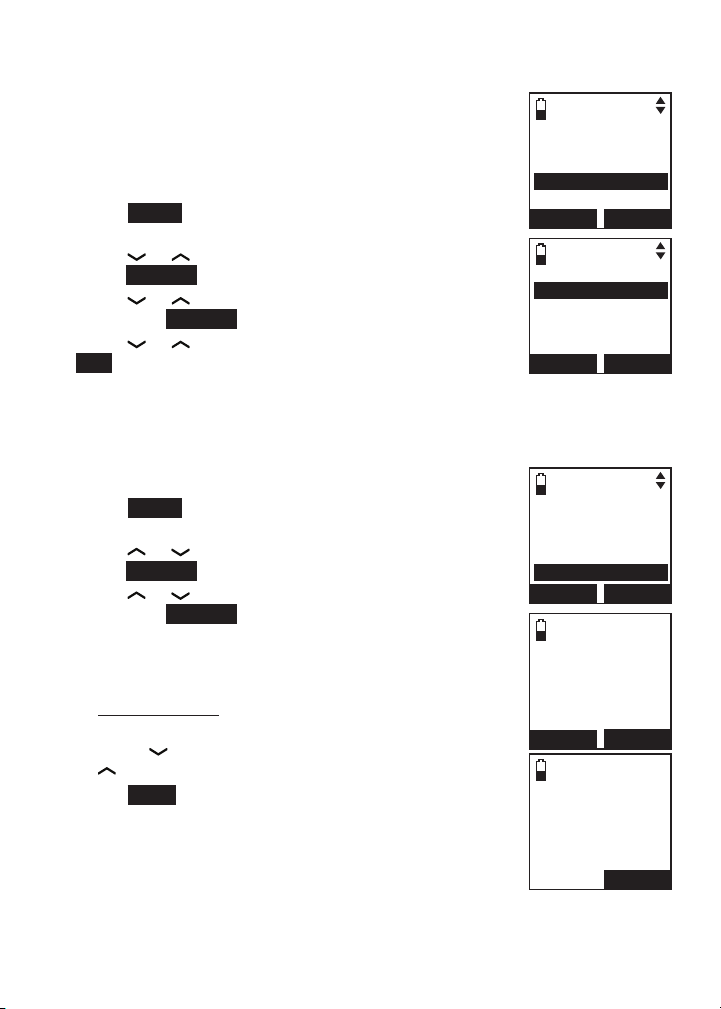
Once you have installed the battery, the handset LCD display
indicates the battery status (see the table below).
For best performance, keep the handset in the telephone base or charger
•
when not in use.
The battery is fully charged after 16 hours of continuous charging.
•
If you place the handset in the telephone base or the charger
•
without plugging in the battery, the screen displays No battery.
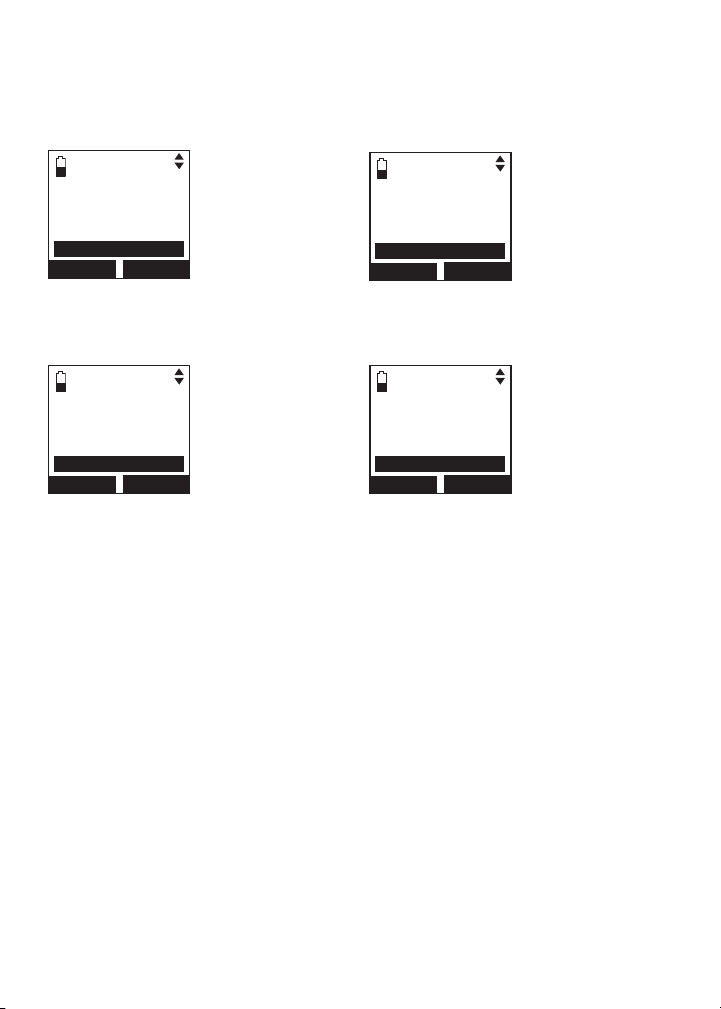
Battery indicators Battery status Action
The screen is blank, or
shows Place in charger
and flashes.
The screen shows Low
battery and flashes.
The screen shows
HANDSET X.
When it is fully charged, you can expect the following performance:
Operation Operating time
While in handset use (talking*) Seven hours
While in speakerphone mode (talking*) Three hours
While not in use (standby**) Five days
* Operating times vary depending on your actual use and the age of the battery.
** Handset is not charging or in use.
Battery has no or very
little charge. The handset
cannot be used.
Battery has enough
charge to be used for a
short time.
Battery is charged. To keep the battery
Charge without interruption
until the screen shows
HANDSET X (at least
30 minutes).
Charge without interruption
until the screen shows
HANDSET X (at least
30 minutes).
charged, place it in the
telephone base or charger
when not in use.
After you install your telephone or power returns following
a power outage, the handset will prompt you to set the
date and time. For instructions, see Set date and time
on page 31. To skip setting, press OFF or BACK.
5
SET DATE
09/30/09
MM/DD/YY
BACK
SET
Page 11
Getting started
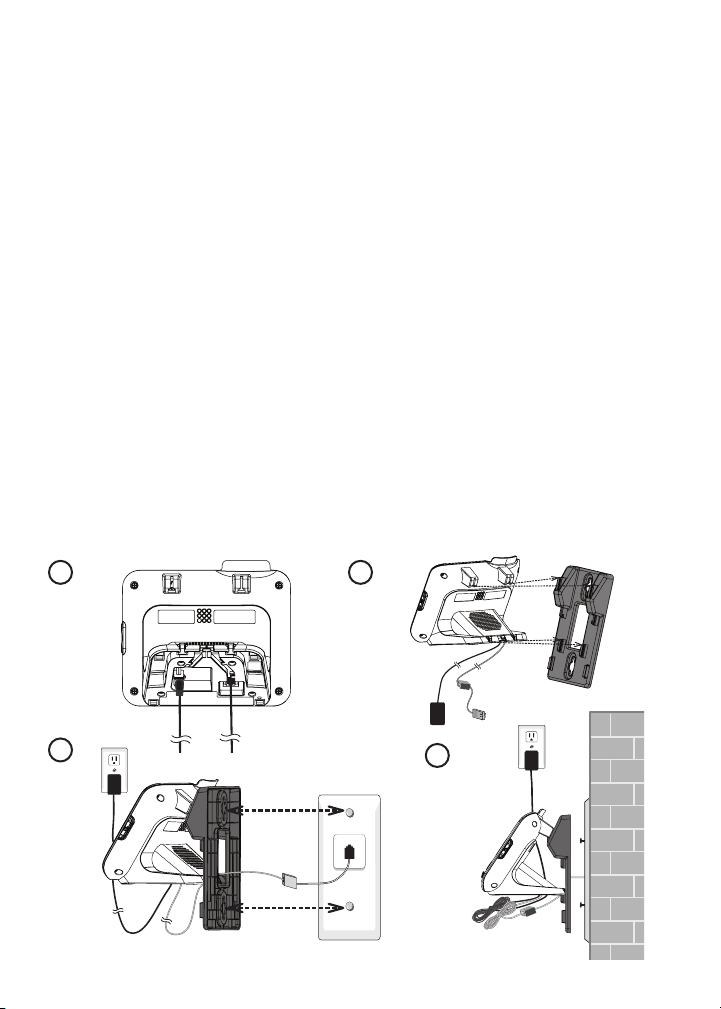
Installation options
Your telephone base is ready for tabletop use. If you want to mount yourIf you want to mount your
telephone on a wall, use the provided wall mount bracket to connect with
a standard dual-stud telephone wall mounting plate. If you do not have this
mounting plate, you can purchase one from many hardware or consumer
electronics retailers. You may need a professional to install the mounting plate.
Tabletop to wall mount installation
Plug one end of the telephone line cord into the TEL LINE jack on the
1.
bottom of the telephone base. Plug the small end of the telephone base
power adapter into the POWER jack on the bottom of the telephone base.
Position the lower portion grooves on the telephone base to the lower
2.
portion tabs (marked B) on the wall mount bracket. Make sure the upper
portion grooves of the telephone base are above the upper portion tabs
(marked A) on the wall mount bracket. Push the telephone base down
until it clicks securely in place.
Route the telephone line cord (or DSL filter) through the wall mount
3.
bracket hole and plug it into the telephone wall jack. Route the power cord
out of the bottom of the telephone and plug it into an electrical outlet not
controlled by a wall switch.
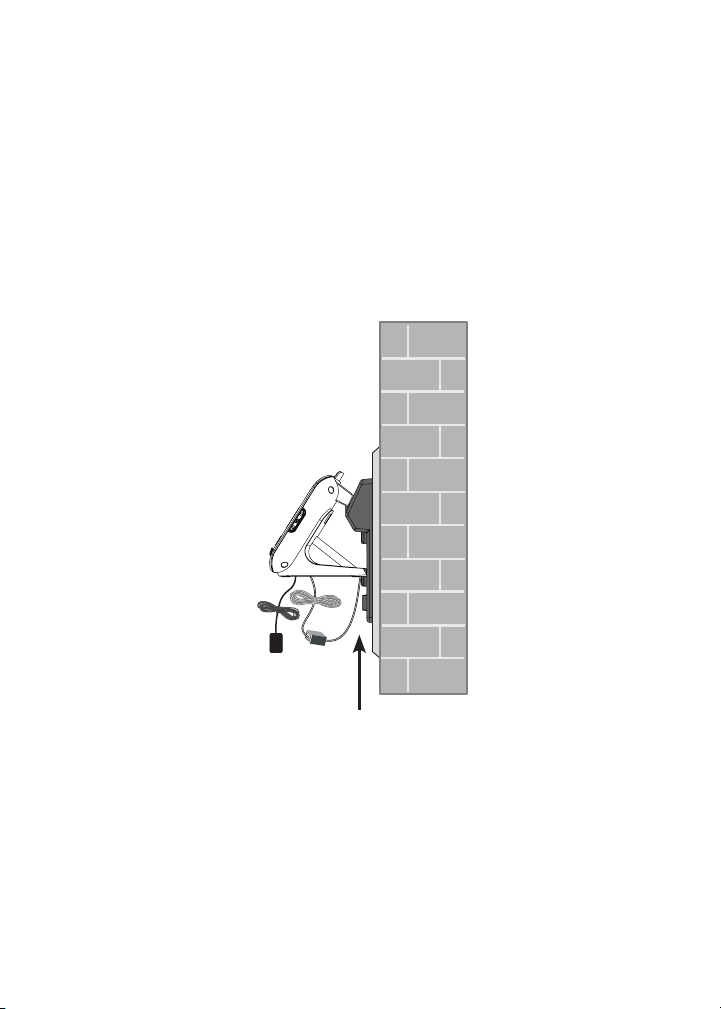
Align the holes on the bracket with the standard wall plate and slide the
4.
bracket down until it locks securely. Bundle the telephone line cord and
power adapter cord neatly with twist ties.
1
3
2
4
6
Page 12
Getting started
Wall mount to tabletop installation
If the telephone line cord and power adapter cord are bundled, untie
1.
them first.
Slide the black wall mount bracket up and remove it from the wall plate.
2.
Unplug the telephone line cord (or DSL filter) from the wall. Unplug the
power adapter from the power outlet.
Slide the telephone base up and remove it from the wall mount bracket.
3.
See Telephone base and charger installation on page 3.
4.
7
Page 13

Getting started
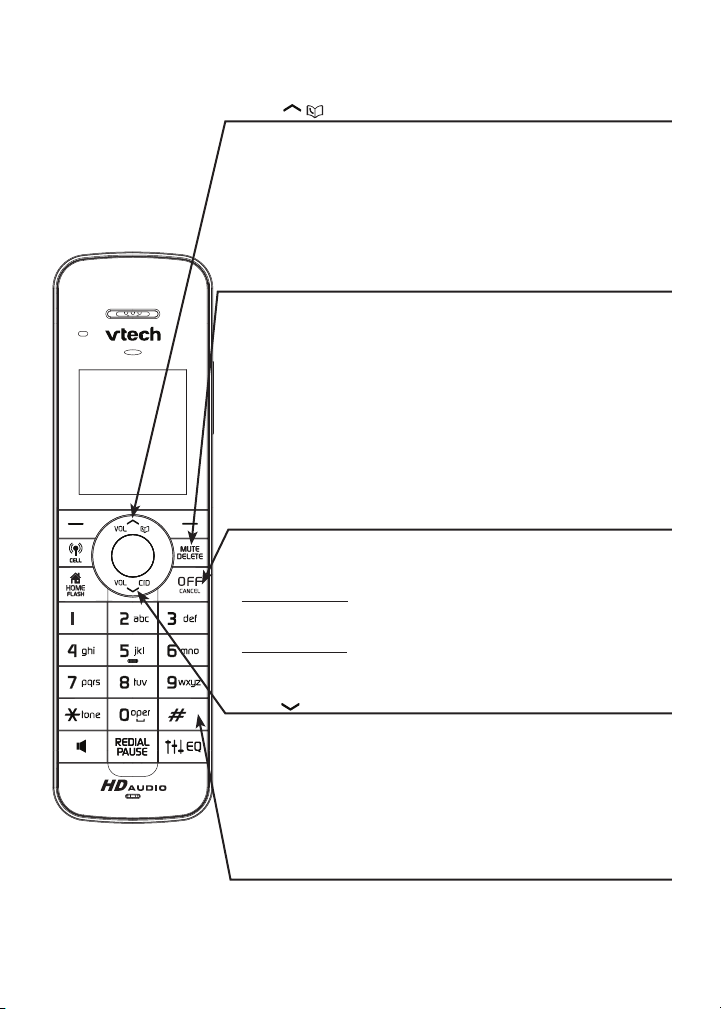
Handset layout
CHARGE light
On when the handset is charging in the telephone base or
charger.
Softkeys (2)
Press to selec t a menu item displayed above the key.
While in a menu, press to select an item, or save an entry
or setting.
/CELL
Press to make or answer a cell call (page 44).
During a cell call, press to answer an incoming call when
you hear a call waiting alert ( page 44).
Flashes quickly when there is an incoming cell call.
Flashes slowly when a cell c all is on hold.
/HOME/FLASH
Press to make or answer a home call (page 42).
During a home call, press to answer an incoming call
when you hear a call waiting alert (page 4 3).
Flashes quickly when there is an incoming home call.
Flashes slowly when a home c all is on hold.
1
While reviewing a caller ID log entr y, press repeatedly to
add or remove 1 in front of the telephone number before
dialing or saving it in the director y (page 71).
Press to switch to tone dialing temporarily during a call if
you have pulse service (page 48).
Press to toggle the name order when saving a caller ID
entry into the directory (page 72).
Press to make or answer a home call using the handset
speakerphone (page 42).
During a call, message or announcement playback, press
to switch between the speakerphone and the handset
(page 47).
REDIAL/PAUSE
Press to review the redial list (page 51).
While dialing or entering numbers into the directory,
press and hold to insert a dialing pause (page 62).
During an outside c all, interc om call, message or
announcement playback, press to change the quality of the
audio to best suit your hearing (page 49).
8
Page 14
Getting started
Handset layout (continued)
VOL/ /
While in a menu, press to scroll up.
During a call or message playback, press to increase the
listening volume (page 47 or page 84).
When the handset is not in use, press to enter the
directory (page 63).
When entering numbers and names in the directory, press
to move the cursor to the lef t.
MUTE/DELETE
While on a call, press to mute the microphone (page 47).
While reviewing the caller ID log, directory or redial list, press
to delete an individual entry (page 73, page 65 and page 52
respectively).
Press to delete digits when predialing (page 42).
While entering or edit ing a direc tory entry, press to erase
a digit or character.
While the handset is ringing, press to silence the ringer
temporarily.
During message or announcement playback, press to
delete a message or announcement.
OFF/CANCEL
During a call, press to hang up (page 42 and page 44).
While the handset is ringing, press to silence the ringer
temporarily (page 47).
Press and hold while the telephone is not in use to erase the
displayed messages (X X Missed calls and Download fail).
While in a menu, press to exit without making changes or
press and hold to return to idle mode.
VOL/ /CID
While in a menu, press to scroll down.
During a call or message playback, press to decrease the
listening volume (page 47 or page 84).
When the handset is not in use, press to review the caller
ID log (page 70).
When entering numbers and names in the directory, press
to move the cursor to the right.
# (pound key)
While reviewing a caller ID log entry or a directory entry,
press repeatedly to show other dialing options
(page 71 and page 64 respectively).
9
Page 15
Getting started
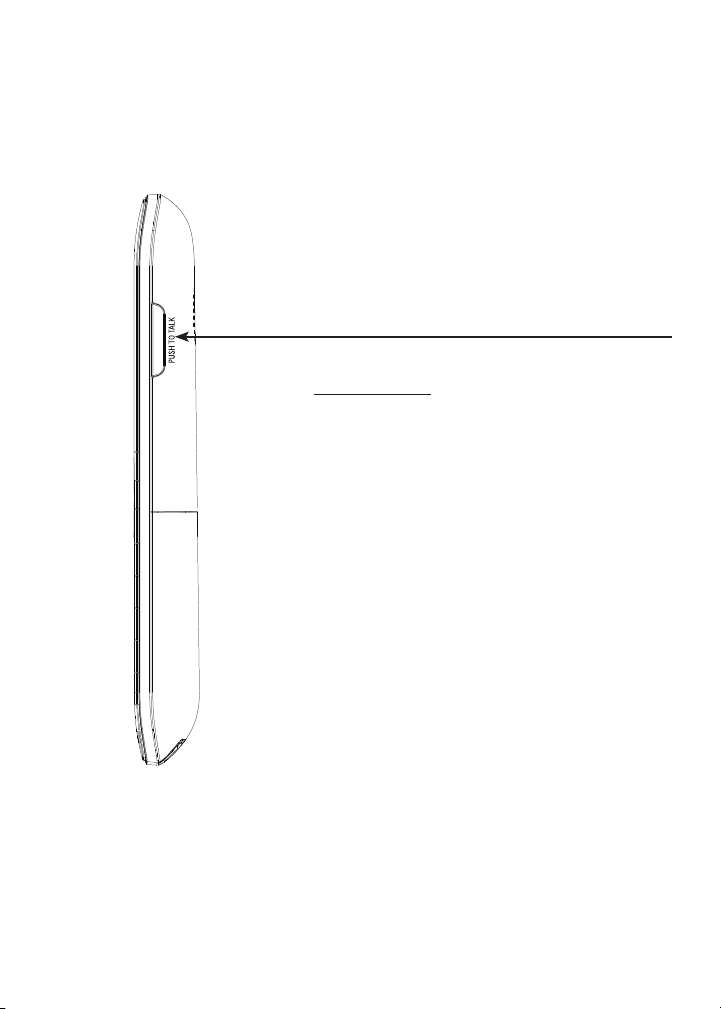
Handset layout (continued)
PUSH TO TALK (PTT)
Press to begin a one-to-one or one-to-group
broadcast (page 57 and page 58).
Press and hold to broadcast to a group of
handsets when the handset is not in use
(page 58).
10
Page 16
Getting started
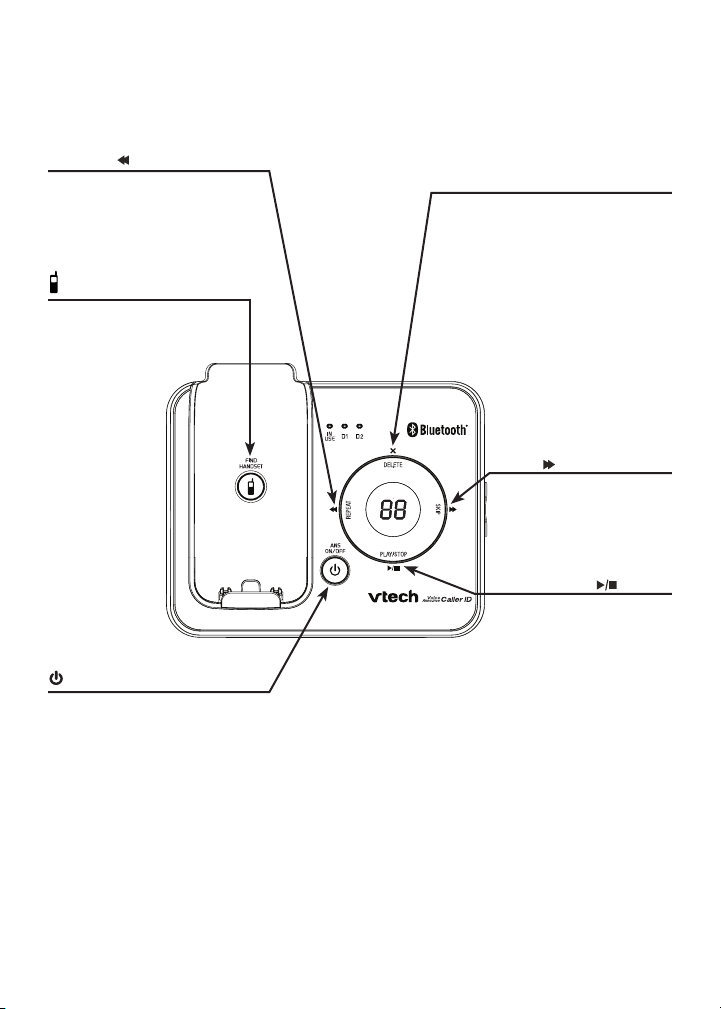
Telephone base layout
REPEAT/
Press to repeat a message
or press twice to play the
previous message
(page 83).
/FIND HANDSET
Press to page all system
handsets (page 48).
/ANS ON/OFF
Press to turn the answering
system on or off (page 74).
DELETE/X
Press to delete the message
currently playing (page 83).
When the phone is not in
use, press twice to delete all
previously reviewed messages
(page 85).
SKIP/
Press to skip to the
next message
(page 83).
PLAY/STOP/
Press to play
messages (page 83).
Press to stop message
playback (page 83).
11
Page 17
Getting started
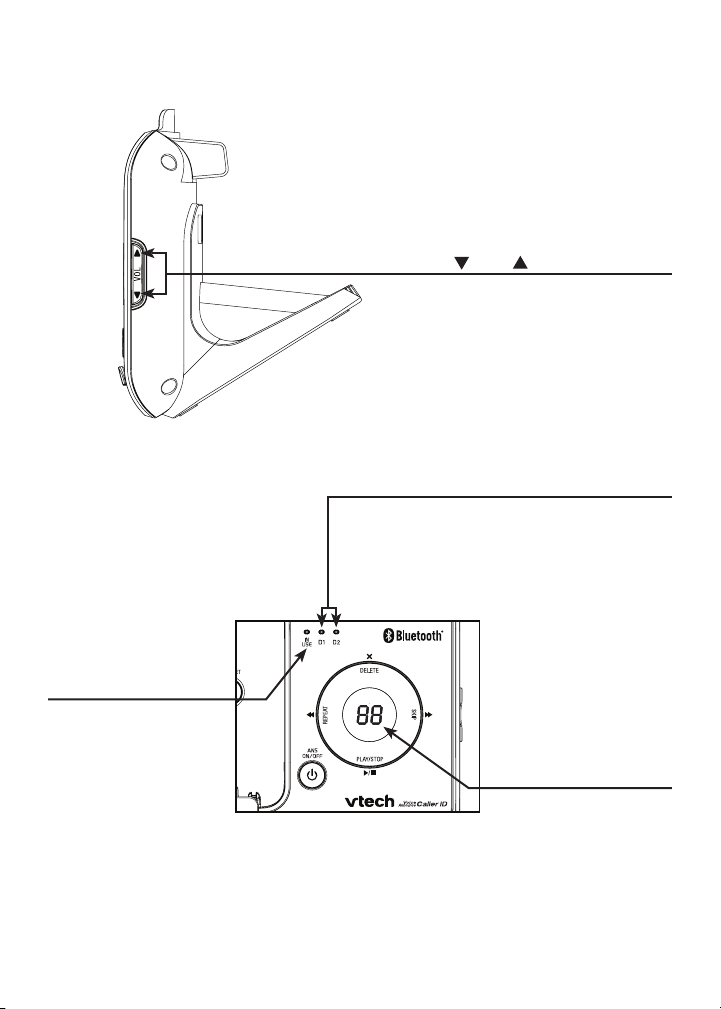
Telephone base layout (continued)
D1/D2 lights
On when the telephone base is paired and
connected with a Bluetooth device.
Flashes when there is an incoming cell call.
Alternate when the telephone base is in
discoverable mode.
/VOL/
Press to adjust the
volume during message
playback (page 83).
When the phone is not in
use, press to adjust the
telephone base ringer
volume (page 41).
IN USE light
On when the handset
or headset is in use.
Flashes when another
telephone sharing the
same line is in use or
on hold.
Flashes quickly when
there is an incoming
home call.
Message window
Shows the number of
messages and other
answering system
information (page 86).
12
Page 18
Getting started
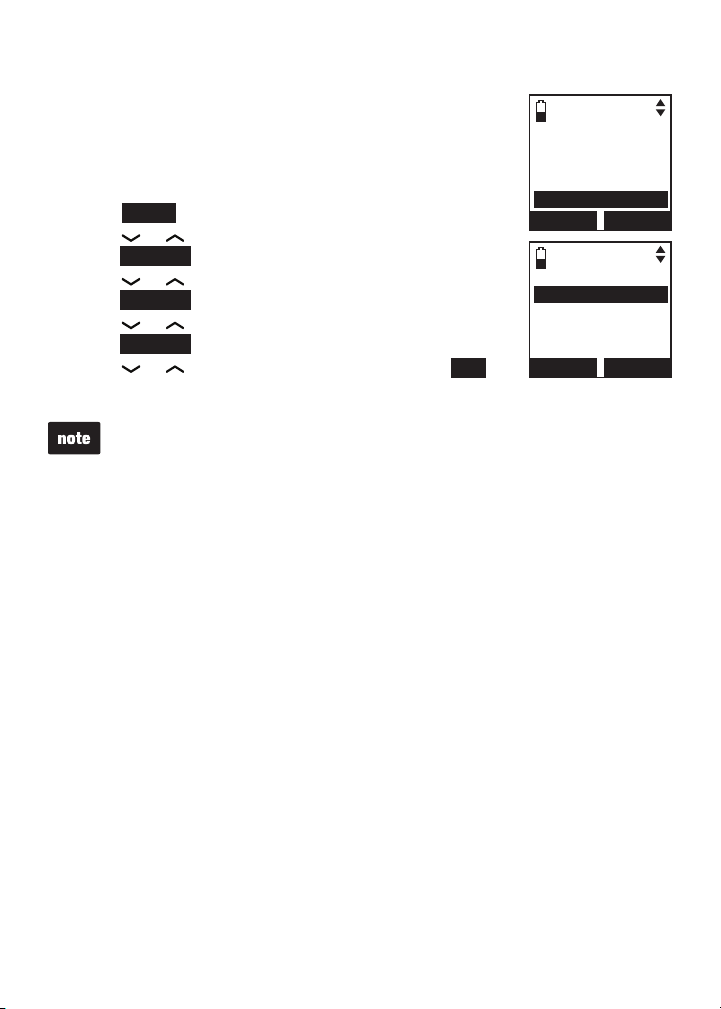
Handset main menu
To enter the main menu:
Press MENU when the handset is not in use.
1.
Press
2.
enter that menu.
To return to the previous menu, press OFF/CANCEL.
To return to idle mode, press and hold OFF/CANCEL.
or
to highlight a handset feature menu, then press
SELECT
to
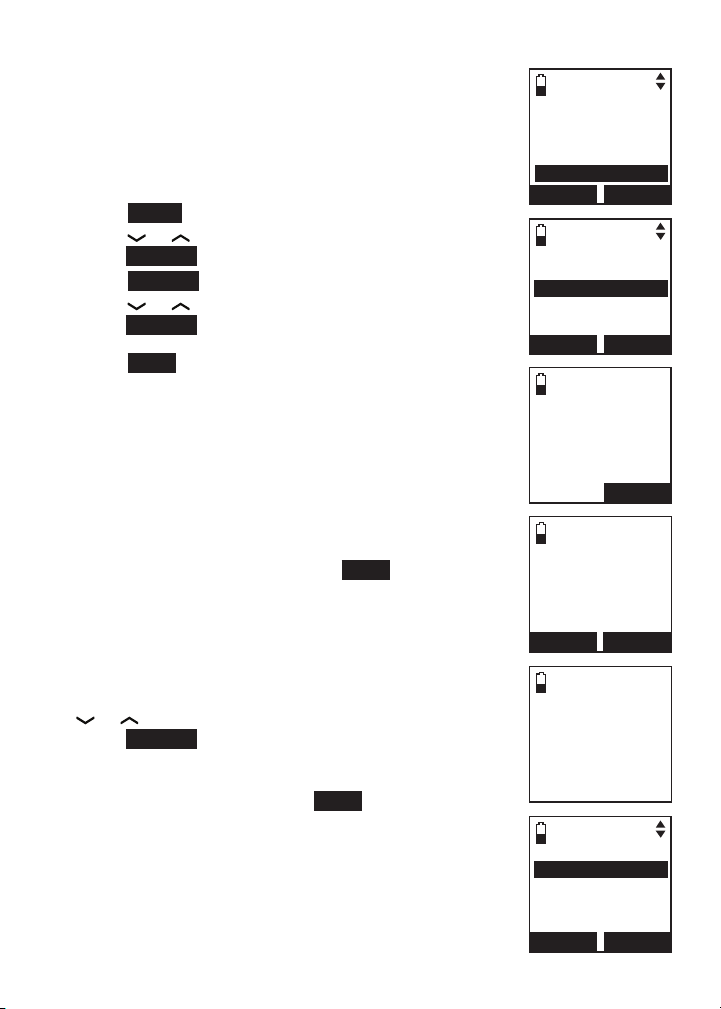
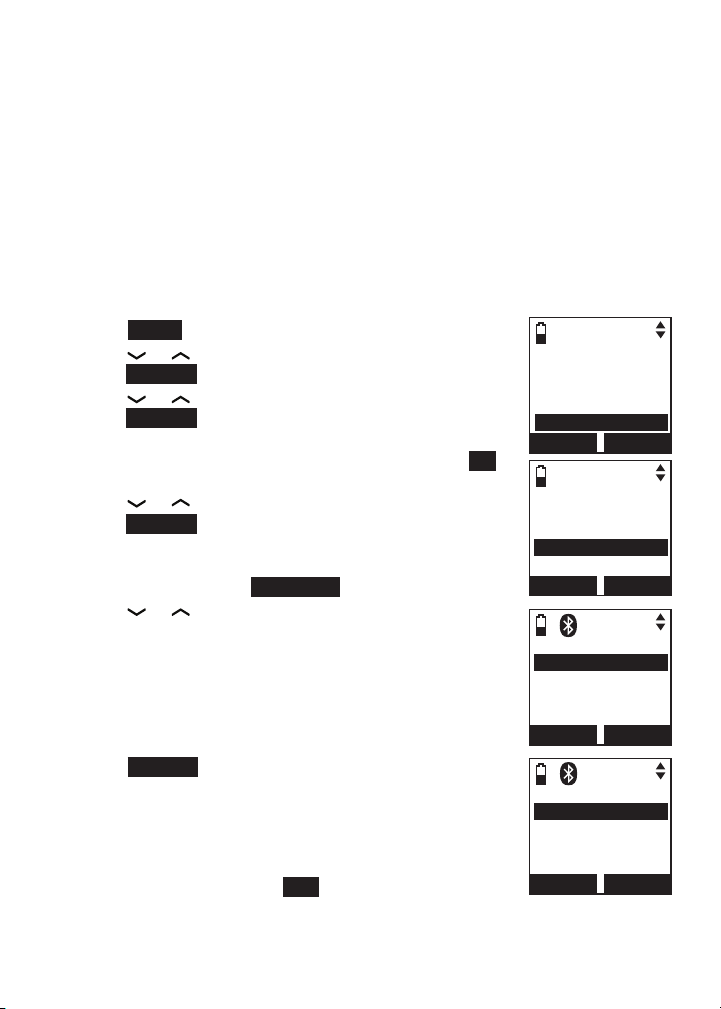
Play messages - play messages from
the answering system.
Play messages
Answe ring sys
Directory
Caller ID log
Intercom
BACK
SELECT
Directory - store and search for
names and numbers.
Play messages
Answe ring sys
Directory
Caller ID log
Intercom
BACK
SELECT
Intercom - make intercom calls to a
system handset.
Play messages
Answe ring sys
Directory
Caller ID log
Intercom
BACK
SELECT
Answering sys - record memos
and change your answering system
settings.
Play messages
Answe ring sys
Directory
Caller ID log
Intercom
BACK
SELECT
Caller ID log - review the c aller ID
history or delete all caller ID log
entries.
Play messages
Answe ring sys
Directory
Caller ID log
Intercom
BACK
SELECT
Bluetooth - set up and manage your
Bluetooth enabled devices.
Answe ring sys
Directory
Caller ID log
Intercom
Blu etooth
BACK
SELECT
13
Page 19
Getting started
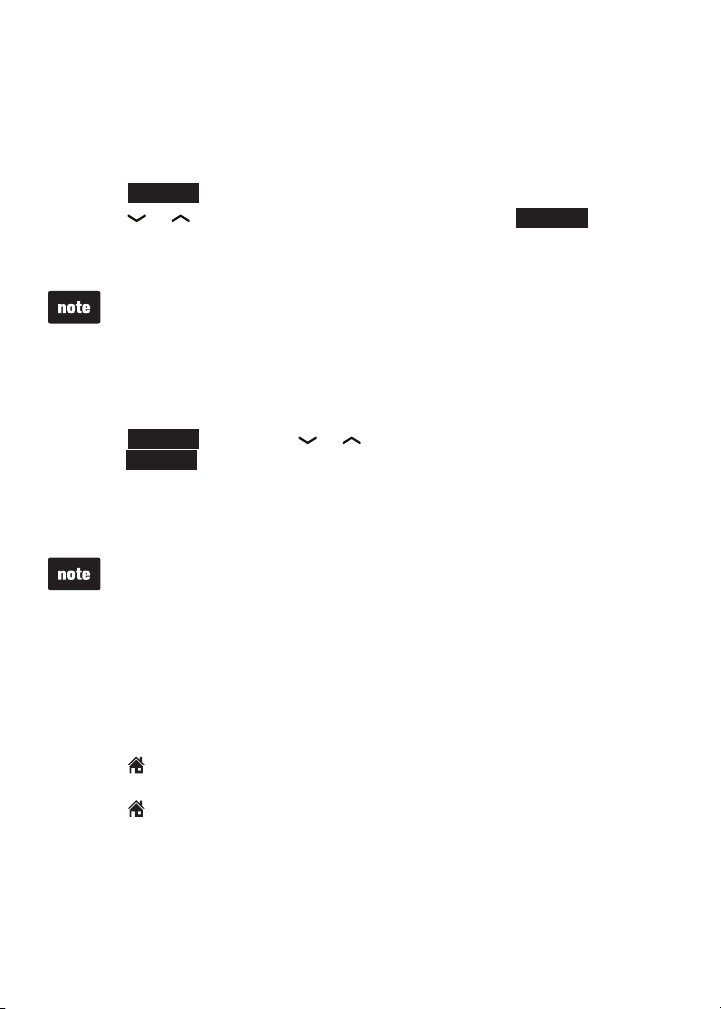
Handset main menu (continued)
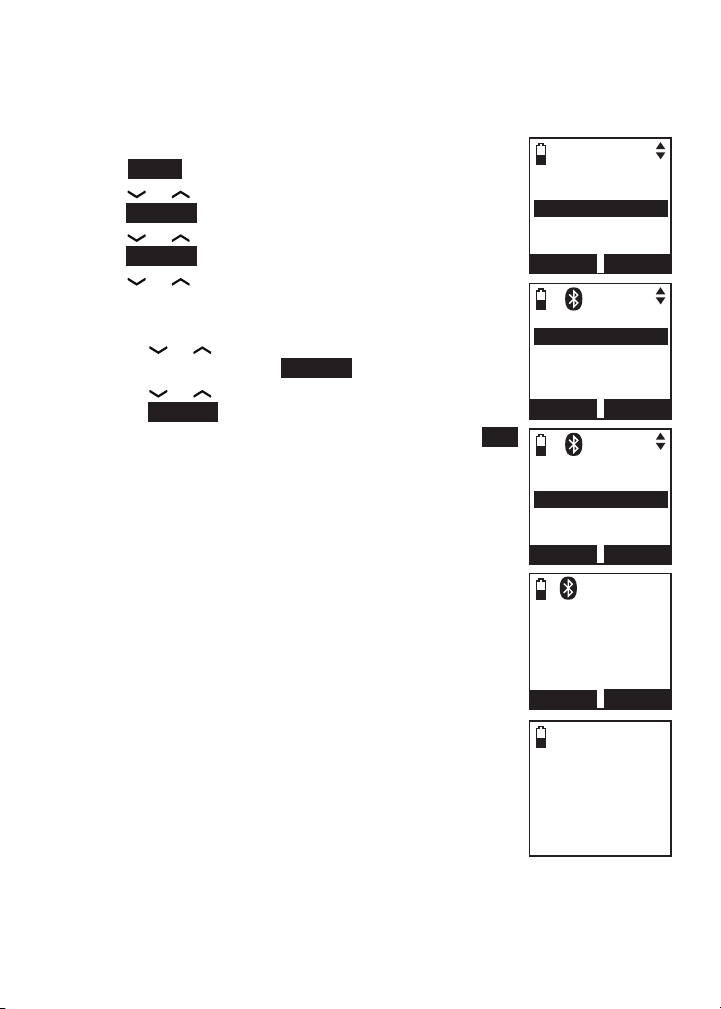
Ringers - set up ringers for the home
and cell lines.
Directory
Caller ID log
Intercom
Blu etooth
Ringers
BACK
SELECT
Settings - change your telephone
settings.
Intercom
Blu etooth
Ringers
Set date/time
Settings
BACK
SELECT
Set date/time - set up the date and
time of your telephone.
Caller ID log
Intercom
Blu etooth
Ringers
Set date/time
BACK
SELECT
Website - displays the VTech website
address.
Blu etooth
Ringers
Set date/time
Settings
Website
BACK
SELECT
14
Page 20

Bluetooth
Introducing Bluetooth
Your new DS6421 telephone system with Bluetooth wireless technology has
the following features:
Pair up to four Bluetooth enabled devices (cell phones or headsets) with
•
the telephone base.
Connect a maximum of two cell phones to make and receive cell calls.
•
Only one cell phone can be active on a call at a time.
Connect one Bluetooth enabled headset for making and receiving
•
home calls.
Conference cell and home calls.
•
Make and receive calls using your cell phone plan while utilizing the ease
•
and comfort of your home telephone system.
IMPORTANT INFORMATION
After plugging in the telephone base, wait at least 20 seconds before
•
connecting a Bluetooth device. The screen shows Bluetooth system busy
if you try to connect too soon.
Refer to the user's manual of your Bluetooth enabled cell phone or
•
headset for more information about how that device uses Bluetooth
connectivity.
Bluetooth wireless technology operates within a short range (a maximum
•
of approximately 30 feet) from the telephone base. Keep connected cell
phones and headset within this range.
If your cell phone has poor reception in your home, the DS6421 cannot
•
improve the reception. However, if there is a location in your house with
better reception, you can leave your cell phone at that location while you
use the DS6421 cell line. In order for this to work, the telephone base
must be within 30 feet of the cell phone.
Charge your cell phone while it is connected to the telephone base.
•
Your cell phone's battery will discharge faster while it is connected to the
telephone base via Bluetooth wireless technology.
Monitor your cell phone's usage because minutes are deducted from your
•
cellular plan for the duration of all cell calls.
Refer to Bluetooth setup (page 17) to learn how to set up and manage your
Bluetooth enabled devices. Refer to Telephone operation (page 42) on how
to operate your Bluetooth devices with your new DS6421 telephone system
with Bluetooth wireless technology. Refer to Troubleshooting (page 97) if
you experience difficulty using the telephone system.
The Bluetooth® word mark and logos are owned by Bluetooth SIG, Inc. and
any use of such marks by VTech Holdings Limited is under license.
VTech Holdings Limited is a member of Bluetooth SIG, Inc. Other trademarks
and trade names are those of their respective owners.
15
Page 21

Bluetooth
Glossary of terms
Below are some terms used in this user’s manual to help you become
familiar with using your Bluetooth enabled devices and your new
DS6421 telephone system.
Active device slots - the Device list has two active slots for two cell
phones, or one cell phone and one headset. When a device on the list
is active, D1 or D2 displays in front of the device name. In order to use a
Bluetooth device on a call, it must be in an active slot and be connected.
Bluetooth cell phone - refers to a Bluetooth enabled cellular telephone.
Cell line - the telephone line associated with your cell phone service. On
your DS6421 handset, press /CELL to use the cell line.
Connected - when you pair a Bluetooth device to the DS6421, it is placed in
an active slot and automatically connected. When a device is connected, 1
and/or 2 displays after on the handset and the D1 and/or D2 light on the
telephone base is on. If a device loses its connection to the telephone base,
it must be reconnected before you can use the device with the DS6421.
Disconnected - when a device is disconnected, 1 and/or 2 displays after
on the handset and the D1 and/or D2 light on the telephone base is off.
Discoverable mode - before a Bluetooth enabled device can be paired, it
must be set to this mode. When pairing your cell phone, the telephone base
will be set to this mode. When pairing a headset, the headset must be set to
this mode. Depending on the manufacturer, this mode is sometimes referred
to as Find Me or Visibility.
Home line - your conventional telephone land line. On your DS6421 handset,
press /HOME/FLASH to use the home line.
Paired devices - once Bluetooth enabled devices have been paired with the
telephone base, they appear on the device list. A maximum of four devices
can be paired with the telephone base.
Pairing - this refers to the process of Bluetooth enabled devices registering
device information with each other. The telephone base must be paired with
a Bluetooth enabled cell phone or headset before the Bluetooth device can
be used. Depending on the manufacturer, this is also referred to as Bonding.
PIN - by default, the PIN is 0000 for the telephone base and for most
Bluetooth devices. PIN information must be exchanged between
Bluetooth devices before they can be used. This is also known as a
Passkey or Passcode.
16
Page 22
Bluetooth
Bluetooth setup
To use a Bluetooth enabled cell phone or headset with your DS6421, you
must first pair and connect your Bluetooth device(s) with the telephone base.
All DS6421 handsets can be used to make or answer on the cell phone line.
Bluetooth wireless technology operates within a short range (30 feet). When
you pair a Bluetooth cell phone or Bluetooth headset to the telephone base,
move closer to the telephone base to maintain sufficient signal strength.
Add a cell phone
Before you begin, make sure that you have cellular coverage and your
Bluetooth enabled cell phone is not connected to any other Bluetooth
devices. Refer to your cell phone user's manual to learn how to search for or
add new Bluetooth devices.
To pair and connect a cell phone:
Press MENU on the handset when it is not in use.
1.
Press or to highlight Bluetooth, then
2.
press SELECT.
3.
Press
SELECT
to choose Add device, then press
to choose Add cellular. The handset
SELECT
displays Please wait... followed by 1. If cell is
connected to BT device, please disconnect it.
If there are already four paired devices on the
•
device list, the 4th device on the device list will be
automatically removed, regardless of whether the
new device pairing is successful or not (page 24).
If there are already two active devices on the device
•
list with prefix D1: or D2:, the handset shows Only
2 devices can be ready for connection. You are
prompted to deactivate an active device.
Press NEXT. The handset displays 2. Place cell
4.
phone next to base.
All devices that are connected to the telephone
•
base are disconnected until the pairing process
is completed.
Answering sys
Directory
Caller ID log
Intercom
Bluetooth
BACK
Add device
Device list
Download dir
Change PIN
BACK
Add cellular
Add headset
BACK
SELECT
BLUETOOTH
SELECT
ADD DEVICE
SELECT
17
Page 23
Bluetooth
Add a cell phone (continued)
Press NEXT to turn on the telephone base
5.
discoverable mode. The handset displays Set cell
to search base: VTech DS6421 discoverable PIN:
0000. Promptly turn on the Bluetooth feature of your
cell phone and search for or add new devices.
Your cell phone may require a passcode. In this
•
case, the handset displays Check cellular. ENTER
PASS CODE. Enter the cell phone passcode into
the handset and press SET to save.
Enter the PIN of the telephone base (the default PIN
6.
is 0000) into your cell phone to continue the pairing
process. The handset displays Adding Cell Phone A
to device list...
When a device is successfully connected, the handset
7.
displays Cell Phone A is added and connected
to base. You hear a confirmation tone. The
corresponding status icon ( 1 or 2) displays. The
corresponding device light on the telephone base (D1
or D2) turns on.
If you have trouble pairing your cell phone, it may not
be compatible with your DS6421. Check the Bluetooth compatibility list
at www.vtechphones.com.
The pairing process may take up to one minute. If the pairing process fails,
•
try again.
The steps for the pairing process may vary for different cell phones. If
•
this happens, follow the prompts on your cell phone and your DS6421 to
complete the pairing process.
If you put the handset back in the telephone base or charger while pairing,
•
the pairing is canceled and the handset returns to idle mode.
Set cell to
search base:
VTech DS6421
discoverable
PIN:0000
Adding
Cell Phone A
to device
list...
Cell Phone A
is added
and connected
to base.
18
Page 24
Bluetooth
Add a headset
Before you begin, make sure that your Bluetooth enabled
headset is not connected to any other Bluetooth device.
Refer to your headset user's manual to learn how to
search for or add new Bluetooth devices.
To pair and connect a headset:
Press MENU on the handset when it is not in use.
1.
Press or to highlight Bluetooth, then
2.
press SELECT.
Press
3.
4.
SELECT
Press or to highlight Add headset, then
press SELECT. The handset displays If headset is
connected to cell, please disconnect it.
Press NEXT.
When there is already an active headset, the
•
handset shows Only 1 headset in device list can
be ready for connection and then prompt you to
replace an existing paired device (page 24).
When there are already two active devices, the
•
handset shows Only 2 devices can be ready for
connection. The telephone base will deactivate
another headset from an active slot automatically.
The handset displays Pls set headset to
5.
discoverable mode, then press NEXT.
All devices that are connected to the telephone
•
base are temporarily disconnected.
The handset displays Searching for Bluetooth
6.
headsets... Set your headset to discoverable mode
(refer to the user’s manual of your headset).
When the handset displays the found devices, press
7.
or to highlight a desired headset and then
press SELECT.
Enter the PIN of your headset. The PIN for most
8.
Bluetooth devices is 0000 (refer to the user’s manual
of your headset). Then press NEXT. The handset
displays Adding Headset A to device list... when the
base is connecting to your headset.
to choose Add device.
Answering sys
Directory
Caller ID log
Intercom
Bluetooth
BACK
Add cellular
Add headset
BACK
If headset is
connected to
cell, please
disconnect it.
Pls set headset
to discoverable
mode
BAC K NEXT
Searching for
FOUND DEVICES
Headset A
Headset B
SELECT
ADD DEVICE
SELECT
NEXT
Bluetooth
headsets...
19
BACK
SELECT
Page 25

Bluetooth
Add a headset (continued)
When a device is successfully connected, the handset
9.
displays Headset A is added and connected to
base and the corresponding status icon ( 1 or 2).
You hear a confirmation tone. The corresponding light
on the telephone base (D1 or D2) turns on.
If you have trouble pairing your headset, it may be not
compatible with your DS6421. Check the Bluetooth
compatibility list at www.vtechphones.com.
The pairing process may take up to one minute. If the
•
pairing process fails, try again.
If you put the handset back in the telephone base or
•
charger while pairing, the process discontinues and
the handset returns to idle mode.
Auto connection
An active device may be disconnected from the telephone base when:
The Bluetooth feature of your connected cell phone is turned off.
•
The power of your device is turned off.
•
Your Bluetooth device is not within range of the telephone base.
•
When the Bluetooth feature or power on the device is turned on, or it moves
within range of the base, the base will try to reconnect to the Bluetooth
device. If you disconnect the device through the device list, the base will not
attempt to reconnect unless your device is moved out of range and back in
range again.
Adding
Headset A
to device
list...
Headset A
is added
and connected
to base.
20
Page 26

Bluetooth
Connecting devices
Up to four devices can be paired to the telephone base. All paired devices
are shown on the device list. To use a paired device, it must be in an active
slot (D1 or D2) on the device list and connected. Only one Bluetooth cell
phone or a headset can be on a call at a time.
Once you have paired a device with the telephone base, you do not need
to repeat the pairing procedure again unless you delete the device from the
device list.
When connecting a Bluetooth device to the device list, all connected devices
will be temporarily disconnected until the procedure is complete. It may take
up to two minutes to reconnect.
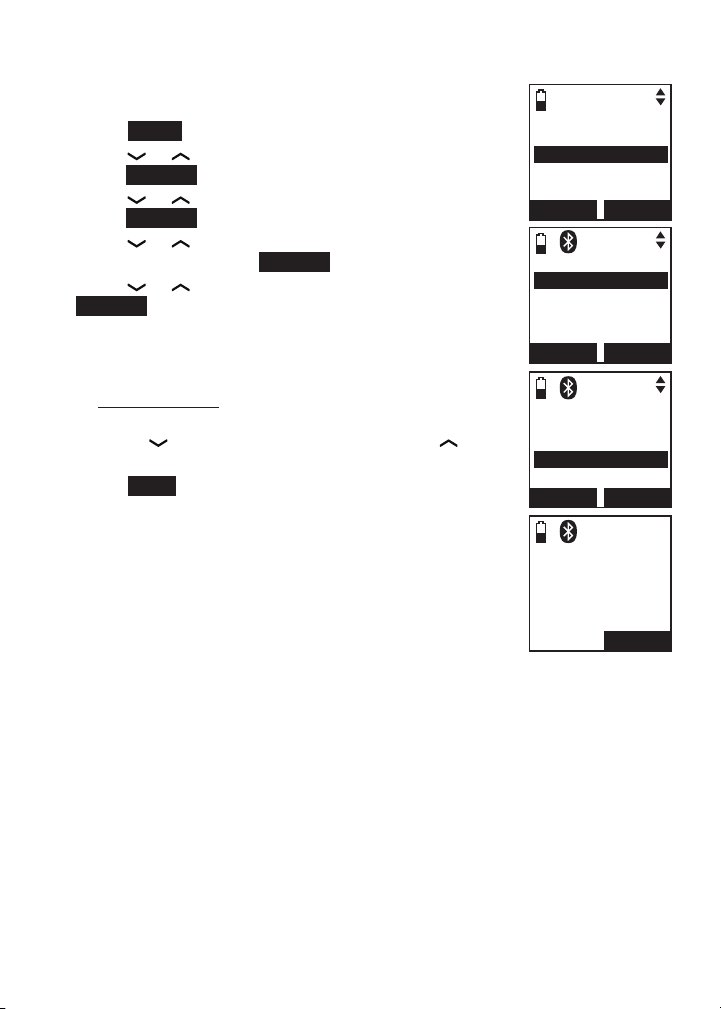
Review the device list
Press MENU on the handset when it is not in use.
1.
Press or to highlight Bluetooth, then
2.
press SELECT.
Press or to highlight Device list, then
3.
press SELECT.
Connect/Disconnect an active device
While in the device list menu, you may connect or
disconnect your devices.
Press MENU on the handset when it is not in use.
1.
Press or to highlight Bluetooth, then
2.
press SELECT.
Press or to highlight Device list, then
3.
press SELECT.
Press or to highlight a device when necessary,
4.
then press OPTION.
Press or to highlight Connect/Disconnect
5.
(whichever is applicable), then press
SELECT to confirm. The handset displays Device
connected/Device disconnected. You hear a
confirmation tone.
When your device is connected, you will be prompted to
select Disconnect. When your device is disconnected,
you will be prompted to select Connect.
Answering sys
Directory
Caller ID log
Intercom
Bluetooth
BACK
Add device
Device list
Download dir
Change PIN
BACK
D1:Headset A
D2:Cell Phone A
Cell Phone B
Cell Phone C
BACK
Connect
Remove
Rename
BACK
SELECT
BLUETOOTH
SELECT
1
DEVICE LIST
OPTION
1
Headset A
SELECT
21
Page 27
Bluetooth
Remove a device
When you already have the maximum of four paired devices on the device list
and you want to add another device, you must first delete a device from the
device list.
Press MENU on the handset when it is not in use.
1.
Press or to highlight Bluetooth, then
2.
press SELECT.
Press or to highlight Device list, then
3.
press SELECT.
Press or to highlight a desired device when
4.
necessary, then press MUTE/DELETE.
- OR -
Press or to highlight a desired device when
•
necessary, then press OPTION.
Press or to highlight Remove, then
•
press SELECT.
The handset displays Remove Headset A? Press YES
5.
to confirm. The handset displays Device removed
from device list. You hear a confirmation tone.
BLUETOOTH
Add device
Device list
Download dir
Change PIN
BACK
D1:Headset A
D2:Cell Pho ne A
BACK
Connect
Remove
Rename
BACK
SELECT
1
DEVICE LIST
OPTION
1
Headset A
SELECT
1
Remove
Headset A
?
22
NO YES
Device removed
from
device list.
Page 28
Bluetooth
Rename a device
You can change the name of a device on the device list.
Press MENU on the handset when it is not in use.
1.
Press or to highlight Bluetooth, then
2.
press SELECT.
Press or to highlight Device list, then
3.
press SELECT.
Press or to choose a desired device when
4.
necessary, then press OPTION.
Press or to highlight Rename, then press
5.
SELECT. The handset displays ENTER NEW NAME.
Use the dialing keys to edit the name (up to
6.
15 characters).
Press MUTE /DELETE to erase a character.
•
Press and hold MUTE/DELETE to erase
•
all characters.
Press to move the cursor to the right or to
•
the left.
Press SAVE. The handset displays Device renamed.
7.
You hear a confirmation tone.
BLUETOOTH
Add device
Device list
Download dir
Change PIN
BACK
D1:Headset A
D2:Cell Pho ne A
BACK
Connect
Remove
Rename
BACK
ENTER NEW NAME
SELECT
1
DEVICE LIST
OPTION
1
Headset A
SELECT
1
23
Headset A
-- ---
SAVE
Page 29
Bluetooth
Replace an active device
If you already have two active devices on the device list
and you want to activate a different device, you must
deactivate one of the two active devices.
To replace an active device:
Press MENU on the handset when it is not in use.
1.
Press or to highlight Bluetooth, then
2.
press SELECT.
Press or to highlight Device list, then
3.
press SELECT.
Press
4.
activate, without a prefix D1: or D2:, then
press OPTION
Press or to highlight Connect,
5.
SELECT
be ready for connection and then a list of devices
for deactivation.
Press or to highlight the device to be
6.
deactivated, then press NEXT. The handset displays
Cell Phone/Headset A is deactivated and you hear a
confirmation tone. The handset displays Connecting
Cell Phone/Headset B to the base...
Depending on your cell phone settings, you may
7.
need to press a key on your cell phone to confirm
the connection. When the new device is successfully
activated and connected, the handset displays Device
connected. You hear a confirmation tone.
or
to highlight the device you want to
.
then press
. The handset displays Only 2 devices can
BLUETOOTH
Add device
Device list
Download dir
Change PIN
BACK
D1:Headset A
D2:Cell Phone A
Cell Phone B
Cell Phone C
BACK
Connect
Remove
Rename
BACK
Cell Phone B
to the base...
SELECT
1
DEVICE LIST
OPTION
1
Cell Phone B
SELECT
Connecting
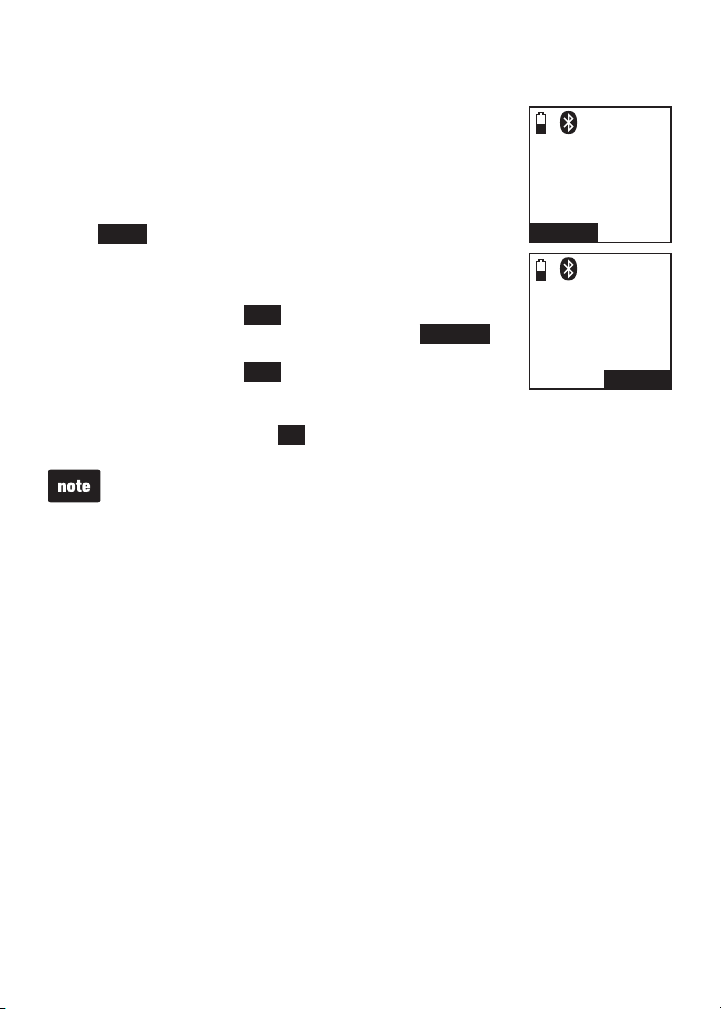
Bluetooth connection from idle mode
When you have active devices that are not connected,
CONNECT
to start connecting an active device. When there are two
active devices, the handset will prompt you to choose one
before connection.
appears on the idle handset. Press
24
CONNECT
1
HANDSET
--:-- --/--
CONNECT
1
MENU
Page 30
Bluetooth
Download directory
You can download up to four cell phone directories (phonebooks) to
your DS6421 telephone system via Bluetooth wireless technology. Each
downloaded directory can store up to 1,500 entries with up to 30 digits for
each phone number and 15 characters for each name.
Before downloading the directory, make sure the cell phone is paired, active
and connected to the DS6421. Make sure the handset battery is charged for
at least 10 minutes.
Place your cell phone next to the telephone base when you download a
cell phone directory to your DS6421.
To download a cell phone directory:
Press MENU on the handset when it is not in use.
1.
Press or to highlight Bluetooth, then
2.
press SELECT.
Press or to highlight Download dir, then
3.
press SELECT.
If there is no cell phone paired to the system, the
•
handset displays Device list is empty. Press OK to
return to the Bluetooth menu.
Press or to highlight a desired device, then
4.
press SELECT.
If the selected device is active but disconnected,
•
the handset displays Cellular phone not
connected. Press CONNECT.
Press or to highlight one of the following options:
5.
Phone memory - download all contacts stored in
•
your phone memory.
SIM card only - download all contacts stored in
•
your SIM card.
Phone and SIM - download all contacts stored in
•
both your phone memory and SIM card.
Press SELECT. During the download, the handset
displays the progress. All other idle system handsets
display Downloading dir.
Your cell phone may require a passcode. In this
•
case, the handset displays Check cellular. ENTER
PASS CODE. Enter the cell phone passcode into
the handset and press SET to save.
Answering sys
Directory
Caller ID log
Intercom
Bluetooth
BACK
Add device
Device list
Download dir
Change PIN
BACK
DOWNLOAD DIR
D1:Cell Ph one A
D2:Cell Pho ne B
BACK
DOWNLOAD FROM
Phone m emory
SIM card only
Phone a nd SIM
BACK
SELECT
BLUETOOTH
SELECT
1
SELECT
1
SELECT
25
Page 31
Bluetooth
Download directory (continued)
If the selected device’s directory has already been
•
downloaded to the DS6421 before, the handset
displays the last update date of your cell phone. The
directory stored on the DS6421 for that cell phone
will be erased and replaced with the current cell
phone directory. If you have edited the downloaded
entries (page 64), those changes will be lost. Press
NEXT to start the download, the handset displays
Erasing directory...
If you already have four downloaded directories, the
•
handset displays Memory is full. Replace existing
directory? Press YES. Highlight the cell phone
directory to be replaced and then press SELECT.
The handset displays Replace Cell Phone A
directory? Press YES to confirm.
When the downloading process is complete, the
6.
handset displays Download ended XXXX entries saved. You hear a
confirmation tone. Press OK to return to the download directory menu.
Certain cell phones do not support SIM card download. If this is the case,
•
try transferring the contacts from your SIM card to your cell phone memory
first, then download from your cell phone memory. For more information on
how to transfer contacts from your SIM card to your cell phone memory, see
the user’s manual of your cell phone.
When downloading the directory from your Bluetooth enabled cell phone,
•
some data may not transfer. For example, if you have home, mobile and
work numbers for a particular contact, the three categories may not transfer
to your DS6421.
•
For certain cell phones, you may need to press a key on your cell phone to
confirm the directory download.
Cell Phone A
Downloading
entry #XXXX
STOP
Download ended
entries saved
1
1
XXXX
OK
26
Page 32
Bluetooth
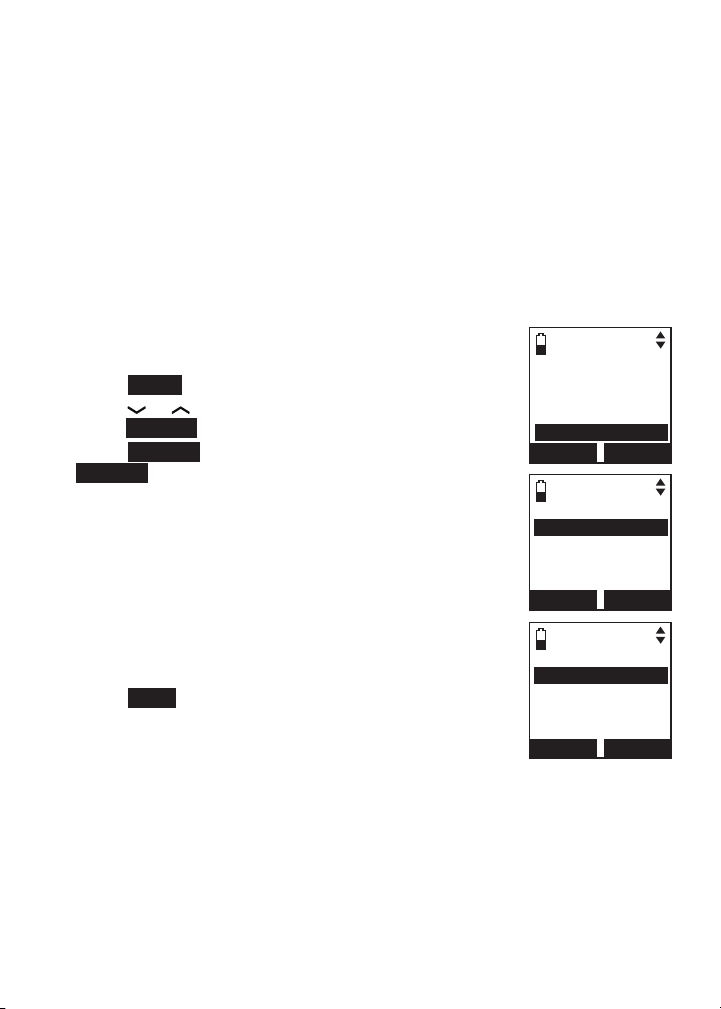
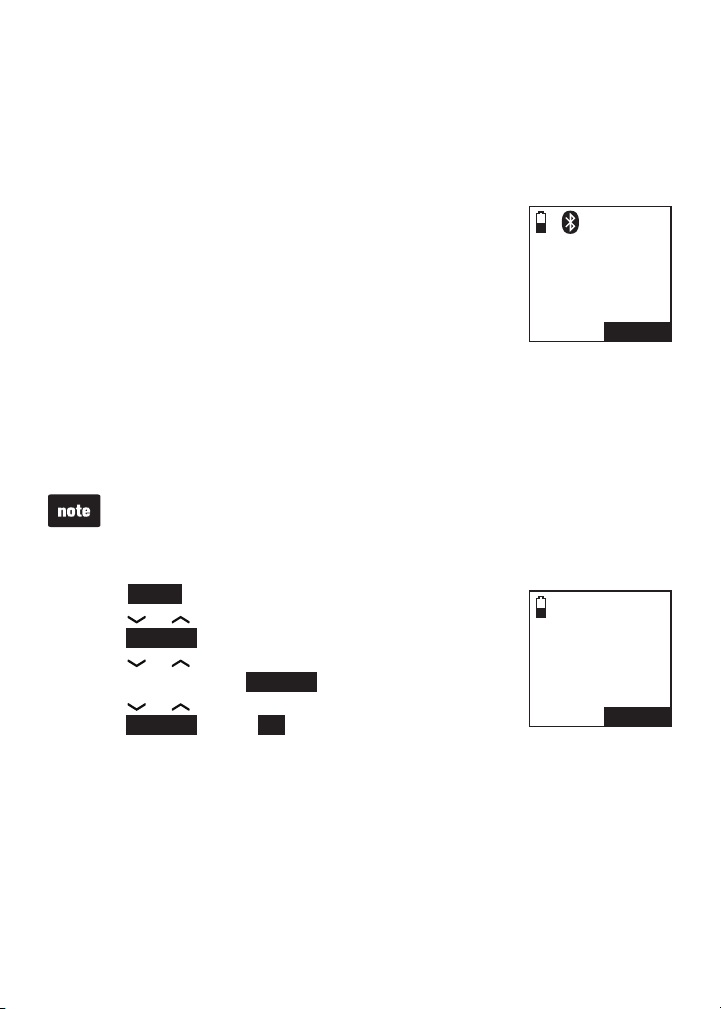
Interruption to directory download
When you are downloading a directory from a cell phone and the phone
receives a call, the download process stops and all handsets display
Download fail after the call ends. When you try to view the downloaded
directory, the handset displays Last download failed: MM/DD/YY. You need
to download the directory again (see page 25).
When you are downloading a directory from a cell phone
and the telephone base loses power, the download
process stops. When the telephone base regains power,
the handset only displays the Home directory. You need
to download the directory again (see page 25).
The download progress screen may be replaced with
Cell line in use. To go back to the downloading progress
screen, do steps one through four on page 25. The
download process continues even if any of the following occurs:
You place the handset in the telephone base or charger.
•
You access your cell phone menu features.
•
The handset battery becomes depleted or the handset loses connection
•
with the telephone base.
During the download process, do not attempt to make changes to your cell
phone directory.
View the directory download information
Press MENU on the handset when it is not in use.
1.
Press or to highlight Directory, then
2.
press SELECT.
Press or to choose the desired downloaded
3.
directory, then press OPTION.
Press or to highlight Last update, then
4.
press SELECT. Press OK to exit.
1
HANDSET
Download fail
12:31PM 12/31
Cell Phone A
Last update:
12/12/09
Total #0159
MENU
OK
1
27
Page 33

Bluetooth
Change PIN
You are required to enter a PIN when establishing a
Bluetooth connection. The default PIN of your telephone
base is 0000.
To change the PIN:
Press MENU on the handset when it is not in use.
1.
Press or to highlight Bluetooth, then
2.
press SELECT.
Press or to highlight Change PIN, then press
3.
SELECT. The handset displays ENTER NEW PIN and
the existing PIN.
Use the dialing keys to enter a new four-digit code.
4.
Press MUTE /DELETE to erase a digit.
•
Press and hold MUTE/DELETE to erase all digits.
•
Press to move the cursor to the right or to the left.
•
Press SET to save. You hear a confirmation tone.
5.
BLUETOOTH
Add device
Device list
Download dir
Change PIN
BACK
ENTER NEW PIN1
BACK
SELECT
----
SET
28
Page 34

Telephone settings
Handset settings
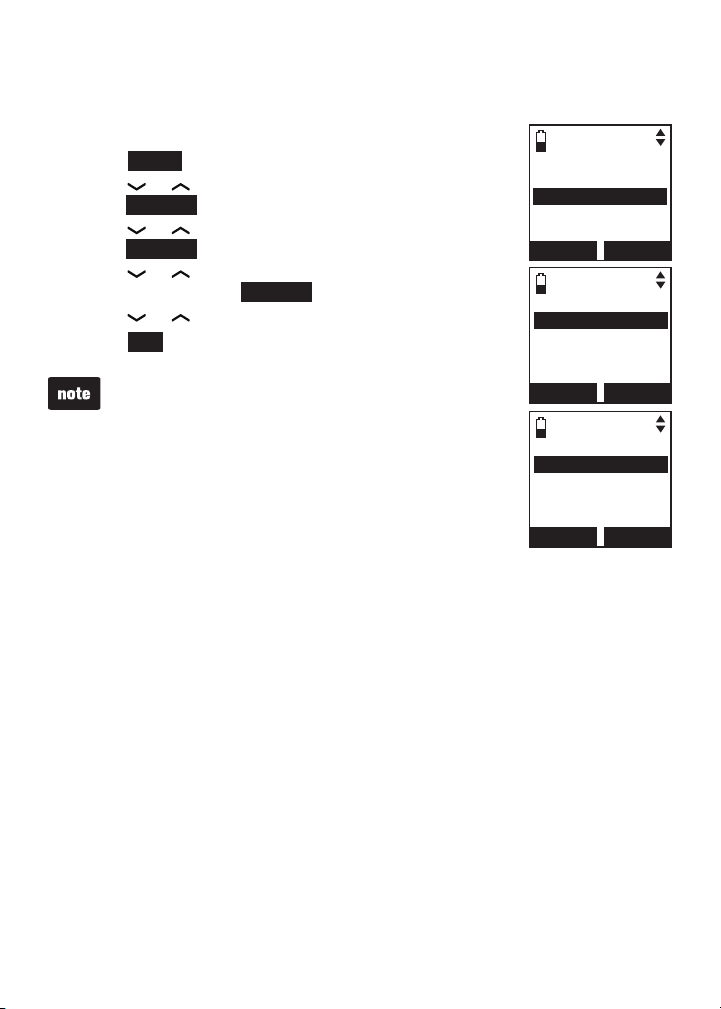
Ringers
In the ringers menu, you can select the ringer tones and adjust the ringer
volume for incoming calls to the home and cell lines.
Ringer volume
You can adjust the ringer volume for the incoming home
and cell calls.
To adjust the handset ringer volume:
Press MENU on the handset when it is not in use.
1.
Press or to highlight Ringers, then
2.
press SELECT.
Press SELECT to choose Ringer volume.
3.
Press or to highlight All lines, Home, Cell-D1,
4.
or Cell-D2 then press
Press or to sample each volume level.
5.
Press SET to save. You hear a confirmation tone.
6.
SELECT
- OR -
Press OFF to turn off the ringer, then press SET to
save. You hear a confirmation tone.
When the ringer volume for all are set to off, a ringer off
•
icon appears steady. When only one or two of the
ringer volume is set to off, a ringer off icon flashes.
When the ringer volume is set to off, the handset
•
displays briefly Caller ID won’t be announced if the
caller ID announce feature is turned on
(page 38).
See page 41 to set the telephone base ringer volume.
•
.
RINGERS
Ringer volume
Ringer tone
BACK
RINGER VOLUME
All lines
Home
Cell-D1
Cell-D2
BACK
RINGER VOLUME
OFF
SELECT
SELECT
SET
29
Page 35
Telephone settings
Ringer tone
You can select the ringer tones for the incoming home and cell calls.
To select a ringer tone:
Press MENU on the handset when it is not in use.
1.
Press or to highlight Ringers, then
2.
press SELECT.
Press or to highlight Ringer tone, then
3.
press SELECT.
Press or to highlight All lines, Home, Cell-D1 or
4.
Cell-D2, then press SELECT.
Press or to sample each ringer tone.
5.
Press SET to save. You hear a confirmation tone.
6.
When you turn off the ringer volume, you will not hear
ringer tone samples.
RINGERS
Ringer volume
Ringer tone
BACK
RINGER TONE
All lines
Home
Cell-D1
Cell-D2
BACK
RINGER TONE
Tone 1
Tone 2
Tone 3
Tone 4
BACK
SELECT
SELECT
SET
30
Page 36

Telephone settings
Set date and time
The answering system announces the day and time of each message prior
to playing it. If you subscribe to caller ID service, the day, month and time are
set automatically with each incoming call. If you do not want to set the date
and time automatically with caller ID information, turn this feature off (see
CID time synchronization on page 36). However, the year must be correct
so that the day of the week can be calculated from the
caller ID information. Before using the answering system,
set the date and time as follows.
To set the date and time manually:
Press MENU on the handset when it is not in use.
1.
Press or to highlight Set date/time, then
2.
press SELECT.
Use the dialing keys (0-9) to enter the month. For
3.
example, enter 02 for February.
- OR -
Press or to choose the month and then
press SET.
Repeat Step 3 to set the date and year, and then
4.
press SET.
Repeat Step 3 to set the hour and minute, and then
5.
press SET.
Press or to choose AM or PM, or press 2 for
6.
AM or 7 for PM. Then press SET to save
. You hear a
confirmation tone.
If the date and time are not set, the system announces,
“Time and day not set,” before each message plays.
Caller ID log
Intercom
Bluetooth
Ringers
Set date/time
BACK
SET DATE
BACK
SET TIME
BACK
SELECT
09/30/09
MM/DD/YY
05:41 PM
SET
SET
31
Page 37

Telephone settings
Settings
In the settings menu, you can modify the settings for LCD language, display
alerts, CID time synchronization, handset name, key tone, dial mode and
caller ID announce.
LCD language
You can select a language (English, French or Spanish) to
be used in all screen displays.
To select a language:
Press MENU on the handset when it is not in use.
1.
Press or to highlight Settings, then
2.
press SELECT.
Press SELECT to choose LCD language.
3.
Press or to choose from English, Français
4.
or Español, then press SET to save. You hear a
confirmation tone.
SETTINGS
LCD language
Display alerts
CID time sync
Rename handset
BACK
LCD LANGUAGE
English
Fran
Espan ol
BACK
SELECT
c
ais
,
SET
32
Page 38

Telephone settings
Display alerts
In the display alerts menu, you can change and edit the settings for display
alerts on the idle screen.
Missed call indicator
When there are missed calls that have not been reviewed
in the caller ID log, the handsets show XX Missed calls.
Each time you review a caller ID log entry marked NEW,
the number of missed calls decreases by one.
When you have reviewed all the missed calls, the missed
calls indicator disappears.
If you do not want to review the missed calls one by one,
you can reset the missed call indicator. All the entries are
then considered old and kept in the caller ID log.
To reset the missed call indicator:
Press MENU on the handset when it is not in use.
1.
Press or to highlight Settings, then
2.
press SELECT.
3.
Press
or
to highlight Display alerts, then
press SELECT.
Press or to highlight Home line or Cell line, then
4.
press SELECT.
Press SELECT to choose Missed calls. The handset
5.
displays Reset missed call indication? Press YES to
confirm. You hear a confirmation tone.
You can also press and hold OFF/CANCEL to erase the
missed call indicator when the telephone is not in use.
HANDSET
XX Missed calls
12:31PM 12/31
800-595-9511
12:31PM 12/31
BACK DIAL
LCD language
Display alerts
CID time sync
Rename handset
BACK
HOME ALERTS
Missed calls
Voicemail
No line
BACK
MENU
VTech
SETTINGS
SELECT
SELECT
NEW
X
33
Page 39

Telephone settings
Display alerts (continued)
Voicemail indicators
If you subscribe to voicemail service offered by your telephone service
provider, New voicemail and appear on the handsets when you have
new voicemail messages. Contact your telephone service provider for more
information and assistance about using your voicemail service.
After you have listened to all new voicemail messages, the indicators on the
handsets turn off automatically.
Reset the voicemail indicators when the telephone indicates that there is
new voicemail but there is none (for example, when you have accessed your
voicemail while away from home). Clearing the voicemail waiting indicators
only turns off the indicators; it does not delete your voicemail messages. As
long as you have new voicemail messages, your telephone service provider
continues to send the signal to turn on the indicators.
To reset the voicemail indicators:
Press MENU on the handset when it is not in use.
1.
Press or to highlight Settings, then press
2.
SELECT.
3.
Press
or
to highlight Display alerts, then press
SELECT.
Press or to highlight Home line, then press
4.
SELECT.
Press or to highlight Voicemail, press SELECT.
5.
The handset displays Reset voicemail indication?
6.
Press YES to confirm. You hear a confirmation tone.
DISPLAY ALERTS
Home line
Cell line
BACK
Missed calls
Voicemail
No line
SELECT
HOME ALERTS
34
BACK
SELECT
Page 40

Telephone settings
Display alerts (continued)
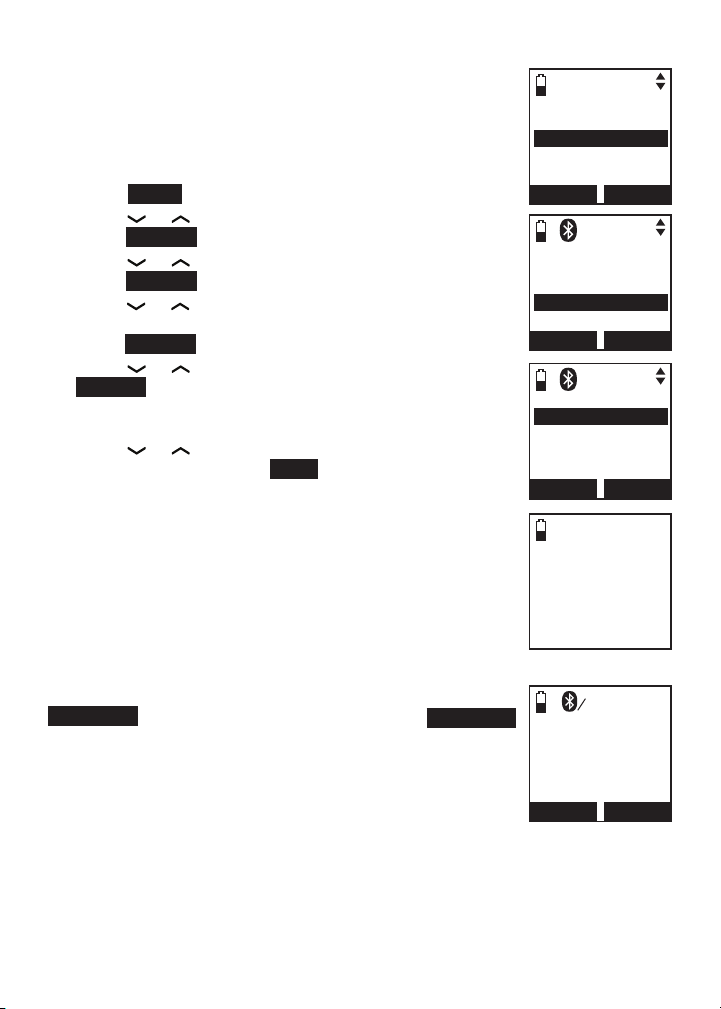
No line
If there is no telephone line connected to the telephone base, the handsets show
No home line. If you do not want to display the message on the handsets (for
example, if you use the cell line only), you can turn off the no line alert.
To turn the no line alert on or off:
Press MENU on the handset when it is not in use.
1.
Press or to highlight Settings, then
2.
press SELECT.
3.
Press
or
to highlight Display alerts, then press
SELECT.
Press or to highlight Home line, then
4.
press SELECT.
Press or to highlight No line, then press SELECT.
5.
Press or to choose On or Off, then press SET to
6.
save. When you choose Off, the handset displays If
the line is not connected, an alert will not appear.
You hear a confirmation tone.
Download fail
If the directory download process is interrupted, the handsets display
Download fail. You can reset the download fail indication on the handset.
To reset the download fail indication:
Press MENU on the handset when it is not in use.
1.
Press or to highlight Settings, then
2.
press SELECT.
3.
Press
or
to highlight Display alerts, then
press SELECT.
Press or to highlight Cell line, then
4.
press SELECT.
Press or to highlight Download fail, then
5.
press SELECT.
The handset displays Reset download failure
6.
indication? Press YES to confirm. You hear a
confirmation tone.
You can also press and hold OFF/CANCEL to erase this
indication when the telephone is not in use.
HOME ALERTS
Missed calls
Voicemail
No line
BACK
NO LINE ALERT
On
Off
BACK
Missed calls
Download fail
BACK
YES
SELECT
SET
CELL ALERTS
SELECT
Reset
download
failure
indication?
NO
35
Page 41
Telephone settings
CID time synchronization
If you subscribe to caller ID service, the date and time
will be set automatically by the caller ID information. You
can turn off this feature if you want to set the date and
time manually.
To change the setting:
Press MENU on the handset when it is not
1.
in use.
Press or to highlight Settings, then
2.
press SELECT.
Press or to highlight CID time sync,
3.
then press SELECT.
Press or to choose On or Off, then press
4.
SET to save. You hear a confirmation tone.
Rename handsets
You can create a name for each handset. The new name
can be up to 11 characters.
To rename a handset:
Press MENU on the handset when it is not
1.
in use.
Press or to highlight Settings, then
2.
press SELECT.
Press or to highlight Rename handset,
3.
then press SELECT. The handset displays
RENAME HANDSET.
Use the dialing keys to edit the name.
4.
Press MUTE /DELETE to erase a character.
•
Press and hold MUTE/DELETE to erase all
•
characters.
Press to move the cursor to the right or
•
to the left.
Press SAVE. You hear a confirmation tone.
5.
SETTINGS
LCD language
Display alerts
CID time sync
Rename handset
BACK
CID TIME SYNC
On
Off
BACK
LCD language
Display alerts
CID time sync
Rename handset
BACK
RENAME HANDSET
Room A _ _ _ _ _
BAC K SAVE
SELECT
SETTINGS
SELECT
Room A
SET
1
36
12:31PM 12/31
MENU
Page 42

Telephone settings
Key tone
You can change the volume of the key tone or turn it off.
To change the setting:
Press MENU on the handset when it is not in use.
1.
Press or to highlight Settings, then
2.
press SELECT.
Press or to highlight Key tone, then
3.
press SELECT.
Press or to sample each volume level.
4.
Press SET to save.
- OR -
Press OFF to turn off the key tone, then press SET to
save. You hear a confirmation tone.
Dial mode
The dial mode is preset to tone dialing. If you have pulse
(rotary) service, you must change the dial mode to pulse
dialing before using the telephone.
To change the setting:
Press MENU on the handset when it is not
1.
in use.
Press or to highlight Settings, then
2.
press SELECT.
Press or to highlight Dial mode, then
3.
press SELECT.
Press or to choose Tone or Pulse, then
4.
press SET to save. You hear a confirmation tone.
SETTINGS
Display alerts
CID time sync
Rename handset
Key tone
BACK
KEY TONE VOLUME
OFF
CID time sync
Rename handset
Key tone
Dial mode
BACK
Tone
Pulse
BACK
SELECT
SET
SETTINGS
SELECT
DIAL MODE
SET
37
Page 43
Telephone settings
Caller ID announce
You can set your handset and/or telephone base to
announce the caller ID information for incoming calls.
The caller ID announce setting is independent for each
handset and the telephone base.
To change the setting:
Press MENU on the handset when it is not in use.
1.
Press or to highlight Settings, then
2.
press SELECT.
Press or to highlight Annc Caller ID, then
3.
press SELECT.
Press or to highlight Handset or Base, then
4.
press SELECT.
Press or to choose On or Off, then press SET to
5.
save. You hear a confirmation tone.
To use the caller ID announce feature, you must subscribe to caller ID
•
service from your telephone service provider.
Only the first four registered handsets will be able to use this feature.
•
If the phone number of the incoming call matches the last 7 digits of a
•
directory entry, the name will be announced as it appears in the entry.
The phone number will be announced when the name is unknown, private
•
or not provided. Only the last 11 numbers of a phone number is announced.
No information will be announced if both the name and number are private,
•
unknown or not provided.
This feature is not supported with headsets.
•
This feature does not announce information for call waiting calls.
•
If both home and cell lines are ringing, only the caller ID information of the
•
first ringing line will be announced.
It takes at least 2 rings for the phone to receive caller ID information and
•
announce it. If the phone is answered before the end of the second ring, it
will not have time to announce the caller ID information.
Pronunciation of names may vary with this feature. Not all names may be
•
pronounced correctly.
SETTINGS
Rename handset
Key tone
Dial tone
Annc Caller ID
BACK
ANNC CA LLER ID
On
Off
BACK
SELECT
SET
38
Page 44

Telephone settings
Website
You can use this feature to view the VTech website
address.
Press MENU on the handset when it is not in use.
1.
Press or to highlight Website, then press
2.
SELECT. The handset displays the VTech website.
Press OK to exit.
3.
Bluetooth
Ringers
Set date/time
Settings
Website
BACK
www.
vtechphones.com
SELECT
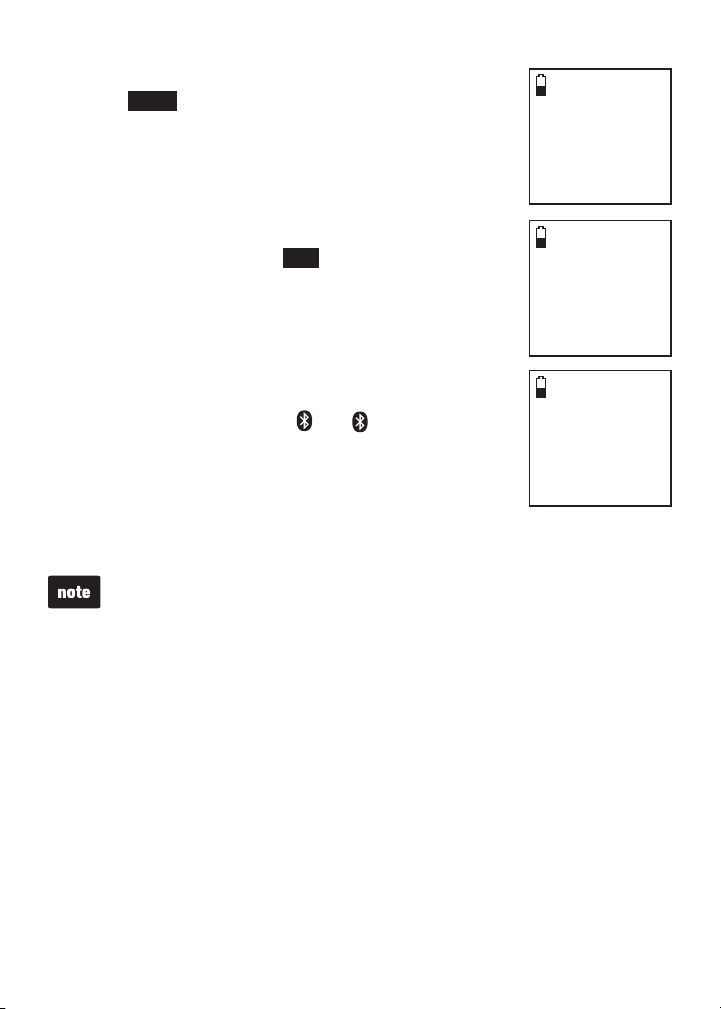
Home area code
OK
If you dial local calls using only seven digits (area code not required), you
can program your home area code so that when you receive a call within your
local area, the telephone number is automatically stored
without the area code in the caller ID log.
When you review the directory, call log or redial list, you
can press # (pound key) repeatedly to show different
800-595-9511
1-800-595-9511
595-9511
1-595-9511
dialing options before dialing.
To change the setting:
Press MENU on the handset when it is not in use.
1.
Press or to highlight Directory, then
2.
press SELECT.
Press SELECT to choose Home, then press OPTION.
3.
Press or to highlight Home area code, then
4.
HOME AREA CODE
BACK
SET
---
press SELECT. The handset displays Only for 7 digits dialing from
Caller ID log.
Use the dialing keys to enter the desired home area code.
5.
Press MUTE /DELETE to erase a digit.
•
Press and hold MUTE/DELETE to erase all digits.
•
Press to move the cursor to the right or to the left.
•
Press SET to save. The handset displays Area code will not show in
6.
Caller ID log. You hear a confirmation tone.
If, in the future, your telephone service provider requires you to dial 10 digits
to make a local call (area code plus telephone number), you need to delete
your home area code. With the home area code displayed, press
MUTE/DELETE to delete the numbers, and then press SET. The home area
code is now restored to its default setting of _ _ _ (empty).
39
Page 45

Telephone settings
Cell area code
Most cell phone entries are stored in a 10-digit format. If all of your cell phone
entries are stored this way, you do not need to program your cell area code.
If your cell phone stores entries in a 7-digit format, we
recommend that you program your cell area code so that
your 7-digit directory entries can be dialed correctly using
your home line. While reviewing an entry in the caller ID
log or directory, you can press # (pound key) repeatedly to
see different dialing options before you dial or store
the number.
To change the setting:
Press MENU on the handset when it is not in use.
1.
Press or to highlight Directory, then press
2.
SELECT.
Press or to highlight a desired downloaded directory, then
3.
press OPTION.
Press SELECT to choose Cell area code. The handset displays Only for
4.
7 digits dialing from Caller ID log.
Use the dialing keys to enter the desired cell area code.
5.
Press MUTE /DELETE to erase a digit.
•
Press and hold MUTE/DELETE to erase all digits.
•
Press to move the cursor to the right or to the left.
•
Press SET to save. The handset displays Area code will not show in
6.
Caller ID log. You hear a confirmation tone.
800-595-9511
1-800-595-9511
595-9511
1-595-9511
CELL AREA CODE
BACK
SET
---
40
Page 46

Telephone settings
Telephone base settings
Telephone base ringer volume
Press /VOL or /VOL on the side of telephone base to adjust the ringer
volume when the telephone is not in use. When you set the ringer volume to
zero, the base ringer is off and the system announces, “Base ringer is off.”
Press /VOL during an incoming call to mute the ringer temporarily.
See page 29 to set the handset ringer volume.
Answering system settings
Go to Answering system settings starting on page 74 for instructions on
how to use a system handset to modify the answering system settings
shown below.
Setting Page
Answer on/off 74
Announcement (play, record and delete) 75-76
Call screening 77
Number of rings 78
Remote access code 79
Message alert tone 80
Recording time 80
41
Page 47

Telephone operation
Make, answer or end a home call
Using a handset:
To make a home call:
Press /HOME/FLASH or , then enter the
•
telephone number.
To predial a home call:
Enter the telephone number, then press
•
/HOME/FLASH or .
To answer a home call:
Press /HOME/FLASH or .
•
To end a home call:
Press OFF/CANCEL or put the handset in the
•
telephone base or charger.
The screen shows the elapsed time as you talk (in hours, minutes
•
and seconds).
When predialing (preview numbers before dialing), press MUTE /DELETE
•
to backspace and delete; press and hold REDIAL /PAUSE to insert a dialing
pause (a p appears).
You cannot answer a home call using your connected cell phone.
•
Using a Bluetooth headset:
You can use a Bluetooth headset on home calls. However, you will need to stay
within 30 feet from the telephone base to maintain the Bluetooth signal.
To answer a home call using a Bluetooth headset:
Press the call key on your headset.
•
To end a home call you answered from a Bluetooth headset:
Press the call key on your headset.
•
42
Page 48
Telephone operation
Make, answer or end a home call (continued)
To transfer a call from a handset to a Bluetooth headset:
If you make or answer a home call on a handset, you can transfer the call
to your headset. The handset remains active, but the handset earpiece and
microphone are muted. If you hang up the handset, the call will end.
Press OPTION.
•
Press or to choose Use BT headset, then press SELECT twice.
•
The handset briefly displays Transferring audio to Headset A when the
call is successfully transferred to the Bluetooth headset.
If you answer a call from the headset, that call cannot be transferred to
•
a handset.
The handset will not show Use BT headset when the Bluetooth headset is
•
already in use, or there are no active Bluetooth headsets on the device list.
You cannot use a Bluetooth headset on cell calls.
•
To transfer a call from the headset back to the handset:
OPTION
Press
•
press
SELECT
To end a call that started at the handset:
Press OFF/CANCEL or put the handset in the telephone base or charger.
•
If you answer a call using a headset, and you lose the Bluetooth connection
•
or the battery is depleted, the call will be lost.
If you are using a headset for a call which is transferred from a DS6421
•
handset, and you lose the Bluetooth connection or the battery of the
headset is depleted, the call will be transferred back to the
originating handset.
, then press or to highlight Use handset and then
.
Call waiting on the home line
When you subscribe to call waiting service with your telephone service
provider, you hear a beep if someone calls while you are already on a call.
Press /HOME/FLASH on the handset to put your current call on hold and
•
take the new call.
Press /HOME/FLASH on the handset at any time to switch back and
•
forth between calls.
43
Page 49

Telephone operation
Make, answer or end a cell call
You can connect a maximum of two Bluetooth enabled cell phones to the
telephone base, but only one cell phone can be used on a cell call at a time. All
DS6421 handsets can be used to make or answer calls on the cell phone line.
To make a cell call:
Press /CELL.
•
Enter the telephone number, then press DIAL.
•
- OR -
Enter the telephone number, then press /CELL.
•
If you have only one cell phone connected to the
telephone base, it is automatically selected to make cell calls. If you have two
cell phones connected to the telephone base, the telephone system prompts
you to select a cell phone before you make a cell call.
To answer a cell call:
Press /CELL.
•
You can also use your cell phone to answer the call. If you answer with your
cell phone, it will disconnect from the telephone base.
To end a cell call:
Press OFF/CANCEL or put the handset in the telephone base or charger.
•
Call waiting on the cell line
When you subscribe to call waiting service with your cell phone service
provider, you hear a beep if someone calls while you are already on a call.
Press /CELL on the handset to put your current call on hold and take
•
the new call.
Press /CELL on the handset at any time to switch back and forth
•
between calls.
- OR -
Press SWAP to switch.
•
To switch back, press OPTION. Press or to choose Swap, and then
•
press SELECT.
44
Page 50

Telephone operation
Answer a cell call while on a home call
When you are on a home call and you receive an incoming cell call, you
hear a beep, and 1 or 2 displays on the handset you are using. The
telephone base and all other handsets ring.
To answer the incoming cell call:
Press /CELL on the handset. The home call is automatically placed
•
on hold and all other handsets display Home call on hold and
Cell line in use alternately.
To end the cell call:
Press OFF/CANCEL on the handset. The home line is still on hold. All
•
handsets display Home call on hold.
To resume the home call on hold:
Press /HOME/FLASH on the handset.
•
Cell phone voicemail
If you have voicemail service active on your cell phone, and you do not
answer the incoming cell call, the call will be answered by your cell phone’s
voicemail. Contact your cell phone service provider for more information
about voicemail service.
Answer a home call while on a cell call
If you are on a cell call and you receive an incoming home call, you will hear
a beep and displays on the handset you are using. The telephone base
and all other handsets will ring.
To answer the incoming home call:
Press
•
placed on hold and all other handsets display Cell call on hold and
Home line in use alternately.
To end the home call:
Press OFF/CANCEL on the handset. The cell line is still on hold. All
•
handsets display Cell call on hold.
To resume the cell call on hold:
Press /CELL on the handset.
•
/HOME/FLASH
on the handset. The cell call is automatically
If you have turned on your answering system and you do not answer the
incoming home call, the call will be answered by your answering system.
45
Page 51

Telephone operation
Conference home and cell calls
When you have calls established on the home and cell lines, you can create
a 3-way conference.
To conference both home and cell calls:
Press OPTION.
1.
Press or to highlight Conference.
2.
Press SELECT. The handset displays Lines now in conference.
3.
To select an option while on a conference call:
Press
1.
2.
3.
To end a conference call:
•
- OR -
•
OPTION.
Press or to highlight one of the following options:
End home line
•
End cell line
•
End Conference
•
Directory
•
Caller ID log
•
Press SELECT.
Press OFF/CANCEL or put the handset back in the telephone base
or charger.
OPTION
Press
SELECT
, then press
to end the conference.
or to highlight End Conference. Press
Using the home and cell lines together
You can be on two different calls using the cell line and home line at the
•
same time using two handsets.
You cannot be on a call using the cell line and a Bluetooth headset via the
•
home line at the same time. These are both Bluetooth devices and only
one can be used at a time.
If you are on a call using the cell line, you cannot join the call using your
•
paired cell phone. However, you can join the call using another DS6421
handset. Your cell phone is being used for the phone call so only features
that are normally available during a call can be used.
46
Page 52

Telephone operation
Handset speakerphone
During a call, press to switch between speakerphone and normal
handset use.
Volume control
During a call, press VOL/ / or VOL/ /CID to adjust the listening volume.
You hear an in-ear beep while adjusting. If you turn off the key tone, the inear beep will not be heard.
If this is a cell call and the volume is too loud or quiet, try changing the
volume on your cell phone. On some cell phones, changing the volume on
the cell phone effects your cell call volume on the DS6421 handset.
Silence the ringer
When the telephone is ringing, you can temporarily silence the ringer of the
handset without disconnecting the call. The next call rings normally at the
preset volume.
To silence the ringer:
Press SILENCE, OFF/CANCEL or MUTE/DELETE on the handset and
•
Ringer muted appears.
Mute
The mute function turns off the microphone. You can hear the caller, but the
caller cannot hear you.
To mute a call:
During a call, press MUTE/DELETE to turn off the microphone. The
•
handset shows Microphone off briefly and MUTE appears until the mute
function is turned off.
To take a call off mute:
Press MUTE/DELETE again to resume the conversation. The handset
•
briefly shows Microphone on.
47
Page 53

Telephone operation
Temporary tone dialing
If you have pulse (rotary) service only, you can switch from pulse to touchtone dialing temporarily during a call. This is useful if you need to send touchtone signals to access your telephone banking or long distance services.
During a call:
Press .
1.
Use the dialing keys to enter the relevant number. The telephone sends
2.
touch-tone signals.
The telephone automatically returns to pulse dialing mode after you end
3.
the call.
Hold
You can place a home or cell call on hold. You will hear an alert tone if you
have not taken the call off of hold after 14 minutes. You will hear another
alert tone 30 seconds later. At 15 minutes on hold, the call on hold
automatically disconnects.
To place a home call on hold:
Press HOLD. Home call on hold appears and
•
To resume a home call on hold:
Press
•
To place a cell call on hold:
Press HOLD. Cell call on hold appears and /CELL flashes.
•
To resume a cell call on hold:
Press /CELL.
•
/HOME/FLASH
.
/HOME/FLASH
flashes.
Handset locator
This feature helps you find misplaced handsets.
To start paging:
Press /FIND HANDSET on the telephone
•
base when it is not in use. All idle handsets
ring and display ** Paging **.
To end paging:
Press /FIND HANDSET on the
•
telephone base.
- OR -
Press /HOME/FLASH, /CELL, , PUSH TO TALK, REDIAL/PAUSE,
•
or any dialing key (0-9, # or ) on the handset.
48
Page 54

Telephone operation
Equalizer
The equalizer feature on the handset enables you to change the quality of the
handset audio to best suit your hearing. While on a call, an intercom, a PTT
session, or listening to a message or announcement, press to select
the equalizer setting Treble 1, Treble 2, Bass or Natural (the default setting)
for the handset. You hear an in-ear beep while adjusting. If you turn off the
key tone, the in-ear beep will not be heard. The current setting is shown on
the handset for two seconds.
The equalizer feature does not apply to the speakerphone on the telephone
•
base or the connected Bluetooth headset.
If you switch the call between the handset and the speakerphone by
•
pressing , the audio setting remains unchanged.
The current equalizer setting remains unchanged until a new setting
•
is selected.
Transfer a call
While on an outside call, you can transfer the call from one handset to another.
Press OPTION, then press SELECT to highlight Transfer.
1.
If you have two handsets, your handset displays Transferring call
•
to HANDSET X. The destination handset rings and displays Home
Transfer from other handset.
If you have three or more handsets, your handset displays TRANSFER
•
TO: and a list of registered handsets. Press or to highlight a
destination handset and then press SELECT. Your handset displays
Transferring call to HANDSET X, or Transferring call to all...
when you choose All handsets. The destination handset rings and
displays Home Transfer from HANDSET X or Home Transfer from
HANDSET X to all.
Your handset displays Call transferred when the other handset picks up
2.
the call. You hear a confirmation tone.
If the destination handset does not answer within 30 seconds, the originating
handset displays No response to transfer and rings. If the originating handset
does not answer the call on hold within 30 seconds, the call will end automatically.
49
Page 55
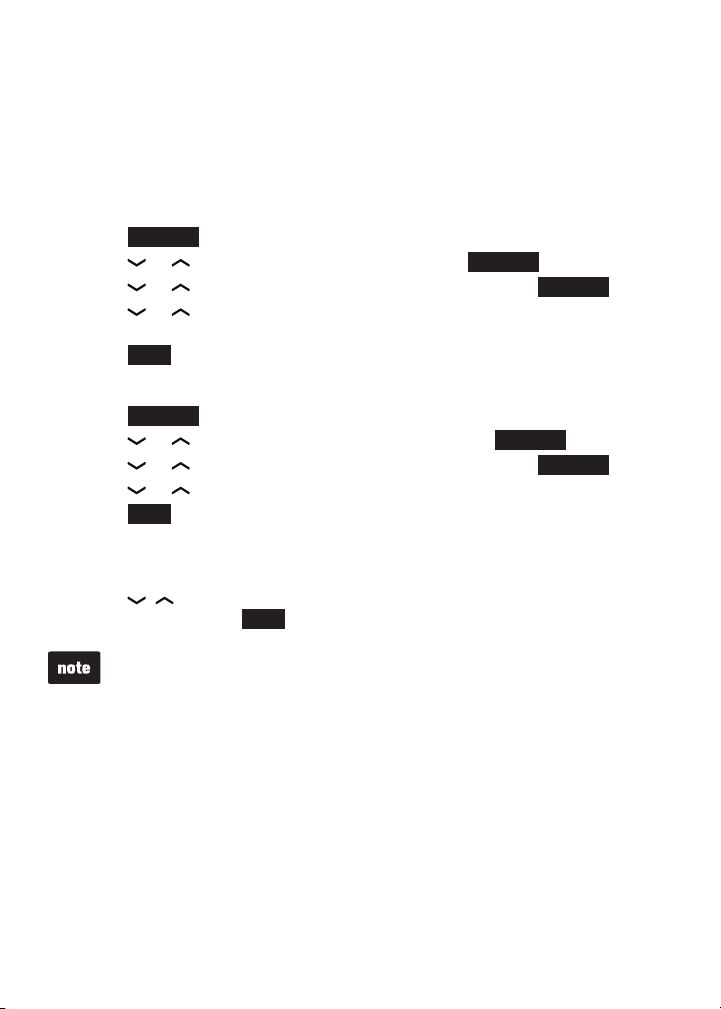
Telephone operation
Chain dialing
Use this feature to initiate a dialing sequence from numbers stored in the
directory, caller ID log or redial while you are on a call.
Chain dialing can be useful if you wish to access other numbers (such as
bank account numbers or access codes) from the directory, caller ID log or
redial list.
To access a number in the directory while on a call:
Press OPTION.
1.
Press or to highlight Directory, then press SELECT.
2.
Press or to highlight a desired directory, then press REVIEW.
3.
Press or to scroll to the desired entry, or perform an alphabetical
4.
search (page 63).
Press DIAL to dial the displayed number.
5.
To access a number in the caller ID log while on a call:
Press OPTION.
1.
Press or to highlight Caller ID log, then press SELECT.
2.
Press or to highlight a desired directory, then press REVIEW.
3.
Press or to scroll to the desired entry.
4.
Press DIAL to dial the displayed number.
5.
To access the redial list while on a call:
Press REDIAL/PAUSE.
1.
Press , or REDIAL/PAUSE repeatedly until the desired number
2.
displays, then press DIAL to dial the displayed number.
You cannot edit a directory entry while on a call. For more details about the
•
directory, see page 61.
You cannot copy a caller ID log entry into the directory while on a call. For
•
more details about caller ID log, see page 69.
You can only view the numbers in the directory, caller ID log or redial while
•
on a call and cannot erase any entries.
While on a call, press OFF/CANCEL to exit the directory, caller ID log or
•
redial list.
50
Page 56

Telephone operation
Redial list
The redial list stores up to 10 of the most recently dialed numbers on
each handset.
When there are already 10 entries, the oldest entry is deleted to make
room for the new entry. Entries are shown in reverse chronological order.
Review the redial list
Press REDIAL/PAUSE when the handset is not
1.
in use.
Press , or REDIAL/PAUSE to browse. You hear
2.
a double beep when you reach the beginning or
end of the redial list.
Dial a redial entry
Press REDIAL/PAUSE when the handset is not in use.
1.
Press
2.
number displays.
Press
3.
- OR -
Press /CELL to use the cell line.
,
or REDIAL/PAUSE to browse until the desired
/HOME/FLASH
or to use the home line.
51
Page 57

Telephone operation
Save a redial entry to the directory
Press REDIAL/PAUSE when the handset is not in use.
1.
Press
2.
Press SAVE.
3.
The handset displays EDIT NUMBER. Use the dialing keys to edit the
4.
number, if necessary.
•
•
•
•
Press NEXT.
5.
Press or to highlight one of the following types:
6.
•
•
•
•
Press NEXT. The handset displays ENTER NAME. Use the dialing keys
7.
to enter a name.
•
•
•
Press SAVE and then Saved displays. You hear a confirmation tone.
8.
Delete a redial entry
Press REDIAL/PAUSE when the handset is not in use.
1.
Press
2.
Press MUTE /DELETE to delete the displayed number. You hear a
3.
confirmation tone.
,
or REDIAL/PAUSE to select the desired number.
Press MUTE /DELETE to erase a digit.
Press and hold MUTE/DELETE to erase all digits.
Press to move the cursor to the right or to the left.
Press and hold REDIAL/PAUSE to insert a dialing pause (a p appears).
Home
Cell
Work
Other
Press MUTE /DELETE to erase a character.
Press and hold MUTE/DELETE to erase all characters.
Press to move the cursor to the right or to the left.
,
or REDIAL/PAUSE to select the desired number.
52
Page 58

Multiple handset use
Share an outside call
Another handset can join you on an outside call. That call continues
until all people hang up. You can share an outside call with up to four
system handsets.
Press /HOME/FLASH or on another handset to join the call.
•
- OR -
Press OPTION during an intercom call, then press or to highlight
•
Share call. Press SELECT.
Intercom
Use the intercom feature for conversations between two system handsets.
Only one intercom call can be established at a time.
You can buy additional expansion handsets (DS6401) for this telephone
system. You can register up to 12 handsets to the telephone base.
To initiate an intercom call:
Press MENU on the handset when it is not in use.
1.
Press or to highlight Intercom, then
2.
press SELECT.
If you have two handsets, your handset displays
•
Calling other handset. The destination handset
rings and displays Other handset is calling.
If you have three or more handsets, your handset
•
displays INTERCOM and a list of registered
handsets.
Press or to highlight a destination handset
�
and then press SELECT. Your handset displays
Calling HANDSET X, or Calling all handsets
when you choose All handsets.
- OR -
Use the dialing keys to enter a destination handset number (1-9 for
�
handsets 1-9, and 0 for handset 10, and 1 for handset
11, and 2 for handset 12, or and # for all handsets).
The destination handset rings and displays HANDSET X is calling, or
HANDSET X is calling all when you choose all handsets.
Play messages
Answering sys
Directory
Caller ID log
Intercom
BACK
HANDSET A 2
HANDSET B 3
HANDSET C 4
All handsets
BACK
SELECT
INTERCOM
SELECT
To answer an intercom call at the destination handset:
Press /HOME/FLASH or . Both handsets show Intercom.
•
53
Page 59

Multiple handset use
Intercom (continued)
To silence an intercom call:
Press OFF/CANCEL, MUTE/DELETE or SILENCE on the destination
•
handset. Its screen displays Ringer muted for a few seconds.
To end an intercom call:
Press OFF/CANCEL, END or place either handset back in the telephone
•
base or charger. Both handsets display Intercom ended.
You can cancel the intercom call before it is answered by pressing
•
OFF/CANCEL or END on your handset.
If you are calling all devices, the quickest device will answer the
•
intercom call.
If the destination handset does not answer the intercom call within
•
100 seconds, is in the directory or caller ID log, or is out of range, the
originating handset displays No answer. Try again. and returns to
idle mode.
Answer an incoming call during an intercom call
When you receive an incoming home call during an intercom call, there is
an alert tone and Home Incoming call and then the caller ID display on
screens. The telephone base and all other handsets ring.
Press /HOME/FLASH to answer the home call and the intercom call
•
ends automatically.
Press OFF/CANCEL to end the intercom call without answering the
•
incoming call. The telephone continues to ring.
When you receive an incoming cell call during an intercom call, there is an
alert tone and Cell Incoming call and then the caller ID display on screens.
The telephone base and all other handsets ring.
Press /CELL to answer the cell call and the intercom call
•
ends automatically.
Press OFF/CANCEL to end the intercom call without answering
•
the incoming call. The telephone continues to ring.
54
Page 60

Multiple handset use
Transfer a call using intercom
You can use the intercom feature to transfer an outside
call to other system handsets.
When on an outside call, press OPTION.
1.
Press or to highlight Intercom, then press
2.
SELECT. The call is automatically put on hold.
If you have two handsets, your handset displays
•
Calling other handset. The destination handset
rings and displays Other handset is calling.
If you have three or more handsets, your handset
•
displays INTERCOM and a list of registered
handsets.
Press or to highlight a destination handset
�
and then press SELECT. Your handset displays
Calling HANDSET X, or Calling all handsets
when you choose All handsets.
- OR -
Use the dialing keys to enter a destination handset number (1-9 for
�
handsets 1-9, and 0 for handset 10, and 1 for handset
11, and 2 for handset 12, or and # for all handsets).
When the destination handset answers the intercom call, both handsets
3.
show Intercom.
From this intercom call, you have the following options:
4.
You can transfer the call. Press OPTION and then press SELECT to
•
choose Transfer. Your handset shows Call transferred. The other
handset automatically connects to the outside call.
You can let the other handset join you on the outside call in a three-way
•
conversation. Press
your handset, then press
Either person can press the appropriate line key ( /HOME/FLASH
•
OPTION
SELECT
. Press or to highlight Share call on
.
or /CELL) on the handset to take the held outside call, or press
OFF/CANCEL or END to end the intercom call (the outside call will
automatically go off hold on the handset that did not hang up).
If you want to cancel an intercom call and reconnect to the outside call
•
before the destination handset answers, press
originating handset.
If the destination handset does not answer the intercom call within 100
•
seconds, is in the directory or caller ID log, or is out of range, the originating
handset displays No answer. Try again. and returns to the outside call.
OFF/CANCEL
Directory
Caller ID log
Intercom
Bluetooth
Ringers
BACK
INTERCOM
HANDSET A 2
HANDSET B 3
HANDSET C 4
All handsets
BACK
or END on the
SELECT
SELECT
55
Page 61

Multiple handset use
Push-to-talk (PTT)
You can directly broadcast messages from one handset to the
speakerphone of one or a group of handsets. Press and hold
PUSH TO TALK to begin two-way communication. If only one
handset is available or registered, the handset screen shows
PTT requires two handsets when you press PUSH TO TALK.
Only one handset can talk at a time. To do so,
•
press and hold PUSH TO TALK while you are speaking.
You must release PUSH TO TALK, so the other person
•
can respond.
Only one PTT session can be active at a time.
•
While PTT is in use between handsets, other handsets
•
cannot use the intercom feature.
If you attempt to place a PTT call to another handset that
•
is on an outside call or intercom call, or accessing the
answering system, your handset displays Not available at
this time.
PTT on/off
You can turn PTT on or off on each handset.
To turn PTT on or off:
Press PUSH TO TALK when the handset is not in use.
1.
The PUSH TO TALK menu displays.
Press or to highlight PTT On/Off, then
2.
press SELECT.
Press or to choose On or Off, then press
3.
SELECT to save. You hear a confirmation tone.
When PTT is turned off, the handset shows
No Incoming PTT while the phone is not in use.
PUSH TO TALK
HANDSET A 2
HANDSET B 3
All handsets
PTT On/Off
BACK
INCOMING PTT
On
Off
BACK
SELECT
SELECT
56
Page 62
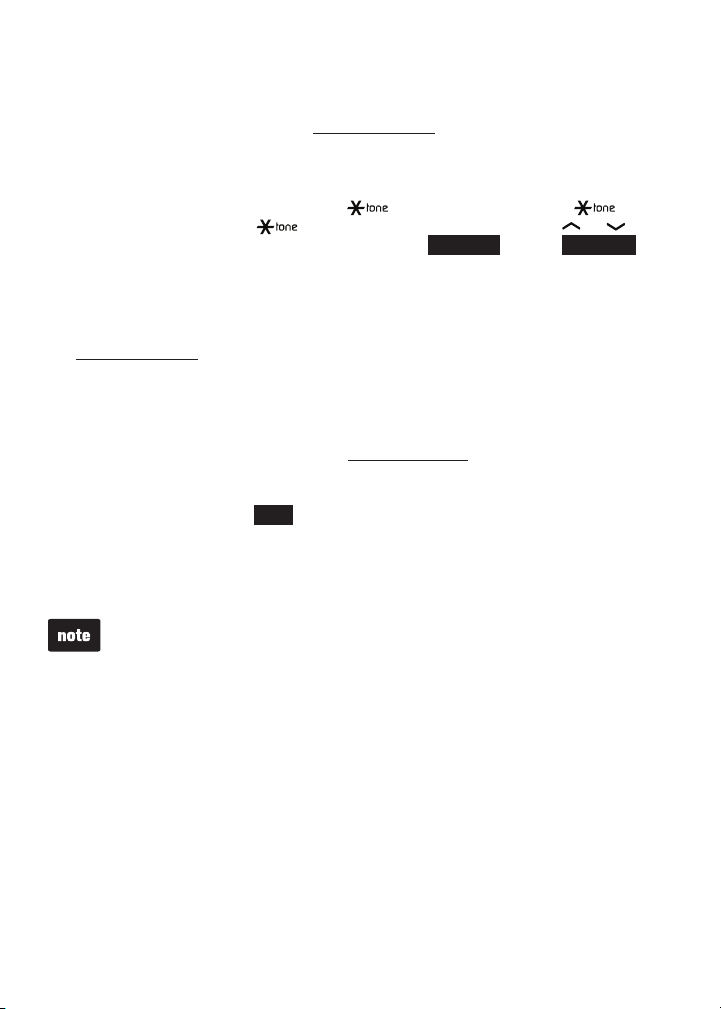
Multiple handset use
PTT to a single handset
You have two ways to begin a PTT call:
1.
If you have two handsets, press and hold PUSH TO TALK when
•
handset is not in use.
If you have three or more handsets, press PUSH TO TALK when the
•
handset is not in use. Then use the dialing keys to enter a handset
number (1-9 for handsets 1-9,
1 for handset 11 or and 2 for handset 12), or press or to
scroll to the desired handset then press SELECT. Press SELECT or
PUSH TO TALK to create the push-to-talk session.
Your handset displays Connecting to HANDSET X... for a few seconds.
When the connection is made, both your and the destination handsets
display Press and hold [PTT] to talk and beep once.
Press and hold PUSH TO TALK on your handset. A chirp indicates your
2.
microphone is on. Speak towards the handset. Your voice is broadcast
to the destination handset. While you are speaking, the handset displays
PTT To HANDSET X (X represents the destination handset number).
Release PUSH TO TALK after speaking. All handsets beep once again.
3.
After the handsets beep, you can press and hold PUSH TO TALK to
continue speaking or the destination handsets can respond (see
Answer a PTT call on page 59).
Press OFF/CANCEL or END to end the PTT call. The handset displays
4.
Push to talk Ended for a few seconds.
- OR -
Place the handset in the telephone base or charger to end the PTT call.
After PUSH TO TALK is released, the PTT call remains open for a short
time. If no one presses PUSH TO TALK within 10 seconds, the PTT call
ends automatically.
and 0 for handset 10, and
57
Page 63

Multiple handset use
PTT to multiple handsets
When there are multiple handsets registered to the telephone system, PTT
supports one-to-group calls. PTT supports a maximum of one-to-four calls
when one to five handsets are registered, and a maximum of one-to-three
calls when six or more handsets are registered. The first four registered
handsets will be able to use this feature. Other handsets can only use PTT
for one-to-one calls.
To begin a PTT call to multiple handsets:
1.
Press and hold PUSH TO TALK when the handset is not in use.
•
If you have three or more handsets, press PUSH TO TALK when the
•
handset is not in use. Press and #, or press or to highlight
All handsets then press SELECT or PUSH TO TALK.
Your handset displays Connecting to all handsets... for a few seconds.
When the connection is made, both your and the destination handsets
display Press and hold [PTT] to talk and beep once.
Press and hold PUSH TO TALK on your handset. A chirp indicates your
2.
microphone is on. Speak towards the handset. Your voice is broadcast to
the destination handset.
While you are speaking, the handset displays PTT To handset X (X
represents the destination handset).
Release PUSH TO TALK after speaking. All eligible handsets beep once
3.
again. After the handsets beep, you can press and hold PUSH TO TALK
to continue speaking or the destination handsets can respond (see
Answer a PTT call on page 59).
Press OFF/CANCEL or END to end the PTT call. The handset displays
4.
Push to talk Ended for a few seconds.
- OR -
Place the handset in the telephone base or charger to end the PTT call.
After PUSH TO TALK is released, the PTT call remains open for a short time.
If no one presses PUSH TO TALK within 10 seconds, the PTT call
ends automatically.
58
Page 64

Multiple handset use
Answer a PTT call
You can respond to a PTT call whenever the speakerphone light is off, as
described below.
When your handset receives a PTT call, the handset beeps and displays
1.
Press and hold [PTT] to talk.
When the other party is speaking, your speakerphone light is on, and your
2.
handset displays PTT From HANDSET X To handset: Y (X represents
the originating handset and Y represents the destination handset; a
maximum of four handset numbers appear).
When your speakerphone light is off and the handset displays Press and
3.
hold [PTT] to talk, press and hold PUSH TO TALK on your handset.
When you hear a chirp, speak towards the handset.
While you are speaking, your handset displays PTT To HANDSET X
•
(X represents the handset numbers of one or more destination
handsets; a maximum of four handset numbers appear).
Your voice is broadcast to all destination handsets.
•
After speaking, release PUSH TO TALK. Your handset will beep. After the beep,
if your speakerphone light is off, you can press and hold PUSH TO TALK to
speak again or the destination handset can respond.
Change a one-to-one PTT to intercom call
You can convert a one-to-one PTT session to an intercom call.
When your handset displays Press and hold [PTT] to talk, press
1.
INTCOM. Your handset displays Switch to Intercom? Press SELECT
to confirm.
If you have two handsets, your handset displays Calling other handset.
•
The destination handset temporarily displays Push to talk Ended and
then Other handset is calling.
If you have three or more handsets, your handset displays Calling
•
HANDSET Y (Y represents the destination handset). The destination
handset temporarily displays Push to talk Ended and then Handset X
is calling (X represents the originating handset).
On the destination handset, press /HOME/FLASH or to answer the
2.
intercom call. Both handsets now display Intercom.
To end the intercom call, press OFF/CANCEL or place the handset in the
3.
telephone base or charger. Both handsets display Intercom ended.
59
Page 65

Multiple handset use
End a PTT call
For a one-to-one PTT call, both the originating and destination handsets
•
can end the PTT call.
For a PTT call to multiple handsets, the originating handset can end the
•
PTT call. If any one of the destination handsets leaves the PTT call, the
call continues until all participants or the initiator hangs up.
To end or leave a PTT call:
Press OFF/CANCEL or place the handset in the telephone base or charger.
The handset displays Push to talk Ended.
After PUSH TO TALK is released, the PTT call remains open for a short time.
If no one presses PUSH TO TALK within 10 seconds, the PTT call
ends automatically.
Answer an incoming call during a PTT call
When you receive an incoming outside call during a PTT session, there is an
alert tone. The PTT screen and the caller ID information display alternately.
During a one-to-one PTT, press /HOME/FLASH or /CELL on the
•
originating or destination handset. The PTT call ends automatically and
the outside call is answered.
During a PTT call to multiple handsets, press /HOME/FLASH or /CELL
•
on the originating handset. The PTT call ends automatically and the outside
call is answered.
During a PTT call to multiple handsets, press /HOME/FLASH or /CELL
•
on any one of the destination handsets and that handset answers the
outside call. The PTT call continues for the rest of the PTT participants.
To leave the PTT call without answering the incoming call, press
•
OFF/CANCEL. The telephone continues to ring.
Make an outgoing call during a PTT call
During a one-to-one PTT call, press /HOME/FLASH or /CELL to get a
•
dial tone. The PTT call ends automatically.
During a PTT call to multiple handsets, press /HOME/FLASH or /CELL
•
on the originating handset. The PTT call ends automatically and you get a
dial tone.
During a PTT call to multiple handsets, press /HOME/FLASH or /CELL
•
on any one of the destination handsets and that handset gets a dial tone.
The PTT call continues for the rest of the PTT participants.
60
Page 66

Directory
About the directory
Your phone directory consists of a home directory and up to four directories
downloaded from cell phones. The home directory stores up to 200 entries
with up to 30 digits for each phone number and 15 characters for each name.
Each downloaded directory stores up to 1,500 entries with up to 30 digits for
each phone number and 15 characters for each name.
Directory entries are stored at the telephone base and shared by all
•
system handsets. Any changes made on one handset apply to all.
Only one handset can review the directory at a time. If another handset
•
tries to enter the directory, it shows Not available at this time.
When you access the directory with no records, the handset shows
•
Directory empty.
When the directory is full and you try to save an entry, the handset shows
•
Directory full.
When you try to save a number already stored in the directory, the
•
handset shows Already saved.
All of the instructions on pages 62-67 for the directories apply to the home
directory and all downloaded directories. Creating a new entry on page 62
only applies to the home directory.
You cannot create new entries in your downloaded directories from the
DS6421 handset. Entries must be downloaded from your cell phone
(see Download directory on page 25).
61
Page 67
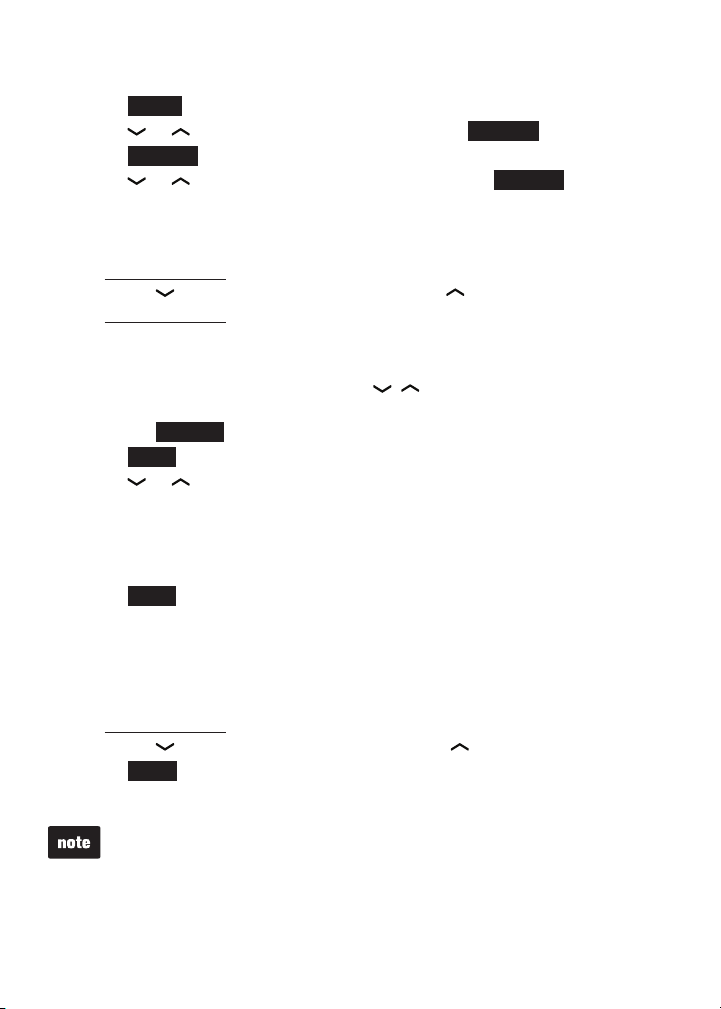
Directory
Create a new entry in the home directory
Press MENU on the handset when it is not in use.
1.
Press or to highlight Directory, then press SELECT.
2.
Press OPTION to select Home.
3.
Press or to highlight Add contact, then press SELECT. The
4.
handset displays ENTER NUMBER.
Use the dialing keys to enter a telephone number (up to 30 digits).
5.
Press MUTE /DELETE to erase a digit.
•
Press and hold MUTE/DELETE to erase all digits.
•
Press to move the cursor to the right or to the left.
•
Press and hold REDIAL/PAUSE to insert a dialing pause (a p appears).
•
- OR -
Copy a number from the redial list.
Press REDIAL/PAUSE and then , or REDIAL/PAUSE to browse
i.
to the desired number.
Press INSERT to copy the displayed number.
ii.
Press NEXT.
6.
Press or to highlight one of the following types:
7.
Home
•
Cell
•
Work
•
Other
•
Press NEXT. The handset displays ENTER NAME.
8.
Use the dialing keys to enter the name (up to 15 characters). Additional
9.
key presses show other characters of that particular key. Press the key
repeatedly until the desired character appears. The first character and the
character after a space are automatically capitalized.
Press MUTE /DELETE to erase a character.
•
Press and hold MUTE/DELETE to erase all characters.
•
Press to move the cursor to the right or to the left.
•
Press SAVE and then the handset shows Saved. You hear a
10.
confirmation tone.
You cannot create new entries in your downloaded directories from your
DS6421 handsets. Entries must be downloaded from your cell phone
(see Download directory on page 25).
62
Page 68

Directory
Review the directory
Entries are sorted alphabetically.
To review the directory:
Press VOL/ / when the handset is not in use.
1.
Press or to choose a directory, then press REVIEW.
2.
Press or to browse.
3.
- OR -
Press MENU on the handset when it is not in use.
1.
Press or to highlight Directory, then press SELECT.
2.
Press or to choose a directory, then press REVIEW.
3.
Press or to browse.
4.
- OR -
Press OPTION while on a call.
1.
Press or to highlight Directory, then press SELECT.
2.
Press or to choose a directory, then press REVIEW.
3.
Press or to browse.
4.
When the desired entry displays, press # (pound key) repeatedly to show
different dialing options.
3-character alphabetical search
You can use the enhanced 3-character search to find your contacts
quickly and efficiently.
To start a search:
Follow the steps in Review the directory above to enter the directory.
1.
When an entry appears, use the dialing keys to enter the letters
2.
associated with the name. You can enter up to three letters for the search.
If there is no name matching the letters entered, the next closest match in
alphabetical order appears. If necessary, use
The cursor automatically moves to the next position in two seconds after
you enter a letter. If you do not enter another letter within two seconds, the
handset starts searching.
63
or
to browse.
Page 69

Directory
Dial a directory entry
You can dial a directory entry on either a home or cell line.
To dial a directory entry:
Search for the desired entry in the directory (see Review the directory
1.
or 3-character alphabetical search on page 63).
When the desired entry appears, press # (pound key)
2.
repeatedly to show different dialing options.
When the displayed number is in the correct format,
3.
press /HOME/FLASH or to use the home line, or
/CELL to use the cell line.
Edit a directory entry
You may edit any directory entry. However, be aware that if you download
from a cell phone again, the directory will be erased and replaced with the
current cell phone directory. If you have edited the downloaded entries on the
DS6421, those changes will be lost.
Search for the desired entry in the directory (see Review the directory
1.
or 3-character alphabetical search on page 63).
When the desired entry appears, press EDIT. The handset shows
2.
EDIT NUMBER.
Use the dialing keys to edit the number.
3.
Press MUTE /DELETE to erase a digit.
•
Press and hold MUTE/DELETE to erase all digits.
•
Press to move the cursor to the right or to the left.
•
Press and hold REDIAL/PAUSE to insert a dialing pause (a p appears).
•
Press NEXT.
4.
Press or to highlight one of the following types:
5.
Home
•
Cell
•
Work
•
Other
•
Press NEXT. The handset displays EDIT NAME.
6.
Use the dialing keys to edit the name.
7.
Press MUTE /DELETE to erase a character.
•
Press and hold MUTE/DELETE to erase all characters.
•
Press to move the cursor to the right or to the left.
•
Press SAVE and then the handset shows Saved.
8.
800-595-9511
1-800-595-9511
595-9511
1-595-9511
64
Page 70

Directory
Edit the type of a directory entry
If you only want to edit the type of a directory entry:
Search for the desired entry in the directory (see Review the directory
1.
or 3-character alphabetical search on page 63).
When the desired entry appears, press LABEL. Enter the corresponding
2.
shortcut keys shown in the below table.
Type: Press:
Home
Cell
Work
Other
- OR -
Press CLEAR to erase the assigned label.
Delete a directory entry
Once a directory entry is deleted, it cannot be retrieved.
To delete an entry:
Search for the desired entry in the directory (see Review the directory
1.
or 3-character alphabetical search on page 63).
When the desired entry appears, press MUTE/DELETE. The handset
2.
displays Delete contact? and the name of the entry. Press YES
to confirm.
The handset displays Contact deleted and then the next alphabetical
3.
entry in the directory. You hear a confirmation tone.
1
2
3
4
Remove a downloaded directory
Search for a desired downloaded directory in the directory menu (see
1.
Review the directory on page 63).
When the desired downloaded directory is chosen, press OPTION, then
2.
press or to highlight Remove dir.
SELECT
Press
3.
erased. Press
The handset displays Erasing directory... and then Directory removed.
4.
You hear a confirmation tone.
. The handset displays Directory CELL PHONE A will be
to confirm.
YES
65
Page 71

Directory
Speed dial
You can copy 10 of your directory entries to the speed dial slots (0-9). The
speed dial entries are shared by all handsets.
Assign a speed dial slot
Press MENU on handset when it is not in use.
1.
Press or to highlight Directory, then press SELECT.
2.
Press or to highlight Speed dial, then press REVIEW.
3.
Press or to highlight an empty slot, then press ASSIGN.
4.
Press or to highlight the desired directory, then press REVIEW.
5.
Search for the desired entry in the directory (see Review the directory
6.
or 3-character alphabetical search on page 63). When the desired
entry appears, press ASSIGN. You hear a confirmation tone.
Reassign a speed dial slot
Press MENU on handset when it is not in use.
1.
Press or to highlight Directory, then press SELECT.
2.
Press or to highlight Speed dial, then press REVIEW.
3.
Press or
4.
Press ASSIGN. The handset displays the directory at the current
5.
assigned entry.
Search for the desired entry in the directory (see Review the directory
6.
or 3-character alphabetical search on page 63). When the desired
entry appears, press ASSIGN.
The handset displays Entry B replaces Entry A Accept? Press YES to
7.
confirm. You hear a confirmation tone.
to highlight the desired slot.
Dial a speed dial entry
Press and hold a desired speed dial slot (0-9).
1.
Press /HOME/FLASH or to use the home line, or /CELL to use the
2.
cell line.
66
Page 72

Directory
Delete a speed dial entry
Press MENU on handset when it is not in use.
1.
Press or to highlight Directory, then press SELECT.
2.
Press or to highlight Speed dial, then press REVIEW.
3.
Press or to highlight an assigned slot, then press DELETE.
4.
The handset displays Delete Entry A Speed dial assignment?
5.
Press YES to confirm. You hear a confirmation tone.
Deleting speed dial entries does not affect the directory entries.
67
Page 73

Caller ID
About caller ID
This product supports caller ID services provided by most telephone service
providers. Depending on your service subscription, you may see the caller’s
number, or the caller’s name and number from the telephone service provider
after the first or second ring. Caller ID from the home line allows you to see the
name, number, date and time of the incoming calls. The caller ID may appear
differently if the caller is matched to a directory entry (see Memory match on
page 69).
Information about caller ID with call waiting
Caller ID with call waiting lets you see the name and telephone number of the
caller before answering the telephone, even while on another call.
It may be necessary to change your telephone service to use this feature.
Contact your telephone service provider and cell phone service provider if:
You have both caller ID and call waiting, but as separate services (you
•
may need to combine these services).
You have only caller ID service, or only call waiting service.
•
You do not subscribe to any caller ID or call waiting services.
•
There are fees for caller ID services. In addition, services may not be
available in all areas.
This product can provide information only if both you and the caller are in
areas offering caller ID service and if both telephone service providers use
compatible equipment. The time and date are sent by your telephone service
provider along with the call information.
You can use this product with regular caller ID service, or you can use this
product’s other features without subscribing to either caller ID or combined
caller ID with call waiting service.
68
Page 74

Caller ID
Caller ID history
If you subscribe to caller ID service provided by your telephone service
provider and/or cell phone service provider, information about each caller
appears after the first or second ring. If you answer a call before the caller
information appears on the screen, it will not be saved in the caller ID log.
The home line and each cell phone paired to the DS6421 have their own
•
caller ID log.
The caller ID log stores up to 50 entries. Each entry has up to 15 digits
•
for the phone number and 15 characters for the name. If the name has
more than 15 characters, only the first 15 characters are shown and
saved in the caller ID log. If the phone number has more than 15 digits,
only the last 15 digits are shown and saved in the caller ID log.
You can review, redial, and copy an entry into the directory.
•
Entries are in reverse chronological order.
•
When the caller ID log is full, the oldest entry is deleted to make room for
•
new incoming call information.
XX Missed calls shows when there are new caller ID log entries that
•
have not been reviewed.
Caller ID log empty shows when you access the caller ID log with
•
no records.
Only one handset can review the caller ID log at a time. If a handset
•
tries to enter the caller ID log while another handset is already in it,
Not available at this time appears.
The caller ID information may not be available for every incoming call. The
callers may intentionally block their names and/or telephone numbers.
Memory match
If the last seven digits of the incoming telephone number is an exact match
with a telephone number in your directory, the name that appears on the
screen matches the corresponding name in your directory.
For example, if Elizabeth Jones calls, her name appears as Liz if this is how
you entered it into your directory.
The number you see on your caller ID is in the format sent by the telephone
service provider. It usually delivers 10-digit telephone numbers (area code
plus telephone number). If the last seven digits of the incoming telephone
number does not match a number in your directory, the name appears as it is
delivered by the telephone service provider.
69
Page 75
Caller ID
Review the caller ID log
Press VOL//CID when the handset is not in use.
1.
Press or to highlight the desired line (home or cell), then
2.
press REVIEW.
Press or to browse.
3.
- OR -
Press MENU on the handset when it is not in use, or press OPTION
1.
while on a call.
Press or to highlight Caller ID log, then press SELECT.
2.
Press or to highlight the desired line (home or cell), then
3.
press REVIEW.
Press or to browse.
4.
The name and telephone number (if available), date and time of all
•
incoming calls are shown.
You hear a double beep when you reach the beginning or end of the
•
caller ID log.
70
Page 76

Caller ID
View dialing options
Although the caller ID log entries received have 10 digits (the area code plus
the seven-digit number), in some areas, you may need to dial only the seven
digits, or 1 plus the seven digits, or 1 plus the area code plus the seven
digits. You can change the number of digits that you dial from the caller ID
log or store to the directory.
While reviewing the caller ID log, press #
(pound key) repeatedly to display different
Press #
dialing options for local and long distance
numbers before dialing or saving the
telephone number in the directory.
Press 1
Press 1 repeatedly if you need to add or
remove 1 in front of the telephone number
before dialing or saving it in the directory.
Press 1
When the number is displayed in the correct
format for dialing, press /HOME/FLASH,
or /CELL to dial.
Dial a caller ID log entry
Search for the desired entry in the caller ID log (see Review the caller ID
1.
log on page 70).
When the desired entry appears and is in the correct format for dialing,
2.
press /HOME/FLASH or to use the home line, or /CELL to use the
cell line.
800-595-9511
1-800-595-9511
595-9511
1-595-9511
1-800-595-9511
800-595-9511
1-595-9511
595-9511
71
Page 77

Caller ID
Save a caller ID log entry to the directory
Caller ID log entries can only be saved to the Home directory.
Select a desired entry in the caller ID log (see Review the caller ID log
1.
on page 70).
When the desired entry appears, press # (pound key) repeatedly to show
2.
different dialing options.
When the number is in the correct format, press SAVE. The handset
3.
shows EDIT NUMBER.
Use the dialing keys to edit the number.
4.
Press MUTE /DELETE to erase a digit.
•
Press and hold MUTE/DELETE to erase all digits.
•
Press to move the cursor to the right or to the left.
•
Press and hold REDIAL/PAUSE to insert a dialing pause (a p appears).
•
Press NEXT.
5.
Press or to highlight one of the following types:
6.
Home
•
Cell
•
Work
•
Other
•
Press NEXT. The handset displays EDIT NAME.
7.
Use the dialing keys to edit the name.
8.
Press MUTE /DELETE to erase a character.
•
Press and hold MUTE/DELETE to erase all characters.
•
Press to move the cursor to the right or to the left.
•
Press to toggle the name order. For example, Mike Smith
•
becomes Smith Mike when you press .
Press SAVE and then the handset shows Saved. You hear a
9.
confirmation tone.
If the name received from the telephone service provider is all in capital
•
letters, the first letter of every word remains a capital letter. However, the
next letter after the prefix “Mac”, “Mc”, or “O’”, is kept as a capital letter. For
example, the “D” in “MacDonald” is kept as a capital letter.
When you try to save a caller ID entry without any caller ID information, the
•
handset displays Unable to save.
72
Page 78

Caller ID
Delete from the caller ID log
To delete a single entry:
Select a desired entry in the caller ID log (see Review the caller ID log
1.
on page 70).
When the desired entry appears, press MUTE/DELETE. The handset
2.
shows the previous caller ID log entry. You hear a confirmation tone.
To delete all entries:
Press VOL//CID when the handset is not in use.
1.
Press ERASE. If you choose the home caller ID log, the handset displays
2.
Delete all Home Calls? If you choose a cell phone caller ID log, the
handset displays Delete all Cell phone A calls? Press YES to confirm.
You hear a confirmation tone.
- OR -
Press MENU on the handset when it is not in use.
1.
Press or to highlight Caller ID log, then press SELECT.
2.
Press ERASE. If you choose the home caller ID log, the handset displays
3.
Delete all Home Calls? If you choose a cell phone caller ID log, the
handset displays Delete all Cell phone A calls? Press YES to confirm.
You hear a confirmation tone.
Caller ID log display screen messages
There are occasions that other information are shown instead of caller ID
information.
Displays: When:
Private name
Private number
Private caller
Unknown name
Unknown number
Unknown caller
Long distance or
L (before the caller’s number)
The caller is blocking the name.
The caller is blocking the telephone number.
The caller is blocking the name and number.
This caller’s name is unavailable.
This caller’s number is unavailable.
No information is available about this caller.
It is a long distance call.
73
Page 79

Answering system settings
Answer on/off
If you turn the answering system on, it answers calls and records messages
only on the home line. If your paired cell phone has voicemail, callers can
leave messages with that voicemail service.
If your answering system is turned off and you change any of its settings, the
answering system automatically turns on again and the handset displays
Calls will be answered.
When the answering system is turned on, the
/ANS ON/OFF light on the telephone base is on
and the handsets display ANS ON.
To turn the answering system on or off:
Using the telephone base:
Press /ANS ON/OFF to turn the answering
•
system on or off. When the answering system is
turned on, it announces,
system is turned off, it announces,
If there is no remaining recording time, the answering system announces,
•
“
Memory is full. Calls will not be answered,
If the total recording time is less than three minutes, the answering system
•
announces,
•
If the answering system is off, you may press
“Less than three minutes to record.”
/ANS ON to turn it on when there is an incoming
call. The answering system answers the call
immediately if there is remaining recording time.
Using a handset:
Press MENU on the handset when it is not in use.
1.
Press or to highlight Answering sys, then
2.
press SELECT.
Press or to highlight Answer ON/OFF, then
3.
press SELECT.
Press or to choose On or Off, then press SET to
4.
save. You hear a confirmation tone.
“Calls will be answered.”
“Calls will not be answered.”
” and cannot be turned on.
When the answering
Play messages
Answering sys
Directory
Caller ID log
Intercom
BACK
ANSWERING SYS
Announcement
Delete all old
Record memo
Answer ON/OFF
BACK
SELECT
SELECT
74
ANSWER ON/OFF
On
Off
BACK
SET
Page 80

Answering system settings
Announcement
The telephone is preset with a greeting that answers calls with
leave a message after the tone.”
replace it with your own.
You can use this preset announcement, or
“Hello, please
Play your announcement
Press MENU on the handset when it is not in use.
1.
Press or to highlight Answering sys, then
2.
press SELECT.
Press SELECT to choose Announcement.
3.
The handset displays ANNOUNCEMENT, press PLAY.
4.
Record your own announcement
Press MENU on the handset when it is not in use.
1.
Press or to choose Answering sys, then
2.
press SELECT.
Press SELECT to choose Announcement.
3.
The handset displays ANNOUNCEMENT,
4.
press RECORD.
The handset announces, “Record after the tone. Press
5.
STOP when you are done.” After the tone, speak
towards the handset microphone.
Press STOP when you finish recording.
6.
The handset automatically plays back the newly
7.
recorded announcement. Press
playback at any time. After the announcement
playback, press PLAY to replay the recorded
announcement, or
Your announcement can be up to 90 seconds
•
in length.
Announcements shorter than two seconds will not
•
be recorded.
RECORD
STOP
to stop the
to record again if desired.
ANSWERING SYS
Announcement
Delete all old
Record memo
Answer ON/OFF
BACK
ANNOUNCEMENT
PLAY
announcement...
Announcement
DELETE
SELECT
RECORD
Recording
STOP
playback
STOP
75
Page 81
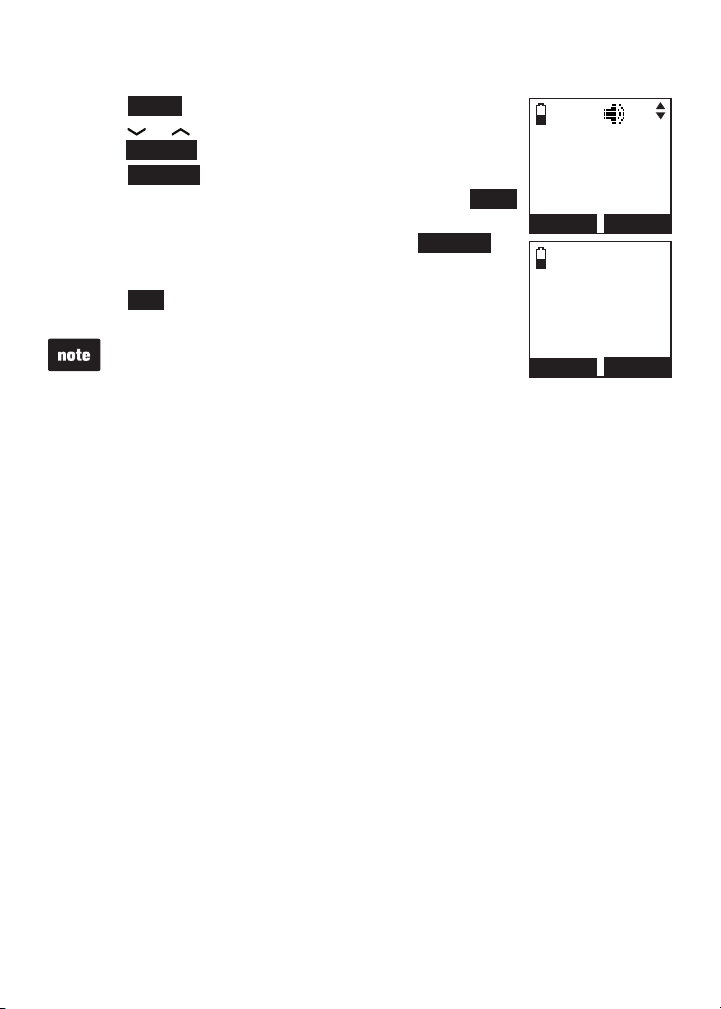
Answering system settings
Delete your announcement
Press MENU on the handset when it is not in use.
1.
Press or to choose Answering sys, then
2.
press SELECT.
Press SELECT to choose Announcement.
3.
The handset displays ANNOUNCEMENT, press PLAY
4.
to play the announcement.
While the announcement is playing, press DELETE
5.
to delete your own recorded announcement. The
handset displays Reset Announcement to default?
Press YES to confirm. You hear a confirmation tone.
When your announcement is deleted, calls are answered
with the default announcement.
Announcement
playback
DELETE
Announcement
YES NO
STOP
Reset
to default?
76
Page 82

Answering system settings
Answering system setup
In the answering system setup menu, you can change the settings for call
screening, number of rings, remote access code, message alert tone and
recording time.
Call screening
Use this feature to choose whether incoming messages
are broadcast from the telephone base speaker when
they are being recorded. While monitoring an incoming
message, you can press /HOME/FLASH or on the
handset to answer the call.
To change the setting:
Press MENU on the handset when it is not in use.
1.
Press or to highlight Answering sys, then
2.
press SELECT.
Press or to highlight Ans sys setup, then
3.
press SELECT.
Press SELECT to choose Call screening.
4.
Press or to choose On or Off, then press
5.
SET to save. You hear a confirmation tone.
ANSWERING SYS
Delete all old
Record memo
Answer ON/OFF
Ans sys setup
BACK
ANS SYS SETUP
Call screening
# of rings
Remote code
Msg alert tone
BACK
CALL SCREENING
On
Off
BACK
SELECT
SELECT
SET
77
Page 83

Answering system settings
Number of rings
When the answering system is turned on, it answers all
incoming home calls after the number of rings set. You
can choose from two, three, four, five or six rings; or toll
saver. With toll saver selected, the answering system
answers after two rings when you have new messages,
and after four rings when you have no new messages.
This enables you to check for new messages and avoid
paying unnecessary long distance charges if you are
calling from outside of your local area. The default number
of rings is four.
To change the setting:
Press MENU on the handset when it is not in use.
1.
Press or to highlight Answering sys, then
2.
press SELECT.
Press or to highlight Ans sys setup, then
3.
press SELECT.
Press or to highlight # of rings, then
4.
press SELECT.
Press or to choose from 6, 5, 4, 3, 2 or Toll saver,
5.
then press SET to save. You hear a confirmation tone.
If you set the number of rings that the answering system answers calls as
3 rings, the answering system may not have enough time to announce the
caller’s full information.
ANS SYS SETUP
Call screening
# of rings
Remote code
Msg alert tone
BACK
6
5
4
3
BACK
SELECT
# OF RINGS
SET
78
Page 84

Answering system settings
Remote access code
A two-digit security code is required to access the
answering system remotely from any touch tone
telephone. The preset code is 19. You can change the
code to any number from 00 to 99.
To change the setting:
Press MENU on the handset when it is not in use.
1.
Press or to highlight Answering sys, then
2.
press SELECT.
Press or to highlight Ans sys setup, then
3.
press SELECT.
Press or to highlight Remote code, then
4.
press SELECT.
Use the dialing keys (0-9) to enter a two-digit number,
5.
then press SET to save. You hear a confirmation tone.
Press MUTE /DELETE to erase a digit.
•
Press and hold MUTE/DELETE to erase all digits.
•
Press to move the cursor to the right or to the left.
•
ANS SYS SETUP
Call screening
# of rings
Remote code
Msg alert tone
BACK
SELECT
REMOTE CODE
19
BACK
SET
79
Page 85

Answering system settings
Message alert tone
When the answering system is turned on, the telephone
beeps every 10 seconds to alert you of new messages.
The tone stops when all new messages have been
reviewed. The message alert tone is preset to off.
To change the setting:
Press MENU on the handset when it is not in use.
1.
Press or to highlight Answering sys, then
2.
press SELECT.
Press or to highlight Ans sys setup, then
3.
press SELECT.
Press or to highlight Msg alert tone, then
4.
press SELECT.
Press or to choose from On or Off, then press
5.
SET to save. You hear a confirmation tone.
You cannot set the message alert tone when another handset or the
telephone base is accessing the answering system.
Recording time
You can set the recording time limit for each incoming
message. The default setting is three minutes.
To change the setting:
Press MENU on the handset when it is not in use.
1.
Press or to highlight Answering sys, then
2.
press SELECT.
Press or to highlight Ans sys setup, then
3.
press SELECT.
Press or to highlight Recording time, then
4.
press SELECT.
Press or to choose from 3 minutes, 2 minutes,
5.
or 1 minute, then press SET to save. You hear a
confirmation tone.
ANS SYS SETUP
Call screening
# of rings
Remote code
Msg alert tone
BACK
MSG ALERT TONE
On
Off
BACK
ANS SYS SETUP
# of rings
Remote code
Msg alert tone
Recording time
BACK
RECORDING TIME
3 minutes
2 minutes
1 minute
BACK
SELECT
SELECT
SET
SET
80
Page 86

Answering system operation
Answering system and voicemail indicators
Your telephone has separate indicators for two different
types of voice messages: those left on its built-in
answering system and those left at your service provider’s
voicemail (fees may apply). Your telephone’s built-in
HANDSET
1 New message
answering system messages and voicemail messages are
separate. Each alerts you to new messages differently.
If and XX New messages display on the
•
12:31PM 12/31
handsets and the message window on
the telephone base flashes, there are new
messages in the built-in answering system,
press
PLAY/STOP/
on the telephone base.
To listen to messages with a handset, see
To play messages with a handset on
If and New voicemail display on the
•
page 84.
handsets, your telephone service provider is
indicating that it has new voicemail for you. To
listen to your voicemail, you typically dial an
access number provided by your telephone
service provider, followed by a security code or PIN.
Some service providers bundle or combine multiple services like voicemail
and call waiting, so you may not be aware that you have voicemail. To check
what services you have and how to access them, contact your telephone
service provider.
To use your voicemail service rather than your answering system, turn off
your answering system. To use your answering system rather than your
voicemail service, contact your telephone service provider to deactivate your
voicemail service.
MENU
ANS
O N
X
Using the answering system and voicemail together
You can use your telephone answering system and voicemail together by
setting your built-in answering system to answer before voicemail answers.
To learn how to program your voicemail settings, contact your telephone
service provider. If you are on a call, or if the answering system is busy
recording a message and you receive another call, the second caller can
leave a voicemail message.
Set your answering system to answer calls at least two rings earlier than your
voicemail is set to answer. For example, if your voicemail answers after six
rings, set your answering system to answer after four rings. Some voicemail
providers may program the delay before answering calls in seconds instead
of rings. In this case, allow six seconds per ring when determining the
appropriate setting.
81
Page 87

Answering system operation
Message capacity
The answering system can record and store up to 99 messages. Each
message can be up to three minutes depending on the message length
set (see Recording time on page 80). The total storage capacity for the
announcement, messages and memos is approximately 14 minutes. The
actual recording time depends on individual message characteristics.
Messages remain available for replay until you delete them.
Voice prompts
The system provides voice prompts to guide you through the setup
procedures at the telephone base, message playback, remote access and
recording outgoing announcements.
Call screening
Call screening at the telephone base:
If the answering system and call screening are on (see Call screening on
page 77), the announcement and the incoming message broadcast at the
telephone base while the call is answered by the answering system.
Options while a message is being recorded:
Press /VOL or /VOL on the telephone base to adjust the call
•
screening volume.
Press PLAY/STOP/ to temporarily silence the call screening.
•
Press PLAY/STOP/ to temporarily turn on or off call screening.
•
Call screening at the handset:
If the answering system is on and your answering system is recording a
message, press SCREEN to screen the call on your handset and the screen
displays the caller ID information. If you do not subscribe to caller ID service,
the handset shows Incoming call.
The call screening setting does not affect the call screening on the handset.
Call intercept
If you want to talk to the person whose message is being recorded, press
/HOME/FLASH or on the handset.
82
Page 88

Answering system operation
Temporarily turning off the message alert tone
If the message alert tone is turned on, the telephone base beeps every 10
seconds when there are new or missed messages. Pressing any telephone
base key (except /FIND HANDSET) temporarily silences the message
alert tone.
If you press DELETE/X when in idle mode to temporarily turn off the
message alert tone, there is a voice prompt directing you to press DELETE/X
again to delete all old messages. The message alert tone is temporarily off.
Only press DELETE/X a second time if you wish to erase all old messages in
your answering system.
The message alert tone resumes when you receive a new message.
Message playback
On the telephone base, if you have new messages, the
telephone plays only the new messages (oldest first). If
there are no new messages, the telephone plays back all
messages (oldest first).
On the handset, if you have both new and old messages,
you can play either new or old messages. The caller ID
information displays on the handset screen when you play
messages and you can call back the caller.
When playback begins, the handset displays the message
status, caller ID information, and time and date of the
message recorded. You hear the total number of messages
followed by the day and time of the message. After the last
message, the telephone announces,
“End of messages,”
and the handset displays End of messages.
To play messages with the telephone base:
Press PLAY/STOP/ to listen to messages.
1.
Options during playback:
Press /VOL or /VOL to adjust the speaker volume.
•
Press SKIP/ to skip to the next message.
•
Press REPEAT/ to repeat the message currently playing. Press
•
REPEAT/ twice to listen to the previous message.
Press DELETE/X to delete the current message. The system
•
advances to the next message.
Press PLAY/STOP/ to stop.
•
You have:
3 Old messages
BACK SKIP
OLD MSG #1/3
ANDERSON ALLEN
11:49 10/29
[2]-Call info
REPEAT
SKIP
83
Page 89

Answering system operation
Message playback (continued)
To play messages with a handset:
Press MENU to show the menu when the handset is not in use.
1.
Press SELECT to choose Play messages. If you have either new or old
2.
messages, the messages play automatically. If you have both new and old
messages:
To play new messages, press SELECT to select Play new msgs.
•
To play old messages, press /VOL or /VOL to highlight
•
Play old msgs, then press SELECT.
When the handset is playing a message, its screen shows the caller’s name
or number. If the caller’s information is unavailable, the handset shows
No caller info.
Options during playback:
Press VOL/ / or VOL/
•
Press to play the messages through the handset earpiece.
•
Press SKIP to skip the message summary or to the next message.
•
Press REPEAT to repeat the message currently playing.
•
Press REPEAT twice to playback the previous message.
•
Press OFF/CANCEL to stop.
•
Press MUTE/DELETE to delete the current message. The handset
•
displays Message deleted briefly and the system advances to the
next message.
Press to adjust the handset message playback audio quality.
•
Press 2 to pause the playback and show the caller ID information. Press
•
/HOME/FLASH,
DIAL
/CELL to use the cell line to call back the caller.
Press OFF/CANCEL or BACK to resume the playback. If you do not
call back within 10 seconds, message playback resumes.
Press /HOME/FLASH or /CELL to pause the message playback. The
•
handset displays Call back? with the caller ID information. Press YES to
call back the caller, or NO to resume the message playback.
/
CID to adjust the speaker volume.
or to use the home line, or press
When the answering system has less than three minutes of recording time
•
left, it announces, “Less than three minutes to record.” and the handset
displays Rec mem low.
When the telephone is not in use, if F and the number of messages are
•
flashing alternately in the message window, or the handset displays
Rec mem full, the memory is full. Delete some messages to make room
for more.
84
Page 90
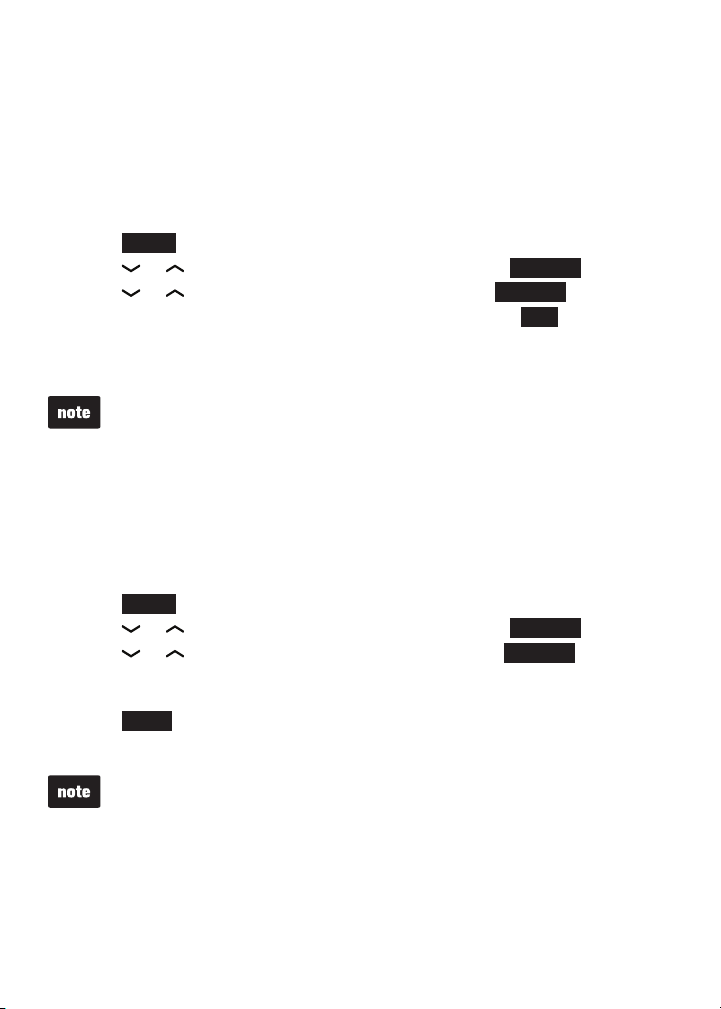
Answering system operation
Delete all old messages
Using the telephone base:
Press DELETE/X when the phone is not in use. The telephone announces,
“To delete all old messages, press DELETE again.” Press DELETE/X
again. All previously heard messages are erased and the telephone
announces, “All old messages deleted.”
Using a handset:
Press MENU on the handset when it is not in use.
1.
Press or to highlight Answering sys, then press SELECT.
2.
Press or to highlight Delete all old, then press SELECT.
3.
The handset displays Delete all old messages? Press YES to confirm.
4.
The handset displays Deleting... and then All old messages deleted!
5.
You hear a confirmation tone.
You can only delete old messages, which are messages you have played.
Record and play memos
Memos are your own recorded messages used as reminders for yourself
or others using the same answering system. You can record your own
memos using a system handset. Play and delete them the same way as
incoming messages.
To record a memo:
Press MENU on the handset when it is not in use.
1.
Press or to highlight Answering sys, then press SELECT.
2.
Press or to highlight Record memo, then press SELECT.
3.
The system announces, “
4.
done
.” After the tone, speak towards the microphone.
Press STOP when you finish recording. The handset announces,
5.
“
Recorded,
” and then returns to the previous menu.
Record after the tone. Press STOP when you are
The system announces “Memory is full.” Memory full displays if you record
•
a memo when the memory is full.
Each memo can be up to four minutes in length.
•
Memos shorter than two seconds are not recorded.
•
85
Page 91
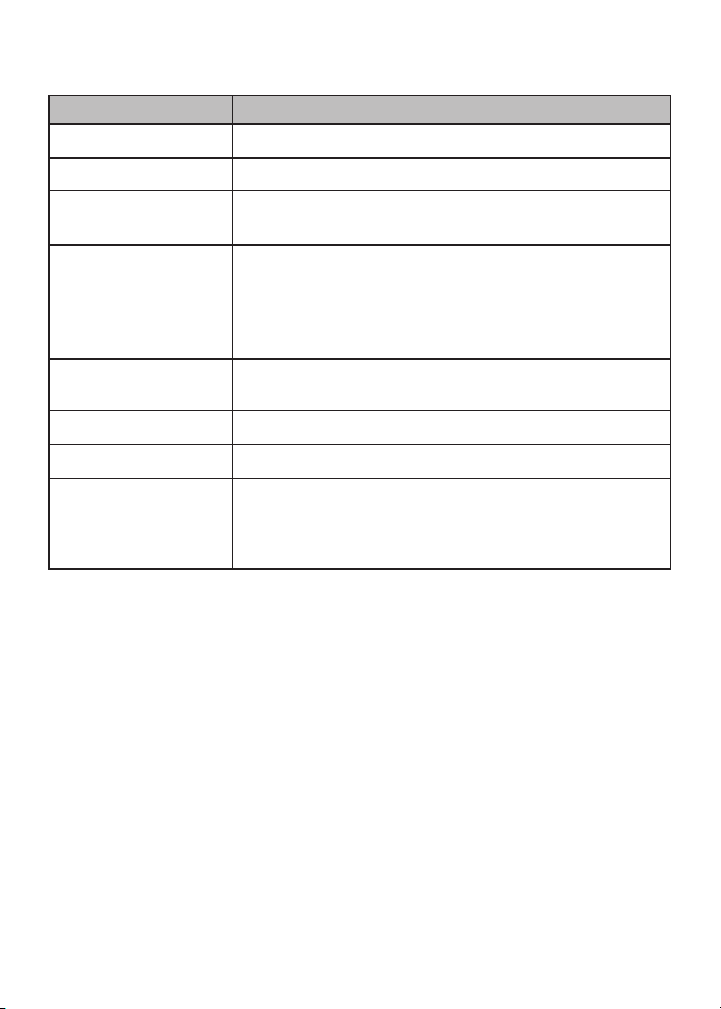
Answering system operation
Message window displays
Window display Description
0
0 (flashing)
1-99
0-99 (flashing)
1-99 & F (alternating)
1-8
0-6
- -
No messages.
The time and date need to be set.
Total number of old messages and memos recorded.
The message number currently playing.
When time and date are not set, it flashes 0, the total
number of new messages recorded, or total number of
old messages recorded.
The telephone base may have lost and regained power.
The clock needs to be set.
The answering system memory is full with total number
of messages recorded.
The telephone base speaker volume level while adjusting.
The telephone base ringer level while adjusting.
The system is answering a call, or recording a memo
or announcement.
The telephone is being accessed remotely.
The answering system is being programmed.
86
Page 92

Answering system operation
Remote access
A two-digit security code is required to access the answering system
remotely from any touch-tone telephone. The preset code is 19. See
Remote access code on page 79 to change it.
Dial your telephone number from any touch-tone telephone.
1.
When the system plays the announcement, enter the two-digit
2.
security code.
You can also enter one of the following remote commands.
3.
Command Function
1
2
3
33
4
44
5
*5
6
*7
8
0
Play all messages.
Play only new messages.
Delete the current message (during playback).
Delete all old messages.
Repeat the current message (during playback).
Play the previous message.
Stop.
Hear a list of remote commands.
Skip to the next message (during playback).
Record a new announcement.
Hang up the call
Turn the answering system on or off.
Hang up or press 8 to end the call.
4.
If you do not press any keys after you enter the remote access code, all new
•
messages play. If there are no new messages, all old messages play.
Once the new messages have played, the telephone announces the help
•
menu options. If you do not press any key within 20 seconds, the remote
access call automatically disconnects.
When the answering system is turned off, the telephone answers after 10
•
rings, and announces, “Please enter your remote access code.”
When the memory is full, the answering system answers incoming calls
•
after 10 rings and announces, “Memory is full. Enter the remote access code.”
87
Page 93

Appendix
Display screen messages
Add device failed
Already saved
Area code will not show
in Caller ID log
Bluetooth headset in use.
Cellular not available.
Bluetooth system busy
Caller ID log empty
Caller ID won’t be
announced.
Calling all handsets
(for models with more than two
handsets)
Calling HANDSET X
(for models with more than two
handsets)
Calling other handset
(for models with two handsets)
Call transferred
Calls will be answered
Calls will not be
answered. Memory full
Cell
Cell call on hold
Cell line in use
Cellular phone not
connected
The Bluetooth device failed to pair to the
telephone base.
The telephone number entered is already
stored in the directory.
The home area code you saved will not be
shown in caller ID log.
You are trying to make a cell call while the
Bluetooth headset is in use.
You are trying to make a cell call or access
the Bluetooth menu when the Bluetooth link is
already being used.
There are no caller ID log entries.
The ringer volume on the handset is turned off
so no caller ID information will be announced for
incoming calls.
You are calling all other handsets.
You are calling another handset.
You have successfully transferred an outside
call to another handset.
You have changed an answering system
setting while the answering system is off. The
answering system turns on automatically to
answer calls.
You have changed an answering system
setting while the answering system is off.
The answering system turns on automatically
but it will not answer calls due to lack of
memory space.
The cell line is in use.
A call on the cell line has been put on hold.
Another system handset is using the cell line.
There is no cell phone connected when you try
to make a call on the cell line.
88
Page 94
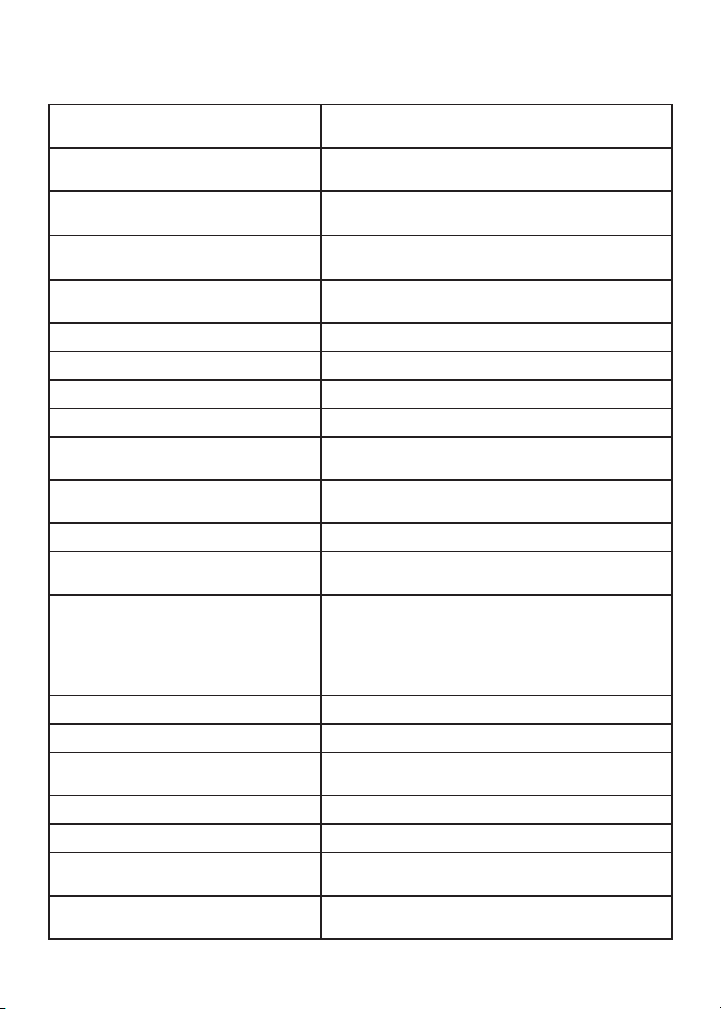
Appendix
Display screen messages (continued)
Connecting...
Connection failed
Connecting to all
handsets...
Cell Phone A is added and
connected to base.
Device list is empty
Device disconnected
Device renamed
Directory empty
Directory full
Download fail
Downloading dir
Ended
End of messages
Handset X is calling
(for models with more than two
handsets)
Other handset is calling
(for models with two handsets)
Handset X is calling all
Headset X is deactivated
Headset not connected!
Home
Home call on hold
Home & cell calls on hold
Home & cell lines in use
Connection is establishing between the
telephone base and the Bluetooth device.
Unsuccessful connection between a Bluetooth
device and the telephone base.
You are trying to start a PTT session to all
other handsets.
The Bluetooth device is successfully added
and connected to the telephone base.
There are no Bluetooth devices paired to the
telephone base.
A Bluetooth device is disconnected.
A Bluetooth device is renamed.
There are no directory entries.
The directory is full.
The telephone system failed to download the
directory from a cell phone.
The telephone system is downloading the
directory from a cell phone.
You have just ended a call.
You have listened to all messages in the
answering system.
Another system handset is calling.
One of the system handset is calling all others.
The headset is deactivated from the active slot.
The Bluetooth headset is not connected to the
telephone base.
The home line is in use.
A call on the home line has been put on hold.
Calls on the home and cell lines have been put
on hold.
Calls on the home and cell lines are in use
while all other handsets are in idle mode.
89
Page 95

Appendix
Display screen messages (continued)
Home line in use
Home Transfer from
HANDSET X
(for models with more than two
handsets)
Home Transfer from other
handset
(for models with two handsets)
Home Transfer from
HANDSET X to all
Home Transfer from other
handset
Incoming call
Incorrect PIN
Intercom
Intercom ended
Key tone off
Less than 3 min to record
Low battery
Message deleted
Memory full
Microphone on
Microphone off
New voicemail
No answer. Try again.
No cellular is ready for
connection.
No Incoming PTT
Another system handset or another telephone
on the same home line is in use.
One handset is receiving an outside call
transferred from another handset.
All handsets are receiving an outside call
transferred from another handset.
All handsets are receiving an outside call
transferred from another handset.
There is an incoming call.
The PIN number for adding a Bluetooth device
is incorrect.
The handset is on an intercom call.
You have just ended an intercom call.
The key tone volume is set as off.
The answering system memory is low.
The battery needs to be recharged.
The message is deleted.
The memory for recording messages and
memos is full.
The mute feature is turned off and the person
on the other end can hear you.
You have turned off the handset microphone.
The other party cannot hear you but you can
hear the other party.
There are new voicemail messages from your
telephone service provider for the home line.
You tried to make an intercom call, but the
handset you are calling is is busy or out
of range.
There are no cell phones in an active slot to
connect with the telephone base.
The incoming PTT function is disabled. The
handset will not receive PTT calls.
90
Page 96

Appendix
Display screen messages (continued)
No entries found. Try
downloading from SIM only
No entries found. Try
downloading from Phone
only
No headset found
No home line
No signal. Call ended.
Not available at this time
Out of range OR No power
at base
Only 1 headset in device
list can be ready
for connection.
Only 2 devices can be
ready for connection
Only for 7 digits dialing
from Caller ID log
** Paging **
Place in charger
Please use cell to
connect to base.
Please use headset to
connect to base.
There are no entries found when you
download a cell phone directory from the
cell memory.
There are no entries found when you
download a cell phone directory from your
SIM card.
There are no entries found in either the cell
or SIM card when you download a cell phone
directory from both memories.
No Bluetooth headset can be found.
There is no telephone line connected.
Communication between the handset and
telephone base is lost during a call.
One handset is already viewing the caller
ID log, directory or answering system, and
another handset attempts to review it.
One handset attempts to place a PTT
call to another handset which is on an
outside or intercom call, or accessing the
answering system.
The handset has lost communication with the
telephone base.
There is no power connected to the
telephone base.
One headset is already connected to the
telephone base.
There are already two Bluetooth devices active
or connected.
The area code will be removed from caller ID
entries to allow seven digit local dialing.
The system handset is being paged.
The battery is very low. The handset should
be placed in the telephone base or charger
to recharge.
You need to use your cell phone to establish a
connection to the telephone base.
You need to use your headset to establish a
connection to the telephone base.
91
Page 97

Appendix
Display screen messages (continued)
PTT From HANDSET X To
HANDSET Y
PTT To HANDSET X
Push to talk Ended
Put handset on BASE to
register
Rec mem full
Rec mem low
Redial empty
Registration failed
Ringer muted
Saved
Transferring call to
HANDSET X
Transferring call to all
(for models with more than two
handsets)
Transferring to other
handset
(for models with two handsets)
Unable to save
XX Missed calls
XX New messages
One handset has started a PTT session to
another handset.
You have started the PTT process.
The PTT session is ended.
Your handset is not registered to the
telephone base.
The answering system has no recording
time left.
The answering system has less than 3 minutes
to record.
There are no entries in the redial list.
You failed to register a handset to the
telephone base.
The ringer is muted temporarily during an
incoming call or intercom call.
Your selection has been saved.
One handset is transferring an outside call to
another handset.
You tried to save a caller ID entry with no caller
ID information.
There are missed calls that have not been
reviewed in your caller ID log.
There are new messages recorded in the
answering system.
92
Page 98

Appendix
Handset and telephone base indicators
Handset lights
On when the handset speakerphone is in use.
/CELL
/HOME/FLASH
CHARGE
Flashes quickly when there is an incoming cell call.
Flashes slowly when the cell line is on hold.
Flashes quickly when there is an incoming home call.
Flashes slowly when the home line is on hold.
On when the handset is charging in the telephone base
or charger.
Telephone base lights
/ANS ON/OFF
D1/D2
IN USE
On when the answering system is turned on.
On when a Bluetooth device is connected to the base.
Flashes alternately while pairing a Bluetooth device.
Flashes quickly when there is an incoming cell call.
On when the telephone line is in use or on hold.
On when the answering system is answering a call.
On when you are registering a handset.
Flashes quickly when there is an incoming call.
Flashes when another telephone sharing the same line is
in use.
93
Page 99

Appendix
Handset icons
1
2
1 2
1 2
1
2
HOME line - on steadily when the home line is in use or
there is an incoming home call.
CELL line - on steadily when the cell line is in use or there
is an incoming cell call.
Bluetooth connected devices - indicates that there are
Bluetooth connected devices on the device list.
Bluetooth disconnected devices - indicates that there are
Bluetooth disconnected devices on the device list.
Wireless Bluetooth headset - on steadily when a wireless
Bluetooth headset is in use on the home line.
Speakerphone - the speakerphone is in use.
Ringer off - on steadily when all the ringers of Home,
Cellular 1 and Cellular 2 are turned off. Flashes when only
one or two of the ringers are turned off.
New voicemail - indicates you have new voicemail
messages from the telephone service provider for the
home line.
New answering system message - indicates you have
new answering system messages.
Battery status - animates when the battery is charging.
Becomes solid when the battery is fully charged.
ANS
O N
NEW
MUTE
Battery status - flashes when the battery is low and
needs charging.
Answering system on - indicates that the answering
system is turned on to answer incoming home calls.
New caller ID log - indicates that the missed call is new.
Mute - the microphone is muted.
94
Page 100

Appendix
Expand your telephone system
The handsets provided with your telephone system are already registered.
Additional handsets registered to the telephone system are assigned
in sequential order. For instance, if you already have HANDSET 1 and
HANDSET 2, the new registered handset is assigned HANDSET 3. This
telephone system accommodates up to 12 handsets.
Add and register a handset
You can add new handsets (DS6401, purchased separately) to your
telephone system, but each handset must be registered with the telephone
base before use. When first purchased, each expansion handset shows
Put handset on BASE to register after a battery is installed. You may
need to charge the handset before registering it to the telephone base. For
more details on battery charging, see the table on page 5.
To register a handset:
Make sure the handset is out of the
1.
telephone base or handset charger and
shows Put handset on BASE to register.
Place the handset you wish to register in the
telephone base.
The handset displays Registering handset...
2.
on the handset and the red IN USE light on
the telephone base turns on. It takes about 90
seconds to complete the registration process.
The handset displays HANDSET X Registered
(X represents the registered handset number).
The IN USE light on the telephone base turns
off and you hear a confirmation tone from the
handset when registration completes.
If registration fails, the system will automatically try to
register again. If registration fails after the third
try, the handset displays Registration failed
then Put handset on BASE to register and the
telephone base beeps. This may take up to five
minutes to occur.
To reset the handset, remove it from the telephone
base. When the handset displays Put handset on
BASE to register, try the registration process again.
You cannot register a handset if any other system
•
handset is in use.
95
 Loading...