

Page 1
English
VIDEO INTERCOM SYSTEM
USER MANUAL
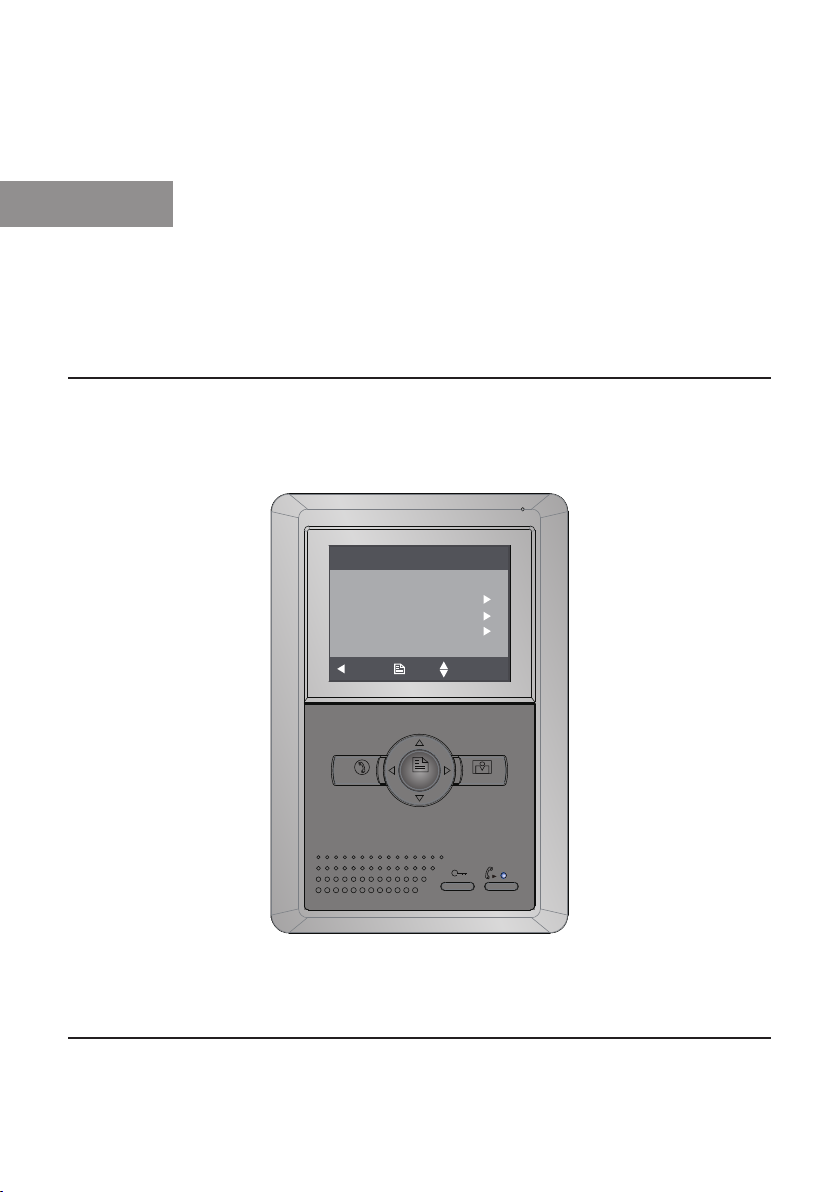
Main Menu
Monitor ...
Intercom
Alarm Function ...
User Setup
Close
About OK Select Item
TALK
MENU
MONITOR
C5-AT25/D4 Version 1.0 120313
Page 2

Page 3
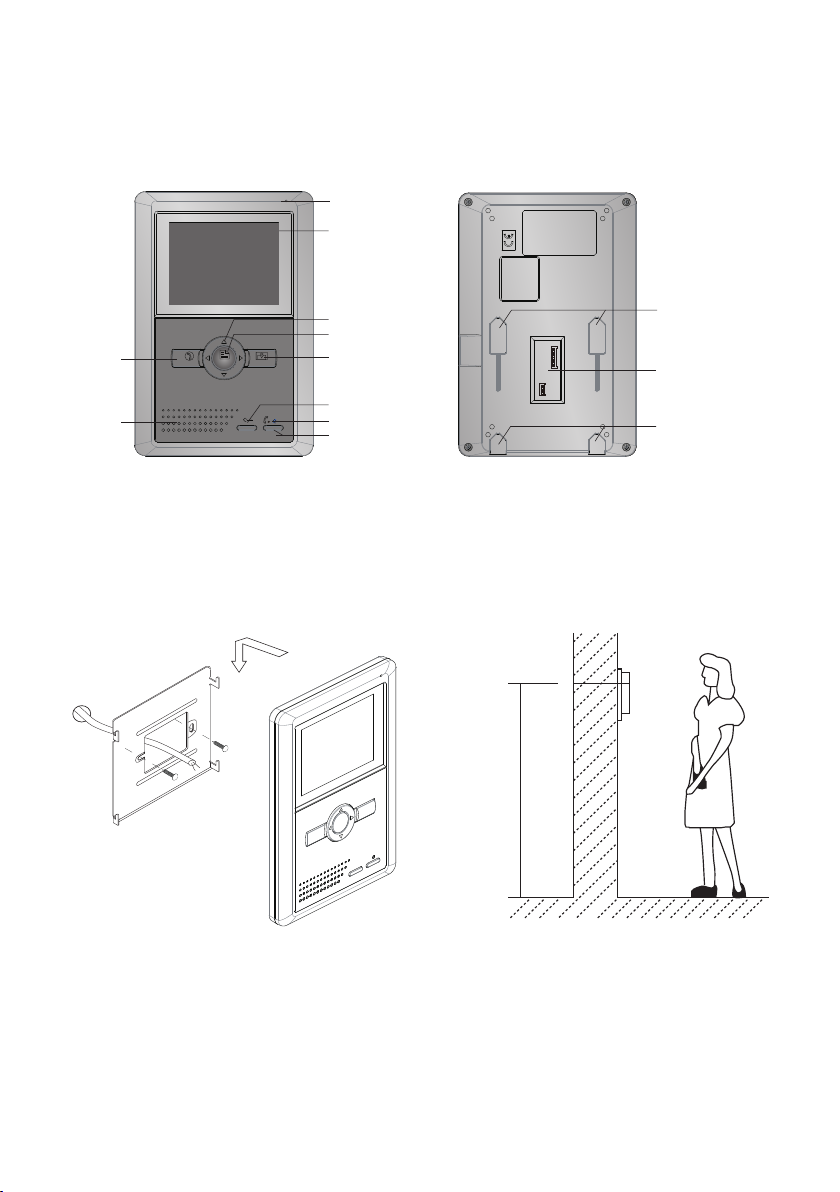
1. Parts and Functions
Microphone
LCD Screen
TALK Button
Speaker
2. Mounting
TALK
OK Select Item
MONITOR
MENU
Navigation Button
MENU Button
MONITOR Button
UNLOCK Button
LED Indicator
CALL Button
Mounting Hook
Main Connection Port
Mounting Hook
145~160 cm
1. Fix 2 screws to the wall at a appropriate height
2. Connect the system correctly
3. Attach the monitor to the bracket.
- 1 -
Page 4
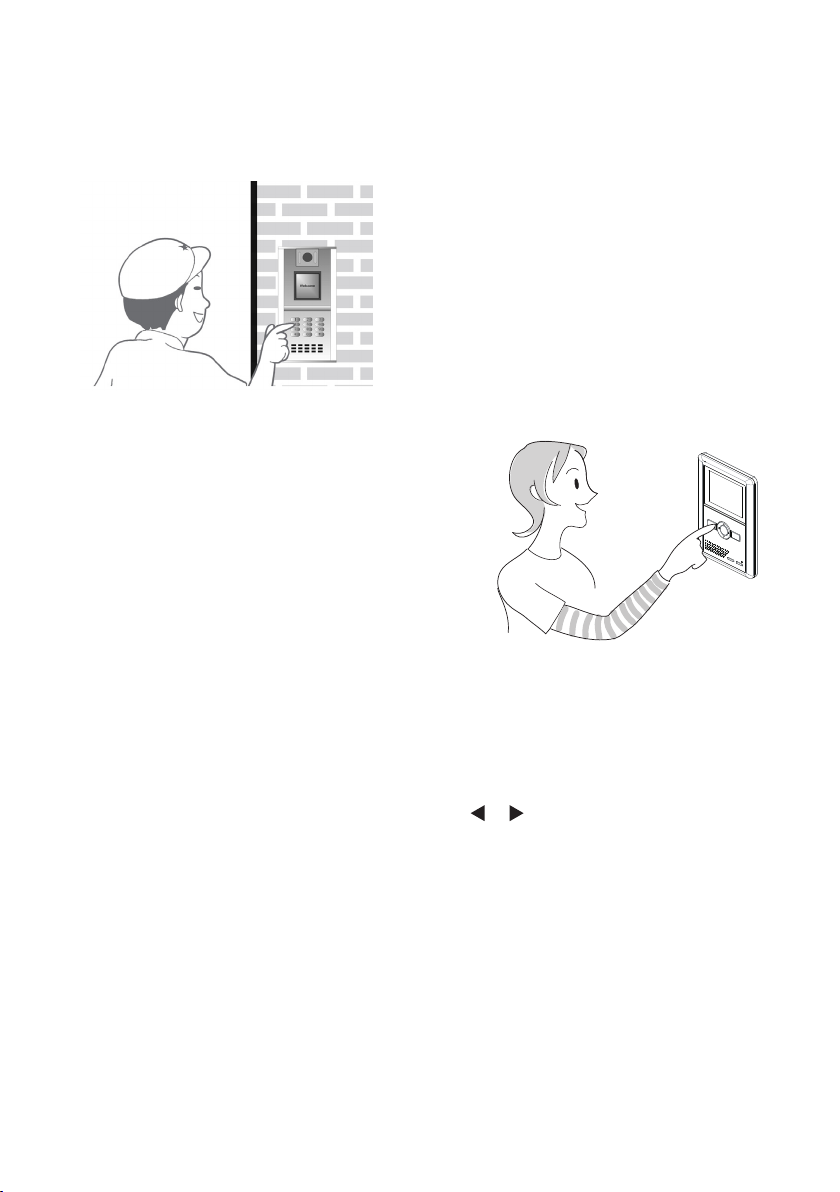
2. Operation Instructions
1. When visitor inputs room number in Door
Station o f the bl ock or m ain entrance, the
Monitor rings, at the same time, the screen
displays the visitor’s image.
2. By pressing TALK Button, you can talk with
the visitors for 70 seconds. During talking state,
press TALK again to end the conversation. If
nobody answers the call, the screen will be
automatically turned off after 40 seconds.
3. Press Unlock Button to open the door before or
during the conversation.
4. When Monitor is standby, press Monitor Button,
the screen will display the view of the Door
Station, and press TALK Button you can speak
to the Door Station. Please note if system is busy,
the monitor will not be turned on. You can talk
with the Door Station during monitoring, and
press UNLOCK to open the door(this function is
depended on the system conguration).
3. Image and Volume Adjustment
During monitoring or talking, press MENU Button,the ADJUST MENU will be displayed.
Use ▲ / ▼ Button to select the adjustment item; use / Button to decrease / increase the
value.
1. The rst item is Scene mode selection: Total 4 screen modes can be selected in sequence:
Normal, User, Soft and Bright. Whenever you modify Brightness or colour, Scene item will be
set to User mode automatically.
2. The Brightness and Colour item is for the image quality setting, adjust the value to get the
best image you like.
3. The Ring Volume and Talk Volume items are ring tone and talking volume adjustment.
4. Note that all the modications will be done immediately after the operation. Press "MENU"
button to quit the adjust page.
- 2 -
Page 5

4. Operation for ring selection
Select
User Setup
Tone, Inercom Call Tone
item on main menu page to enter setup page.Select
or
DoorBell Call Tone
item, There are 12 pieces ring tones can
Door Station Call
be selected.use / Button to select last/next ring tone, press MENU button to save and exit.
Door Station Call Tone
Intercom Call Tone
DoorBell Call Tone
User Setup (1)
Door Station Call Tone ...
Intercom Call Tone ...
DoorBell Call Tone ...
Date&Time Setup ...
Next Page
Exit OK Select Item
:set the ring tone calling from outdoor station.
:set the ring tone calling from other apartments.
:set the ring tone calling from door bell.
Door Station Call Tone
Selected: 06
1 Carmen 5 Sonatine 9 Do Re Me
2 Ding Dong 6 Edelweiss 10 Happy Birthday
3 Rain 7 Going Home 11 Jingle Bells
4 For Alice 8 Congratulation 12 Telephone Ring
Cancel Save&Exit Last/Next
5. Day Ring Volume & Night Ring Volume Setting
The ring volume for day time and night time can be set
individually, 6:00 AM~18:00 PM is the day time by
default,if you don't want to be disturbed at night,you
can set the night ring volume to 0.
Select
User Setup
setup page,then select
Setup 2 page, select Day
Night Ring Volume
item on main menu page to enter
Next Page
item to enter User
Ring Volume Setting or
item. then press ▲ / ▼ button to
increase / decrease the value; After nish, press Menu
buton to save and exit.(press button to cancel the setting and
return last page)
User Setup 2
Day Ring Volume Setup ...
Night Ring Volume Setup ...
Monitor Time Setup ...
Restore to Default ...
Last Page
Exit
OK Select Item
Day Ring Volume
Current : 05
Cancel
Save&Exit
Select Item
- 3 -
Night Ring Volume
Current : 05
Cancel
Save&Exit
Select Item
Page 6

6. Date and Time Setting
Select
User Setup
enter setup page,then use ▲ / ▼ button to select
Date&Time Setup...
enter. Input date and time by pressing ▲ / ▼ Button
to increase / decrease the value; use / Button
to select last / next digit. After nish, press MENU
Button to conrm and return last page.
item on main menu page to
item and pres MENU button to
7. Monitor Time settig
Select User Setup -> Next Page ->
item , 30s, 40s, 50s, 01min, 02min, 03min,
Setup
04min, 05min, 06min, 07min, 08min, 09min, 10min
can be selected. Use ▲ / ▼ Button to increase /
decrease the value; After nish, press MENU Button
to conrm and return last page.
Monitor Time
8. Intercom Function
When the monitor is in standby mode, press
Button to enter Intercom Function page(or select
Intercom
Button to move upward / downward to select the item
you want, press MENU Button to enter.
1. Ch oose
item on main menu page). Press ▲ / ▼
Al a rm to G uard U n it
CALL
i t em,t h e
monitor will send the alarm message to the
guard center and show emergency calling.
2. Choose
Direct Call Guard Unit
item,the
monitor dails the guard center immediately.
Intercom Call
3.
: you can call the other users
in the same network with you. Input the
building code and room number by using▲
/▼ Button to increase / decrease the value;
use Button to select next digit; then
Menu
press
Button to active the calling, a
call message will be sent out, if the system
is free, you will heard the feedback rings,
you can talk with someone who answers the
call.
Date&Time Setup
2010 - 12 - 20 17:17
Adjust Save&Exit Select
Monitor Time Select
Current : 01min
Cancel Save&Exit Adjust
Call Select
Alarm to Guard Unit
Direct Call Guard Unit ...
Intercom Menu ...
Exit
OK Select Item
Intercom Menu
Building Room
Adjust Call Select
- 4 -
Page 7

9. Defense Alarm Function(Optional)
This system have auto-alarm function to ensure the security for the house owner. Total 4
different sensors were placed to protect different defense area. When the sensor was triggered,
the monitor will sent out alarm sound immediately and will sent the alarm signal to the guard
center at the same time. Note that your system may not have all the 4 sensors according to the
system conguration.
○ Intruction:
Motion Sensor
Delay sensor, normally it
will be placed on doors
or windows. If the sensor
is set, when the door or
wi ndo w is opened, the
monitor will s e n t ou t
alarm sound and sent the
alarm signal to the guard
center.
Smoke Sensor
24-hour sensor, this sensor
is opened by the system by
default. It can be placed on
living room or kitchens.
if a ny fir e hap pened i n
the area, the monitor will
sent out alarm sound and
sent the alarm signal to the
guard center.
Infrared Sensor
De l a y se n s o r , can be
pla ced on livi n g r oom
or bedr oo ms. W he n the
sensor is set, if some body
invade into the defence
area, the monitor will sent
out alarm sound and sent
th e ala rm sig nal to the
guard center. You can set
this sensor when nobody
at home.
Emergency Help Button
24-hour sensor, this sensor
is opened by the system by
default. It can be placed
any where suitable. if any
fire happened in the area,
the monitor will sent out
the emergency help signal
to the guard center.
- 5 -
Page 8

○ Operation instructions:
Select Alarm Function on main menu
page to enter alarm function page as
shown on the right.
1. Select
Ar med-O ut
item t o trigger
defense function,If the armed function
is activated,the
Alarm Status
page
Alarm Function
Armed-Out
Armed-Stay Home
Disarm
Alarm Status ...
Change Password ...
Exit OK Adjust
will be shown"Status:Armed".
2. If you stay at home, and you want
to activate the defense function, you
should select
Armed-Stay
Home item
to trigger all defense function except
Infrared defense,If the armed function
is activated,the
Alarm Status
page will
be shown"Status:Armed".
Out-Delay Period:
3.
after you arm the system, you will get into Out Delay Period,
Alarm Status
Door Magnetic IR
Gas or Smoke Emergency
Alarm 5 Alarm 6
Alarm 7
Status: normal armed
Exit
Alarm 8
monitor will sent out short “Di” every 3 seconds; you will hear a long “Di~” at
the end of the Out Delay Period, and the system is gotten into the protecting
status. By default, the Out Delay Period is 40 seconds, users must get out off the
room within 40 seconds, otherwise the system will treat the user as a invader and
sent out the alarm signal.
In-Delay Period:
4.
When the system is armed, the defence alarm are activated,
to disarm the alarms. When you come into the room, you have 40 seconds to
deactivate the sensors(by enter MAIN --> ALARM menu, select Disarm item); if
you didn’t deactivate the sensors after 40 seconds, the monitor will sent out alarm
sound and sent the alarm signal to the Guard Unit.
5. 40 seconds is the default setting for in-out delay time, it can be changed by the
administrator.
- 6 -
Page 9

10. Remote Control Function(optional)
This function should be customized.
Keypad functions of the remote control.
[A] Button:
and hold this button for 3s, the monitor will sent out the
emergency help signal to the guard center.
[B] Button:
1s will arm the system(same result as enter Main Menu-->
Alarm Functions menu, select Arm item).
[C] Button:
1s will disarm the system(same result as enter Main Menu-> Alarm Functions menu, select Disarm item).
[D] Button:
as press the Unlock button on monitor).
NOTE:
Work as E me rgency Help Bu tt on, press
Arm button, press and hold this button for
Disarm button, press and hold this button for
Use this button to release the door.(same result
B C
D A
1. Remote control distance is normally up to 30 meters, and will extend if the built-in
telescopic antenna is taken out.
2. If the controlled distance is becoming shorter, or LED doesn't light on while pressing
any button, open the remote control unit and replace the battery with a new one.
11. Estate Management
With this function,it is convenient for users to tell the Guard Unit for maintenance.Including
Message,Host Services,Electricity Maintenance,Water Maintenance,TV Maintenance.
12. Intelligent Home
Totally have 6 modes: All Close Mode,Home Mode,Out Mode,Sleep Mode,Entertainment
Mode,Romantic Mode.
- 7 -
Page 10

13. Specication
●Power supply for Monitor: DC 15~18V
●Power consumption: <0.5W on standby, <15W on working
●Monitor screen: 4 Inch digital TFT
●Video signal: 1Vp-p, 75Ω, CCIR standard
●Resolution: >300 TV lines
●Door Camera power: DC 10~12V (Supplied by Monitor)
●Connecting methods: 6 wires with system, 4 wires with Camera
●Ring tune: electronic chime, user congurable
●Operating temperature: 0 ~ +40 0C
●Dimensions: 199(H)×135(W)×23(D)mm
14. Precautions
1) All parts should be protected from violence vibration. And not allow to be impacting,
knocking and dropping.
2) For the Lens& Screen cleaning, using hands or wet cloth is forbidden.
3) Please do the cleanness with soft cotton cloth, please do not use the organic or chemical
clean impregnate. If necessary, please use a little pure water or dilute soap water to clean the
dust.
4) Image distortion may occur if the video door phone is mounted too close to magnetic eld e.
g. Microwaves, TV, computer etc.
5) Please keep the video door monitor away from wet, high temperature, dust, and caustic and
oxidation gas in order to avoid any unpredictable damage.
WARNING
1. Don’t attempt to service this product yourself as opening or removing covers
may expose you to dangerous voltage or other hazards. Refer servicing to
qualied service personnel.
2. To prevent re or shock hazard, do not expose this product to rain or moisture.
3. Do not install the product where it is exposed to constant sunlight or rain.
4. Do not install the product where excess dust or humidity is present.
- 8 -
Page 11

Page 12

Please read this manual carefully before using the product you purchase, and keep it well for
future use.We reserve the right to modify the specication in this manual at any time without
notice.
 Loading...