

Page 1

Kobold
System
VK 140
User Guide & Instructions
Vorwerk Folletto s.r.l.
Capitale Euro 3.000.000
Via Ludovico di Breme, 33
20156 Milano
Numero verde 800-014457
Codice Fiscale 04029500966
Vorwerk Folletto
è presente su Internet all’indirizzo
www.folletto.it
CODE 22857- GIUGNO08 -COPIES 100.000
PRINTED ON ECOLOGICAL PAPER.
PARTIAL OR TOTAL REPRODUCTION OF THE TEXT AND IMAGES IS FORBIDDEN.
GIUGNO08
Page 2
3
The Kobold VK 140 is intended for
domestic use. It complies with the
most advanced safety standards.
For your own safety, read this
instruction manual carefully
before using the Kobold VK 140 for
the first time and be sure to take
particular note of the following.
Keep the instruction manual for
future reference. It is an important
part of the Kobold VK 140, and so
must always accompany the
appliance if you lend it to anyone.
The Kobold VK 140 may only be
used to remove household dust.
The Kobold VK 140 is not suitable
for use by children or persons with
physical or mental handicap,
unless supervised or instructed on
the use of the appliance by the
person responsible for their safety.
Children must not be allowed to
play with the appliance.
Electric shock hazard
Always switch off the appliance
and remove the plug from the
mains socket before winding the
mains cord, changing accessories,
cleaning or any kind of
maintenance.
Do not clean your appliance or
any of its electrical accessories,
especially the suction hose
connectors, with water or wet
cleaning products.
Never run the Electronic Brush
over the connecting cable or other
cables lying on the floor.
Do not insert pointed objects
into the electrical contacts! Do not
tamper with the contacts.
Do not continue to operate the
appliance and the electrical
accessories when they are
damaged and contact your
authorized Vorwerk Distributor or
your official Technical Customer
Service Centre.
Never use the appliance in
damp surroundings.
Never vacuum up any liquids,
moist dirt, moist doormats, humid
carpets.
Never carry out any repairs on
your appliance by yourself.
Repairs to electrical appliance
may only be done by your
authorized Vorwerk Distributor or
official Technical Customer
Service Centre.
Only unplug the appliance by
pulling on the mains plug, and
never by pulling on the mains cord.
Never use the Kobold Freshener
Kit FK 360 in connection with any
kind of liquid cleaning agents,
cleaning foam or cleaning agents
containing damp substances.
Fire hazard
Never vacuum up glowing ash
or smouldering cigarette ends.
Use your Kobold VK 140
exclusively at the voltage rating
shown on the nameplate.
Explosion hazard
Do not vacuum up anything
that is explosive or highly
inflammable.
For your safety
First of all we want to thank you for
the trust you accorded to our Sales
Representative and to our Company.
We are sure that You, as millions of
Customer in the all World, will be
completely satisfied with your choice.
You have bought, a product which
represents the result of the most
advanced research of Vorwerk,
constantly developed to guarantee to
its customers the best cleaning solution
with the maximum quality, efficiency,
usability, hygiene and well being in
the domestic environment.
Your new VK 140 is the most recent
example of this constant excellence
and innovation choice. The most
well-established tradition of the
unmistakeable upright vacuum cleaner
supports the uniqueness and the
vanguard of the technological
solutions of the new generation. An
élan vital through the future which
underlines once again the attention of
Vorwerk to the evolution of its
products for the customer satisfaction.
The Vorwerk System, together with
the product you bought, will always
be a precious help, fair and trusty,
result of constant improvements of
the already excellent performances and
of a particular look after details and
design.
Last of all, I allow myself to
recommend you always to use for your
Kobold original consumable and spare
parts. Only doing that your appliance
will always maintain its maximum
efficiently and warranty.
Choose always original product,
choose always Vorwerk quality and
warranty! Thank You very much once
again for Your choice and... welcome
in the Kobold Family!
Best Regards.
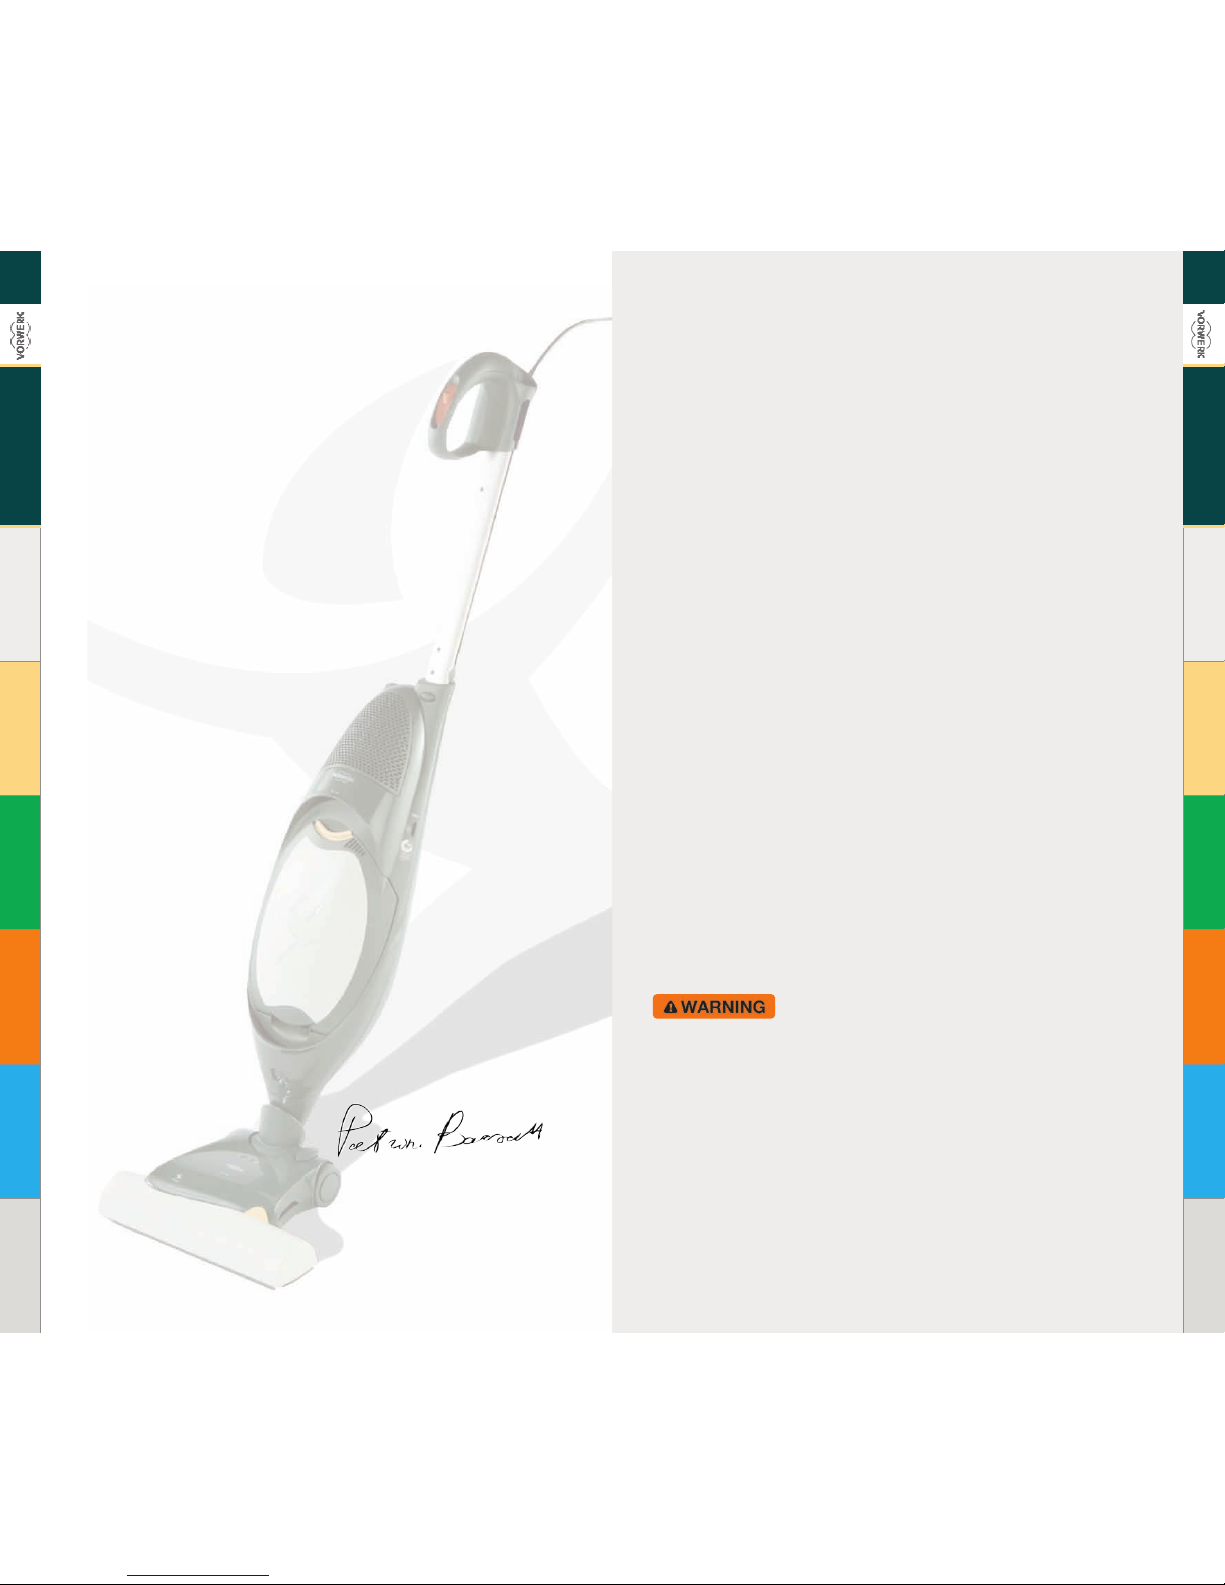
Patrizio Barsotti
Presidente Vorwerk Folletto
Dear Customer...
2
Text to be specified
by Country
Page 3
5
Vorwerk and the Environment
A history of improving the quality of life
The reason for a choice: direct sales
The Kobold System
The new filtering system
Hygiene and allergy
Kobold VK 140 with HD 40
Kobold VK 140 with HD 40
Description & features
Technical specifications
Assembly & Use
Handling and telescoping the Kobold VK 140
Making the appliance ready for operation
23 Switching on and off
Using the Kobold VK 140 with the HD 40
Parking, transporting and storage of the Kobold VK 140
Maintenance
27 Changing the filter bag and inserting the Dovina fragrance chip
28 Inserting new filter bags
30 Caring for the motor protection filter
30 Cleaning the motor protection filter
31 Replacing the front panel of the appliance
32 Maintenance of the HD 40
Spare parts & consumables
Kobold VK 140 with EB 360
Kobold VK 140 with EB 360
Description & features
Technical specifications
Assembly & Use
Handling and telescoping the Kobold VK 140
Making the appliance ready for operation
39 Switching on and off
Parking, transporting and storage of the Kobold VK 140
Maintenance
42 Changing the filter bag and inserting the Dovina fragrance chip
43 Inserting new filter bags
45 Caring for the motor protection filter
45 Cleaning the motor protection filter
46 Replacing the front panel of the appliance
Spare parts & consumables
EB 360
EB 360
Description & features
Technical specifications
Assembly & Use on carpets and mattresses
51 Assembling & Disassembling
52 Use on carpets
53 “Soft function”
54 Use on matresses
Table of contents
5
7
8
9
10
12
15
16
16
18
20
22
23
24
25
26
33
34
34
35
36
38
39
40
41
47
48
48
50
51
4
Injury hazard
Do not use the appliance on any
part of the body.
Always unplug the appliance
when it is stored or left unattended.
Stay away from rotating brushes
of the electronic brush.
Never use the vacuum cleaner
near children or pets.
Suffocation hazard
Small parts, like the Dovina
fragrance chips, must be kept out
of children’s reach.
Risk of loosing the aptitude
for allergic persons
Only use the appliance if the
motor protection filter is correctly
fitted.
Risk of damage due
to improper use
Check that the mains cord slides
freely through the handle when
telescoping. Do not hold on to the
mains cord when telescoping.
The Kobold VK 140 is
maintenance-free, therefore do not
lubricate the appliance with oil or
any other grease.
Use exclusively Vorwerk original
parts.
TÜV Seal of Quality
The Vorwerk Kobold
System has achieved this
prestigious certification,
which guarantees that
our products are truly
effective in the
prevention of allergies.
VDE Symbol,
German Electro
Technical Institute
Guarantees safety,
long life and
suitability for use.
Italian Quality
Institute Symbol
Guarantees safety, long
ife and suitability for use.
CE European
Community
Marking guarantees than
the product meets the
requirements of Europe
an Union Directive 336/89
on electromagnetic
compatibility.
Double
Isolation
Symbol
Guarantees
maximum safety.
HEPA
The Vorwerk Filter
System is classified as
HEPA class H11,
according to standard
EN 1822 (HEPA standard)
by the DMT institute in
Essen – Germany.
Suitablefor
AllergicPerson
Voluntarytest
forhouse dust
retention
SEGB-47/98
A
c
c
o
r
d
i
n
g
t
o
T
Ü
V
N
O
R
D
S
t
a
n
d
a
r
d
HEPA
classe 11
Vorwerk guarantees the
availability of spare parts
for at least 10 years.
Declaration of conformity:
The producer, Vorwerk Elektrowerke GmbH & Co. KG, declares that all the motors
described in this manual are in conformity to all the laws and rules applicable to the
products themselves.
Page 4

7
Preserving Nature and protecting
the environment, is at Vorwerk an
important company goal.
Environmentally friendly
Vorwerk also takes the
environment into consideration.
Conservation starts with
development and production and
continues through the sale and
ultimately even to the disposal of
Vorwerk products.
Less Packaging
Unfortunately, we cannot do
without packaging altogether. For
this reason, we exclusively use
environmentally-friendly materials
that are reusable when disposed of
properly.
The Green Dot
Vorwerk is a member of the Dual
System (Green Dot). We
participate in the elimination of
packaging waste and participate in
its disposal.
Saving Energy
Vorwerk products are in favour of
the environment: they only use a
small amount of energy while
providing a high level of suction
performance.
Environmentally-Orientated
Production
We value the protection of the
environment in the production of
our products. We use
environmentally-friendly plastics
and colours containing no toxic
cadmium, for example.
We have intentionally refrained
from using flame-retardant agents
that pollute the environment.
For our filter bags, we use nonsolvent adhesives, unbleached
paper and safe plastics.
Our instruction manuals are
printed on FFC-bleached paper.
Vorwerk
and the Environment
As the owner of a waste electrical or electronic appliance
(in accordance with the EU directive 2002/96/EC of 27
January 2003 on waste electrical and electronic equipment
WEEE and the law on electrical or electronic equipment of
16 March 2005) you are by law not allowed to dispose of
this appliance or its electrical/ electronic accessories with
your other household waste.
Instead, you have to hand it over to a designated free-ofcharge collection point for the recycling of waste electrical
or electronic equipment.
For more information on how to return your waste
equipment for recycling, please contact your local
authorities.
EB 3
60
EB 360 - Assembly & Use on carpets and mattresses - follows
56 Dry clean with freshener Kit FK 360
57 Lavenia for mattress hygiene
59 Kobosan active for carpets and rugs
60 Kobotex for stain removal
Assembly & Use on hard floors
61 Dust vacuuming on hard floors
Maintenance
64 Freshener Kit Cleaning
64 Worn out brushes
Spare parts & consumables
Pulilux PL 515
Pulilux PL 515
Description & features
Technical specifications
Assembly & Use
69 Changing the pad modules
70 Hard floor module
70 Polishing module for waxed and parquet floors
71 Polishing with Kobolin
Maintenance
Spare parts & consumables
Polsterboy PB 420
Polsterboy PB 420
Description & features
Technical specifications
Assembly & Use
Maintenance
Spare parts & consumables
Tiger 260
Tiger 260
Important Notice
Floor cleaning accessories
Non-floor cleaning accessories
Technical specifications
Assembly & Use
84 Working with the Tiger 260
Parking & Transporting
Maintenance
89 Changing the filters
91 Using attachments for raised areas
93 The Polsterboy PB 420
Spare parts & consumables
Accessories
Accessories
Description & features
Assembly & Use
97 Assembling the Kobold VK 140 for raised areas
99 Vario Nozzle - VD 14
100 Telescopic Tube - TR 14
100 Soft Nozzle - SD 14
101 Flexo Nozzle - FD 14
Maintenance
Spare parts & consumables
Troubleshooting & repairs
Troubleshooting & repairs
Technical service center
Technical service center
Guarantee
Guarantee
6
61
63
65
66
66
68
69
72
73
74
74
75
76
78
79
80
80
81
82
83
84
88
89
94
96
96
97
103
104
105
107
109
Text to be specified
by Country
Page 5

The reasons for a choice:
direct sales
9
Direct sales are a solid and
structured channel, developed over
the years to the point of acquiring
particular features that traditional
commercial structures don’t have.
Traditional structures have to offer
a range of similar products in a
range of different prices, whereas
direct sales allows for a
personalized demonstration
tailored to the needs of every
single family.
This way, with the help of the
salesman, an advisor capable of
solving every doubt related to
household cleaning and hygiene,
potential Customers can discover
the product’s features and
performance through a real
“hands-on” approach.
Vorwerk saw this as the only way
of demonstrating the uniqueness
of its products, and so decided
that was the only way to present
them. Indeed, direct sales is the
only way of establishing a direct
rapport with Customers, entering
their homes and presenting
something that will enhance their
quality of life. A choice that goes
hand in hand with the philosophy
of Total Quality that Vorwerk has
followed since its beginnings,
demonstrating a far-sightedness
that separates it from the
competition. But such a cutting
edge, high technology product still
needs the support of
another fundamental link in the
chain: a personalized service for
guiding customers in getting to
know, trying out and buying the
product.
From this came the commitment
to develop a sales network that was
truly up to the job, and that now
counts hundreds of thousand
advisors all over the world,
distinguished for their
professionalism, profound
knowledge of the product and
great relational skills.
With a wide network of Sales
Offices and Service Centres, and
an excellent customer care service,
Vorwerk pays the greatest
attention to after-sales support.
Because the relationship with the
Customer doesn’t end with the
demonstration, but goes on after
purchase as well, through
continual, long-term service.
A history of improving
the quality of life
8
Vorwerk is the leading company in
the field of household cleaning
appliances: since the thirties, the
vacuum cleaners manufactured at
the factories of the Vorwerk
Group have always been the
perfect solution to household
cleaning problems. Vorwerk is a
success created by focusing
attention on one key factor: the
Customer. Never losing track of
consumer demands, Vorwerk has
been able to market a product that
combines technology and
simplicity, high quality and
captivating design.
A highly complex machine,
developed though continual
innovation resulting in hundreds
of exclusive patents, the Kobold is
extremely simple to use, making it
a very practical and effective
appliance. From the outset, the
company began an ongoing
process of research into aesthetics
applied to its machines, to give
families a product capable of
blending into the domestic
environment perfectly, without
looking out of place. A Philosophy
of Quality that reflects in our
motto “Our best for your family”,
and in the makeup of our Sales
Force. From the very outset
Vorwerk adopted the direct, house
to house sales channel as the best
and only way of bringing its
products into the homes of Italian
families. The relationships that this
creates with Customers reflect the
Philosophy of Quality:
relationships that our Salesmen
build day by day, starting out from
a Demonstration, and continuing
after the sale through constant
support.
Text to be specified
by Country
Text to be specified
by Country
Page 6

The beginning of the ‘70 saw
the first dry cleaning system for
carpets and rugs, with Kobosan
and Refreshing Kit adding
effective chemical action to the
system’s suction and mechanical
action. In the ‘eighties the Kobold
VK 120 brought a new dimension
to the concept of modularity,
becoming one of the world most
widely used vacuum cleaner.
In the early ‘nineties the
“Kobold System” concept reached
completion with the birth of
Pulilux, a new appliance that was
capable of cleaning hard floors in
a new and effective way. The year
two thousand is an important
milestone: the Kobold System
underwent a technological and
conceptual evolution, making an
important step on the road toward
innovating household cleaning
appliances.
Entering the XXI century, Kobold
is the synthesis of a decade of
commitment, passion and research.
World families now have at hand an
integrated and modular System
capable of tackling any type of
cleaning problem: hard floors,
carpets -even delicate ones-,
carpeting, cleaning the largest or
smallest surfaces, on mattresses and
upholstery. In a word: everywhere
there’s dust. Because it is a system,
the Kobold is capable of combining
suction power with effective
mechanical action and the gentle
strength of chemicals, to restore a
pleasant and healthy environment,
for you and your family.
Today a new generation of
Kobold is carrying on this vision.
Our new System respects the environment, combining low energy consumption with high efficiency. Its
safety and quality are assured by
many of the world’s leading certifications. The brand new Kobold
VK 140 generation has been projected
to be even more light and powerful,
easy handling and effective, quiet
and astonishing designed. Its electronic heart set a new state of the art in
the market. With well-being in mind,
Kobold has developed a new and
exclusive generation of special filter
that reduce the allergic potential of
dust by retaining the particles they
collect, especially the smallest and
most harmful. And all this technology is even more easy to use.
11
Only a century ago, cleaning a
house meant enormous effort.
What now is just part of our daily
routine was once a task that
demanded an unthinkable amount
of energy. The main reason for
this situation was the simple lack
appliances efficient enough to
really clean, rather than just
moving dust around as was so
often the case. After this
“prehistoric” period for domestic
appliances, the first real vacuum
cleaners began to appear. That
was in the early twentieth century,
when the advertisements used to
boast features like “our cleaners
are so light they can be lifted by
just two people”: slogans that
sound funny now, but you have to
remember that up until the late
twenties all domestic
appliances were gigantic, difficult
to use, costly and above all
inefficient.
This was the situation when
Vorwerk began introducing
innovations in the thirties. The
Ger man company marketed a
product that revolutionized the
concept of the vacuum cleaner,
with revolutionary features for
the time: it was light, practical,
effective and relatively cheap.
They baptized the new machine
“Kobold”, the sprite: an
enchanting name for a product
destined to become world
famous thanks to its exceptional
qualities. The new product won
the hearts and homes of people
immediately, thanks to highly
competitive features and the
direct sales strateg y adopted by
the Group. From then on, sales
went from strength to strength,
to give millions of families the
ideal solution to the problem of
household cleaning. Soon after
its birth, the Kobold was
already something more than
just a vacuum cleaner.
Equipped with a full range of
accessories for all household
needs, it began to show its
decisive multifunctional
characteristics.
The decades that followed were
a succession of innovations, fruit
of unrelenting attention to
technological research.
At the end of the ‘50 the first
electric carpet-brush was presented
in Europe, which combined
suction power with a mechanical
action capable of cleaning carpets
like never before. New accessories
increased the range of floors and
surfaces the Kobold could clean,
and the “Kobold System” began
to take shape.
The
Kobold
System
10
Text to be specified
by Country
Text to be specified
by Country
Page 7
13
Premium Filterbag FP 40:
3 in 1
With the development of the new
Kobold VK 140 comes also a brand
new and innovative filtering
technology included in the
Premium Filterbag FP 40.
The new Premium Filterbag FP 40
has 3 features in 1 filterbag:
high filtration efficiency (HEPA
classification);
optimized dust capacity (rela-
tive to the comparatively small filter volume);
odour filtration and a pleasant
fragrance in combination with
Dovina.
Moreover, with the use of the new
Premium Filterbag FP 40, the great
suction power of the Kobold
VK 140 lasts for a longer period.
In contrast to the Kobold VK 140
other vacuum cleaners need at
least 2 filter elements for achieving
a comparable filtration
performance.
The so called HEPA filter (High
Efficiency Particulate Air Filter) is
integrated inside the Filterbag, this
allows the filtering of the smallest
particles, inhalable by man, which
can cause allergies.
The new filtering system
12
Filtration Efficiency
(HEPA, High Efficiency
Particulate Air Filter)
The filtration efficiency of filter
elements is evaluated by the
European standard EN1822.
According to this standard the
Premium Filterbag FP 40 has
achieved HEPA H11 level, this
means that our Filterbag can block
up to 99% of particles with size
around 0.09 µm (1000 times
smaller than a human hair), and
since bacteria have an average size
of 0.5 µm to 50 µm, the Premium
Filterbag FP 40 effectively filters
out 99% of all bacteria.
To achieve this result, we used
special materials that attract dust
and dirt thanks to their particular
electrostatic charge.
The Kobold VK 140 system has
achieved the TÜV seal as a
guarantee for allergy sufferers: the
emission of allergens are below all
known medical and allergological
limits.
Optimized Dust Capacity
The Kobold VK 140 was designed
to be compact and lightweight and
extremely easy to handle, and even
the Filtrello Premium FP 40 was
designed to have great dust
capacity despite its relatively low
volume of just 2.5 liters.
This is thanks to the special bag
configuration, with three different
layers, shown in
FIGURE B.
Every layer has to fulfill a special
filtration function.
The pre-separation layer consists
of a very voluminous fabric
material which removes larger
particles and fibers (e.g. from
animals, carpets, dust etc.) and
stores these inside the layer.
However, smaller particles can
penetrate the pre-separation layer,
but the adjacent precipitation layer
removes these very small particles.
This is thanks to their special
electrostatic charge.
By the pre-separation of larger
particles and fibers a premature
clogging of the filter bag can be
avoided and the dust capacity of
the filter bag can be increased.
This ensures a long-lasting and
high suction power for the
Kobold VK 140.
The outer layer is made of a
strong fabric designed to prevent
damage to the inner layers.
FILTERBAG
HEPA FILTER
PREMIUM FILTERBAGFP 40
FIGURE A
FIGURE B
EXTERNAL PROTECTION LAYER
PRECIPITATION LAYER
REMOVES SMALL PARTICLES
PRE-SEPARATION LAYER
HIGH VOLUMINOUS STORAGE LAYER
OUTSIDE
FILTER BAG
INSIDE
FILTER BAG
Page 8

15
Odour Filtration
The built-in anti-odour pearls
absorb bad odours inside the filter
bag.
These pearls have and incredibly
large activated surface area.
Each gram of these pearls has an
equivalent surface area of around
6 tennis courts.
The open porous structure adsorbs
the smell deep inside the antiodour pearls where it remains.
Combined with the Dovina
fragrance chip your house smells
fresh and clean.
TÜV Certificated
Premium Filterbag FP 40
(first certified bag ever)
The FP 40 Premium Filterbag is
the world’s first filter bag to be
certified
by the TÜV Nord authority as a
premium quality filter bag.
This certification is only awarded
to high-quality filter bags that have
special hygienic properties.
Highest filtration efficiency
Odour filtration
High dust capacity related to
the filtration volume
Brilliant fine dust reduction,
and bacteria removal
Insignificant impact with fine
dust for customers while filter bag
replacement and disposal
Best germs retention
Highest strength durability of
the filter bag
9 times patented
Premium Filterbag FP 40
A total of 9 patents are proof of
the highly innovative technology
used for the FP 40 Filterbag.
The new FP 40 Filterbag’s capacity
to retain micro-particles and
allergens is guaranteed for 3 years
from the date of manufacture.
After this period, retention capacity
decreases, just as the HEPA filter.
However, this has no effect on the
usability of the filterbag and does
not damage the appliance.
14
There are many sources of
household dust: people and pets
continually shed scales of dead
skin tissue, hair and fur. Normal
life habits (household chores,
cooking, eating, hobbies, smoking,
etc.) create other kinds of dust and
particles. Particles and heavy
metals get into our homes every
day through doors and windows,
on shoes, clothes and anything else
brought in from the outside.
Mattresses, upholstery, carpets and
rugs trap this dirt, and produce
dust themselves as well.
Household dust is thus made up of
organic and inorganic substances.
High concentrations of certain
types of these substances, called
allergens, can cause allergies, even
in people who have never suffered
them before. By allergy, we mean
an overreaction of the body to
other wise innocuous substances in
the environment. Many of these
substances, to which many people
are allergic, are produced by mites
in household dust.
Dust mites belong to the arachnid
species (like spiders) and feed
mainly on dead skin and bacteria.
People with allergic illnesses
usually have a hereditary
predisposition to developing
hypersensitivity to ambient
allergens, but more often than not
it is prolonged contact with these
substances that effectively
generates the reaction. Since
people spend most of their time
in confined spaces, care for our
homes is a fundamental factor in
caring for our health.
Caring for the home doesn’t mean
just removing visible dirt
(traditional cleaning) but also
eliminating invisible dirt,
hazardous to our health, to
improve the quality of life in the
domestic environment. Vorwerk
has long since gone beyond the
simple concept of vacuum cleaner.
Our challenge is to provide
families with a global system for
removing dirt: easy to use,
manageable, quick and versatile,
able to reach into every corner of
the house to prevent dirt
accumulating. Vorwerk has fitted
its appliances with a state of the a
filtering system, capable of
retaining 99.97% of particles
down to 0.09 microns.
For this reason, Vorwerk
appliances have been awarded the
prestigious TÜV and HEPA
markings for their anti-allergic
effectiveness and quality. These
filters are a real help, especially
with small children and pets
around the house.
Hygiene and allergy
This data of the performance
of the filterbag have been
verified by TÜF NORD:
● Highest filtration efficiency
● Odour filtration
● High dust capacity related
to the filtration volume
● Brilliant fine dust reduction,
and bacteria removal
● Insignificant impact with
finedust for customers
while filter bag replacement
and disposal
● Best germs retention
● Highest strength durability
of the filter bag
TÜF certification
Premium
Filter
SEGB-2424/08
V
o
l
u
n
t
a
r
y
t
e
s
t
o
f
e
f
f
i
c
e
n
t
y
a
c
c
o
r
d
i
n
g
t
o
T
Ü
F
N
O
R
D
s
t
a
n
d
a
r
d
TÜV PREMIUM FILTER SEAL
Page 9
VK 140
16
The Kobold VK 140 is the “heart”
of a grand domestic cleaning care
and hygiene system. It’s a
technically advanced product,
developed around the concept of
modularity.
It took years of research to obtain
an appliance that, worthy of the
great Vorwerk tradition, integrates
all these features:
high suction power in a very
quiet product;
high energy efficiency
completely managed by
sophisticated electronics and
adaptable to all kinds of
situations;
improved ergonomics and
manageability, very compact size
and extremely light, less
than 3 Kilos;
a world-renowned standard for
quality and durability;
a new concept of vacuum
cleaner that guarantees total dust
retention with an exceptional
innovative HEPA filter system
which sets a new level of
filtering performance and
easiness in maintenance.
As well as saving time and effort,
the Kobold VK 140 guarantees
health and hygiene: the special
HEPA filtering system guarantees
its effectiveness in preventing
allergies, this is certificated
by TÜV.
(FIGURE 2)
FIGURE 2
Suitable for
Allergic Person
Voluntary test
for house dust
retention
SEGB-47/98
A
c
c
o
r
d
i
n
g
t
o
T
Ü
V
N
O
R
D
S
t
a
n
d
a
r
d
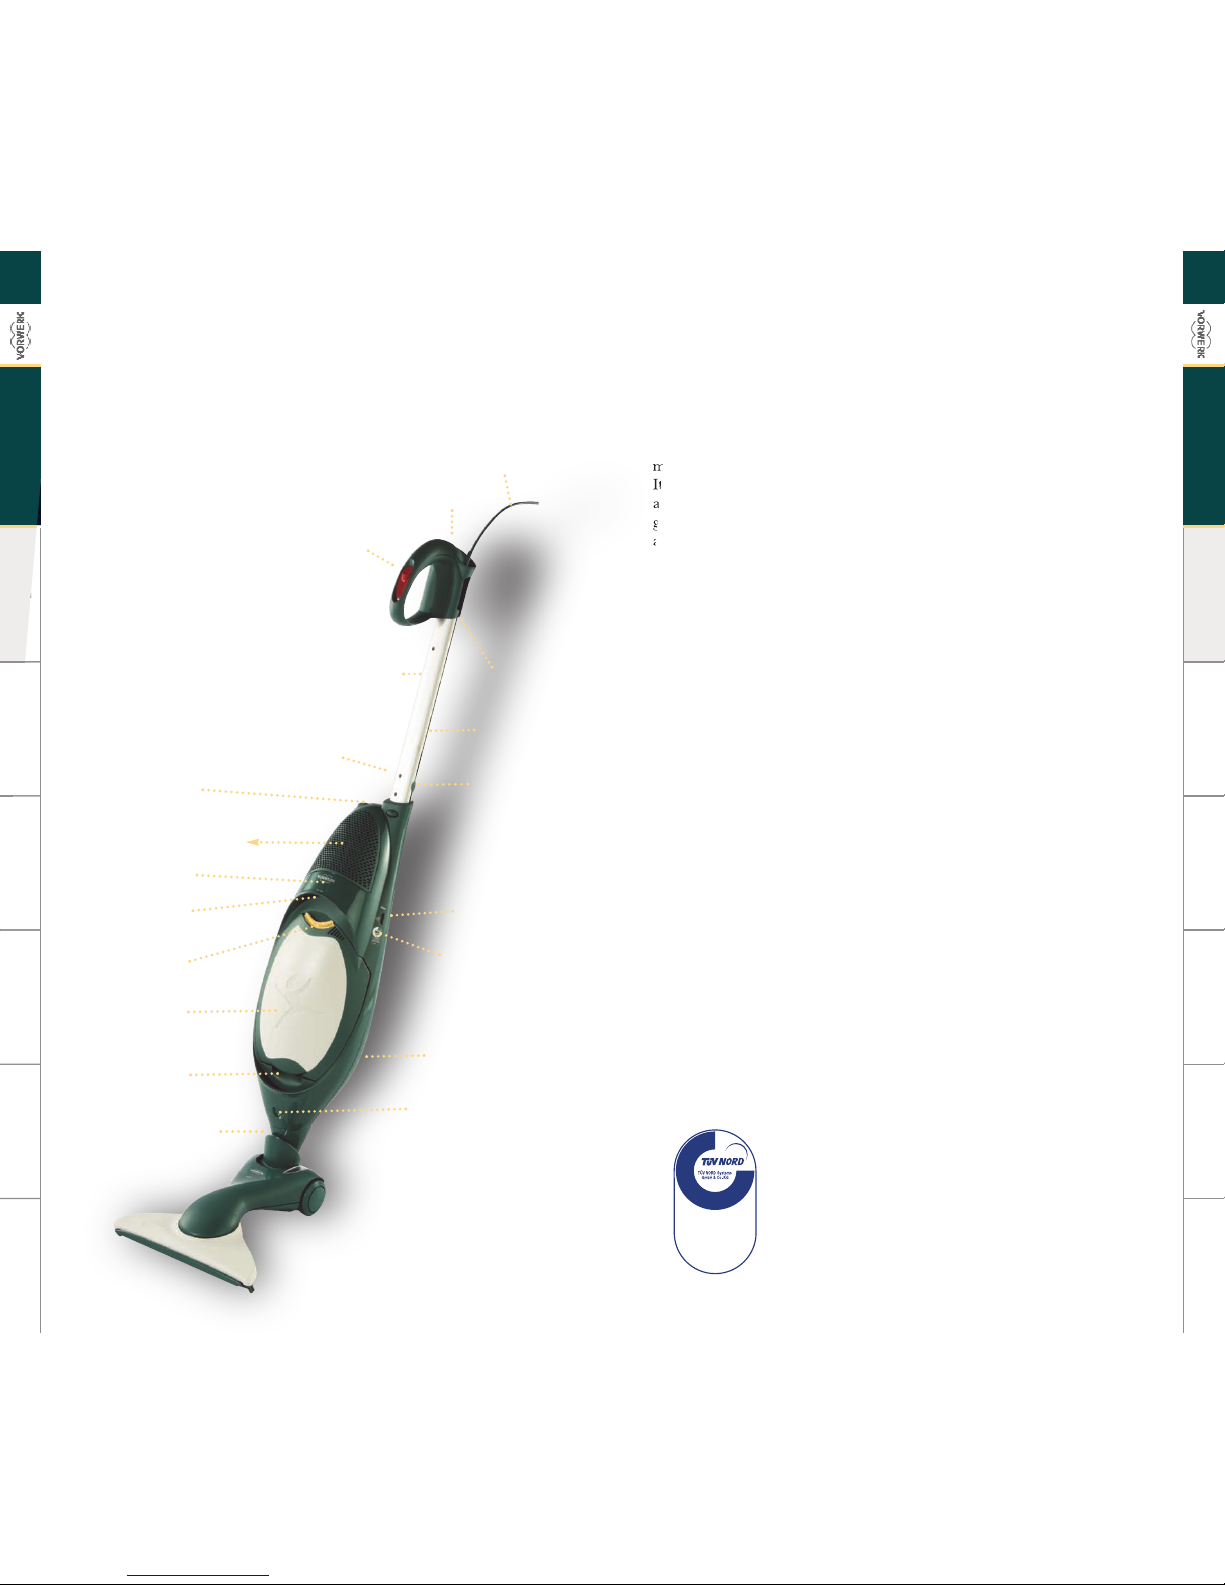
Description & features
Kobold VK 140 with HD 40
Description & features
VK 140
17
Description & features
FIGURE 1
HD 40
MAINS LEAD
SWIVELING
CABLE STAY ON
THE REAR SIDE
GROOVE FOR
MAINS LEAD
STICK RELEASE/LENGHT
ADJUSTER BUTTON
PREMIUM FILTERBAG FP 40
EXHAUSTED INDICATOR
ACCESSORY
ATTACHMENT/RELEASE
BUTTON
MOTOR HOUSING
FILTER UNIT
HANDLE
LOWER
HANDLE
MAIN ON/OFF AND POWER
SETTING SWITCH
TELESCOPIC STICK
AUXILIARY ON /OFF
AND POWER
SETTING SWITCH
ON THE REAR SIDE
APPLIANCE/ACCESSORY
CONNECTOR
MAINS LEAD
SOCKET
FILTER UNIT
OPENER
TÜV SEAL
AIR EXIT
LOWER
HANDLE
ACCESSORY
ATTACHMENT/RELEASE
BUTTON
Page 10
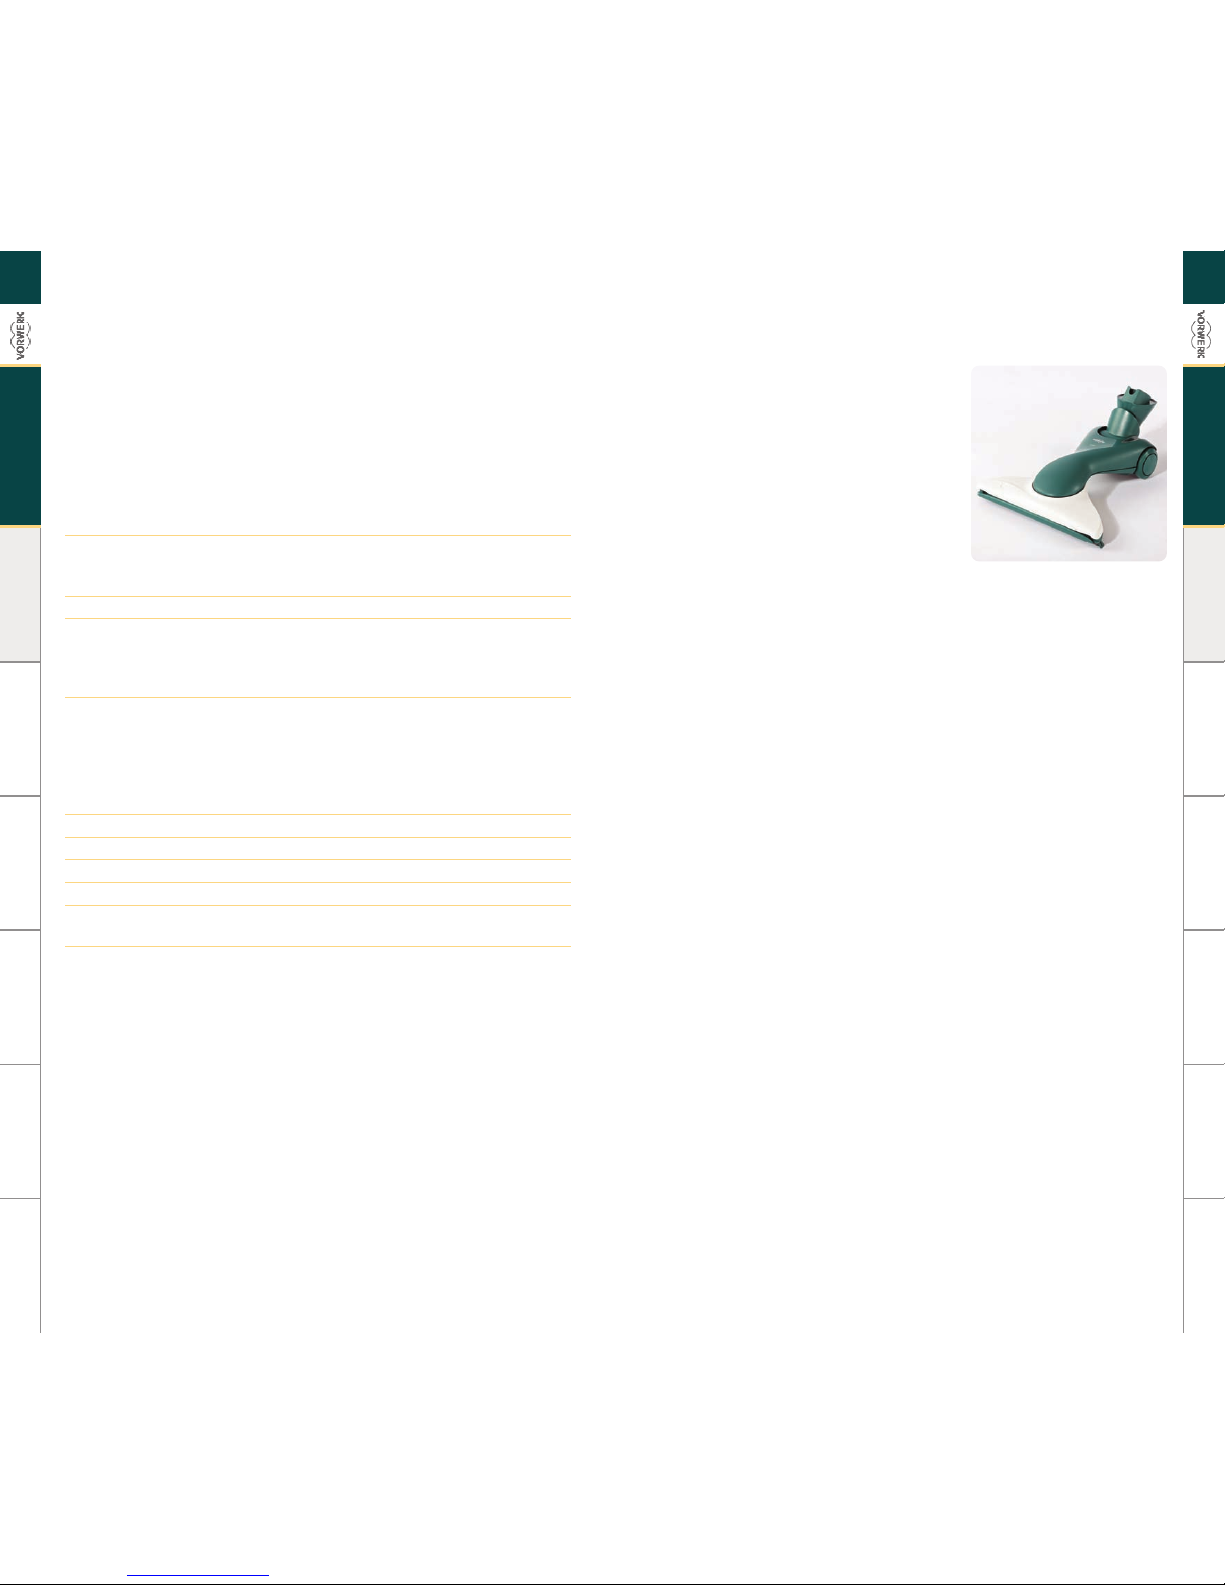
For quick and easy cleaning of hard floors,
waxed floors, parquet or ceramic tiles
where an effective, manageable electric
broom is needed, use the HD 40; connected
to the Kobold VK 140, it is extremely agile
on all kinds of floors.
The HD 40 is a revolutionary cleaning
nozzle that swivels with an exclusive
oscillating motion and allows access to all
surface areas, even the most inaccessible,
and gets round all kinds of obstacles with
ease.
Another important feature of the new
HD 40 is that, despite the exceptional
suction power, it is surprisingly easy to
handle and manoeuvre.
The elegant shape of the HD 40 suits
perfectly with the Kobold VK 140 design.
(FIGURE 3)
HD 40 Features
Swivelling joint for greater flexibility
Oscillating motion to get into difficult
corners and around obstacles
Interchangeable brush plates
Crash and scratchproof material
Casters for easy transport and use
Parking position
Advantages
Lighter and even more practical
Easier to push
Reaches inaccessible places (tight
corners, deep under furniture, around table
legs, etc., ...)
Easier to use
Easier to transport
FIGURE 3
VK 140
19
VK 140
18
Kobold VK 140 with HD 40
Technical specifications
Technical specifications
Housing High-grade recyclable plastic
Motor Maintenance-free switched reluctance motor,
ball-bearing, electronic performance control,
nominal speed 60,000 rpm
Ventilator Single-stage radial fan
Voltage for 220-240 VAC 50/60 Hz
nominal performance 900 watts,
with additional devices max. 1,300 watts,
action radius 7.0 m in accordance with IEC 60 312
Suction values (average) for complete appliance without nozzle
max. negative pressure 175 hPa
max. air flow 41 l/s
max. suction performance 260 watts complete with clean filter system
(in accordance with IEC 60 312)
max. efficiency 32%
Filter bag volume 2.5 l in accordance with IEC 60 312
Dust emission Ca. 0.0001 mg/m3in accordance with IEC 60 312
Noise emission 74 dBA without nozzle
Weight approx. 3.00 kg for the appliance without nozzle
Certifications TÜV “suitable for allergy sufferers”
HEPA class 11
Protection level IPX 0
The identification details of the product are on the label on the rear side
of the appliance.
The manufacturer reserves the right to make any changes suggested by
developing technology, at any time and without prior notice.
Technical specifications
Page 11
21
VK 140
20
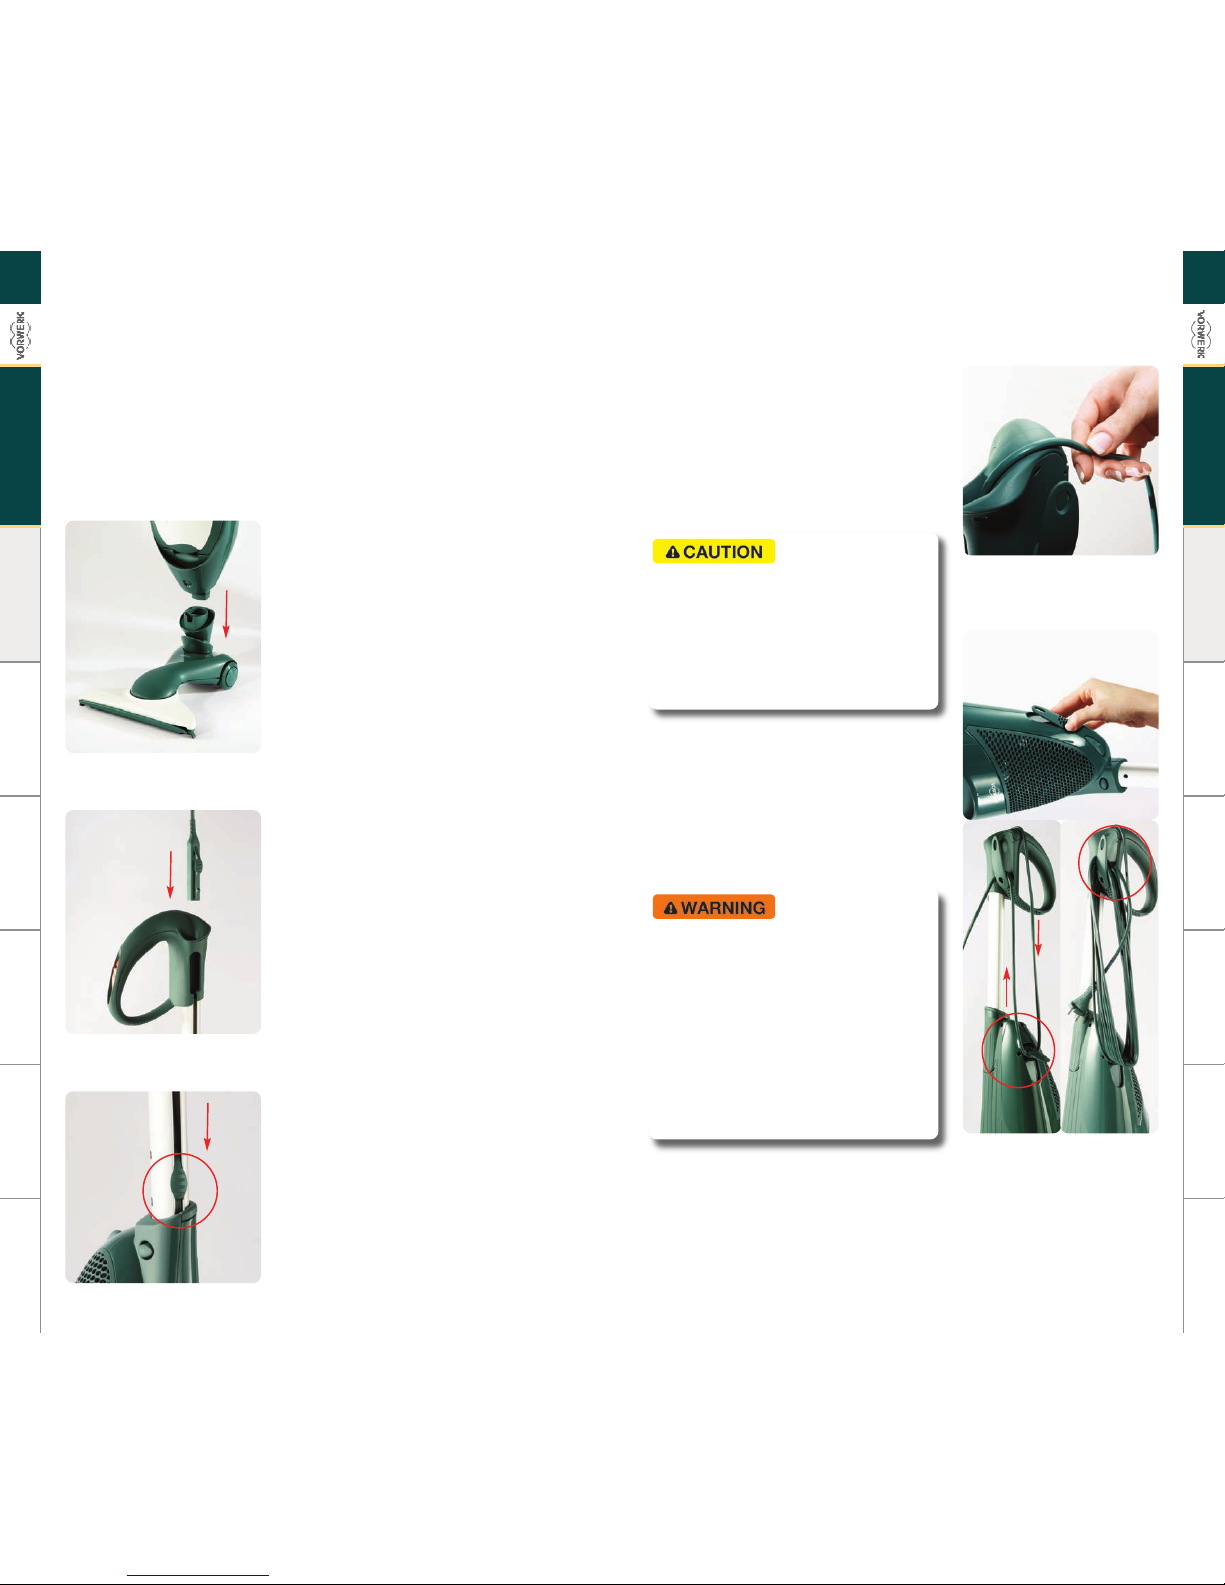
To get the Kobold VK 140 ready for used, fit
the HD 40 as shown in the picture..
(FIGURE 7)
To do this, guide the mains plug and lead
through the rod handle.
(FIGURE 8)
Before using the Kobold VK 140 for the first
time, it is necessary to insert the mains cord
within the rod handle, you do not need to
remove it unless you have to change the
cable.
Slide it down from top to bottom of the rod
handle and insert it in the appliance until
you can hear a click.
(FIGURE 9)
Kobold VK 140 with HD 40
Assembly & Use
FIGURE 8
FIGURE 9
FIGURE 7
Assembly & Use Assembly & Use
By winding the mains cord, make sure that
it is rolled in the same direction as shown in
the picture.
(FIGURE 10)
Doing otherwise you might damage the
cable.
Pay attention to possible damages to the
appliance or the connecting cable when
winding it up.
Check that the mains cord can slide
freely through the handle when telescoping.
Do not hold on to the mains cord during
telescoping.
Wind the connecting cable around the two
hooks which are designed for this purpose.
(FIGURE 11)
Remove the plug from the socket before
winding up the mains cord.
Make sure not to crush the mains cord in
the rod handle.
Never try to take out the rod handle from
appliance.
Only unplug the appliance by pulling on
the mains plug, and never by pulling on the
mains cord.
Never carry the appliance with the
mains cord.
FIGURE 10
FIGURE 11
VK 140
Page 12
23
VK 140
22
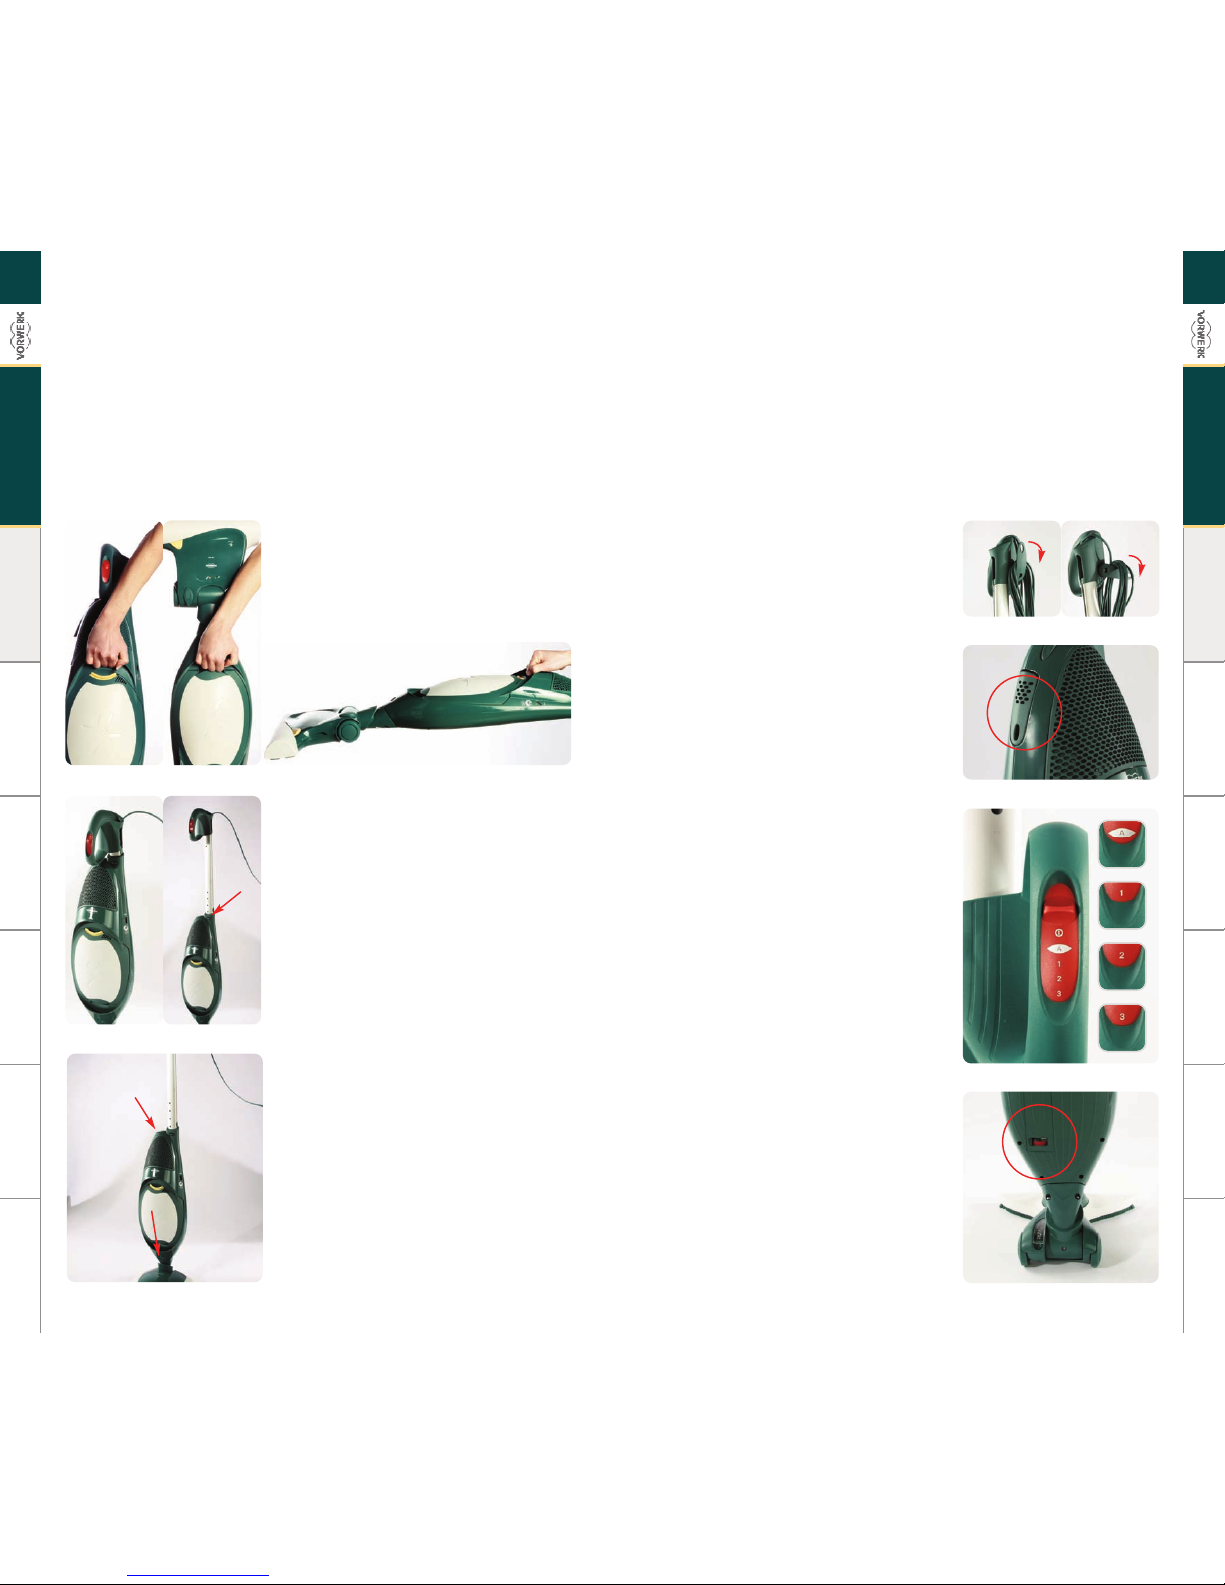
With the integrated grip handles, you can
comfortably transport the Kobold VK 140,
use it on stairs and mattresses, and clean
raised areas throughout the home..
(FIGURE 12)
Furthermore, the Kobold VK 140 allows you
to adjust the working length by means of
the telescoping rod handle.
For telescoping, hold down the telescoping
notch, slide the rod handle into the desired
position and let it snap in.
For storage of the appliance or for working
in raised areas, you can slide the rod handle
completely into the appliance.
(FIGURE 13)
Through the connection system, the Kobold
VK 140 can be connected to the HD 40, the
EB 360, the Pulilux PL 515, the Polsterboy
PB420, the suction hoses and the respective
accessories. Thus you can select the best
combination of appliances for each
application.
(FIGURE 14)
Handling and telescoping
the Kobold VK 140
FIGURE 12
FIGURE 13
FIGURE 14
FIGURE 15
FIGURE 17
FIGURE 18
FIGURE 16
Remove the mains cord from the lead
holder by turning the hook downwards.
Insert the plug into the wall socket.
(FIGURE 15)
To prevent damage to furniture, always fold
the lower hook inwards when you work
with the Kobold VK 140.
(FIGURE 16)
Switching on and off
This is done with the sliding switch on the
handle, with which you can also set the
desired suction performance power.
The sliding switch makes sure that you can
easily and safely select one of the power
performance settings.
Select the desired power performance
setting between
(FIGURE 17):
“A” - automatic level (with EB 360)
“
” - lower suction power
“
” - mid suction power
“
” - higher suction power
With the level A the EB 360 automatically
adjust the suction power of the Kobold
VK 140 to the different floor types.
For all other accessories and motors the
level A gives a suction power equal to 1
to the Kobold VK 140.
The Kobold VK 140 is also equipped with a
secondary switch located on the back side
of the appliance.
(FIGURE 18)
It is possible to operate trough the
secondary switch doing the raised cleaning
areas with the carrying strap.
The motors connected to the Kobold VK 140
switches itself on and off automatically.
Making the appliance ready
for operation
Assembly & Use Assembly & Use
VK 140
Page 13

FIGURE 6
Parking
A fundamental feature for storing the
Kobold VK 140 is the parking position,
making it easier to keep Kobold VK 140
vertical, always ready for use…
(FIGURE 4)
Transporting
… and its casters make it easier to move
around…
(FIGURE 5)
Storage
… and you can even hang your Kobold
VK 140 at the cable hook to store it.
(FIGURE 6)
VK 140
25
VK 140
24
Using the Kobold VK 140 with the HD 40
FIGURE 19
FIGURE 20
To assemble, insert the Kobold VK 140 into
the joint nozzle of the HD 40 nozzle until it
clicks into place.
(FIGURE 19)
The HD 40 is perfect for cleaning
right up to the skirting board
thanks to its shape that delicately
follows the pattern of the surfaces
it encounters.
(FIGURE 20)
It is exceptionally effective for
removing coarse dust from
corners, around the feet of
furniture, chairs and all kinds of
difficult spots thanks to its caster
system.
FIGURE 4
FIGURE 5
Parking, transporting and storage
of the Kobold VK 140
Assembly & Use Assembly & Use
Page 14
Kobold VK 140 with HD 40
Maintenance
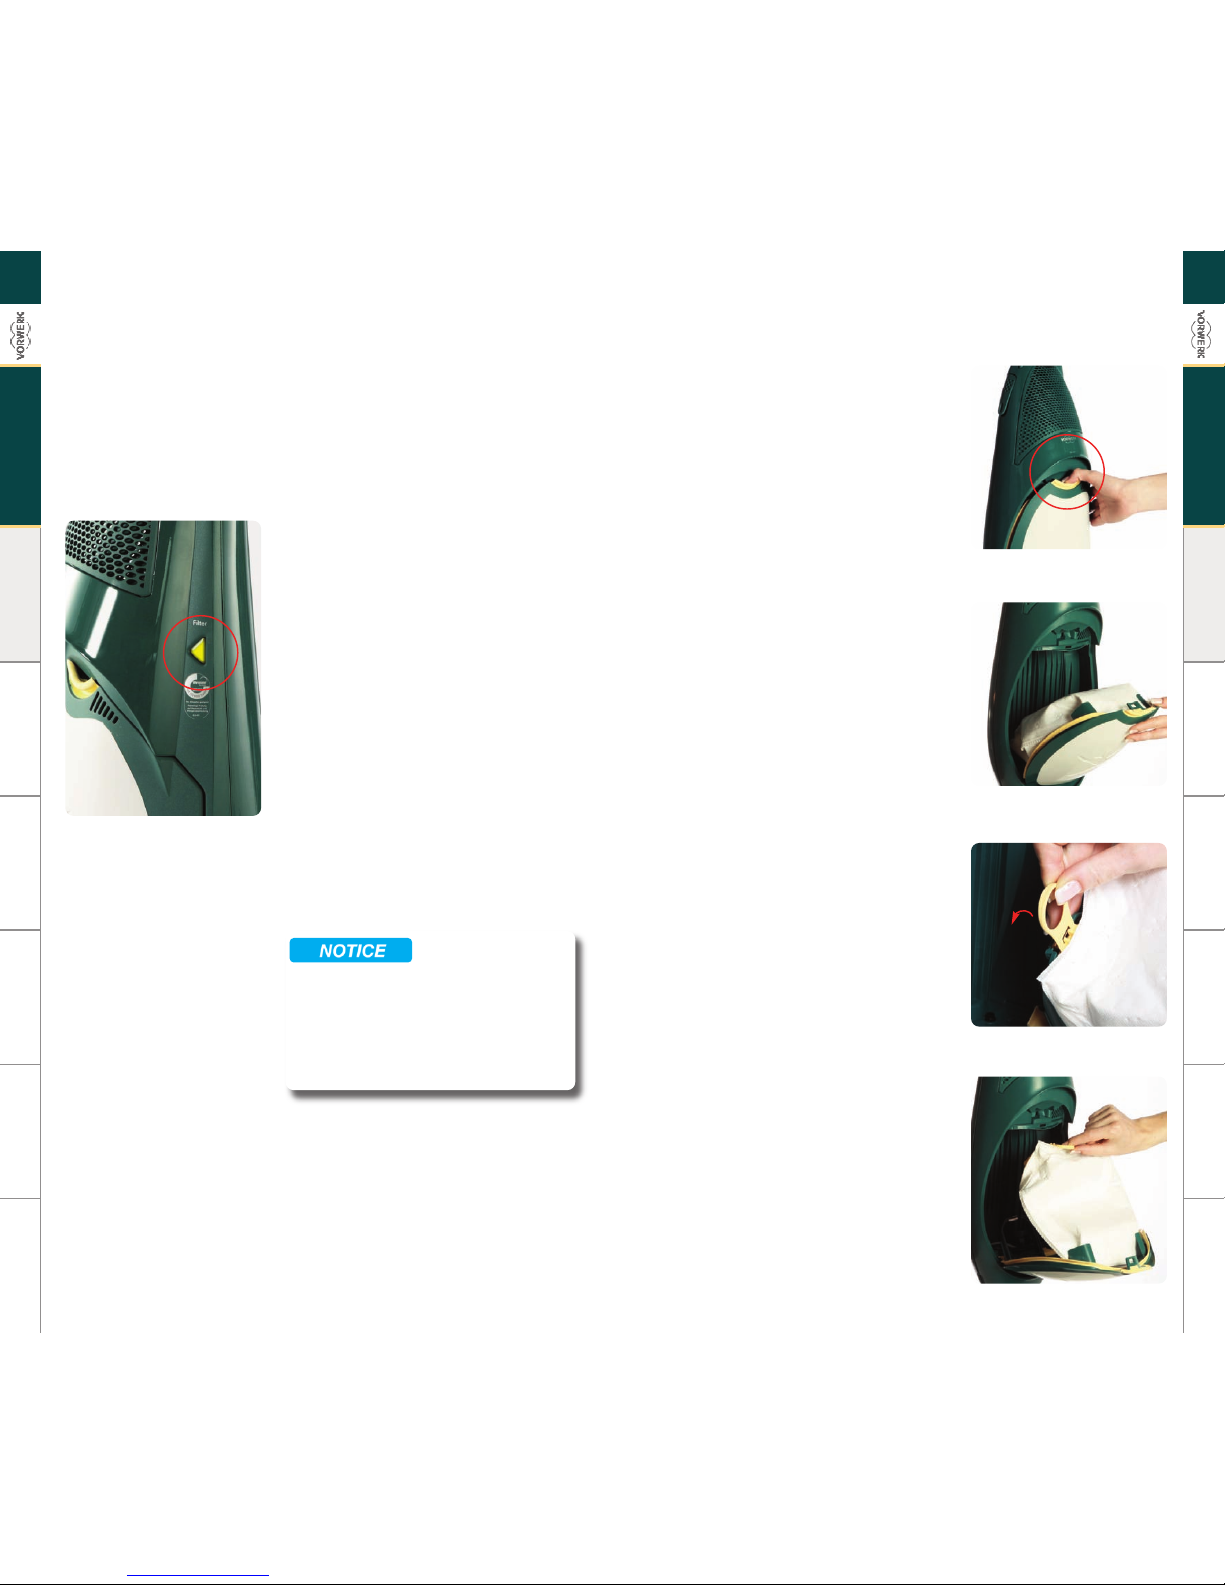
In the Kobold VK 140 all the filter system is
integrated in the Filterbag thus changing it
will renew the entire filtering system.
If, while using the appliance, the exhausted
filterbag display is completely yellow the
filter bag should be changed.
(FIGURE 21)
The filterbag is exhausted when its pores
are blocked by the dust and not by the
quantity of material contained, which
means that vacuuming a great quantity of
very fine dust could result in exhaustion of
the filterbag even when it is not completely
full.
When the Kobold VK 140 is unusually loud
as well or the suction power performance is
reduced, check if the filter bag should be
changed.
For protecting the motor from soiling, the
Kobold VK 140 has a separate motor
protection filter; this filter ensures the long
life and performance of the appliance thus
must be always kept in place while
vacuuming.
FIGURE 21
VK 140
27
VK 140
26
Maintenance Maintenance
Changing the filter bag
and inserting the Dovina
fragrance chip
Press the yellow release button.
(FIGURE 22)
Open the front filter cassette.
(FIGURE 23)
Remove the bag by grasping the ring, first
pushing forward…
(FIGURE 24)
… and then pulling outward.
(FIGURE 25)
Then dispose the full bag properly.
FIGURE 22
FIGURE 23
FIGURE 24
FIGURE 25
click
Page 15
Inserting new filter bags
Press the Dovina fragrance chip into the
new filter bag plastic plate.
(FIGURE 26)
Small parts, like the Dovina fragrance
chips, must be kept out of children’s reach.
Insert the filter bag plastic plate starting
with the bottom first, ensuring the two
small plastic “tabs” go over the green base
plate of the Kobold VK 140.
(FIGURE 27)
Then press the top of the filter bag plastic
plate into the metal clasp until you hear a
click.
(FIGURES 28 AND 29)
FIGURE 26
FIGURE 27
FIGURE 28
FIGURE 29
VK 140
29
VK 140
28
Ensure both filter bag corners are tucked
within the green supports.
(FIGURE 30)
Finally, close the filter cassette back onto
the motor head ensuring that it clicks firmly
into place.
(FIGURE 31)
The Kobold VK 140 is fitted with a special
system that prevents the filter cassette from
closing if the filterbag is not present, is not
corrected inserted or is not the filter
suitable for the appliance.
If the filter cassette does not close easily,
do not force it and check if you have
correctly inserted the Premium Filterbag
FP 40.
During a long period of usage, if the
ambient temperature is high or vacuuming
with a exhausted filterbag, the Kobold VK
140 may switch to a higher performance
setting due to overheating and therefore no
regulation of the suction power is possible.
In this situation an air vent opens
automatically and allows air into the interior
of the motor.
This significantly reduces the suction
performance power and the Kobold VK 140
becomes louder. If the filterbag is not
exhausted then examine the suction canal
of the Kobold VK 140 and of the attached
appliance or nozzle.
Then remove any blockage and/or change
the filterbag if necessary. Only after the
cooling of the motor the performance
setting can be regulated again.
Do not reuse filter bags. Due to the
blocked pores, the Kobold VK 140 loses
performance and can overheat.
FIGURE 30
FIGURE 31
click
Maintenance Maintenance
Page 16
Before doing any maintenance,
disconnect the appliance from the mains
supply by removing the plug.
Never clean the motor filter with water
or other liquid cleaning agent.
To avoid damage to the motor blower
unit use the appliance only with the motor
protection filter inserted in its place.
Replacing the front panel
of the appliance
The front panel of the Kobold VK 140 may
detach while opening the appliance to
change the filter bag or to do maintenance
work.
(FIGURE 35)
This is easier to do if you lay the appliance
on the floor.
Fit the front panel starting with the bottom
first, ensuring the two hooks are placed in
the hinge, to do that the right angulation
should be around 70°. (
FIGURE 36)
Then gently press the hooks in the hinge
until you hear a click.
(FIGURE 37)
FIGURE 32
FIGURE 33
FIGURE 34
VK 140
31
VK 140
30
Do not reuse filter bags otherwise you
lose the allergy reducing performance.
Only original Vorwerk filterbags
guarantee the allergy reducing
performance.
If the filter bag breaks, clean the filter
compartment and the motor protection filter
thoroughly. If the motor protection filter is
very soiled, replace it. Then change the
filter bag.
In order to re-establish the allergy reducing
performance, turn the appliance on and let
it run at least 45 minutes. This measure is
for ensuring the anti-allergic performance
of the appliance. Not doing it will under no
circumstances damage the appliance.
Caring for the motor
protection filter
The motor protection filter is important for
the long life of your appliance. It protects
the motor from soiling.
(FIGURE 32)
The motor protection filter should only be
vacuum cleaned or replaced if it is heavily
soiled or the filterbag breaks.
Cleaning the motor
protection filter
Remove the motor protection filter.
To do this, open the appliance where you
will find the motor protection filter located
directly on the top.
(FIGURE 33)
You can clean the filter by gently
vacuuming it.
When inserting the motor protection filter,
please observe that you insert it exactly
according to its form so that no air flows
around it.
(FIGURE 34)
Afterwards, close the filter cassette back
onto the motor.
FIGURE 35
FIGURE 36
FIGURE 37
Maintenance Maintenance
Page 17
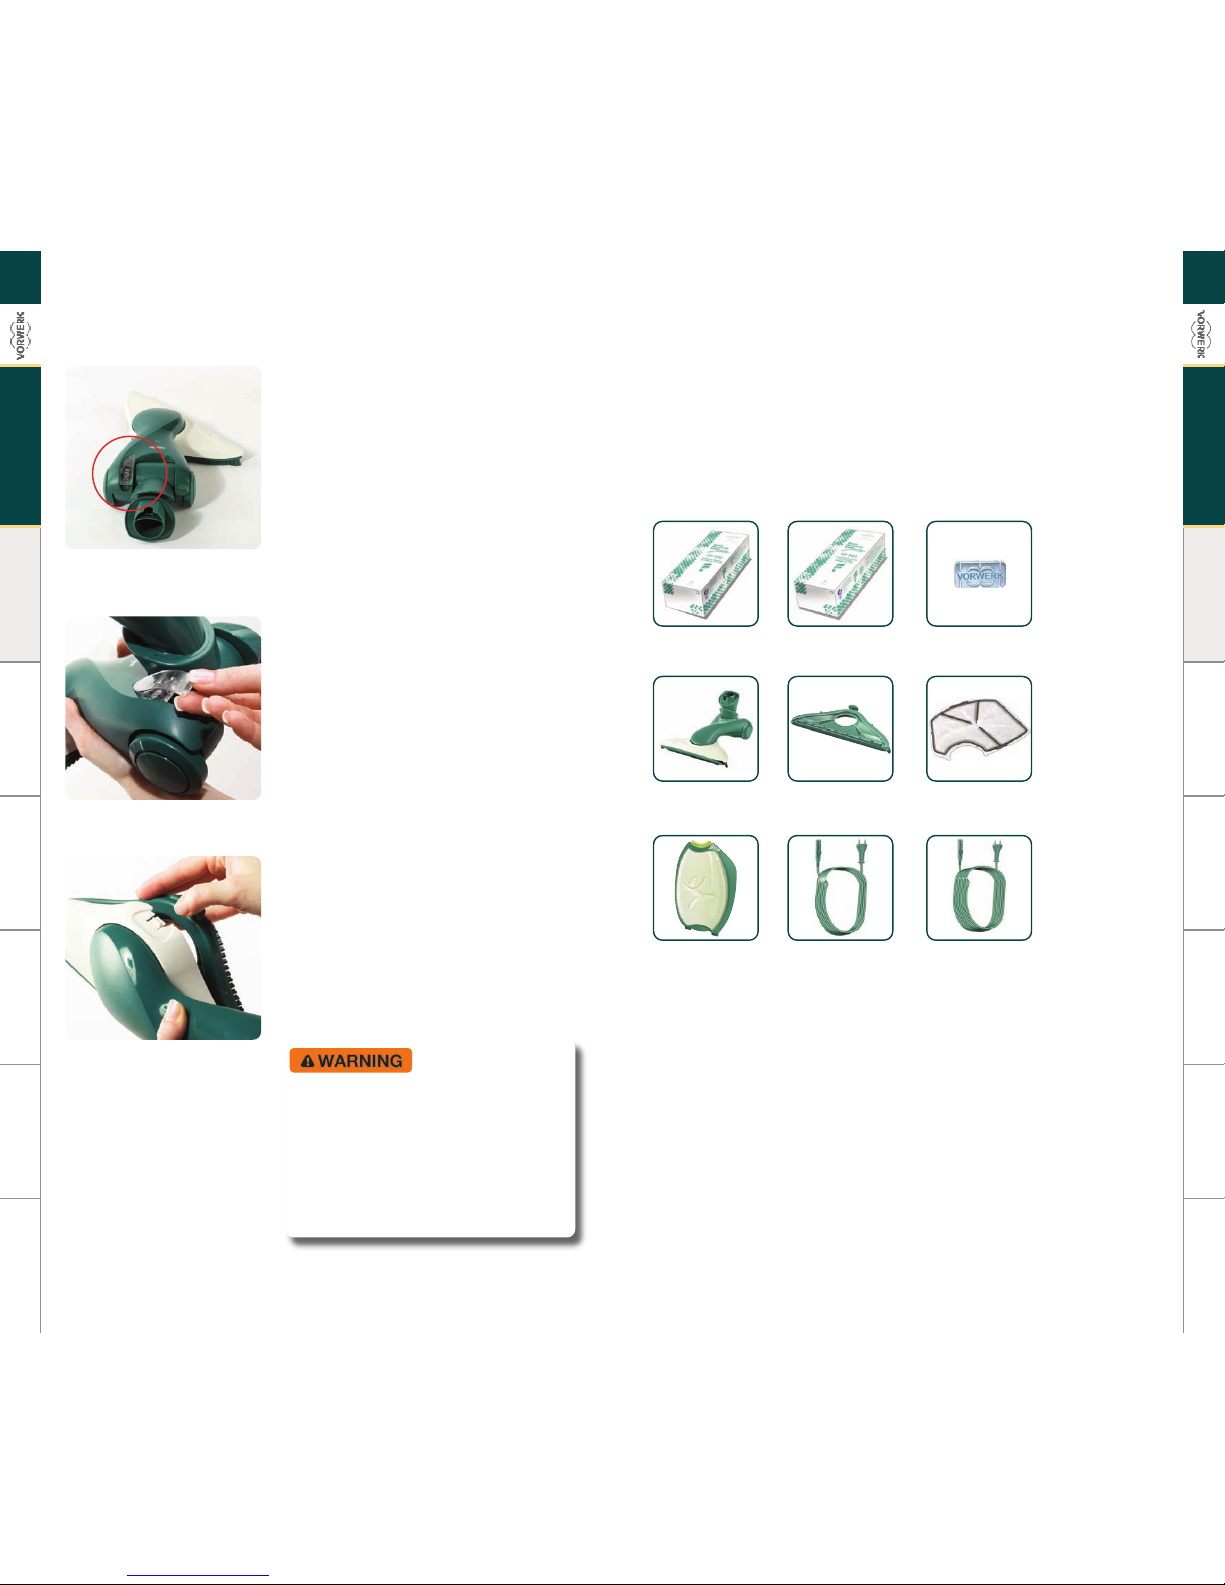
FIGURE 38
Kobold VK 140 with HD 40
Spare parts & consumables
5035
FP 140
5033
FP 140 + DOVINA
4856
DOVINA
5090
HD 40
4866
FILTRO MOTORE
5041
UNITA’ FILTRO
5040
PIASTRA CON SETOLE
Maintenance of the HD 40
If the HD 40 becomes clogged while using
the Kobold VK 140, open the transparent
hatch on the upper side of the brush and
remove the blockage, then close the hatch
again.
(FIGURE 38)
To open the transparent cover pull it
upwards. To close it, replace it and push it
backwards.
(FIGURE 39)
If the bristle plate is worn out, you can
replace it: to remove the old one press the
hook downwards and detach it, attach now
the new bristle plate beginning from the
front paying attention the 3 hooks are
inserted in the hinges and strongly pressing
till the back hook clicks into place.
(FIGURE 40)
Before doing any maintenance,
disconnect the appliance from the mains
supply by removing the plug.
Do not twist the HD 40 plate over the
mechanical end stop.
Keep small parts such as the transparent
cover away from children due to the danger
of choking and suffocation.
Maintenance Spare parts & consumables
VK 140
33
VK 140
32
FIGURE 39
5090
CAVO 7 M
5040
CAVO 10 M
FIGURE 40
Page 18

VK 140
35
VK 140
34
Description & features
Kobold VK 140 with EB 360
Description & features
Description & features
FIGURE 1
EB 360
Technical specifications
Housing High-grade recyclable plastic
Motor Maintenance-free switched reluctance motor,
ball-bearing, electronic performance control,
nominal speed 60,000 rpm
Ventilator Single-stage radial fan
Voltage for 220-240 VAC 50/60 Hz
nominal performance 900 watts,
with additional devices max. 1,300 watts,
action radius 7.0 m in accordance with IEC 60 312
Suction values (average) for complete appliance without nozzle
max. negative pressure 175 hPa
max. air flow 41 l/s
max. suction performance 260 watts complete with clean filter system
(in accordance with IEC 60 312)
max. efficiency 32%
Filter bag volume 2.5 l in accordance with IEC 60 312
Dust emission Ca. <0,001 mg/m3in accordance with IEC 60 312
Noise emission 74 dBA with EB 360
Weight approx. 3.00 kg for the appliance without nozzle
Certifications TÜV “suitable for allergy sufferers”
HEPA class 11
Protection level IPX 0
The identification details of the product are on the label on the rear side
of the appliance. The manufacturer reserves the right to make any changes
suggested by developing technology, at any time and without prior notice.
The Kobold VK 140 is the “heart”
of a grand domestic cleaning care
and hygiene system. It’s a
technically advanced product,
developed around the concept of
modularity. It took years of
research to obtain an appliance
that, worthy of the great Vorwerk
tradition, integrates all these
features:
high suction power in a very
quiet product;
high energy efficiency
completely managed by
sophisticated electronics and
adaptable to all kinds of situations;
improved ergonomics and
manageability, very compact size
and extremely light, less
than 3 Kilos;
a world-renowned standard for
quality and durability;
a new concept of vacuum
cleaner that guarantees total dust
retention with an exceptional
innovative HEPA filter system
which sets a new level of filtering
performance and easiness in
maintenance.
As well as saving time and effort,
the Kobold VK 140 guarantees
health and hygiene: the special
HEPA filtering system guarantees
its effectiveness in
preventing allergies,
this is certificated
by TÜV.
(FIGURE 2)
Suitablefor
AllergicPerson
Voluntarytest
forhouse dust
retention
SEGB-47/98
A
c
c
o
r
d
i
n
g
t
o
T
Ü
V
N
O
R
D
S
t
a
n
d
a
r
d
FIGURE 2
MAINS LEAD
SWIVELING CABLE
STAYON THEREAR
SIDE
STICK RELEASE/LENGHT
ADJUSTER BUTTON
PREMIUM FILTERBAG FP 40
EXHAUSTED INDICATOR
ACCESSORY
ATTACHMENT/RELEASE
BUTTON
MOTOR HOUSING
FILTER UNIT
HANDLE
LOWER
HANDLE
MAIN ON/OFF AND POWER
SETTING SWITCH
AUXILIARY ON /OFF
AND POWER
SETTING SWITCH
ON THE REAR SIDE
APPLIANCE/ACCESSORY
CONNECTOR
FILTER UNIT
OPENER
TÜV SEAL
AIR EXIT
LOWER
HANDLE
ACCESSORY
ATTACHMENT/RELEASE
BUTTON
GROOVE FOR
MAINS LEAD
TELESCOPIC STICK
MAINS LEAD
SOCKET
Page 19

VK 140
37
VK 140
36
Assembly & Use Assembly & Use
To get the Kobold VK 140 ready for use, fit
the EB 360 as shown in the picture.
(FIGURE 3)
To this, guide the plug of the mains cord
through the rod handle.
(FIGURE 4)
Before using the Kobold VK 140 for the first
time, it is necessary to insert the mains cord
within the rod handle, you do not need to
remove it unless you have to change the
cable.
Slide it down from top to bottom of the rod
handle and insert it in the appliance until
you can hear a click.
(FIGURE 5)
Kobold VK 140 with EB 360
Assembly & Use
By winding the mains cord, make sure that
it is rolled in the same direction as shown in
the picture.
(FIGURE 6)
Pay attention to possible damages to the
appliance or the connecting cable when
winding it up.
Check that the mains cord can slide
freely through the handle when telescoping.
Do not hold on to the mains cord during
telescoping.
Wind the connecting cable around the two
hooks which are designed for this purpose.
(FIGURE 7)
Remove the plug from the socket before
winding up the mains cord
Check that the mains cord can slide
freely through the handle when telescoping.
Never try to take out the rod handle from
appliance.
Only unplug the appliance by pulling on
the mains plug, and never by pulling on the
mains cord.
Never carry the appliance with the
mains cord.
Never run the Electronic brush over the
mains cord or other cable lying on the floor.
FIGURE 6
FIGURE 7
FIGURE 4
FIGURE 5
FIGURE 3
Page 20

39
VK 140
38
With the integrated grip handles, you can
comfortably transport the Kobold VK 140,
use it on stairs and mattresses, and clean
raised areas throughout the home.
(FIGURE 8)
Furthermore, the Kobold VK 140 allows you
to adjust the working length by means of
the telescoping rod handle.
For telescoping, hold down the telescoping
notch, slide the rod handle into the desired
position and let it snap in.
For storage of the appliance or for working
in raised areas, you can slide the rod handle
completely into the appliance.
(FIGURE 9)
Through the connection system, the Kobold
VK 140 can be connected to the EB 360, the
Pulilux PL 515, the Polsterboy PB420, the
suction hoses and the respective accessories.
Thus you can select the best combination
of appliances for each application.
(FIGURE 10)
Handling and telescoping
the Kobold VK 140
FIGURE 8
FIGURE 9
FIGURE 10
Making the appliance
ready for operation
Remove the mains cord from the cable
holder by turning downwards. Insert the
plug into the wall outlet.
(FIGURE 11)
In order to avoid damage on furniture,
always fold the lower hook inwards when
you work with the Kobold VK 140.
(FIGURE 12)
Switching on and off
This is done with the sliding switch on the
handle, with which you can also set the
desired suction performance power.
The sliding switch makes sure that you can
easily and safely select one of the power
performance settings.
Select the desired power performance
setting between
(FIGURE 13):
“A” - automatic level (with EB 360)
“” - lower suction power
“” - mid suction power
“” - higher suction power
With the level A the EB 360 automatically
adjust the suction power of the Kobold
VK 140 to the different floor types.
For all other accessories and motors the
level A gives a suction power equal to 1 to
the Kobold VK 140.
The Kobold VK 140 is also equipped with a
secondary switch located on the back side
of the appliance.
(FIGURE 14)
It is possible to operate trough the
secondary switch doing the raised cleaning
areas with the carrying strap.
The motors connected to the Kobold VK 140
switches itself on and off automatically.
FIGURE 11
FIGURE 14
FIGURE 12
FIGURE 13
Assembly & Use Assembly & Use
VK 140
Page 21

VK 140
41
VK 140
40
Kobold VK 140 with EB 360
Maintenance
In the Kobold VK 140 all the filter system is
integrated in the Filterbag thus changing it
will renew the entire filtering system.
If, while using the appliance, the exhausted
filterbag display is completely yellow the
filter bag should be changed.
(FIGURE 18)
The filterbag is exhausted when its pores
are blocked by the dust and not by the
quantity of material contained, which
means that vacuuming a great quantity of
very fine dust could result in exhaustion of
the filterbag even when it is not completely
full.
When the Kobold VK 140 is unusually loud
as well or the suction power performance is
reduced, check if the filter bag should be
changed.
For protecting the motor from soiling, the
Kobold VK 140 has a separate motor
protection filter; this filter ensures the long
life and performance of the appliance thus
must be always kept in place while
vacuuming.
FIGURE 18
Parking
In the parking position, the Electronic
Brush EB 360 switches itself off
automatically, so you can pause the
vacuuming process for a moment - for
example to place or lift an object to the side
- without switching off the appliance.
The Kobold VK 140 then remains at the
selected performance setting.
The Kobold VK 140 and EB 360 can stand
together alone. For this, stand the vacuum
cleaner vertically until the joint nozzle
snaps into place.
Ensure under all circumstances that the
cable does not create a tripping hazard and
that the telescopic handle is leaning slightly
forward. Otherwise, the appliances could
tip over.
(FIGURE 15)
Transporting
The Kobold VK 140 and the Electronic
Brush EB 360 - as well as other accessories can comfortably be transported in the
parking position. Simply tip and roll.
To continue vacuuming, you only have to
press the Electronic Brush against the floor
with the foot.
(FIGURE 16)
Storage
Store the Kobold VK 140 with the EB 360
preferably in the park position. The EB 360
should stand together on straight, smooth
flooring without edges. Please do not place
the EB 360 on the mains cord. You can
alternatively hang your Kobold VK 140 with
EB 360 on at the cable hook with the EB 360
hanging freely as well.
(FIGURE 17)
FIGURE 15
FIGURE 16
FIGURE 17
Parking, transporting and storage
of the Kobold VK 140
Assembly & Use Assembly & Use
Page 22

VK 140
43
VK 140
42
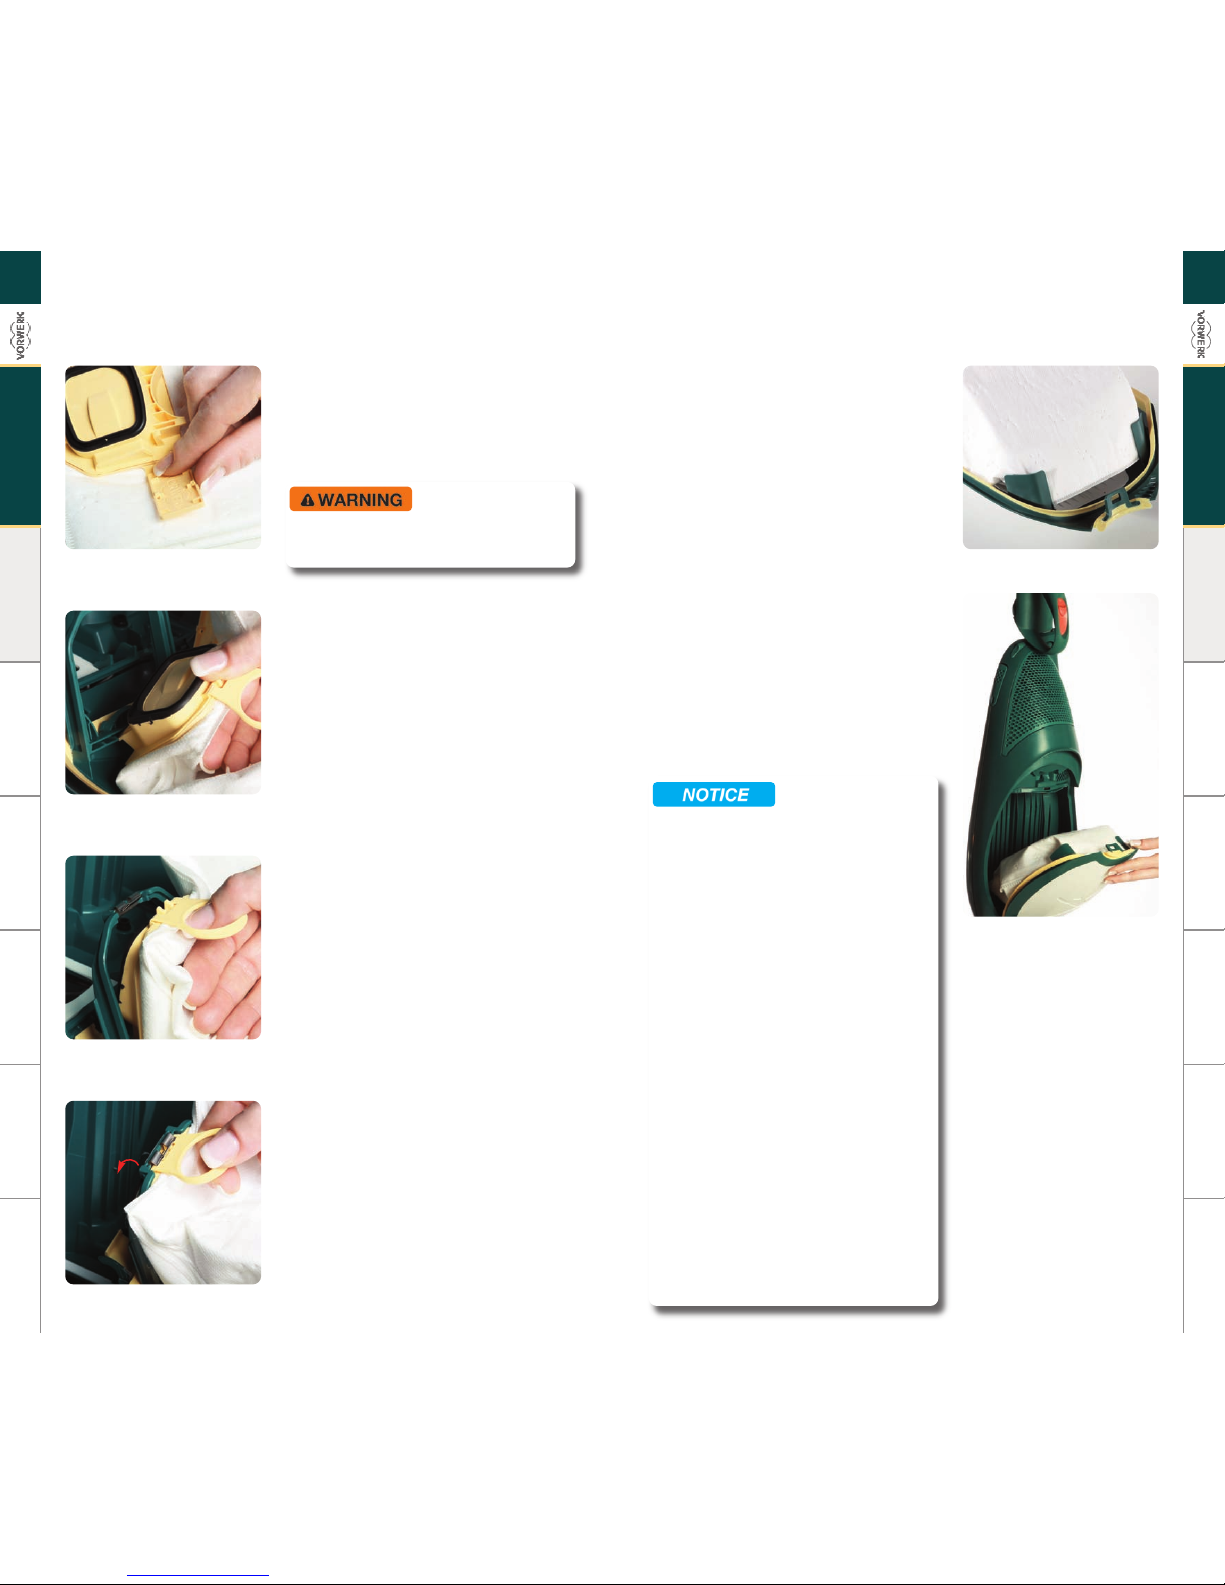
Inserting new filter bags
Press the Dovina fragrance chip into the
new filter bag plastic plate.
(FIGURE 23)
Small parts, like the Dovina fragrance
chips, must be kept out of children’s reach.
Insert the filter bag plastic plate starting
with the bottom first, ensuring the two
small plastic “tabs” go over the green base
plate of the Kobold VK 140.
(FIGURE 24)
Then press the top of the filter bag plastic
plate into the metal clasp until you hear a
click.
(FIGURES 25 AND 26)
FIGURE 23
FIGURE 24
FIGURE 25
FIGURE 26
Maintenance Maintenance
Changing the filter bag
and inserting the Dovina
fragrance chip
Press the yellow release button.
(FIGURE 19)
Open the front filter cassette.
(FIGURE 20)
Remove the bag by grasping the ring, first
pushing forward…
(FIGURE 21)
… and then pulling outward.
(FIGURE 22)
Then dispose of the full bag properly.
FIGURE 19
FIGURE 20
FIGURE 21
FIGURE 22
click
click
Page 23

VK 140
45
VK 140
44
FIGURE 29
FIGURE 30
FIGURE 31
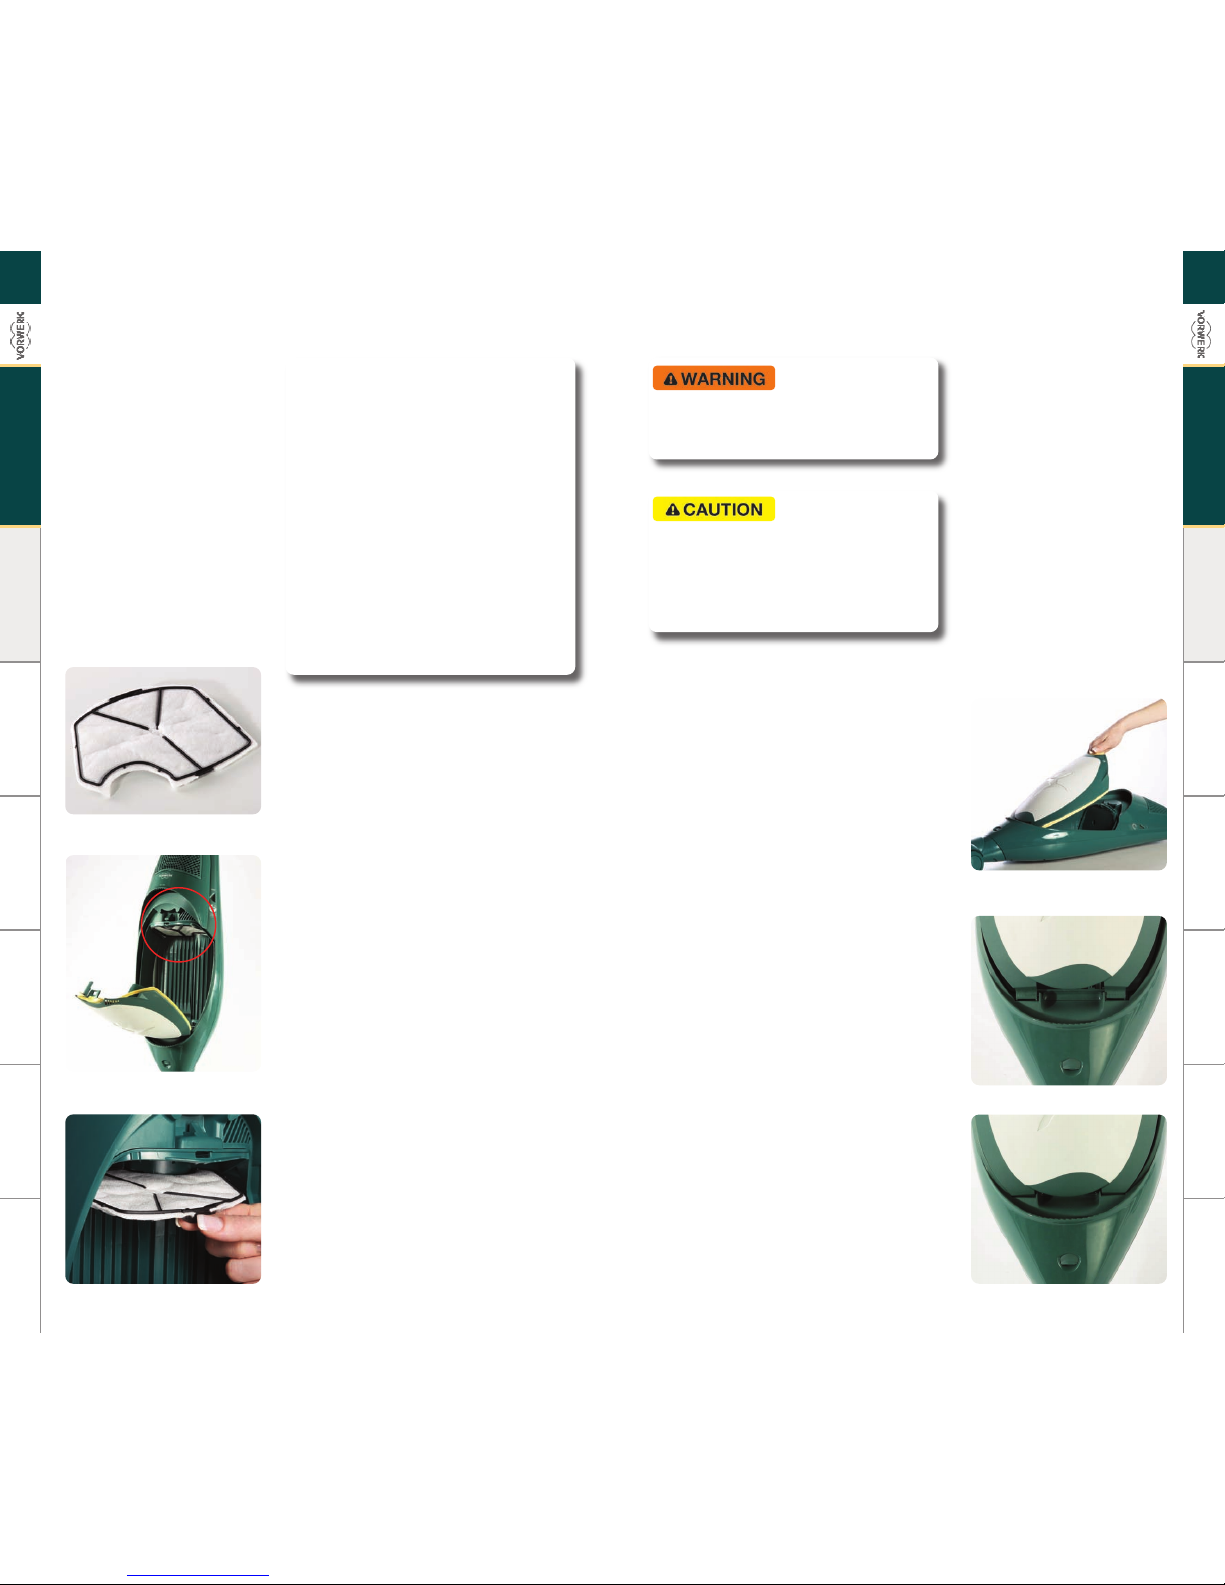
Caring for the motor
protection filter
The motor protection filter is important for
the long life of your appliance. It protects
the motor from soiling.
(FIGURE 29)
Only in the case that the filter bag breaks
or the motor protection filter is heavily
soiled, it should be cleaned by vacuuming
or replaced.
Cleaning the motor
protection filter
Remove the motor protection filter.
For this, open the appliance where you will
find the motor protection filter located
directly on the top.
(FIGURE 30)
You can clean the filter by gently
vacuuming it.
When inserting the motor protection filter,
please observe that you insert it exactly
according to its form so that no air flows
around it.
(FIGURE 31)
Afterwards, close the filter cassette back
onto the motor.
Before doing any maintenance,
disconnect the appliance from the mains
supply by removing the plug.
Ensure both filter bag corners are tucked
within the green supports.
(FIGURE 27)
Finally, close the filter cassette back onto
the motor head ensuring that it clicks firmly
into place.
(FIGURE 28)
The Kobold VK 140 is fitted with a special
system that prevents the filter cassette from
closing if the filterbag is not present, is not
corrected inserted or is not the filter
suitable for the appliance
If the filter cassette does not close
easily, do not force it and check if you have
correctly inserted the Premium Filterbag
FP 40.
During a long period of usage, if the
ambient temperature is high or vacuuming
with a exhausted filterbag, the Kobold VK
140 may switch to a higher performance
setting due to overheating and therefore no
regulation of the suction power is possible.
In this situation an air vent opens
automatically and allows air into the interior
of the motor.
This significantly reduces the suction
performance power and the Kobold VK 140
becomes louder. If the filterbag is not
exhausted then examine the suction canal
of the Kobold VK 140 and of the attached
appliance or nozzle.
Then remove any blockage and/or change
the filterbag if necessary. Only after the
cooling of the motor the performance
setting can be regulated again.
Do not reuse filter bags. Due to the
blocked pores, the Kobold VK 140 loses
performance and can overheat.
Do not reuse filter bags otherwise you
lose the allergy reducing performance.
Only original Vorwerk filter bags
guarantees the allergy reducing
performance.
FIGURE 27
FIGURE 28
Maintenance Maintenance
Page 24

VK 140
47
VK 140
46
Kobold VK 140 with EB 360
Spare parts & consumables
5035
FP 140
5033
FP 140 + DOVINA
4856
DOVINA
4866
FILTRO MOTORE
5041
UNITA’ FILTRO
5090
CAVO 7 M
5040
CAVO 10 M
Maintenance Spare parts & consumables
If the filter bag breaks, clean the filter
compartment and the motor protection filter
thoroughly. If the motor protection filter is
very soiled, replace it. Then change the
filter bag. In order to re-establish the allergy
reducing performance, turn the appliance
on and let it run at least 45 minutes.
This measure is for ensuring the antiallergic performance of the appliance. Not
doing it will under no circumstances
damage the appliance.
Never clean the motor filter with water
or other liquid cleaning agent.
To avoid damage to the motor blower
unit use the appliance only with the motor
protection filter inserted in its place.
Replacing the front panel
of the appliance
The front panel of the Kobold VK 140 may
detach while opening the appliance to
change the filter bag or to do maintenance
work.
(FIGURE 32)
This is easier to do if you lay the appliance
on the floor.
Fit the front panel starting with the bottom
first, ensuring the two hooks are placed in
the hinge, to do that the right angulation
should be around 70°.
(
FIGURE 33)
Then gently press the hooks in the hinge
until you hear a click.
(FIGURE 34)
FIGURE 32
FIGURE 33
FIGURE 34
Page 25

The innovative EB 360 is a
multifunctional appliance.
Coupled with the Kobold VK 140,
it’s perfect for cleaning and caring
for mattresses, carpets, rugs.
The EB 360 is also perfect for
vacuuming on hard floors.
With the new automatic power
regulation function, coupled with
the Kobold VK 140, the EB 360,
automatically adapts to different
types of rugs and carpets or hard
floors.
The EB 360 also has a “SOFT”
function, especially for delicate
and valuable carpets.
An exclusive and extremely
practical system for mattress
hygiene: used with Lavenia it is
capable of removing dust from
deep in the mattress and
considerably reducing the
quantity of allergens.
Its performance on carpeted
floors is extraordinary: cleans
accurately and, with the action of
Kobosan active, does an effective
dry cleaning to bring back the
original splendour of the fibres
and colours.
The TÜV, the renowned German
institute for technical supervision,
has confirmed that Kobosan
active and Lavenia are effective
in reducing allergens and are
recommended for allergy
sufferers.
For any stain Kobotex proves to
be a gentle and effective stain
remover.
FIGURE 2
Description & features
EB 360
Description & features
EB 360
49
EB 360
48
Description & features
FIGURE 1
“SOFT”
FUNCTION PEDAL
ATTACHMENT
TO VK 140
OPERATING LIGHT
EB 360 MOTOR HOUSING
“SOFT”
FUNCTION
LIGHT
COWLING
OPENING
BUTTON
COWLING
BRISTLE
BRUSHES
SLATTED BRUSHES
FRESHENER
KIT FK 360
KOBOTEX
KOBOSAN
ACTIVE
LAVENIA
EB 360
Page 26

EB 360
Assembly & Use
on carpets and mattresses
FIGURE 3
Assembling & Disassembling
Simply insert the Kobold VK 140 into the
joint nozzle of the Electronic Brush until it
clicks into place.
(FIGURE 3)
Both devices are now ready for operation.
In order to take off the accessories, pull the
remote release
(FIGURE 4, DETAIL A) or press
the release button
(FIGURE 4, DETAIL B) on
the lower end of the Kobold VK 140 and
remove the accessory part.
Always switch off the appliance and
remove the plug from the mains socket
before changing any electrical accessories.
Do not insert pointed objects into
the electrical contacts! Do not tamper with
the contacts.
Stay away from rotating brushes
of the electronic brush.
To change the brushes, proceed
as follows: remove the plug from
the mains supply, open the cowling
on the EB 360 by pressing the yellow
button. The cowling releases and can be
pushed forward with ease.
(FIGURE 5)
FIGURE 4
DETAIL A
DETAIL B
EB 360
Technical specifications
EB 360
51
EB 360
50
Technical specifications
Appliance usable exclusively when connected to Kobold appliances
Connects to the Kobold through a practical connection system.
Voltage 220 -240 V / 50 Hz
Power absorption 100W
Motor Motor maintenance free DC-motor
with toothed belt drive
Brushes Rotary, interchangeable and replaceable
Working surface area 300 mm
Skirting-brush distance 0 cm
for cleaning against walls, right, left and frontal
Brush speed
Bristle and mattress ca 6200 rpm
“Soft” function brush speed
ca 800 rpm
Brush height adjustment Automatic
Refreshing Kit speed ca 1700 rpm
Height ca 59 mm
Weight 1.60 kg
Noise emission 78 dB with VK 140 system
(measured on carpet floor in ideal conditions)
Protection level IPX 0
The identification details of the product are on the label on the rear side
of the appliance.
The manufacturer reserves the right to make any changes suggested by
developing technology, at any time and without prior notice.
Assembly & Use
FIGURA 5
Page 27

“Soft” Function
The EB 360 soft function is designed to
delicately clean and care for valuable
carpets, and even fringed rugs.
This function significantly reduces the
speed of the roller brushes. The “soft”
function is activated by pressing the pedal.
The yellow operating light comes on when
operating in soft mode. Press the pedal
again returns to normal function
(see
FIGURE 11).
The function is disabled when the vacuum
cleaner is switched off.
When cleaning delicate rugs and fringes
with the “soft” function, the EB 360 must
only be pulled backwards from the rug
toward the fringes
, then lift the appliance
and carry it to the side still to vacuum
(see FIGURE 12).
Anti-damadge block
If you accidentally suck up something big
or the fringes themselves, the EB 360
automatically cuts-out while the Kobold
VK 140 continues to operate at the set
power level.
The blinking green operating light (on)
indicates a blockage
(see FIGURE 13).
Switch off the appliance, remove the plug
from the mains socket and remove the
trapped object from the EB 360.
Then switch on again and resume cleaning.
Stay away from rotating brushes of the
electronic brush.
FIGURE 11
FIGURE 12
FIGURE 13
Use on carpets
To clean carpets and rugs, the EB 360
should be fitted with the bristle brushes.
(FIGURE 6)
To change the brushes, refer to chapter
“Assembly & Use on carpets and
mattresses”.
If you need to remove the brushes, remove
the brushes already mounted in the tunnels
by pulling on the ends or the fresher kit by
pulling the handles.
(FIGURE 7)
Fit the carpet brushes with a slight rotary
movement on the drive shaft until they click
into place. Always check that the red cap of
the brush corresponds to the red mark on
the EB 360 (see
FIGURE 8).
Always replace both brushes. Carefully
close the cowling using both hands until it
clicks into place.
We recommend starting the Kobold VK 140
at setting A. The green indicator light
shows the appliance is working.
(FIGURE 13)
Now it’s possible to thoroughly clean
carpets and rugs.
(FIGURE 10)
The Kobold VK 140 is an extremely
powerful appliance. Power setting “A” is
sufficient for cleaning most types of of rugs
and carpets. Do not use it on carpets with
pile thicker than 4 centimetres.
Never allow the appliance to operate for
a long period on a single spot since this
could damage the surface.
Remember that if the joint is set vertical the
EB 360 automatically stops to prevent
damage to carpets or other surfaces, while
the Kobold VK 140 stays on at the set power
level.
EB 360
53
EB 360
52
Assembly & Use Assembly & Use
FIGURE 7
FIGURE 6
FIGURE 8
FIGURE 9
FIGURE 10
Page 28

Never run the Electronic Brush over the
mains cord or other cables lying on the
floor.
The appliance can also be used with the
stick extended. This is more practical when
vacuum larger mattresses (for example,
double beds).
(FIGURE 18)
When using the EB 360 on mattresses
always set suction power on the Kobold VK
140 to minimum, in position “1”.
(FIGURE 19)
Never allow the appliance to operate for a
longer period than 5 seconds on a
single spot since this could damage
the surface.
Note that to protect surfaces,
when the joint of the EB 360 is in
vertical position, brush rotation is
disabled, whereas the Kobold VK 140
remains at the set suction power. Reset the
switch to minimum power (“1”) for mattress
cleaning.
Anti-damadge block
If you accidentally suck up something big
or if the mattress lining is a little loose and
the suction power of the Kobold VK 140 is
too high, the EB 360 automatically cuts-out
while the Kobold VK 140 continues to
operate at the set power.
The blinking green operating light (on)
indicates a blockage.
(FIGURE 20)
Switch off the appliance, remove the plug
from the mains socket and remove the
trapped object from the EB 360. Switch the
Kobold VK 140 on again at minimum power
level “1”.
FIGURE 17
FIGURE 18
FIGURE 20
EB 360
55
EB 360
54
FIGURE 14
Use on mattresses
To handle the Kobold VK 140 on mattresses
you can adapt it as described in chapter
Kobold VK 140 “Assembly and use -
Handling the appliances and telescoping”.
Use the special slatted brushes on
mattresses (see
FIGURE 2 at page 49).
This makes mattress care both easy and
effective.
Be aware that some mattresses have
very special surfaces (eg. Jersey) that are
not suitable to be cleaned with slatted
brushes.
To change the brushes, refer to chapter
“Assembly & Use on carpets and
mattresses”.
Fit the mattress brushes with a slight rotary
movement on the drive shaft until they click
into place. Always check that the red cap of
the brush corresponds to the red mark on
the EB 360 (see
FIGURE 16).
Carefully close the cowling using both
hands until it clicks into place.
Always replace both brushes.
Switch on the Kobold VK 140 and operate,
the green operating light on the EB 360
indicates that the appliance is on.
Stay away from rotating brushes of the
electronic brush.
Remove the electrical plug from outlet
prior to all adaption.
FIGURE 15
FIGURE 16
FIGURE 19
Assembly & Use Assembly & Use
Page 29

Dry clean with Freshener Kit
FK 360
The Freshener Kit FK 360 is the latest
accessory for the EB 360 that when used
with Lavenia on mattresses and Kobosan
active on carpets and rugs, makes it
possible to effectively dry clean and
hygienize mattresses, rugs and carpets (see
FIGURE 13 at PAGE 52).
Inside its brushes, a real concentrate of
technology, there’s a special drive system
capable of adapting brush speed for use
with Lavenia and Kobosan active.
With the Kit installed the Kobold VK 140
interrupts the suction.
Before fitting the Kit, disconnect the
appliance from the mains supply as
described in chapter: “Assembly & Use on
carpets and mattresses”.
Open the cowling of the EB 360 by pressing
the yellow button. This releases the cowling,
which can then be pushed forward with
ease.
Remove the brushes already in the tunnel,
gripping them by the ends.
Check that the tunnel has no residues of
dirt that could make the Freshener Kit
FK 360 difficult to insert.
(FIGURE 23)
Insert the Freshener Kit FK 360 into the
tunnel, making certain to insert them
completely. Always make sure the red mark
on the Kit corresponds to the red mark on
the EB 360. For correct insertion, line up the
arrows.
(FIGURE 24)
Now close the white cap using both hands
until it clicks, and check for perfect closure.
To remove the Freshener Kit FK 360, use the
handles provided.
EB 360
57
EB 360
56
FIGURE 24
FIGURE 21
FIGURE 22
FIGURE 23
With the Freshener Kit FK 360 installed,
the Kobold VK 140 vacuuming remains off. If
it does not, switch off the appliance,
remove the plug and check that the
Freshener Kit FK 360 units are correctly
inserted and remain inside the appliance.
Lavenia for mattress hygiene
Before using Lavenia on your mattresses,
clean them with the EB 360 and Mattress
Brushes. After doing this, fit the Freshener
Kit FK 360 in the EB 360 (see
PAGE XX) and
spread the Lavenia over the mattress
following the instructions given with the
product. Switch on the Kobold VK 140.
(FIGURE 25)
With the Freshener Kit FK 360 installed,
the VK 140 vacuuming remains off. If it does
not, check that the brushes are correctly
fitted and the colours correspond. If the
fault persists, switch off the Kobold VK 140
and contact your nearest Technical Service
(see page XX).
Only use Lavenia, never any other type
of powder, liquid of foam detergent. We
recommend testing Lavenia on a small part
of the mattress before cleaning the whole
mattress.
Pass the brushes over the mattress as
explained in the Lavenia instructions.
Allow the Lavenia to penetrate into the
mattress, rubbing it in with the brushes for
about 3 minutes.
After doing this, allow the Lavenia to dry, if
possible with the windows open. This takes
around half an hour, according to the type
of mattress and the temperature of the
room.
(FIGURE 26)
FIGURE 25
FIGURE 26
The TÜV North, prestigious
German indipendent agency
confirms that Lavenia is
effective in removing allergenes
and protecting allergy sufferes.
Suitable for
Allergic Person
Voluntarytest for house
dust retentionon
matresses of
expanded material
3.2-2279/04
A
c
c
o
r
d
i
n
g
t
o
T
Ü
V
N
O
R
D
S
t
a
n
d
a
r
d
Assembly & Use Assembly & Use
Page 30

EB 360
59
EB 360
58
Disconnect the plug from the
mains supply and replace the
Freshener Kit FK 360 with the
mattress brushes
(see page 54).
Set the Kobold VK 140 suction
power to position “1” when using the
EB 360 with the mattress brushes.
(FIGURE 27)
Once the treated surface is dry, vacuum up
the Lavenia with the EB 360.
(FIGURE 28)
Anti damadge-block
If you accidentally suck up something big
or if the mattress lining is a little loose and
the suction power of the Kobold VK 140 is
too high, the EB 360 automatically cuts-out
while the Kobold VK 140 continues to
operate at the set power.
The blinking green operating light (on)
indicates a blockage.
(FIGURE 29)
Switch off the appliance, remove the plug
from the mains socket and remove the
trapped object from the EB 360. Switch the
Kobold VK 140 on again at minimum power
level “1”.
Remember that when the EB 360 is
vertical, the brushes are disabled to
prevent damage to surfaces.
(FIGURE 29)
FIGURE 29
FIGURE 28
Kobosan active
for carpets and rugs
Before refreshing your carpeted floor, clean
it with the EB 360 with bristle brushes.
Then fit the Freshener Kit FK 360 into the
EB 360 (see
FIGURE 13 at PAGE 52) and spread
the Kobosan active over the floor, following
the instructions given on the packet. Switch
on the Kobold VK 140.
With the Freshener Kit installed,
the Kobold VK 140 vacuuming remains off.
Only use Kobosan active, never any
other type of powder, liquid of foam
detergent.
We recommend testing Kobosan active
on a small part of the carpet or rug.
Move the Kobold VK 140 strip by strip
obliquely to the carpet surface. To help the
Kobosan active penetrate, massage the
carpet for about 3 minutes per square
meter, according to how dirty it is.
(FIGURE 31)
After this, leave the Kobosan active to dry,
if possible with the windows open. This will
take about half an hour, depending on the
type of carpet and room temperature.
After checking the treated surface is dry,
vacuum up the Kobosan active with the
EB 360.
(FIGURE 32)
Before doing this, disconnect the plug
from the mains socket and replace the
Freshener Kit FK 360 with the carpet
brushes
(PAGE XX).
FIGURE 31
FIGURE 32
FIGURE 30
The TÜV North, prestigious
German indipendent agency
confirms that Kobosan active
is effective in removing allergenes
and protecting allergy sufferes.
Suitable for
Allergic Person
Voluntarytest for
house dust retention
on velours rugs
3.2-2278/04
A
c
c
o
r
d
i
n
g
t
o
T
Ü
V
N
O
R
D
S
t
a
n
d
a
r
d
FIGURE 27
Assembly & Use Assembly & Use
Page 31

FIGURE 35
FIGURE 34
EB 360
61
EB 360
60
When using the EB 360 with
brushes on carpets and rugs
(especially fine velour), set the
Kobold VK 140 suction power to
automatic setting “A”
(FIGURE 33).
If the EB 360 joint is set vertical,
the brushes are stopped to prevent
damage to surfaces.
Anti-damadge block
If you accidentally suck up something
big or if the mattress lining is a little loose
and the suction power of the Kobold VK 140
is too high, the EB 360 automatically cutsout while the Kobold VK 140 continues to
operate at the set power.
The blinking green operating light (on)
indicates a blockage. Switch off the
appliance, remove the plug from the mains
socket and remove the trapped object from
the EB 360. Switch the Kobold VK 140 on
again at minimum power level “1”.
Kobotex for stain removal
If there are still some stains left after
cleaning with Kobosan active or with
Lavenia, use Kobotex to remove them.
Read the instructions given on the back of
the Kobotex container. Apply Kobotex
directly to the stain, rubbing it in from the
outside of the stain inwards.
Continue this action until no visible traces
are left on a clean cloth after rubbing it on
the stain. If left for a long time, certain
stains can permanently discolour carpets
and rugs. We recommend cleaning stains as
soon as they form, as rapidly as possible.
Before removing stains with Kobotex,
test its effect on a small portion of the
carpet. Kobotex will not remove paint stains
or other substances containing solvents.
EB 360
Assembly & Use on hard floors
To clean hard floors the EB 360 should be
fitted with the bristle brushes.
We recommend to use the soft function
on hard floors: the noise will be reduced by
equal performance.
Dust vacuuming
on hard floors
Switch on the Kobold VK 140 and operate,
the green operating light on the EB 360
indicates that the appliance is on.
In this function we recommend to set the
Kobold VK 140 suction power to automatic
setting A or
.
For cleaning coarse dirt we recommend
to vacuum with a backwards movement
of the EB 360 (see
FIGURE 37).
Do not use EB 360 on delicate or PVC
hard floors without the soft function
activated.
FIGURE 36
FIGURE 33
FIGURE 37
Assembly & Use Assembly & Use
Page 32

Thanks to its rotating and tilting joint
nozzle the EB 360 reaches effortlessly
hard-to-reach spots.
(FIGURE 38)
For vacuuming under furniture with
reduced floor access swivel both appliances
fully flat against the floor.
(FIGURE 39)
FIGURE 38
FIGURE 39
EB 360
63
EB 360
62
Assembly & Use Maintenance
EB 360
Maintenance
From time to time we recommend checking
if the EB 360 is clean.
If the EB 360 becomes clogged, open the
hatch on the bottom and remove the
blockage, then close the hatch.
It threads become tangled around the
brushes, remove the brushes and then clean
away the threads.
(FIGURES 40 & 41)
Anti-damadge block
If you accidentally suck up something big
or if the mattress lining is a little loose and
the suction power of the Kobold VK 140 is
too high, the EB 360 automatically cuts-out
while the Kobold VK 140 continues to
operate at the set power.
The blinking green operating light (on)
indicates a blockage.
(FIGURE 42)
Switch off the appliance, remove the plug
from the mains socket and remove the
trapped object from the EB 360. Switch the
Kobold VK 140 on again at minimum power
level “1”.
Stay away from rotating brushes of the
electronic brush.
FIGURE 40
FIGURE 41
FIGURE 42
Page 33

EB 360
Spare parts & consumables
EB 360
4977
DUMMY TEXT
4976
DUMMY TEXT
4978
DUMMY TEXT
4979
DUMMY TEXT
4980
DUMMY TEXT
4975
DUMMY TEXT
4972
DUMMY TEXT
EB 360
65
EB 360
64
Maintenance Spare parts & consumables
FIGURE 44
Freshener Kit FK 360 Maintenance
Wash the drawer directly under cold or
warm running water, retaining the brushes
to prevent water entering into the drive
hole.
It is also possible to remove the brushes
from their respective drawers paying
attention to replace them correctly (red
bristles in drawer with red arrow).
After shaking off any excess water, leave the
Freshener Kit FK 360 to dry, with the drive
hole facing downwards.
Never use detergents, solvents or
alcohol to clean the Freshener Kit FK 360.
Never dry the kit under direct sunlight or
near a heater.
Never replace the Freshener Kit FK 360
in the EB 360 if it is not perfectly dry.
Worn out brushes
When the length of the bristles wear down
to the same length as the yellow indicators,
the brushes are worn out and must be
replaced.
(FIGURE 44)
FIGURE 43
Page 34

The Pulilux PL 515 is a specific
appliance for cleaning and
maintaining hard floors.
Combining powerful all round
perimeter suction with effective
brushing action, the Pulilux PL 515
assures more effective dry cleaning
of your floors.
It comes with two combined
brush modules capable of
adapting to most types of hard
floors (see next page):
the Hard floor module:
on one side a ring of cleaning
bristles for deep cleaning grooves
in the floor, profiles and rough
surfaces, on the other, pad brushes
recommended for vitrified ceramic
floors and for removing stubborn
dirt.
the Polishing module
for waxed and parquet floors:
polishing brushes on one side and
polishing pads on the other, mainly
for cleaning and efficiently
polishing waxed floors. Used
regularly, it keeps waxed floors
shining.
FIGURE 2
Description & features
Pulilux PL 515
Description & features
PL 515
67
PL 515
66
Description & features
ATTACHMENT
TO VK 140
COWLING
OPENING
BUTTON
COWLING
FIGURE 1
HARD FLOOR
MODULE
POLISHING MODULE
FOR WAXED AND
PARQUET FLOORS
PL 515
HANDLE FOR OPENING
COWLING
Page 35

Pulilux PL 515
Assembly & Use
Fit the Kobold VK 140 to the joint on the
Pulilux PL 515.
(FIGURE 3)
The Kobold VK 140 will remain upright
when the joint is locked perpendicular.
(FIGURE 3)
Switch off the appliances before and
always remove the plug from the power
supply before changing the pads. The
Pulilux PL 515 has a motor overload cutout, which triggers if the appliance
overheats. After removing the cause and
allowing the Pulilux PL 515 to cool down
for about 15 minutes, the Pulilux PL 515 is
ready to be used again. Always switch off
the appliance when cooling down.
Use the Pulilux PL 515 only for dry
cleaning of hardfloors for domestical use.
Changing the pad modules
Choose the pads suitable for the floor to
clean
(see PAGE XX).
1. Press the opener button fully down to
release the handle.
(FIGURE 4)
2. Open the cowling. (FIGURE 5)
The Hard floor and Polishing Modules are
both dual-function:
Hard floor Module: combines cleaning bru-
shes and power pads
(see PAGE xx).
Polishing Module: combines polishing bru-
shes and polishing pads
(see PAGE xx).
FIGURE 3
FIGURE 4
FIGURE 5
Pulilux PL 515
Technical specifications
PL 515
69
PL 515
68
Technical specifications
Appliance usable exclusively when connected to Kobold appliances.
Connects to the Kobold through a practical connection system.
Voltage 230V AC / 50 Hz
Power absorption 350 W
Maintenance free motor with drive and reduction by gears
Brushes set speed 1200 rpm
Working surface area 600 cm
2
Height approx. 99 mm
Weight 3.00 kg
Noise emission 85 dB with VK 140 system
(measured on hard floor in ideal conditions)
Protection level IPX 0
The identification details of the product are on the label on the rear side
of the appliance.
The manufacturer reserves the right to make any changes suggested by
developing technology, at any time and without prior notice.
Assembly & Use
Page 36

by thorough cleaning, apply the new wax
following the manufacturer’s instructions.
Allow the wax to dry completely, then
polish the floor with the waxing brushes,
turn over the Module and use the polishing
pads to give the floor its final gloss.
Polishing pads side
– These shine up
waxed surfaces
(FIGURE 11), whether hard
floor or parquet.
Do not use the appliance on wet
surfaces or outdoors.
Never run the Pulilux PL 515 over the
connecting cable or other cables lying on
the floor.
Do not use the Pulilux PL 515 with
inflammable waxes.
Stay away from rotating brushes of the
electronic brush.
Polishing with Kobolin
Remove the old wax coat, dirt and stains by
thoroughly washing the floor.
Spread the Kobolin
(FIGURE 12) wax
emulsion evenly on the clean and dry floor
using a humid cloth or a mop. Let the wax
emulsion dry well, at least 20 minutes and
preferably do not walk on the surface.
The Polishing-brushes (black discs) are used
on the dried Kobolin wax emulsion for a
rough polish and to remove excessive wax.
Polishing pads
– To achieve a better
optical effect and to obtain a glossy finish,
use the polishing pads and polish. One
square meter should be worked on for
about one minute, this also increases the
durability of the wax coating.
Tip: Kobolin wax emulsion can only be used
on water resistant floors; such as sealed
parquet, stone floors (marble, granite and
tiles), PVC-floors and linoleum. A bottle of
Kobolin can be used on appr. 330 m
2
sealed
parquet or stone floors, and for appr. 70 m
2
on PVC and linoleum floors.
FIGURE 12
FIGURE 11
Remove the brush unit by means of the
yellow ring (
FIGURE 6). Insert the required
brushes making certain that the selected
brushes are facing downward. Check that
all the protrusions fit snugly in their
respective seats.
Close the cowling of the Pulilux PL 515
until it locks and push the handle downwards
(FIGURE 7). Only use the handle for opening
the appliance, and never for carrying it.
Hard floor Module
Cleaning brush side Pulilux (FIGURE 8) with
cleaning brushes is highly effective for the
daily dry maintenance of most types of
hard floors such as tile, terracotta, porcelain
gres, clinker, rubber, etc. Their main feature
is their capacity to work even on floors that
aren’t perfectly flat, and with wide crevices.
Regular use stops the build-up of dirt in the
crevices and helps maintain the original
colour.
Power pad side
– These pads (FIGURE 9)
are extremely effective for removing driedon dirt and the opaque patina left after
traditional cleaning. They are perfect for
flat, non-waxed tiled or porcelain gres floors.
The PADS are not suitable for other
types of floor. Do not use them on metal or
fabric surfaces. Do not work on a single
point with the PADS for more than 3
seconds. Only the PADS are replaceable
(see
PAGE 36). Keep the Pulilux PL 515
moving when cleaning, and never stationary
when switched on.
Polishing module for waxed
and parquet floors
Waxing brush side (FIGURE 10) for polishing
waxed floors and for daily maintenance of
varnished parquet and linoleum floors.
To wax a floor, after removing the old wax
PL 515
71
PL 515
70
Assembly & Use Assembly & Use
FIGURE 7
FIGURE 8
FIGURE 9
FIGURE 10
FIGURE 6
Page 37

Pulilux PL 515
Spare parts & consumables
4750
MODULO PECARI
4751
MODULO PANDA
4752
CARTER INFERIORE
4753
CONFEZIONE 6 PAD
The two Pulilux PL 515 modules should
never be washed, but can be easily cleaned
using the accessories of the Kobold VK 140.
The brush units and housings can be
replaced when necessary.
With the Hard Floor module, it is possible to
change just the Pads, since they tend to
wear down more rapidly than the other
brushes.
If the PAD set (hard floor module) is worn,
replace it with a new set. To do this, lever
up the white ring under the PAD using a
flat, thin tool that is not sharp. When fitting
the new PAD, make sure that the
attachments penetrate correctly into their
respective seats.
(FIGURE 13)
If the polishing pads (Polishing module)
are heavily soiled, for example, by wax
residues, the module must be replaced.
If necessary, the brush unit housing plate
can also be replaced.
Open the cowling, remove the brush unit
and apply leverage to the two attachment
points, exerting the same force on both
points (as shown in
FIGURE 14).
After inserting the new plate onto the two
pins, position the brush unit on the plate,
close the cowling and lower the handle: the
Pulilux PL 515 is now ready to use again.
For exceptional cases in which obstructions
have to be removed from the frontal suction
channels, open the cover as shown in the
photo and remove the obstruction. Then
close the cover again by attaching the two
hooks and pressing the pins into their
guides.
(FIGURE 15)
Pulilux PL 515
Maintenance
PL 515
73
PL 515
72
Maintenance Spare parts & consumables
FIGURE 13
FIGURE 14
FIGURE 15
Page 38

Technical specifications
Polsterboy PB 420
Technical specifications
Appliance usable exclusively when connected to Kobold appliances
Connects to the Kobold through a specific flexible hose with electric cable.
Voltage 230 V AC / 50 Hz
Power absorption 50 W
Direct current free motor, direct drive
maintenance
Brush rotation 4000 rpm approx., counter-motion
Brush set consisting of nylon casing with 2 rotary brushes
Noise emission 76 dBA with VK 140 on upholstery
Weight 600 g (excluding flexible hose)
Polsterboy body high quality thermoplastic material
Protection level IPX 0
The identification details of the product are on the label on the rear side
of the appliance.
The manufacturer reserves the right to make any changes suggested by
developing technology, at any time and without prior notice.
Coupled with the Kobold VK 140,
the innovative Polsterboy PB 420
is powerful and effective cleaning
appliance for deep-cleaning all
kinds of upholstery.
This practical and manageable
accessory is perfect for removing
dust from sofas, armchairs and
upholstery in general, even in
your car.
A must if you’ve got pets: quick
and practical for deep-cleaning
even the most difficult corners of
sofas and armchairs.
Polsterboy PB 420
Description & features
PB 420
75
PB 420
74
Description & features
SELECTOR FOR CLEARING
SURFACES OR IN-BETWEEN
SPACES
CONNECTION
TO FLEXIBLE HOSE
FIGURE 1
FRONT SUCTION
SURFACE SUCTION
Page 39

FIGURE 4
For cleaning deep in the crevices and
difficult corners of sofas and armchairs, set
the selector as shown in
FIGURE 4.
This concentrates the suction power in the
tip of the Polsterboy PB 420.
Never vacuum up any body parts
Stay away from rotating brushes.
Avoid any contact with hair. The hair
could be vacuumed and get twisted around
the brushes. For his reason leave children
away from operating appliance.
Do not use any cleaning powder or
detergents with the Polsterboy PB 420.
Do not ever use the Polsterboy PB 420
without the nozzle inserted.
The Polsterboy PB 420 must only be
used on fabric lined upholstery. It is not
recommended for leather, vinyl or sky
surfaces.
It must not be used to clean quilts,
mattresses or similar.
Occasionally check the brushes set for
wear. Use only Genuine Spare Parts.
Polsterboy PB 420
Assembly & Use
This appliance is designed for cleaning
sofas, armchairs, seats and upholstery in
general, even in your car.
To connect the Polsterboy PB 420 to the
Kobold VK 140, after inserting the flexible
electric hose (ESSVK130/1/5/6) to the
Kobold VK 140, attach the Polsterboy as
shown in
FIGURE 2.
The Polsterboy is controlled via the switch
on the Kobold VK 140.
It has two cleaning functions: for cleaning
flat surfaces, set the selector as shown in
FIGURE 3.
Its combined brushing and suction cleans
upholstered surfaces easily and effectively.
Switch off the appliances and remove
the plug before changing any of the
accessories.
FIGURE 2
FIGURE 3
PB 420
77
PB 420
76
Assembly & Use Assembly & Use
Page 40

4964
SET SPAZZOLEESS
5041
TUBO FLEX ESS
4833
ANELLO FERMACAVO ESS
5042
SPALLACCIO SG 13
Polsterboy PB 420
Spare parts & consumables
PB 420
79
PB 420
78
Maintenance Spare parts & consumables
Polsterboy PB 420
Maintenance
Before doing any maintenance,
disconnect the appliance from the mains
supply by removing the plug. To clean or
replace the brush set press the end of the
suction nozzle in
FIGURE 5.
Release the nozzle as shown in FIGURE 6.
Extract the brush set suction nozzle from
the motor block as shown in
FIGURE 7.
Use the Kobold VK 140 accessories or a
soft brush to remove dust and dirt from the
brush set. Never use water or other liquids
to clean the appliance.
FIGURE 5
FIGURE 6
FIGURE 7
Page 41

TIGER 260
81
TIGER 260
80
Tiger 260 floor cleaning
accessories - Overview
FIGURE 1
Please read through the instruction
manual before using your vacuum
cleaner to ensure safe and correct
use of the appliance as well as in the
future to help you operate the
appliance safely and free of defects.
Store carefully.
Do not use outdoors otherwise
electrical shock could occur. This
vacuum cleaner must be used for
floor and room care only.
Never leave the operative device
unattended. Always unplug from
outlet when not in use, before putting
on or taking off accessories, and
before cleaning as unexpected
operations could cause bodily harm.
Never unplug the appliance by
pulling on the electric cord.
Do not leave children, especially
small ones, alone with the appliance
when it is ready to be used. The
rotating brushes of the EB 360 and the
Pulilux PL 515 can cause injuries
when touched.
To protect against risk of electrical
shock do not immerse the appliance
in water.
Do not clean your vacuum cleaner
or the accessories with water!
Never use the appliance on damp
or wet floors or carpets or any other
damp, wet or liquid material as
electrical shock could occur.
Do not vacuum any hot ash or
cigarette ends as the contents of the
filter bag could catch fire!
Never run the power brush over
the electric cord as it could damage
the cord.
Never use an appliance with a
damaged cord or plug, or if the
appliance is damaged or malfunctioning in any way. The security of the
appliance could be reduced, causing
electrical shock and/or bodily harm.
Return appliance to the nearest
authorized service facility for
examination, repair or adjustment.
Repair jobs on the Vorwerk
appliances should only be undertaken
by professionals. Faulty repairs or
inappropriate use of the appliance
could expose the user to considerable
risks. Use Vorwerk original parts
exclusively.
s The Freshener Kit FK 360 is a system
that is specially designed for dry
cleaning with Kobosan powder only.
The Freshener Kit FK 360 must not be
used in connection with any form of
cleaning foams, loom foams or other
cleaning agents consisting of damp or
liquid substances. Applying the
Freshener Kit FK 360 in combination
with any such agents can cause
electric shocks and may lead to
serious injuries!
As owner of an electrical or
electronic product, you are not
allowed by law (according to EUDirective 2002/96/EC of 27 January
2003 on waste electrical and
electronic equipment and the
particular national laws of the EUMember States tran sforming this
Directive) to dispose of this product or
its electrical/electronic accessories
as unsorted domestic waste. You shall
use the designated gratis possibilities
for return instead.
SAVE THESE INSTRUCTIONS
Tiger 260
IMPORTANT NOTICE
OverviewImportant notice
Page 42

TIGER 260
83
TIGER 260
82
Tiger 260
Canister-type vacuum cleaner
Technical specifications
Motor Maintenance-free universal motor, ball-bearing,
electronic performance control, safeguarded with
safety switch, nominal speed 37 500 rpm. max.
Ventilator Single-stage radial ventilator
Housing High-grade, recyclable plastic
Electrical connection For 230 Volt a.c. nominal performance 900 Watts,
with additional devices max. 1,300 Watts, action
radius: 10.9 m in accordance with DIN IEC 60 312,
automatic rewinding of cable
Suction values (medium values)
For complete appliance with suction hose and
suction
tube: max. negative pressure 240 hPa, max. air
quantity 41 l/s, max. suction performance 250 Watts
Filter bag volumes 4.5 l in accordance with DIN IEC 60 312
Dust emission Ca. 0.0001 mg/m3in accordance with DIN IEC 60 312
Noise emission 74 dBA basic appliance VT 260 with electronic
suction hose ESS 260 and electronic suction tube
ESR 260 (without intake air noise)
(workplace-related, measured under free-field
conditions on carpet)
Protection level IPX 0
The identification details of the product are on the label on the rear side
of the appliance.
The Tiger 260 with EB 351 has been tested by an approved institute (TÜV) and
found ‘suitable for allergy sufferers’. Extensive tests have confirmed that the
Tiger’s 3-phase filter system ensures that none of the currently identified
medical allergic limit values are exceeded.
Technical specifications
Tiger 260 non-floor cleaning
accessories - Overview
Overview
FIGURE 2
Page 43

TIGER 260
85
TIGER 260
84
Connecting the Electronic Brush
and other accessories
Push the electrical suction tube into the
joint nozzle of the Electronic Brush or of
other accessories until it clicks into place.
Both devices are now ready for operation.
(FIGURE 7)
In order to detach the accessories, press
the release button on the lower side of the
electrical suction tube and take off the
accessory part. (
FIGURE 8)
Connecting
Pull the connecting cable out of the Tiger
260 and insert the plug into the mains
socket.
(FIGURE 9)
A marking on the mains cord indicates that
there are only a few centimetres left for the
cable to be fully paid out. The cable can be
wound up again without the need of
pressing an additional button. You just have
to slightly pull at the cable (2.5 cm). It will
then wind up automatically.
(FIGURE 10)
FIGURE 7
FIGURE 8
FIGURE 9
FIGURE 10
Tiger 260
Assembly & Use
Assembly & Use Assembly & Use
Working with the Tiger 260
Connecting the suction hose
Press the electrical suction hose onto the
suction socket of the Tiger 260 until the
connecting piece can be heard
to click into place. When doing so, please
take into account the position of the
contact clamps, since the electronic suction
hose can be assembled in one direction
only.
The hose is connected to the appliance by
means of a 360 degree joint. The joint
allows you to easily vacuum all around the
vacuum cleaner.
(FIGURE 3)
In order to detach the suction hose,
press the two release buttons and lift the
electrical suction hose off the Tiger 260.
(FIGURE 4)
Connecting the electrical suction tube
Push the electrical suction tube into the
connecting socket of the handle until you
hear the tube click into place.
(FIGURE 5)
In order to detach the electrical suction
tube, push the release button located on the
end of the suction hose and pull the
connecting pieces apart.
(FIGURE 6)
The Tiger 260 can only be used with the
electrical suction hose for the Tiger 260, not
with the hose of an older model.
FIGURE 3
FIGURE 4
FIGURE 5
FIGURE 6
Page 44

TIGER 260
87
TIGER 260
86
Winding up the connecting cable
The cable can be wound up without the
need of pressing an additional button.
You just have to slightly pull at the
cable (2.5 cm).
It will then wind up automatically.
(FIGURE 14)
Storing
In order to safely store your Tiger 260 and
save place you can hook the electrical
suction tube into a holding device located
under the appliance.
(FIGURE 15)
FIGURE 14
FIGURE 15
Switching on and off
After your Tiger 260 has been connected to
the mains, the green ready-light on the
appliance will come on
(FIGURE 11).
The Tiger 260 is switched on and off by
means of the sliding switch on the electronic
suction hose. The sliding switch makes sure
that you can easily and safely select one of
the four power performance settings. Select
the desired power performance setting
between “A and 3”.
(FIGURE 12)
The Electronic Brush will automatically be
switched on or off in accordance with the
setting selected. Performance setting “A” is a
particularly low performance setting for
loose rugs and carpets.
(FIGURE 13)
Performance Type of floor setting
A rugs, carpets
1 rugs, carpets, fitted carpets
2 heavily soiled, fitted carpets
3 hard floors, raised area,
special fitted carpets (needled felt,
loop-woven goods)
Always switch off the Tiger 260 and
other accessories before changing
accessories, cleaning or doing any
maintenance, and remove the pug from the
mains socket. Only unplug the appliance by
pulling on the mains plug, and never by
pulling on the mains cord.
FIGURE 11
FIGURE 12
FIGURE 13
Tiger 260
Assembly & Use
Assembly & Use Assembly & Use
Page 45

TIGER 260
89
TIGER 260
88
Changing the filters
During the care and maintenance of your
Tiger 260 please always pay attention to the
filter exchange indicators on the appliance
hood. If you do not change the filters, in
particular the filter bag, the Tiger 260 will no
longer have its full suction performance
power.
Filter bag
The yellow indicator on the Tiger 260 shows
how full the bag is.
(FIGURE 18)
If the indicator of suction performance
power is completely yellow, the pores of the
filter bag are clogged to such an extent that
the bag has to be exchanged. Before
exchanging any of the appliance filters, you
have to open the appliance hood first. Pull
out the yellow release flap and clap open
the appliance hood.
(FIGURE 19)
When you have opened the appliance hood,
take out the full filter bag. Afterwards insert
the new filter bag in a way to make sure
that the holding plate fits into the respective
recesses within the appliance. After you
have closed the appliance hood, the
indication of suction performance is reset
automatically. The display is no longer
yellow.
(FIGURE 20)
If no filter bag is inserted, the appliance
hood closed. Always use Vorwerk original
filter bags to ensure optimum performance
from your appliance.
Tiger 260
Maintenance
FIGURE 18
FIGURE 19
FIGURE 20
Parking
The Electronic Brush Kobold EB 351 and
the ergonomically shaped electrical suction
tube can stand on their own together. For
this purpose, you place the electrical suction
tube in an upright position until your hear
the joint nozzle of the Electronic Brush
click into place. It is of high importance
that the electrical suction tube is leaning
forward in a straight line, otherwise it could
tip over.
(FIGURE 16)
In the parking position, the Electronic
Brush switches itself off automatically.
Thus, you can interrupt the vacuuming
process for a short while, for example to put
aside or pick up an object, without having
to switch off the appliance.
The Tiger 260 will remain at the
performance level previously selected.
Transporting
For transporting the appliance at home, the
Tiger 260 is equipped with a handgrip on
the upside as well as a recessed grip located
at the front of the underside of the
appliance.
(FIGURE 17)
If no filter bag is inserted, the appliance
hood cannot be closed. Always use
Vorwerk original filter bags to ensure
optimum performance from your appliance.
Tiger 260
Parking & Transporting
Parking & Transporting Maintenance
FIGURE 16
FIGURE 17
Page 46

TIGER 260
91
TIGER 260
90
After having been inserted, the Active
Odour Filter has an effective life of one
year, depending on how it is used.
The Hygiene Microfilter and the Active
Odour Filter can be disposed of with your
normal household waste.
Dovina
Press the Dovina Fragrance Chip into the
Dovina holder on the hygiene Microfilter.
(FIGURE 27)
Using attachments
for raised areas
Unplug appliance prior to connecting or
changing brushes.
Connecting accessories
Press the desired accessory part onto the
handle of the suction hose until it can be
heard to click into place. Both devices are
now ready for operation.
(FIGURE 28)
Switching on and off
After your Tiger 260 has been connected to
the mains, the green ready-for-operation
light on the appliance will be activated.
(FIGURE 29)
The Tiger 260 is switched on and off by
means of the sliding switch on the
electronic suction hose. The sliding switch
makes sure that you can easily and safely
select one of the four power performance
settings. Select the desired power
performance setting between A and
.
For the raised areas we suggest the power
setting
. (FIGURE 30)
The Tiger 260 can only be used with the
electrical suction hose for the Tiger 260,
NOT with the hose of an older model.
FIGURE 26
FIGURE 27
FIGURE 28
FIGURE 29
FIGURE 30
Maintenance Maintenance
Hygiene Microfilter
The red indicator on the appliance draws
your attention to the fact that the Hygiene
Microfilter has to be changed.
(FIGURE 21)
In order to change the Hygiene Microfilter,
open the appliance hood and press the flap
that is located at the side of the Hygiene
Microfilter. When inserting the new
Hygiene Microfilter, make sure the flap is
showing towards the cable drum. Then
close the hood. The appliance is now ready
for operation, the red indicator light goes
out.
(FIGURE 22)
After having been inserted, the Hygiene
Microfilter has an effective life of one year,
depending on how it is used.
(FIGURE 23)
Active Odour Filter
In order to change the active odour filter,
take the filter bag out of the appliance first.
(FIGURE 24)
Depress the upper flap of the holding grid.
Afterwards clap the grid to the front and
remove the filter pad. Insert the new filter
into the grid with the writing facing
outwards.
(FIGURE 25)
Clap the grid back into its original position
and hook in the upper flap. Re-insert the
filter bag into the appliance. When you
have closed the hood, the appliance is ready
for operation.
(FIGURE 26)
FIGURE 21
FIGURE 22
FIGURE 23
FIGURE 25
FIGURE 24
Page 47

TIGER 260
93
TIGER 260
92
In combination with the textile attachment,
curtains can be cleaned in a thorough and
protective way all the way up to the ceiling,
for example.
In order to detach the accessories, press
the release button on the lower side of the
electrical suction tube and take off the
accessory part.
The Polsterboy PB 420
This extraordinary motorized accessory has
been created for the maintenance and
cleaning care of any kind of pad furniture
such as sofas, armchairs and car seats
and/or for confined small areas that the
EB 360 can not access.
(FIGURE 35)
Connect the Polsterboy PB 420 to the
Tiger 260 by attaching it to the electrical
hose.
The Polsterboy PB 420 turns on or off with
the main switch of the Tiger 260.
FIGURE 35
You can free textile fabrics as well as
upholstery and mattresses from hairs,
threads and fuzz with the textile
attachment.
The Vario-attachment thoroughly vacuums
dust from seams and gaps, in upholstery
and mattresses and between furniture items,
to name just a few. Its two joints allow a
variety of adjustments, making your work
particularly comfortable.
For dust removal from radiators, Venetian
blind blades and similar items, use the
special Vario-attachment connectable
brush.
(FIGURE 31)
Vacuum away drilling dust at the source
For this, switch on your Tiger 260 and
position the drilling dust attachment to the
planned drilling hole - it suction- attaches
itself firmly to the wall.
(FIGURE 32)
Soft attachment
For gentle dusting, pull the outer pipe away
from the bristle ring.
For energetic dusting, push the outer pipe
forward over the bristles.
The soft attachment, adjustable to 10
settings, is suitable for soft-to-energetic
dusting.
(FIGURE 33)
With the soft attachment, you can dust
furniture and books, stereos and profiled
surfaces.
Hard-to-reach spots can be reached with
the optional accessories and its angled,
rotating suction nozzle (with four lock-in
positions).
(FIGURE 34)
The telescopic pipe can be pulled out for
extension.
Switch off the lamp or chandelier prior to
cleaning. Otherwise, it could melt the bristle
ring.
Maintenance Maintenance
FIGURE 31
FIGURE 32
FIGURE 33
FIGURE 34
Page 48

TIGER 260
95
TIGER 260
94
Tiger 260
Spare parts & consumables
EB 360
BORSA ACCESSORI
4977
DUMMY TEXT
4976
DUMMY TEXT
4978
DUMMY TEXT
4979
DUMMY TEXT
4980
DUMMY TEXT
4975
DUMMY TEXT
4972
DUMMY TEXT
Spare parts & consumables Spare parts & consumables
Page 49

ACCESSORIES
97
ACCESSORIES
96
Assembly & Use
Accessories
Assembly & Use
FIGURE 2
FIGURE 3
Assembling the Kobold VK 140
for raised areas
For cleaning special surfaces, telescope the
rod handle completely inwards, then
connect the suction hose and the nozzle
needed for your work to the Kobold VK 140.
You can vacuum with the Kobold VK 140
the raised areas by carrying the appliance
using the lower recessed grip
(FIGURE 2) or
attach the shoulder strap
(FIGURE 3) for easy
carrying.
Connect the flexible suction hose
in the Kobold VK 140
Customers who bought the Polsterboy PB
420 and the Kobold VK 140 together will
have the electrified flexible suction hose.
Customer who have not bought at the same
time the Polsterboy PB 420 and the Kobold
VK 140 have the non electrified flexible
suction hose. For use with the accessories,
both flexible suction hoses are the same.
The picture shows the electric flexible
suction hose.
Connect the suction hose
Press the suction hose onto the suction
nozzle of the Kobold VK 140 until it can be
heard to click into place.
(FIGURE 4)
Attach the shoulder strap. (FIGURE 5)
Pull the shoulder strap.
FIGURE 4
FIGURE 5
A complete set of multifunctional
accessories indispensable for
cleaning all kinds of different
Accessories
Description & features
Description & features
surfaces, in a practical bag for easy
transport and storage of all the
Kobold System’s accessories.
FIGURE 1
FLEXIBLE HOSE
VARIO NOZZLE
VD 14
TELESCOPIC TUBE
TR 14
SOFT NOZZLE
SURFACE NOZZLE
FD 13
SHOULDER STRAP
ACCESSORY BAG
BRISTLE
BRUSH
DRILL-DUST
ATTACHMENT
Page 50

ACCESSORIES
99
ACCESSORIES
98
Vario Nozzle – VD14
The vario-nozzle VD 14 is the specialist for
various specific uses. The flat and long tip
allows the user to reach narrow and small
spaces.
(FIGURE 10)
The nozzle thoroughly vacuums dust from
seams and gaps, in upholstery and
mattresses and between furniture items, to
name just a few.
(FIGURE 11)
Its joint close to the handle allows a variety
of adjustments, making your work
particularly comfortable.
The extractable, flexible extension allows
the user to reach and clean narrow places
that are difficult to access.
Just pull out the tip until the flexible
extension click into place. To push it back
together, push the button in the middle of
the nozzle.
(FIGURE 12)
The attachable bristle brush allows
cleaning of areas such as, behind radiators
and air conditioners.
(FIGURE 13)
An extraordinary accessory is the drill-dust
attachment, the definitive solution for
drilling holes without soiling the wall.
(FIGURE 14)
The drill-dust attachment permits freehand
operation with the drilling machine and
vacuums away the resulting dirt directly at
the drill hole. For this, switch on your
Kobold VK 140 and position the drilling dust
attachment to the planned drilling hole
where the suction attaches itself firmly to
the wall.
(FIGURE 15)
Once finished, remember to take hold of
the nozzle before switching the Kobold VK
140 off to stop it falling off the wall.
We recomend to store the Vario nozzle
once you have closed it.
FIGURE 10
FIGURE 11
FIGURE 13
FIGURE 15
FIGURE 14
FIGURE 12
Hook the shoulder strap into the
corresponding strap eyelet.
(FIGURE 6)
This is to the right on the upper housing.
(FIGURE 7)
To connect the accessories to the suction
hose simply insert them until it can be
heard to click into place.
(FIGURE 8)
To remove the accessories from the suction
hose simply press the button on the Hose.
(FIGURE 9)
Switching on and off
With the main switch on your Kobold
VK 140, you can rotate the switch to select
the desired setting from
up to .
Switch off the appliance and remove
the plug before changing any of the
accessories.
Do not insert pointed objects into the
electrical contacts! Do not rig the contact
systems.
The Electrified suction hose has
electrical contacts. Do not vacuum up any
liquids. Do not clean it with water.
Assembly & Use Assembly & Use
FIGURE 6
FIGURE 7
FIGURE 8
FIGURE 9
Page 51

ACCESSORIES
101
ACCESSORIES
100
Flexo Nozzle – FD 14
with additional surface plate
For various surfaces, the flexo nozzle FD 14
offers a variety of solutions.
(FIGURE 21)
On textile surfaces, such as upholstery
furniture or other kind of textile fabrics this
nozzle offers an easy way to remove dust,
hair, threads and fuzz.
(FIGURE 22)
In addition, gaps and cracks can be reached
through an easy conversion of the flexo
nozzle FD 14, this without the need to
change the nozzle. To close the “wings” of
the flexo nozzle FD 14 just push the slider to
the front.
(FIGURE 23)
So it becomes a perfect helper, even for
your car as well.
(FIGURE 24)
We recomend to set the suction power to
position 2 when operating with the flexo
nozzle FD 14 on upholtery.
For larger surfaces, simply attach the flexo
nozzle FD 14 in the drawn tray of the
additional cleaning plate until it locks.
(FIGURE 25)
FIGURE 21
FIGURE 22
FIGURE 24
FIGURE 25
FIGURE 23
Assembly & Use Assembly & Use
Telescopic Tube – TR14
The telescopic tube TR 14 is the Kobold
VK 140 extension of human arms! Hard-to-
reach spots can be reached with the
telescopic tube TR 14
(FIGURE 16) and it’s
angled, rotating suction nozzle (with four
lock-in positions) with ease. It is also
possible to comfortably reach very high
raised areas with all kinds of Vorwerk
accessories. For example in combination
with the flexo nozzle FD 14 attachment,
curtains can be cleaned in a thorough and
protective way all the way up to the ceiling
(FIGURE 17). It is possible to adjust the tube
to different length and lock this fixed
length. To do this, simply hold the thick
part of the tube in one hand and twist the
middle handgrip (see
FIGURE 16) to the right.
Now you can adjust the length of the tube
and set the fixed length by twisting the
hand grip to the left.
(FIGURE 18)
Pay attention to lock the handgrip before
useing the telescopic tube.
Soft Nozzle – SD14
The soft nozzle SD 14 is the clever
substitute for a feather duster, while directly
vacuuming away the dust. The simple
single hand operation allows a comfortable
and easy adjustment of the bristle length
from slightly aggressive dusting to soft
feather-dusting.
(FIGURE 19). Extracting the
bristles (see
FIGURE 19) for gentle dusting
you can comfortably and easily push the
sliding switch to the front. For more
aggressive dusting slide the switch back.
With the soft nozzle SD 14, you can dust
furniture and books, picture frames, stereos
and profiled surfaces and much, much
more.
(FIGURE 20)
FIGURE 16
FIGURE 19
FIGURE 20
FIGURE 18
FIGURE 17
Page 52

ACCESSORIES
103
ACCESSORIES
102
The wings of the flexo nozzle FD 14 are
designed to detach to prevent damage to
the nozzle or furniture.
To reattach a wing, move the hinge
connection of the wing back to the middle
position and firmly push on the two hinges
until they click into place (see
FIGURE 31).
Clean the crown with warm soapy water.
(FIGURE 32)
Never use detergents, solvents or
alcohol to clean the accessories.
Never dry the accessories under direct
sunlight or near a heater.
Never use an accessory if it is not
perfectly dry.
Accessories
Maintenance
FIGURE 31
FIGURE 32
With the bristle-covered plate the nozzle
can be used for cleaning walls, door frames
and skirting boards…
(FIGURE 26)
… It is especially suited for stairs.
(FIGURE 27)
It is also possible to remove the brushes by
holding the connection of the cleaning
plate in one hand and detaching the white
part at the edge with a strong pull from the
plate
(FIGURE 28).
In this configuration the flexo nozzle FD 14
is perfect for operating on curtains and
large textile superficies.
(FIGURE 29)
To remove the additional cleaning plate,
simply push the button on the back down
and lift the flexo nozzle FD 14 up.
FIGURE 30)
Assembly & Use Maintenance
FIGURE 26
FIGURE 30
FIGURE 28
FIGURE 27
FIGURE 29
Page 53

105
ACCESSORIES
104
Troubleshooting & repairs Accessories
Spare parts & consumables
Spare parts & consumables Troubleshooting & repaira
5060
DUMMY TEXT
5048
DUMMY TEXT
5047
DUMMY TEXT
5042
DUMMY TEXT
5046
DUMMY TEXT
5061
DUMMY TEXT
5044
DUMMY TEXT
5049
DUMMY TEXT
5061
DUMMY TEXT
5041
DUMMY TEXT
5045
DUMMY TEXT
???? - DUMMY TEXT
???? - DUMMY TEXT
4861
DUMMY TEXT
Always remove the plug from the mains socket before doing any
maintenance.
The Kobold VK 140
does not start:
check that the mains lead is correctly inserted in
the socket on the Kobold VK 140
(page 20);
check that the mains plug is correctly inserted in
the mains socket;
remember that the Kobold VK 140 suction power
is disabled when you use the EB 360 with the
Refresh Kit fitted
(page 16).
No suction or low
suction power:
check that there is no blockage in the suction
channels of the Kobold VK 140 or any accessories
fitted to it; remove any blockage and switch on the
Kobold VK 140 again;
check that the Premium Filterbag FP 40
exhausted indicator does not show yellow. If so,
change the filterbag
(page 26).
The Filtrello Premium
exhausted indicator
may yellow even
if the filterbag
is not full:
this could happen if you have vacuumed a lot of
fine dust that clogs the Premium Filterbag FP 40
before the bag is completely full
(page 26);
Check that the motor protection grill is not soiled.
If so, clean or replace it
(page 30).
Bad odour:
the Premium Filterbag FP 40 may have exhausted
its capacity retain bod odours even if it is not
completely full. In this case it must be replaced
(page 26);
carefully clean the suction channels of the
Kobold and any accessories fitted to it, as well as
the Premium Filterbag FP 40 compartment and/or
motor protection grill.
Kobold VK 140
Page 54

107
106
The appliance does
not effectively clean
carpets with the
EB 360 fitted:
check that the specific bristle brushes for carpets
are correctly fitted
(page 43);
The carpet sticks to
the EB 360 when it is
switched on:
check that suction power is set to A on the
Kobold VK 140;
The anti-damadge
block cuts-in
frequently when
cleaning fabrics
or mattresses
with the EB 360:
check that the appliance is set to the
recommended power setting, and if necessary set
power to level 1.
EB 360
The appliance
leaves marks on the
floor with the PL 515
Pulilux fitted:
check that the pads are correct for the type of
floor
(page 56);
The Pulilux PL 515
is very noisy:
check that the pads are correctly fitted in the
housing
(page 55).
PL 515 Pulilux
The brushes of the
Polsterboy PB 420
do not turn:
check that the ESS 13 electric hose is fitted;
Polsterboy PB 420
The filter unit
does not close:
check that the Premium Filterbag FP 40 is
correctly fitted
(page 29);
check that the filterbag is a Premium Filterbag
FP 40 not another type of filterbag
(page 29);
Filter unit
Only Vorwerk Original Spares guarantee perfect efficiency of the appliances.
Use of non-original spares will cancel the guarantee.
In the problem persists, contact your nearest Vorwerk Authorized Service
Centre.
Technical service center
Lorem ipsum dolor sit amet,
consectetuer adipiscing elit, sed
diam nonummy nibh euismod
tincidunt ut laoreet dolore magna
aliquam erat volutpat. Ut wisi
enim ad minim veniam, quis
nostrud exerci tation ullamcorper
suscipit lobortis nisl ut aliquip ex
ea commodo consequat. Duis
autem vel eum iriure dolor in
hendrerit in vulputate velit esse
molestie consequat, vel illum
dolore eu feugiat nulla facilisis at
vero eros et accumsan et iusto
odio dignissim qui blandit
praesent luptatum zzril delenit
augue duis dolore te feugait nulla
facilisi. Nam liber tempor cum
soluta nobis eleifend option
congue nihil
imperdiet doming id quod mazim
placerat facer possim assum. Typi
non habent claritatem insitam; est
usus legentis in iis qui facit eorum
claritatem. Investigationes
demonstraverunt lectores legere
me lius quod ii legunt saepius.
Claritas est etiam processus
dynamicus, qui sequitur
mutationem consuetudium
lectorum. Mirum est notare quam
littera gothica, quam nunc
putamus parum claram,
anteposuerit litterarum formas
humanitatis per seacula quarta
decima et quinta decima. Eodem
modo typi, qui nunc nobis
videntur parum clari, fiant
sollemnes in futurum.
Text to be specified
by Country
Troubleshooting & repaira Technical service center
Page 55

109
108
Lorem ipsum dolor sit amet,
consectetuer adipiscing elit, sed
diam nonummy nibh euismod
tincidunt ut laoreet dolore magna
aliquam erat volutpat. Ut wisi
enim ad minim veniam, quis
nostrud exerci tation ullamcorper
suscipit lobortis nisl ut aliquip ex
ea commodo consequat. Duis
autem vel eum iriure dolor in
hendrerit in vulputate velit esse
molestie consequat, vel illum
dolore eu feugiat nulla facilisis at
vero eros et accumsan et iusto
odio dignissim qui blandit
praesent luptatum zzril delenit
augue duis dolore te feugait nulla
facilisi. Nam liber tempor cum
soluta nobis eleifend option
congue nihil
imperdiet doming id quod mazim
placerat facer possim assum. Typi
non habent claritatem insitam; est
usus legentis in iis qui facit eorum
claritatem. Investigationes
demonstraverunt lectores legere
me lius quod ii legunt saepius.
Claritas est etiam processus
dynamicus, qui sequitur
mutationem consuetudium
lectorum. Mirum est notare quam
littera gothica, quam nunc
putamus parum claram,
anteposuerit litterarum formas
humanitatis per seacula quarta
decima et quinta decima. Eodem
modo typi, qui nunc nobis
videntur parum clari, fiant
sollemnes in futurum.
Lorem ipsum dolor sit amet,
consectetuer adipiscing elit, sed
diam nonummy nibh euismod
tincidunt ut laoreet dolore magna
aliquam erat volutpat. Ut wisi
enim ad minim veniam, quis
nostrud exerci tation ullamcorper
suscipit lobortis nisl ut aliquip ex
ea commodo consequat. Duis
autem vel eum iriure dolor in
hendrerit in vulputate velit esse
molestie consequat, vel illum
dolore eu feugiat nulla facilisis at
vero eros et accumsan et iusto
odio dignissim qui blandit
praesent luptatum zzril delenit
augue duis dolore te feugait nulla
facilisi. Nam liber tempor cum
soluta nobis eleifend option
congue nihil
imperdiet doming id quod mazim
placerat facer possim assum. Typi
non habent claritatem insitam; est
usus legentis in iis qui facit eorum
claritatem. Investigationes
demonstraverunt lectores legere
me lius quod ii legunt saepius.
Claritas est etiam processus
dynamicus, qui sequitur
mutationem consuetudium
lectorum. Mirum est notare quam
littera gothica, quam nunc
putamus parum claram,
anteposuerit litterarum formas
humanitatis per seacula quarta
decima et quinta decima. Eodem
modo typi, qui nunc nobis
videntur parum clari, fiant
Text to be specified
by Country
In full respect of the laws
safeguarding consumers (D.Lgs n.
24/2002) Vorwerk Folletto s.r.l.,
with registered offices in Milan,
guarantees every product ordered
for a period of three years, from
the date of delivery, against all
possible manufacturing faults and
for all breakdowns, even if caused
by the customer or due to
accidents, on condition that they
occur while using the appliance
normally and according to the
instructions given in the use and
maintenance manual, except in
the case of aesthetic damages that
do not compromise the function of
the appliance itself. To obtain
repairs or replacements under the
guarantee, the purchaser must take
the appliance to an authorized
Vorwerk Folletto service center,
with the guarantee certificate. If
the guarantee is valid, Vorwerk
Folletto s.r.l. shall repair or replace
the defective parts, or the entire
appliance, after applying the
evaluation criteria set forth in
article 3, paragraph 4 of D.Lgs n.
24/2002. If the purchaser is in
arrears in relation to payment of
one or more of the agreed
installments, the appliance
repaired under guarantee shall be
returned to the purchaser only
after producing evidence of
payment of the outstanding
installments. The guarantee
excludes normal wear to
consumable accessories and parts,
damage due to use of the
appliance with voltages different to
those indicated, as well as normal
wear to all types of brushes (bristle
or slatted), felt pads and roller
brushes.
The purchaser shall forfeit the
guarantee in the event of
tampering, repairs or maintenance
on the machine by third parties
not authorized by Vorwerk Folletto
s.r.l. or the use of filter sacks or
other spares that are not genuine
Vorwerk Folletto parts.
6-year guarantee
To maintain the performance of the Kobold VK140 System especially with
regard to the efficiency, cleaning performances, prevention of allergies and to
maintain the corresponding TÜV and Hepa certification, replace the
Consumables parts regularly as instructed by the manual, using only Genuine
Spare Parts.
Always choose the quality of Vorwerk genuine spare parts.
Beware of imitations that could compromise performance and render the
guarantee void.
Text to be specified
by Country
Technical service center
Technical service center Guarantee
 Loading...