


XC40
OWNER'S MANUAL


VÄLKOMMEN!
We hope your Volvo will give you many years of happy motoring. The vehicle is designed for the safety and comfort of you and your passengers. Volvo strives to design one of the world's safest passenger vehicles. Your Volvo is also designed to meet applicable safety and environmental requirements.
To increase your enjoyment of your Volvo, we recommend that you read the instructions and maintenance information contained in this owner's
manual. The owner's manual is also available as a mobile app (Volvo Manual) and on Volvo Cars support page (support.volvocars.com).
We also encourage everyone to always use seat belts in this and other vehicles. You should also not drive if you are under the influence of alcohol or medicines or if your ability to drive is for some other reason impaired.

TABLE OF CONTENTS
OWNER'S INFORMATION
Owner's information |
16 |
Owner's Manual in the center display |
17 |
Navigate in the Owner's Manual in |
18 |
the center display |
|
Owner's manual in mobile devices |
20 |
Volvo Cars support site |
21 |
Using the Owner's Manual |
21 |
The Owner's Manual and the envi- |
24 |
ronment |
|
YOUR VOLVO
Contacting Volvo |
26 |
Volvo ID |
26 |
Creating and registering a Volvo ID |
26 |
Drive-E ‒ purer driving pleasure |
27 |
IntelliSafe - driver support |
28 |
Sensus - connection and entertainment |
30 |
Software Updates |
33 |
Data recording |
33 |
Terms & Conditions for Services |
35 |
Customer Privacy Policy |
35 |
Important information on accessories |
35 |
and extra equipment |
|
Accessory installation |
36 |
Connecting equipment to the vehi- |
37 |
cle's data link connector |
|
Technician certification |
38 |
Viewing the Vehicle Identification |
38 |
Number (VIN) |
|
Volvo Structural Parts Statement |
39 |
Driver distraction |
39 |
SAFETY
Safety |
42 |
Safety during pregnancy |
43 |
Occupant safety |
43 |
Reporting safety defects |
44 |
Recall information |
45 |
Whiplash Protection System |
46 |
Seat belts |
47 |
Buckling and unbuckling seat belts |
48 |
Seat belt tensioners |
50 |
Resetting the electric seat belt ten- |
51 |
sioners* |
|
Door and seat belt reminders |
51 |
Airbags |
52 |
Driver/passenger-side airbags |
53 |
Occupant Classification System |
56 |
Side airbags |
59 |
Inflatable curtain |
60 |
Safety mode |
61 |
Starting and moving the vehicle |
62 |
when it is in safety mode |
|
Child safety |
63 |
Child restraints |
65 |
Infant seats |
67 |
Convertible seats |
69 |
Booster cushions |
71 |
2

Top tether anchors |
72 |
Lower child seat attachment points |
73 |
ISOFIX/LATCH lower anchors |
74 |
DISPLAYS AND VOICE CONTROL
Instruments and controls in left-hand |
78 |
drive vehicles |
|
Instrument panel |
80 |
Instrument panel settings |
82 |
Fuel gauge |
83 |
Trip computer |
83 |
Displaying trip data in the instrument |
84 |
panel |
|
Resetting the trip odometer |
85 |
Displaying trip statistics in the center |
86 |
display |
|
Trip statistics settings |
86 |
Date and time |
87 |
Ambient temperature sensor |
88 |
Indicator symbols in the instrument panel |
88 |
Warning symbols in the instrument panel |
91 |
Instrument panel licenses |
92 |
App menu in instrument panel |
96 |
Handling the App menu in the instru- |
96 |
ment panel |
|
Messages in the instrument panel |
97 |
Handling messages in the instru- |
99 |
ment panel |
|
Handling messages saved from the |
100 |
instrument panel |
|
Center display overview |
102 |
Handling the center display |
105 |
Activating and deactivating the cen- |
108 |
ter display |
|
Navigating in the center display's views |
108 |
Handling tiles in the center display |
112 |
Function view in the center display |
115 |
Moving apps and buttons in the cen- |
117 |
ter display |
|
Symbols in the center display status bar |
117 |
Using the center display keyboard |
119 |
Changing keyboard language in the |
122 |
center display |
|
Entering characters, letters and |
122 |
words by hand in the center display |
|
Changing the appearance of the |
124 |
center display |
|
Turning off and adjusting the volume |
124 |
of the center display system sounds |
|
Changing system units of measurement |
125 |
Changing system language |
125 |
Changing settings in the center dis- |
125 |
play's Top view |
|
Opening contextual setting in the |
126 |
center display |
|
Resetting user data when the vehicle |
127 |
changes owners |
|
Resetting center display settings |
127 |
Table of settings in the center display |
128 |
3

Driver profiles |
129 |
Selecting a driver profile |
130 |
Changing a driver profile's name |
130 |
Protecting a driver profile |
131 |
Linking a remote key to a driver profile |
131 |
Resetting driver profile settings |
133 |
Messages in the center display |
133 |
Handling messages in the center display |
134 |
Handling messages saved from the |
134 |
center display |
|
Voice control |
135 |
Using voice commands |
136 |
Voice control for cellular phones |
137 |
Voice control for radio and media |
137 |
Voice control settings |
138 |
LIGHTING
Lighting panel and controls |
140 |
Adjusting light functions via the cen- |
141 |
ter display |
|
Parking lights |
142 |
Daytime running lights |
142 |
Low beams |
143 |
Using high beam |
144 |
Active high beam |
145 |
Using turn signals |
146 |
Active Bending Lights* |
146 |
Front fog lights/cornering illumination* |
147 |
Rear fog light |
148 |
Brake lights |
148 |
Emergency brake lights |
149 |
Hazard warning flashers |
149 |
Using home safe lighting |
149 |
Welcome Light |
150 |
Interior Lighting |
150 |
Adjusting interior lighting |
152 |
WINDOWS, GLASS AND MIRRORS
Windows, glass and mirrors |
154 |
Pinch protection for windows and |
154 |
sun curtains |
|
Reset procedure for pinch protection |
155 |
Power windows |
155 |
Operating the power windows |
156 |
Rearview/door mirrors |
157 |
Adjusting the rearview mirror dim- |
158 |
ming function |
|
Adjusting the door mirrors |
158 |
Panoramic roof* |
160 |
Operating the panoramic roof* |
161 |
Auto closing the panoramic roof* sun |
163 |
curtain |
|
Wiper blades and washer fluid |
164 |
Using the windshield wipers |
164 |
Using the rain sensor |
165 |
Using the rain sensor's memory function |
166 |
Using the windshield and headlight |
167 |
washers |
|
Using the rear window wiper/washer |
168 |
Using automatic rear window wiping |
168 |
when backing up |
|
4

SEATS AND STEERING WHEEL
Manual front seats |
172 |
Power* front seats |
173 |
Adjusting the power* front seats |
173 |
Storing positions for seats and mirrors |
174 |
Using stored positions for seats and |
175 |
mirrors |
|
Adjusting* front seat cushion length |
176 |
Adjusting front seat lumbar support* |
176 |
Folding down the rear seat backrests |
177 |
Adjusting the rear seat head restraints |
179 |
Steering wheel controls and horn |
181 |
Adjusting the steering wheel |
181 |
CLIMATE CONTROL
Climate |
184 |
Climate zones |
184 |
Climate control sensors |
185 |
Perceived temperature |
185 |
Climate control system voice commands |
186 |
Air quality |
187 |
Clean Zone* |
187 |
Clean Zone Interior Package* |
188 |
Interior Air Quality System* |
188 |
Activating and deactivating the air |
189 |
quality sensor* |
|
Passenger compartment air filter |
189 |
Air distribution |
190 |
Adjusting air distribution |
191 |
Opening, closing and directing air vents |
191 |
Air distribution options |
193 |
Climate system controls |
196 |
Activating and deactivating power |
198 |
front seats* |
|
Activating and deactivating the |
198 |
heated front seat* |
|
Activating and deactivating the |
199 |
heated rear seats* |
|
Activating and deactivating front seat |
199 |
ventilation* |
|
Activating and deactivating the |
200 |
heated steering wheel* |
|
Activating and deactivating automatic |
200 |
steering wheel heating* |
|
Activating auto climate control |
201 |
Activating and deactivating recirculation |
201 |
Activating and deactivating the recir- |
202 |
culation timer setting |
|
Activating and deactivating max defroster |
202 |
Activating and deactivating the |
204 |
heated windshield* |
|
Activating and deactivating automatic |
205 |
windshield heating* |
|
Activating and deactivating the |
205 |
heated rear window and door mirrors |
|
Automatically activating and deacti- |
206 |
vating the heated rear window and |
|
door mirrors |
|
Setting the blower speed for the |
206 |
front seats |
|
Setting the temperature for the front |
207 |
seats |
|
Synchronize temperature |
208 |
Activating and deactivating air condi- |
208 |
tioning |
|
Parking climate* |
209 |
Preconditioning* |
210 |
Starting and stopping preconditioning* |
210 |
5

Preconditioning timer* |
211 |
Adding and editing timer settings for |
211 |
preconditioning* |
|
Activating and deactivating precondi- |
212 |
tioning timer* |
|
Deleting preconditioning timer settings* |
213 |
Climate comfort retaining function* |
213 |
Starting and switching off the cli- |
214 |
mate retaining function when parking* |
|
Parking climate symbols and messages* |
215 |
KEY, LOCKS AND ALARM
Lock indication |
218 |
Lock confirmation settings |
219 |
Remote key |
219 |
Locking and unlocking using the |
222 |
remote key |
|
Settings for remote and inside door |
223 |
unlock |
|
Unlocking the tailgate using the |
223 |
remote key |
|
Remote key range |
224 |
Replacing the remote key's battery |
225 |
Ordering additional remote keys |
228 |
Detachable key blade |
229 |
Locking and unlocking with detacha- |
230 |
ble key blade |
|
Electronic immobilizer |
231 |
Start and lock system type designations |
232 |
Keyless and touch-sensitive surfaces* |
233 |
Keyless locking and unlocking* |
234 |
Keyless unlock settings* |
235 |
Keyless tailgate unlock* |
236 |
Antenna locations for the start and |
236 |
lock system |
|
Locking and unlocking from inside |
237 |
the vehicle |
|
Unlocking the tailgate from inside |
238 |
the |
|
Activating and deactivating child |
239 |
safety locks |
|
Automatic locking when driving |
240 |
Opening and closing the power tailgate* |
241 |
Setting a maximum height for the |
244 |
power tailgate* |
|
Foot movement tailgate operation* |
244 |
Private Locking |
245 |
Activating and deactivating private |
246 |
locking |
|
Alarm |
247 |
Arming and disarming the alarm |
248 |
6

DRIVER SUPPORT
Driver support systems |
252 |
Speed-dependent steering wheel |
252 |
resistance |
|
Stability system Roll Stability Control |
253 |
Electronic Stability Control |
253 |
Electronic Stability Control Sport mode |
255 |
Activating/deactivating Sport mode |
255 |
in Electronic Stability Control |
|
Electronic Stability Control Sport |
255 |
mode limitations |
|
Electronic Stability Control symbols |
256 |
and messages |
|
Speed limiter |
257 |
Activating and starting Speed Limiter |
258 |
Managing Speed Limiter speed |
258 |
Deactivating and putting Speed Lim- |
259 |
iter in standby mode |
|
Reactivating Speed Limiter from |
260 |
standby mode |
|
Turning off Cruise Control |
260 |
Cruise Control limitations |
261 |
Automatic Speed Limiter |
261 |
Activating/deactivating Automatic |
263 |
Speed Limiter |
|
Changing Automatic Speed Limiter |
264 |
tolerance |
|
Automatic Speed Limiter limitations |
265 |
Cruise control |
265 |
Activating and starting Cruise Control |
266 |
Managing Cruise Control speed |
267 |
Deactivating and putting Cruise Con- |
269 |
trol in standby mode |
|
Reactivating Cruise Control from |
269 |
standby mode |
|
Switching off Cruise Control |
270 |
Adaptive Cruise Control* |
271 |
Adaptive Cruise Control and collision |
273 |
warning |
|
Activating and starting Adaptive |
274 |
Cruise Control |
|
Managing Adaptive Cruise Control speed |
275 |
Setting Adaptive Cruise Control time |
276 |
intervals |
|
Deactivating/reactivating Adaptive |
278 |
Cruise Control |
|
Passing assistance with Adaptive |
280 |
Cruise Control |
|
Starting passing assistance with |
280 |
Adaptive Cruise Control |
|
Limitations of passing assistance |
281 |
with Adaptive Cruise Control |
|
Switching target vehicles with Adap- |
281 |
tive Cruise Control |
|
Automatic braking with Adaptive |
282 |
Cruise Control |
|
Adaptive Cruise Control limitations |
283 |
Switching between Cruise Control |
283 |
and Adaptive Cruise Control |
|
Symbols and messages for Adaptive |
285 |
Cruise Control |
|
Pilot Assist |
287 |
Pilot Assist and collision warning |
290 |
Activating and starting Pilot Assist |
291 |
Managing Pilot Assist speed |
292 |
Setting a time interval for Pilot Assist |
293 |
Deactivating/reactivating Pilot Assist |
294 |
Passing assistance with Pilot Assist |
296 |
Starting passing assistance with |
297 |
Pilot Assist |
|
Passing assistance with Pilot Assist |
297 |
limitations |
|
Switching target vehicles with Pilot Assist |
297 |
Auto-hold braking with Pilot Assist |
298 |
Pilot Assist limitations |
299 |
Pilot Assist* symbols and messages |
300 |
Radar sensor |
302 |
Radar sensor limitations |
303 |
Recommended maintenance for the |
306 |
radar sensor |
|
Radar sensor type approval |
306 |
Camera |
307 |
7

Camera limitations |
308 |
Recommended maintenance for the |
311 |
camera/radar sensor |
|
City Safety™ |
311 |
City Safety parameters and sub-functions |
312 |
Setting a warning distance for City Safety |
314 |
Detecting obstacles with City Safety |
315 |
City Safety in crossing traffic |
317 |
Limitations of City Safety in crossing |
318 |
traffic |
|
City Safety and delayed evasive |
319 |
maneuvers |
|
City Safety braking for oncoming |
320 |
vehicles* |
|
City Safety limitations |
321 |
City Safety messages |
323 |
Rear Collision Warning |
324 |
Rear Collision Warning limitations |
324 |
BLIS* |
325 |
Activating/deactivating BLIS |
326 |
BLIS limitations |
327 |
Recommended maintenance for BLIS |
328 |
BLIS messages |
329 |
Cross Traffic Alert* |
330 |
Activating/deactivating Cross Traffic |
331 |
Alert |
|
8
Cross Traffic Alert limitations |
331 |
Recommended maintenance for |
332 |
Cross Traffic Alert |
|
Cross Traffic Alert messages |
334 |
Road Sign Information* |
335 |
Activating/deactivating Road Sign |
336 |
Information |
|
Road Sign Information and sign displays |
337 |
Road Sign Information and Sensus |
337 |
Navigation |
|
Road Sign Information with Speed |
338 |
Warning and Settings |
|
Activating/deactivating Speed Warn- |
339 |
ing in Road Sign Information |
|
Road Sign Information with speed |
339 |
camera information |
|
Road Sign Information limitations |
340 |
Driver Alert Control |
341 |
Activating/deactivating Driver Alert |
342 |
Control |
|
Selecting guidance to a rest area if |
343 |
the Driver Alert Control warning has |
|
been given |
|
Driver Alert Control limitations |
343 |
Lane Keeping Aid |
343 |
Steering assistance with Lane Keep- |
345 |
ing Aid |
|
Activating/deactivating Lane Keeping Aid |
346 |
Selecting type of assistance for Lane |
346 |
Keeping Aid |
|
Lane Keeping Aid limitations |
346 |
Lane Keeping Aid symbols and mes- |
348 |
sages |
|
Lane Keeping Aid symbols in the |
350 |
instrument panel |
|
Steering assistance at risk of collision |
351 |
Activating/deactivating steering |
351 |
assistance during collision risks |
|
Run-Off Mitigation with steering |
352 |
assistance |
|
Run-Off Mitigation with steering |
352 |
assistance levels |
|
Activating/deactivating Run-Off Miti- |
353 |
gation with steering assistance |
|
Limitations of Run-Off Mitigation |
354 |
with steering assistance |
|
Steering assistance during collision |
354 |
risks from oncoming traffic |
|
Activating/deactivating Steering |
355 |
assistance during collision risks with |
|
oncoming vehicles |
|
Limitations of steering assistance |
356 |
during collision risks from oncoming |
|
traffic |
|
Symbols and messages for steering |
357 |
assistance during collision risks |
|
Park Assist* |
358 |
Park Assist front, rear and sides |
359 |
Activating/deactivating Park Assist |
360 |
Park Assist limitations |
361 |
Recommended maintenance for |
362 |
Park Assist |
|
Park Assist symbols and messages |
363 |
Park Assist Camera* |
364 |
Park Assist Camera views |
365 |
Park Assist Camera trajectory lines |
367 |
Sensor field from Park Assist for |
369 |
Park Assist Camera |
|
Starting the Park Assist Camera |
370 |
Park Assist Camera limitations |
371 |
Recommended maintenance of the |
372 |
Park Assist Camera |
|
Park Assist Camera symbols and |
373 |
messages |
|
Park Assist Pilot* |
374 |
Types of parking with Park Assist Pilot |
374 |
Parking with Park Assist Pilot |
376 |
Leaving a parking space with Park |
378 |
Assist Pilot |
|
Park Assist Pilot* limitations |
379 |
Recommended maintenance for |
381 |
Park Assist Pilot |
|
Park Assist Pilot* messages |
382 |
STARTING AND DRIVING
Starting the vehicle |
384 |
Switching off the vehicle |
386 |
Ignition modes |
386 |
Selecting ignition mode |
388 |
Brake functions |
388 |
Brakes |
389 |
Brake Assist System |
390 |
Braking on wet roads |
390 |
Braking on salted roads |
391 |
Maintenance of the brake system |
391 |
Parking brake |
391 |
Activating and deactivating the park- |
392 |
ing brake |
|
Settings for automatically activating |
393 |
the parking brake |
|
Parking on a hill |
394 |
Parking brake malfunction |
394 |
Auto-hold brakes |
395 |
Activating and deactivating Auto- |
396 |
hold at a standstill |
|
Hill Start Assist |
396 |
Braking assist after a collision |
397 |
Transmission |
397 |
Gear selector positions for automatic |
398 |
transmissions |
|
Using the steering wheel paddles* to |
400 |
shift |
|
Shiftlock |
401 |
The kickdown function |
401 |
All Wheel Drive (AWD)* |
402 |
Drive modes* |
402 |
Changing drive mode* |
404 |
ECO drive mode |
404 |
Activating and deactivating ECO |
406 |
drive mode using the function button |
|
Start/Stop function |
407 |
Driving with the Start/Stop function |
407 |
Temporarily deactivating the Start/ |
408 |
Stop function |
|
Conditions for the Start/Stop function |
408 |
Leveling control* and suspension |
410 |
Low Speed Control* |
412 |
Activating and deactivating Low |
412 |
Speed Control* using the function button |
|
Hill Descent Control* |
413 |
Activating and deactivating Hill |
414 |
Descent Control* using the function |
|
button |
|
Economical driving |
415 |
Preparing for a long trip |
416 |
Winter driving |
416 |
9

Driving through standing water |
417 |
Opening/closing the fuel filler door |
418 |
Refueling |
418 |
Fuel |
419 |
Octane rating |
420 |
Emission controls |
422 |
Overheating of engine and transmission |
422 |
Battery drain |
423 |
Jump starting using another battery |
424 |
Detachable towbar* |
425 |
Driving with a trailer |
426 |
Trailer Stability Assist* |
428 |
Checking trailer lights |
429 |
Towing using a towline |
430 |
Attaching and removing the towing eyelet |
431 |
Recovery |
432 |
HomeLink®* |
433 |
Programming HomeLink®* |
434 |
Using HomeLink®* |
435 |
Type approval for HomeLink®* |
436 |
Compass* |
436 |
Activating and deactivating the compass* |
437 |
Calibrating the compass* |
437 |
AUDIO, MEDIA AND INTERNET
Audio, media and Internet |
440 |
Sound settings |
440 |
Sound experience* |
441 |
Apps |
442 |
Download apps |
443 |
Updating apps |
443 |
Deleting apps |
444 |
Radio |
444 |
Starting the radio |
445 |
Changing waveband and radio station |
446 |
Searching for a radio station |
446 |
Storing radio favorites |
447 |
Radio settings |
448 |
RBDS |
448 |
HD Radio™ |
449 |
Activating and deactivating the HD |
450 |
Radio™ |
|
HD Radio™ sub-channels |
451 |
HD Radio™ limitations |
451 |
SiriusXM® Satellite radio* |
452 |
Using SiriusXM® Satellite radio* |
453 |
Settings for SiriusXM® Satellite radio* |
455 |
SiriusXM Travel Link®* |
456 |
SiriusXM Travel Link®* - Weather |
457 |
SiriusXM Travel Link®* - Notifications |
459 |
SiriusXM Travel Link®* - Fuel |
459 |
SiriusXM Travel Link®* - Sports |
461 |
Media player |
461 |
Playing media |
462 |
Controlling and changing media |
463 |
Media searches |
464 |
Gracenote® |
465 |
Video |
466 |
Playing video |
466 |
Playing DivX® |
466 |
Video settings |
467 |
Streaming media via Bluetooth® |
467 |
Connecting a device via Bluetooth® |
467 |
Playing media via the USB port |
468 |
Connecting a device via the USB port |
468 |
Technical specifications for USB devices |
469 |
Compatible file formats for media |
469 |
Apple® CarPlay®* |
470 |
Using Apple® CarPlay®* |
471 |
Settings for Apple® CarPlay®* |
472 |
Tips for using Apple® CarPlay®* |
473 |
Android Auto* |
474 |
10

Using Android Auto* |
474 |
Settings for Android Auto* |
475 |
Tips for using Android Auto* |
476 |
Phone |
476 |
Connecting a phone to the car via |
477 |
Bluetooth for the first time |
|
Connecting a phone to the car via |
479 |
Bluetooth automatically |
|
Connecting a phone to the car via |
479 |
Bluetooth manually |
|
Disconnecting a Bluetooth-con- |
480 |
nected phone |
|
Switch between phones connected |
480 |
via Bluetooth |
|
Disconnecting Bluetooth-connected |
480 |
devices |
|
Handling phone calls |
481 |
Handling text messages |
482 |
Text message settings |
483 |
Managing the phone book |
483 |
Phone settings |
484 |
Settings for Bluetooth devices |
484 |
Wireless phone charger* |
485 |
Using the wireless phone charger* |
485 |
Internet-connected vehicle* |
486 |
Connecting the vehicle to the Inter- |
487 |
net via a Bluetooth-connected phone |
|
Connecting the vehicle to the Inter- |
488 |
net via a phone (Wi-Fi) |
|
Connecting the vehicle to the Inter- |
488 |
net via vehicle modem (SIM card) |
|
Vehicle modem settings |
489 |
Sharing Internet from the vehicle via |
490 |
Wi-Fi hotspot (tethering) |
|
No or poor Internet connection |
491 |
Deleting Wi-Fi networks |
491 |
Wi-Fi technology and security |
492 |
Terms of use and data sharing |
492 |
Activating and deactivating data sharing |
492 |
Hard disk storage space |
493 |
License agreement for audio and media |
494 |
WHEELS AND TIRES
Tires |
506 |
Tire direction of rotation |
508 |
Tread wear indicator |
509 |
Tire terminology |
509 |
Tire sidewall designations |
510 |
Uniform Tire Quality Grading |
512 |
Checking tire pressure |
513 |
Adjusting tire pressure |
514 |
Recommended tire pressure |
515 |
Tire pressure monitoring system* |
515 |
Calibrating the tire pressure monitor- |
517 |
ing system* |
|
Viewing tire pressure status in the |
518 |
center display* |
|
Action when warned of low tire pressure |
519 |
When changing wheels |
520 |
Tool kit |
520 |
Jack* |
521 |
Wheel bolts |
522 |
Removing a wheel |
522 |
Installing a wheel |
524 |
Spare wheel |
526 |
Accessing the spare wheel |
527 |
Snow tires |
527 |
Snow chains |
528 |
11

Tire sealing system |
529 |
Using the tire sealing system |
530 |
Inflate tires with the compressor |
533 |
included in the tire sealing system |
|
Determining the vehicle's permitted |
534 |
weight |
|
LOADING, STORAGE AND PASSENGER COMPARTMENT
Passenger compartment interior |
538 |
Tunnel console |
539 |
Electrical outlets |
539 |
Using the electrical outlets |
540 |
Using the glove compartment |
541 |
Sun visors |
542 |
Cargo compartment |
543 |
Loading recommendations |
543 |
Roof loads and load carriers |
544 |
Grocery bag holders |
545 |
Load anchoring eyelets |
545 |
Rear seat ski hatch* |
546 |
Folding up the cargo compartment floor |
546 |
Removing the folding cargo compart- |
546 |
ment floor* |
|
Installing and removing the cargo net* |
548 |
Removing and storing the parcel |
550 |
shelf in the vehicle |
|
MAINTENANCE AND SERVICE
Volvo's service program |
552 |
Data transfer between vehicle and |
554 |
workshop over Wi-Fi |
|
Download Center |
555 |
Handling system updates via Down- |
555 |
load Center |
|
Vehicle status |
556 |
Scheduling service and repairs |
557 |
Sending vehicle information to the |
558 |
workshop |
|
Hoisting the vehicle |
560 |
Opening and closing the hood |
562 |
Climate control system service |
563 |
Engine compartment overview |
563 |
Engine oil |
564 |
Checking and filling engine oil |
565 |
Refilling coolant |
566 |
Replacing bulbs |
567 |
Location of exterior lights |
568 |
Replacing rear turn signal bulbs |
569 |
Replacing the brake light bulb |
570 |
Replacing the rear fog light bulb |
571 |
Bulb specifications |
572 |
Start battery |
573 |
Support battery |
576 |
12

Battery symbols |
577 |
Fuses and fuseboxes |
578 |
Replacing fuses |
579 |
Fuses in the engine compartment |
580 |
Fuses under the left front seat |
583 |
Cleaning the interior |
586 |
Cleaning the center display |
586 |
Cleaning fabric upholstery and ceil- |
587 |
ing liner |
|
Cleaning the seat belt |
588 |
Cleaning floor mats and inlay mats |
588 |
Cleaning leather upholstery |
589 |
Cleaning the leather steering wheel |
590 |
Cleaning interior plastic, metal and |
590 |
wood surfaces |
|
Cleaning the exterior |
591 |
Polishing and waxing |
591 |
Hand washing |
592 |
Automatic car washes |
593 |
High-pressure washing |
594 |
Cleaning the wiper blades |
595 |
Cleaning exterior plastic, rubber and |
595 |
trim components |
|
Cleaning rims |
596 |
Corrosion protection |
597 |
Paintwork |
597 |
Touching up minor paint damage |
598 |
Color codes |
599 |
Changing rear window wipers |
599 |
Replacing windshield wiper blades |
600 |
Windshield wipers in the service position |
601 |
Filling washer fluid |
602 |
SPECIFICATIONS
Type designations |
606 |
Dimensions |
609 |
Weights |
611 |
Towing capacity and tongue weight |
613 |
Engine specifications |
614 |
Engine oil specifications |
615 |
Coolant specifications |
616 |
Transmission fluid specifications |
616 |
Brake fluid specifications |
616 |
Fuel tank volume |
617 |
Air conditioning specifications |
617 |
Approved tire pressure |
618 |
13

INDEX
Index |
619 |
14

OWNER'S INFORMATION
OWNER'S INFORMATION
Owner's information
Owner's information is available in several different formats, both digital and printed. The Owner's Manual is available on the vehicle's center display, as a mobile app and on Volvo Cars' support website. There is also a Quick Guide in the glove compartment, as well as a supplement to the Owner's Manual containing information about e.g. fuses, specifications, etc. A printed Owner's Manual can be ordered.
Vehicle's center display1
In the center display, pull down Top view and tap Owner's
manual. This gives you access
to visual navigation with exterior and interior images of the vehicle. The information is searchable and is divided into catego-
ries.
Mobile app
In App Store or Google Play, search for "Volvo Manual". Download the app to your smartphone or tablet and select your vehicle model. The app contains instructive videos and offers visual navigation, includ-
ing exterior and interior images of the vehicle. You can easily navigate between sections in the Owner's Manual and the contents are searchable.
Volvo Cars support site
Go to support.volvocars.com and select your country. Owner's Manuals are available here for viewing online and in
PDF format. The support site also contains instructive videos and additional information and
assistance concerning your vehicle and owning a Volvo. The website is available on most markets.
1 For markets without Owner's Manuals in the center display, a complete printed
Printed information
The glove compartment contains a printed supplement to the Owner's Manual1, which contains information on fuses and specifications as well as a summary of important and practical information.
There is also a printed Quick Guide with useful information about the most commonly used features and functions in your vehicle.
Other printed information may also be provided in the vehicle, depending on equipment level, market, etc.
A printed Owner's Manual and accompanying supplement can also be ordered. Contact a Volvo retailer to order.
16
CAUTION
The driver is always responsible for operating the vehicle in a safe manner and adhering to all applicable laws and regulations. It is also important that the vehicle is operated, maintained and serviced according to Volvo's recommendations provided in the owner's information.
If the information in the center display differs from the printed information, the printed information always takes precedence.
NOTE
Changing languages in the center display could mean that certain owner's information will not comply with national or local laws and regulations. Do not change to a language that you do not fully understand, as this could make it difficult to navigate back through the menu.
Related information
•Owner's Manual in the center display (p. 17)
•Owner's manual in mobile devices (p. 20)
•Volvo Cars support site (p. 21)
•Using the Owner's Manual (p. 21)
2 Available in most markets.
Owner's Manual in the center display
A digital version of the Owner's Manual is available in the vehicle's center display2.
The digital Owner's Manual can be accessed from Top view and in certain cases, the contextual Owner's Manual can also be accessed from Top view.
NOTE
The digital Owner's Manual is not available during driving.
OWNER'S MANUAL
OWNER'S INFORMATION
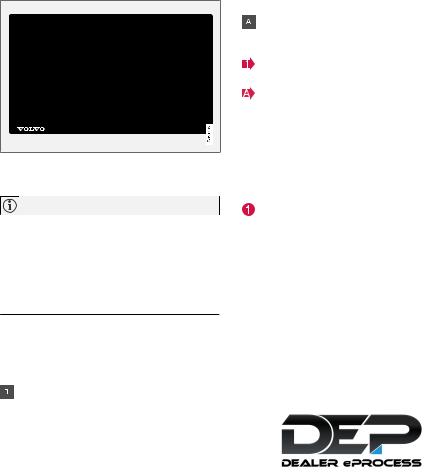
To open the Owner's Manual, pull down Top view in the center display and tap Owner's manual.
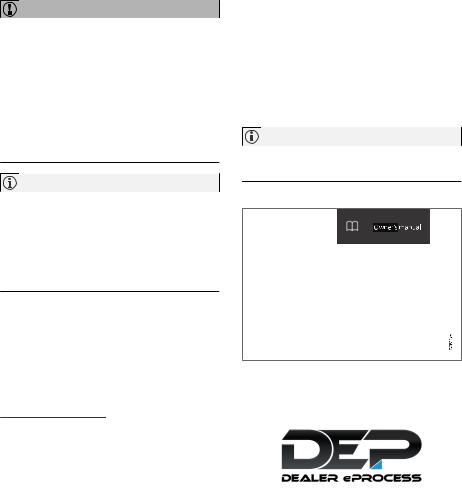
The information in the Owner's Manual can be accessed directly via the Owner's Manual start page or via its Top menu.
Top view with button for Owner's Manual.
}}
17
|
OWNER'S INFORMATION |
|
|
|
|
|
|| Contextual Owner's Manual |
|
|
|
Related information |
||
|
|
|
|
|
|
• Navigate in the Owner's Manual in the center |
|
|
|
|
|
|
|
|
|
|
|
|
|
display (p. 18) |
|
|
|
|
|
|
• Navigating in the center display's views |
|
|
|
|
|
|
(p. 108) |
|
|
|
|
|
|
• Download apps (p. 443) |
|
|
|
|
|
|
|
|
|
|
|
|
|
|
|
|
|
|
|
|
|
|
|
|
|
|
|
|
|
|
|
|
|
|
|
Navigate in the Owner's Manual in the center display
The digital Owner's Manual can be accessed from the center display's Top view. The contents are searchable and it is easy to navigate among the various sections.
Top view with button for contextual Owner's Manual.
The contextual Owner's Manual is a shortcut to an article in the Owner's Manual describing the active function displayed on the screen. When a contextual Owner's Manual is available, it will be shown to the right of Owner's manual in Top view.
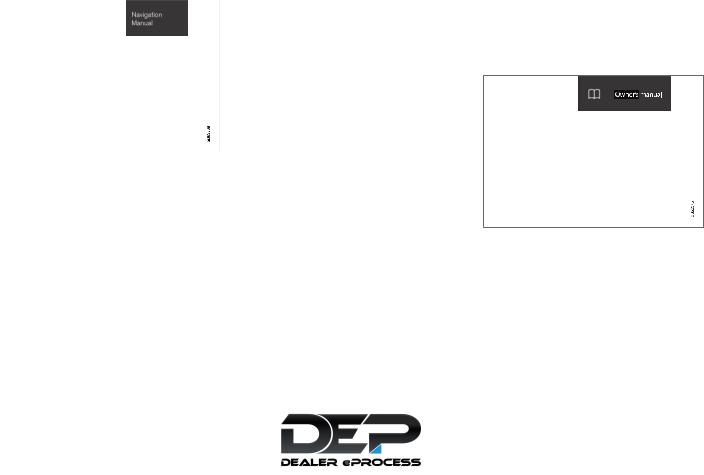
Tap the contextual Owner's Manual to open an article in the Owner's Manual related to the information displayed on the screen. For example, tap Navigation Manual to open an article related to navigation.
Certain apps in the vehicle only. For third-party apps that have been downloaded, it is not possible to e.g. access app-specific articles.
The Owner's Manual is accessed from Top view.
–To open the Owner's Manual, pull down Top view in the center display and tap Owner's manual.
There are a number of ways to find information in the Owner's Manual. The options can be accessed from the Owner's Manual start page and from the Top menu.
18
Opening the menu in the Top menu
–Tap  in the upper list in the Owner's Manual.
>A menu will open, displaying different options for finding information:
Start page
Categories |
Tap the symbol to return to the Owner's Manual start page.
The articles in the Owner's Manual are structured into main and sub-categories. The same article may appear in several relevant categories in order to help make them easier to find.
1.Tap Categories.
>The main categories are listed.
2.Tap a main category (  ).
).
>A list of sub-categories (  ) and articles (
  ) will appear.
3.Tap an article to open it.
To go back, tap the left arrow.
Quick Guide
Tap the symbol to go to a page with links to a selection of use-
ful articles about the vehicle's
most commonly used features and functions. The articles can also be accessed via categories, but have been collected
here for quick access. Tap an article to read it in its entirety.
Exterior and interior hotspots
Exterior and interior overviews of the vehicle. Hotspots are
provided for certain functions, components, etc. Tap a hotspot to come to a relevant article.
1.Press Exterior or Interior.
>Exterior or interior images of the vehicle are shown with hotspots. The hotspots lead to articles about the corresponding function, component, etc. Swipe the screen horizontally to scroll between the images.
OWNER'S INFORMATION
2.Tap a hotspot.
>The title of a relevant article will be displayed.
3.Tap the title to open the article.
To go back, tap the left arrow.
Favorites |
Tap the symbol to go to articles saved as favorites. Tap an article to read it in its entirety.
Saving or deleting favorite articles
Save an article as a favorite by tapping the  at the upper right when the article is open. When an article has been saved as a favorite, the star sym-
bol will be filled in:  .
.
To remove an article from the list of favorites, tap its star again.
Video
Tap the symbol to go to brief instructive videos for various functions in the vehicle.
}}
19

OWNER'S INFORMATION
||Information
Tap the symbol for information about the current version of the Owner's Manual in your vehicle and other useful information.
Owner's manual in mobile devices
The Owner's Manual is available as a mobile app3 and can be downloaded from the App Store and Google Play. The app is adapted for both smartphones and tablets.
can easily navigate between sections in the Owner's Manual and the contents are searchable.
Using the search function in the Top menu
1.Tap  in the Owner's Manual upper menu. A keyboard will appear at the bottom of the screen.
2.Enter a search word, e.g. "seat belt".
>Suggested articles and categories will be displayed as characters are entered.
3.Tap the article or category to read it.
Related information
•Owner's Manual in the center display (p. 17)
•Using the center display keyboard (p. 119)
•Using the Owner's Manual (p. 21)
3 Certain mobile devices.
The Owner's Manual can be downloaded as a mobile app
from the App Store or Google
Play. This QR code will take
you directly to the app. You can also search for "Volvo manual" in the App Store or Google
Play.
The app contains videos and exterior/interior images of the vehicle. These images contain hotspots for various functions, components, etc., which lead directly to related information. You
The mobile app is available on both App Store and Google Play.
Related information
•Using the Owner's Manual (p. 21)
20

Volvo Cars support site
Volvo Cars' website and support site contain additional information about your vehicle.
Online support
Go to support.volvocars.com to visit the site. The support site is available in most markets.
The site contains support for e.g. Internet-based services and functions, Volvo On Call, the navigation system* and apps. Videos and step-by-step instructions explain various procedures, such as how to connect the vehicle to the Internet via a cellular phone.
Downloadable information
Maps
For vehicles equipped with Sensus Navigation maps can be downloaded from the support site.
Mobile apps
Beginning with model year 2014, the Owner's Manual is available as an app for certain Volvo models. The Volvo On Call app can also be downloaded from the support site.
Owner's manuals in PDF format
Owner's Manuals are available for downloading in PDF format. Select the vehicle model and year to download the desired manual.
Contact
Contact information for customer support and your nearest Volvo retailer are available on the support site.
Related information
•Contacting Volvo (p. 26)
•Volvo ID (p. 26)
OWNER'S INFORMATION
Using the Owner's Manual
Reading your Owner's Manual is a good way to get to know your new Volvo, preferably before driving it for the first time.
Reading your Owner's Manual is a good way to familiarize yourself with new features and functions, get advice on the best way to handle your vehicle in different situations, and to learn how to get the most out of everything your Volvo has to offer. Pay particular attention to the safety warnings provided in the Owner's Manual.
The intention of this owner's information is to explain all of the possible features, functions and options included in a Volvo vehicle. It is not intended as an indication or guarantee that all of these features, functions and options are included in every vehicle. Some terminology used may not exactly match terminology used in sales, marketing and advertising materials.
Volvo continuously works to develop and improve our products. Modifications can mean that information, descriptions and illustrations in the Owner's Manual differ from the equipment in the vehicle. We reserve the right to make changes without prior notice.
Do not remove this manual from the vehicle. If a problem should occur, you will not have the necessary information on where and how to get professional assistance.
© Volvo Car Corporation
}}
* Option/accessory. 21
OWNER'S INFORMATION
||Option/accessory
In addition to standard equipment, the Owner's Manual also describes options (factory-installed equipment) and certain accessories (extra retrofitted equipment).
All options and accessories are marked with an asterisk: *.
The equipment described in the Owner's Manual is not available in all vehicles. Vehicles may be equipped differently depending on market requirements and national or local laws and regulations.
For more information on which equipment is standard and which is an option or accessory, please contact your Volvo retailer.
Footnotes
Certain parts of the Owner's Manual contain information in the form of footnotes at the bottom of the page or at the end of a table. This information supplements the text that the footnote number refers to. If the footnote refers to text in a table, a letter is used instead of a number.
Messages
There are several displays in the vehicle that show messages and menu texts. The appearance of these texts differs from the normal texts provided. Example of messages and menu texts:
Phone, New message.
Decals
There are various types of decals affixed in the vehicle to communicate important information in a clear and concise manner. The importance of these decals is explained as follows, in descending order of importance.
Risk of injury
Black ISO symbols on a yellow warning field, white text/image on a black message field. Used to indicate potential danger. Ignoring a warning of this type could result in serious injury or death.
Risk of damage
White ISO symbols and white text/image on a black or blue warning field and message field. Used to indicate potential danger. Ignoring a warning of this type could result in damage.
22 |
* Option/accessory. |
Information
White ISO symbols and white text/image on a black message field.
NOTE
The decals shown in the Owner's Manual do not claim to be exact reproductions of those found in the vehicle. The purpose is to show approximately how they look and about where they are located. The information that applies for your vehicle in particular is found on the decal on the vehicle.
Procedures
Procedures that must be carried out in a certain order are shown as numbered lists in the Owner's Manual.
When a series of illustrations are provided along with the step-by-step instructions, the
numbers of the steps correspond with the numbers of the illustrations.
Lists using letters instead of numbers are used in cases where the order in which the instructions are carried out is not important.
Arrows with or without numbers are used to indicate the direction of movement.
Arrows with letters are used to indicate a movement in cases where the order in which the instructions are carried out is not important.
If there are no illustrations associated with step- by-step instructions, the steps are indicated by ordinary numbers.
Position lists
Red circles containing a number are used in general overview illustrations of components. The corresponding number is used in the position list's description of that component.
Bullet lists
Bullets are used for items (components, functions, information, etc.) that can be listed in a random order.
For example:
•Coolant
•Engine oil
OWNER'S INFORMATION
Related information
Related information offers references to other parts of the manual containing information associated with the information you are currently reading.
Illustrations, images and video clips
Illustrations, images and video clips used in the Owner's Manual are sometimes generic and are intended to provide an overview or an example of a certain function or feature. They may vary depending on equipment level and market and may differ from the appearance of your vehicle.
Continues on next page
}} This symbol is shown in the lower right-hand corner to indicate that the current topic continues on the next page.
Continuation from previous page
|| This symbol is shown in the upper left-hand corner to indicate that the current topic is a continuation from the previous page.
Related information
•Owner's Manual in the center display (p. 17)
•Owner's manual in mobile devices (p. 20)
•Volvo Cars support site (p. 21)
23
OWNER'S INFORMATION
The Owner's Manual and the environment
The Owner's Manual is printed on paper from responsibly managed forests.
The Forest Stewardship Council (FSC)® symbol certifies that the paper pulp in the printed Owner's Manual comes from FSC®-certified forests or other responsibly managed sources.
Related information
•Drive-E ‒ purer driving pleasure (p. 27)
24

YOUR VOLVO

YOUR VOLVO
Contacting Volvo
Use the following contact information if you would like to get in touch with Volvo in the United States or Canada.
In the USA:
Volvo Car USA, LLC Customer Care Center 1 Volvo Drive,
P.O. Box 914
Rockleigh, New Jersey 07647 1-800-458-1552 www.volvocars.com/us
In Canada:
Volvo Car Canada Ltd.
Customer Care Centre
9130 Leslie Street, Suite 101 Richmond Hill, Ontario L4B 0B9 1-800-663-8255 www.volvocars.com/ca
Volvo ID
Volvo ID is a personal ID that gives you access to a range of services using a single username and password.
Examples of services:
•Volvo On Call-app - check your vehicle using your phone. You can check fuel level, find the nearest gas station and lock the vehicle remotely.
•Send to Car – send addresses from online map services directly to the vehicle.
•Book service and repairs – register your preferred workshop/retailer on volvocars.com to schedule service directly from the vehicle.
NOTE
If the username/password for a service (e.g. Volvo On Call) is changed, the change will also automatically be applied to other services.
A Volvo ID can be created from the vehicle or the Volvo On Call app.
When a Volvo ID is registered in the vehicle, additional services are available.
Related information
•Creating and registering a Volvo ID (p. 26)
•Scheduling service and repairs (p. 557)
Creating and registering a Volvo ID
A Volvo ID can be created in two ways. If your Volvo ID was created with the Volvo On Call app, the Volvo IDmust also be registered to the vehicle to enable access to the Volvo ID services.
Creating a Volvo ID with the Volvo ID app
1.Download the Volvo ID app from Download Center in the center display's App view.
2.Start the app and register a personal email address.
3.Follow the instructions that will be sent automatically to this email address.
>A Volvo ID has now been created and is automatically registered to the vehicle. The Volvo ID services can now be used.
26

Creating a Volvo ID using the Volvo On Call app1
1.Download the latest version of the Volvo On Call app from a smartphone, via e.g. App Store, Windows Phone or Google Play.
2.On the app's start page, create a Volvo ID and enter a personal email address.
3.Follow the instructions that will be sent automatically to this email address.
>A Volvo ID has now been created. See below for information on how the ID is registered to the vehicle.
Registering your Volvo ID to the vehicle
If your Volvo ID was created using the Volvo On Call app, follow these steps to register the ID to the vehicle:
1.If you have not already done so, download the Volvo ID app from Download Center in the center display's App view.
NOTE
To download apps the vehicle must be connected to the internet.
2.Start the app and enter your Volvo ID/email address.
1 Vehicles with Volvo On Call.
3.Follow the instructions that will be automatically sent to the email address connected to your Volvo ID.
>Your Volvo ID has now been registered to the vehicle. The Volvo ID services can now be used.
Related information
•Volvo ID (p. 26)
•Download apps (p. 443)
•Handling system updates via Download Center (p. 555)
•Internet-connected vehicle* (p. 486)
YOUR VOLVO
Drive-E ‒ purer driving pleasure
Volvo is committed to the well-being of its customers. As a natural part of this commitment, we care about the environment in which we all live. Concern for the environment means an everyday involvement in reducing our environmental impact.
Volvo's environmental activities are based on a holistic view, which means we consider the overall environmental impact of a product throughout its complete life cycle. In this context, design, production, product use, and recycling are all important considerations. In production, Volvo has partly or completely phased out several chemicals including CFCs, lead chromates, asbestos, and cadmium; and reduced the number of chemicals used in our plants 50% since 1991.
Volvo was the first in the world to introduce into production a three-way catalytic converter with a Lambda sond, now called the heated oxygen sensor, in 1976. The current version of this highly efficient system reduces emissions of harmful substances (CO, HC, NOx) from the exhaust pipe by approximately 95 - 99% and the search to eliminate the remaining emissions continues. Volvo is the only automobile manufacturer to offer CFC-free retrofit kits for the air conditioning system of all models as far back as the 1975 model 240. Advanced electronic engine controls and cleaner fuels are bringing us closer to our
}}
* Option/accessory. 27

YOUR VOLVO
||goal. In addition to continuous environmental refinement of conventional gasoline-powered internal combustion engines, Volvo is actively looking at advanced technology alternative-fuel vehicles.
When you drive a Volvo, you become our partner in the work to lessen the vehicle's impact on the environment. To reduce your vehicle's environmental impact, you can:
•Maintain proper air pressure in your tires. Tests have shown decreased fuel economy with improperly inflated tires.
•Follow the recommended maintenance schedule in your Warranty and Service Records Information booklet.
•Drive at a constant speed whenever possible.
•See a trained and qualified Volvo service technician as soon as possible for inspection if the check engine (malfunction indicator) light illuminates, or stays on after the vehicle has started.
•Properly dispose of any vehicle-related waste such as used motor oil, used batteries, brake pads, etc.
•When cleaning your vehicle, please use genuine Volvo car care products. All Volvo car care products are formulated to be environmentally friendly.
Related information
•Economical driving (p. 415)
•Starting and stopping preconditioning* (p. 210)
•The Owner's Manual and the environment (p. 24)
•Air quality (p. 187)
2 Depending on market, this function can be either standard or optional.
IntelliSafe - driver support
IntelliSafe is Volvo Cars' philosophy regarding vehicle safety. IntelliSafe consists of a number of systems, both standard and optional, that are designed to help make driving safer, prevent accidents and protect passengers and other road users.
Support
IntelliSafe includes driver support functions such as Adaptive cruise control* which helps the driver to maintain an even speed combined with a preselected time interval to the vehicle ahead.
Pilot Assist2 helps the driver keep the vehicle in the current traffic lane by providing steering assistance and maintaining an even speed and a set time interval to the vehicle ahead.
Park Assist Pilot* helps the driver pull into and out of parking spaces.
Other examples of systems that can help the driver are the Active main beam, Cross Traffic Alert (CTA)* and Blind Spot Information (BLIS)* systems.
Prevention
City Safety is a function intended to help prevent accidents. The function can help prevent or mitigate a collision with pedestrians, cyclists, large animals or other vehicles. Light, sound and pulsations in the brake pedal are provided to alert of a
28 |
* Option/accessory. |
 Loading...