

Vodafone K4201-Z, K4201, K5150 User Manual

User Guide
Vodafone Mobile
Broadband USB Stick
K4201-Z
Designed
by Vodafone

Welcome
to the world of mobile communications
1 Welcome
2 Set up your USB Stick
3 Windows 8 installation and
user experience
4 Connection window
5 QuickStart window layout
6 QuickStart view: Current
network panel
7 SMS view
8 Account view
9 USB Stick LED lights
10 Hints and tips
14 Glossary

1
Your new Vodafone Mobile Broad band USB Stick connects your
computer to the internet over the Vodafone mobile phone
network. T he Vodafone QuickStar t technology built into the
device lets you connect quickly, simply and easily.
Browse the we b
You can now access the web and any other interne t service
wherever there’s a mobile p hone networ k.
Pick up emails
Keep up to date with your emails, wherever you are.
Send and r eceive SMS tex t messages
You can send an d receive SMS tex t messages s traight from your
computer. The SMS application provides an easy way to view
messages, write new ones, a nd manage them .
System Requirements
To use this USB St ick and the Vodafone Mobile Broadband
application, you need:
A computer running Microsoft –
®
Windows® 8, Windows® 7
(SP1 recommended), W indows Vista™ (SP2 recommended ), or
Windows® XP (SP3 recommended ), or an Apple Mac running
Mac OS® X 10.5 (Intel®), 10.6 or 10.7 (all with lates t updates),
or a computer running Linux Ubuntu 11.10/10.10/10.04,
openSUSE 11.4/11. 3, Fedora 16/14, Debian 6.0/5.0, Mandr iva
2010.2, Red F lag 7.0. There may be some limitations in the
Linux implementation.
A USB socket –
Admini strator rights on your computer. –
Welcome
Note:
Linux users can access
the Vodafone Mobile
Broadband application
by entering either of the
following addresses into
your browser: http://
VodafoneMobile.vmb or
http://192.168.9.1.
2
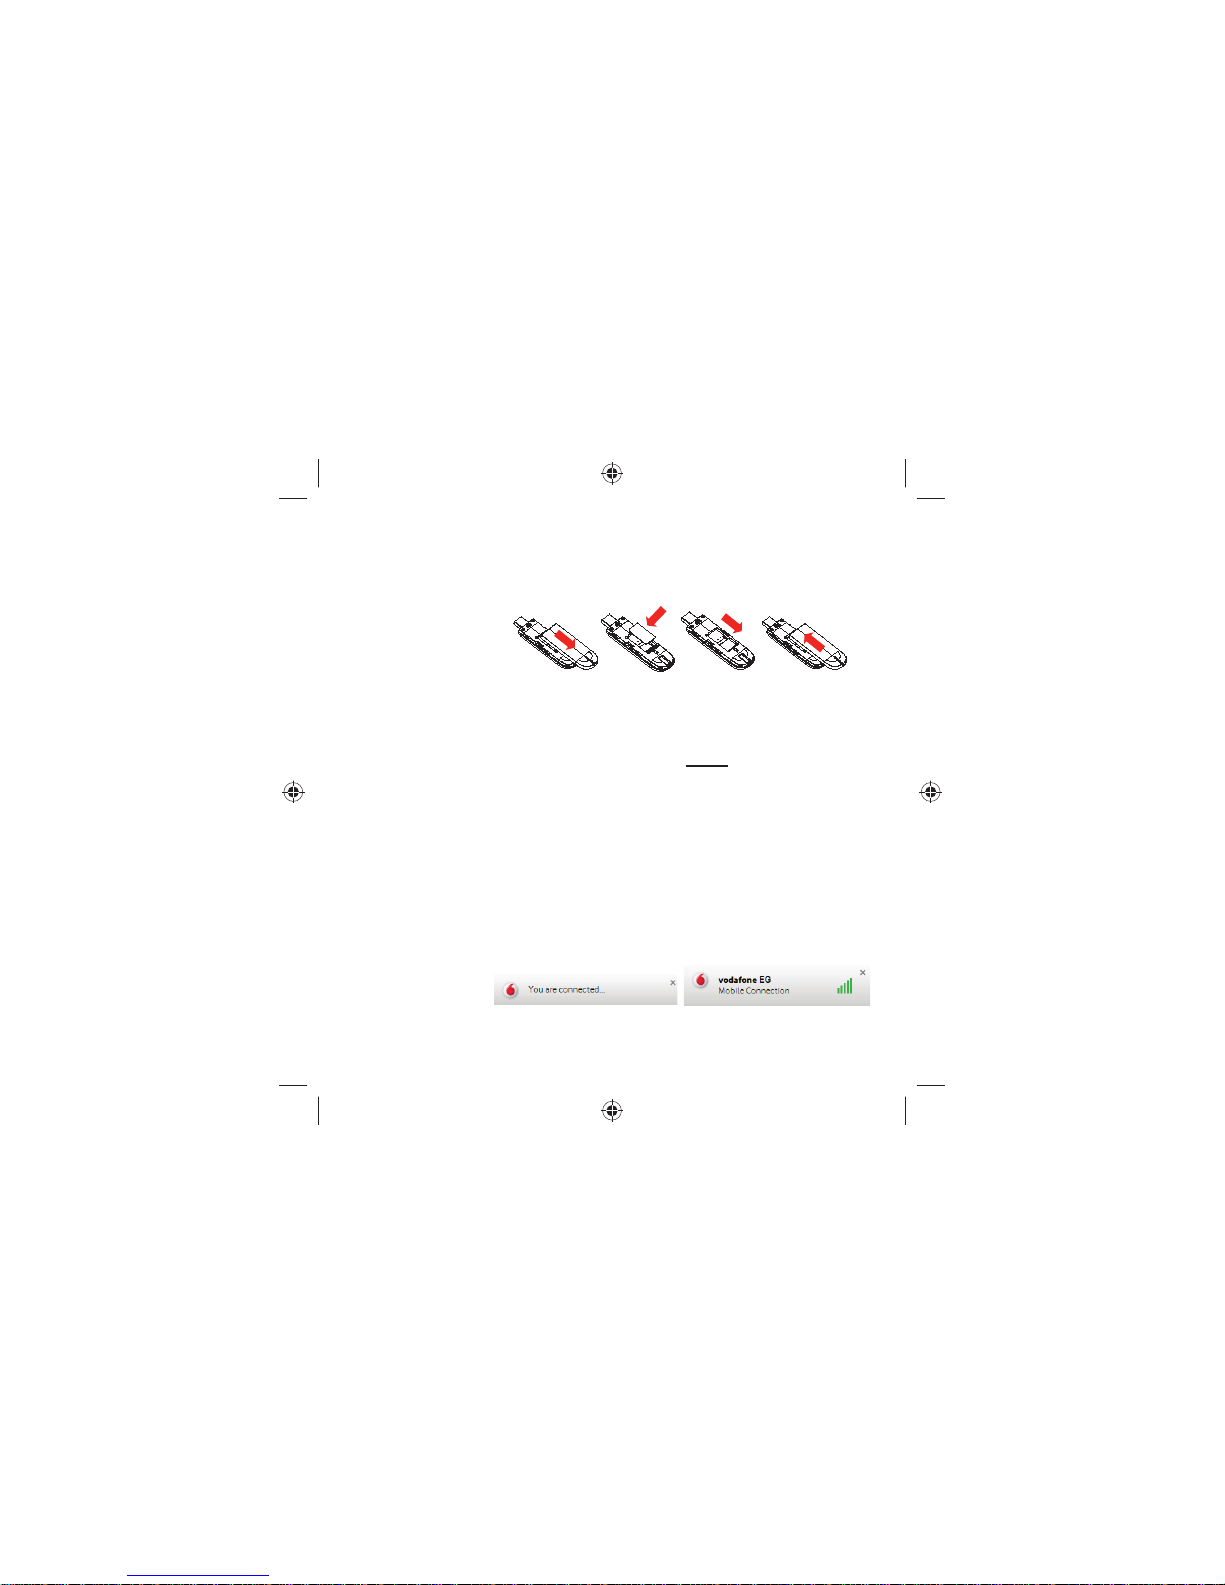
Step 1
Slide t he front cover of f the USB Stick, a nd insert you r SIM as
shown.
Step 2
Important. If you have an ear lier version of the VMB s oftware
on your computer, you must un -install the VMB softw are
completely and re -boot your PC before inserting this USB Stick.
Step 3
Plug the USB Stick fi rmly into your computer ’s USB port.
You should see a progress bar whilst the Vodafo ne Mobile
Broadband servi ce is installed on your computer f rom the
USB Stick . Once setup is co mplete, the Vodafone Mobile
Broadband applicat ion is started autom atically, and you are
connec ted to the Vodafone n etwork (if a P IN is required yo u
will se e a popup screen requesting it before you can connect).
The LED on the USB Stick will change f rom fl ashing to solid , and
you will see 2 popup scree ns.
Set up your
USB Stick
Note: Some computers
may be set up to
prevent automatic
installation of the VMB
Lite service from your
USB Stick. In this case,
follow the steps in the
hints and tips section
to manually install the
VMB Lite service on your
computer.
On a Windows 8 PC
the user experience is
slightly different. This is
explained on the next
page.
3
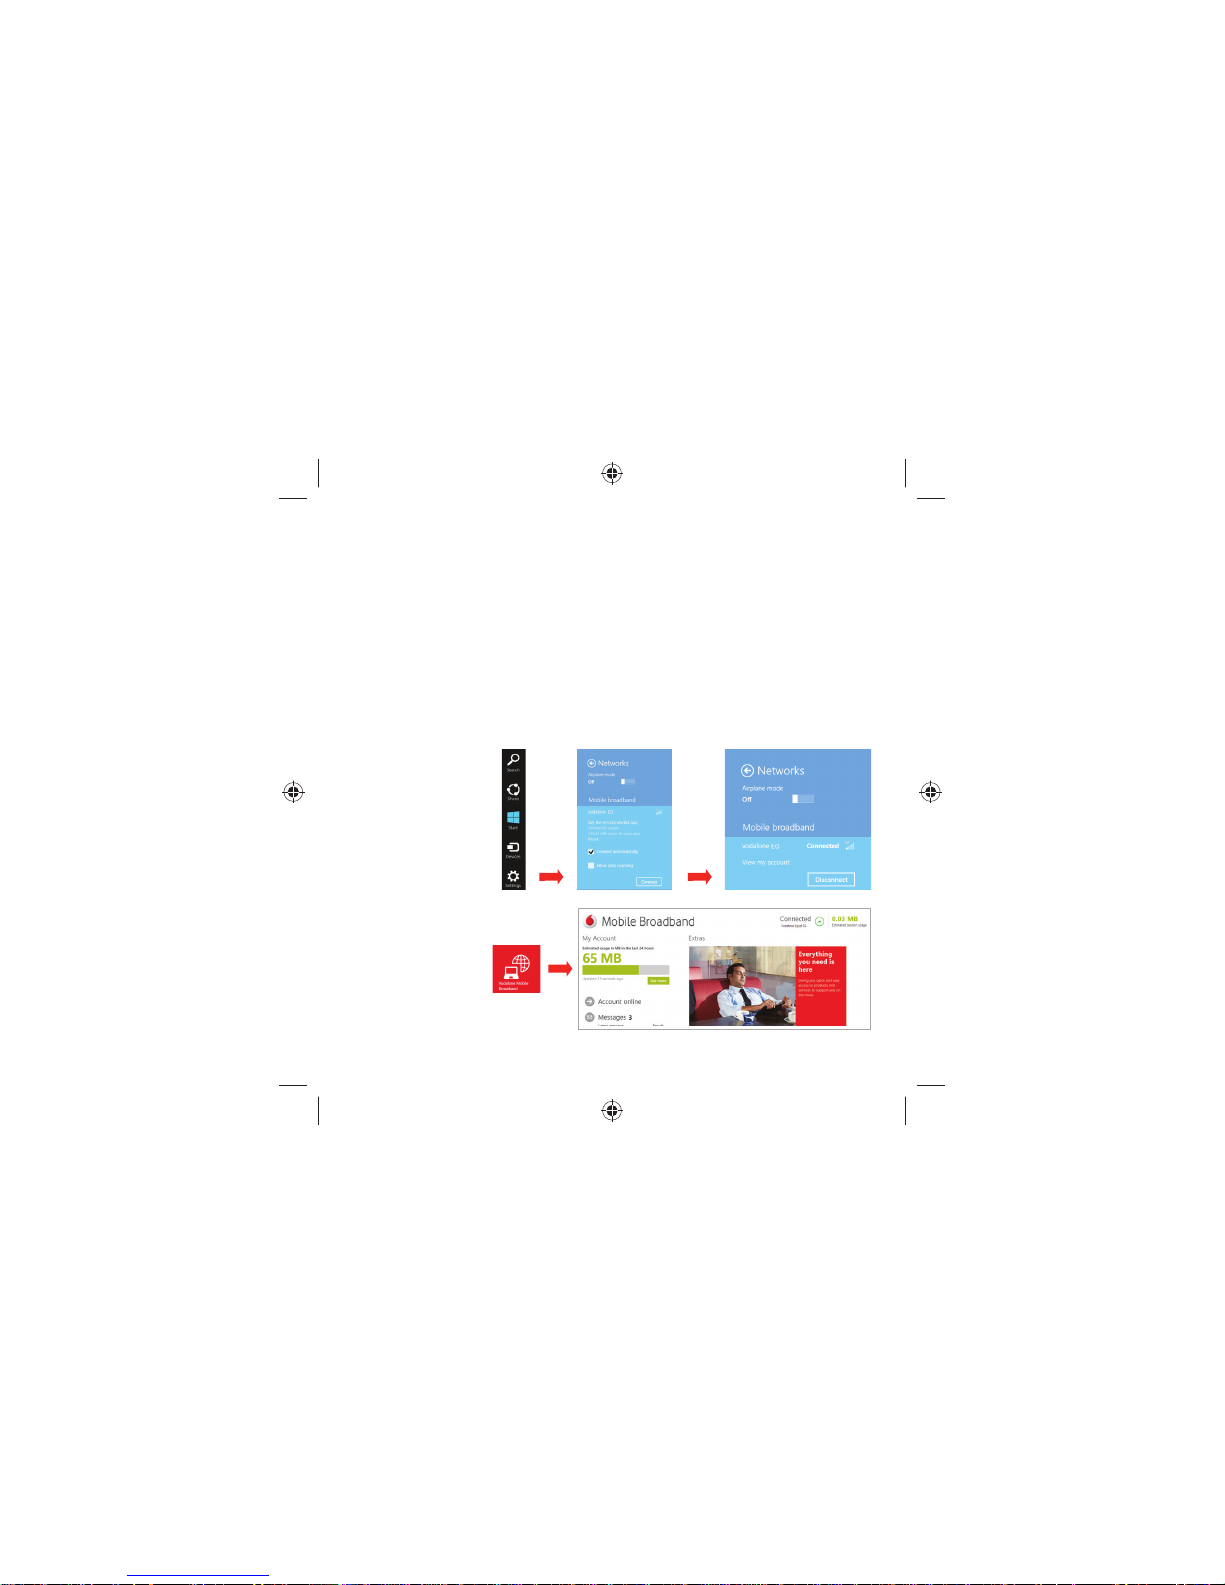
On a Windows 8 PC t he Mobile Broadband us er experience is
slightly different as the mobile net work connectivity is managed
withi n the Windows 8 operat ing system. When you plug in th e
USB Stick, you ne ed to open the ‘charms’ (Search, Share , Start,
Device and Set tings), and select Settings > Networks (or Your
Wi-F i Network Name) > Mobile Broadband.
Select
Connect Automatically if required, then click Connect .
Initially the Con nection Manager wi ll show ‘Get recommended
app’ and t his will chang e to ‘View my account’ w hen the Mobile
Broadband app lication has be en automatically downloaded by
Windows 8.
Windows 8
installation
and user
experience
Note:
The Mobile Broadband
application can be
launched by selecting
the application Tile or
View My Account Link in
the Networks area of the
Settings charm

4
Connection
window
Connect /Disconnect
Connec t to the internet v ia the mobile pho ne network or
Wi-Fi, to browse the web or use email
Status
Check th e status of the current connec tion
Shortcuts
Select ser vices, applicatio ns and tools
Menu bar
Device and net work setti ngs and diagnostics , SMS
functionality, manage your account.
Help
View Help topics
Always Best Connected
Confi gure connection preferences
4
5
3
1
2
6
Note: On ce setup
is comp lete, you
can alw ays access
the Voda fone
Mobile Broadband
application when
your US B Stick
is inserted into
your computer by
click ing the desk top
icon
4
5
3
2
1
6
5
3
5
1
2
Note: Every window
in the QuickStart
application has this
same standard layout.
Context-sensitive
help for each window
is always available
at the bottom of the
window.
Sometimes an
additional Menu bar
will appear on the left
of the window
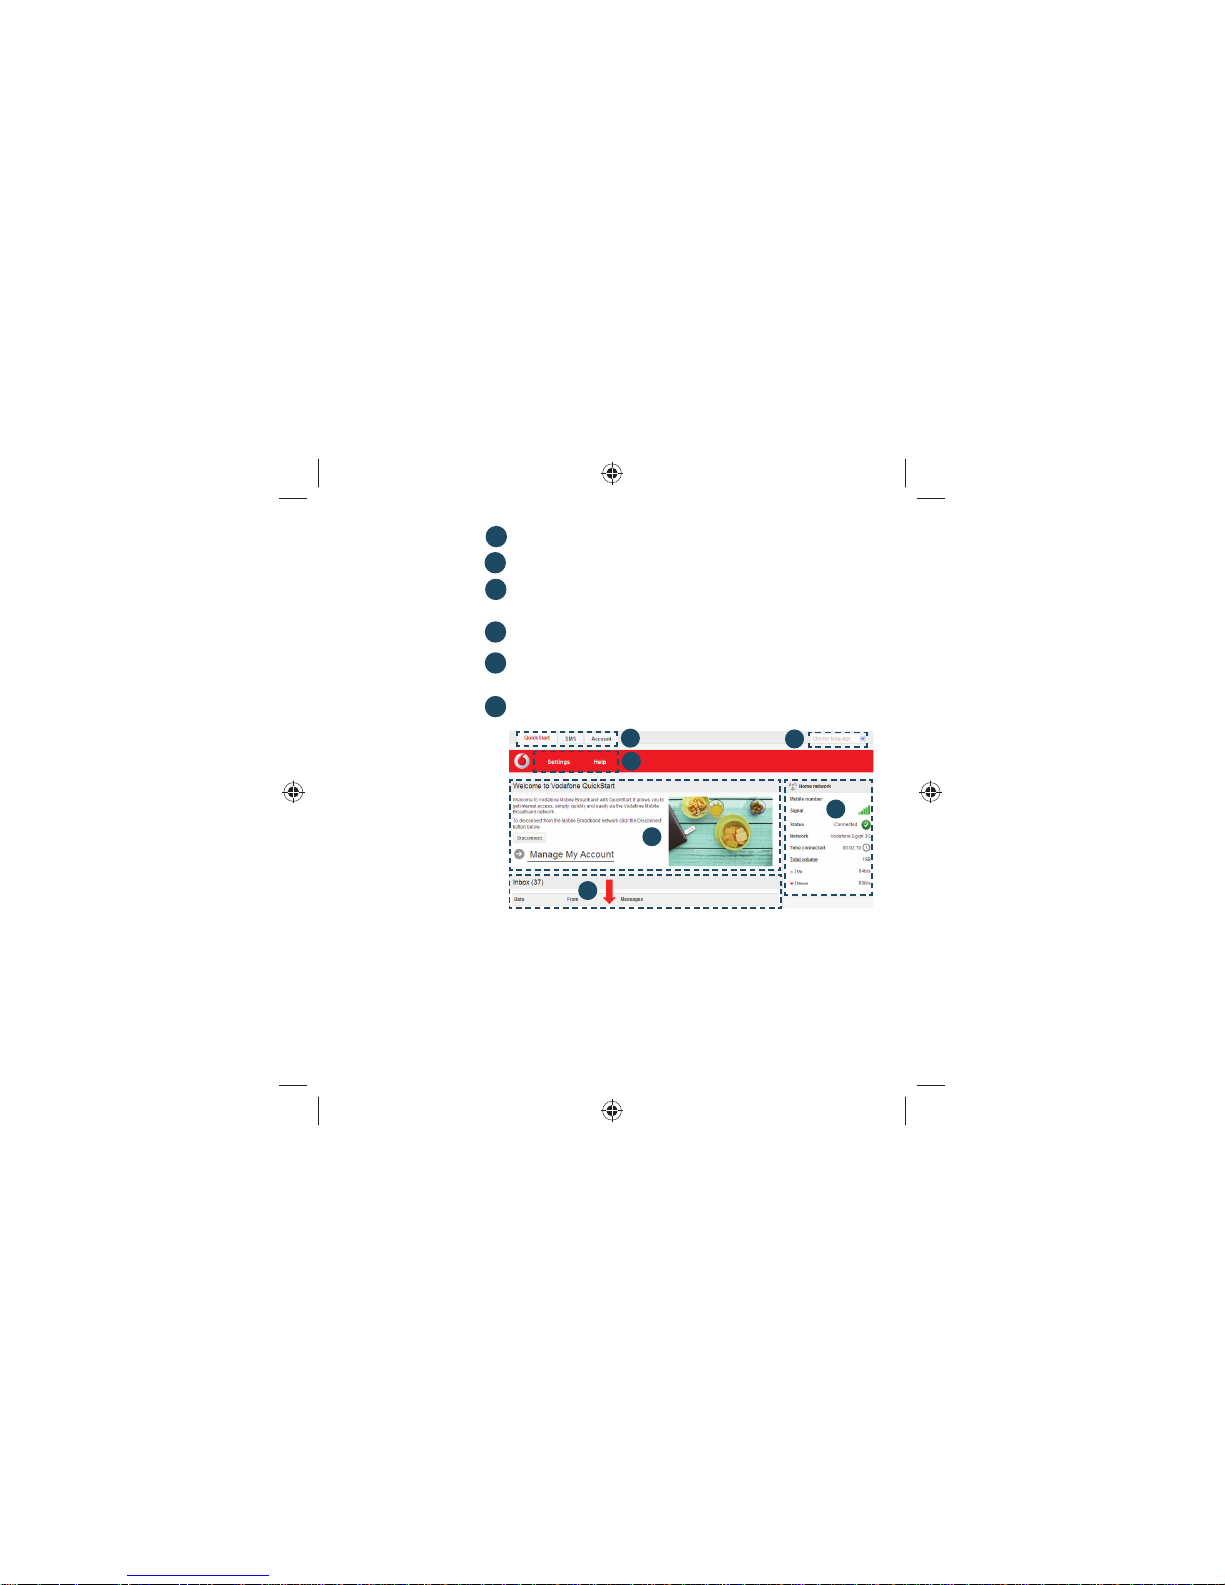
Navigation tabs – Select Q uickStart, SMS or Account v iew
Navigation bar – Select an area within each view
Current network pan el – Status of mobile broadband
network connection
Content area – Content fo r current area
Context help – Context-sensitive help for current area
(scroll down )
Language selection – Defaults to browser la nguage
QuickStart
window
layout
4
6
In the QuickSt art view Set tings area you can:
Set opti ons for automatic connection to the mobi le network –
Specify the S IM PIN number (if requi red by your netw ork) –
Set othe r options via th e Menu bar on the lef t-hand side of t he –
window.
6
1
2
3
4
5
6
Note: Whenever you
insert your USB Stick
into your computer
you are connected to
the mobile network.
If you are running
Linux you will need
to open the browser
manually.
Automatic network
connection can be
disabled from the
Settings area in the
QuickStart view.
The QuickStart
application can also
be accessed from
the Vodafone Mobile
Broadband desktop
icon.
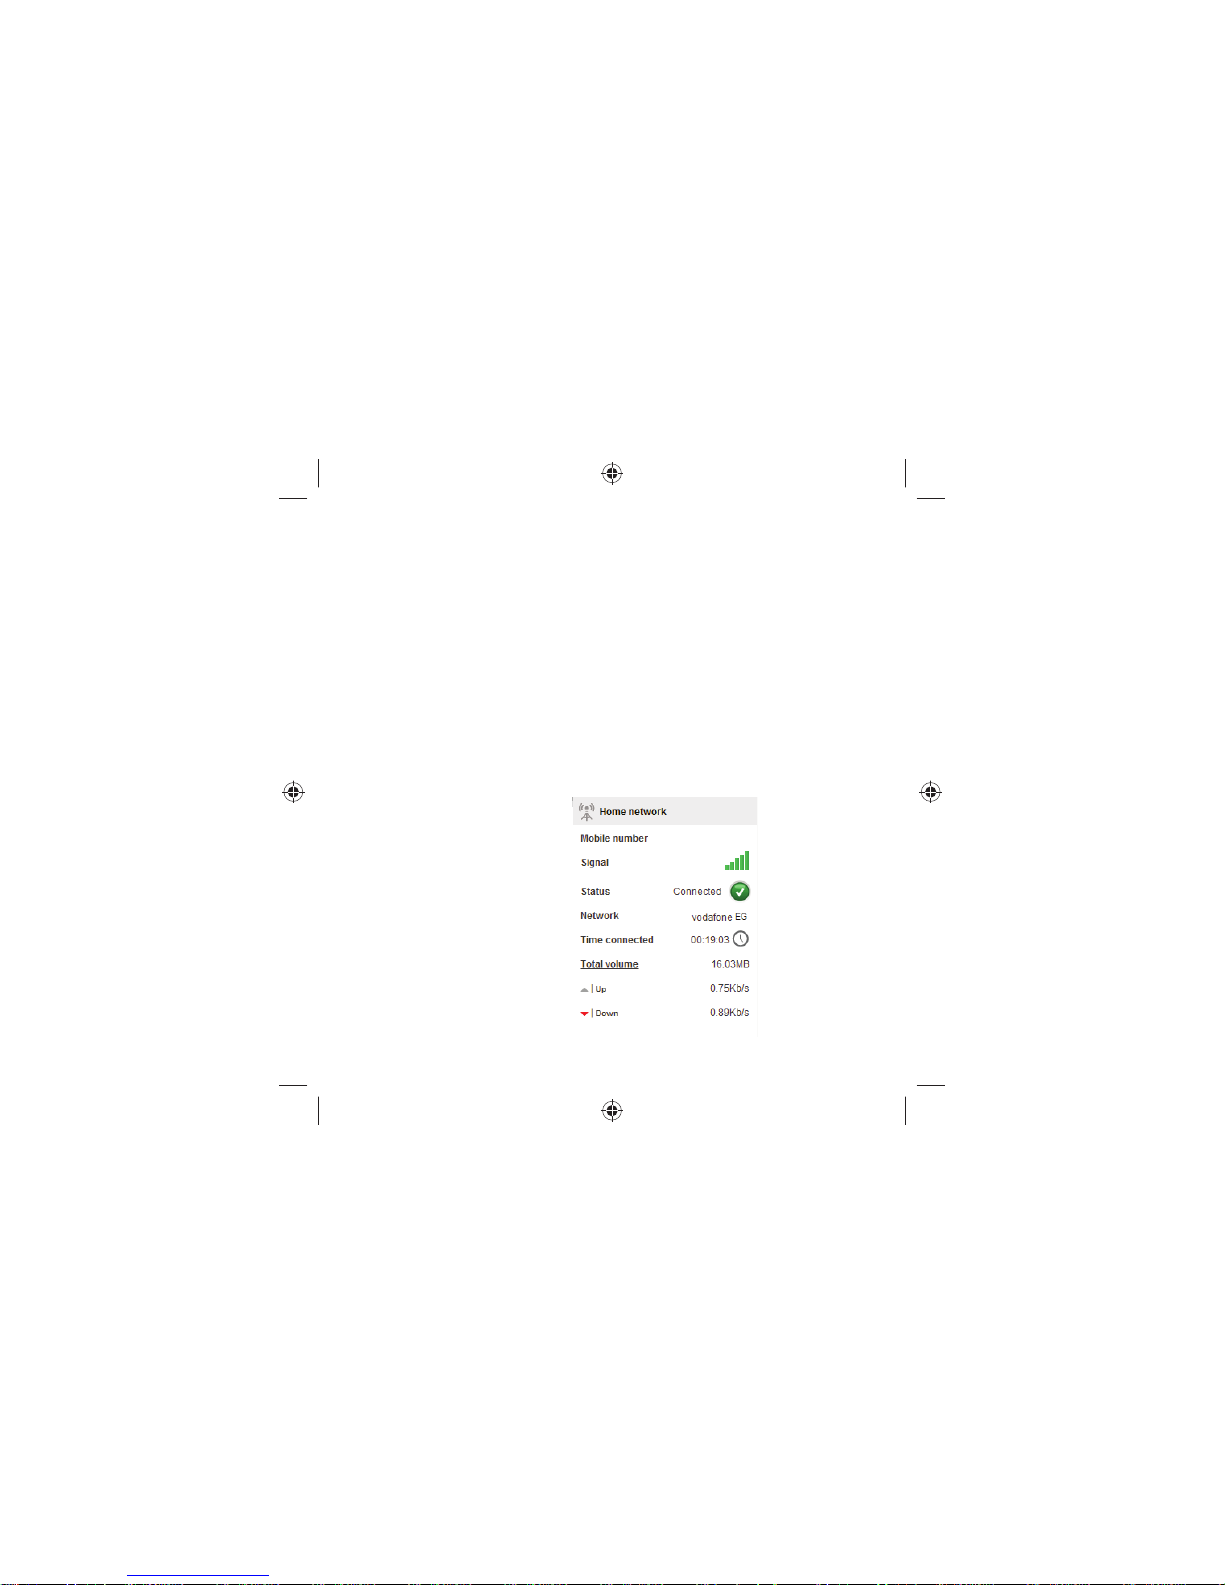
The Current net work panel appears on the ri ght-hand side
of ever y screen within the QuickSt art application. ‘Roaming
network’ is displ ayed when you are r oaming on another
operator’s network, or ‘Home network’.
Mobile number – Shown if permitted by your network oper ator
Signal – More bars indicates bet ter mobile broad band networ k
signal
Status – Tick when co nnected to net work; Cross w hen not
connected
Network – Name and typ e of currently connected network
Time connected – For current connecti on to network
Tot al vo lum e – Approx imate cumulat ive data usage
Up / Down – A pproximate connection speed: ‘U p’ to the
network from your computer, and ‘Down’ from the network
QuickStart
view: Current
network panel
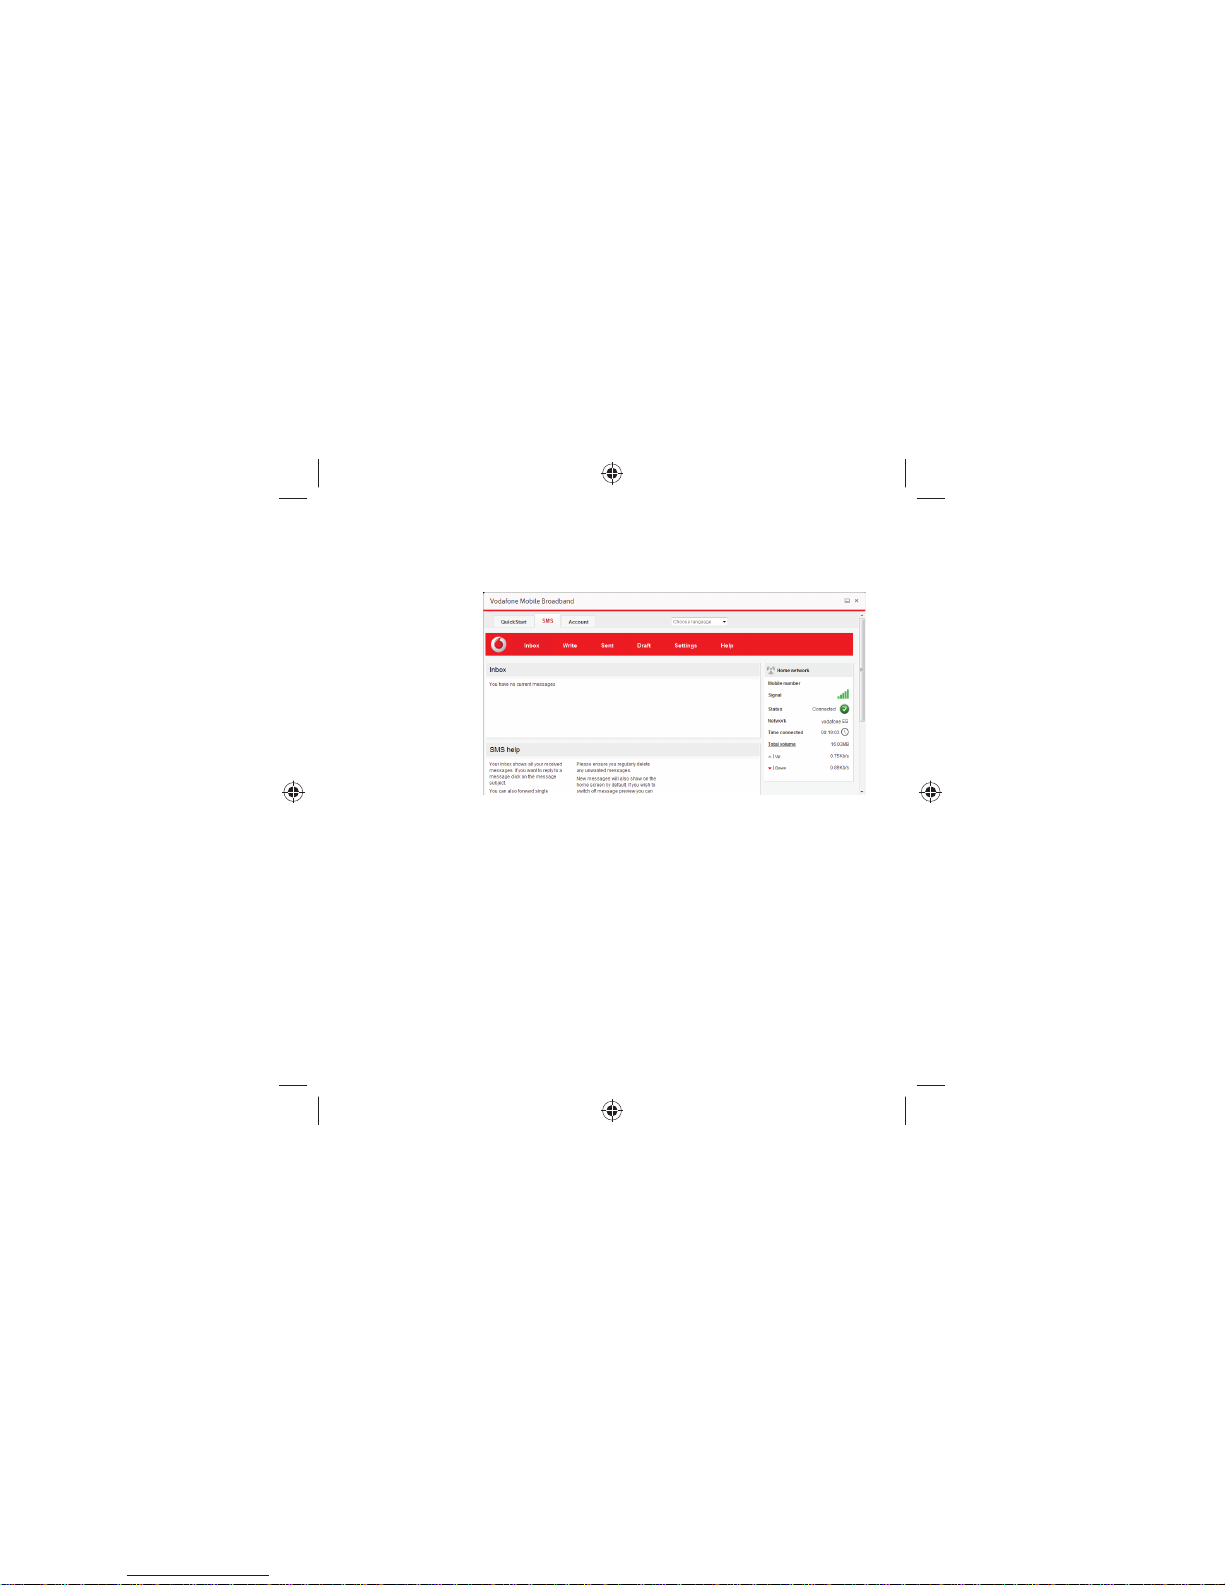
7
The SMS v iew has six opti ons on the Navigation bar covering
all messaging functions: Inbox , Write, Sent, Draf t, Settings
and Help.
Note: When you
select the checkbox
in the title bar of the
Inbox, Sent folder
or Draft folder, all
messages in that
folder are selected.
This is useful if
you want to delete
multiple messages.
It is not possible to
forward multiple
messages.
In the Settings area
you can select or
de-select the SMS
preview in the
QuickStart view.
SMS view
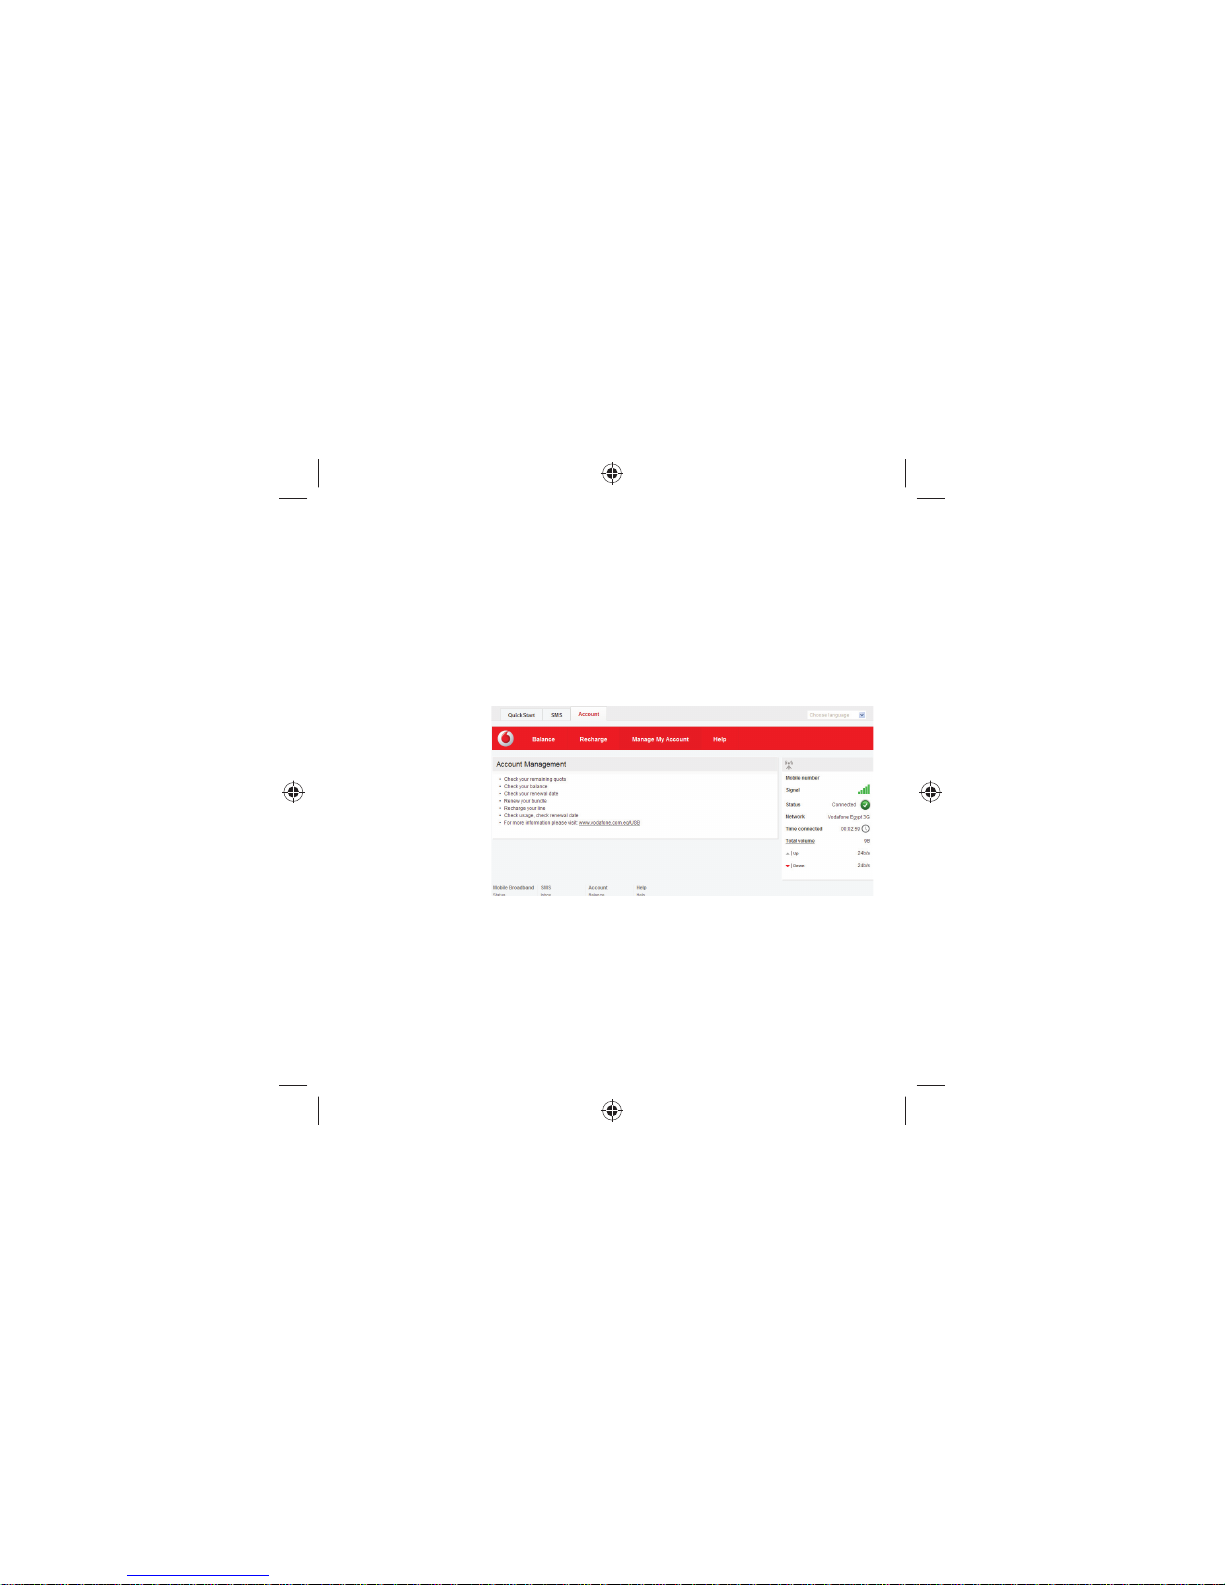
8
The Account view has thre e options on the Navigation bar :
Account d etails, Acco unt type and He lp. For prepaid account
custom ers there are t wo additional options: Ba lance and
Top Up.
For prepa id accounts, t he Balance area shows your current
account b alance. Click the Refresh button to update the
balance value . The TopUp area allows you to top up a pr epaid
account b alance using e ither a voucher, or a credit o r debit card.
Note: The options
that are displayed on
the Navigation bar
are dependent on the
account type selected.
Account
view

9
Signal strength
The LED light on your USB Stick shows which kind of mobile
network has been foun d, and whethe r the USB Stick is
connec ted to that network.
Green blinking
A GPRS networ k has been found – you could connect
Green solid
Connec ted via GPRS
Blue blinking
A 3G network has been foun d – you could connec t
Blue solid
Connected via 3G
Light blue solid
Connec ted via 3G Broadband.
The strength of the mobile or Wi -Fi network sign al is shown
by the sy mbol to the left of t he Connect but ton, and by the
icon in th e Windows Notifi cation area.
The more bars th at are fi lled in, the bet ter the signal quality.
At least one bar mus t be fi l led in order to conn ect.
USB Stick LED
lights

10
Install problems on PC with older version of VMB
If you had a problem ins talling the sof tware (the symptoms
could be any of the following):
– a new desktop icon for VMB was not created on your
desktop, or
– when you run VMB from the desktop shortcut you do not
get a new software splash screen displayed which says
“Vodafone Mobile Broadband with QuickStart”, or
– when you inser t the device you do not see it appear as a CD
ROM device on your computer, or
– when running VMB you receive a “Device Not Detected”
message.
The cause of the problem could be an issue with an
incomplete un-install of an earlier version of the Vodafone
Mobile Broadband soft ware already installed for an older
device. This problem may appear on all PCs with Windows
operating systems. It should not occur on Apple devices.
Vodafone have developed a clean-up tool to remove the old
version of the sof tware correctly, it is available from
www.support.vodafone.com/vmb_cleanup.
Download the clean-up tool and unzip the fi les. After
removing the current VMB soft ware (remove using Windows),
run the clean-up tool (VmbCleanup.exe) and select all
3
options – Settings, Data and Device Registration. Re-boot
your PC and then insert your new USB Stick, and the correct
VMB software should install automatically.
Hints and tips
Note: The correct
software has the
“Vodafone Mobile
Broadband with
QuickStart” splashscreen, and you
should be able
to access all the
functions referenced
in this QSG by clicking
on the Vodafone
Mobile Broadband
desktop icon.
 Loading...