

Page 1

vShield Administration Guide
vShield Manager 5.0
vShield App 5.0
vShield Edge 5.0
vShield Endpoint 5.0
This document supports the version of each product listed and
supports all subsequent versions until the document is replaced
by a new edition. To check for more recent editions of this
document, see http://www.vmware.com/support/pubs.
EN-000694-01
Page 2

vShield Administration Guide
You can find the most up-to-date technical documentation on the VMware Web site at:
http://www.vmware.com/support/
The VMware Web site also provides the latest product updates.
If you have comments about this documentation, submit your feedback to:
docfeedback@vmware.com
Copyright © 2010, 2011 VMware, Inc. All rights reserved. This product is protected by U.S. and international copyright and
intellectual property laws. VMware products are covered by one or more patents listed at
http://www.vmware.com/go/patents.
VMware is a registered trademark or trademark of VMware, Inc. in the United States and/or other jurisdictions. All other marks
and names mentioned herein may be trademarks of their respective companies.
VMware, Inc.
3401 Hillview Ave.
Palo Alto, CA 94304
www.vmware.com
2 VMware, Inc.
Page 3

Contents
About This Book 7
Overview of vShield 9
1
About vShield Components 9
Migration of vShield Components 11
About VMware Tools on vShield Components 11
Ports Required for vShield Communication 11
vShield Manager User Interface Basics 13
2
Log in to the vShield Manager User Interface 13
About the vShield Manager User Interface 14
Management System Settings 17
3
Connect to Your vCenter Server 17
Register the vShield Manager as a vSphere Client Plug-In 18
Identify DNS Services 18
Set the vShield Manager Date and Time 19
Download a Technical Support Log from a Component 19
View vShield Manager Status 19
Add an SSL Certificate to Identify the vShield Manager Web Service 20
User Management 21
4
Managing User Accounts 21
Managing the Default User Account 22
Add a User Account 22
Edit a User Account 23
Change a User Role 23
Disable or Enable a User Account 24
Delete a User Account 24
VMware, Inc.
Updating System Software 25
5
View the Current System Software 25
Upload an Update 25
Backing Up vShield Manager Data 27
6
Back Up Your vShield Manager Data on Demand 27
Schedule a Backup of vShield Manager Data 28
Restore a Backup 29
System Events and Audit Logs 31
7
View the System Event Report 31
3
Page 4

vShield Administration Guide
vShield Manager Virtual Appliance Events 31
vShield App Events 32
About the Syslog Format 33
View the Audit Log 33
vShield Edge Management 35
8
View the Status of a vShield Edge 35
Specify a Remote Syslog Server 36
Managing the vShield Edge Firewall 36
Managing NAT Rules 40
Managing DHCP Service 41
Managing VPN Service 42
Add a Static Route 45
Manage Load Balancer Service 45
Start or Stop vShield Edge Services 46
Upgrade vShield Edge Software 46
Re-deploy vShield Edge 47
vShield App Management 49
9
Send vShield App System Events to a Syslog Server 49
View the Current System Status of a vShield App 50
vShield App Flow Monitoring 51
10
Understanding the Flow Monitoring Display 51
Change the Date Range of the Flow Monitoring Charts 52
View a Specific Application in the Flow Monitoring Charts 52
View the Flow Monitoring Report 53
Delete All Recorded Flows 54
vShield App Firewall Management 55
11
Using App Firewall 55
Working with Applications 57
Grouping Objects 58
Working with Application Firewall Rules 59
Using SpoofGuard 61
vShield Endpoint Events and Alarms 65
12
View vShield Endpoint Status 65
vShield Endpoint Alarms 66
vShield Endpoint Events 66
vShield Endpoint Audit Messages 67
vShield Data Security Management 69
13
vShield Data Security User Roles 69
Defining a Data Security Policy 70
Editing a Data Security Policy 72
Running a Data Security Scan 72
Analyzing Results 73
4 VMware, Inc.
Page 5

Creating Regular Expressions 74
Available Regulations 75
Available Content Blades 90
Supported File Formats 109
Contents
Troubleshooting 115
14
Troubleshoot vShield Manager Installation 115
Troubleshooting Operational Issues 116
Troubleshooting vShield Edge Issues 117
Troubleshoot vShield Endpoint Issues 119
Troubleshooting vShield Data Security Issues 120
Index 123
VMware, Inc. 5
Page 6

vShield Administration Guide
6 VMware, Inc.
Page 7

About This Book
This manual, the vShield Administration Guide, describes how to install, configure, monitor, and maintain the
VMware®vShield™ system by using the vShield Manager user interface, the vSphere Client plug-in, and
command line interface (CLI). The information includes step-by-step configuration instructions, and suggested
best practices.
Intended Audience
This manual is intended for anyone who wants to install or use vShield in a VMware vCenter environment.
The information in this manual is written for experienced system administrators who are familiar with virtual
machine technology and virtual datacenter operations. This manual assumes familiarity with VMware
Infrastructure 4.x, including VMware ESX, vCenter Server, and the vSphere Client.
VMware Technical Publications Glossary
VMware Technical Publications provides a glossary of terms that might be unfamiliar to you. For definitions
of terms as they are used in VMware technical documentation, go to http://www.vmware.com/support/pubs.
Document Feedback
VMware welcomes your suggestions for improving our documentation. If you have comments, send your
feedback to docfeedback@vmware.com.
Technical Support and Education Resources
The following technical support resources are available to you. To access the current version of this book and
other books, go to http://www.vmware.com/support/pubs.
Online and Telephone
Support
Support Offerings
VMware Professional
Services
VMware, Inc. 7
To use online support to submit technical support requests, view your product
and contract information, and register your products, go to
http://www.vmware.com/support.
Customers with appropriate support contracts should use telephone support
for the fastest response on priority 1 issues. Go to
http://www.vmware.com/support/phone_support.html.
To find out how VMware support offerings can help meet your business needs,
go to http://www.vmware.com/support/services.
VMware Education Services courses offer extensive hands-on labs, case study
examples, and course materials designed to be used as on-the-job reference
tools. Courses are available onsite, in the classroom, and live online. For onsite
pilot programs and implementation best practices, VMware Consulting
Page 8

vShield Administration Guide
Services provides offerings to help you assess, plan, build, and manage your
virtual environment. To access information about education classes,
certification programs, and consulting services, go to
http://www.vmware.com/services.
8 VMware, Inc.
Page 9

Overview of vShield 1
VMware® vShield is a suite of security virtual appliances built for VMware vCenter Server and VMware ESX
integration. vShield is a critical security component for protecting virtualized datacenters from attacks and
misuse helping you achieve your compliance-mandated goals.
This guide assumes you have administrator access to the entire vShield system. The viewable resources in the
vShield Manager user interface can differ based on the assigned role and rights of a user, and licensing. If you
are unable to access a screen or perform a particular task, consult your vShield administrator.
n
About vShield Components on page 9
vShield includes components and services essential for protecting virtual machines. vShield can be
configured through a web-based user interface, a vSphere Client plug-in, a command line interface (CLI),
and REST API.
n
Migration of vShield Components on page 11
The vShield Manager and vShield Edge virtual appliances can be automatically or manually migrated
based on DRS and HA policies. The vShield Manager must always be up, so you must migrate the vShield
Manager whenever the current ESX host undergoes a reboot or maintenance mode routine.
n
About VMware Tools on vShield Components on page 11
Each vShield virtual appliance includes VMware Tools. Do not upgrade or uninstall the version of
VMware Tools included with a vShield virtual appliance.
n
Ports Required for vShield Communication on page 11
About vShield Components
vShield includes components and services essential for protecting virtual machines. vShield can be configured
through a web-based user interface, a vSphere Client plug-in, a command line interface (CLI), and REST API.
To run vShield, you need one vShield Manager virtual machine and at least one vShield App or vShield Edge
module.
vShield Manager
The vShield Manager is the centralized network management component of vShield and is installed from OVA
as a virtual machine by using the vSphere Client. Using the vShield Manager user interface, administrators
install, configure, and maintain vShield components. A vShield Manager can run on a different ESX host from
your vShield App and vShield Edge modules.
The vShield Manager leverages the VMware Infrastructure SDK to display a copy of the vSphere Client
inventory panel.
For more on the using the vShield Manager user interface, see Chapter 2, “vShield Manager User Interface
Basics,” on page 13.
VMware, Inc.
9
Page 10

vShield Administration Guide
vShield Edge
vShield Edge provides network edge security and gateway services to isolate the virtual machines in a port
group, vDS port group, or Cisco® Nexus 1000V. The vShield Edge connects isolated, stub networks to shared
(uplink) networks by providing common gateway services such as DHCP, VPN, NAT, and Load Balancing.
Common deployments of vShield Edge include in the DMZ, VPN Extranets, and multi-tenant Cloud
environments where the vShield Edge provides perimeter security for Virtual Datacenters (VDCs).
NOTE You must obtain an evaluation or full license to use vShield Edge.
Standard vShield Edge
Services (Including
n
Firewall: Supported rules include IP 5-tuple configuration with IP and port
ranges for stateful inspection for TCP, UDP, and ICMP.
Cloud Director)
n
Network Address Translation: Separate controls for Source and
Destination IP addresses, as well as TCP and UDP port translation.
n
Dynamic Host Configuration Protocol (DHCP): Configuration of IP pools,
gateways, DNS servers, and search domains.
Advanced vShield Edge
Services
n
Site-to-Site Virtual Private Network (VPN): Uses standardized IPsec
protocol settings to interoperate with all major firewall vendors.
n
Load Balancing: Simple and dynamically configurable virtual IP addresses
and server groups.
vShield Edge supports syslog export for all services to remote servers.
vShield App
vShield App is an interior, vNIC-level firewall that allows you to create access control policies regardless of
network topology. A vShield App monitors all traffic in and out of an ESX host, including between virtual
machines in the same port group. vShield App includes traffic analysis and container-based policy creation.
vShield App installs as a hypervisor module and firewall service virtual appliance. vShield App integrates
with ESX hosts through VMsafe APIs and works with VMware vSphere platform features such as DRS,
vMotion, DPM, and maintenance mode.
vShield App provides firewalling between virtual machines by placing a firewall filter on every virtual network
adapter. The firewall filter operates transparently and does not require network changes or modification of IP
addresses to create security zones. You can write access rules by using vCenter containers, like datacenters,
cluster, resource pools and vApps, or network objects, like Port Groups and VLANs, to reduce the number of
firewall rules and make the rules easier to track.
You should install vShield App instances on all ESX hosts within a cluster so that VMware vMotion™
operations work and virtual machines remain protected as they migrate between ESX hosts. By default, a
vShield App virtual appliance cannot be moved by using vMotion.
The Flow Monitoring feature displays allowed and blocked network flows at the application protocol level.
You can use this information to audit network traffic and troubleshoot operational.
NOTE You must obtain an evaluation or full license to use vShield App.
10 VMware, Inc.
Page 11

vShield Endpoint
vShield Endpoint offloads antivirus and anti-malware agent processing to a dedicated secure virtual appliance
delivered by VMware partners. Since the secure virtual appliance (unlike a guest virtual machine) doesn't go
offline, it can continuously update antivirus signatures thereby giving uninterrupted protection to the virtual
machines on the host. Also, new virtual machines (or existing virtual machines that went offline) are
immediately protected with the most current antivirus signatures when they come online.
vShield Endpoint installs as a hypervisor module and security virtual appliance from a third-party antivirus
vendor (VMware partners) on an ESX host.
NOTE You must obtain an evaluation or full license to use vShield Endpoint.
vShield Data Security
vShield Data Security provides visibility into sensitive data stored within your organization's virtualized and
cloud environments. Based on the violations reported by vShield Data Security, you can ensure that sensitive
data is adequately protected and assess compliance with regulations around the world.
Migration of vShield Components
Chapter 1 Overview of vShield
The vShield Manager and vShield Edge virtual appliances can be automatically or manually migrated based
on DRS and HA policies. The vShield Manager must always be up, so you must migrate the vShield Manager
whenever the current ESX host undergoes a reboot or maintenance mode routine.
Each vShield Edge should move with its secured port group to maintain security settings and services.
vShield App, vShield Endpoint, or vShield Data Security cannot be moved to another ESX host. If the ESX host
on which these components reside requires a manual maintenance mode operation, you must de-select the
Move powered off and suspended virtual machines to other hosts in the cluster check box to ensure these
virtual appliances are not migrated. These services restart after the ESX host comes online.
About VMware Tools on vShield Components
Each vShield virtual appliance includes VMware Tools. Do not upgrade or uninstall the version of VMware
Tools included with a vShield virtual appliance.
Ports Required for vShield Communication
The vShield Manager requires the following ports to be open:
n
Access to ESX hosts: 902/TCP and 903/TCP
n
REST API: 80/TCP and 443/TCP
n
Graphical User Interface: 80/TCP to 443/TCP and initiates connections to vSphere vCenter SDK.
n
SSH access to the CLI (not enabled by default): 22/TCP
VMware, Inc. 11
Page 12

vShield Administration Guide
12 VMware, Inc.
Page 13

vShield Manager User Interface Basics 2
The vShield Manager user interface offers configuration and data viewing options specific to vShield use. By
utilizing the VMware Infrastructure SDK, the vShield Manager displays your vSphere Client inventory panel
for a complete view of your vCenter environment.
NOTE You can register the vShield Manager as a vSphere Client plug-in. This allows you to configure vShield
components from within the vSphere Client. For more, see “Register the vShield Manager as a vSphere Client
Plug-In,” on page 18.
n
Log in to the vShield Manager User Interface on page 13
You access the vShield Manager management interface by using a Web browser.
n
About the vShield Manager User Interface on page 14
The vShield Manager user interface is divided into two panels: the inventory panel and the configuration
panel. You select a view and a resource from the inventory panel to open the available details and
configuration options in the configuration panel.
Log in to the vShield Manager User Interface
You access the vShield Manager management interface by using a Web browser.
VMware, Inc.
Procedure
1 Open a Web browser window and type the IP address assigned to the vShield Manager.
The vShield Manager user interface opens in an SSH session.
2 Accept the security certificate.
NOTE To use an SSL certificate for authentication, see “Add an SSL Certificate to Identify the vShield
Manager Web Service,” on page 20.
The vShield Manager login screen appears.
3 Log in to the vShield Manager user interface by using the username admin and the password default.
You should change the default password as one of your first tasks to prevent unauthorized use. See “Edit
a User Account,” on page 23.
4 Click Log In.
13
Page 14
vShield Administration Guide
About the vShield Manager User Interface
The vShield Manager user interface is divided into two panels: the inventory panel and the configuration panel.
You select a view and a resource from the inventory panel to open the available details and configuration
options in the configuration panel.
When clicked, each inventory object has a specific set of tabs that appear in the configuration panel.
n
vShield Manager Inventory Panel on page 14
The vShield Manager inventory panel hierarchy mimics the vSphere Client inventory hierarchy.
n
vShield Manager Configuration Panel on page 15
The vShield Manager configuration panel presents the settings that can be configured based on the
selected inventory resource and the output of vShield operation. Each resource offers multiple tabs, each
tab presenting information or configuration forms corresponding to the resource.
vShield Manager Inventory Panel
The vShield Manager inventory panel hierarchy mimics the vSphere Client inventory hierarchy.
Resources include the root folder, datacenters, clusters, port groups, ESX hosts, and virtual machines, including
your installed vShield App and vShield Edge modules. As a result, the vShield Manager maintains solidarity
with your vCenter Server inventory to present a complete view of your virtual deployment. The vShield
Manager is the only virtual machine that does not appear in the vShield Manager inventory panel. vShield
Manager settings are configured from the Settings & Reports resource atop the inventory panel.
The inventory panel offers multiple views: Hosts & Clusters, Networks, and Secured Port Groups. The Hosts
& Clusters view displays the datacenters, clusters, resource pools, and ESX hosts in your inventory. The
Networks view displays the VLAN networks and port groups in your inventory. The Secured Port Groups
view displays the port groups protected by vShield Edge instances. The Hosts & Clusters and Networks views
are consistent with the same views in the vSphere Client.
There are differences in the icons for virtual machines and vShield components between the vShield Manager
and the vSphere Client inventory panels. Custom icons are used to show the difference between vShield
components and virtual machines, and the difference between protected and unprotected virtual machines.
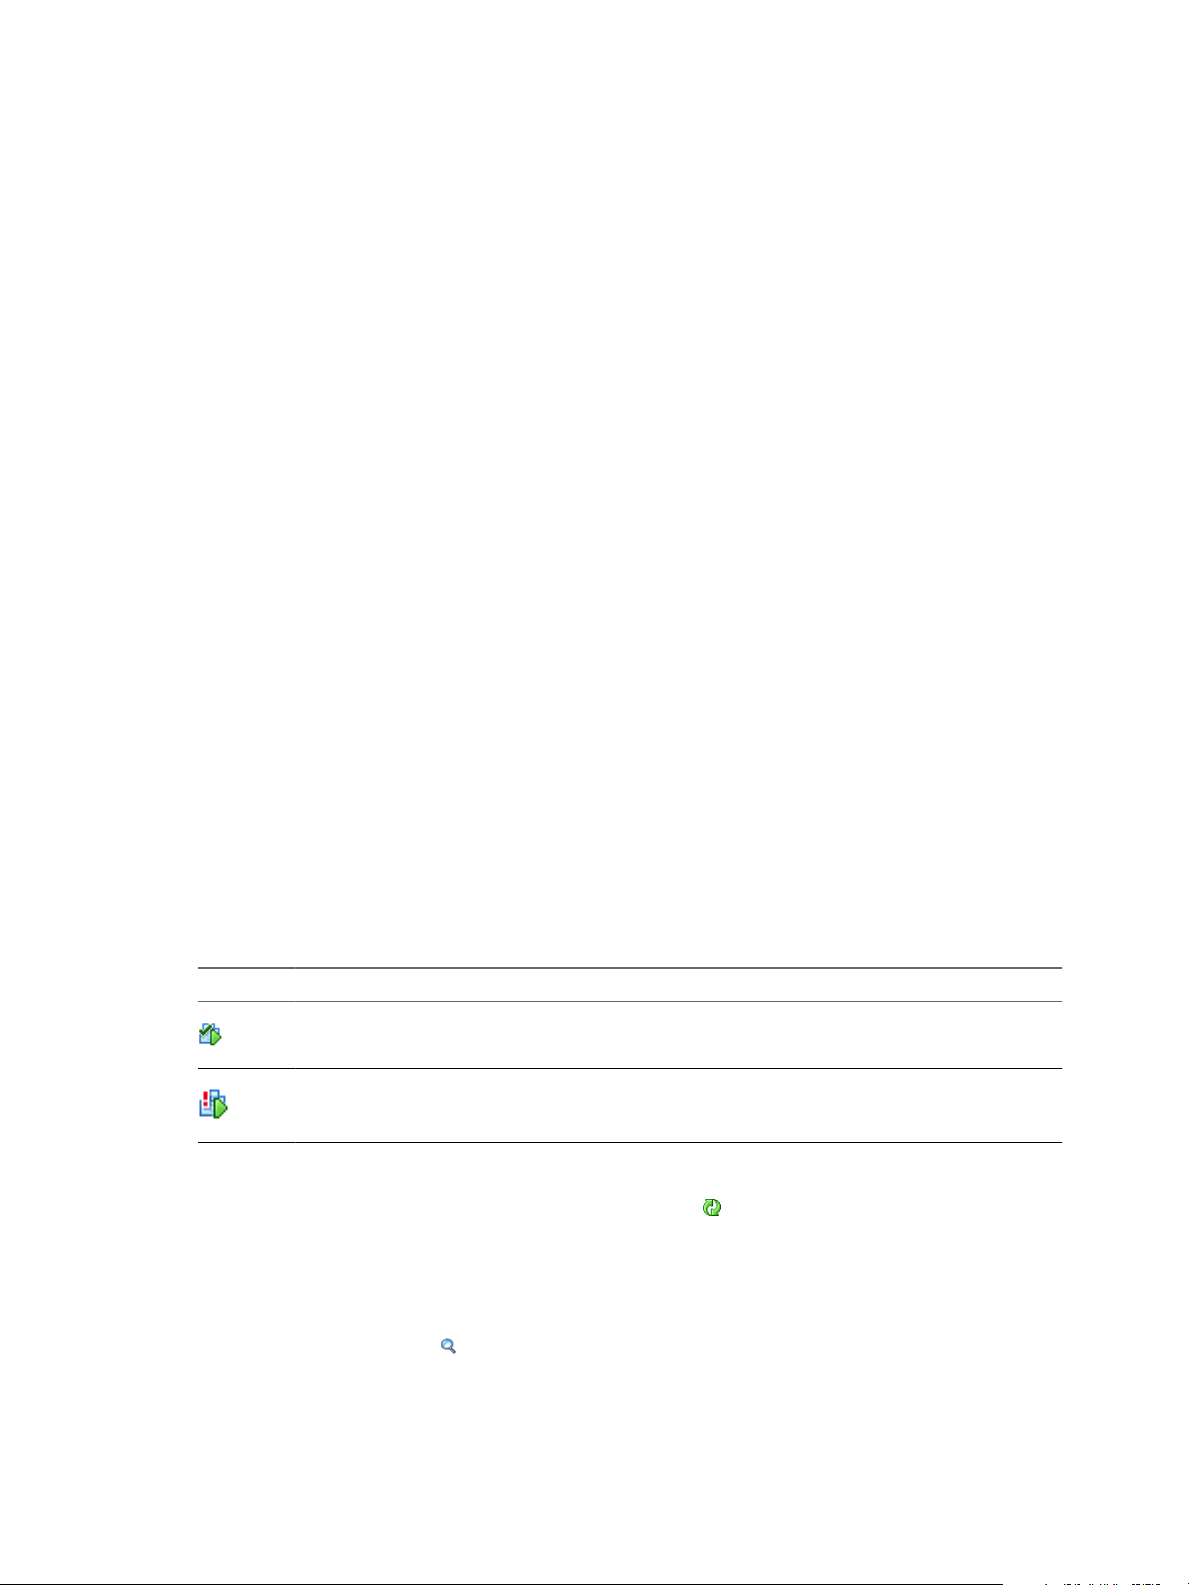
Table 2-1. vShield Virtual Machine Icons in the vShield Manager Inventory Panel
Icon Description
n
Refreshing the Inventory Panel on page 15
To refresh the list of resources in the inventory panel, click
A powered on virtual machine that is protected by a vShield App.
A powered on virtual machine that is not protected by a vShield App.
. The refresh action requests the latest
resource information from the vCenter Server. By default, the vShield Manager requests resource
information from the vCenter Server every five minutes.
n
Searching the Inventory Panel on page 15
To search the inventory panel for a specific resource, type a string in the field atop the vShield Manager
inventory panel and click .
14 VMware, Inc.
Page 15

Chapter 2 vShield Manager User Interface Basics
Refreshing the Inventory Panel
To refresh the list of resources in the inventory panel, click . The refresh action requests the latest resource
information from the vCenter Server. By default, the vShield Manager requests resource information from the
vCenter Server every five minutes.
Searching the Inventory Panel
To search the inventory panel for a specific resource, type a string in the field atop the vShield Manager
inventory panel and click .
vShield Manager Configuration Panel
The vShield Manager configuration panel presents the settings that can be configured based on the selected
inventory resource and the output of vShield operation. Each resource offers multiple tabs, each tab presenting
information or configuration forms corresponding to the resource.
Because each resource has a different purpose, some tabs are specific to certain resources. Also, some tabs have
a second level of options.
VMware, Inc. 15
Page 16

vShield Administration Guide
16 VMware, Inc.
Page 17

Management System Settings 3
The vShield Manager requires communication with your vCenter Server and services such as DNS and NTP
to provide details on your VMware Infrastructure inventory.
This chapter includes the following topics:
n
“Connect to Your vCenter Server,” on page 17
n
“Register the vShield Manager as a vSphere Client Plug-In,” on page 18
n
“Identify DNS Services,” on page 18
n
“Set the vShield Manager Date and Time,” on page 19
n
“Download a Technical Support Log from a Component,” on page 19
n
“View vShield Manager Status,” on page 19
n
“Add an SSL Certificate to Identify the vShield Manager Web Service,” on page 20
Connect to Your vCenter Server
Connecting to your vCenter Server enables the vShield Manager to display your VMware Infrastructure
inventory.
VMware, Inc.
Procedure
1 Log in to the vShield Manager.
Upon initial login, the vShield Manager opens to the Configuration > vCenter tab. If you have previously
configured the vCenter tab form, perform the following steps:
a Click the Settings & Reports from the vShield Manager inventory panel.
b Click the Configuration tab.
The vCenter screen appears.
2 Under vCenter Server Information, type the IP address of your vCenter Server in theServer IP
Address/Name field.
3 Type your vSphere Client login user name in the Administrator User Name field.
This user account must have administrator access.
4 Type the password associated with the user name in the Password field.
5 Click Save.
17
Page 18

vShield Administration Guide
The vShield Manager connects to the vCenter Server, logs on, and utilizes the VMware Infrastructure SDK to
populate the vShield Manager inventory panel. The inventory panel is presented on the left side of the screen.
This resource tree should match your VMware Infrastructure inventory panel. The vShield Manager does not
appear in the vShield Manager inventory panel.
Register the vShield Manager as a vSphere Client Plug-In
The vSphere Plug-in option lets you register the vShield Manager as a vSphere Client plug-in. After the plugin is registered, you can open the vShield Manager user interface from the vSphere Client.
Procedure
1 If you are logged in to the vSphere Client, log out.
2 Log in to the vShield Manager.
3 Click Settings & Reports from the vShield Manager inventory panel.
4 Click the Configuration tab.
The vCenter screen appears.
5 Under vSphere Plug-in, click Register.
Registration might take a few minutes.
6 Log in to the vSphere Client.
7 Select an ESX host.
8 Verify that vShield Install appears as a tab.
What to do next
You can install and configure vShield components from the vSphere Client.
Identify DNS Services
You must specify at least one DNS server during vShield Manager setup. The specified DNS servers appear
in the vShield Manager user interface.
In the vShield Manager user interface, you can specify up to three DNS servers that the vShield Manager can
use for IP address and host name resolution.
Procedure
1 Click Settings & Reports from the vShield Manager inventory panel.
2 Click the Configuration tab.
The vCenter screen appears.
3 Under DNS Servers, type an IP address in Primary DNS IP Address to identify the primary DNS server.
This server is checked first for all resolution requests.
4 (Optional) Type an IP address in the Secondary DNS IP Address field.
5 (Optional) Type an IP address in the Tertiary DNS IP Address field.
6 Click Save.
18 VMware, Inc.
Page 19

Chapter 3 Management System Settings
Set the vShield Manager Date and Time
You can set the date, time, and time zone of the vShield Manager to timestamp events and data. You can also
specify a connection to an NTP server to establish a common network time.
Procedure
1 Click Settings & Reports from the vShield Manager inventory panel.
2 Click the Configuration tab.
3 Click Date/Time.
4 In the Date and Clock field, type the date and time in the format YYYY-MM-DD HH:MM:SS.
5 In the NTP Server field, type the IP address of your NTP server.
You can type the hostname of your NTP server if you have set up DNS service.
6 From the Time Zone drop-down menu, select the appropriate time zone.
7 Click Save.
Download a Technical Support Log from a Component
You can download the system log from a vShield component to your PC. A system log can be used to
troubleshoot operational issues.
Procedure
1 Click Settings & Reports from the vShield Manager inventory panel.
2 Click the Configuration tab.
3 Click Support.
4 Under Tech Support Log Download, click Initiate next to the appropriate component.
Once initiated, the log is generated and uploaded to the vShield Manager. This might take several seconds.
5 After the log is ready, click the Download link to download the log to your PC.
The log is compressed and has the proprietary file extension .blsl.
What to do next
You can open the log using a decompression utility by browsing for All Files in the directory where you saved
the file.
View vShield Manager Status
vShield Manager shows system resource utilization.
Procedure
1 Click Settings & Reports from the vShield Manager inventory panel.
2 Click the Configuration tab.
3 Click Status.
What to do next
See “View the Current System Software,” on page 25.
VMware, Inc. 19
Page 20

vShield Administration Guide
Add an SSL Certificate to Identify the vShield Manager Web Service
You can generate or import an SSL certificate into the vShield Manager to authenticate the identity of the
vShield Manager web service and encrypt information sent to the vShield Manager web server. As a security
best practice, you should use the generate certificate option to generate a private key and public key, where
the private key is saved to the vShield Manager.
Procedure
1 Click Settings & Reports from the vShield Manager inventory panel.
2 Click the Configuration tab.
3 Click SSL Certificate.
4 Under Generate Certificate Signing Request, complete the form by filling in the following fields:
Option Action
Common Name
Organization Unit
Organization Name
City Name
State Name
Country Code
Key Algorithm
Key Size
5 Click Generate.
Enter the name that matches the site name. For example, if the IP address of
vShield Manager management interface is 192.168.1.10, enter
192.168.1.10.
Enter the department in your company that is ordering the certificate.
Enter the full legal name of your company.
Enter the full name of the city in which your company resides.
Enter the full name of the state in which your company resides.
Enter the two-digit code that represents your country. For example, the
United States is US.
Select the cryptographic algorithm to use from either DSA or RSA.
Select the number of bits used in the selected algorithm.
Import an SSL certificate
You can import a pre-existing SSL certificate for use by the vShield Manager.
Procedure
1 Click Settings & Reports from the vShield Manager inventory panel.
2 Click the Configuration tab.
3 Click SSL Certificate.
4 Under Import Signed Certificate, click Browse at Certificate File to find the file.
5 Select the type of certificate file from the Certificate Type drop-down list.
6 Click Apply.
The certificate is stored in the vShield Manager.
20 VMware, Inc.
Page 21

User Management 4
Security operations are often managed by multiple individuals. Management of the overall system is delegated
to different personnel according to some logical categorization. However, permission to carry out tasks is
limited only to users with appropriate rights to specific resources. From the Users section, you can delegate
such resource management to users by granting applicable rights.
User management in the vShield Manager user interface is separate from user management in the CLI of any
vShield component.
This chapter includes the following topics:
n
“Managing User Accounts,” on page 21
n
“Managing the Default User Account,” on page 22
n
“Add a User Account,” on page 22
n
“Edit a User Account,” on page 23
n
“Change a User Role,” on page 23
n
“Disable or Enable a User Account,” on page 24
n
“Delete a User Account,” on page 24
Managing User Accounts
Within the vShield Manager user interface, a user’s role define the actions the user is allowed to perform on a
given resource. The role determine the user’s authorized activities on the given resource, ensuring that a user
has access only to the functions necessary to complete applicable operations. This allows domain control over
specific resources, or system-wide control if your right has no restrictions.
The following rules are enforced:
n
A user can only have one role.
n
You cannot add a role to a user, or remove an assigned role from a user. You can, however, change the
assigned role for a user.
Table 4-1. vShield Manager User Roles
Right Permissions
Enterprise Administrator vShield operations and security.
vShield Administrator vShield operations only: for example, install virtual appliances, configure port groups.
VMware, Inc. 21
Page 22

vShield Administration Guide
Table 4-1. vShield Manager User Roles (Continued)
Right Permissions
Security Administrator vShield security only: for example, define data security policies, create port groups, create
Auditor Read only.
reports for vShield modules.
The scope of a role determines what resources a particular user can view. The following scopes are available
for vShield users.
Table 4-2. vShield Manager User Scope
Scope Description
No restriction Access to entire vShield system
Limit access scope to the
selected port groups below
Access to a specified datacenter or port group
The Enterprise Administrator and vShield Administrator roles can only be assigned to vCenter users, and their
access scope is global (no restrictions).
Managing the Default User Account
The vShield Manager user interface includes a local user account, which has access rights to all resources. You
cannot edit the rights of or delete this user. The default user name is admin and the default password is
default.
Change the password for this account upon initial login to the vShield Manager. See “Edit a User Account,”
on page 23.
Add a User Account
You can either create a new user local to vShield, or assign a role to a vCenter user.
Create a New Local User
1 Click Settings & Reports from the vShield Manager inventory panel.
2 Click the Users tab.
3 Click Add.
The Assign Role window opens.
4 Click Create a new user local to vShield.
5 Type an Email address.
6 Type a Login ID.
This is used for login to the vShield Manager user interface. This user name and associated password
cannot be used to access the vShield App or vShield Manager CLIs.
7 Type the user’s Full Name for identification purposes.
8 Type a Password for login.
9 Re-type the password in the Retype Password field.
10 Click Next.
11 Select the role for the user and click Next. For more information on the available roles, see “Managing
User Accounts,” on page 21.
22 VMware, Inc.
Page 23

12 Select the scope for the user and click Finish.
The user account appears in the Users table.
Assign a Role to a vCenter User
When you assign a role to a vCenter user, vCenter authenticates the role with the Active Directory.
1 Click Settings & Reports from the vShield Manager inventory panel.
2 Click the Users tab.
3 Click Add.
The Assign Role window opens.
4 Click Select vCenter user.
5 Type the vCenter User name for the user.
NOTE If the vCenter user is from a domain, then you must enter a fully qualified windows domain path.
This user name is for login to the vShield Manager user interface, and cannot be used to access the vShield
App or vShield Manager CLIs.
6 Click Next.
Chapter 4 User Management
7 Select the role for the user and click Next. For more information on the available roles, see “Managing
User Accounts,” on page 21.
8 Select the scope for the user and click Finish.
The user account appears in the Users table.
Edit a User Account
You can edit a user account to change the password, role, and scope. You cannot edit the admin account.
Procedure
1 Click Settings & Reports from the vShield Manager inventory panel.
2 Click the Users tab.
3 Select the user you want to edit.
4 Click Edit.
5 Make changes as necessary.
If you are changing the password, confirm the password by typing it a second time in the Retype
Password field.
6 Click Finish to save your changes.
Change a User Role
You can change the role assignment for all users, except for the admin user.
Procedure
1 Click Settings & Reports from the vShield Manager inventory panel.
2 Click the Users tab.
3 Select the user you want to change the role for
VMware, Inc. 23
Page 24

vShield Administration Guide
4 Click Change Role.
5 Make changes as necessary.
6 Click Finish to save your changes.
Disable or Enable a User Account
You can disable a user account to prevent that user from logging in to the vShield Manager. You cannot disable
the admin user.
Procedure
1 Click Settings & Reports from the vShield Manager inventory panel.
2 Click the Users tab.
3 Select a user account.
4 Do one of the following.
n
Click Actions > Disable selected user(s) to disable a user account.
n
Click Actions > Enable selected user(s) to enable a user account.
Delete a User Account
You can delete any created user account. You cannot delete the admin account. Audit records for deleted users
are maintained in the database and can be referenced in an Audit Log report.
Procedure
1 Click Settings & Reports from the vShield Manager inventory panel.
2 Click the Users tab.
3 Select the user you want to delete.
4 Click Delete.
5 Click OK to confirm deletion.
If you delete a vCenter user account, only the role assignment for vShield Manager is deleted. The user
account on vCenter is not deleted.
24 VMware, Inc.
Page 25

Updating System Software 5
vShield software requires periodic updates to maintain system performance. Using the Updates tab options,
you can install and track system updates.
n
View the Current System Software on page 25
You can view the current installed versions of vShield component software or verify if an update is in
progress.
n
Upload an Update on page 25
vShield updates are available as offline updates. When an update is made available, you can download
the update to your PC, and then upload the update by using the vShield Manager user interface.
View the Current System Software
You can view the current installed versions of vShield component software or verify if an update is in progress.
Procedure
1 Click Settings & Reports from the vShield Manager inventory panel.
2 Click the Updates tab.
3 Click Update Status.
Upload an Update
vShield updates are available as offline updates. When an update is made available, you can download the
update to your PC, and then upload the update by using the vShield Manager user interface.
When the update is uploaded, the vShield Manager is updated first, after which, each vShield Zones or vShield
App instance is updated. If a reboot of either the vShield Manager or a vShield Zones or App is required, the
Update Status screen prompts you to reboot the component. In the event that both the vShield Manager and
all vShield Zones or App instances must be rebooted, you must reboot the vShield Manager first, and then
reboot each vShield Zones or App.
Procedure
1 Click Settings & Reports from the vShield Manager inventory panel.
2 Click the Updates tab.
3 Click Upload Settings.
4 Click Browse to locate the update.
5 After locating the file, click Upload File.
VMware, Inc.
25
Page 26

vShield Administration Guide
6 Click Update Status and then click Install.
7 Click Confirm Install to confirm update installation.
There are two tables on this screen. During installation, you can view the top table for the description,
start time, success state, and process state of the current update. View the bottom table for the update
status of each vShield App. All vShield App instances have been upgraded when the status of the last
vShield App is displayed as Finished.
8 After the vShield Manager reboots, click the Update Status tab.
9 Click Reboot Manager if prompted.
10 Click Finish Install to complete the system update.
11 Click Confirm.
26 VMware, Inc.
Page 27

Backing Up vShield Manager Data 6
You can back up and restore your vShield Manager data, which can include system configuration, events, and
audit log tables. Configuration tables are included in every backup. You can, however, exclude system and
audit log events. Backups are saved to a remote location that must be accessible by the vShield Manager.
Backups can be executed according to a schedule or on demand.
n
Back Up Your vShield Manager Data on Demand on page 27
You can back up vShield Manager data at any time by performing an on-demand backup.
n
Schedule a Backup of vShield Manager Data on page 28
You can only schedule the parameters for one type of backup at any given time. You cannot schedule a
configuration-only backup and a complete data backup to run simultaneously.
n
Restore a Backup on page 29
To restore an available backup, the Host IP Address, User Name, Password, and Backup Directory fields
in the Backups screen must have values that identify the location of the backup to be restored. When
you restore a backup, the current configuration is overridden. If the backup file contains system event
and audit log data, that data is also restored.
Back Up Your vShield Manager Data on Demand
VMware, Inc.
You can back up vShield Manager data at any time by performing an on-demand backup.
Procedure
1 Click Settings & Reports from the vShield Manager inventory panel.
2 Click the Configuration tab.
3 Click Backups.
4 (Optional) Select the Exclude System Events check box if you do not want to back up system event tables.
5 (Optional) Select the Exclude Audit Logs check box if you do not want to back up audit log tables.
6 Type the Host IP Address of the system where the backup will be saved.
7 (Optional) Type the Host Name of the backup system.
8 Type the User Name required to log in to the backup system.
9 Type the Password associated with the user name for the backup system.
10 In the Backup Directory field, type the absolute path where backups are to be stored.
27
Page 28

vShield Administration Guide
11 Type a text string in Filename Prefix.
This text is prepended to the backup filename for easy recognition on the backup system. For example, if
you type ppdb, the resulting backup is named as ppdbHH_MM_SS_DayDDMonYYYY.
12 Enter a Pass Phrase to secure the backup file.
13 From the Transfer Protocol drop-down menu, select either SFTP or FTP.
14 Click Backup.
Once complete, the backup appears in a table below this forms.
15 Click Save Settings to save the configuration.
Schedule a Backup of vShield Manager Data
You can only schedule the parameters for one type of backup at any given time. You cannot schedule a
configuration-only backup and a complete data backup to run simultaneously.
Procedure
1 Click Settings & Reports from the vShield Manager inventory panel.
2 Click the Configuration tab.
3 Click Backups.
4 From the Scheduled Backups drop-down menu, select On.
5 From the Backup Frequency drop-down menu, select Hourly, Daily, or Weekly.
The Day of Week, Hour of Day, and Minute drop-down menus are disabled based on the selected
frequency. For example, if you select Daily, the Day of Week drop-down menu is disabled as this field is
not applicable to a daily frequency.
6 (Optional) Select the Exclude System Events check box if you do not want to back up system event tables.
7 (Optional) Select the Exclude Audit Log check box if you do not want to back up audit log tables.
8 Type the Host IP Address of the system where the backup will be saved.
9 (Optional) Type the Host Name of the backup system.
10 Type the User Name required to login to the backup system.
11 Type the Password associated with the user name for the backup system.
12 In the Backup Directory field, type the absolute path where backups will be stored.
13 Type a text string in Filename Prefix.
This text is prepended to each backup filename for easy recognition on the backup system. For example,
if you type ppdb, the resulting backup is named as ppdbHH_MM_SS_DayDDMonYYYY.
14 From the Transfer Protocol drop-down menu, select either SFTP or FTP, based on what the destination
supports.
15 Click Save Settings.
28 VMware, Inc.
Page 29

Restore a Backup
To restore an available backup, the Host IP Address, User Name, Password, and Backup Directory fields in
the Backups screen must have values that identify the location of the backup to be restored. When you restore
a backup, the current configuration is overridden. If the backup file contains system event and audit log data,
that data is also restored.
IMPORTANT Back up your current data before restoring a backup file.
Procedure
1 Click Settings & Reports from the vShield Manager inventory panel.
2 Click the Configuration tab.
3 Click Backups.
4 Click View Backups to view all available backups saved to the backup server.
5 Select the check box for the backup to restore.
6 Click Restore.
7 Click OK to confirm.
Chapter 6 Backing Up vShield Manager Data
VMware, Inc. 29
Page 30

vShield Administration Guide
30 VMware, Inc.
Page 31

System Events and Audit Logs 7
System events are events that are related to vShield operation. They are raised to detail every operational event,
such as a vShield App reboot or a break in communication between a vShield App and the vShield Manager.
Events might relate to basic operation (Informational) or to a critical error (Critical).
This chapter includes the following topics:
n
“View the System Event Report,” on page 31
n
“vShield Manager Virtual Appliance Events,” on page 31
n
“vShield App Events,” on page 32
n
“About the Syslog Format,” on page 33
n
“View the Audit Log,” on page 33
View the System Event Report
The vShield Manager aggregates system events into a report that can be filtered by vShield App and event
severity.
Procedure
1 Click Settings & Reports from the vShield Manager inventory panel.
2 Click the System Events tab.
3 (Optional) Select one or more vShield App instances from the vShield field.
All vShield App instances are selected by default.
4 From the and Severity drop-down menu, select a severity by which to filter results.
All severities are included by default. You can select one or more severities at a time.
5 Click View Report.
6 In the report output, click an Event Time link to view details about a specific event.
vShield Manager Virtual Appliance Events
The following events are specific to the vShield Manager virtual appliance.
VMware, Inc.
31
Page 32

vShield Administration Guide
Table 7-1. vShield Manager Virtual Appliance Events
Power Off Power On Interface Down Interface Up
Local CLI Run show log follow
command.
GUI NA NA NA NA
Table 7-2. vShield Manager Virtual Appliance Events
CPU Memory Storage
Local CLI Run show process monitor
command.
GUI See “View vShield Manager
Status,” on page 19.
vShield App Events
The following events are specific to vShield App virtual appliances.
Table 7-3. vShield App Events
Power Off Power On Interface Down Interface Up
Local CLI Run show log
follow command.
Syslog NA See “About the
GUI “Heartbeat failure”
event in System
Event log. See
“View the System
Event Report,” on
page 31.
Run show log follow
command.
Run show system memory
command.
See “View vShield Manager
Status,” on page 19.
Run show log
follow
command.
Syslog Format,”
on page 33.
See “View the
Current System
Status of a vShield
App,” on
page 50.
Run show log follow
command.
Run show log follow
command.
e1000: mgmt:
e1000_watchdog_task:
NIC Link is Up/Down 100
Mbps Full Duplex. For
scripting on the syslog server,
search for NIC Link is.
See “View the Current System
Status of a vShield App,” on
page 50.
Run show log follow
command.
Run show filesystem command.
See “View vShield Manager
Status,” on page 19.
Run show log follow
command.
e1000: mgmt:
e1000_watchdog_task: NIC
Link is Up/Down 100 Mbps
Full Duplex. For scripting on
the syslog server, search for
NIC Link is.
See “View the Current System
Status of a vShield App,” on
page 50.
Table 7-4. vShield App Events
Session reset due to DoS,
CPU Memory Storage
Local CLI Run show process
monitor command.
Syslog NA NA NA See “About the Syslog
GUI See “View the Current
System Status of a
vShield App,” on
page 50.
32 VMware, Inc.
Run show system
memory command.
See “View the Current
System Status of a
vShield App,” on
page 50.
Run show
filesystem
command.
See “View the Current
System Status of a
vShield App,” on
page 50.
Inactivity, or Data Timeouts
Run show log follow
command.
Format,” on page 33.
Refer to the System Event Log.
See “View the System Event
Report,” on page 31.
Page 33

About the Syslog Format
The system event message logged in the syslog has the following structure.
syslog header (timestamp + hostname + sysmgr/)
Timestamp (from the service)
Name/value pairs
Name and value separated by delimiter '::' (double colons)
Each name/value pair separated by delimiter ';;' (double semi-colons)
The fields and types of the system event contain the following information.
Event ID :: 32 bit unsigned integer
Timestamp :: 32 bit unsigned integer
Application Name :: string
Application Submodule :: string
Application Profile :: string
Event Code :: integer (possible values: 10007 10016 10043 20019)
Severity :: string (possible values: INFORMATION LOW MEDIUM HIGH CRITICAL)
Message ::
Chapter 7 System Events and Audit Logs
View the Audit Log
The Audit Logs tab provides a view into the actions performed by all vShield Manager users. The vShield
Manager retains audit log data for one year, after which time the data is discarded.
Procedure
1 Click Settings & Reports from the vShield Manager inventory panel.
2 Click the Audit Logs tab.
3 Narrow the output by clicking one or more of the column filters.
Option Action
User Name
Module
Operation
Status
Operation Span
Select the login name of a user who performed the action.
Select the vShield resource on which the action was performed.
Select the type of action performed.
Select the result of action as either Success or Failure.
Select the vShield component on which the action was performed. Local
refers to the vShield Manager.
VMware, Inc. 33
Page 34

vShield Administration Guide
34 VMware, Inc.
Page 35

vShield Edge Management 8
vShield Edge provides network edge security and gateway services to isolate the virtual machines in a port
group, vDS port group, or Cisco® Nexus 1000V. The vShield Edge connects isolated, stub networks to shared
(uplink) networks by providing common gateway services such as DHCP, VPN, NAT, and Load Balancing.
Common deployments of vShield Edge include in the DMZ, VPN Extranets, and multi-tenant Cloud
environments where the vShield Edge provides perimeter security for Virtual Datacenters (VDCs).
This chapter includes the following topics:
n
“View the Status of a vShield Edge,” on page 35
n
“Specify a Remote Syslog Server,” on page 36
n
“Managing the vShield Edge Firewall,” on page 36
n
“Managing NAT Rules,” on page 40
n
“Managing DHCP Service,” on page 41
n
“Managing VPN Service,” on page 42
n
“Add a Static Route,” on page 45
n
“Manage Load Balancer Service,” on page 45
n
“Start or Stop vShield Edge Services,” on page 46
n
“Upgrade vShield Edge Software,” on page 46
n
“Re-deploy vShield Edge,” on page 47
View the Status of a vShield Edge
The Status option presents the network configuration and status of services of a vShield Edge module. Details
include interface addressing and network ID. You can use the network ID to send REST API commands to a
vShield Edge module.
Procedure
1 In the vSphere Client, go to Inventory > Networking.
2 Select an internal port group that is protected by a vShield Edge.
3 Click the vShield Edge tab.
VMware, Inc.
35
Page 36

vShield Administration Guide
Specify a Remote Syslog Server
You can send vShield Edge events, such as violated firewall rules, to a syslog server.
Procedure
1 In the vSphere Client, go to Inventory > Networking.
2 Select an internal port group that is protected by a vShield Edge.
3 Click the vShield Edge tab.
4 Click Status.
5 Expand the Remote Syslog Servers panel.
6 Click Edit.
The Edit Syslog Servers Configuration dialog box opens.
7 Type the IP address of a remote syslog server.
8 Click OK to save the configuration.
Managing the vShield Edge Firewall
The vShield Edge provides firewall protection for incoming and outgoing sessions. The default firewall policy
blocks all traffic. In addition to the default firewall policy, you can configure a set of rules to allow or block
traffic sessions to and from specific sources and destinations. You manage the default firewall policy and
firewall rule set separately for each vShield Edge agent.
Edit Default Firewall Settings
You can edit the default settings for firewall rules. Default firewall settings apply to traffic that does not match
any of the firewall rules.
Procedure
1 In the vSphere Client, go to Inventory > Networking.
2 Select an internal port group that is protected by a vShield Edge.
3 Click the vShield Edge tab.
4 Click Firewall.
5 In the Default Firewall Settings panel, click Configure Settings.
The Edit Default Policy Configuration dialog box opens.
6 In Default Traffic Policy, select Block or Allow. The default value is Block.
7 In Default Policy Logging, select Enable or Disable. If logging is enabled, firewall rules are logged in
vShield Edge logs. If a remote syslog server is configured, the logs are also displayed on the remote syslog
server.
8 In ICMP Errors, click Block or Allow.
9 Click OK.
36 VMware, Inc.
Page 37

Chapter 8 vShield Edge Management
Create an IP or MAC Address Group
You can create an IP or MAC address group consisting of a range of IP/MAC addresses. You can then add this
group as the source or destination in a firewall rule.
Procedure
1 Click a datacenter resource from the vSphere Client.
2 Click the vShield tab.
3 Click the Grouping tab.
4 Click Add and select IP Addresses or MAC Addresses.
The Add IP Addresses or Add MAC Addresses window opens.
5 Type a name for the address group.
6 Type a description for the address group.
7 Type the IP or MAC addresses to be included in the group.
8 Click OK.
Add a vShield Edge Firewall Rule
vShield Edge firewall rules police traffic based on the following criteria:
Table 8-1. vShield Edge Firewall Rules Criterion
Criteria Description
Source IP address from which the communication originated.
Source Port Port or range of ports from which the communication originated. To enter a port range,
separate the low and high end of the range with a hyphen. For example, 1000-1100.
Destination IP address which the communication is targeting.
Traffic type Application or protocol to which the rule applies to.
Intf(Dir) Interface and direction of transmission.
Action Action to enforce on transmission. Options are Allow or Block. The default action on all
traffic is Allow.
Log Traffic details to be logged or not.
Enable Firewall rule is enabled or disabled.
You can add destination and source port ranges to a rule for dynamic services such as FTP and RPC, which
require multiple ports to complete a transmission. If you do not allow all of the ports that must be opened for
a transmission, the transmission is blocked.
When you add a firewall rule, you must specify what happens to traffic as it passes via the internal and external
interface. For example, if traffic is to flow from clients in an internal network to a HTTPS server in the external
network, you need to specify two rules.
Table 8-2. Firewall Rules for traffic to flow from an internal network to a HTTP server
Source Source Port Destination Traffic type Interface:Direction
192.168.0.0/24 Any 10.20.222.34 HTTP Int:In
192.168.0.0.24 Any 10.20.222.34 HTTP Ext:Out
VMware, Inc. 37
Page 38

vShield Administration Guide
Procedure
1 In the vSphere Client, go to Inventory > Networking.
2 Select an internal port group that is protected by a vShield Edge.
3 Click the vShield Edge tab.
4 Click the Firewall link.
5 Click Add.
6 In Rule applied to, select the interface at which you want to add the firewall rule.
7 Select the Traffic Direction to which you want to apply the firewall rule.
8 In Source, type the IP address (or IP address group), IP range, or subnet from which the communication
originated. Leaving this option blank indicates that this rule applies to traffic from any source.
9 In Source Port, type the port or range of ports from which the communication originated.
10 In Destination, type the IP address (or IP address group), IP range, or subnet which the communication
is targeting. Leaving this option blank indicates that this rule applies to traffic to any destination.
11 Specify whether the Type of traffic is Known Application or Protocol. Select the application or protocol.
12 In Action, select whether to Block or Allow traffic.
13 In Rule, select whether to Enable or Disable to rule you are adding.
14 In Logging, select whether to Log or Do not log the traffic that is allowed or blocked by this rule.
15 Type any Notes if required.
16 Click OK.
17 Click Publish Changes.
Edit a vShield Edge Firewall Rule
You can edit any custom firewall rules.
Procedure
1 In the vSphere Client, go to Inventory > Networking.
2 Select an internal port group that is protected by a vShield Edge.
3 Click the vShield Edge tab.
4 Click the Firewall link.
5 Select the rule you want to edit.
6 Click Edit Rule.
7 Edit the options as appropriate.
8 Click OK.
9 Click Publish Changes.
Change the Priority of a vShield Edge Firewall Rule
You can change the priority of custom firewall rules.
Procedure
1 In the vSphere Client, go to Inventory > Networking.
38 VMware, Inc.
Page 39

2 Select an internal port group that is protected by a vShield Edge.
3 Click the vShield Edge tab.
4 Click the Firewall link.
5 Select the rule you want to change the priority for.
6 Click Move Up or Move Down.
7 Click Publish Changes.
Display Rules by Type
You can filter rules to display a subset of the rules. All rules are displayed by default.
Procedure
1 In the vSphere Client, go to Inventory > Networking.
2 Select an internal port group that is protected by a vShield Edge.
3 Click the vShield Edge tab.
4 Click the Firewall link.
5 Click Show and de-select options for rules that you do not want to be displayed.
Chapter 8 vShield Edge Management
Option Description
All Rules
Int Intf Rules
Ext Intf Rules
VPN Intf Rules
Inbound Rules
Outbound Rules
Generated Rules
Displays all rules
Displays rules that apply to the vShield internal interface.
Displays rules that apply to the vShield external interface.
Displays rules that apply to the VPN interface
Displays rules for traffic entering your virtual network.
Displays rules for traffic leaving your virtual network.
Displays rules generated by vShield Edge.
Delete a vShield Edge Firewall Rule
You can delete any custom firewall rule you have added.
Procedure
1 In the vSphere Client, go to Inventory > Networking.
2 Select an internal port group that is protected by a vShield Edge.
3 Click the vShield Edge tab.
4 Click the Firewall link.
5 Select the rule you want to delete.
6 Click Delete Selected.
7 Click Publish Changes.
VMware, Inc. 39
Page 40

vShield Administration Guide
Managing NAT Rules
The vShield Edge provides network address translation (NAT) service to assign a public address to a computer
(or group of computers) inside a private network. This limits the number of public IP addresses an organization
or company must use, for both economy and security purposes. You must configure NAT rules to provide
access to services running on privately addressed virtual machines.
The NAT service configuration is separated into SNAT and DNAT rules.
Add a SNAT Rule
You create a SNAT rule to translate a private internal IP address into a public IP address for outbound traffic.
Procedure
1 In to the vSphere Client, go to Inventory > Networking.
2 Select an Internal port group where a vShield Edge has been installed.
3 Click the vShield Edge tab.
4 Click the NAT link.
5 Under SNAT, click Add Rule.
The Add SNat Rule dialog box opens.
6 Type the Original (Internal) Source IP/Range address. To enter a range of IP addresses, separate the
addresses by a comma.
7 Type the Translated (External) Source IP/Range address. To enter a range of IP addresses, separate the
addresses by a hyphen.
8 Select Log or Do not log.
9 Click OK to save the rule.
10 Click Publish Changes.
Add a DNAT Rule
You create a DNAT rule to map a public IP address to a private internal IP address.
Procedure
1 In to the vSphere Client, go to Inventory > Networking.
2 Select an Internal port group where a vShield Edge has been installed.
3 Click the vShield Edge tab.
4 Click the NAT link.
5 Under DNAT, click Add Rule.
The Add DNat Rule dialog box opens.
6 Type the Translated (Internal Destination) IP/Range address.
7 Type the internal Port/Range.
8 Type the Original (External) Destination IP/Range.
9 Select the Protocol.
40 VMware, Inc.
Page 41

10 Depending on the protocol you selected, specify one of the following.
If the Protocol is Specify
tcp or udp
icmp
11 Select Log or Do not log.
12 Click OK to save the rule.
Managing DHCP Service
vShield Edge supports IP address pooling and one-to-one static IP address allocation. Static IP address binding
is based on the vCenter managed object ID and interface ID of the requesting client.
vShield Edge DHCP service adheres to the following rules:
n
Listens on the vShield Edge internal interface for DHCP discovery.
n
Uses the IP address of the internal interface on the vShield Edge as the default gateway address for all
clients, and the broadcast and subnet mask values of the internal interface for the container network.
You must re-start the DHCP service on client virtual machines in the following situations:
Chapter 8 vShield Edge Management
Port or range of ports
ICMP type
n
You changed or deleted a DHCP pool, default gateway, or DNS servers.
n
You changed the internal IP address of the vShield Edge.
Add a DHCP IP Pool
DHCP service requires a pool of IP addresses that will be assigned to the virtual machines protected by a
vShield Edge.
Procedure
1 In the vSphere Client, go to Inventory > Networking.
2 Select an internal port group that is protected by a vShield Edge.
3 Click the vShield Edge tab.
4 Click the DHCP link.
5 Under DHCP Pools, click Add Pool.
The Add DHCP Pool window opens.
6 Type the Start IP address.
7 Type the End IP address.
8 Type the Domain Name.
9 Type the Primary Nameserver and Secondary Nameserver, which refer to the DNS service. You must
enter the IP address of a DNS server for hostname-to-IP address resolution.
10 In Default Gateway address, type the internal IP address of the vShield Edge.
11 For Lease Time, select whether you want to lease the address to the client for the default time (1 day) or
specify a value in seconds.
12 Click OK.
VMware, Inc. 41
Page 42

vShield Administration Guide
What to do next
Ensure that DHCP service has been enabled. For more information, see “Start or Stop vShield Edge
Services,” on page 46
Add a DHCP Static Binding
You can enable static binding to bind an IP address to the MAC address of a virtual machine.
Procedure
1 In the vSphere Client, go to Inventory > Networking.
2 Select an internal port group that is protected by a vShield Edge.
3 Click the vShield Edge tab.
4 Click the DHCP link.
5 Under DHCP Bindings, click Add Binding.
6 Select the VM Name that you want to bind.
7 Select the Interface for which you want to create the binding.
8 Type the IP Address to which you want to bind the MAC address of the selected virtual machine.
9 Type the Domain Name.
10 Type the Primary Nameserver and Secondary Nameserver, which refer to the DNS service. You must
enter the IP address of a DNS server for hostname-to-IP address resolution.
11 Type the Default Gateway address.
12 For Lease Time, select whether you want to lease the address to the client for the default time (1 day) or
specify a value in seconds.
13 Click OK.
What to do next
Ensure that the DHCP service has been enabled. For more information, see “Start or Stop vShield Edge
Services,” on page 46
Managing VPN Service
vShield Edge modules support site-to-site IPSec VPN between a vShield Edge and remote sites.
vShield Edge supports certificate authentication, pre-shared key mode, IP unicast traffic, and no dynamic
routing protocol between the vShield Edge and remote VPN routers. Behind each remote VPN router, you can
configure multiple subnets to connect to the internal network behind a vShield Edge through IPSec tunnels.
These subnets and the internal network behind a vShield Edge must have non-overlapping address ranges.
You can deploy a vShield Edge agent behind a NAT device. In this deployment, the NAT device translates the
VPN address of a vShield Edge into a publicly accessible address facing the Internet. Remote VPN routers use
this public address to access the vShield Edge.
Remote VPN routers can be located behind a NAT device as well. You must provide both the VPN native
address and the VPN Gateway ID to set up the tunnel.
On both ends, static one-to-one NAT is required for the VPN address.
42 VMware, Inc.
Page 43

Chapter 8 vShield Edge Management
Configure VPN Service on a vShield Edge
You must configure an external IP address on the vShield Edge to provide VPN service.
Procedure
1 In the vSphere Client, go to Inventory > Networking.
2 Select an internal port group that is protected by a vShield Edge.
3 Click the vShield Edge tab.
4 Click the VPN link.
5 Under Global Configuration, click Enable VPN.
The Add VPN Configuration dialog box opens.
6 Type the IP address of the vShield Edge instance in Local Service IP Address.
7 Type the pre-shared key in PSK for Sites with any Peer IP if anonymous sites are to connect to the VPN
service.
8 Type a name for the VPN connection in VPN Gateway ID.
9 Select Log to log VPN activity.
10 Click OK.
What to do next
Complete the authentication certificate and upload the signed certificate.
Configure Authentication Certificate
In order to use certificate authentication for your VPN service, you can generate a certificate signing request,
download the request, have it signed, and then upload the signed certificate.
Generate Certificate Signing Request (CSR)
1 Select an internal port group that is protected by a vShield Edge.
2 Click the vShield Edge tab.
3 Click the VPN link.
4 In the Actions option under Global Configuration, select Generate CSR.
5 Complete the Generate Certificate Signing Request form.
6 Click Generate.
vShield Manager's web server certificate is replaced with the new certificate.
NOTE VMware recommends that you reboot the vShield Manager after generating a certificate.
Download Generated CSR
1 In the Actions option under Global Configuration, select Download Generated CSR.
2 Click Copy CSR Text to Clipboard to copy the certificate to the clipboard. You need to send this a
Certificate Authority (CA) who will return the signed certificate to you.
VMware, Inc. 43
Page 44

vShield Administration Guide
Upload CA Certificate and Signed Certificate
1 In the Actions option under Global Configuration, select Upload Signed Certificate.
2 Depending on the type of certificate you want to upload, click the appropriate tab.
3 In Certificate file text, paste the certificate text.
4 Click Upload.
The certificate is displayed in the Uploaded Certificates list.
5 Click Save.
Add a VPN Peer Site and Tunnel
An end-to-end VPN configuration requires one or more remote peer sites to connect to the vShield Edge across
the Internet.
Procedure
1 In the vSphere Client, go to Inventory > Networking.
2 Select an internal port group that is protected by a vShield Edge.
3 Click the vShield Edge tab.
4 Click the VPN link.
5 Expand Peer Sites and Tunnels.
6 Click Add Site.
7 Type a name to identify the site in Peer Site name.
8 Type the Peer Id to uniquely identify the peer site.
For peers using certificate authentication, this ID must be the common name in the peer's certificate. For
PSK peers, this ID can be any string. VMware recommends that you use the public IP address of the VPN
or a FQDN for the VPN service as the peer ID.
9 Type the IP address of the peer subnet in Peer subnets.
10 Type the subnet address of the vShield Edge in Local subnets.
11 Type the maximum transmission unit threshold in MTU. If you do not specify the MTU, the MTU of the
vShield Edge external Interface is used.
12 Select the Encryption algorithm.
13 In Authentication Method, select one of the following:
Option Description
PSK (Pre Shared Key)
Certificate
Indicates that the secret key shared between vShield Edge and the peer site
is to be used for authentication. The secret key can be a string with a
maximum length of 128 bytes.
Indicates that the certificate defined at the global level is to be used for
authentication.
14 In Diffie-Hellman (DH) Group, select the cryptography scheme that will allow the peer site and the
vShield Edge to establish a shared secret over an insecure communications channel.
15 Select whether to enable or disable the Perfect Forward Secrecy (PFS) threshold. In IPsec negotiations,
Perfect Forward Secrecy (PFS) ensures that each new cryptographic key is unrelated to any previous key.
44 VMware, Inc.
Page 45

16 Click OK.
vShield Edge creates a tunnel from the local subnet to the peer subnet.
What to do next
After you identify a VPN peer site, you must add firewall rules to indicate how traffic should flow between
the local subnet and peer subnet.
Add a Static Route
You can define a static route for your data packets to follow.
Procedure
1 In the vSphere Client, go to Inventory > Networking.
2 Select an internal port group that is protected by a vShield Edge.
3 Click the vShield Edge tab.
4 Click the Static Routing link.
5 Click Add Route.
6 Type the Network IP address.
Chapter 8 vShield Edge Management
7 Type the IP address of the Next Hop.
8 For Interface, select Internal or External.
9 For MTU, select Use default value, or type the maximum transmission value for the data packets.
10 Click Publish Changes.
Manage Load Balancer Service
The vShield Edge provides load balancing for HTTP traffic. Load balancing (up to Layer 7) enables Web
application auto-scaling.
You map an external (or public) IP address to a set of internal servers for load balancing. The load balancer
accepts HTTP requests on the external IP address and decides which internal server to use. Port 80 is the default
listening port for load balancer service.
Configure Load Balancer Service
Load balancer service requires two or more servers to distribute HTTP traffic. You can identify two or more
virtual machines behind a vShield Edge for load balancer service.
Procedure
1 In the vSphere Client, go to Inventory > Networking.
2 Select an internal port group that is protected by a vShield Edge.
3 Click the vShield Edge tab.
4 Click the Load Balancer link.
5 Click Add Configuration.
6 Type the External IP Addresses.
7 Select the load balancing algorithm.
VMware, Inc. 45
Page 46

vShield Administration Guide
8 (Optional) Select the Logging check box to send a syslog event for each request to the external IP address.
9 Click Add.
10 Type the IP address of the first web server.
11 Click Add.
You can add additional web servers in the same manner.
12 Click Commit.
13 If load balancer service has not been enabled, enable the service.
See “Start or Stop vShield Edge Services,” on page 46.
Start or Stop vShield Edge Services
You can start and stop the VPN, DHCP, and load balancing services of a vShield Edge from the vSphere Client.
By default, all services are stopped, or in Not Configured state. Once you configure a service, vShield Edge
starts the service.
NOTE You should configure a service before starting it.
The default firewall policy blocks all traffic. After you configure a VPN, DHCP, or Load Balancer service, you
must add corresponding firewall rules for this traffic to pass so that the data path can work for these services.
Procedure
1 In the vSphere Client, go to Inventory > Networking.
2 Select an internal port group that is protected by a vShield Edge.
3 Click the vShield Edge tab.
4 Click the Status link.
5 Under Edge Services, select a service and click Start to start the service.
Select a service and click Stop to stop a running service.
6 Click Refresh Status to refresh the status of a service on vShield Edge.
7 If a service has been started but is not responding, or if service is out-of-sync with what the vShield
Manager is showing, click Force Sync to send a synchronization request from the vShield Manager to the
vShield Edge.
Upgrade vShield Edge Software
You upgrade the vShield Edge software on a per vShield Edge basis. vShield Edge upgrades must be performed
separately from vShield Manager-based upgrades.
Procedure
1 In the vSphere Client, go to Inventory > Networking.
2 Select an internal port group that is protected by a vShield Edge.
3 Click the vShield Edge tab.
4 Click the Status link.
5 To the right of the Configuration heading, click the Upgrade to link to install the upgrade file. This link
is displayed only if an upgrade is available.
46 VMware, Inc.
Page 47

Re-deploy vShield Edge
If vShield Edge is not found in your vCenter inventory, you must re-deploy the vShield Edge.
Procedure
1 In the vSphere Client, go to Inventory > Networking.
2 Select an internal port group that is protected by a vShield Edge.
3 Click the vShield Edge tab.
4 Click the Status link.
5 Click Re-deploy.
Chapter 8 vShield Edge Management
VMware, Inc. 47
Page 48

vShield Administration Guide
48 VMware, Inc.
Page 49

vShield App Management 9
vShield App is a hypervisor-based firewall that protects applications in the virtual datacenter from networkbased attacks. Organizations gain visibility and control over network communications between virtual
machines. You can create access control policies based on logical constructs such as VMware vCenter™
containers and vShield security groups—not just physical constructs such as IP addresses. In addition, flexible
IP addressing offers the ability to use the same IP address in multiple tenant zones to simplify provisioning.
You should install vShield App on each ESX host within a cluster so that VMware vMotion operations work
and virtual machines remain protected as they migrate between ESX hosts. By default, a vShield App virtual
appliance cannot be moved by using vMotion.
The Flow Monitoring feature displays network activity between virtual machines at the application protocol
level. You can use this information to audit network traffic, define and refine firewall policies, and identify
botnets.
This chapter includes the following topics:
n
“Send vShield App System Events to a Syslog Server,” on page 49
n
“View the Current System Status of a vShield App,” on page 50
Send vShield App System Events to a Syslog Server
VMware, Inc.
You can send vShield App system events to a syslog server.
Procedure
1 In the vSphere Client, go to Inventory > Hosts and Clusters.
2 Select a host from the resource tree.
3 Click the vShield tab.
4 Expand the vShield App SVM.
5 In the Syslog Servers area, type the IP address of the syslog server.
6 From the Log Level drop-down menu, select the event level at and above which to send vShield App
events to the syslog server.
For example, if you select Emergency, then only emergency-level events are sent to the syslog server. If
you select Critical, then critical-, alert-, and emergency-level events are sent to the syslog server.
You send vShield App events to up to three syslog instances.
7 Click Save to save the new settings.
49
Page 50

vShield Administration Guide
View the Current System Status of a vShield App
The System Status option lets you view and influence the health of a vShield App. Details include system
statistics, status of interfaces, software version, and environmental variables.
Procedure
1 In the vSphere Client, go to Inventory > Hosts and Clusters.
2 Select a host from the resource tree.
3 Click the vShield tab.
4 Expand the vShield App SVM.
The Resource Utilization panel displays the system details for the vShield App.
Force a vShield App to Synchronize with the vShield Manager
The Force Sync option forces a vShield App to re-synchronize with the vShield Manager. This might be
necessary after a software upgrade.
Procedure
1 In the vSphere Client, go to Inventory > Hosts and Clusters.
2 Select a host from the resource tree.
3 Click the vShield tab.
4 Expand the vShield App SVM.
5 Click Force Sync.
Restart a vShield App
You can restart a vShield App to troubleshoot an operational issue.
Procedure
1 In the vSphere Client, go to Inventory > Hosts and Clusters.
2 Select a host from the resource tree.
3 Click the vShield tab.
4 Expand the vShield App SVM.
5 Click Restart.
View Traffic Statistics by vShield App Interface
You can view the traffic statistics for each vShield interface.
Procedure
1 In the vSphere Client, go to Inventory > Hosts and Clusters.
2 Select a host from the resource tree.
3 Click the vShield tab.
4 Expand the vShield App SVM.
The Management Port Interface panel displays the traffic statistics for the vShield App.
50 VMware, Inc.
Page 51

vShield App Flow Monitoring 10
Flow Monitoring is a traffic analysis tool that provides a detailed view of the traffic on your virtual network
that passed through a vShield App. The Flow Monitoring output defines which machines are exchanging data
and over which application. This data includes the number of sessions, packets, and bytes transmitted per
session. Session details include sources, destinations, direction of sessions, applications, and ports being used.
Session details can be used to create App Firewall allow or deny rules.
You can use Flow Monitoring as a forensic tool to detect rogue services and examine outbound sessions.
This chapter includes the following topics:
n
“Understanding the Flow Monitoring Display,” on page 51
n
“Change the Date Range of the Flow Monitoring Charts,” on page 52
n
“View a Specific Application in the Flow Monitoring Charts,” on page 52
n
“View the Flow Monitoring Report,” on page 53
n
“Delete All Recorded Flows,” on page 54
Understanding the Flow Monitoring Display
The Flow Monitoring tab displays throughput statistics as returned by a vShield App.
VMware, Inc.
Flow Monitoring displays traffic statistics in three charts:
Sessions/hr
Server KBytes/hr
Client/hr
Flow Monitoring organizes statistics by the application protocols used in client-server communications, with
each color in a chart representing a different application protocol. This charting method enables you to track
your server resources per application.
Traffic statistics display all inspected sessions within the time span specified. The last seven days of data are
displayed by default.
Total number of sessions per hour
Number of outgoing kilobytes per hour
Number of incoming kilobytes per hour
51
Page 52

vShield Administration Guide
Change the Date Range of the Flow Monitoring Charts
You can change the date range of the Flow Monitoring charts for an historical view of traffic data.
Procedure
1 In the vSphere Client, select a datacenter, virtual machine, port group, or network adapter.
Option Action
Select a datacenter or virtual
machine
Select a port group or network
adapter
2 Click the vShield tab.
3 Click Flow Monitoring.
The charts are updated to display the most current information for the last seven days. This might take
several seconds.
4 Next to Time Period, type a new start date in the left text box.
Go to Inventory > Hosts and Clusters
Go to Inventory > Networking
This date represents the date furthest in the past on which to start the query.
5 In the right text box, type a new end date.
This date represents the most recent date on which to stop the query.
6 Click Update.
View a Specific Application in the Flow Monitoring Charts
You can select a specific application to view in the charts by clicking the Application drop-down menu.
Procedure
1 In the vSphere Client, select a datacenter, virtual machine, port group, or network adapter.
Option Action
Select a datacenter or virtual
machine
Select a port group or network
adapter
2 Click the vShield tab.
3 Click Flow Monitoring.
4 From the Application drop-down menu, select the application to view.
Go to Inventory > Hosts and Clusters
Go to Inventory > Networking
The Flow Monitoring charts are refreshed to show data corresponding to the selected application.
52 VMware, Inc.
Page 53

View the Flow Monitoring Report
You can generate the Flow Monitoring report to view the allowed and blocked packets recorded by your
vShield App instances.
Procedure
1 In the vSphere Client, select a datacenter, virtual machine, port group, or network adapter.
Option Action
Select a datacenter or virtual
machine
Select a port group or network
adapter
2 Click the vShield tab.
3 Click Flow Monitoring.
The charts update to display the most current information for the last seven days. This might take several
seconds.
4 Click Show Report.
Go to Inventory > Hosts and Clusters
Go to Inventory > Networking
Chapter 10 vShield App Flow Monitoring
5 Drill down into the report.
6 For a virtual machine or network adapter, click Show Latest to update the report statistics.
Viewing Data in the Flow Monitoring Report
The Flow Monitoring report presents the traffic statistics in tabular format.
The report supports drilling down into traffic statistics based on the following hierarchy:
1 Select the firewall action: Allowed or Blocked.
2 Select an L4 or L2/L3 protocol.
n
L4: TCP, UDP, or Dynamic TCP
n
L2/L3: ICMP, OTHER-IPV4, ETH_GENERIC, ARP, or RARP.
3 If an L2/L3 protocol was selected, select an L2/L3 protocol or message type.
4 Select the traffic direction: Incoming or Outgoing.
5 Select the port type: Categorized (standardized ports) or Uncategorized (non-standardized ports).
6 Select an application, port, or port group.
7 Select an operating system.
8 Select a destination IP address.
For a TCP or UDP protocol, you can create an App Firewall rule at the destination IP address level.
VMware, Inc. 53
Page 54

vShield Administration Guide
Add an App Firewall Rule from the Flow Monitoring Report
By drilling down into the traffic data, you can evaluate the use of your resources and send session information
to App Firewall to create a new Layer 4 allow or deny rule. App Firewall rule creation from Flow Monitoring
data is available at the datacenter level only for TCP and UDP protocols.
Procedure
1 Log in to the vShield Manager user interface..
2 Select a datacenter resource from the inventory panel.
3 Click Flow Monitoring.
The charts update to display the most current information for the last seven days. This might take several
seconds.
4 Click Show Report.
5 Expand the firewall action list.
6 Expand the transport protocol list.
7 Expand the traffic direction list.
8 Expand the port type list.
9 Expand the application or port group list.
10 Expand the source or destination IP address list. This is the IP address of a virtual machine in your network.
11 Click Add Rule in the Firewall column for a destination IP address to create an App Firewall rule.
A pop-up window opens. Click Ok to proceed.
The Add window opens.
NOTE The Add Rule option is available only for TCP and UDP protocols.
12 Complete the form to configure the firewall rule. For more information, see “Working with Application
Firewall Rules,” on page 59
13 Click OK.
Delete All Recorded Flows
At the datacenter level, you can delete the data for all recorded traffic sessions within the datacenter. This clears
the data from charts, the report, and the database. Typically, this is only used when moving your vShield App
deployment from a lab environment to a production environment. If you must maintain a history of traffic
sessions, do not use this feature.
Procedure
1 Select a datacenter resource from the inventory panel.
2 Click the Flow Monitoring tab.
3 Click Delete All Flows.
4 Click Ok in the pop-up window to confirm deletion.
CAUTION You cannot recover traffic data after you click Delete All Flows.
54 VMware, Inc.
Page 55

vShield App Firewall Management 11
vShield App provides firewall protection through access policy enforcement. The App Firewall tab represents
the vShield App firewall access control list.
This chapter includes the following topics:
n
“Using App Firewall,” on page 55
n
“Working with Applications,” on page 57
n
“Grouping Objects,” on page 58
n
“Working with Application Firewall Rules,” on page 59
n
“Using SpoofGuard,” on page 61
Using App Firewall
The App Firewall service is a centralized, hierarchical firewall for ESX hosts. App Firewall enables you to create
rules that allow or deny access to and from your virtual machines. Each installed vShield App enforces the
App Firewall rules.
You can manage App Firewall rules at the datacenter, cluster, and port group levels to provide a consistent
set of rules across multiple vShield App instances under these containers. As membership in these containers
can change dynamically, App Firewall maintains the state of existing sessions without requiring
reconfiguration of firewall rules. In this way, App Firewall effectively has a continuous footprint on each ESX
host under the managed containers.
Namespaces in a Multi Tenant Environment
In a multi tenant mode, vShield App allows you to assign an independent IP address to specific port groups.
By default, all port groups in a datacenter share the same IP address. You can assign an independent namespace
to a port group, and then the datacenter level firewall rules no longer apply to that port group. You can use
the namespace feature along with security groups to segregate firewall rules by tenant.
To assign an independent IP address to a port group
1 In the vSphere Client, go to Inventory > Networking.
2 Select a port group from the resource tree.
3 Click the vShield tab.
4 Click Namespace.
5 Click Change to Independent namespace.
VMware, Inc.
55
Page 56

vShield Administration Guide
6 Click Reload to view the updated information.
About Applications
vShield App allows you to create applications and then define firewall rules for those applications.
All custom application-port pair mappings that you may have defined in a previous level are displayed as
default applications.
You can create an application at the datacenter or port group level. If you create an application for a port group
with an independent namespace, the application scope is limited to that port group.
Designing Security Groups
When creating App Firewall rules, you can create rules based on traffic to or from a specific container that
encompasses all of the resources within that container. For example, you can create a rule to deny any traffic
from inside of a cluster that targets a specific destination outside of the cluster. You can create a rule to deny
any incoming traffic that is not tagged with a VLAN ID. When you specify a container as the source or
destination, all IP addresses within that container are included in the rule.
A security group is a trust zone that you create and assign resources to for App Firewall protection. Security
groups are containers, like a vApp or a cluster. Security groups enables you to create a container by assigning
resources arbitrarily, such as virtual machines and network adapters. After the security group is defined, you
add the group as a container in the source or destination field of an App Firewall rule. For more information,
see “Grouping Objects,” on page 58.
About System Defined Rules in App Firewall
By default, the App Firewall enforces a set of rules allowing traffic to pass through all vShield App instances.
These rules appear in the L3 and L2 System Defined section of the App Firewall table. The default rules cannot
be deleted or added to. However, you can change the Action element of each rule from Allow to Deny.
About Layer 3 and Layer 2 Rules
The App Firewall tab offers multiple sets of configurable rules: Layer 3 (L3) rules and Layer 2 (L2) rules. Layers
refer to layers of the Open Systems Interconnection (OSI) Reference Model.
Layer 3 and Layer 2 rules monitor traffic from ICMP, ARP, and other Layer 3 and Layer 2protocols. You can
configure Layer 3 and Layer 2 rules at the datacenter level only. By default, all L3, and L2 traffic is allowed to
pass.
Hierarchy of App Firewall Rules
Each vShield App enforces App Firewall rules in top-to-bottom ordering. A vShield App checks each traffic
session against the top rule in the App Firewall table before moving down the subsequent rules in the table.
The first rule in the table that matches the traffic parameters is enforced.
The rules are enforced in the following hierarchy:
1 High Precedence
2 Network
3 Low Precedence
4 System Defined
56 VMware, Inc.
Page 57

Chapter 11 vShield App Firewall Management
App Firewall offers container-level and custom priority precedence configurations:
n
Container-level precedence refers to recognizing the datacenter level as being higher in priority than the
cluster level. When a rule is configured at the datacenter level, the rule is inherited by all clusters and
vShield agents therein. A cluster-level rule is only applied to the vShield App within the cluster.
n
Custom priority precedence refers to the option of assigning high or low precedence to rules at the
datacenter level. High precedence rules work as noted in the container-level precedence description. Low
precedence rules include the Default Rules and the configuration of Data Center Low Precedence rules.
This flexibility allows you to recognize multiple layers of applied precedence.
At the cluster level, you configure rules that apply to all vShield App instances within the cluster. Because
Data Center High Precedence Rules are above Cluster Level Rules, ensure your Cluster Level Rules are
not in conflict with Data Center High Precedence Rules.
Planning App Firewall Rule Enforcement
Using App Firewall, you can configure allow and deny rules based on your network policy.
The following examples represent two common firewall policies:
Allow all traffic by
default
Deny all traffic by default
You keep the default allow all rules and add deny rules based on Flow
Monitoring data or manual App Firewall rule configuration. In this scenario,
if a session does not match any of the deny rules, the vShield App allows the
traffic to pass.
You can change the Action status of the default rules from Allow to Deny, and
add allow rules explicitly for specific systems and applications. In this scenario,
if a session does not match any of the allow rules, the vShield App drops the
session before it reaches its destination. If you change all of the default rules to
deny any traffic, the vShield App drops all incoming and outgoing traffic.
Working with Applications
You can create an application, and then define rules for that application.
Create an Application
All custom application-port pair mappings that you may have defined in a previous level are displayed as
default applications.
Procedure
1 In the vSphere Client, go to Inventory > Hosts and Clusters .
2 Select a datacenter resource from the inventory panel.
3 Click the Applications tab.
4 Click Add.
The Add Application window opens.
5 Type a Name to identify the application.
6 (Optional) Type a Description for the application.
7 (Optional) Select a Protocol to which you want to add a non-standard port.
8 Type the port number(s) in Ports=.
VMware, Inc. 57
Page 58

vShield Administration Guide
9 Click Save.
The custom application appears in the Applications table.
Edit an Application
You can edit custom applications only.
Procedure
1 In the vSphere Client, go to Inventory > Hosts and Clusters .
2 Select a datacenter resource from the inventory panel.
3 Click the Applications tab.
4 Select a custom application and click Edit.
The Edit Application window opens.
5 Make the appropriate changes.
6 Click OK.
Delete an Application
You can delete custom applications only.
Procedure
1 In the vSphere Client, go to Inventory > Hosts and Clusters .
2 Select a datacenter resource from the inventory panel.
3 Click the Applications tab.
4 Select a custom application and click Delete
The Delete Application dialog box opens.
5 Click Yes.
The application is deleted.
Grouping Objects
The Grouping feature enables you to create custom containers to which you can assign resources, such as
virtual machines and network adapters, for App Firewall protection. After a group is defined, you can add the
group as source or destination to a firewall rule for protection.
Create an IP or MAC Address Group
You can create an IP or MAC address group consisting of a range of IP/MAC addresses. You can then add this
group as the source or destination in a firewall rule.
Procedure
1 Click a datacenter resource from the vSphere Client.
2 Click the vShield tab.
3 Click the Grouping tab.
4 Click Add and select IP Addresses or MAC Addresses.
The Add IP Addresses or Add MAC Addresses window opens.
58 VMware, Inc.
Page 59

Chapter 11 vShield App Firewall Management
5 Type a name for the address group.
6 Type a description for the address group.
7 Type the IP or MAC addresses to be included in the group.
8 Click OK.
Create a security group
In the vSphere Client, you can add a security group at the datacenter or port group level.
Procedure
1 Click a datacenter resource from the vSphere Client.
2 Click the vShield tab.
3 Click the Grouping tab.
4 Click Add and select Security Group.
The Add Security Group window opens with the selected datacenter displayed as the Scope.
5 Type a name and description for the security group.
6 Click Next.
7 Click in the field next to the Add button and select the resource you want to include in the security group.
8 Click Add. The selected resource appears in the list below the Add button. You can add multiple resources
to the security group.
When you add a resource to a security group, all associated resources are automatically added. For
example, when you select a virtual machine, the associated vNIC is automatically added to the security
group.
9 Click Finish.
Working with Application Firewall Rules
You can add high and low precedence L3 and L2 firewall rules.
Add an application firewall rule
You can add an application firewall rule at various container levels.
Procedure
1 In the vSphere Client, go to Inventory > Hosts and Clusters and select a datacenter, or go to Inventory >
Networking and select a port group.
2 Click the vShield App tab.
3 Click App Firewall.
4 In the High Precedence, Network, or Low Precedence area, click Add Rule.
The Add Rule window opens.
NOTE After you create a rule in any of these areas, you must click the Add button above the Source column
to add additional rules.
VMware, Inc. 59
Page 60

vShield Administration Guide
5 Complete the form to configure the firewall rule.
Option Description
Source
Source boundary
Destination
Destination boundary
Protocol
Logging
Enabled
Notes
6 Click OK.
7 Select the new rule and click the Move Up or Move Down button to move the rule up or down in priority.
8 Click Publish Changes to push the new rule to all vShield App instances.
Delete an Application Firewall Rule
You can delete any App Firewall rule you have created. You cannot delete any rules in the System Defined
section of the table.
Container or IP address from which the communication originated.
Direction in relation to source from which the communication originated.
Container or IP address which the communication is targeting.
Direction in relation to destination which the communication is targeting.
Protocol for the rule.
Determines whether to log all sessions matching this rule.
Determines whether to enable the rule you are creating.
Comments on the rule.
Procedure
1 In the vSphere Client, go to Inventory > Hosts and Clusters.
2 Depending on the level at which you want to delete a rule, select a datacenter or port group from the
resource tree.
3 Click the vShield App tab.
4 Click App Firewall.
5 Click a rule in appropriate table.
6 Click Delete Selected.
You can click Delete All to delete all firewall rules.
Revert to a Previous Application Firewall Configuration
The vShield Manager saves the App Firewall settings each time you publish a new rule. Clicking Publish
Changes causes the vShield Manager to save the previous configuration with a timestamp before adding the
new rule. These configurations are available from the History drop-down list.
Procedure
1 In the vSphere Client, go to Inventory > Hosts and Clusters.
2 Select a datacenter or cluster resource from the inventory panel.
3 Click the App Firewall tab.
4 Click History > Load.
The Firewall Configuration History dialog box displays the previous configurations in the order of
timestamps, with the most recent configuration listed at the top.
5 Select the configuration to which you want to revert.
6 Click OK.
60 VMware, Inc.
Page 61

7 In the Load Configuration dialog box, click OK.
8 Click Publish Changes.
The selected configuration is loaded.
Using SpoofGuard
After synchronizing with the vCenter Server, the vShield Manager collects the IP addresses of all vCenter guest
virtual machines from VMware Tools on each virtual machine. Up to vShield 4.1, vShield trusted the IP address
provided by VMware Tools on a virtual machine. However, if a virtual machine has been compromised, the
IP address can be spoofed and malicious transmissions can bypass firewall policies.
SpoofGuard allows you to authorize the IP addresses reported by VMware Tools, and alter them if necessary
to prevent spoofing. SpoofGuard inherently trusts the MAC addresses of virtual machines collected from the
VMX files and vSphere SDK. Operating separately from the App Firewall rules, you can use SpoofGuard to
block traffic determined to be spoofed.
When enabled, you can use SpoofGuard to monitor and manage the IP addresses reported by your virtual
machines in one of the following modes.
Chapter 11 vShield App Firewall Management
Automatically Trust IP
Assignments On Their
First Use
Manually Inspect and
Approve All IP
This mode allows all traffic from your virtual machines to pass while building
a table of MAC-to-IP address assignments. You can review this table at your
convenience and make IP address changes.
This mode blocks all traffic until you approve each MAC-to-IP address
assignment.
Assignments Before Use
NOTE SpoofGuard inherently allows DHCP requests regardless of enabled mode. However, if in manual
inspection mode, traffic does not pass until the DHCP-assigned IP address has been approved.
SpoofGuard Screen Options
The Spoofguard interface contains the following options:
The SpoofGuard screen displays the following options.
Table 11-1. SpoofGuard Screen Options
Option Description
Active IP assignments List of all validated IP addresses
Inactive IP Assignments List of IP addresses where the current IP address does not match the published IP
address.
Active Since Last Published List of IP addresses that have been validated since the policy was last updated
Unpublished IP assignment changes List of virtual machines for which you have edited the IP address assignment but
have not yet published
IP assignments that require my review
and approval
Duplicate IP assignments IP addresses that are duplicates of an existing assigned IP address within the
IP address changes that require approval before traffic can flow to or from these
virtual machines
selected datacenter
VMware, Inc. 61
Page 62

vShield Administration Guide
Enable SpoofGuard
Once enabled, you can use SpoofGuard to manage IP address assignments for your entire vCenter inventory.
IMPORTANT You must upgrade all vShield App instances to vShield App 1.0.0 Update 1 or later before you
enable SpoofGuard.
Procedure
1 In the vShield Manager user interface, go to the Settings and Reports view.
2 Click the SpoofGuard tab.
3 Click Edit to the right side of the Global Status heading.
4 For IP Assignment Tracking, click Enable.
5 For Operation Mode, select one of the following:
Option Description
Automatically Trust IP Assignments
on Their First Use
Manually Inspect and Approve All IP
Assignments Before Use
6 Click OK.
Select this option to trust all IP assignments upon initial registration with the
vShield Manager.
Select this option to require manual approval of all IP addresses. All traffic
to and from unapproved IP addresses is blocked.
Approve IP Addresses
If you set SpoofGuard to require manual approval of all IP address assignments, you must approve IP address
assignments to allow traffic from those virtual machines to pass.
Procedure
1 In the vSphere Client, go to the Hosts and Clusters view.
2 Select a datacenter resource from the resource tree.
3 Click the vShield tab.
4 Click the SpoofGuard tab.
5 Click the Require Approval or Duplicate IP assignments link.
6 Do one of the following:
n
Select the top check box in the right side check box column to select all assignments on the screen.
n
Select the check box for each assignment you are ready to approve.
7 Click Approve Selected.
8 Click Publish Now.
Edit an IP Address
You can edit the IP address assigned to a MAC address to correct the assigned IP address.
NOTE SpoofGuard accepts a unique IP address from more than virtual machine. However, you can assign an
IP address only once. An approved IP address is unique across the vShield system. Duplicate approved IP
addresses are not allowed.
62 VMware, Inc.
Page 63

Chapter 11 vShield App Firewall Management
Procedure
1 In the vSphere Client, go to the Hosts and Clusters view.
2 Select a datacenter resource from the resource tree.
3 Click the vShield tab.
4 Click the SpoofGuard tab.
5 Click one of the option links.
6 In the Approved IP column, click Edit.
7 Type an IP address in the Approved IP Address pop-up window.
8 Click Apply.
9 Click Publish Now.
Delete an IP Address
You can delete a MAC-to-IP address assignment from the SpoofGuard table to clean the table of a virtual
machine that is no longer active. Any deleted instance can reappear in the SpoofGuard table based on viewed
traffic and the current enabled state of SpoofGuard.
Procedure
1 In the vSphere Client, go to the Inventory > Hosts and Clusters
2 Select a datacenter resource from the resource tree.
3 Click the vShield tab.
4 Click the SpoofGuard tab.
5 Click one of the option links.
6 In the Approved IP column, click Delete.
7 Click Publish Now.
VMware, Inc. 63
Page 64

vShield Administration Guide
64 VMware, Inc.
Page 65

vShield Endpoint Events and Alarms 12
vShield Endpoint offloads antivirus and anti-malware agent processing to a dedicated secure virtual appliance
delivered by VMware partners. Since the secure virtual appliance (unlike a guest virtual machine) doesn't go
offline, it can continuously update antivirus signatures thereby giving uninterrupted protection to the virtual
machines on the host. Also, new virtual machines (or existing virtual machines that went offline) are
immediately protected with the most current antivirus signatures when they come online.
vShield Endpoint health status is conveyed by using alarms that show in red on the vCenter Server console.
In addition, more status information can be gathered by looking at the event logs.
IMPORTANT Your vCenter Server must be correctly configured for vShield Endpoint security:
n
Not all guest operating systems are supported by vShield Endpoint. Virtual machines with non-supported
operating systems are not protected by the security solution. For information on the supported operating
systems, see the Installing vShield Endpoint section in the vShield Quick Start Guide.
n
All hosts in a resource pool containing protected virtual machines must be prepared for vShield Endpoint
so that virtual machines continue to be protected as they are vMotioned from one ESX host to another
within the resource pool.
This chapter includes the following topics:
n
“View vShield Endpoint Status,” on page 65
n
“vShield Endpoint Alarms,” on page 66
n
“vShield Endpoint Events,” on page 66
n
“vShield Endpoint Audit Messages,” on page 67
View vShield Endpoint Status
Monitoring a vShield Endpoint instance involves checking for status coming from the vShield Endpoint
components: the security virtual machine (SVM), the ESX host-resident vShield Endpoint module, and the
protected virtual machine-resident thin agent.
Procedure
1 In the vSphere Client, go to Inventory > Hosts and Clusters.
2 Select a datacenter, cluster, or ESX host resource from the resource tree.
3 Click the vShield tab.
4 Click Endpoint.
The vShield Endpoint Health and Alarms page displays the health of the objects under the datacenter,
cluster, or ESX host you selected, and the active alarms.
VMware, Inc.
65
Page 66

vShield Administration Guide
vShield Endpoint Alarms
Alarms signal the vCenter Server administrator about vShield Endpoint events that require attention. Alarms
are automatically cancelled in case the alarm state is no longer present.
vCenter Server alarms can be displayed without a custom vSphere plug-in. See the vCenter Server Administration
Guide on events and alarms.
Upon registering as a vCenter Server extension, the vShield Manager defines the rules that create and remove
alarms, based on events coming from the three vShield Endpoint components: SVM, vShield Endpoint module,
and thin agent. Rules can be customized. For instructions on how to create new custom rules for alarms, see
the vCenter Server documentation. In some cases, there are multiple possible causes for the alarm. The tables
that follow list the possible causes and the corresponding actions you might want to take for remediation.
Host Alarms
Host alarms are generated by events affecting the health status of the vShield Endpoint module.
Table 12-1. Errors (Marked Red)
Possible Cause Action
The vShield Endpoint module has been installed
on the host, but is no longer reporting status to the
vShield Manager.
SVM Alarms
SVM alarms are generated by events affecting the health status of the SVM.
Table 12-2. Red SVM Alarms
Problem Action
There is a protocol version mismatch with the
vShield Endpoint module
vShield Endpoint could not establish a connection
to the SVM
The SVM is not reporting its status even though
guests are connected.
vShield Endpoint Events
Events are used for logging and auditing conditions inside the vShield Endpoint-based security system.
1 Ensure that vShield Endpoint is running by logging in to the host
and typing the command /etc/init.d/vShield-Endpoint-Mux
start
2 Ensure that the network is configured properly so that vShield
Endpoint can connect to the vShield Manager.
3 Reboot the vShield Manager.
Ensure that the vShield Endpoint module and SVM have a protocol
that is compatible with each other.
Ensure that the SVM is powered on and that the network is configured
properly.
Internal error. Contact your VMware support representative.
Events can be displayed without a custom vSphere plug-in. See the vCenter Server Administration Guide on
events and alarms.
Events are the basis for alarms that are generated. Upon registering as a vCenter Server extension, the vShield
Manager defines the rules that create and remove alarms.
Common arguments for all events are the event time stamp and the vShield Manager event_id.
The following table lists vShield Endpoint events reported by the SVM and the vShield Manager (VSM).
66 VMware, Inc.
Page 67

Chapter 12 vShield Endpoint Events and Alarms
Table 12-3. vShield Endpoint Events
Description Severity VC Arguments
vShield Endpoint solution SolutionName enabled. Supporting
version versionNumber of the VFile protocol.
ESX module enabled. info timestamp
ESX module uninstalled. info timestamp
The vShield Manager has lost connection with the ESX module. info timestamp
vShield Endpoint solution SolutionName was contacted by a noncompatible version of the ESX module.
A connection between the ESX module and SolutionName failed. error timestamp, ESX module version,
vShield Endpoint failed to connect to the SVM. error timestamp
vShield Endpoint lost connection with the SVM. error timestamp
vShield Endpoint Audit Messages
Audit messages include fatal errors and other important audit messages and are logged to vmware.log.
The following conditions are logged as AUDIT messages:
n
Thin agent initialization success (and version number.)
n
Thin agent initialization failure.
n
Established first time communication with SVM.
n
Failure to establish communication with SVM (when first such failure occurs).
info timestamp
error timestamp, solution version, ESX
module version
solution version
Generated log messages have the following substrings near the beginning of each log message: vf-AUDIT, vf-
ERROR, vf-WARN, vf-INFO, vf-DEBUG.
VMware, Inc. 67
Page 68

vShield Administration Guide
68 VMware, Inc.
Page 69

vShield Data Security Management 13
vShield Data Security provides visibility into sensitive data stored within your organization's virtualized and
cloud environments. Based on the violations reported by vShield Data Security, you can ensure that sensitive
data is adequately protected and assess compliance with regulations around the world.
To begin using vShield Data Security, you create a policy that defines the regulations that apply to data security
in your organization and specifies the areas of your environment and files to be scanned. A regulation is
composed of content blades, which identify the sensitive content to be detected. vShield supports PCI, PHI,
and PII related regulations only.
When you start a Data Security scan, vShield analyzes the data on the virtual machines in your vSphere
inventory and reports the number of violations detected and the files that violated your policy.
You can perform all data security tasks using REST APIs. For more information, see the vShield API
Programming Guide.
This chapter includes the following topics:
n
“vShield Data Security User Roles,” on page 69
n
“Defining a Data Security Policy,” on page 70
n
“Editing a Data Security Policy,” on page 72
n
“Running a Data Security Scan,” on page 72
n
“Analyzing Results,” on page 73
n
“Creating Regular Expressions,” on page 74
n
“Available Regulations,” on page 75
n
“Available Content Blades,” on page 90
n
“Supported File Formats,” on page 109
vShield Data Security User Roles
A user's role determines the actions that the user can perform.
Role Actions Allowed
Security Administrator Create and publish policies and view violation reports. Cannot start or stop a data security scan.
vShield Administrator Start and stop data security scans.
Auditor View configured policies and violation reports.
VMware, Inc. 69
Page 70

vShield Administration Guide
Defining a Data Security Policy
To detect sensitive data in your environment, you must create a data security policy. You must be a Security
Administrator to create policies.
To define a policy, you must specify the following:
1 Regulations
A regulation is a data privacy law for protecting PCI (Payment Card Industry), PHI (Protected Health
Information) and PII (Personally Identifiable Information) information. You can select the regulations that
your company needs to comply to. When you run a scan, vShield Data Security identifies data that violates
the regulations in your policy and is sensitive for your organization.
2 Exclusion areas
By default, all virtual machines in your data center are subject to sensitive data discovery. You can exclude
specific areas of your environment from the data security scan if they are test environments or if you want
to maintain sensitive data on them.
3 File filters
You can create filters to limit the data being scanned and exclude file types unlikely to contain sensitive
data from the scan.
Select Regulations
Once you select the regulations that you want your company data to comply with, vShield can identify files
that contain information which violates these particular regulations.
Prerequisites
You must have been assigned the Security Administrator role.
Procedure
1 In the vSphere Client, go to Inventory > Hosts and Clusters.
2 Select a datacenter.
NOTE Even though you are selecting a datacenter, the policy that you configure will be applied to the
entire vSphere inventory.
3 Click the vShield App tab and click Data Security.
4 Click the Policy tab and expand Regulations and standards to detect.
5 Click Edit and click All to display all available regulations.
6 Select the regulations for which you want to detect compliance.
NOTE For information on available regulations, see “Available Regulations,” on page 75.
7 Click Next.
70 VMware, Inc.
Page 71

Chapter 13 vShield Data Security Management
8 Certain regulations require additional information for vShield Data Security to recognize sensitive data.
If you selected a regulation that monitors Group Insurance Numbers, Patient Identification Numbers,
Medical Record Numbers, Health Plan Beneficiary Numbers, US Bank Account Numbers, Custom
Accounts, or Student identification numbers, specify a regular expression pattern for identifying that data.
NOTE Check the accuracy of the regular expression. Specifying incorrect regular expressions can slow
down the discovery process. For more information on regular expressions, see GUID-6F5D3FAA-
E445-4406-92BB-3C86B6734299#GUID-6F5D3FAA-E445-4406-92BB-3C86B6734299.
9 Click Finish.
10 If you are updating an existing policy, click Publish Changes to apply it.
Specify Areas to Exclude from the Policy Scan
By default, the entire vSphere infrastructure is scanned by vShield Data Security. You can exclude certain areas
from the scan.
Prerequisites
You must have been assigned the Security Administrator role.
Procedure
1 In the Policy tab of the Data Security panel, expand Set Excluded Area.
2 Click Edit.
3 Click in the field next to the Add button and select the datacenter, cluster, or resource pool you want to
exclude from the scan.
NOTE The C:\windows directories are excluded.
4 Click Add.
5 Click Save.
6 If you are updating an existing policy, click Publish Changes to apply it.
Specify File Filters
You can restrict the files that you want to monitor based on size, last modified date, or file extensions.
Prerequisites
You must have been assigned the Security Administrator role.
Procedure
1 In the Policy tab of the Data Security panel, expand Files to scan.
2 Click Change.
VMware, Inc. 71
Page 72

vShield Administration Guide
3 You can either monitor all files on the virtual machines in your inventory, or select the restrictions you
want to apply.
Option Description
Monitor all files on the guest virtual
machines
Monitor only the files that match the
following conditions
For information on file formats that vShield Data Security can detect, see “Supported File Formats,” on
page 109.
4 Click Save.
5 If you are updating an existing policy, click Publish Changes to apply it.
Editing a Data Security Policy
vShield Data Security scans all files.
Select the following options as appropriate.
n
Size indicates that vShield Data Security should only scan files less than
the specified size.
n
Last Modified Date indicates that vShield Data Security should scan
only files modified between the specified dates.
n
Types: Select Only files with the following extensions to enter the file
types to scan. Select All files, except those with extensions to enter the
file types to exclude from the scan.
After you have defined a data security policy, you can edit it by changing the regulations selected, areas
excluded from the scan, or the file filters. To apply the edited policy, you must publish it.
Prerequisites
Verify that you have been assigned the Security Administrator role.
Procedure
1 In the vSphere Client, select Inventory > Hosts and Clusters.
2 Select a datacenter.
NOTE Even though you are selecting a datacenter, the edited policy will be applied to the entire vSphere
inventory.
3 Click the vShield App tab and click Data Security.
4 Click the Policy tab and expand sections that you want to edit.
5 Make changes as appropriate.
6 Click Save.
7 If you are updating an existing policy, click Publish Changes to apply it.
NOTE If you publish a policy while a scan is running, the scan restarts. This rescan ensures that all virtual
machines comply with the edited policy.
Running a Data Security Scan
Running a data security scan identifies data in your virtual environment that violates your policy.
Prerequisites
You must be a vShield Administrator to start, pause, or stop a data security scan.
72 VMware, Inc.
Page 73

Chapter 13 vShield Data Security Management
Procedure
1 In the vSphere Client, go to Inventory > Hosts and Clusters.
2 Click the vShield App tab and click Data Security.
3 Click Start.
NOTE If a virtual machine is powered off, it will not be scanned till it is powered on.
If a scan is in progress, the available options are Pause and Stop.
All virtual machines in your datacenter are scanned once during a scan. If the policy is edited and published
while a scan is running, the scan restarts. This rescan ensures that all virtual machines comply with the edited
policy. A rescan is triggered by publishing an edited policy, not by data updates on your virtual machines.
If new virtual machines are added to your inventory while a scan is in progress, those machines will also be
scanned. If a virtual machine is moved to an excluded cluster or resource pool while the data security scan is
in progress, the files on that virtual machine are not scanned. In case a virtual machine is moved via vMotion
to another host, the scan continues on the second host (files that were scanned while the virtual machine was
on the previous host are not scanned again).
When the Data Security engine starts scanning a virtual machine, it records the scan start time. When the scan
ends, it records the end of the scan. You can view the scan start and end time for a cluster, host, or virtual
machine by selecting the Tasks and Events tab.
vShield Data Security throttles the number of virtual machines scanned on a host at a time to minimize impact
on performance. VMware recommends that you pause the scan during normal business hours to avoid any
performance overhead.
Analyzing Results
After you start a data security scan, vShield displays two reports - the regulations that are violated by files in
your inventory, and the violating files.
View Violation Counts Report
When you start a security scan, vShield displays the regulations that are being violated by the data in your
virtual environment.
Prerequisites
Verify that you have been assigned the Security Administrator or Auditor role.
Procedure
1 In the vSphere Client, select Inventory > Hosts and Clusters.
2 Select the datacenter, cluster, resource pool, or virtual machine for which you want to view reports.
3 Click Data Security.
4 Click the Reports tab in the Data Security panel.
The Violation counts list displays each regulation in your policy that is violated, and the number of times
it is violated.
VMware, Inc. 73
Page 74

vShield Administration Guide
View Violating Files Report
When you start a data security scan, vShield displays the files that contain data deemed sensitive by your
policy.
Prerequisites
Verify that you have been assigned the Security Administrator or Auditor role.
Procedure
1 In the vSphere Client, select Inventory > Hosts and Clusters.
2 Select the datacenter, cluster, resource pool, or virtual machine for which you want to view reports.
3 Click Data Security.
4 Click the Reports tab in the Data Security panel.
5 From View Report, select Violating files.
The Violating files report lists the datacenter, cluster, and virtual machine containing the files that violated the
policy, the regulations they violated, and the date and time at which the violations were detected.
If you fix a violating file by deleting the sensitive information from the file, deleting or encrypting the file, or
editing the policy, the file continues to be displayed in the Violating files section until the next scan is completed.
Download Violating Files Report
You can export the security scan reports to a CSV file.
Prerequisites
Verify that you have been assigned the Security Administrator or Auditor role.
Procedure
1 Display the Violating files report by following the steps described in “View Violating Files Report,” on
page 74.
2 Click Download Complete Report.
3 In Save in, browse to the location where you want to save the file.
4 Specify the File name.
5 Click Save.
Creating Regular Expressions
A regular expression is a pattern that describes a certain sequence of text characters, otherwise known as
strings. You use regular expressions to search for, or match, specific strings or classes of strings in a body of
text.
Using a regular expression is like performing a wildcard search, but regular expressions are far more powerful.
Regular expressions can be very simple, or very complex. An example of a simple regular expression is cat.
This finds the first instance of the letter sequence cat in any body of text that you apply it to. If you want to
make sure it only finds the word cat, and not other strings like cats or hepcat, you could use this slightly more
complex one: \bcat\b.
This expression includes special characters that make sure a match occurs only if there are word breaks on
both sides of the cat sequence. As another example, to perform a near equivalent to the typical wildcard search
string c+t, you could use this regular expression: \bc\w+t\b.
74 VMware, Inc.
Page 75

This means find a word boundary (\b) followed by a c, followed by one or more non-whitespace, nonpunctuation characters (\w+), followed by a t, followed by a word boundary (\b). This expression finds cot,
cat, croat, but not crate.
Expressions can get very complex. The following expression finds any valid email address.
\b[A-Za-z0-9._%-]+@[A-Za-z0-9.-]+\.[A-Za-z]{2,4}\b
For more information on creating regular expressions, see http://userguide.icu-project.org/strings/regexp.
Available Regulations
Below are descriptions of each of the regulations available within vShield Data Security.
Arizona SB-1338
Arizona SB-1338 is a state data privacy law which protects personally identifiable information. Arizona SB-1338
was signed into law April 26, 2006 and became effective December 31, 2006. The law applies to any person or
entity that conducts business in Arizona and owns or licenses unencrypted computerized data that includes
personally identifiable information.
The policy looks for at least one match to personally identifiable information, which may include:
Chapter 13 vShield Data Security Management
n
Credit Card Number
n
Credit Card Track Data
n
US Drivers License Number
n
US Social Security Number
ABA Routing Numbers
A routing transit number (RTN) or ABA number is a nine digit bank code, used in the United States, which
appears on items such as checks that identifies which financial institution it is drawn upon. This code is also
used by the Automated Clearing House to process direct deposits and other automated transfers. This system
is named after the American Bankers Association, which designed it in 1910.
There are approximately 24,000 active routing and transit numbers currently in use. Every financial institution
has one of these; it is a 9-digit number printed in MICR font at the bottom of checks that specifically identifies
which financial institution it is associated with, and it is governed by the Routing Number Administrative
Board which is sponsored by the ABA.
The primary purposes of the routing number are:
n
To identify the bank which is responsible to either pay or give credit or is entitled to receive payment or
credit for a financial transaction.
n
To provide a reference to a designated presentment point of the bank at which the transaction can be
delivered or presented.
For more information, see “ABA Routing Number Content Blade,” on page 90.
VMware, Inc. 75
Page 76

vShield Administration Guide
Australia Bank Account Numbers
An Australian bank account number, along with a BSB (Bank-State-Branch number) identifies the bank account
of an individual or organization.
Australia Business and Company Numbers
Australia Business Numbers (ABN) and Australia Company Numbers (ACN) uniquely identify businesses
within the country.
The ABN is a unique 11-digit identifying number that businesses use when dealing with other businesses. A
company's ABN frequently includes the ACN as the last nine digits. The ABN indicates that a person, trust or
company is registered with the Australian Business Register (ABR).
An Australian Company Number (usually shortened to ACN) is a unique 9-digit number issued by the
Australian Securities and Investments Commission (ASIC) to every company registered under the
Commonwealth Corporations Act 2001 as an identifier. The number is usually printed in three groups of three
digits.
Companies are required to disclose their ACN on:
n
the common seal (if any)
n
every public document issued, signed or published by, or on behalf of, the company
n
every eligible negotiable instrument issued, signed or published by, or on behalf of, the company
n
all documents required to be lodged with ASIC
This regulation uses the content blades titled Australia Business Number or Australia Company Number. For
more information, see.
Australia Medicare Card Numbers
All Australian citizens and permanent residents of Australia and their families are eligible for a Medicare Card,
with the exception of residents on Norfolk Island. The card lists an individual as well as members of his or her
family he or she chooses to add who are also permanent residents and meet the Medicare definition of a
dependent (maximum of five names). It is necessary to provide a Medicare Number for a Medicare rebate or
to gain access to the public hospital system to be treated at no cost as a public patient.
Medicare is administered by Medicare Australia (known as the Health Insurance Commission until late 2005)
which also has the responsibility for supplying Medicare cards and numbers. Almost every eligible person has
a card: in June 2002 there were 20.4 million Medicare card-holders, and the Australian population was less
than 20 million at the time (card-holders includes overseas Australians who still have a card).
The Medicare card is used for health care purposes only and cannot be used to track in a database. It contains
a name and number, and no visible photograph (with the exception of the Tasmanian “Smartcard” version
which does have an electronic image of the cardholder on an embedded chip).
The primary purpose of the Medicare card is to prove Medicare eligibility when seeking Medicare-subsidized
care from a medical practitioner or hospital. Legally, the card need not be produced and a Medicare number
is sufficient. In practice, most Medicare providers will have policies requiring the card be presented to prevent
fraud.
Australia Tax File Numbers
A Tax File Number (TFN) is a number that is issued to a person by the Commissioner of Taxation and is used
to verify client identity and establish income level.
This policy uses the content blade titled Australia Tax File Number. Refer to the description of the content
blades to understand what content will be detected.
76 VMware, Inc.
Page 77

Chapter 13 vShield Data Security Management
California AB-1298
California AB-1298 is a state data privacy law which protects personally identifiable information. California
AB-1298 in was signed into law October 14, 2007 and became effective January 1, 2008. The law applies to any
person, business, or state agency that conducts business in California and owns or licenses unencrypted
computerized data that includes personally identifiable information.
This law is an amendment to California SB-1386 to include medical information and health information in the
definition of personal information.
The regulation looks for at least one match to personally identifiable information, as defined through the
following content blades:
n
Admittance and Discharge Dates
n
Credit Card Numbers
n
Credit Card Track Data
n
Group Insurance Numbers
n
Health Plan Beneficiary Numbers
n
Healthcare Dictionaries
n
Medical History
n
Patient Identification Numbers
n
US Drivers License Numbers
n
US National Provider Identifiers
n
US Social Security Numbers
California SB-1386
California SB-1386 is a state data privacy law which protects personally identifiable information. California
SB-1386 was signed into law September 25, 2002 and became effective July 1, 2003. The law applies to any
person, business, or state agency that conducts business in California and owns or licenses unencrypted
computerized data that includes personally identifiable information.
This law has been amended to include medical information and health information; it is now referred to as
California AB-1298, which is provided as an expanded regulation in the SDK. If California AB-1298 is enabled,
you do not need to also use this regulation as the same information is detected as part of AB-1298.
The regulation looks for at least one match to personally identifiable information, which may include:
n
Credit Card Number
n
Credit Card Track Data
n
US Drivers License Number
n
US Social Security Number
Canada Social Insurance Numbers
A Social Insurance Number (SIN) is a number issued in Canada to administer various government programs.
The SIN was created in 1964 to serve as a client account number in the administration of the Canada Pension
Plan and Canada's varied employment insurance programs. In 1967, Revenue Canada (now the Canada
Revenue Agency) started using the SIN for tax reporting purposes.
VMware, Inc. 77
Page 78

vShield Administration Guide
Canada Drivers License Numbers
In Canada, driver's licenses are issued by the government of the province in which the driver resides. Thus,
specific regulations relating to driver's licenses vary province to province, though overall they are quite similar.
All provinces have provisions allowing non-residents to use licenses issued by other provinces and
International Driving Permits.
The regulation looks for at least a match to at least one of the following content blades:
n
Alberta Drivers Licence
n
British Columbia Drivers Licence
n
Manitoba Drivers Licence
n
New Brunswick Drivers Licence
n
Newfoundland and Labrador Drivers Licence
n
Nova Scotia Drivers Licence
License pattern rules: 5 letters followed by 9 digits
n
Ontario Drivers Licence
n
Prince Edward Island Drivers Licence
n
Quebec Drivers Licence
n
Saskatchewan Drivers Licence
Colorado HB-1119
Colorado HB-1119 is a state data privacy law which protects personally identifiable information. Colorado
HB-1119 was signed into law April 24, 2006 and became effective September 1, 2006. The law applies to any
individual or a commercial entity that conducts business in Colorado and owns or licenses unencrypted
computerized data that includes personally identifiable information.
The regulation looks for at least one match to personally identifiable information, which may include:
n
Credit Card Number
n
Credit Card Track Data
n
US Drivers License Number
n
US Social Security Number
Connecticut SB-650
Connecticut SB-650 is a state data privacy law which protects personally identifiable information. Connecticut
SB-650 was signed into law June 8, 2005 and became effective January 1, 2006. The law applies to any person,
business or agency that conducts business in Connecticut and owns or licenses unencrypted computerized
data that includes personally identifiable information.
The regulation looks for at least one match to personally identifiable information, as defined through the
following content blades:
n
Admittance and Discharge Dates
n
Birth and Death Certificates
n
Credit Card Numbers
n
Credit Card Track Data
78 VMware, Inc.
Page 79

Chapter 13 vShield Data Security Management
n
Group Insurance Numbers
n
Health Plan Beneficiary Numbers
n
Healthcare Dictionaries
n
Medical History
n
Patient Identification Numbers
n
US Drivers License Numbers
n
US National Provider Identifiers
n
US Social Security Numbers
Credit Card Numbers
Custom Account Numbers
If you have organizational account numbers that need to be protected, then customize the content blade
assigned to the Custom Account Numbers regulation with the number pattern via a regular expression.
EU Debit Card Numbers
The policy looks for debit card numbers as issued by the major debit card carriers in the European Union such
as Maestro, Visa and Laser.
FERPA (Family Educational Rights and Privacy Act)
FERPA protects the privacy of student records at educational institutions receiving U.S. Department of
Education funds. It requires the educational institution to have written permission from a parent or student
in order to release information from a student’s educational record.
Under certain circumstances the release of information such as name, address, telephone number, honors and
awards, and dates of attendance may be released or published without permission. Information that can
connect an individual with grades or disciplinary actions requires permission.
The policy must match both of the following content blades for a document to trigger as a violation:
n
Student Identification Numbers
n
Student Records
Florida HB-481
Florida HB-481 is a state data privacy law which protects personally identifiable information. Florida HB-481
was signed into law June 14, 2005 and became effective July 1, 2005. The law applies to any person, firm,
association, joint venture, partnership, syndicate, corporation, and all other groups or combinations that
conduct business in Florida and owns or licenses unencrypted computerized data that includes personally
identifiable information.
The policy looks for at least one match to personally identifiable information, which may include:
n
Credit Card Number
n
Credit Card Track Data
n
US Drivers License Number
n
US Social Security Number
VMware, Inc. 79
Page 80

vShield Administration Guide
France IBAN Numbers
A France International Bank Account Number (IBAN) is an international standard for identifying France bank
accounts across national borders and was originally adopted by the European Committee for Banking
Standards. The official IBAN registrar under ISO 13616:2003 is issued by the Society for Worldwide Interbank
Financial Telecommunication (SWIFT).
The policy looks for a match to the content blade France IBAN Number.
France National Identification Numbers Policy
The policy identifies documents and transmissions that contain national identification numbers, also called
INSEE numbers and Social Security numbers, issued to individuals at birth by the Institut National de la
Statistique et des Etudes Economiques (INSEE) in France.
The policy looks for a match to the content blade France National Identification Number.
Georgia SB-230 Policy
Georgia SB-230 is a state data privacy law which protects personally identifiable information. Georgia SB-230
was signed into law May 5, 2005 and became effective May 5, 2005. The law applies to any person or entity
who, for monetary fees or dues, engages in whole or in part in the business of collecting, assembling, evaluating,
compiling, reporting, transmitting, transferring, or communicating information concerning individuals for the
primary purpose of furnishing personally identifiable information to nonaffiliated third parties, or any state
or local agency or subdivision thereof that maintains data that includes personally identifiable information.
The policy looks for at least one match to personally identifiable information, which may include:
n
Credit Card Number
n
Credit Card Track Data
n
US Drivers License Number
n
US Social Security Number
Germany BIC Numbers Policy
A Bank Identifier Code (BIC) uniquely identifies a particular bank and is used in France and worldwide for
the exchange of money and messages between banks. The policy identifies documents and transmissions that
contain BIC codes, also known as SWIFT codes, issued by the Society for Worldwide Interbank Financial
Telecommunication (SWIFT).
The policy looks for a match to the content blade Germany BIC Number.
Germany Driving License Numbers Policy
A Germany Drivers License Number is an identification number on a German Drivers License and identifies
the owner of said number for the purposes of driving and driving offences.
The policy looks for a match to the content blade Germany Driving License Number.
Germany IBAN Numbers Policy
International Bank Account Number (IBAN) is an international standard for identifying bank accounts across
national borders and was originally adopted by the European Committee for Banking Standards. The official
IBAN registrar under ISO 13616:2003 is issued by the Society for Worldwide Interbank Financial
Telecommunication (SWIFT).
The policy looks for a match to the content blade Germany IBAN Number.
80 VMware, Inc.
Page 81

Chapter 13 vShield Data Security Management
Germany National Identification Numbers Policy
The policy identifies documents and transmissions that contain personal identification numbers, or
Personalausweis, issued to individuals in Germany.
The policy looks for a match to the content blade Germany National Identification Number.
Germany VAT Numbers Policy
based business or legal entity for the purposes of levying Value Added Tax (or goods and services tax).
The policy looks for a match to the content blade Germany VAT Number.
Hawaii SB-2290 Policy
Hawaii SB-2290 is a state data privacy law which protects personally identifiable information.
Hawaii SB-2290 was signed into law May 25, 2006 and became effective January 1, 2007. The law applies to
any sole proprietorship, partnership, corporation, association, or other group, however organized, and
whether or not organized to operate at a profit, including financial institutions organized, chartered, or holding
a license or authorization certificate under the laws of Hawaii, any other state, the US, or any other country,
or the parent or the subsidiary of any such financial institution, and any entity whose business is records
destruction, or any government agency that collects personally identifiable information for specific
government purposes
The policy looks for at least one match to personally identifiable information, which may include:
n
Credit Card Number
n
Credit Card Track Data
n
US Drivers License Number
n
US Social Security Number
HIPPA (Healthcare Insurance Portability and Accountability Act) Policy
The Health Insurance Portability and Accountability Act (HIPAA) was enacted by the Congress of the United
States of America. HIPAA includes a Privacy Rule regulating the use and disclosure of protected health
information (PHI), a Security Rule defining security safeguards required for electronic protected health
information (ePHI), and an Enforcement Rule that defines procedures for violation investigations and penalties
for confirmed violations.
PHI is defined as individually identifiable health information that is transmitted or maintained in any form or
medium (electronic, oral, or paper) by a covered entity or its business associates, excluding certain educational
and employment records. Individually identifiable means the identity of the subject is or may readily be
ascertained by the investigator or associated with the information.
This policy is designed to detect electronic PHI, which contains a personal health number in addition to healthrelated terminology. Some false negatives may occur since combinations of personally identifiable information,
such as name and address, would not be considered as ePHI with this policy. Internal research indicates that
the majority of health communication will contain a personal health number in addition to health-related
terminology.
VMware, Inc. 81
Page 82

vShield Administration Guide
Idaho SB-1374 Policy
Idaho SB-1374 is a state data privacy law which protects personally identifiable information. Idaho SB-1374
was signed into law March 30, 2006 and became effective July 1, 2006. The law applies to any agency, individual,
or commercial entity that conducts business in Idaho and owns or licenses unencrypted computerized data
that includes personally identifiable information about a resident of Idaho.
The policy looks for at least one match to personally identifiable information, which may include:
n
Credit Card Number
n
Credit Card Track Data
n
US Drivers License Number
n
US Social Security Number
Illinois SB-1633
Illinois SB-1633 is a state data privacy law which protects personally identifiable information. Illinois SB-1633
was signed into law June 16, 2005 and became effective June 27, 2006.
The law applies to any data collector, which includes, but is not limited to, government agencies, public and
private universities, privately and publicly held corporations, financial institutions, retail operators, and any
other entity that, for any purpose, handles, collects, disseminates, or otherwise deals with nonpublic personally
identifiable information that owns or licenses personally identifiable information concerning an Illinois
resident.
The policy looks for at least one match to personally identifiable information, which may include:
n
Credit Card Number
n
Credit Card Track Data
n
US Drivers License Number
n
US Social Security Number
Indiana HB-1101 Policy
Indiana HB-1101 is a state data privacy law which protects personally identifiable information. Indiana
HB-1101 was signed into law April 26, 2005 and became effective July 1, 2006. The law applies to any individual,
corporation, business trust, estate, trust partnership, association, nonprofit corporation or organization,
cooperative, or any other legal entity that owns or licenses unencrypted computerized data that includes
personally identifiable information.
The policy looks for at least one match to personally identifiable information, which may include:
n
Credit Card Number
n
Credit Card Track Data
n
US Drivers License Number
n
US Social Security Number
Italy Driving License Numbers Policy
A Italy Drivers License Number is an identification number on a Italian Drivers License and identifies the
owner of said number for the purposes of driving and driving offences.
The policy looks for a match to the content blade Italy Driving License Number.
82 VMware, Inc.
Page 83

Chapter 13 vShield Data Security Management
Italy IBAN Numbers Policy.
A International Bank Account Number (IBAN) is an international standard for identifying bank accounts across
national borders and was originally adopted by the European Committee for Banking Standards. The official
IBAN registrar under ISO 13616:2003 issued by the Society for Worldwide Interbank Financial
Telecommunication (SWIFT)
The policy looks for a match to the content blade Italy IBAN Number.
Italy National Identification Numbers Policy
The policy identifies documents and transmissions that contain personal identification numbers, or Codice
Fiscale, issued to individuals in Italy.
The policy looks for a match to the content blade Italy National Identification Number.
Kansas SB-196 Policy
Kansas SB-196 is a state data privacy law which protects personally identifiable information. Kansas SB-196
was signed into law April 19, 2006 and became effective January 1, 2007. The law applies to any individual,
partnership, corporation, trust, estate, cooperative, association, government, or government subdivision or
agency or other entity that conducts business in Kansas and owns or licenses unencrypted computerized data
that includes personally identifiable information.
The policy looks for at least one match to personally identifiable information, which may include:
n
Credit Card Number
n
Credit Card Track Data
n
US Drivers License Number
n
US Social Security Number
Louisiana SB-205 Policy
Louisiana SB-205 is a state data privacy law which protects personally identifiable information. Louisiana
SB-205 was signed into law July 12, 2005 and became effective January 1, 2006. The law applies to any
individual, corporation, partnership, sole proprietorship, joint stock company, joint venture, or any other legal
entity that conducts business in Louisiana and owns or licenses unencrypted computerized data that includes
personally identifiable information.
The policy looks for at least one match to personally identifiable information, which may include:
n
Credit Card Number
n
Credit Card Track Data
n
US Drivers License Number
n
US Social Security Number
VMware, Inc. 83
Page 84

vShield Administration Guide
Maine LD-1671 Policy
Maine LD-1671 is a state data privacy law which protects personally identifiable information. Maine LD-1671
was signed into law June 10, 2005 and became effective January 31, 2006.
The law applies to any individual, partnership, corporation, limited liability company, trust, estate,
cooperative, association, or other entity, including agencies of state government, the University of Maine
System, the Maine Community College System, Maine Maritime Academy and private collages and
universities, or any information in whole or in part in the business of collecting, assembling, evaluating,
compiling, reporting, transmitting, transferring or communicating information concerning individuals for the
primary purpose of furnishing personally identifiable information to nonaffiliated third parties that maintains
computerized data that includes personally identifiable information.
The policy looks for at least one match to personally identifiable information, which may include:
n
Credit Card Number
n
Credit Card Track Data
n
US Drivers License Number
n
US Social Security Number
Massachusetts CMR-201
Massachusetts CMR-201 is a state data privacy regulation which protects personally identifiable information.
Massachusetts CMR-201 was issued on September 19, 2008 and became effective May 1, 2009. The regulation
applies to all businesses and other legal entities that own, license, collect, store or maintain personal information
about a resident of the Commonwealth of Massachusetts.
The policy looks for at least one match to personally identifiable information, which may include:
n
ABA Routing Numbers
n
Credit Card Number
n
Credit Card Track Data
n
US Bank Account Numbers
n
US Drivers License Number
n
US Social Security Number
Minnesota HF-2121
Minnesota HF-2121 is a state data privacy law which protects personally identifiable information. Minnesota
HF-2121 was signed into law June 2, 2005 and became effective January 1, 2006. The law applies to any person
or business that conducts business in Minnesota and owns or licenses data that includes personally identifiable
information.
The policy looks for at least one match to personally identifiable information, which may include:
n
Credit Card Number
n
Credit Card Track Data
n
US Drivers License Number
n
US Social Security Number
84 VMware, Inc.
Page 85

Chapter 13 vShield Data Security Management
Montana HB-732
Montana HB-732 is a state data privacy law which protects personally identifiable information. Montana
HB-732 was signed into law April 28, 2005 and became effective March 1, 2006. The law applies to any person
or business that conducts business in Montana and owns or licenses computerized data that includes personally
identifiable information.
The policy looks for at least one match to personally identifiable information, which may include:
n
Credit Card Number
n
Credit Card Track Data
n
US Drivers License Number
n
US Social Security Number
Netherlands Driving Licence Numbers
A Netherlands Driving License number is an identification number on a Netherlands Drivers License and
identifies the owner of said number for the purposes of driving and driving offences.
The policy looks for a match to the content blade Netherlands Driving License Number.
Nevada SB-347
Nevada SB-347 is a state data privacy law which protects personally identifiable information. Nevada SB-347
was signed into law June 17, 2005 and became effective October 1, 2005. The law applies to any government
agency, institution of higher education, corporation, financial institution or retail operator, or any other type
of business entity or association that owns or
The policy looks for at least one match to personally identifiable information, which may include:
n
Credit Card Number
n
Credit Card Track Data
n
US Drivers License Number
n
US Social Security Number
New Hampshire HB-1660
New Hampshire HB-1660 is a state data privacy law which protects personally identifiable information. New
Hampshire HB-1660 was signed into law June 2, 2006 and became effective January 1, 2007. The law applies
to any individual, corporation, trust, partnership, incorporated or unincorporated association, limited liability
company, or other form of entity, or any agency, authority, board, court, department, division, commission,
institution, bureau, or other state governmental entity, or any political subdivision of the state doing business
in New Hampshire that owns or licenses computerized data that includes personally identifiable information.
The policy looks for at least one match to personally identifiable information, which may include:
n
Credit Card Number
n
Credit Card Track Data
n
US Drivers License Number
n
US Social Security Number
VMware, Inc. 85
Page 86

vShield Administration Guide
New Jersey A-4001
New Jersey A-4001 is a state data privacy law which protects personally identifiable information.
New Jersey A-4001 was signed into law September 22, 2005 and became effective January 1, 2006. The law
applies to New Jersey, and any country, municipality, district, public authority, public agency, and any other
political subdivision or public body in New Jersey, any sole proprietorship, partnership, corporation,
association, or other entity, however organized and whether or not organized to operate at a profit, including
a financial institution organized, chartered, or holding a license or authorization certificate under the law of
New Jersey, any other state, the United States, or of any other country, or the parent or the subsidiary of a
financial institution, that conducts business in New Jersey that compiles or maintains computerized records
that include personally identifiable information.
The policy looks for at least one match to personally identifiable information, which may include:
n
Credit Card Number
n
Credit Card Track Data
n
US Drivers License Number
n
US Social Security Number
New York AB-4254
New York AB-4254 is a state data privacy law which protects personally identifiable information. New York
AB-4254 was signed into law August 10, 2005 and became effective December 8, 2005. The law applies to any
person or business which conducts business in New York and owns or licenses unencrypted computerized
data that includes personally identifiable information.
The policy looks for at least one match to personally identifiable information, which may include:
n
Credit Card Number
n
Credit Card Track Data
n
US Drivers License Number
n
US Social Security Number
New Zealand Inland Revenue Department Numbers
The policy identifies documents and transmissions that contain New Zealand Inland Revenue Department
(IRD) numbers issued by the Inland Revenue Department to every taxpayer and organization. The number
must be provided by an individual to the Inland Revenue, employers, banks or other financial institutions,
KiwiSaver scheme providers, StudyLink and tax agents.
The policy looks for a match to the content blade New Zealand Inland Revenue Department Number.
New Zealand Ministry of Health Numbers
The policy identifies documents and transmissions that contain New Zealand Health Practitioner Index (HPI)
or National Health Index (NHI) numbers.
The New Zealand Ministry of Health, or Manatū Hauora in Māori, is the New Zealand government's principal
agent and advisor on health and disability. The agency uses the NHI numbering system for registering patients
and the HPI system for registering medical practitioners to ensure that records are accurate while protecting
the privacy of individuals. This policy detects 6-digit alphanumeric New Zealand Health Practitioner Index
Common Person numbers (HPI-CPN), which uniquely identify a health practitioner or worker. This policy
also detects 7-digit NHI numbers used to uniquely identify a patient within the New Zealand health system.
86 VMware, Inc.
Page 87

Chapter 13 vShield Data Security Management
The policy looks for a match to either of the content blades:
n
New Zealand Health Practitioner Index Number
n
New Zealand National Health Index Number
Ohio HB-104
Ohio HB-104 is a state data privacy law which protects personally identifiable information. Ohio HB-104 was
signed into law November 17, 2005 and became effective December 29, 2006. The law applies to any individual,
corporation, business trust, estate, trust, partnership, or association that conducts business in Ohio and owns
or licenses computerized data that includes personally identifiable information.
The policy looks for at least one match to personally identifiable information, which may include:
n
Credit Card Number
n
Credit Card Track Data
n
US Drivers License Number
n
US Social Security Number
Oklahoma HB-2357
Oklahoma HB-2357 is a state data privacy law which protects personally identifiable information. Oklahoma
HB-2357 was signed into law June 8, 2006 and became effective November 1, 2008. The law applies to any
corporations, business trusts, estates, partnerships, limited partnerships, limited liability partnerships, limited
liability companies, associations, organizations, joint ventures, governments, governmental subdivisions,
agencies, or instrumentalities, or any other legal entity, whether for profit or not-for-profit that conducts
business in Oklahoma HB-2357 and owns or licenses unencrypted computerized data that includes personally
identifiable information.
The policy looks for at least one match to personally identifiable information, which may include:
n
Credit Card Number
n
Credit Card Track Data
n
US Drivers License Number
n
US Social Security Number
Patient Identification Numbers
The personally identifiable information (PII) commonly held by hospitals and healthcare-related organizations
and businesses in the United States of America. This policy should be customized to define the patient
identification number format.
The policy looks for at least one match to personally identifiable information, which may include:
n
Patient Identification Numbers
n
US National Provider Identifier
n
US Social Security Number
VMware, Inc. 87
Page 88

vShield Administration Guide
Payment Card Industry Data Security Standard (PCI-DSS)
The PCI DSS, a set of comprehensive requirements for enhancing payment account data security, was
developed by the founding payment brands of the PCI Security Standards Council, including American
Express, Discover Financial Services, JCB International, MasterCard Worldwide and Visa Inc. Inc.
International, to help facilitate the broad adoption of consistent data security measures on a global basis.
The PCI DSS is a multifaceted security standard that includes requirements for security management, policies,
procedures, network architecture, software design and other critical protective measures. This comprehensive
standard is intended to help organizations proactively protect customer account data.
The policy looks for at least one match to either of the content blades:
n
Credit Card Number
n
Credit Card Track Data
Texas SB-122
Texas SB-122 is a state data privacy law which protects personally identifiable information. Texas SB-122 was
signed into law June 17, 2005 and became effective September 1, 2005. The law applies to any person that
conducts business in Texas and owns or licenses unencrypted computerized data that includes personally
identifiable information.
The policy looks for at least one match to personally identifiable information, which may include:
n
Credit Card Number
n
Credit Card Track Data
n
US Drivers License Number
n
US Social Security Number
UK BIC Numbers
A Bank Identifier Code (BIC) uniquely identifies a particular bank and is used in the UK and worldwide for
the exchange of money and messages between banks. The policy identifies documents and transmissions that
contain BIC codes, also known as SWIFT codes, issued by the Society for Worldwide Interbank Financial
Telecommunication (SWIFT).
The policy looks for a match to the content blade UK BIC Number.
UK Driving Licence Numbers
A UK driving license number is an identification number on a UK driving license and identifies the owner of
said number for the purposes of driving and driving offences.
The policy looks for a match to the content blade UK Driving License Number.
UK IBAN Numbers
International Bank Account Number (IBAN) is an international standard for identifying the UK bank accounts
across national borders and was originally adopted by the European Committee for Banking Standards. The
official IBAN registrar under ISO 13616:2003 is issued by the Society for Worldwide Interbank Financial
Telecommunication (SWIFT).
The policy looks for a match to the content blade UK IBAN Number.
88 VMware, Inc.
Page 89

Chapter 13 vShield Data Security Management
UK National Health Service Numbers
A UK National Health Service number is an identification number provided by the UK National Health Service
and identifies the owner of said number for the purposes of medical records.
The policy looks for a match to the content blade UK National Health Service Number.
UK National Insurance Numbers (NINO)
UK National Insurance is a system of payments made out of earnings by employees, employers and the selfemployed to the Government that entitle you to a state pension and other benefits.
UK National Insurance Numbers (NINO) are the identification numbers assigned to each person born in the
UK, or to anyone resident in the UK who is a legal employee, student, recipient of social welfare benefits,
pension etc.
The policy looks for a match at least one of the content blades UK NINO Formal or UK NINO Informal.
UK Passport Numbers
The policy identifies documents and transmissions that contain passport numbers issued in the UK.
The policy looks for a match to the content blade UK Passport Number.
US Drivers License Numbers
Driver's licenses issued in the United States have a number or alphanumeric code issued by the Department
of Motor Vehicles (or equivalent), usually show a photograph of the bearer, as well as a copy of his or her
signature, the address of his or her primary residence, the type or class of license, restrictions and/or
endorsements (if any), the physical characteristics of the bearer (such as height, weight, hair color, eye color,
and sometimes even skin color), and birth date. No two driver's license numbers issued by a state are alike.
Social Security numbers are becoming less common on driver's licenses, due to identity theft concerns.
The policy looks for a match to the content blade US Drivers Licenses.
US Social Security Numbers
The U.S. Social Security number is issued to U.S. citizens, permanent residents, and temporary (working)
residents under section 205(c)(2) of the Social Security Act, codified as 42 U.S.C. § 405(c)(2). The number is
issued to an individual by the Social Security Administration, an independent agency of the United States
government. Its primary purpose is to track individuals for taxation purposes.
Utah SB-69
Utah SB-69 is a state data privacy law which protects personally identifiable information. Utah SB-69 was
signed into law March 20, 2006 and became effective January 1, 2007. The law applies to any who owns or
license computerized data that includes personally identifiable information concerning a Utah resident.
The policy looks for at least one match to personally identifiable information, which may include:
n
Credit Card Number
n
Credit Card Track Data
n
US Drivers License Number
n
US Social Security Number
VMware, Inc. 89
Page 90

vShield Administration Guide
Vermont SB-284
Vermont SB-284 is a state data privacy law which protects personally identifiable information. Vermont SB-284
was signed into law May 18, 2006 and became effective January 1, 2007. The law applies to any data collector
that owns or licenses unencrypted computerized data that includes personally identifiable information
concerning an individual residing in Vermont.
The policy looks for at least one match to personally identifiable information, which may include:
n
Credit Card Number
n
Credit Card Track Data
n
US Drivers License Number
n
US Social Security Number
Washington SB-6043
Washington SB-6043 is a state data privacy law which protects personally identifiable information. Washington
SB-6043 was signed into law May 10, 2005 and became effective July 24, 2005. The law applies to any state or
local agency or any person or business which conducts business in Washington and owns or licenses
computerized data that includes personally identifiable information.
The policy looks for at least one match to personally identifiable information, which may include:
n
Credit Card Number
n
Credit Card Track Data
n
US Drivers License Number
n
US Social Security Number
Available Content Blades
This sections lists the available content blades for vShield regulations.
ABA Routing Number Content Blade
The content blade looks for matches to 3 pieces of information in close proximity of each other.
The content blade looks for:
n
ABA routing number
n
Banking words and phrases (e.g. aba, routing number, checking, savings)
n
Personally identifiable information (e.g. name, address, phone number)
Words and phrases related to banking are implemented in order to increase precision. A routing number is 9digits and may pass for many different data types, for example, a valid US Social Security number, Canadian
Social Insurance number or international telephone number.
Since routing numbers themselves are not sensitive, personally identifiable information is necessary for a
violation to occur.
Admittance and Discharge Dates Content Blade
The content blade looks for matches to the U. S. Date Format entity and words and phrases such as admit date,
admittance date, date of discharge, discharge date in close proximity to each other.
90 VMware, Inc.
Page 91

Chapter 13 vShield Data Security Management
Alabama Drivers License Content Blade
The content blade looks for matches to the Alabama driver’s license pattern and words and phrases such as
driver’s license and license number and, optionally, terms such as AL or Alabama.
Driver's license pattern
7 Numeric or 8 Numeric
Alaska Drivers License Content Blade
The content blade looks for matches to the Alaska driver’s license pattern and words and phrases such as
driver’s license and license number and, optionally, terms such as AK or Alaska.
Driver's license pattern:
7 Numeric
Alberta Drivers Licence Content Blade
The content blade looks for matches to the Alaska driver’s license pattern and words and phrases such as
driver’s license and license number and, optionally, terms such as AK or Alaska.
Driver's license pattern
7 Numeric
American Express Content Blade
The content blade looks for a combination of the following pieces of information.
n
More than one American Express credit card number
n
A single credit card number plus words and phrases such as ccn, credit card, expiration date
n
A single credit card number plus an expiration date
VMware, Inc. 91
Page 92

vShield Administration Guide
Arizona Drivers License Content Blade
The content blade looks for matches to the Arizona driver’s license pattern and words and phrases such as
driver’s license and license number and, optionally, terms such as AZ or Arizona.
The Driver's license pattern can be 1 Alphabetic, 8 Numeric; or 9 Numeric (SSN); or 9 Numeric (Unformatted
SSN).
Arkansas Drivers License Content Blade
The content blade looks for matches to the Arizona driver’s license pattern and words and phrases such as
driver’s license and license number and, optionally, terms such as AR or Arkansas.
Driver's license pattern can be 9, 8 Numeric.
Australia Bank Account Number Content Blade
The Australian bank account number itself is not sensitive, but identifies a bank account, without identifying
the bank branch. Therefore, both the account number and branch information must exist for the document to
be considered sensitive.
The content blade looks for matches to both:
n
An Australian bank account number
n
Words and phrases related to bank state branch or BSB.
It also uses a regular expression rule to differentiate between telephone numbers of the same length.
An Australian bank account number is 6 to 10-digits without any embedded meaning. It has no check digit
routine.
Australia Business Number Content Blade
The content blade looks for matches to both pieces of information in close proximity to each other.
n
Australia Business Number
n
ABN words and phrases (e.g. ABN, Australia business number)
Australia Company Number Content Blade
The content blade looks for matches to both pieces of information in close proximity to each other.
n
Australia Company Number
n
ACN words and phrases (e.g. ACN, Australia Company Number)
Australia Medicare Card Number Content Blade
The content blade will match if one of the following combinations of information appears in a document.
n
More than one Australia Medicare Card Number
n
One Medicare card number plus Medicare or patient identification terms (e.g. patient identifier, patient
number)
n
One Medicare card number plus two of either a name, expiration date or expiration terms
92 VMware, Inc.
Page 93

Chapter 13 vShield Data Security Management
Australia Tax File Number Content Blade
The content blade looks for matches to both pieces of information in high proximity to each other.
n
Australia Tax File Number (refer to entity description)
n
Tax file number words and phrases (e.g. TFN, tax file number)
California Drivers License Number Content Blade
The content blade looks for matches to the California driver’s license pattern and words and phrases such as
driver’s license and license number and terms such as CA or California.
The Driver's license pattern is 1 Alphabetic, 7 Numeric.
Canada Drivers License Number Content Blade
The content blade is only a container file for child content blades. The content blades assigned to it separately
look for driver's licenses in individual providences and territories.
Canada Social Insurance Number Content Blade
The content blade is only a container file for child content blades. The content blades assigned to it separately
look for formatted and unformatted versions of the Canadian Social Insurance numbers plus personal
information so different rules may be assigned to them. The formatted version of the Social Insurance number
is a more specific pattern, so the rules are less strict for retuning a match. However, the unformatted version
is very general and matches to many common numbers.
Colorado Drivers License Number Content Blade
The content blade looks for matches to the Colorado driver’s license pattern and words and phrases such as
driver’s license and license number and terms such as CO or Colorado.
The driver's license pattern is 9 Numeric.
Connecticut Drivers License Number Content Blade
The content blade looks for matches to the Connecticut driver’s license pattern and words and phrases such
as driver’s license and license number and terms such as CT or Connecticut.
Driver's license pattern: 9 Numeric, 1st two positions are month of birth in odd or even year. 01-12 Jan-Dec
odd years, 13-24 Jan-Dec even years, 99 unknown.
Credit Card Number Content Blade
The content blade looks for a combination of the following pieces of information.
n
More than one credit card number
n
A single credit card number plus words and phrases such as ccn, credit card, expiration date
n
A single credit card number plus an expiration date
VMware, Inc. 93
Page 94

vShield Administration Guide
Credit Card Track Data Content Blade
Track data is the information encoded and stored on two tracks located within the magnetic stripe on the back
of a credit card (debit card, gift card, etc). There are three tracks on the magstripe (magnetic strip on the back
of a credit card).
Each track is .110-inch wide. The ISO/IEC standard 7811, which is used by banks, specifies:
n
Track one is 210 bits per inch (bpi), and holds 79 six-bit plus parity bit read-only characters.
n
Track two is 75 bpi, and holds 40 four-bit plus parity bit characters.
n
Track three is 210 bpi, and holds 107 four-bit plus parity bit characters.
Your credit card typically uses only tracks one and two. Track three is a read/write track (that includes an
encrypted PIN, country code, currency units, amount authorized), but its usage is not standardized among
banks.
This content blade requires a match to the Credit Card Track Data entity.
Custom Account Number Content Blade
The Custom Accounts content blade is an editable blade and should contain a regular expression for an
organization's custom account patterns.
Delaware Drivers License Number Content Blade
The content blade looks for matches to the Delaware driver’s license pattern and words and phrases such as
driver’s license and license number and terms such as DE or Delaware.
EU Debit Card Number Content Blade
The content blade looks for patterns of the major European Union debit card numbers.
The content blade will match with a combination of the following pieces of information in close proximity, if
either:
n
More than one match to a EU debit card number
n
A single match to a EU debit card number plus two of either a word or phrase for credit card (e.g. card
number or cc#), credit card security, expiration date or name
n
A single match to a EU debit card number with an expiration date
Florida Drivers License Number Content Blade
The content blade looks for matches to the Florida driver’s license pattern and words and phrases such as
driver’s license and license number and terms such as FL or Florida.
Driver's license pattern: 1 Alphabetic, 12 Numeric.
France Driving License Number Content Blade
The content blade requires the following to match for a French driving license in a close proximity.
n
French driving license pattern
n
Either words or phrases for a driving license (e.g. driving license, permis de conduire) or E.U. date format
94 VMware, Inc.
Page 95

Chapter 13 vShield Data Security Management
France BIC Number Content Blade
The content blade scans for French BIC numbers by requiring matches for both the following rules.
n
European BIC number format
n
French format of the BIC number
France IBAN Number Content Blade
The content blade requires the following to match for a French IBAN number in a close proximity.
n
European IBAN number format
n
French IBAN number pattern
France National Identification Number Content Blade
The content blade requires the following to match for a French National Identification number in a close
proximity.
n
More than one match to the French National Identification pattern
n
One match to the French National Identification pattern plus either words or phrases for a social security
number (e
France VAT Number Content Blade
The content blade requires a match for a French value added tax (VAT) number pattern in a close proximity
to the abbreviation FR.
Georgia Drivers License Number Content Blade
The content blade looks for matches to the Georgia driver’s license pattern and words and phrases such as
driver’s license and license number and terms such as GA or Georgia.
Driver's license pattern: 7-9 Numeric; or Formatted SSN.
Germany BIC Number Content Blade
The content blade scans for German BIC numbers by requiring matches for both the following rules.
n
European BIC number format
n
German format of the BIC number
Germany Driving License Number Content Blade
The content blade requires the following to match for a German driving license in a close proximity.
n
German driving license pattern\
n
Words or phrases related to a driving license (e.g. driving license, ausstellungsdatum)
Germany IBAN Number Content Blade
The content blade requires the following to match for a German IBAN number in a close proximity.
n
European IBAN number format
VMware, Inc. 95
Page 96

vShield Administration Guide
n
German IBAN number pattern
THe German IBAN rule: "DE" country code followed by 22 digits.
Germany National Identification Numbers Content Blade
The content blade requires the following to match for a German National Identification number in a close
proximity.
n
Either a German National Identification number or a machine-readable version of the number
n
Words or phrases for a German National Identification number (e.g. personalausweis,
personalausweisnummer)
Germany Passport Number Content Blade
The content blade requires the following to match for a German passport number in a close proximity.
n
Either a German passport number or a machine-readable version of the number
n
Words or phrases for a German passport number or issuance date (e.g. reisepass, ausstellungsdatum)
Germany VAT Number Content Blade
The content blade requires a match for a German value added tax (VAT) number pattern (refer to entity
description) in a close proximity to the abbreviation DE.
Group Insurance Numbers Content Blade
This is a content blade that requires customization. To use this content blade, add a regular expression to match
the number pattern for an organization's Group Insurance Number. The content blade looks for matches to
words and phrases such as group insurance or a name, U.S. address or U.S. date in combination with the
custom regular expression.
Hawaii Drivers License Number Content Blade
The content blade looks for matches to the Hawaii driver’s license pattern and words and phrases such as
driver’s license and license number and terms such as HI or Hawaii.
Driver's license pattern: H Alphabetic, 8 Numeric; or SSN.
Italy National Identification Numbers Content Blade
The content blade requires the following to match for an Italy National Identification number in a close
proximity.
1 Italy National Identification number pattern
2 Words or phrases for an Italy National Identification number (e.g. codice fiscale, national identification)
National Identification Rule: 16 character alphanumeric code. where:
n
SSS are the first three consonants in the family name (the first vowel and then an X are used if there are
not enough consonants)
n
NNN is the first name, of which the first, third and fourth consonants are used—exceptions are handled
as in family names
n
YY are the last digits of the birth year
n
M is the letter for the month of birth—letters are used in alphabetical order, but only the letters A to E, H,
L, M, P, R to T are used (thus, January is A and October is R)
96 VMware, Inc.
Page 97

Chapter 13 vShield Data Security Management
n
DD is the day of the month of birth—in order to differentiate between genders, 40 is added to the day of
birth for women (thus a woman born on May 3 has ...E43...)
n
ZZZZ is an area code specific to the municipality where the person was born—country-wide codes are
used for foreign countries, a letter followed by three digits
n
X is a parity character as calculated by adding together characters in the even and odd positions, and
dividing them by 26. Numerical values are used for letters in even positions according to their alphabetical
order. Characters in odd positions have different values. A letter is then used which corresponds to the
value of the remainder of the division in the alphabet.
Pattern:
n
LLLLLLDDLDDLDDDL
n
LLL LLL DDLDD LDDDL
Health Plan Beneficiary Numbers
This is a content blade that requires customization. To use this content blade, add a regular expression to
identify recipients of health plan benefits and payments. The content blade looks for matches to words and
phrases such as beneficiary or a name, U.S. address or U.S. date in combination with the custom regular
expression.
Idaho Drivers License Number Content Blade
The content blade looks for matches to the Idaho driver’s license pattern and words and phrases such as driver’s
license and license number and terms such as ID or Idaho.
Driver's license pattern: 2 Alphabetic, 6 Numeric, 1 Alphabetic.
Illinois Drivers License Number Content Blade
The content blade looks for matches to the Illinois driver’s license pattern and words and phrases such as
driver’s license and license number and terms such as IL or Illinois.
Driver's license pattern: 1 Alphabetic, 11 Numeric.
Indiana Drivers License Number Content Blade
The content blade looks for matches to the Indiana driver’s license pattern and words and phrases such as
driver’s license and license number and terms such as IN or Indiana.
Driver's license pattern: 10 Numeric.
Iowa Drivers License Number Content Blade
The content blade looks for matches to the Iowa driver’s license pattern and words and phrases such as driver’s
license and license number and terms such as IA or Iowa.
Driver's license pattern can be 3 numeric, 2 alphabetic, 3 numeric; or Social Security Number.
Index of Procedures Content Blade
The content blade looks for words and phrases related to medical procedures based on the International
Classification of Diseases (ICD).
The content blade will match with a combination of the following pieces of information, either:
n
More than one match to the Index of Procedures dictionary
n
A single match to the Index of Procedures dictionary plus two of either a name, U.S. Address or U.S. Date
VMware, Inc. 97
Page 98

vShield Administration Guide
n
A single match to the Index of Procedures dictionary with a patient or doctor identification word or phrase
(e.g. patient ID, physician name)
Italy Driving License Number Content Blade
The content blade requires the following to match for an Italy driving license in a close proximity.
n
Italy driving license pattern
n
Words or phrases for a driving license (e.g. driving license, patente di guida)
Driver's License Rule: 10 alphanumeric characters -- 2 letters, 7 numbers and a final letter. The first letter may
only be characters A-V.
Driver's License Pattern:
n
LLDDDDDDDL
n
LL DDDDDDD L
n
LL-DDDDDDD-L
n
LL - DDDDDDD - L
Italy IBAN Number Content Blade
The content blade requires the following to match for a Italy IBAN number in a close proximity.
1 IBAN words and phrases (e.g. International Bank Account Number, IBAN)
2 Italy IBAN number pattern
IBAN Rule: IT country code followed by 25 alphanumeric characters.
Pattern:
n
ITDDLDDDDDDDDDDAAAAAAAAAAAA
n
IT DDL DDDDD DDDDD AAAAAAAAAAAA
n
IT DD LDDDDD DDDDD AAAAAAAAAAAA
n
IT DD L DDDDD DDDDD AAAAAAAAAAAA
n
IT DD LDDDDDDDDDDAAAAAAAAAAAA
n
IT DD L DDDDDDDDDDAAAAAAAAAAAA
n
ITDD LDDD DDDD DDDA AAAA AAAA AAA
n
IT DDL DDDDD DDDDD AAAAAA AAAAAA
n
IT DDL DDD DDD DDD DAAA AAA AAAAAA
n
IT DDL DDDDDDDDDD AAAAAA AAAAAA
Spaces may be substituted with dashes, forward slashes or colons.
ITIN Unformatted Content Blade
The content blade looks for unformatted patterns of the U.S. Taxpayer Identification Number (ITIN). The
content blade will match if an unformatted ITIN is found within close proximity of a word or phrase for an
ITIN number (e.g. tax identification, ITIN).
ITIN Rule: 9-digit number that always begins with the number 9 and has a range of 70-88 in the fourth and
fifth digit.
Pattern: DDDDDDDDD
98 VMware, Inc.
Page 99

Chapter 13 vShield Data Security Management
Kansas Drivers License Number Content Blade
The content blade looks for matches to the Kansas driver’s license pattern and words and phrases such as
driver’s license and license number and terms such as KS or Kansas.
Driver's license pattern: 1 Alphabetic (K), 8 Numeric; or Social Security Number.
Kentucky Drivers License Number Content Blade
The content blade looks for matches to the Kentucky driver’s license pattern and words and phrases such as
driver’s license and license number and terms such as KY or Kentucky.
Driver's license pattern: 1 Alphabetic, 8 Numeric; or Social Security Number.
Louisiana Drivers License Number Content Blade
The content blade looks for matches to the Louisiana driver’s license pattern and words and phrases such as
driver’s license and license number and terms such as LA or Louisiana.
Driver's license pattern: 2 Zeros, 7 Numeric.
Maine Drivers License Number Content Blade
The content blade looks for matches to the Maine driver’s license pattern and words and phrases such as
driver’s license and license number and terms such as ME or Maine.
Driver's license pattern: 7 Numeric, optional alphabetic X.
Manitoba Drivers Licence Content Blade
The content blade looks for matches to the Manitoba driver’s license pattern and words and phrases such as
driver’s licence and permis de conduire plus terms such as MB or Manitoba in a close proximity.
License pattern rules: 12 alphanumeric characters that may be hyphen-separated, where:
n
1st character is a letter
n
2nd - 5th characters are a letter or asterisk
n
6th character is a letter
n
7th - 10th characters are digits
n
11th character is a letter
n
12th character is a letter or digit
or
n
1st character is a letter
n
2nd - 4th characters are a letter or asterisk
n
5th - 6th characters are digits
n
7th - 12th characters are a letter or digit
Driver's license pattern:
n
LLLLLLDDDDLA
n
LLLLLDDAAAAAA
VMware, Inc. 99
Page 100

vShield Administration Guide
Maryland Drivers License Number Content Blade
The content blade looks for matches to the Maryland driver’s license pattern and words and phrases such as
driver’s license and license number and terms such as MD or Maryland.
Driver's license pattern: 1 Alphabetic, 12 Numeric
Massachusetts Drivers License Number Content Blade
The content blade looks for matches to the Massachusetts driver’s license pattern and words and phrases such
as driver’s license and license number and terms such as MA or Massachusetts.
Driver's license pattern: 1 Alphabetic (S), 8 Numeric; or Social Security Number
Michigan Drivers License Number Content Blade
The content blade looks for matches to the Michigan driver’s license pattern and words and phrases such as
driver’s license and license number and terms such as MI or Michigan.
Driver's license pattern: 1 Alphabetic, 12 Numeric
Minnesota Drivers License Number Content Blade
The content blade looks for matches to the Minnesota driver’s license pattern and words and phrases such as
driver’s license and license number and terms such as MN or Minnesota.
Driver's license pattern: 1 Alphabetic, 12 Numeric
Mississippi Drivers License Number Content Blade
The content blade looks for matches to the Mississippi driver’s license pattern and words and phrases such as
driver’s license and license number and terms such as MS or Mississippi.
Driver's license pattern: 9 Numeric; or Formatted Social Security Number
Missouri Drivers License Number Content Blade
The content blade looks for matches to the Missouri driver’s license pattern and words and phrases such as
driver’s license and license number and terms such as MO or Missouri
Driver's license pattern: 1 Alphabetic, 6-9 Numeric; or 9 Numeric; or Formatted Social Security Number
Montana Drivers License Number Content Blade
The content blade looks for matches to the Montana driver’s license pattern and words and phrases such as
driver’s license and license number and terms such as MT or Montana.
Driver's license pattern: 9 Numeric (SSN); or 1 Alphabetic, 1 Numeric, 1 Alphanumeric, 2 Numeric, 3
Alphabetic and 1 Numeric; or 13 Numeric
NDC Formulas Dictionary Content Blade
The content blade looks for words and phrases related to formulas based on the National Drug Codes (NDC).
The content blade will match with a combination of the following pieces of information, either:
1 More than one match to the NDC Formulas dictionary
2 A single match to the NDC Formulas dictionary plus two of either a name, U.S. Address or U.S. Date
100 VMware, Inc.
 Loading...