

Vivo MOUNT-VWSF1 Instruction Manual
TV Wall Mount and Entertainment Shelf
Scan the QR code with your mobile device or follow the link
for helpful videos and specications related to this product.
Instruction Manual
https://vivo-us.com/products/mount-vwsf1
help@vivo-us.com www.vivo-us.com 1-800-371-5654
SKU: MOUNT-VWSF1
2 3
PACKAGE CONTENTS
TOOLS NEEDED
100lbs
(45.36kg)
DO NOT EXCEED WEIGHT CAPACITY.
Failure to do so may result in serious injury.
WARNING!
Phillips
Screwdriver
A (x1)
Mount
B (x2)
Plastic Cover
C (x1)
Cable Clip
W-A (x3)
Bolt
M-A (x4)
M6x14
M-B (x4)
M8x20
M-C (x4)
M8x50
M-D (x4)
Spacer
If you do not understand these directions, or if you have any doubts about the safety of the
installation, please call a qualied technician. Check carefully to make sure there are no missing or
defective parts. Improper installation may cause damage or serious injury. Do not use this product
for any purpose that is not explicitly specied in this manual. Do not exceed weight capacity.
We cannot be liable for damage or injury caused by improper mounting, incorrect assembly or
inappropriate use.
NOTE: NOT ALL HARDWARE INCLUDED WILL BE USED
W-C (x1)
Washer
W-B (x3)
Anchor
Drill
CAUTION!
DO NOT INSTALL INTO DRYWALL ALONE. VERIFY YOUR WALL CONSTRUCTION. USE WOOD STUDS TO
MOUNT. We include mounting for brick and concrete walls. If unsure, please contact us at vivo-us.
com, email at help@vivo-us.com, or call us at 1-800-371-5654.
D (x4)
VESA Ada pter
E (x4)
M6x15
A2 (x1)
Shelf Bracket
B2 (x1)
Shelf
C2 (x2)
Shelf Clip
D2 (x2)
M5x8
E2 (x2)
Suction Cup
W-A2 (x3)
Bolt
W-C2 (x3)
Washer
W-B2 (x3)
Anchor
F (x4)
M6 Nut
TV MOUNT ASSEMBLY STEPS
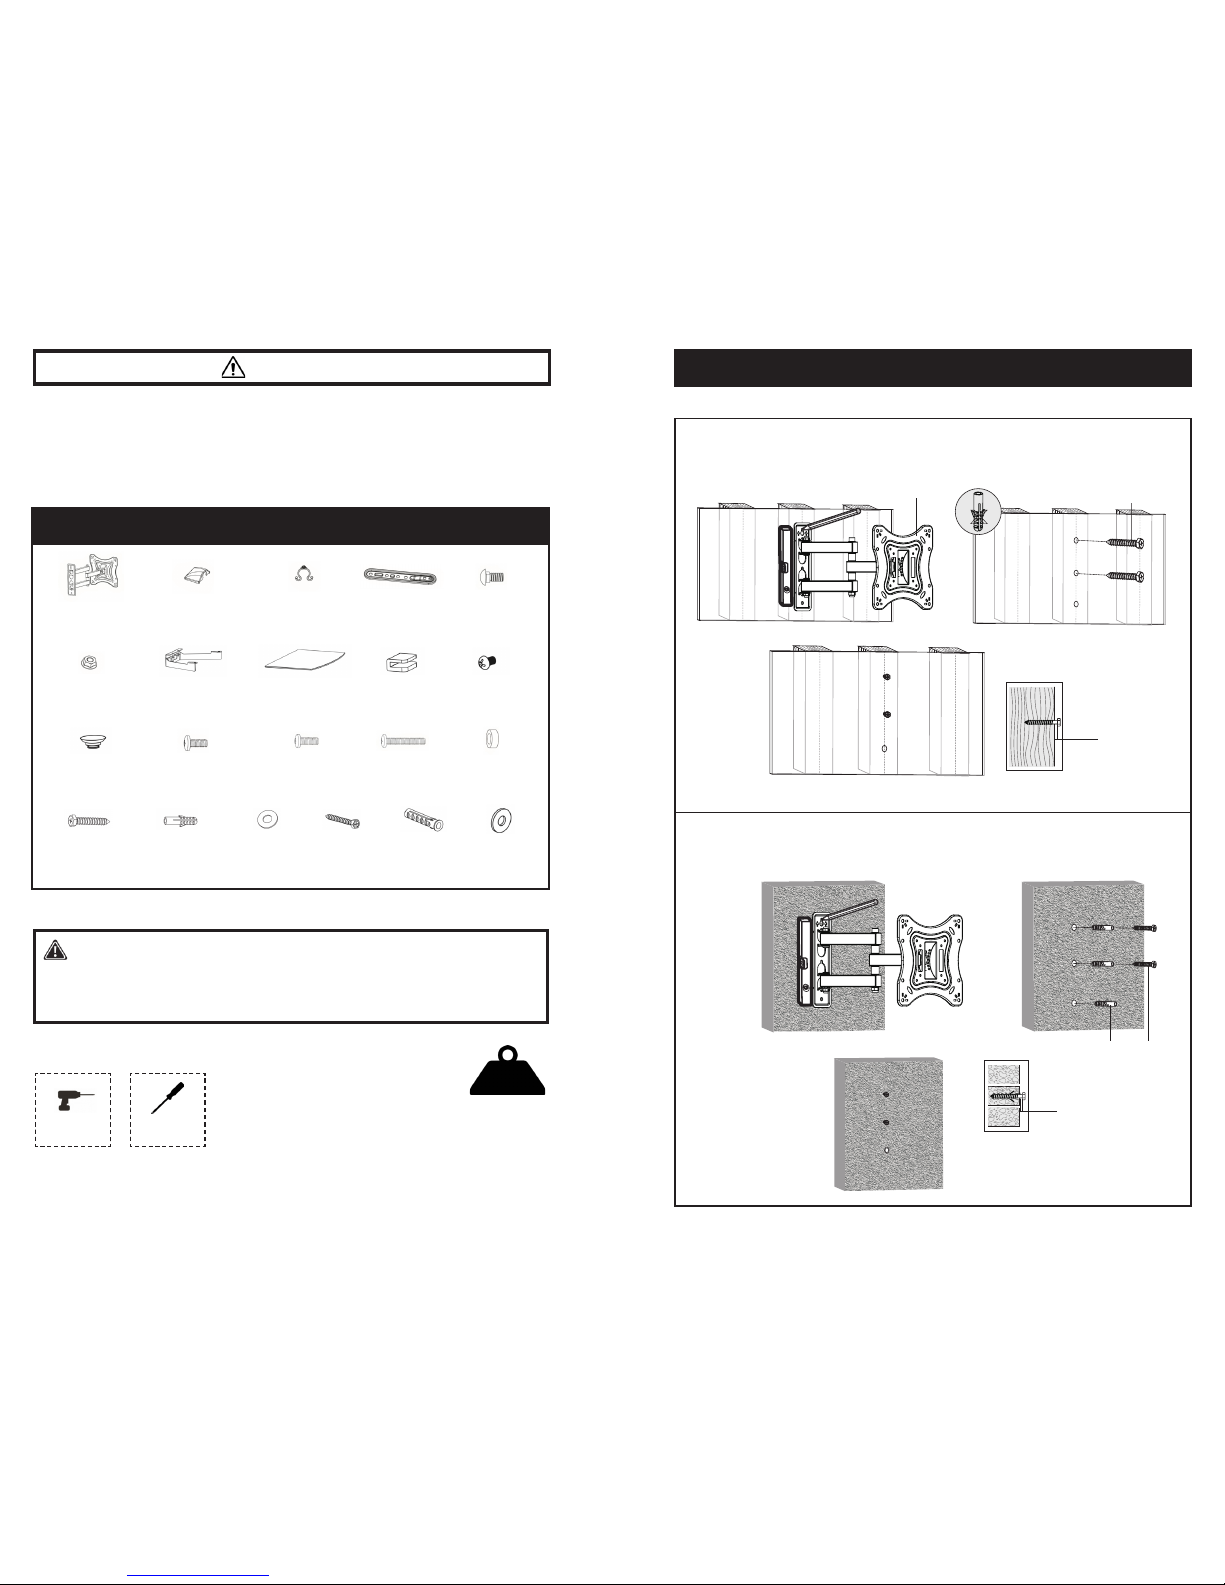
STEP 1
OPTION A: Wood Wall
Use mount (A) to mark mounting holes on wall where stud is located. Using a 3/16” bit, drill
approximately 2.2” into marked locations. Screw top two bolts (W-A) in making sure to leave 3mm of
threads exposed.
OPTION B: Concrete/Brick Wall
Use mount (A) to mark mounting holes on wall. Using a 3/8” bit, drill approximately 2.4” into marked
locations. Insert wall anchors (W-B) and screw in top two bolts (W-A) making sure to leave 3mm of
threads exposed.
A
W-A
X
3m m
W-A
W-B
3mm
 Loading...