

Vivo DESK-V201G Instruction Manual
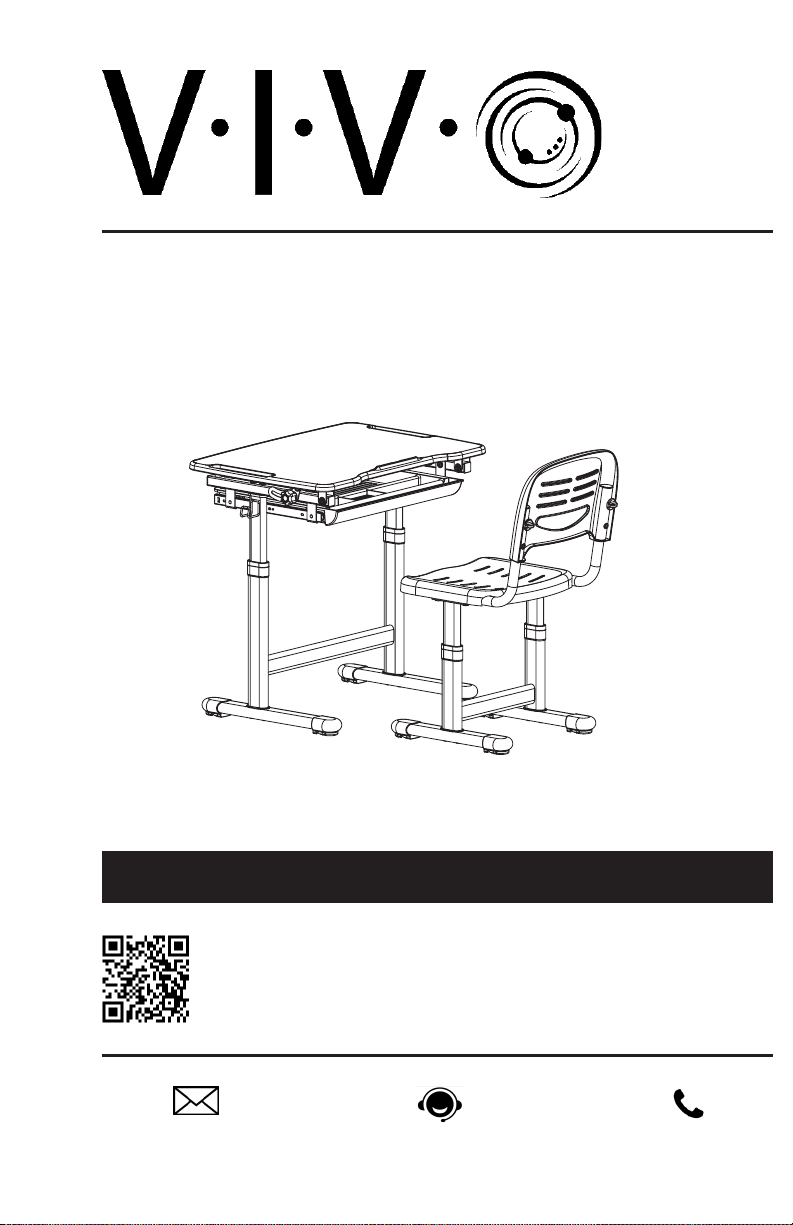
26” x 19” Height Adjustable Desktop Workstation
Instruction Manual
SKU: DESK-V201G
Scan the QR code with your mobile device or follow the link
for helpful videos and specifications related to this product.
https://vivo-us.com/products/desk-v201g
help@vivo-us.com www.vivo-us.com 1-800-371-5654

WARNING!
If you do not understand these directions, or if you have any doubts about the safety of the
installation, please call a qualified technician. Check carefully to make sure there are no missing or
defective parts. Improper installation may cause damage or serious injury. Do not use this product
for any purpose that is not explicitly specified in this manual and do not exceed weight capacity.
We cannot be liable for damage or injury caused by improper mounting, incorrect assembly or
inappropriate use.
TIPOVER WARNING
SERIOUS OR FATAL CRUSHING INJURIES CAN OCCUR FROM TIPOVER. TO HELP PREVENT TIPOVER:
• NEVER ALLOW CHILDREN TO CLIMB, STAND, HANG, OR PLAY ON ANY PART OF DESK OR CHAIR
• USE TIPOVER RESTRAINT OR ANCHOR DESK TO WALL
USE OF TIPOVER RESTRAINTS MAY ONLY REDUCE, BUT NOT ELIMINATE RISK OF TIPOVER.
PACKAGE CONTENTS
B1 (x1)
Chair Leg
B6 (x1)
Seat Bot tom
B11 (x1)
Plastic Drawer
A1 (x8)
Metal Washer
A6 (x4)
Short Screw
B2 (x2)
Chair Feet
B7 (x1)
Seat Back
B12(x1)
Desk Leg
A2(x12)
Medium Screw
A7 (x4)
Short Thread
Screw
B3 (x1)
Support Bar
B8 (x1)
Desktop
B13(x2)
Desk Feet
A3(x12)
Plastic Washer
A8 (x4)
Long Screw
B4 (x1)
Side Support Bar
B9 (x1)
Right Side
Drawer Slider
A4 (x4)
Long Thread Screw
A9 (x1)
Hook
B5 (x1)
Center Support
Bar
B10 (x1)
Le Side
Drawer Slider
A5(x2)
Knob
A10(x1)
Allen Wrench
2
NOTE: Not all hardware included will be used.

WARNING: CHOKING HAZARD
SMALL PARTS - NOT FOR CHILDREN UNDER 3 YEARS. ADULT SUPERVISION IS REQUIRED.
TOOLS NEEDED
Phillips
Screwdriver
DO NOT EXCEED WEIGHT CAPACITY.
Failure to do so may result in serious injury.
50lbs
(22.68kg)
DESK
150lbs
(68.04kg)
CHAIR
ASSEMBLY STEPS
STEP 1
Attach chair legs (B1) to chair feet (B2), making sure legs are fully seated in openings. Secure feet using
4 medium screws (A2) and 4 metal lock washers (A1). Tighten with allen wrench (A10).
Assemble right side support bar (B3) to leg using 2 medium screws (A2) and 2 plastic washers (A3). The
support bar has a large hole on the le side which will face inward. Tighten with allen wrench. Slide
center support bar (B5) into large hole on right side bar. Slide le side support bar (B4) onto center bar,
and secure to legs with 2 medium screws (A2) and 2 plastic washers (A3). Tighten with allen wrench.
3
 Loading...