

Page 1
ИНСТРУКЦИЯ ПО ЭКСПЛУАТАЦИИ
MANUAL INSTRUCTION
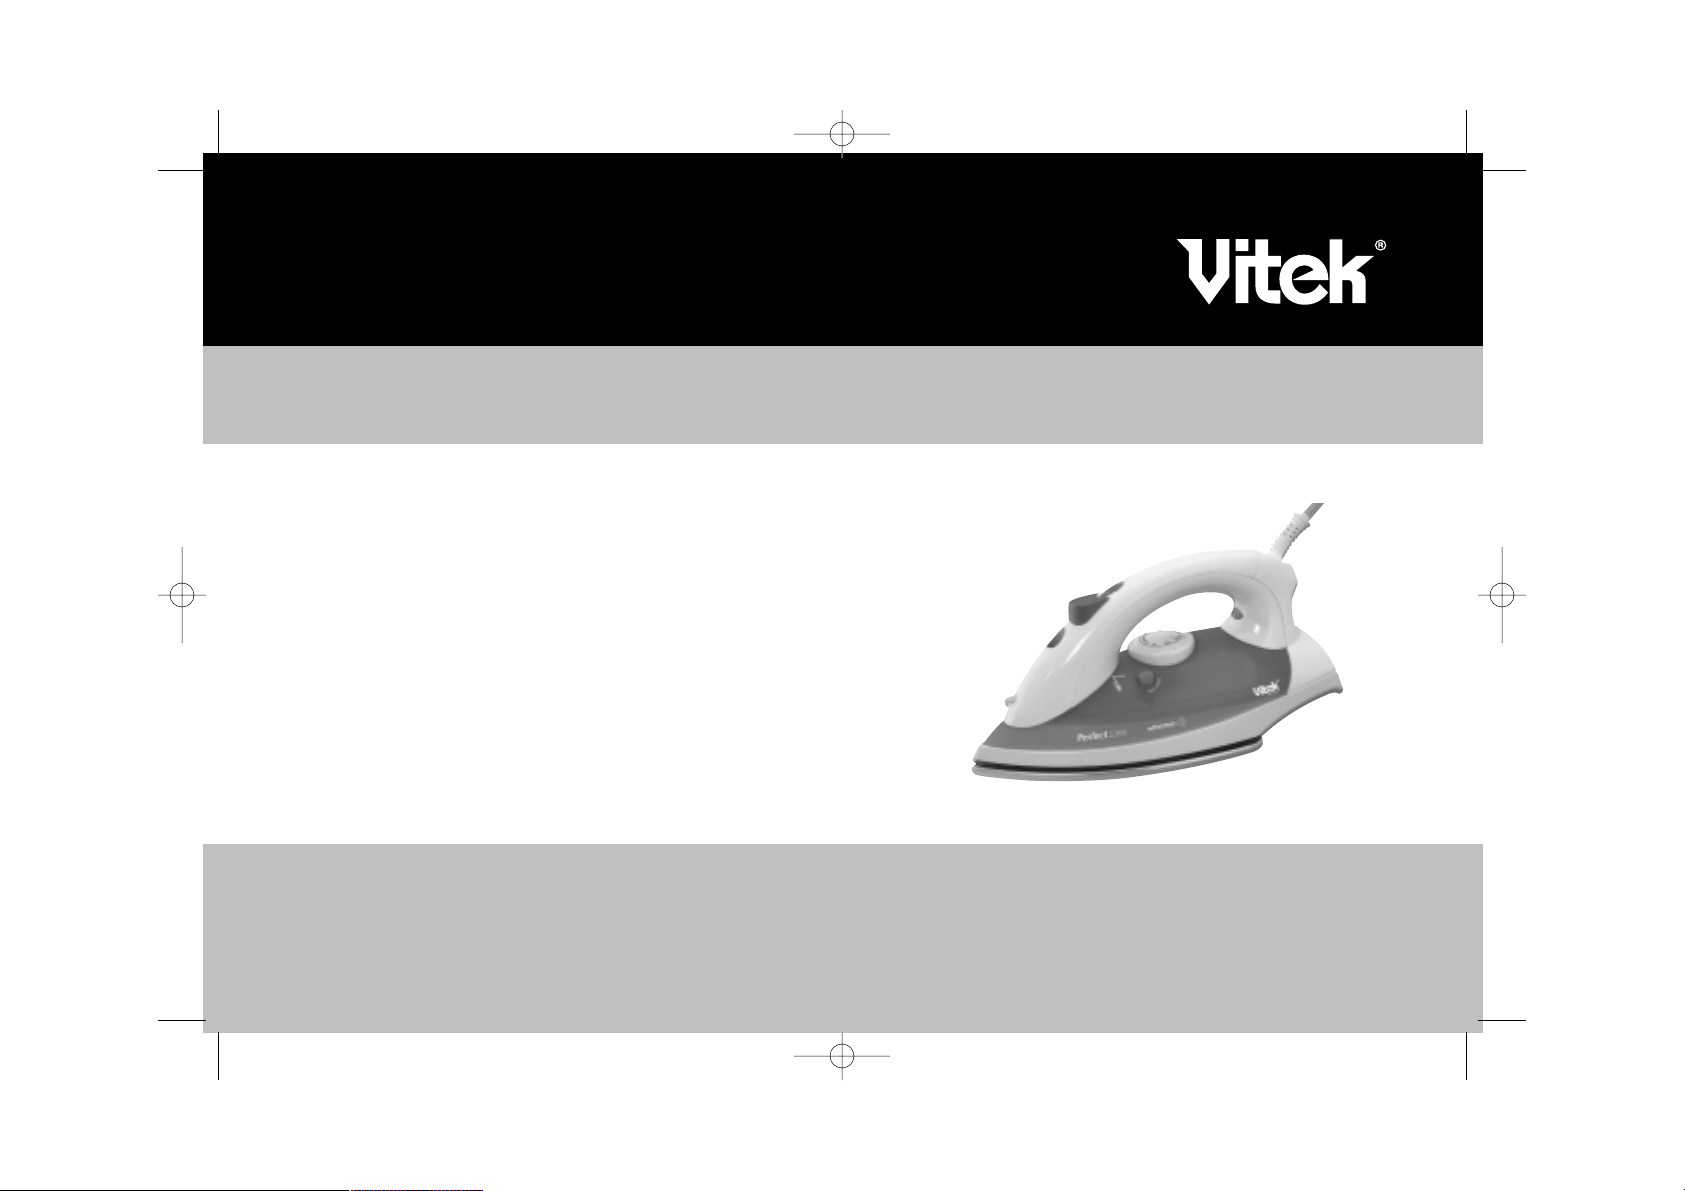
МОДЕЛЬ VT1205
ПАРОВОЙ УТЮГ
STEAM IRON
1205new.qxd 01.07.03 14:57 Page 2
Page 2
2
Гарантийный талон
Сведения о покупке
Модель:
Серийный №:
Дата покупки:
Сведения о продавце
Название и адрес продающей организации
Подтверждаю получение исправного изделия, с условиями гарантии ознакомлен
Подпись покупателя
Телефон:
Купон №3
Модель: Серийный №:
Дата поступления в ремонт:
Дата выполнения ремонта:
Вид ремонта:
М.П.
Купон №2
Модель: Серийный №:
Дата поступления в ремонт:
Дата выполнения ремонта:
Вид ремонта:
М.П.
Купон №1
Модель: Серийный №:
Дата поступления в ремонт:
Дата выполнения ремонта:
Вид ремонта:
М.П.
Внимание!
Гарантийный талон действителен только при наличии печати
продающей организации
М.П.
IR 120500000
IR 120500000
IR 120500000
IR 120500000
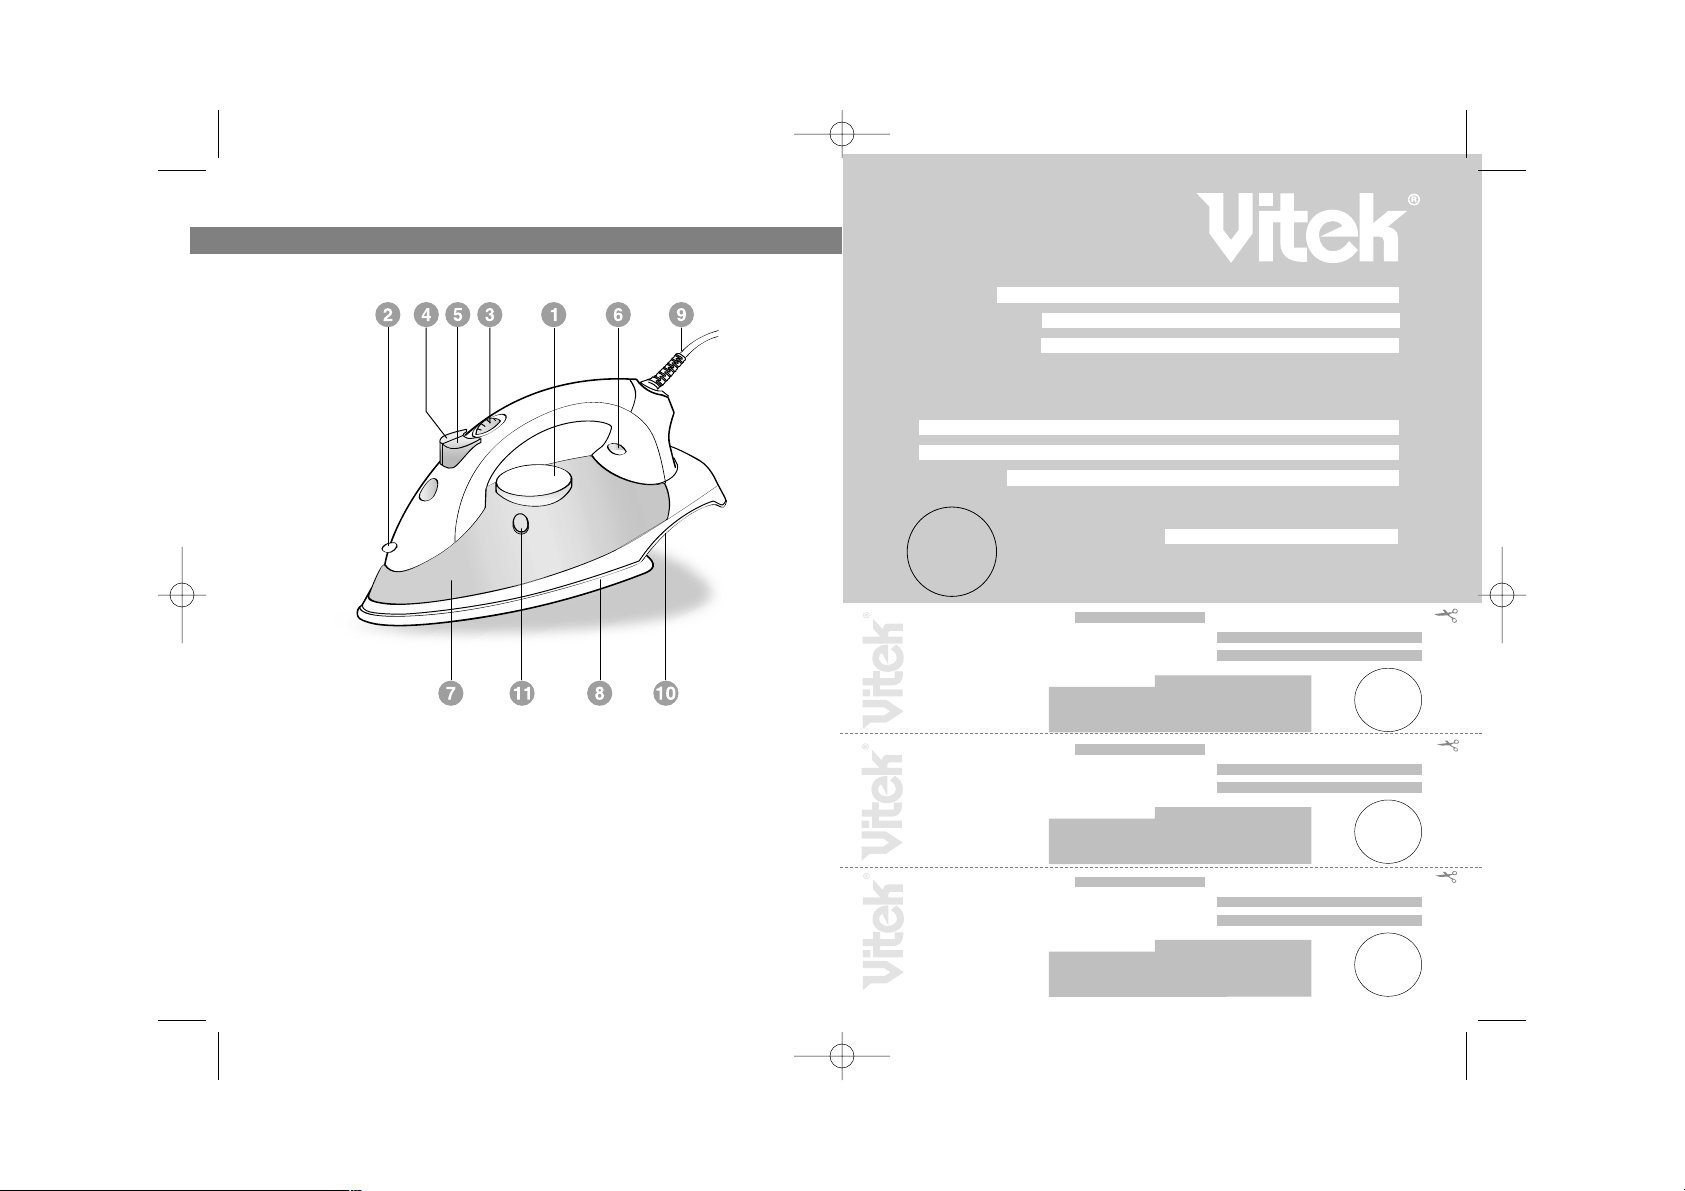
IRON FEATURES (FIG.1)
1. Temperature control dial
2. Spray nozzle
3. Steam dial
4. Spray button
5. Steam button
6. Indication light
7. Water tank
8. Soleplate
9. Power cord
10. Typeplate
11. “Self clean” button
FIGURE 1
ENGLISH
1205new.qxd 01.07.03 14:57 Page 4
Page 3
IMPORTANT SAFEGUARDS
1. Read all instructions before use.
2. Ensure the voltage on the Rating Label is the same as that in your home.
3. Use the iron only for its intended use.
4. The iron should always be turned to off before plugging or unplugging from
the wall socket. Never yank the cord to disconnect from the wall socket;
instead. Grasp plug and pull to disconnect.
5. Do not operate iron with a damaged cord/plug or if the iron has been
dropped or damaged. To avoid the risk of electric shock, do not disassem\
ble the iron, take it to a qualified serviceman for examination and repair.
Incorrect reassemble can cause a risk of electric shock when the iron is
used.
6. Take care: If you are leaving the appliance momentarily, always switch it off,
remove the plug from the socket and stand the iron on its base.
7. Close supervision is necessary for any appliance being used by or near
children. Do not leave the iron unattended while connected or on an ironing
board.
8. To protect against a risk of electric shock, do not immerse the iron in water
or other liquids.
9. Burns can be occur from touching hot metal parts, hot water or steam. Use
caution when you turn a steam iron upside down\there may be hot water in
the reservoir.
10. Do not allow cord to touch hot surfaces. Let the iron cool completely before
putting away, loop cord loosely around the iron when storing.
11. Always disconnect the iron from the electrical socket when filling with water
or emptying and when not in use.
12. To avoid a circuit overload, do not operate another high wattage appliance
on the same circuit.
13. Prevent water over flow, do not fill water over max level.
14. Save these instructions.
NOTE:
When using the iron for the first time test on an old piece of fabric to ensure the
Soleplate and water tank are completely clean.
The iron may slightly smoke when switched on for the first time\this is normal
and will soon cease.
3
18
ENGLISH
1205new.qxd 01.07.03 14:57 Page 6
Page 4

17
IRONING
Important: Have your read the section «Important safeguards?»
CHOICE OF WATER
• The iron be used with normal tap water.
• If, however, the water in your area is particularly hard (Hardness Higher than
17° DH), it is advisable to use distilled or demineralized water to prolong the
life of your iron.
• Do not use chemically de\scaled water.
• Turn off the iron and remove the plug from the wall socket before filling the
iron.
• Fill water through the water\filling aper\
ture (Fig. 2).
• Do not fill higher than indication MAX of
the water tank, in order to avoid spilling
out of water.
• Do not fill with any thing but water. If you
have to refill while ironing, remove the
mains plug from the wall socket before
filling.
• Pour out any remaining water out after
use.
IRONING TEMPERATURE
• Always check first to see whether a label with ironing instructions is
attached to the article to be ironed.
• Follow these ironing instructions in all cases.
• If ironing instructions are missing but you do know the kind of fabric, then
see the table below.
• The table is valid for the materials only and is not applicable to any applied
finish, gloss etc.
Textile to which some kind of finish has been applied (gloss, wrinkle, relief
etc.) can best be ironed at lower temperatures.
• Sort the laundry out according to ironing temperature first: wool whit wool,
cotton with cotton, etc.
4
На ярлыке означает: изделие нельзя гладить!
(например, эластик)
Примечание:
вид ткани
синтетика
синтетика
ацетатволокно
триацетат
с люрексом
полиамид
(нейлон)
полиэстер
вискоза
шелк
шерсть
шерсть
хлопок
хлопок
лен лен
синтетика
акрил
полипропилен
полиэтан
волокно
позиция
терморегулятора
ярлык
шелк
ENGLISH РУССКИЙ
2
1205new.qxd 01.07.03 14:57 Page 8
Page 5

16
• The iron heats up quicker than it cools down. Therefore, start ironing the
articles requiring the lowest temperature such as those made of synthetic
fibres.
• If the fabric consists of various kinds of fibres, you must always select the
lowest ironing temperature of the composition of those fibres.
(E.g. an article consisting of «60% polyester and 40% cotton» should be
ironed at the temperature indicator for polyester (·) and without steam.)
If you do not know what kinds of fabrics the article has been made of, find
a spot which will be invisible when wearing or using the article. Try out the
ironing temperature which is most suitable there.
(Start at a relatively low temperature.)
• Pure woolen fabric (100% wool) may be pressed with the iron set to a steam
position. Preferably set the steam control to maximum position and use a
dry pressing cloth.
• When steam\ironing woolen fabrics, shining of the fabric may occur. This
can be prevented by turning the article inside out and ironing the reverse
side.
• Velvet and other textures which rapidly acquire shiny spots should be
ironed in one direction only (with the nap) applying light pressure.
• Always keep the iron moving.
• Silk and other fabrics likely to become shiny should be ironed on the
reverse side. To prevent staining do not use the spray on silk or other deli\
cate fabrics.
SETTING THE TEMPERATURE
• Insert the plug in the wall socket.
• Stand the iron upright.
• Set the temperature control dial to the correct ironing temperature as indi\
cated in the ironing instructions or in the tables.
• The correct temperature will be reached when the indication light has gone.
The indication light will be on and off from time to time indicating that the
selected temperature is being maintained.
5
• Корпус утюга протирайте сначала влажной тканью, а затем сухой.
• Для чистки подошвы не используйте обдирающие материалы.
• Подошва всегда должна оставаться гладкой. Избегайте контактов с ме\
таллическими объектами.
ЗАЩИТНОЕ ОТКЛЮЧЕНИЕ
В случае неисправности термостата срабатывает механизм защитного
отключения, предохраняющий утюг от перегрева. Неисправный утюг
необходимо показать специалисту.
СПЕЦИФИКАЦИЯ
Питание 230В ~ 50Гц
Максимальная мощность 1800 Вт
СРОК СЛУЖБЫ УТЮГА НЕ МЕНЕЕ 3Х ЛЕТ
РУССКИЙ ENGLISH
8
9
1205new.qxd 01.07.03 14:57 Page 10
Page 6

ФУНКЦИЯ САМООЧИСТКИ
Самоочистку следует производить раз в месяц для удаления накипи,
ворсинок и загрязнений. Эта процедура поможет вам продлить срок
службы вашего утюга.
• Заполните емкость для воды до
максимума.
• Поставьте утюг вертикально.
• Установите терморегулятор в
положение”MAX”.
• Поставьте регулятор отпаривания в
положение “0”.
• Включите утюг в сеть.
• Подождите, пока утюг нагреется и
погаснет лампочка индикатора.
• Отключите утюг от сети и держите его
горизонтально над раковиной.
• Нажмите кнопку “Самоочистка” (11) (рис.7).
• Из отверстий на подошве будут выделяться вода и пар с частицами
накипи и грязи. Двигайте утюгом вперед и назад.
• Когда емкость очистится, отпустите кнопку (11).
• Включите утюг и дайте утюгу нагреться.
• Установите терморегулятор в положение”MAX”. Прогладьте какую\
нибудь ненужную ткань. Остатки воды испарятся.
• Выключите утюг и поставьте его на хранение.
ХРАНЕНИЕ
• Отсоедините утюг от сети.
• Вылейте оставшуюся воду из емкости (рис.8).
• Установите терморегулятор в положение”MIN”, а регулятор
отпаривания \ в положение “0”.
• Поставьте утюг вертикально и дайте ему остыть.
• Электрический шнур можно намотать вокруг утюга.
• Храните утюг в вертикальном положении (рис.9).
УХОД И ЧИСТКА
• Перед тем как чистить утюг, отключите его от сети и дайте ему остыть.
• Накипь и загрязнения на подошве могут быть удалены при помощи
ткани и жидкого моющего средства.
15
SPRAYING
• At any temperature, by pushing on the
spray button (4) a couple of times, the
laundry can be damped down (fig. 3)
• Ensure that there is enough water in the
water tank.
STEAMIRONING
• The steam\ironing is only possible at higer
ironing temperatures:
•• or ••• for moderate steam
••• or MAX for maximum steam
• Ensure that there is enough water in the
water tank.
• Stand the iron on its rear side.
• Insert the plug into the wall socket.
• Set the temperature control dial (1) at the
required position within the «steam area» (
•• , ••• or MAX setting.)
• Wait a little while for the indication light (6)
to go out to come on again.
• Set the steam control dial (3) to the required position (fig. 4), then the
steam will emerge from the vents in the soleplate.
Notes: Water may leak from the Soleplate if too low a temperature has been
selected. This will then cause stains. If this hap\
pens, set the temperature control to the
advised position. Steaming will recommence as
soon as the appropriate temperature has been
reached.
BURST OF STEAM
• By pressing the steam button (5) an
intense «shot» of steam is emitted from the
Soleplate (fig.5). This can be very useful
e.g. when removing stubbom creases.
6
ENGLISH
РУССКИЙ
3
4
5
7
1205new.qxd 01.07.03 14:57 Page 12
Page 7

СИСТЕМА “ANTIDRIP”
У Вашего утюга есть функция “ANTI\DRIP”, которая предотвращает
вытекание воды из подошвы: утюг автоматически прекращает
отпаривание при слишком низких температурах. Когда это произойдет, Вы
услышите щелчок.
КРАТКОВРЕМЕННАЯ ОБРАБОТКА
ПАРОМ
При нажатии кнопки отпаривания (5) из
подошвы утюга произойдет
непродолжительное выделение пара
(рис.5). Эта процедура помогает при раз\
глаживании складок. Кратковременная
подача пара может быть использована
только во время глажения при высоких тем\
пературах.
ВЕРТИКАЛЬНЫЙ ПАР
Эта функция используется для
разглаживания складок на вещах,
находящихся в вертикальном положении
(рис.6).
• Установите терморегулятор (1) в
максимальное положение.
• Подождите, пока лампочка индикатора
погаснет и загорится снова.
• Держите утюг вертикально на
расстоянии 20\40 см от вещи.
• Нажмите на кнопку (5).
• Через некоторое время подайте еще
одну порцию пара.
ГЛАЖЕНИЕ БЕЗ ПАРА
• Включите прибор в сеть.
• Установите регулятор отпаривания (3) в позицию “0”.
• На терморегуляторе выберите подходящую для изделия температуру
глаженья.
• Когда лампочка индикатора погаснет, можете начинать гладить.
14
• The «shot» of steam facility can be used only while ironing with high ironing
temperature (positions ••, •••or MAX ).
VERTICAL STEAM
This function provides an extra amount of steam to remove wrinkles on delicate
garments in hanging position, hanging curtains, or other hanging fabrics.
• Set the temperature control dial (1) to the
position “MAX”.
• Hold the iron in vertical position between
20 and 40 centimeters away from the gar\
ment.
• Press the steam button (5) once (fig.6).
• An intense steam will penetrate into the
garment removing the wrinkles.
• Wait a few seconds before pressing burst
of steam button again.
DRY IRONING
• Insert the plug in the wall socket.
• Ensure that the steam dial (3) is in the position “0”.
• Select the setting on the temperature control dial best suited for the fabric
to be ironed.
• When the indication light has extinguished ironing may commence.
MAINTENANCE
S
elfcleaning
Important: Your iron will give the best ironing
results and last longest if you apply «self\clean\
ing» once a month to remove any scale, fluff
etc.
• Fill the water reservoir up to 1/2 with water.
• Place the iron on its rear side.
• Set the steam dial (3) to position “0”.
7
РУССКИЙ ENGLISH
6
7
5
6
1205new.qxd 01.07.03 14:57 Page 14
Page 8

бежать, утюжьте изделия с изнаночной стороны.
• Бархат и ткани, на которых быстро появляются блестящие пятна, необ\
ходимо гладить в одном направлении. Утюг должен всегда находиться
в движении.
• Шелк и другие блестящие ткани необходимо гладить с изнаночной сто\
роны. Для предотвращения появления пятен не увлажняйте такие
ткани.
УСТАНОВКА ТЕМПЕРАТУРЫ
• Включите прибор в сеть.
• Поставьте утюг в вертикальное положение.
• Установите терморегулятор (1) в нужное положение.
• После того как лампочка индикатора погаснет и загорится снова, Вы
можете начинать гладить.
УВЛАЖНЕНИЕ
Ткань можно увлажнить при любой
температуре глажения, дважды нажав
кнопку увлажнителя (4). При этом в емкости
должна находиться вода (рис.3).
ПАРОВОЕ ГЛАЖЕНИЕ
Паровое глаженье возможно только при вы\
соких температурах:
•• или ••• для умеренного пара,
••• или “MAX” для максимального па\
ра.
• Емкость должна быть заполнена водой.
• Поставьте утюг вертикально.
• Включите прибор в сеть.
• Установите терморегулятор (1) в необхо\
димую позицию «в зоне парового глаже\
нья».
• Подождите, пока лампочка индикатора
погаснет и загорится снова.
• Установите регулятор отпаривания (3) в
требуемое положение (рис.4).
13
• Set the temperature control dial (1) to the position”MAX”.
• Insert the plug into the wall socket.
• Allow the iron to heat up until indicator light first goes out.
• Remove the plug from the wall socket.
• Keep the iron horizontally over the sink.
• Press button “Self clean” (fig. 7).
• Boiling water and steam will now emit from the holes in the Soleplate.
Impurities and scale (if any) are washed away with it.
• Move the iron forwards and backwards while this happens. Go on letting
steam and water escape until the water reservoir is virtually empty.
• Stand the iron on it end.
• Insert the plug into wall socket.
• Set the temperature dial to position MAX. Let the iron heat up again. The
remainder of the water inside the steam chamber will now vaporize and
leave the iron through the Soleplate.
• During this process of dry\steaming it is advisable to move the iron over the
old piece of cloth.
ANTIDRIP
1. Anti\drip system, which is designed to prevent water escaping from the
soleplate when the iron is too cold automatically.
2. During use, the anti drip system may emit a loud clicking sound, partic\
ularly during heat\up or whilst cooling down. This is perfectly normal
and indicates that the system is functioning correctly.
STORAGE
• Turn the temperature control dial (1) to “MIN” and set the steam dial to
position “0” (= no steam)
• Turn off the iron and disconnect the plug from the wall socket.
• Pour any remaining water out of the water tank (fig.8)
• Stand the iron upright and let it cool down sufficiency (fig.9)
• The power cord can be wound around the cord storage.
• Always store the iron in an upright position.
8
ENGLISH РУССКИЙ
3
4
1205new.qxd 01.07.03 14:57 Page 16
Page 9

тиллированную воду во избежание
засорения утюга. Не используйте хими\
чески очищенную воду.
• Перед наполнением утюга водой
отключите его от сети.
• Установите регулятор отпаривания в
положение “0”.
• Налейте воду в отверстие (рис.2)
• Не наливайте воду выше отметки
“MAX”.
• Выливайте воду после глажения.
ТЕМПЕРАТУРА ГЛАЖЕНИЯ
• Перед глажением изделия проверьте, есть ли на нем ярлык с
инструкциями по глажению. Следуйте этим инструкциям.
• Если инструкция по утюжке изделия отсутствует, но Вы знаете вид тка\
ни, обратитесь к таблице температур.
• Таблица относится только к конкретным тканям и не подходит для от\
делок изделий (оборок, блестящих нашивок и т.д.).
Изделия с различными видами отделок рекомендуется гладить при
низких температурах.
• Сначала рассортируйте изделия по видам ткани: шерсть с шерстью,
хлопок с хлопком и т.д.
• Утюг нагревается быстрее, чем остывает, поэтому рекомендуется на\
чинать гладить с тканей, требующих более низкой температуры утюж\
ки, таких, как синтетика.
• Если изделие состоит из нескольких видов ткани,выбирайте мини\
мальную температуру для этих компонентов. (Например, если изделие
состоит из 60% синтетики и 40% хлопка, для утюжки выбирается пози\
ция для синтетических тканей (•) и процесс утюжки осуществляется
без пара).
• Если Вы не знаете состав изделия, найдите на нем место, которое не
заметно при носке, и попробуйте подобрать соответствующую темпе\
ратуру глаженья, начиная с минимальной.
• При утюжке тканей из 100% шерсти утюг нужно установить в позицию
парового глажения. Рекомендуется установить регулятор отпаривания
в максимальную позицию и гладить через тонкую ткань.
Шерстяные изделия могут лосниться после глаженья. Чтобы этого из\
12 9
CARE AND CLEANING
• Before cleaning the iron ensure it is disconnected from the power supply
and has completely cooled down.
• Deposits on the Soleplate may be removed with a rough cloth soaked in a
vinegar/water solution.
• The casting may be wiped with a damp cloth and then polished with a dry
one.
• Do not use abrasives on the Soleplate.
• Keep the Soleplate smooth: avoid hard contact with metal objects.
SAFETY PROTECTIVE CUTOUT
In the unlikely event of the thermostat failing, the protective cut\out will operate
to prevent the iron overheating.
The iron should then be taken to an authorized repairer.
SPECIFICATION
Power requirement 230 V ~ 50 Hz
Max. power 1800 W
SERVICE LIFE OF THE IRON NOT LESS THAN 3 YEARS
РУССКИЙ ENGLISH
8
9
2
1205new.qxd 01.07.03 14:57 Page 18
Page 10

МЕРЫ БЕЗОПАСНОСТИ
1. Перед эксплуатацией внимательно прочитайте всю инструкцию.
2. Используйте утюг в целях, предусмотренных инструкцией.
3. Удостоверьтесь, что напряжение прибора (см. маркировку) соответст\
вует локальному напряжению сети в Вашем доме.
4. При отключении прибора от сети тяните за вилку, а не за электричес\
кий шнур.
5. Не используйте утюг с поврежденным электрическим шнуром, а также
с любыми другими неисправностями. Для предотвращения пораже\
ния электрическим током не разбирайте утюг. Неправильная сборка
может стать причиной поражения электрическим током во время экс\
плуатации. При неисправности отнесите утюг квалифицированным
специалистам для ремонта.
6. Если Вам необходимо отлучиться, выключите утюг, отсоедините его
от сети и поставьте на основание.
7. При работе электрических приборов вблизи детей необходимо на\
блюдение взрослых. Не оставляйте включенный утюг без присмотра.
8. Чтобы избежать поражения электрическим током, не погружайте утюг
в воду или в любую другую жидкость.
9. При соприкосновении с горячими поверхностями утюга или горячей
водой Вы можете получить ожог.
10. Не допускайте соприкосновения электрического шнура с горячими
поверхностями. Перед тем как убрать утюг, дайте ему полностью ос\
тыть, а затем намотайте электрический шнур вокруг утюга.
11. Перед наполнением утюга водой отключите его от сети.
12. Не наливайте воду выше обозначенного уровня.
13. Чтобы избежать перегрузки сети, не включайте одновременно не\
сколько приборов.
14. Храните эту инструкцию.
Примечание: Перед использованием утюга в первый раз попробуйте его
на кусочке ненужной ткани, чтобы полностью очистить подошву и емкость
для воды. При включении утюга в первый раз может появиться дым, это
нормально и скоро прекратится.
НАПОЛНЕНИЕ ВОДОЙ
• Этот утюг можно использовать с нормальной питьевой водой.
• Если в Вашем районе вода жесткая, рекомендуется использовать дис\
10
11
ОПИСАНИЕ ЧАСТЕЙ УТЮГА (рис.1)
1. Терморегулятор
2. Отверстие увлажнителя
3. Регулятор пара
4. Кнопка увлажнителя
5. Кнопка отпаривания
6. Индикатор
7. Емкость
8. Подошва
9. Шнур
10. Маркировка
11. Кнопка “Самоочистка”
ОПИСАНИЕ ЧАСТЕЙ УТЮГА
РУССКИЙ РУССКИЙ
1205new.qxd 01.07.03 14:57 Page 20
 Loading...