

Vintage view Case & Crate Series, Case & Crate CC-BIN Installation Instructions Manual

Case & Crate
Bin Short (CC-BIN) Installation Instructions
The Bin Short is the base unit for all Case & Crate bin congurations.
Video guides, spec sheets, and additional support are available at vintageview.com/caseandcrate
Parts List & Congurations
• (2) Bin Side Wall
• (4) Bin Shelves
• (4) Levelers
• (4) Couplers (for vertical extension)
• (24) 5mm x 25mm Bolts with Nuts
• (1) Wall Anchor Bracket with
Bin/Locker Short (Figure A)
All parts included in this box for Bin; Locker Doors
(CC-LOCKER) required for Locker conguration
Bin/Locker Tall (Figure B)
• (1) Toggle Bolt
Additional Bin needed (CC-BIN); Locker Doors
(CC-LOCKER) required for Locker conguration
Bin/Locker Extended Units (Figure C)
Bin Extension kits (CC-BIN-EX) required for modular, horizontal growth. Locker Doors (CC-LOCKER)
required for Locker conguration and additional Bins
and Extension Kits required for tall congurations.
Instructions
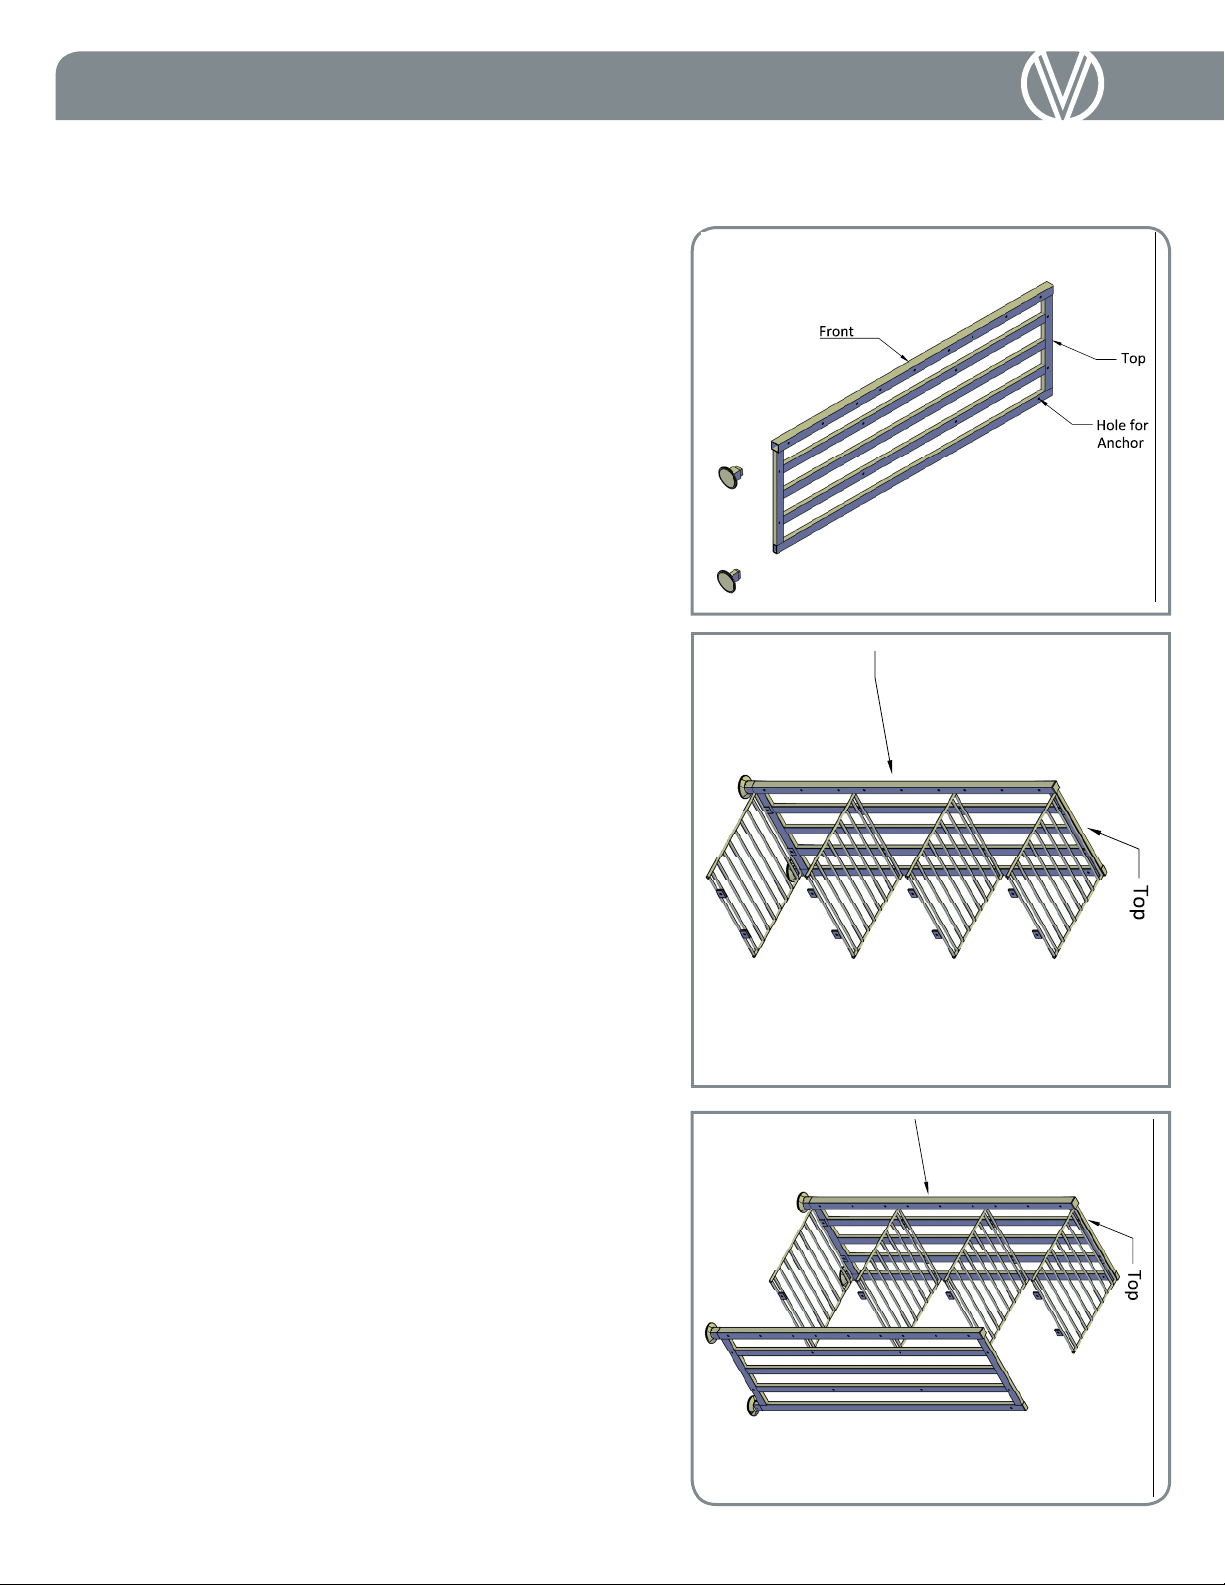
Step 1: Prep the Pieces
Begin by orienting the Bin Side Wall. The front features
the thicker 1”x1” steel supports and the top of each
unit features one drill hole on the inside of the slimmer
1”x0.5” beam.
Insert the supplied levelers on the bottom of each unit that
will be used as a base. Insert End Caps to the top of the
unit (skip this if it will the base unit of a Bin Tall conguration).
Step 2: Connect the Shelves
Lay the rst Bin Side Wall on the ground on its narrow
edge (at a 90-degree angle from the oor). Starting from
the top end, connect the rst shelf using the supplied metal
bolts inserted into the pre-drilled holes. Ensure the tabs of
the shelf are facing down and the shelf is ush with the top
of the support. Repeat this step for the middle shelfs.
When installing the bottom shelf, ensure its tabs are
facing up (the opposite of the other three shelves).
Pro Tip: When threading the bolts to the shelves, place
the bolt head on the outside of the unit for added security.
Step 3: Attach the Second Side Wall
Align the top of the second Side Wall with the top shelf
and connect using the provided bolts. Repeat for all other
shelves.
Front
Front
 Loading...