

Page 1
Wine Master Cellars • 2000 S. Dahlia Street, Unit 300, Denver, CO 80222 • phone: 866.650.1500 • fax: 866.650.1501
Wine storage system
A
B
C
X
60"
Please feel free to contact us regarding the assembly of this product.
Each FCF kit contains:
2 Frame Pieces• 40 self-drilling screws• 2 Plastic Couplers•
Before starting, open all Packaging for the FCF and take inventory to make sure you have everything.
Level• Tape Measure• Metal File• Hack Saw•Phillips Head Power Screwdriver•
Recommended Fasteners:
For attachment to drywall ceiling, use spiral inserts or expanding wall anchors for both attachment points. When
possible to attach into wood joists, use #10 X 1-1/2” screws.
For attachment directly into wood, use #10 coarse thread 1” screws.
Attaching into concrete we recommend predrilling and using 3/16” X 1” masonry screws or concrete anchors.
FCF Installation Instructions
1. Measure the exact dimension between the oor and ceiling in
the exact position you intend to place the frame. Subtract 5 feet
(60 inches) from the measured dimension.
Example:
98” oor to ceiling measurement
98” – 60” = 38”
2. Using the resulting dimension, measure away from the
mounting plate and mark both rails on one of the frame halves.
Note: If the measurement falls on one of the cross members, you
will need to cut some off of both halves. Cut 2” off of one half and
increase your resulting dimension from step 1 by 2” and mark the
2nd frame half.
3. Using a hack saw, carefully cut both rails squarely at the
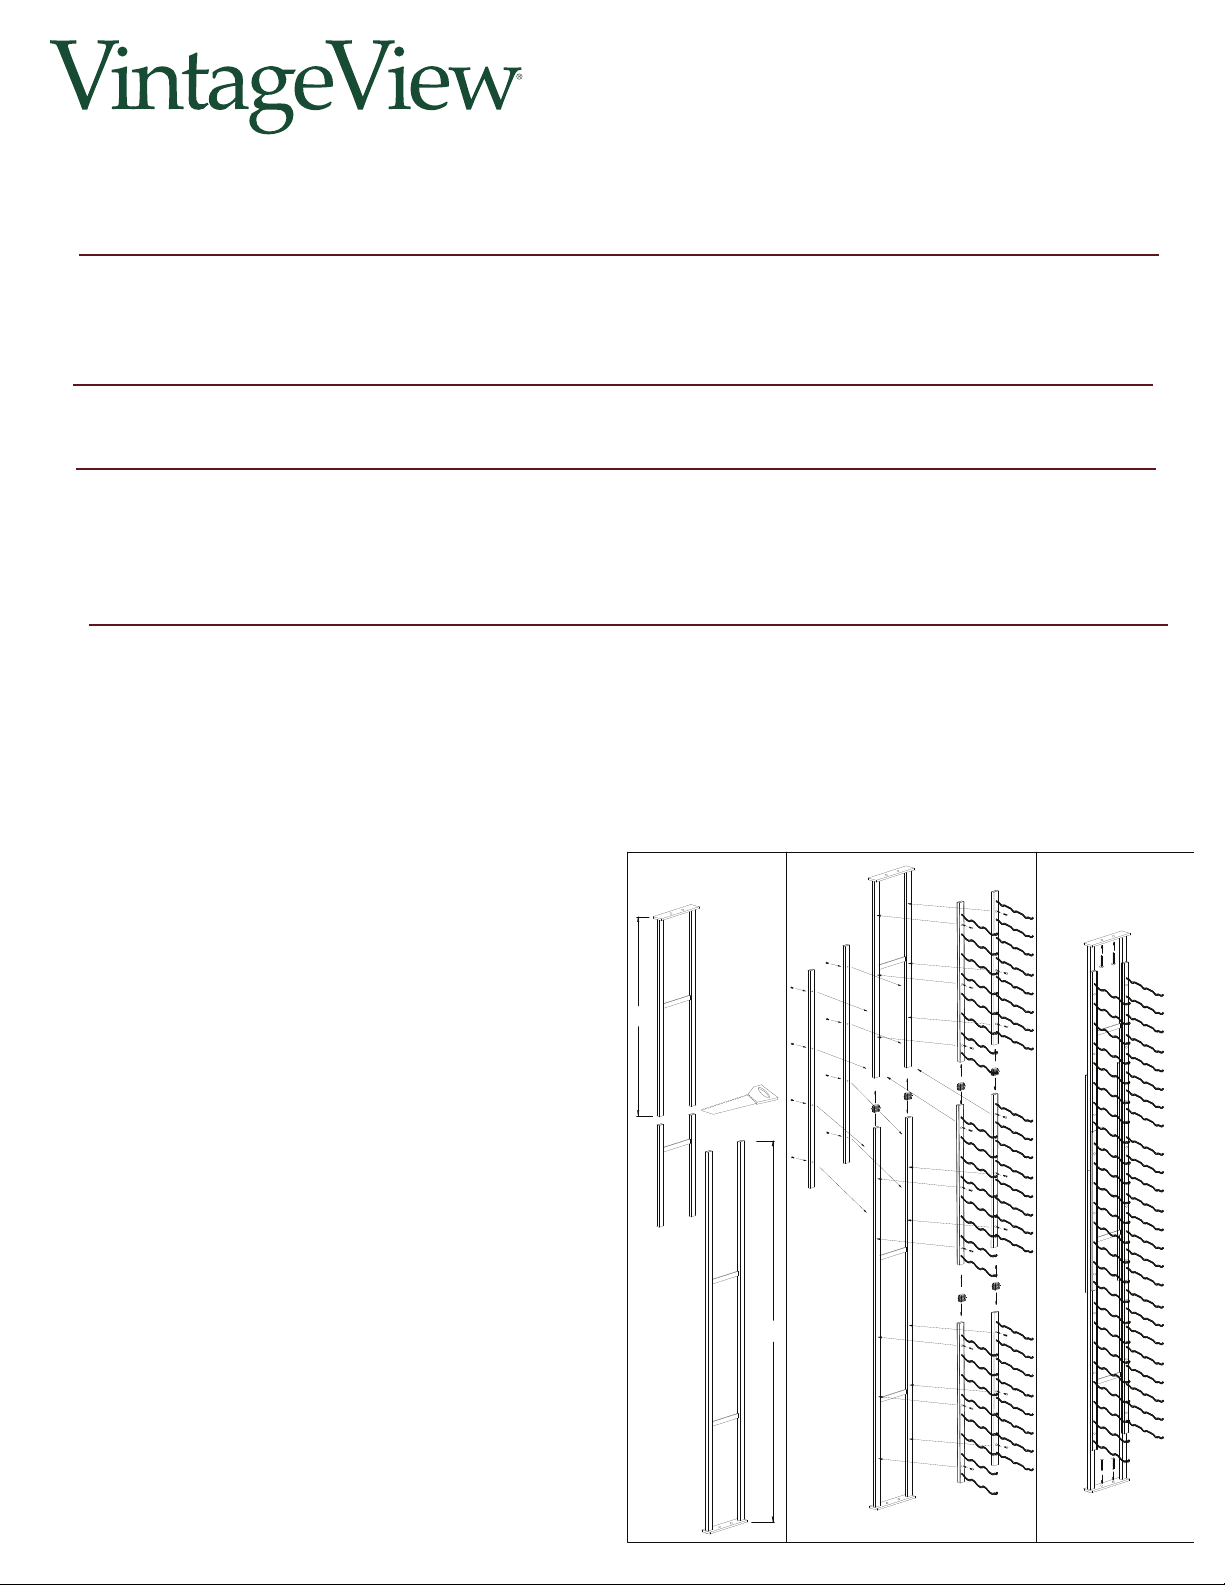
markings. Clean off any burrs with a metal le. (IMAGE A)
4. Insert the plastic couplers into the ends of one frame piece and
slide the two frame sections together. Place the assembled frame
on a level surface, so that the frame lays at with support under
the coupled joint.
5. Remove 2 WS series racks from their packaging and remove the
plastic end caps from the bottom of one set and from the top of
the other set.
6. Determine whether you would like the bottle necks to face left
or right. Using the set of WS series racks with the plugs removed
from the top, place either the neck or base of the rack on the 5’
section of the frame rail. Locate the bottom of the rack to the
desired distance above the plate that will be fastened to the oor.
Using the provided self-drilling screws, mount the WS series rack
to the frame. (IMAGE B)
7. Attach the other side of the rack to the 2nd rail and insert the
plastic couplers provided with the WS series racks into the bottom
of the 2nd set of racks.
8. Slide the coupler into the 1st rack and attach it to the frame.
Repeat for the other half of the rack.
11. Attach the remaining racks or FCF Back to the opposite side of
the frame
Note: You may need to offset the racks vertically about 1/8” so
that the screws from the opposite side will not interfere with the
insertion of screws.
10. Stand the frame in place and shim at the top, if necessary, to
achieve a snug t.
Floor to Ceiling Frame (FCF)
Installation Instructions
Tools Needed:
11. Attach the frame to the ceiling rst with the appropriate
fasteners for your surface*. Using a level, ensure the rack is vertical
both side-to side and front-to-back. Next, attach the frame to the
oor using fasteners suitable for that surface*. (IMAGE C)
12. Load your racks with wine and enjoy the VintageView®!
 Loading...