

Viking VQWO5311SS, VBBO1601SS, VSBO2402, VBO1830, VBO1811SS Maintance Manual
...
Use & Care
MANUAL
Outdoor Stainless Steel Cabinets
VBBO1601 / VBBO2602 / VURO3200 / VBO1811 / VBO1830 / VSBO2402 / VTOP1810
IMPORTANT - PLEASE READ AND FOLLOW
•Before beginning, please read these instructions completely and carefully.
•Do not remove permanently affi xed labels, warnings, or plates from product. This may void the warranty.
• Outdoor stainless steel cabinets are not designed to be water tight. Water may enter cabinetry under certain conditions
•The installer should leave instructions with the consumer who should retain for future reference
•NEVER use LP tanks inside any stainless steel cabinetry. Tanks must be located outside of the cabinetry at all times.
TO INSTALL CABINETS:
1. Verify cabinet product number(s) on box(es) to list of
cabinets ordered.
2. Carefully unpack cabinets making sure not to scratch fronts.
Front panels are protected by plastic coating (that must be
removed after setup). Cabinets with interchangeable doors
are shipped from the factory with opening from left to right
as shown (See illustration #1).
3. In cabinets with interchangeable doors, hardware package
will contain hole covers and hardware to install.
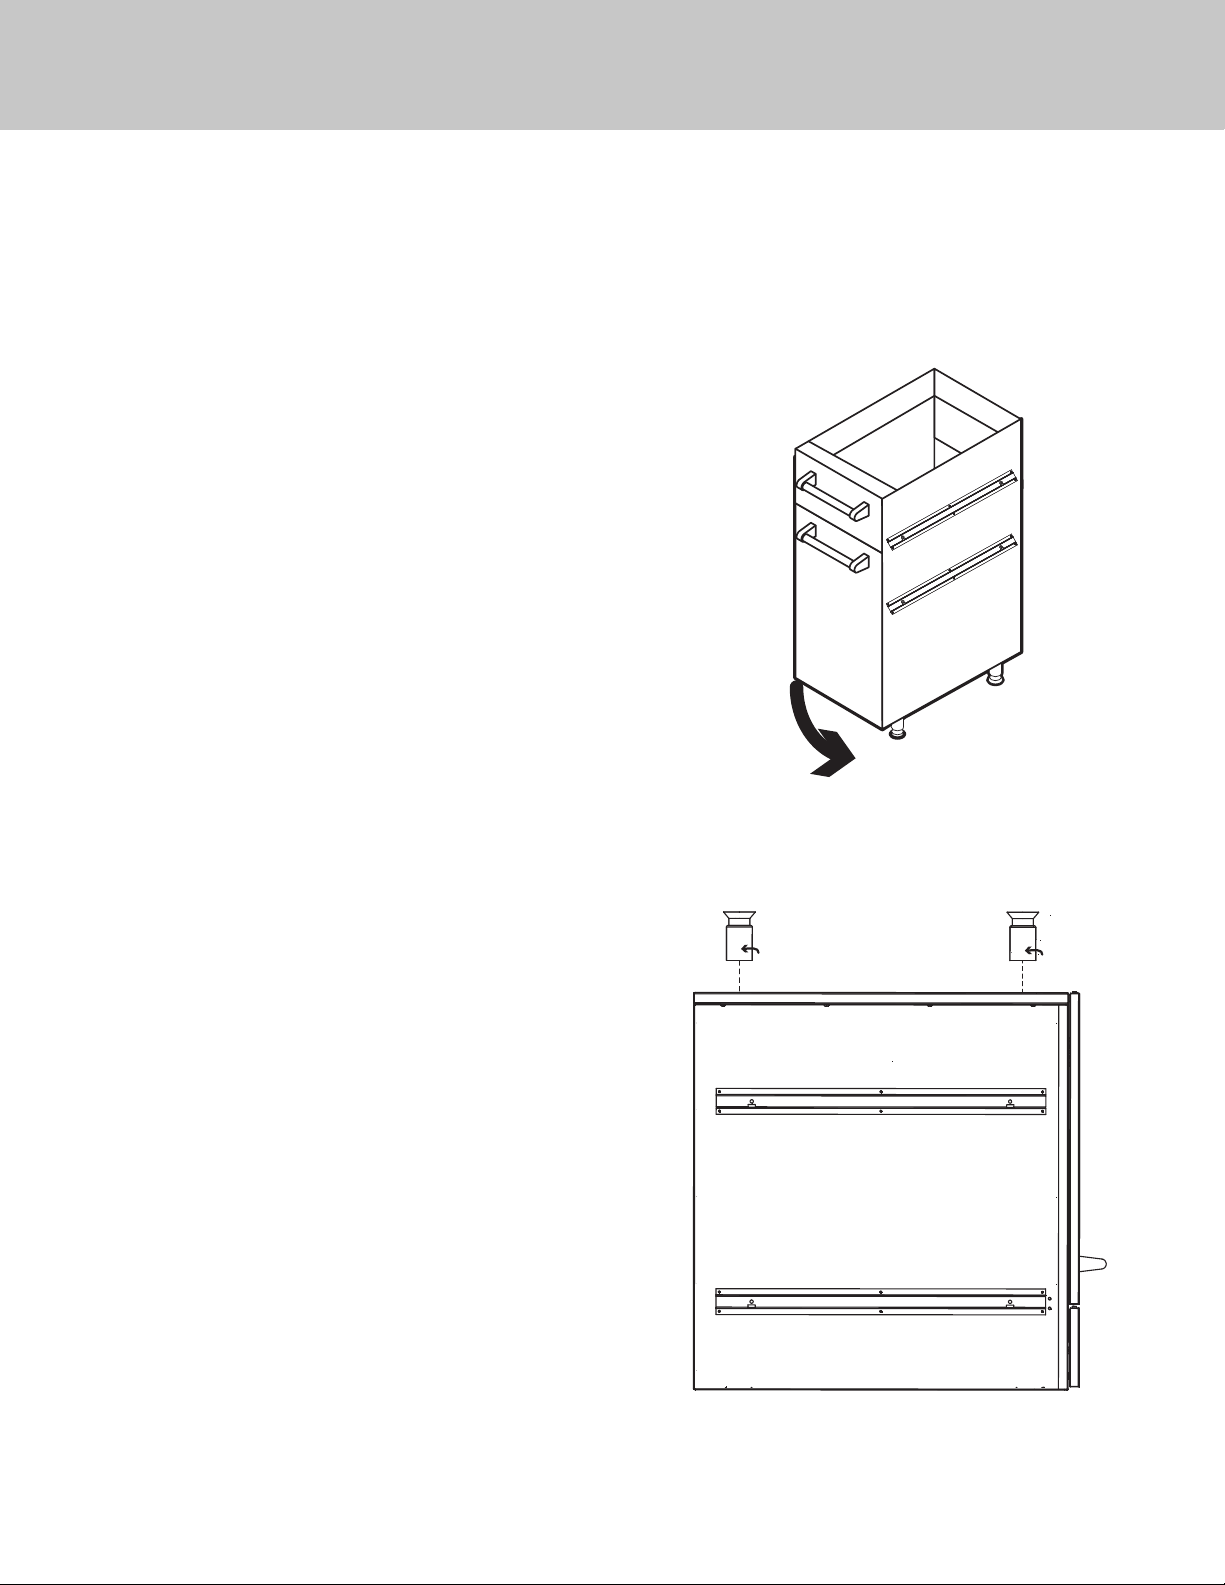
Illustration #1
Illustration #2
4. Install 4 legs in the leg plates attached to bottom of each
cabinet. Screw in place. (See illustration #2).
2
IMPORTANT - PLEASE READ AND FOLLOW!
5. Place cabinet(s) in approximate fi nal position.
Level cabinets using leveling legs. If installing
two or more cabinets, use 1/2” SMS screws
provided to screw them together. (See
illustration #3).
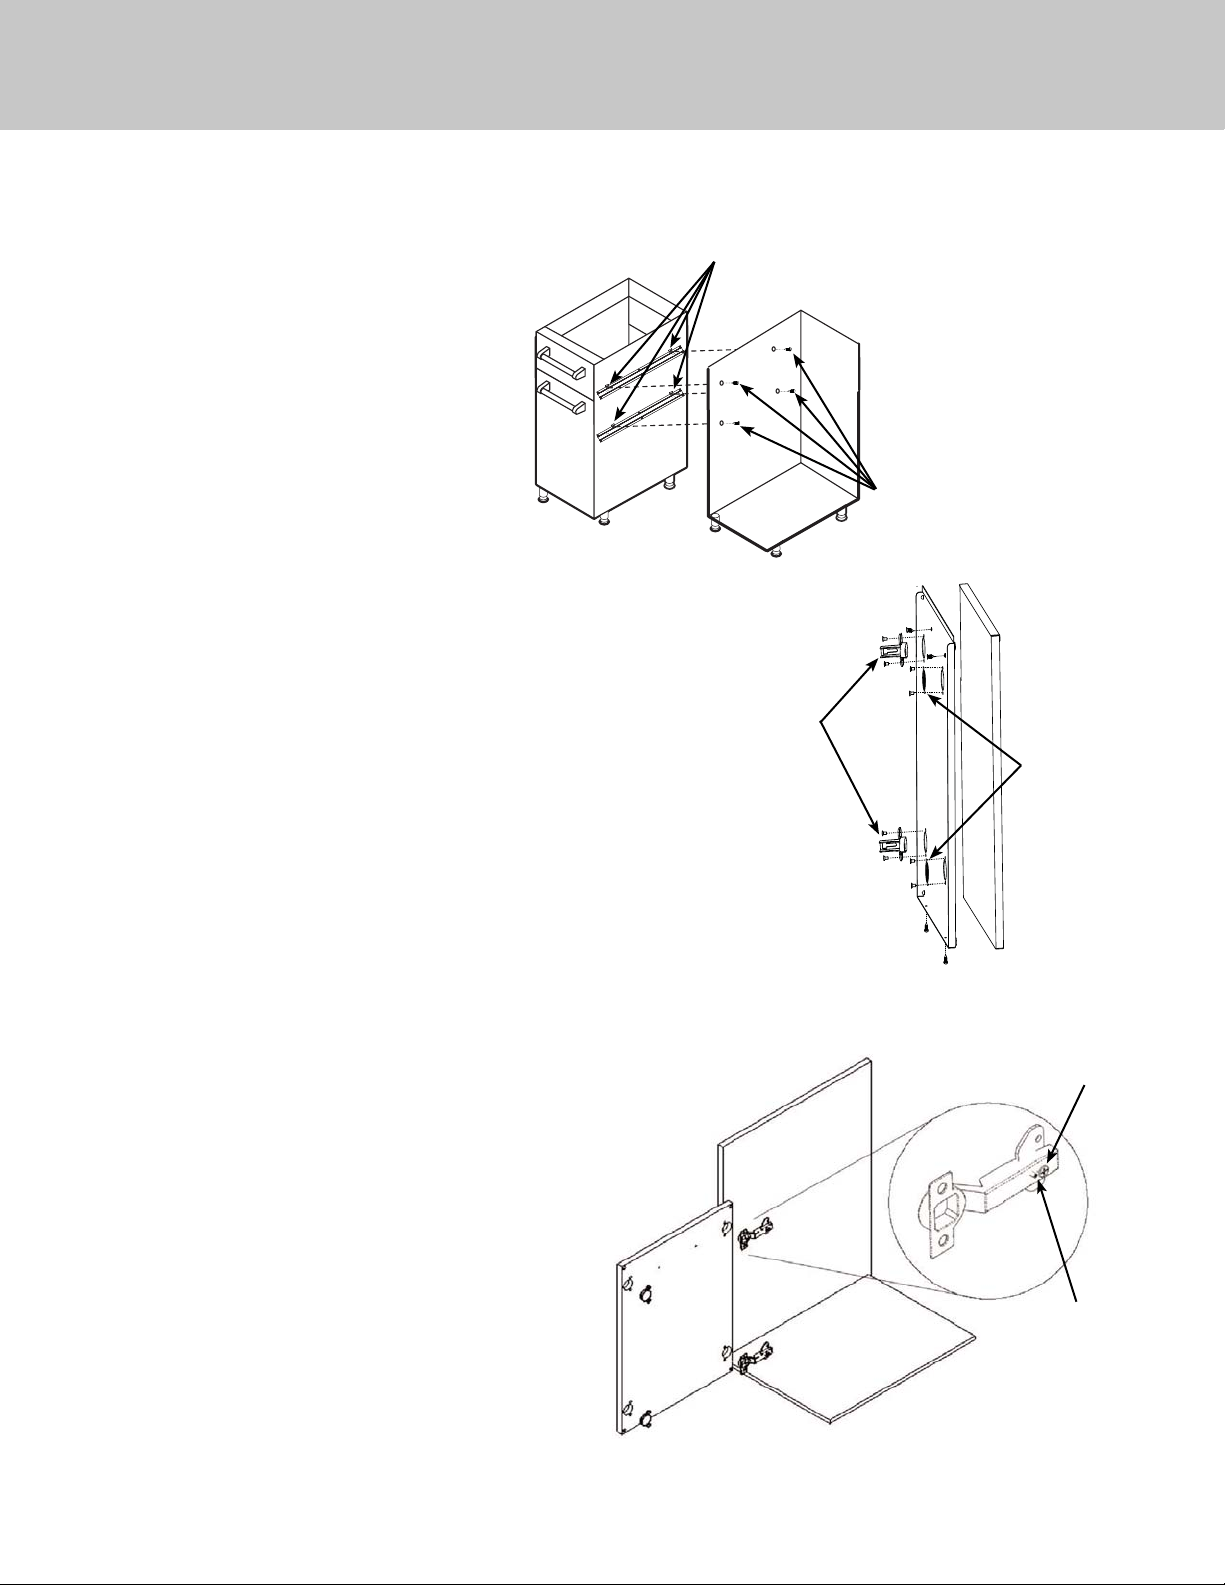
6. On cabinets with interchangeable left or right hand swing,
determine appropriate hinge side for cabinets. Remove
outside door panel. Install hinges by placing hinge
bracket in hole in door and fasten in place with hardware
provided. Screw hole plate covers in appropriate predrilled holes in cabinet side. Fasten hole covers with
hardware provided. (See Illustration #4).
Illustration #3
Install (4) Tinnerman clips
(provided) before fastening
cabinets together.
Use #8 x 3/8”
(.95 cm) fl at head
M.S. and locknut
to attach hinge
bracket to the
inside door
Mount cabinets with
#10 x 1/2” (1.3 cm)
screws provided.
Use #8 x 3/8”
(.95 cm) M.S.
and locknut
to fasten hole
cover to inside
door panel.
7. Cabinet doors must be adjusted when cabinets are level
in fi nal position. There are two adjustment screws on the
hinge receiver. (See Illustration #5)
• The front screw is used to center the door in the
opening. Turning the front screws in or out will
center the door over the cabinet opening.
• The back screw is used to align the front of the
door with the cabinet frame and secure the door
to the cabinet. Slightly loosen the screw and slide
door in or out. Retighten the screw to secure the
door.
Illustration #5
3
Back
Screw
Front
Screw
 Loading...