

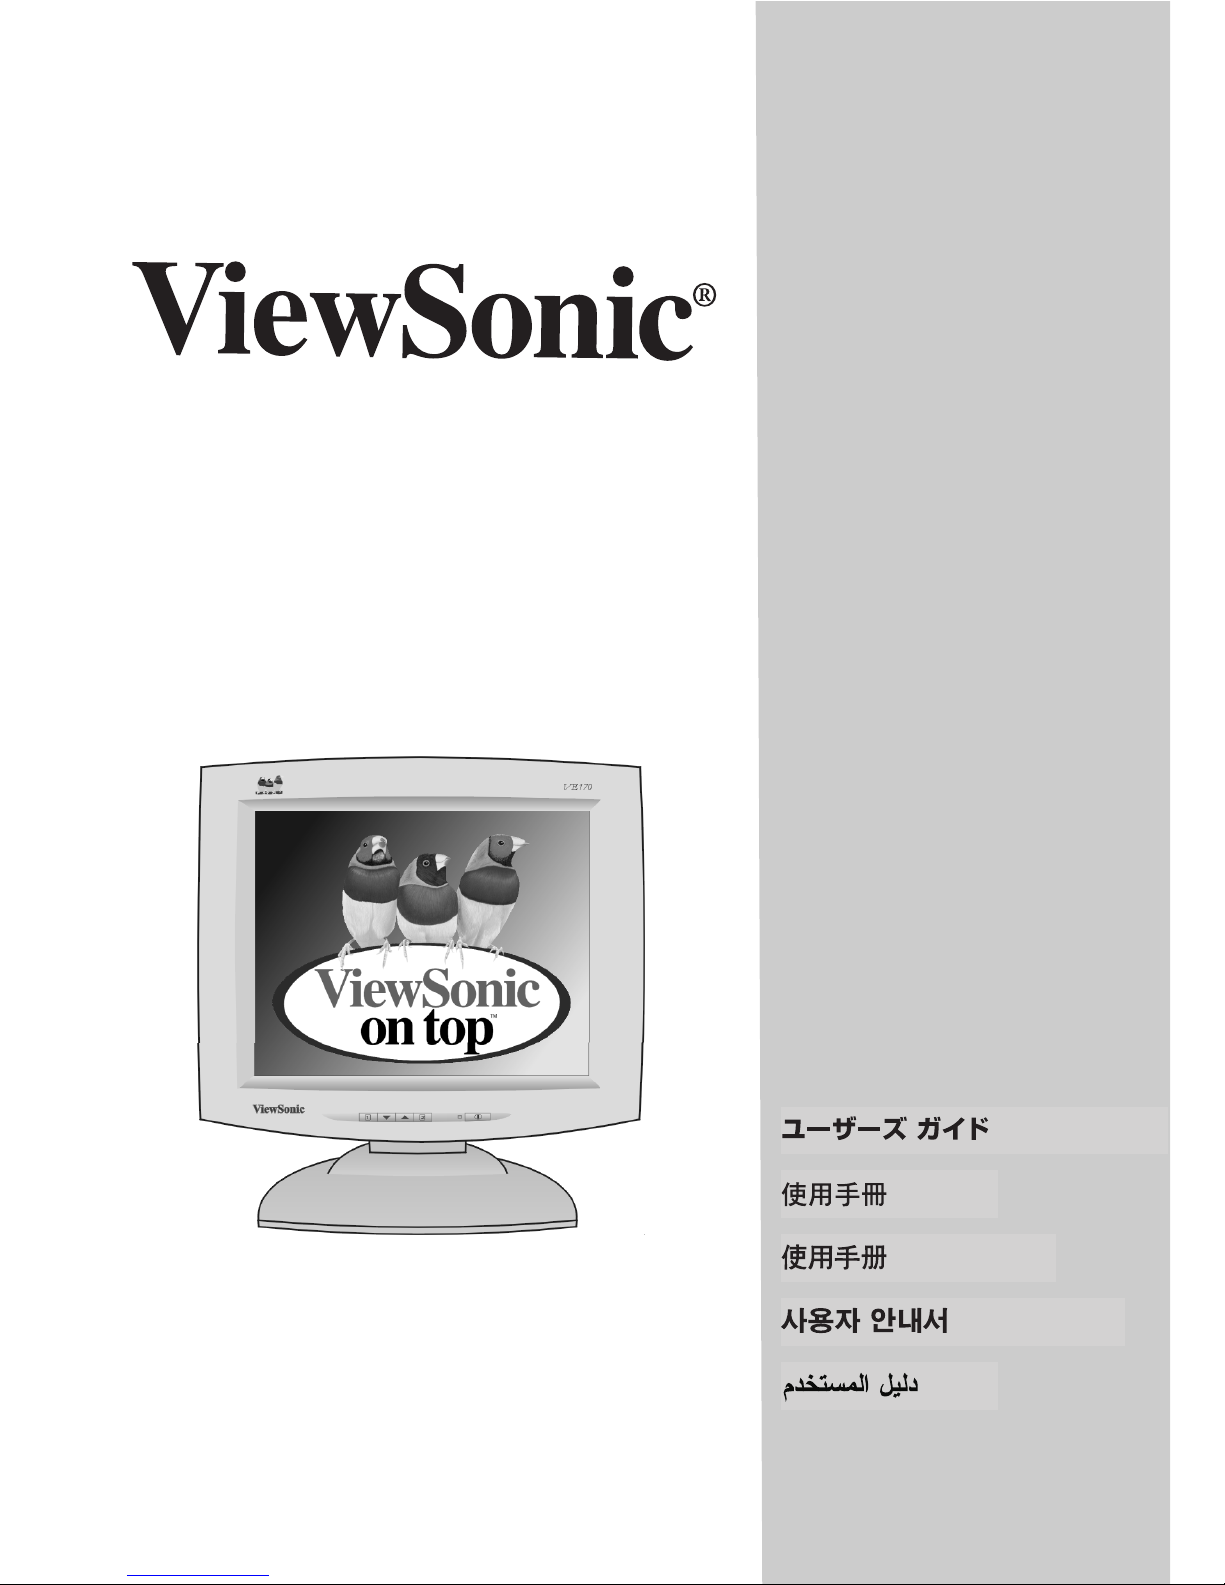
ViewSonic ViewPanel VE170B, VLCDS22034-1, VLCDS22034-1b User Manual
User Guide
Guide de l’utilisateur
Bedienungsanleitung
Guía del usuario
Guida dell’utente
Guia do usuário
Användarhandbok
Руководство пользователя
Podręcznik użytkownika
Full 17.0" Diagonal Viewable Screen
VE170/ ViewPanel
®
VE170b
Copyright © ViewSonic Corporation, 2000. All rights reserved.
Macintosh and Power Macintosh are registered trademarks of Apple Computer, Inc.
Microsoft, Windows, Windows NT, and the Windows logo are registered trademarks of Microsoft
Corporation in the United States and other countries.
ViewPanel, ViewSonic, the three birds logo, OnView, ViewMatch, and ViewMeter are registered
trademarks of ViewSonic Corporation.
ENERGY STA R is a registered trademark of the U.S. Environmental Protection Agency (EPA).
As an ENERGY STAR® partner, ViewSonic Corp. has determinded that this product meets the
ENERGY STA R® guidelines for energy efficiency.
VESA is a registered trademark of the Video Electronics Standards Association. DPMS and DDC
are trademarks of VESA.
Disclaimer: ViewSonic® Corporation shall not be liable for technical or editorial errors or omissions
contained herein; nor for incidental or consequential damages resulting from furnishing this
material, or the performance or use this product.
In the interest of continuing product improvement, ViewSonic Corporation reserves the right to
change product specification without notice. Information in this document may change without
notice.
No part of this document may be copied, reproduced, or transmitted by any means, for any purpose
without prior written permission from ViewSonic Corporation.
E
N
G
L
I
S
H
Electronic Warranty Registration
To meet your future needs, and to receive any additional product information as it becomes
available, please register your monitor's warranty on the Internet at:
http://www.viewsonic.com.
For Your Records
Write the Serial Number (see back of ViewPanel) and the Purchase Date in the
spaces below. Keep this User Guide as a permanent record of your purchase to help
with identification in the event of theft or loss.
Product Name: ViewSonic VE170/VE170b
Model Number: VLCDS22034-1/1b
Document Number: VE170_UG_68
Serial Number: __________________
Purchase Date: __________________
Product disposal at end of product life
ViewSonic is concerned about the preservation of our enviornment. Please dispose of this product
propersly at the end of its useful life. Your local waste disposal company may provide
information about proper disposal.
ViewSonic VE170/VE170b
1
E
N
G
L
S
H
CONTENTS
For Your Records. . . . . . . . . . . . . . . . . . . . . . . . . . . . . . . . . . . . . . . . . 1
Getting Started
Package Contents . . . . . . . . . . . . . . . . . . . . . . . . . . . . . . . . . . . . . . . . 3
Before using the ViewPanel®. . . . . . . . . . . . . . . . . . . . . . . . . . . . . . . 4
Precautions . . . . . . . . . . . . . . . . . . . . . . . . . . . . . . . . . . . . . . . . . . . . . 4
I
Quick Installation* . . . . . . . . . . . . . . . . . . . . . . . . . . . . . . . . . . . . . . . 5
Using the ViewPanel
Setting the Timing Mode . . . . . . . . . . . . . . . . . . . . . . . . . . . . . . . . . . 6
Preset Timing Modes . . . . . . . . . . . . . . . . . . . . . . . . . . . . . . . . . . . 6
Maximum Refresh Rates . . . . . . . . . . . . . . . . . . . . . . . . . . . . . . . . 6
Adjusting the Screen Image . . . . . . . . . . . . . . . . . . . . . . . . . . . . . . . . 7
Other Information
Specifications . . . . . . . . . . . . . . . . . . . . . . . . . . . . . . . . . . . . . . . . . . 14
Troubleshooting . . . . . . . . . . . . . . . . . . . . . . . . . . . . . . . . . . . . . . . . 15
Customer Support . . . . . . . . . . . . . . . . . . . . . . . . . . . . . . . . . . . . . . . 16
Cleaning the ViewPanel . . . . . . . . . . . . . . . . . . . . . . . . . . . . . . . . . . 17
Warranty . . . . . . . . . . . . . . . . . . . . . . . . . . . . . . . . . . . . . . . . . . . . . . 18
Appendix
Power Cord Safety Guidelines . . . . . . . . . . . . . . . . . . . . . . . . . . . . . 19
FCC Information . . . . . . . . . . . . . . . . . . . . . . . . . . . . . . . . . . . . . . . . 20
CE Conformity . . . . . . . . . . . . . . . . . . . . . . . . . . . . . . . . . . . . . . . . . 20
*To meet your future needs, and to receive any additional product information as it becomes available,
please register your monitor's warranty on the Internet at: http://www.viewsonic.com.
2
ViewSonic VE170/VE170b
Getting Started
Congratulations on your purchase of a ViewSonic VE170/VE170b color
ViewPanel®!
Save the original box and all packing material for future shipping needs.
NOTE: The word "Windows®" in this user guide refers to the following
Microsoft® operating systems: Windows '95, Windows '98, Windows NT®,
Windows 2000®, Windows Me® (Millenium).
Package Contents
• ViewSonic
VE170/VE170b
ViewPanel
• DC Power Supply (AC
adapter)
The power cable connects to the AC
Adapter. The other end of the AC Adapter
connects to the back of the ViewPanel (the
DC In port).
• Power cord/USA type
Connects the wall outlet to DC Power
supply.
• Power cord/SCHUKO type for
Europe
Connects wall outlet to DC Power supply
• Setup Guide
E
N
G
L
I
S
H
• Detachable video cable (15
pin D-sub)
Required to receive Analog RGB video
signal from PC
Includes User Guide PDF files and INF/
ICM Display Optimization files*
*NOTE: The supplied INF file assures compatibility with Windows operating
systems, and the ICM file (Image Color Matching) ensures accurate on-screen
colors. ViewSonic® recommends that you install both files as shown in the
Quick Installation section.
• ViewSonic® Wizard CD-ROM
ViewSonic VE170/VE170b
Getting Started
3
Before Using the ViewPanel
®
• Read Precautions on this page and Power Cord Safety Guidelines in the
Appendix.
• Read Setting the Timing Mode on page 6 before you adjust the
ViewPanel. This will prevent you from making adjustments unnecessarily.
E
N
G
L
S
H
Precautions
• For best viewing conditions sit at least
18" from the ViewPanel.
I
• AVOID TOUCHING THE SCREEN
WITH YOUR FINGERS. Oils from the
skin are difficult to remove.
• NEVER REMOVE THE REAR
COVER. The ViewPanel contains highvoltage parts. You may suffer serious
injury if you touch these parts.
• Avoid exposing the ViewPanel to direct
sunlight or another heat source. The
ViewPanel should be facing away from
direct sunlight to reduce glare.
• Always handle your ViewPanel with care
when moving it.
• Place your ViewPanel in a well ventilated
area. Do not place anything on the
ViewPanel that prevents adequate
dissipation of heat.
• Ensure the area around the ViewPanel is
clean and free of moisture.
• Do not place heavy objects on the
ViewPanel, video cable, or power cord.
• If smoke, abnormal noise, or strange
odor is present, immediately switch the
ViewPanel off and call your dealer or
ViewSonic. It is dangerous to continue
using the ViewPanel.
4
Getting Started
ViewSonic VE170/VE170b
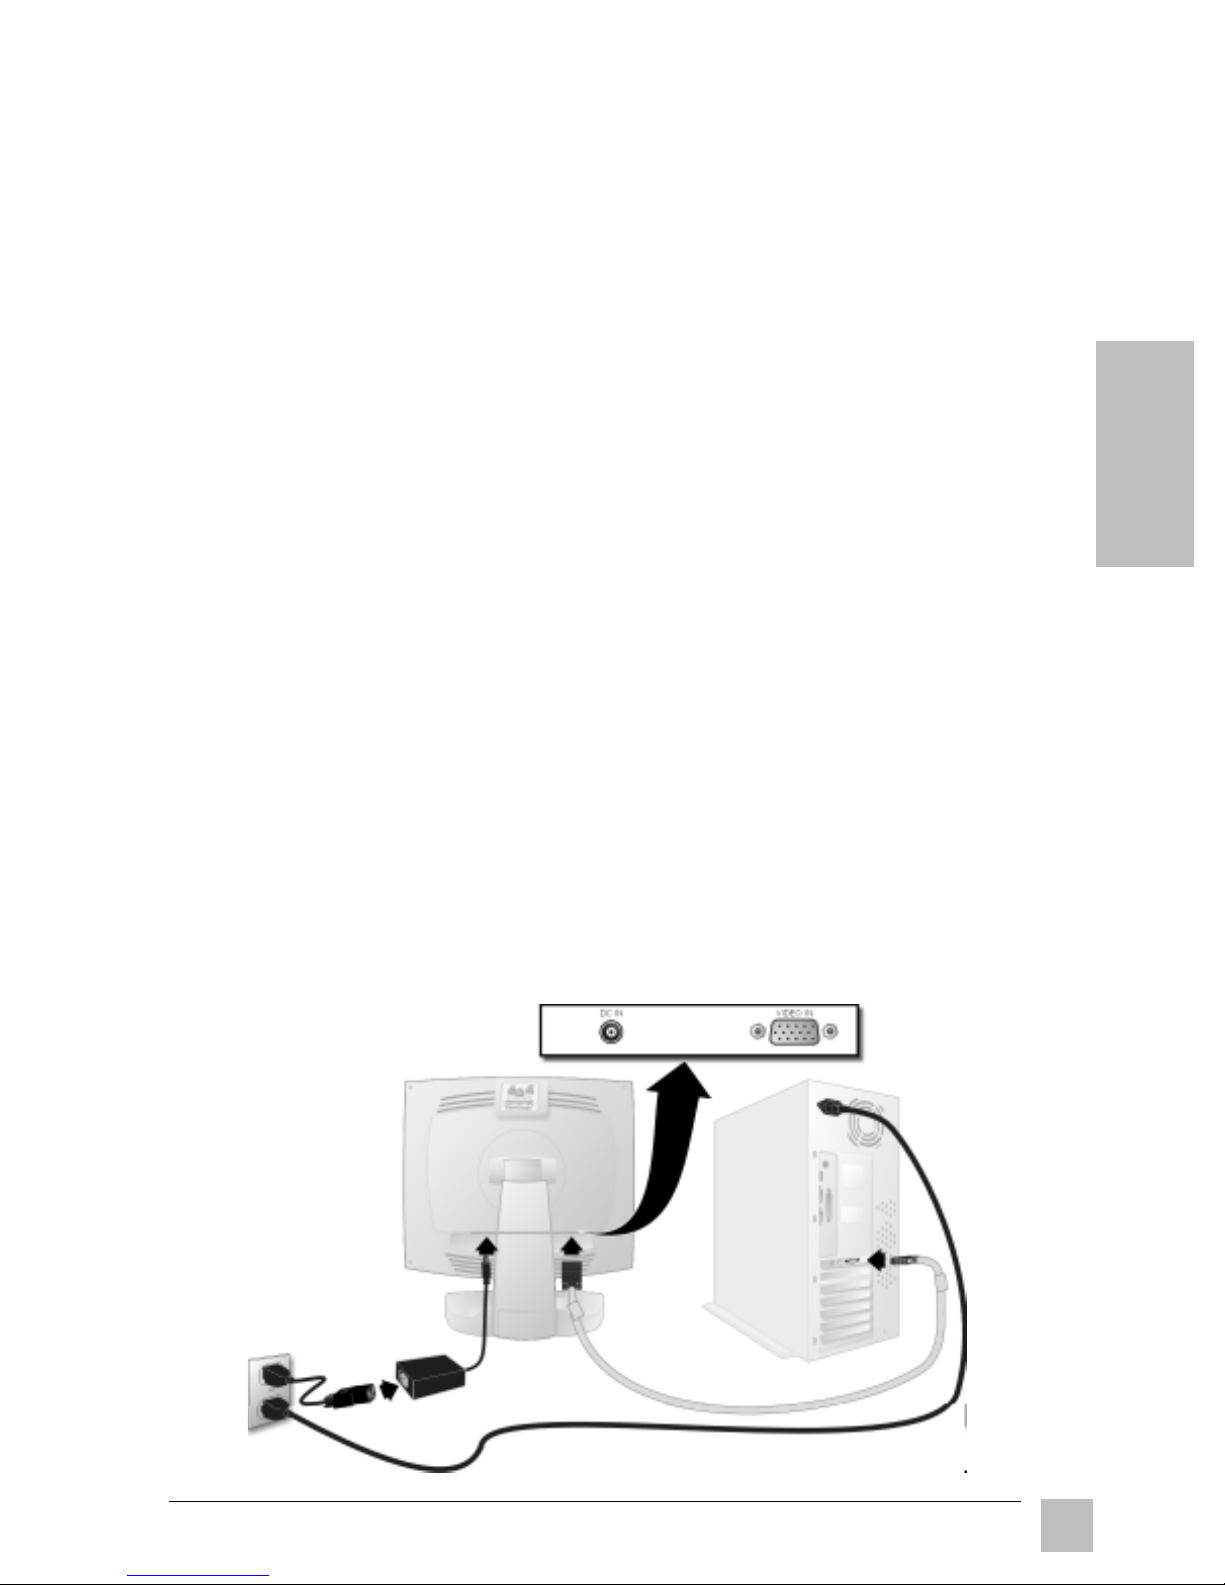
1 Connect video cable
Make sure that both the ViewPanel® and the
computer are powered OFF. Connect the
video cable from the back of your
computer to the video input on the back of
the display.
Macintosh® users: Connect a Macintosh
adapter (part No. VMAC-1) to the video
cable, then to the ViewPanel. To order an
E
N
G
L
I
S
H
ViewSonic VE170/VE170b
5
G
H
Using the ViewPanel
Setting the Timing Mode
The timing mode consists of the resolution and refresh rate (vertical frequency).
After setting the timing mode, use the ViewSonic OnView® controls in this section
to make adjustments. The recommended timing mode for this ViewPanel® is:
E
N
L
I
S
1280 x 1024 @ 60Hz.
To set the Timing Mode:
1 Set the resolution: Right-click on the Windows® desktop > Properties >
Settings > Desktop Area > set the resolution (example 1280 x 1024 @
60Hz).
2 Set the refresh rate: See your graphic card's user guide for instructions.
NOTE: To minimize the adjustments required for an optimal screen image,
select a timing mode from the Preset Timing Modes table below.
Preset Timing Modes
VGA 640 x 350 @ 70Hz
VGA 640 x 400 @ 70Hz
VESA 640 x 480 @ 75Hz
VESA 800 x 600 @ 75Hz
VESA 1280 x 1024 @ 60Hz & 75Hz
Macintosh® 640 x 480 @ 67Hz
Macintosh® 832 x 624 @ 75Hz
Macintosh® 1024 x 768 @ 75Hz
VESA 1024 x 768 @ 75Hz
NOTE: For best image quality, activate AUTO TUNE from the IMAGE
ADJUST menu.
If necessary, from the IMAGE ADJUST menu, make small adjustments using
H POSITION and V POSITION, then PHASE, until the screen image is
completely visible. (The black border around the edge of the screen should
barely "touch" the illuminated "active area" of the ViewPanel.)
Maximum Refresh Rates
1280 x 1024 NI @ 75Hz
1024 x 768 NI @ 75 Hz
800 x 600 NI @ 75Hz
640 x 480 NI @ 75 Hz
(NI= Non Interlaced)
WARNING: Do NOT set the graphics card in your computer to exceed the maximum
refresh rate for each resolution shown below in the Maximum Refresh Rates table.
Doing so may result in permanent damage to your ViewPanel.
Using the ViewPanel
6
®
ViewSonic VE170/VE170b
 Loading...