

Vicks V5100NS Series Use And Care Manual
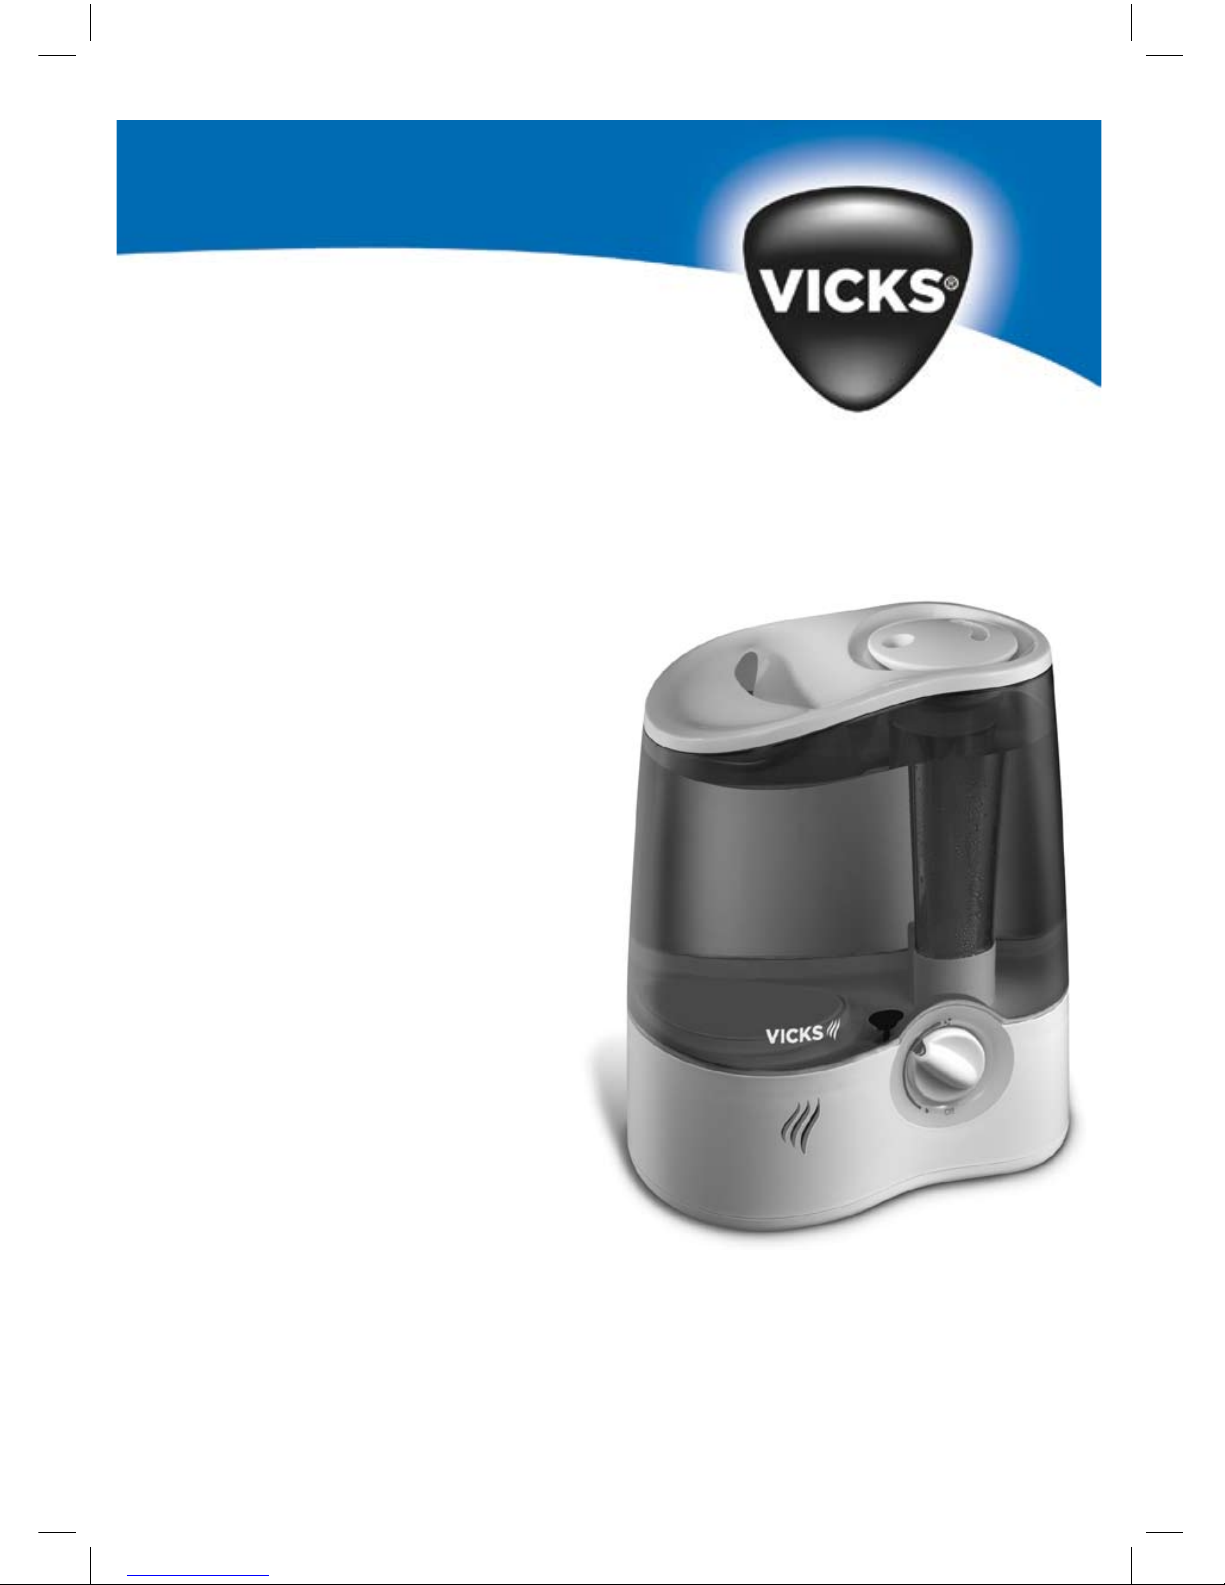
Ultrasonic Humidifier
Humidificateur ultrasonique
Use and Care Manual
Manuel d’utilisation et d’entretien
Quiet Operation
20 Hours Operation Between Fillings
Scent Pad Heater for Soothing Vicks Vapours
Adjustable Mist Control
Water Filter Traps Impurities
V5100NS Series / Série V5100NS
If you have any questions about the operation of
your Ultrasonic Humidifier, call our toll-free
Consumer Service line at 1-800-477-0457.
Fonctionnement discret
Autonomie de 20 heures
Chauffe-tampon pour vapeurs
Vicks calmantes
Débit d’humidité réglable
Filtre arrêtant les impuretés de l’eau
Pour toute question au sujet du fonctionnement de
l’humidificateur à ultrasons Vicks, communiquez
avec notre Service à la clientèle en composant ce
numéro sans frais : 1-800-477-0457.
Accessories / Accessoires :
DC-51 Demineralization Cartridge / DC-51 Cartouche de déminéralisation
VSP-19-CAN Vicks VapoPad™ / VSP-19-CAN Vicks VapoPad
MC
k
Manufacturing Quality Healthcare Products for Over 75 Years
Fabricant de produits de soins de santé de qualité depuis plus de 75 ans
2
3
(2)
(3)
(4)
(6)
(15)
(11)
(16)
(13)
(1)
(14)
(5)
(7)
(8)
(9)
(10)
(12)
IMPORTANT SAFETY INSTRUCTIONS
Read all instr uctions before operating the humid ifier. Keep these
instruct ions.
1. This applian ce is
not intended f or use by persons (including
children) with re duced physical, sens ory or mental
capabilities, or lack of experi ence and knowledge, un less
they have been g iven supervision o r instruction concerning
use of the ap pliance by a person responsible for the ir safety.
Children should be supervised t o ensure that they do not play
with the appl iance.
2. Keep out of th e reach of children.
3. Do
not operate t he humidifier ou tdoors; do not place in
direct sunl ight, high-temperature areas or near compute rs or
sensitive elec tronic equipment .
4. Place the hum idifier on a level, firm, non-meta llic and
waterproof sur face. Make sure it is in a stable pos ition, so that
it cannot fa ll over or fall down. Water can damage furni ture
and floor s.
5. Unravel the c ord before use. Failure to do so could cau se
overheating and possible fire ha zard.
6. Do
not use prod uct if cord has b een damaged. Keep cor d
away from heate d surfaces and o ut of the way, where it c an
not be steppe d on or tripped over.
7. Do
not use an e xtension cord or a solid-state speed -control
device. Doing so could cause overheat ing, fire hazard or
electric shock.
8.
This produc t has a polarized p lug (one blade is wider t han the
other) as a saf ety feature. This plug will fit into a polarized
outlet only o ne way. If the plug does not fit fully i nto the
outlet, rever se the plug. If it still does not f it, contact a
qualified electrician. Do not attempt to def eat this
safety fe ature.
9. Always disco nnect cord at wall plug before moving the unit,
filling, touc hing, cleaning or when not in use. Do not pull on
the cord when disconnecting it . Plug and unplug unit with
dry hands.
10.
Do not add a ny substances i nto the Water Tank (3) or
Reservoir (7) (e.g. inhalant, aromatic sub stances etc.). This
can cause he alth hazards to pe ople.
11. Do
not touch the Ultrasonic Nebulizer (10) when the
humidifier is operating. Doing so could cause bur ns.
12. Do
not direct the Mist Nozzle (1) dir ectly at peopl e, walls or
any object s.
13. Do
not remove the filled Water Tank (3) when the hum idifier
is in operati on. Do not operate t he humidifier wi thout water
or when the Tank (3) is emp ty. Doing so could dam age the
humidifier. Do not overfill.
14. Do
not operate t he humidifier wi thout the Deminera lization
Cartridge (6) and do not use an e xhausted cartr idge. In hard
water areas, the re might be an outp ut of minerals, noticea ble
as “white dust ”.
15. Do
not immerse the humidifier in water or other liqui ds and
do not pour w ater or other liquids over the humidifie r or into
the Mist Out let (14) or Air Outlet (8).
16. Ventilate the room regular ly. When a humidifier is used in
closed or sma ll rooms, excessive humi dity can condens e on
furniture, w alls and floors.
17. Clean the humidifie r regularly and fol low the “Cleaning
Instructi ons”.
18. If the cord is damaged, the replacement mus t be conducted
by the manufac turer, service agen t or authorized per son to
avoid any risk of electrical sho ck.
19. Do
not operate t he humidifier if it is damaged, fault y or is not
working prop erly. Disconnect it from the elect ricity supply.
20. D o
not block th e scent pad heater air flow.
21. Do
not place exp osed Vicks scent pad (VapoPad™) on
furniture, f abrics, bedding, or plastics.
22. SCENT PAD WARNING:
WARNING: CHOKING HA ZARD
Keep out of reach of children and pets.
Contact with exposed pad may cause eye
irritation. Do not touch exposed pad directly.
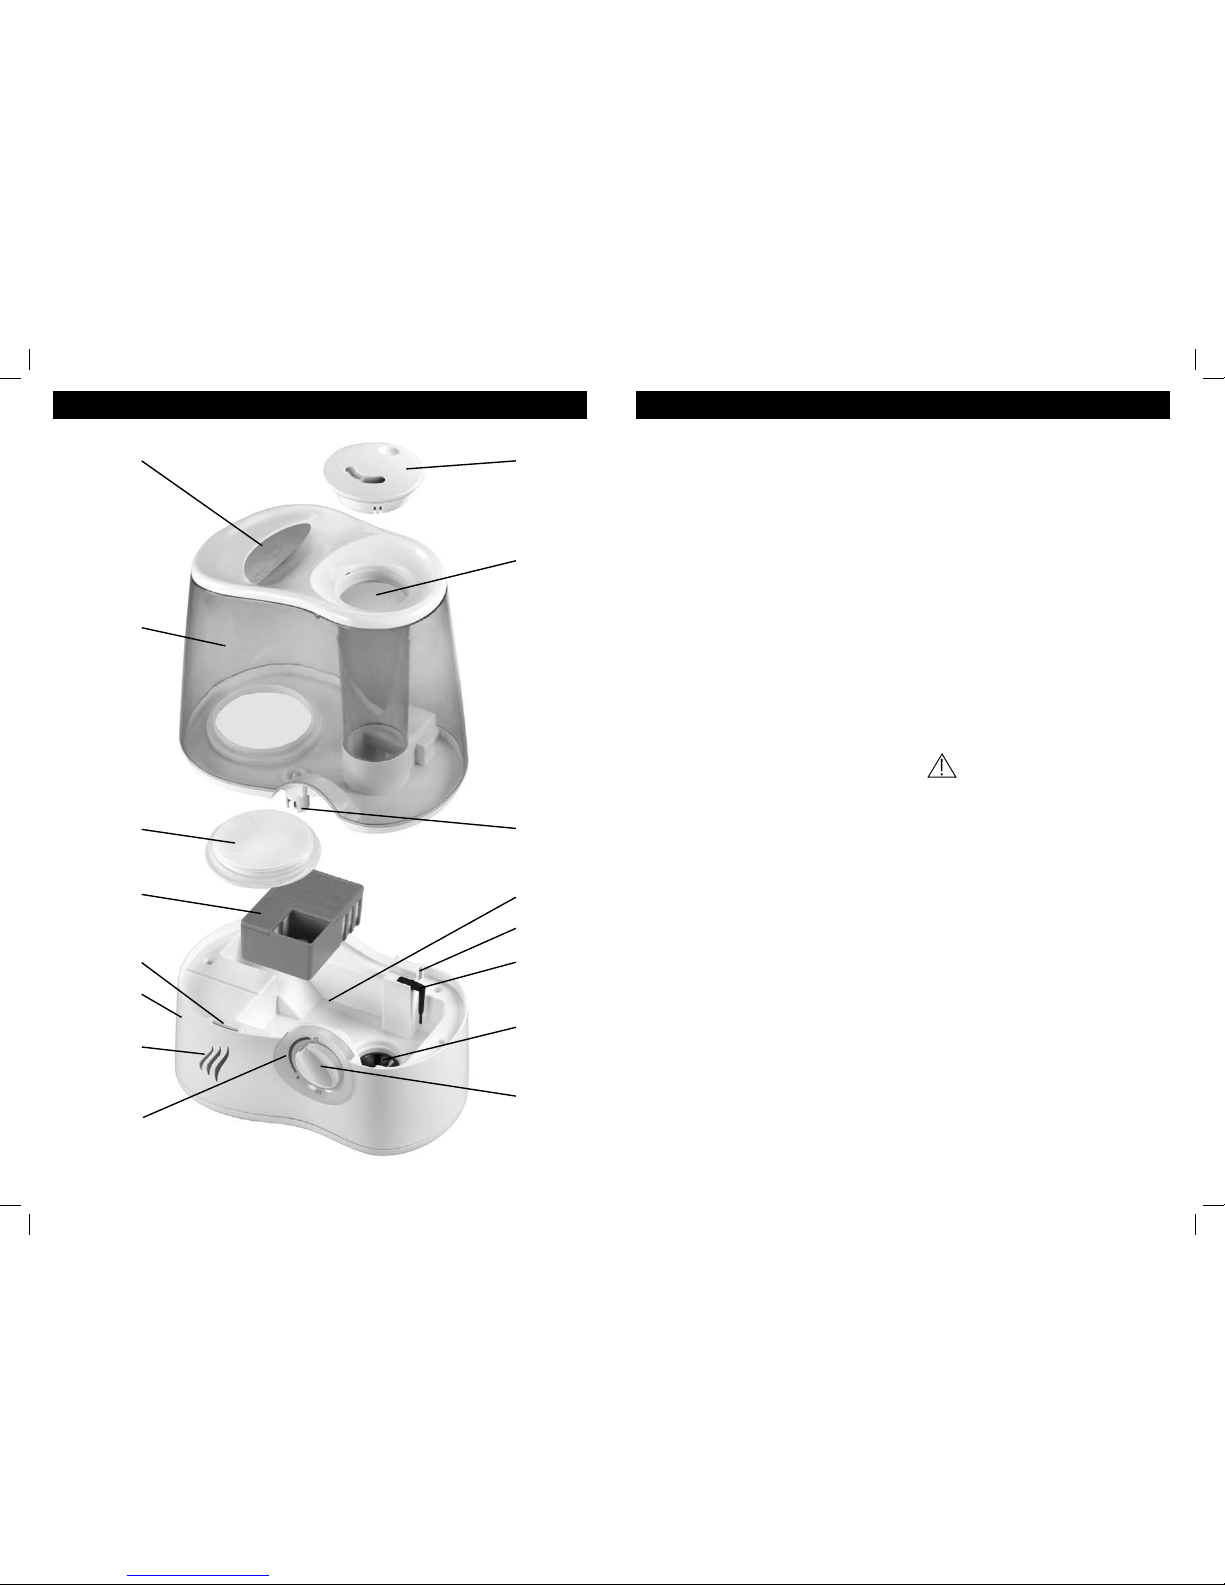
PARTS IDENTIFICATION (See page 2)
1. Directiona l Mist Nozzle
2. Carrying Handle
3. Water Tank
4. Tank Cap
5. Water Valve
6. Demineralizat ion Cartridge (in cluded in certai n models)
7. Reservoir
8. Air Outlet
9. Water Sensor
10. Ul trasonic Nebulizer
11. B ase
12. Powe r Knob
13. M ist Intensity Indic ator
14. M ist Outlet
15. S cent Pad Slot
16. S cent Pad Heater
FIRST TIME USE
1. Read all ins tructions bef ore using the humidi fier.
2.
Unpack the humidifier, the Suppl y Cord, the Water Tank (3),
the Direct ional Mist Nozzle (1), the Base (11) and the
ENGLISH

4
5
Cartridge (6); remove all packaging mater ial and discard.
Packaging materi al can be recyc led.
3. Place the hum idifier on a level, firm, non-meta llic and
waterproof sur face. Make sure it is in a stable pos ition, so
that it cannot fall over or fall do wn. Water can damage
furniture a nd floors. A s afety distance of at least 1,20 m
from any obje cts should be kep t.
FILLING THE WATER TANK
1. Always UNPLUG th e humidifier bef ore filling.
2. Remove the Water Tank (3) from the Base (11) and turn
it upside down. Open the Tank Cap (4) by turni ng it
counter-cl ockwise.
3. Fill the Water Tank (3)
only with c lean, cool tap water. Do n ot
use warm or h ot water. This can damage the Cartridge (6) and
the Ultrasoni c Nebulizer (10) and void the wa rranty.
4.
Do not add any substances into the Water Tank (3) or
Reservoir (7) or onto the Cartridge (6) (e.g. inhalant,
aromatic substances etc.). This can cause health hazards.
5. Close the Water Tank (3) with the Tank Cap (4) by turning
it clock wise.
6. Check that th e Cartridge (6) is in place.
7. Turn the Water Tank (3) uprigh t. Make sure that the Tank C ap
(4) is in place and che ck it for leaks .
8. Replace the filled Water Tank (3) on the Bas e (11). Wait for
approx. 15 minutes b efore operating t he humidifier, so
that the water c an run through th e Cartridge (6) into t he
Reservoir (7).
PROTEC DEMINERALIZATION CARTRIDGE
(Model DC-51)
This humidif ier may be supplied with a Demineraliza tion
Cartridge (6) that removes minerals f rom the water. This preven ts
the precipit ation of minerals (“whi te dust”) that can occur in hard
water areas. The Demineralization C artridge (6) is desig ned to
last for abo ut a month to two months of normal use; the effect ive
time will var y depending on the mineral content of th e water
used. If you l ive in a hard water ar ea, we recommend the us e of
distilled wate r for better res ults from the hum idifier.
If you are usin g distilled water in the humidifier, you may find the
Demineralizat ion Cartridge u nnecessary. And, if y ou choose, you
may operate the humidifier witho ut it.
Replacement Car tridge Model DC-51 should be avai lable where
you purchased the humidifier.
For assistanc e in locating an ou tlet near you or to p urchase
directly f rom Kaz, please c all 1-800-477-0457.
SCENT PAD HEATER DIRECTIONS FOR USE:
Your Vicks Ultr asonic Humidifier includes a scent pa d heater (16)
so that you c an enjoy Vicks soo thing menthol vapour s to increase
your comfor t. Each scent pad i s designed to last for 6-8 hours
of use.
1. Remove the wa ter tank and locate the scent pad slot (15) on
the base.
2. Place one sce nt pad in the slot, being careful not to touch the
scent pad wit h your hands. If your hands do come in cont act
with the pad, please wash them th oroughly as the ment hol
can be an ir ritant.
3. Replace the tan k and turn the unit on.
Note: As long a s your humidifier is on, the scent pad heater will
also be act ivated. This area ca n be warm to the to uch.
Replacing Pads:
1. Turn off and u nplug your humidif ier.
2. Remove tank and set aside.
3. Gently pull old scent pad out of the slot and disc ard.
4. Open refi ll pad and insert as described ab ove.
Note: One complem entary scent pad is included with yo ur unit.
Additional Vic ks scent pads (Vapo Pads™), model (VSP-19-CAN)
can be purcha sed at most reta ilers or through K az Consumer
Relations.
OPERATING INSTRUCTIONS
1. Check that the Water Tank (3) is filled and that the Cartr idge
(6) is in place.
2. Check that the Power Knob (12) is in the O ff-position. Plug the
supply cord in to the outlet. Do n ot touch the sup ply cord
with wet han ds.
3. Turn the Power Kn ob (12) to the desired positio n. Turn the
Power Knob (12) clockwis e to increase mist output; turn it
counterclock wise to decrease mi st output.
4. Direct the Mist Nozzle (1) away fr om people, object s or walls.
5. If surplus humidity condense s on furniture, wa lls or floors
in closed or small rooms, turn th e Power Knob (12) counterclockwise to decrease mist output and open th e door to the
room. If this does not solve the problem turn the Powe r Knob
(12) to the Off-posit ion and unplug the hu midifier.
6. Before moving the humidif ier or filling t he Water Tank (3)
turn the Power K nob (12) to the Off-positi on and unplug
the humidif ier.
ENGLISH
CLEANING, CARE AND STORAGE
We recommend cleaning the h umidifier fr equently. In
order to no t impair the pe rformance of the humidifi er,
follow the instruction s for Cleaning, Care and Storage.
Daily Clea ning
1. Before c leaning, turn the Power Knob (12) to the Off-posit ion
and unplug the unit.
2. Remove the D irectional Mist Nozzle (1) from the Water Tank
(3) and remove the Water Tank (3) fro m the Base (11).
3. Remove the C artridge (6) from t he Base (11). Do not wash
or clean the C artridge (6). Do not at tempt to remove o r
in any other way modify th e Water Sensor (9). Even
touching i t can damage th is delicate Se nsor.
4. Empty excess water from the Reservoir (7) where indicated by the
arrow and make sure that water does not enter into the Air Outlet
(8) or the Scent Pad Slot (15)
5. Open the Tank Cap (4) by turning it
counter-cl ockwise and
drain any water from the Water Tank (3).
6. Rinse the Water Tank (3) thoroughly with lukewa rm water.
7. Wipe the outer sur faces of the Water Tank (3) with a clean,
damp cloth.
8. To operate the humidifi er follow the instr uctions under
“Filling th e Water Tank” and “Op erating Instruc tions”.
Weekly Clea ning
1. Before cleaning, tur n the Power Knob (12) to the Of f-position
and unplug the unit.
2. Remove the Directio nal Mist Nozzle (1) from t he Water Tank
(3) and remove the Water Tank (3) fro m the Base (11).
3. Remove the Cartrid ge (6) from the Base (11). Do not wash
or clean the C artridge (6). Do not at tempt to remove o r
in any other way modify th e Water Sensor (9). Even
touching i t can damage th is delicate Se nsor.
4. Empty excess water f rom the Base (11) only on side opp osite
to the Water Senso r (9) and make sure, that water d oes not
enter into the A ir Outlet (8).
5. Open the Tank Cap (4) by turning it
counter-cl ockwise and
drain any water from the Water Tank (3).
6.
Clean the Water Tank (3) with a solution of bleac h and water
(one teaspoon of b leach to one gallon of water). Fill tank
partially w ith this solution, l et stand twent y (20) minutes,
shaking vigoro usly every few minu tes, drain, and rins e with
clean water unti l the bleach smell is gone.
7. Wipe the Reservoir (7) with a soft cloth dampened in t his
solution. If mineral deposits ar e evident around th e Nebulizer
and Water Sensor, clean their surfaces with a soft, c lean cloth
and a small amou nt of undiluted vine gar. If necessary fo r
removal of miner al deposits, mix a solution of 50% wh ite
vinegar and 50 % water and fill t he Reservoir with enough
solution to cove r the Nebulizer. Allow it to soak for an hour,
then use a cot ton swab to gently loosen buildup on the
Nebulizer. Rinse ou t the Reservoir a nd wipe clean. Do n ot
touch Nebul izer or the Water S ensor with bar e fingers
as any finge rprints or residu e can reduce mist output. Do not
immerse t he Base (11) in water.
8. To operate the humidifier follow the instructio ns under
“Filling th e Water Tank” and “Op erating Instruc tions”.
Care and Sto rage
1. Follow the “ Weekly Cleaning” ins tructions when the
humidifier is not used for a longer period (one week or
more).
2. Let the hum idifier and all i ts parts dr y completely.
3. Remove the C artridge (6) from t he Base (11) and discard.
4. Do
not store th e humidifier wit h a filled Water Tank (3) nor
with a used Cartridge (6).
5. Store the humidi fier in a cool, dr y place.
ENGLISH
 Loading...