

Page 1
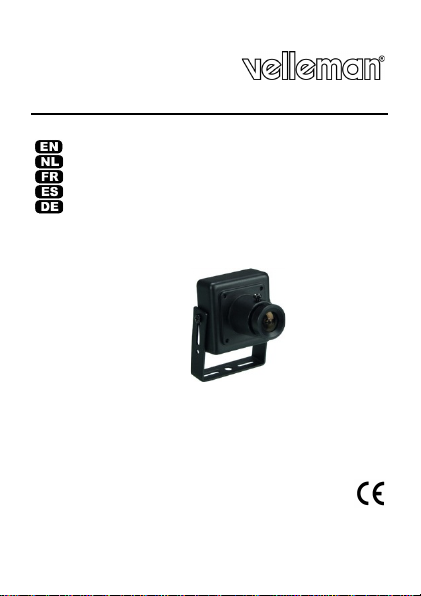
CAMCOLMHA9
1/3" HIGH RESOLUTION SO NY MINIATURE CA MERA
M IN I CÁMARA SO NY D E ALTA RES OLUCIÓN D E 1/3"
1/3" HO CHAUF LÖSE NDE SO NY MI NI -KA MERA
1/3" HOGE RE SO LUTIE SO NY MINI -CA MERA
MINI -CAMÉRA S ONY 1/3" HAUTE R ÉS OLUTI ON
USER MANUAL 3
GEBR UIKER SHANDLEI DING 8
MODE D'EMP LOI 14
MANUAL DEL USU ARIO 20
BEDIENUNGSA NLEI TUNG 26
Page 2

CAMCOLMHA 9
video
voeding
vidéo
alimentation
Video
Stromverso rgung
1
2 3
A B
video powe r
vídeo alimentación
vídeo alimentação
wide o zasila nie
V. 01 – 14/04/2014 2 ©Velleman nv
Page 3
CAMCOLMHA 9
conc er ning use of the appli ance by a person re sp onsibl e
when opening the cover. Touching
disassemble or open the housing yourself. Have the
USER MAN UAL
1. Introduction
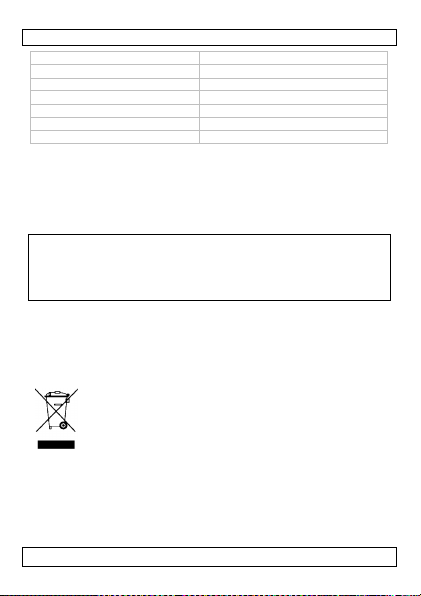
To all residents of the Europea n Un ion
Important environmental information about this produ ct
Th is symb ol on the de vi ce o r the packag e i ndi ca tes tha t
disposal of the device after its lifecycle could harm the
environment. Do not dispose of the unit (or batteries) as
unso rted m unicipal waste; it should be take n to a
spe cialized com pan y fo r re cycli n g. Th i s de vice sh oul d be
ret urned to yo ur dis t ri buto r or t o a lo ca l re cyc l ing se rvice . R espect
the loc al environmental rules.
If in doubt, contact yo ur loca l waste d isposal authorities.
Tha nk you fo r ch oo s ing V e l l e m a n ! Pl ea s e rea d the manu a l tho ro ug hly
before bringing this device into service. If the device was damaged in
transit, don't install or use it and conta ct your dealer.
2. Safety Instr u c tions
T h is app l ia n ce is no t in te n d ed fo r u s e b y pe r s o ns
(including children) with reduced physical, sensory or
mental capabilities, or lack of experien ce and knowled ge ,
unless they have been giv en su pervi sion or i nstruct i on
for the ir safe ty.
Ch ildren s hall be su pervised to ens ure tha t they do not
play with the appliance.
Risk of electroshock
live wires can cause life-threaten i ng ele ctrosh ocks. Do not
device repaired by qualified personnel.
Do not crimp the power cord and protect it against
damage .
Warning! If the power cord is damaged, it must be
rep lace d by the man ufa ctu re r, i t s se rvice agen t, or
similarly qualified persons in order to avoid any hazard.
V. 01 – 14/04/2014 3 ©Velleman nv
Page 4
CAMCOLMHA 9
abuse. Avoid
Only use the device for its intended purpose. Using the device in
Th ere are no u ser -service a ble pa rts in si de the device.
Re fe r to an au tho ri ze d dea ler for se rvice and /o r spare
pa rts.
3. General Guideli n es
Refer to the Velleman® Se rvice a nd Quality Warranty on the last
page s of this manua l.
Indoor use only. Ke ep th i s de vice a way f rom
rain , m oistu re, splas hi ng and dripp i ng liqu ids.
Pro tect th is device f rom shock s and
br u t e forc e when oper a t in g th e d ev ice.
• Familiarise yourself with the functions of the device before actua lly
using i t .
• All modificat io ns of the device are forbidden for safety rea sons.
Dam age cau sed by user modifi ca tions to the device i s not cove red
by the warranty .
•
an unauthorised way will void the warra nty.
• Damage caused by disregard of certain guidelines in this manual
is no t cov e red by the wa r ra nt y a nd t he deal e r will no t acce pt
resp onsi bi l i t y for any ensui ng defects or pr obl ems.
• Do not use outside the t ec hni cal specifi cations as ment ioned at
the end of this us er manual.
• It is recomme nded to use a lightn ing p ro tection sys tem, or to
unplug the camera po wer supp ly in thunderstorm con ditions.
• DO NO T use this product to violate privacy laws or perform other
illegal activities.
• Keep this manua l for future reference.
V. 01 – 14/04/2014 4 ©Velleman nv
Page 5

CAMCOLMHA 9
2
bra cket
3
power/video connector
Choose a location for the camera. Keep the following guidelines
objects or reflections (e.g. metal doors). This may damage the
Connect the power connector [B] to a 12 VDC power supply (not
4. Overview
Refer to the illus trations on page 2 of this man ual.
1 lens
5. Hardware installatio n
1.
in mind:
o Do not install the camera in locations wh e re extremely high or
low temperatures or excessive vibrations may occur. Do not
install near heati ng or cooling devices.
o Avoid moun ting the came ra nea r h ig h e l e ctro -ma gn e t i c fie ld s .
o Do no t aim the came ra at the sun or othe r ex tremely bright
im age sen sor.
2. Use the m o un t i ng bra ck e t [2 ] t o d e term ine t he loc a tio n of the
mounting holes. Drill the holes and secure the bracket.
Wiring
1.
incl.).
2. Connect the BNC connector [A] to a monitor (not incl.).
N ote: for op ti mum image qual i ty, k eep the pow er an d video
cab les as short as possible.
Lens
The zoom and fo cus of the lens are adjus tab le, a s f ollows:
1. Use a hex key to gently lo osen th e s crew on the lens.
2. Poin t the came ra towards the fie ld of interest and adjust the
lens.
3. Gen tl y tig h te n the s cre w.
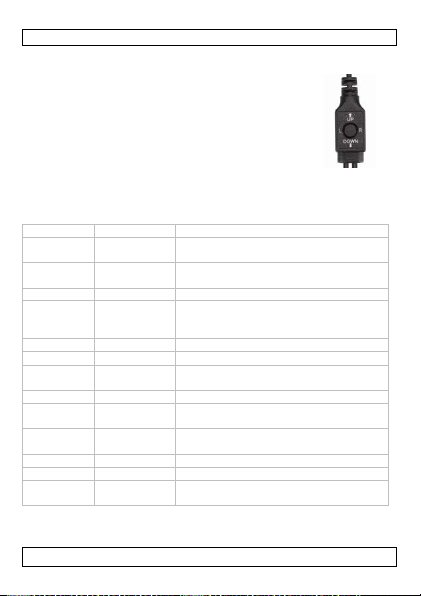
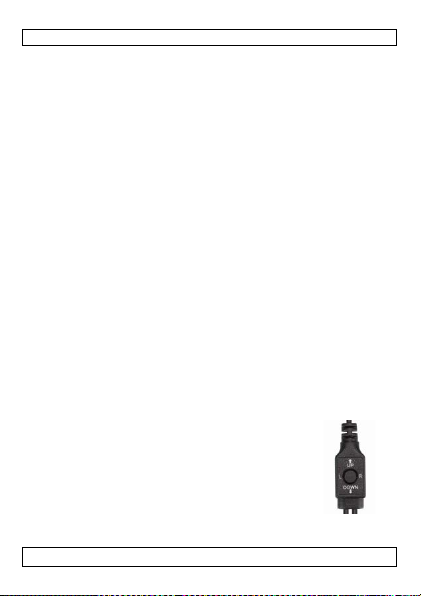
6. Ope rat ion
T he j o ys tic k a l lo ws ad justing set ti ng s in the cam e ra 's on s cree n
display (OSD).
V. 01 – 14/04/2014 5 ©Velleman nv
Page 6
CAMCOLMHA 9
Pre s s the jo y s tick button t o display the OSD o n
Move the joystick up or down to select a
Brig htness
Sets i m age brightne ss.
AGC
Sets the auto gain contro l level (off,
Ma nual
Sets manu al white balance
DPC Sets digital pitch co n trol.
Sp e cia l
C am T i tle
Sh o ws or hides the camera title.
defines mo tion detection se ttings .
General use
•
the monitor.
•
setting.
• Move the joystick to the left or right to chan ge
a setting.
• If a se tting has a submenu, press the button to
acce ss i t.
Men u
The OSD menu contains the following items:
Me nu Submenu Function
Le ns Sets the lens to DC , vid e o o r ma n u al,
Ex p o s u re Shutte r Sets the shutter speed ( a u to o r fi x e d
WDR Sets wide dynamic range on or of f .
Retu rn returns to pre vious me nu
Wh i te Ba l Atw1-
Atw2
Ba ck light Sets ba ckligh t compe nsation to
Da y/Night Sets the camera's day or night
with spe cific settings for each mode .
shutte r speed)
low, middle, high). AGC increa ses
ima ge intensity.
Select s white balance settings.
off/BLC/HLC
capturing con d itions.
Motion Turns motion detecti o n on or off and
V. 01 – 14/04/2014 6 ©Velleman nv
Page 7
CAMCOLMHA 9
recording may be illegal.
Image Ad j.
Contai ns variou s option s f or t h e
image on the m on i tor.
1/3" Sony colour CCD image sensor
resolution
650 TV lines
DSP
Ne x tc hip NV R 2 0 9 0
min. illumination
0.001 lux
lens a ngle
79°
white balance
automatic
Privacy Use this function to block a part of
P a rk Li ne Shows or hides park lines on the
the ima ge where you d o not want to
view activity. For e xample, if part of
the ima ge shows a public area where
monitor.
Comm Ad j. Contains se ttings fo r p roto col, baud
Language English or Chinese
Version S o ftwa re ve rsion
Reset Re se ts the camera to fa cto ry
Exit Saves settings and exits the menu.
ra te , dis p la y I D…
settings.
7. Cleanin g a nd Maintenance
• Th ere are n o u ser-se rv i ce a ble pa rts .
• Wipe the device regularly with a dry, lint-free clot h . Do not use
alcohol or solvents.
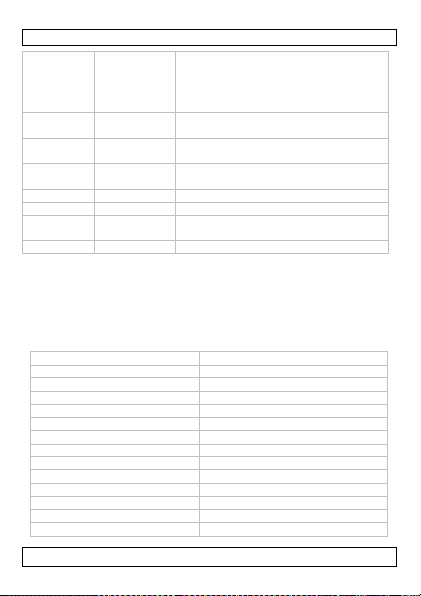
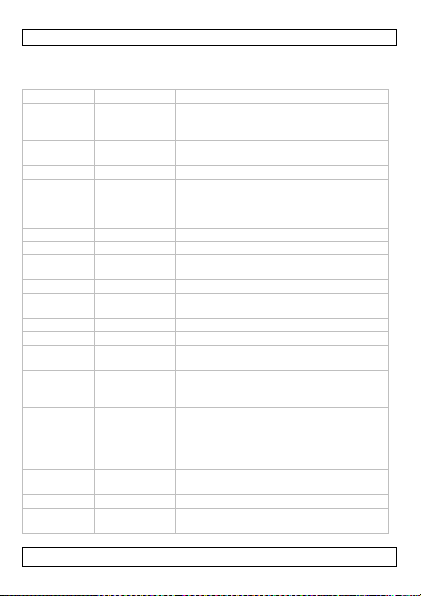
8. Technical Spe cif icat ions
IP ra ting N.A.
pick-up element
number o f pix els 752 (H) x 582 (V) - PAL
IR L EDs N.A.
max. IR p rojection dista n ce N. A.
S/ N ra tio > 50 dB (AGC off)
electron ic sh utter 1/50 to 1/100 000 s
lens f3.6mm / F2.0
AGC yes
V. 01 – 14/04/2014 7 ©Velleman nv
Page 8
CAMCOLMHA 9
aud io
no
power supply
12 Vdc
curre n t co ns um p tio n
80 mA
terechtkomen voor recyclage. U m oet dit toestel naar uw verdeler of
naar een lokaal recyclagepunt brengen. Respecteer de plaatselijke
vide o output 1.0 Vpp composite, 75 ohm
ope ra ting temp e rature -10 °C to 55 °C
dimensions 30 x 33 x 30 mm
we ight 70 g
Use this device wit h original accessor ies on ly. Velleman nv
cannot be held responsible in the event of damage or i njury
resulting from (incorre ct) use of this dev ice. For more info
concern ing th is pro duct a nd the latest ve rs ion of this ma nual,
please visit our we bsite www.velleman.eu. The information in
this manual is subject to change without prior notice.
© COP YRIGHT NO TICE
The co pyright to this manual is owned by Ve lleman nv . A ll
worldwide rights reserv ed. No part of this manual may be copied,
rep roduced, translated or reduced to a ny electron ic me dium or
othe rwise witho ut the prior written co nsen t of the cop yrig h t holde r.
GEBRUIKERSHANDLEIDING
1. Inle iding
Aan alle ing ezeten en van de Europese Unie
Be la n gr ijk e mi lie u-informati e b etreffende dit prod uct
Dit symbool op het toestel of de verpakking geeft aan dat,
als het na zijn levenscyclus wordt weg geworpen, dit toestel
scha d e k an toebrengen aan het milieu. Gooi dit t oestel (en
eventuele batterijen) niet bij h et gewone huishoudelij ke
afval; h et moet bi j een gesp ecialiseerd bedr ijf
milieuwetgeving.
Hebt u vrag en, contac tee r d an de plaatselijke autoriteiten
betreffende de verwij deri n g .
V. 01 – 14/04/2014 8 ©Velleman nv
Page 9

CAMCOLMHA 9
instructie hebben gekregen over het gebruik van het
toestel van een persoon die verantwoordelijk is voor hun
het apparaat gaan spelen.
het toestel. Raak
elektroschokken te vermijden. Open de behuizing niet
zelf. Laat het on derh oud van het toestel ov er aan e en
dan moet dez e door de fabrik an t, diens servic edienst, of
een g eli jkwaardig bekw aa m p ersoo n v ervangen worde n
vervangbar e onder delen i n
dit toestel. Voor onderhoud en/of reserveonderdelen,
Dank u voor uw aa nkoop! Lees deze handleiding grondig voor u het
toes tel in gebru ik neem t. Werd he t toestel beschadigd ti jdens het
tra nspo rt, in s tal lee r het dan niet en ra adpleeg uw dealer.
2. Veilighe idsinstr ucties
Dit toestel is niet geschikt v oor ge bruik door per s onen
(kinderen inbegrepen) met verm inderde fysieke,
zintuiglijke of geestelijke capaciteiten of gebrek aan
ervaring en ken n is, tenzij zij onder toezich t s ta an o f
veiligheid.
Ho ud toe z i ch t op ki nderen om te voo rkom en dat ze met
Elektrocutiegevaar bij het openen van
gee n kabels aan die onder s troom s taan, om dode lijke
ge scho o lde vakma n.
Zorg ervoor dat he t stroom snoer niet gekneld of g eplooid
is en b e s che rm he t teg e n bes c ha diging .
Waarschuwing! Indi en de voe din gsk a be l bes cha di gd is,
om ge vaa r te voorkom en .
Er zi jn g een door de gebruike r
con tacteer u w dealer.
3. Algemene ri chtlijnen
Ra ad plee g de Velleman® service- en k wal ite itsgara ntie
achteraan deze ha ndlei di ng.
V. 01 – 14/04/2014 9 ©Velleman nv
Page 10

CAMCOLMHA 9
m het toestel tegen regen, vochtigheid
Bescherm tegen schokken. Vermijd brute kracht
verantwoordelijkheid afwijzen voor defecten of problemen die hier
Gebrui k het toestel enkel binnen shuis .
Bescher
en opspattende vloeistoffen.
tijdens de bedi enin g.
• Leer eerst de functies van het toestel kennen voor u het gaat
gebruiken.
• Om vei l ig he ids rede ne n m a g u geen w i jzigingen aanbrengen.
Sc hade door w i jzigingen die de ge bruiker heeft a angebracht aan
het toestel valt niet on der de garantie.
• Gebruik het toestel enkel waarvoor het gemaakt is. De garantie
verva lt automatisch bij ongeoorloofd gebruik.
• De garantie gel d t n iet voor schade door het negeren van bepaalde
richtlijnen in deze handleiding en uw dealer zal de
rechtstreeks verband mee houden.
• Respecteer de technische specificaties in deze handleiding.
• Gebruik een bliksembeveiligingss ysteem of ontkoppel de
stroomkabel van de camera bij onweer.
• Installeer en gebruik deze camera NIET voor illegale
prakti j ken en respecteer ied ers privac y.
• Bewaa r deze handleiding voor verdere raadpleging.
4. Omschrijving
Ra ad plee g de afbee ldingen op pag ina 2 van dez e handle i di n g.
1 lens
2 beuge l
3 video-/voedingsaansluiting
5. Hardware-installa tie
1. Kies een ges ch ikte m on tage plaats voor de came ra. Houd
rekening met volgende punten:
V. 01 – 14/04/2014 10 ©Velleman nv
Page 11
CAMCOLMHA 9
extreme temperaturen en trillingen. Installeer de camera nooit
Richt de camera niet naar de zon of naar een lichtweerkaatsend
Beweeg de joystick naar links of rechts om een
Is de inste lling voorzien van e en submenu, druk
o Montee r de came ra noo i t op e e n pl a a ts onderhevig aan
in de buurt van verwarmings- of koel apparatuur.
o Monteer de camera nooit in de buurt van elektromagnetis che
velden.
o
voo rwerp ( bv. een metalen deur) . D it kan de bee ldsen so r
beschadigen.
2. Gebruik de beug el [2] om de plaat s van de mon tage g aten te
bepa len . Boor de gaten e n beves tig de be ugel.
Aansluiting
1. Ko ppe l de voe d in g s a a n s lu i ting [B] aan de 12 VD C-voeding (niet
meegeleverd).
2. Ko ppel de BNC-s tekke r [A] aan ee n monitor (niet meegeleverd).
Opmerk ing: voor een optimale beeldkwaliteit, houd de stroomen videokabels zo kort mogelijk.
Lens
U kunt de zoom en de focus inst ellen als vol gt :
1. Gebruik een inbussleutel om de schroeven op de lens voorzichtig
los te d raa ien.
2. Richt de camera en stel de lens in.
3. Draai de schroe f voorzichtig vast.
6. Gebruik
Met de joystick kunt u de camera-instellingen via een instelmenu
(OSD) regelen.
Algemeen gebruik
• Druk op knop van de joyckstick om het
instelmenu (OSD) weer te geven.
• Bewee g de jo yst ick naar omhoog of om laa g om
een instelling te selecteren.
•
instelling te wijzige n.
•
op de knop om deze weer te geven.
V. 01 – 14/04/2014 11 ©Velleman nv
Page 12
CAMCOLMHA 9
Le ns Le ns in s te llen naa r DC, v id eo o f
of va s te sluitersnelheid)
AGC
Automatische versterkingsregeling
AGC verhoogt de intensiteit van het
WDR
Dynamisch bereik in-/uitschakelen.
Wh i te Ba l
At w1-
Witbalansinstellingen selecteren.
Da y/Night
Ins telling d ag -/nachtmodus.
Sp e cia l
C am T i tle
De cam eratitel weergeven of
bewegin gsdetecti e bepalen.
Bijvoorbeeld: bij het weergeven van
Lijnen op de monitor weergeven of
Image Ad j.
Opties voor het beeld op de monitor.
In st ellingen v oor protocol, baudrate,
Men u
Het instelmenu (OSD) bevat de volgende opties:
Me nu Submenu Functie
manueel, met specifieke instellingen
Ex p o s u re Shutte r Sluitersnelheid instellen (automatisch
voor el ke modus.
Brightne ss Beeldheld erheid instellen.
instellen (uit, laag, gemiddeld, hoog).
beeld.
Retu rn naar het vorige menu terugkeren
Manual Manuele witbalans instellen
Ba ck light Tegenlichtcomp ensatie instellen naar
At w2
off/BLC/HLC
DPC DPC-functie instellen.
Motion Bewegingsdetectie in-/uitschakelen
Privacy Gebruik deze func tie, om een deel
P a rk Li ne
Comm Ad j.
V. 01 – 14/04/2014 12 ©Velleman nv
verbergen.
en inst e lling en vo o r
van het beeld te verbergen.
een openbare ruimte waar opname
illegaal is.
verbergen.
sch e rm -ID, ...
Page 13

CAMCOLMHA 9
Ve rs io n
Software versie
Reset Fabrieksinstellingen terugzetten.
Exit Ins tellingen o pslaan en m en u
opneemelement
1/3" Sony kleure n CCD -sensor
S/R-verhouding
> 50 dB (AGC uit)
elektronische sluiter
1/50 tot 1/100 000 s
lens
f3.6mm / F2.0
automatische versterking ( AGC)
voeding
12 Vdc
werktemperatuur
-10 °C tot 55 °C
Language Engels of Chinees
verlaten.
7. Reiniging en onderhoud
• Er zi jn g een door de gebruike r te ve rvangen o nderde len .
• Ma ak het t oestel geregeld sch o on met een dr oge, niet plu i zend e
doek . Gebruik gee n alco ho l o f op lo sm id de le n.
8. Technische specificaties
IP-norm N.V.T.
aantal pixel s 752 (H) x 582 (V) - PAL
re so lutie 650 tv-lijnen
DSP Nex t ch ip NV R 2 09 0
min. verlichting 0.001 lux
IR-leds N.V.T.
max. max. IR-bereik N.V.T.
lenshoek 79°
witbalans automatisch
video-uitgang 1,0 Vpp composiet, 75 ohm
aud io nee
ja
stroom verbruik 80 mA
afmetingen 30 x 33 x 30 mm
ge wich t 70 g
Gebrui k dit toestel enkel met origin ele accessoires. Velleman
nv is n iet aa nsprake lijk v oor sc hade of k wetsuren bij
(verkeerd ) g ebruik van dit toestel . Voor meer informatie over
V. 01 – 14/04/2014 13 ©Velleman nv
Page 14

CAMCOLMHA 9
dit p roduct en de laatste versie van de ze ha nd leid ing, z ie
www .vell eman.eu. De informatie in deze ha nd leidin g ka n t e
allen tijde worden gewijzigd zo nder voorafgaande
kennisgeving.
© AUTEURSRECHT
Velleman nv heef t het auteursrec ht voor deze handle iding.
Alle wereldwijde rechten voorbe houden. Het is niet toegestaan
om d ez e ha ndle idi ng of gedeelt en erv an ov er t e n emen, t e kopiëren,
te vertalen, te bewerken en o p te sla an op een elektronisch m edium
zonder voorafgaand e s ch rif teli jke toestem m ing van de
rechthebbende.
MODE D' EM PLOI
1. Introduction
Aux résidents de l'Union e uropée nne
Informations environnementales importantes concernant ce
produit
Ce symbole sur l'appa reil ou l'em ballage indique que
l'élimination d'un appar eil en fin de vi e peut polluer
l'e nv iron ne m ent. Ne pa s jeter un a pp ar ei l électrique ou
électronique (et des piles éventuell es) parmi les déchets
mun i cipaux non su jets au tri sél ectif; un e déchet terie
traitera l'appareil en question. Renvoyer cet appareil à votre
fourn i sseur ou à un ser v i c e de rec y c l ag e local. Il convient de
respecter la réglementation locale relative à la protection de
l'environnement.
En cas de doute, contacter les autor ités locales pour
élim inatio n.
Nous vous remercions de votre achat ! Lire le présent mode d'emploi
attentivement avant la mise en service de l'appareil. Si l'appareil a
été en dommag é pendant le transport, ne pas installer et consulter
votre revendeur.
V. 01 – 14/04/2014 14 ©Velleman nv
Page 15

CAMCOLMHA 9
Cet appareil ne convient pas aux personnes (y co mpris
une sup er v i sion ou des inst ruct ions concern ant l’ ut i l isati on
Surveiller les enfa nts pour s’a ssurer qu’ils ne jo uent pas
doit être remplacé par le fabricant, un technicien ou une
Commander des pièces de rechange éventuelles chez
2. Consig nes de séc urité
enfants) qui po ssèdent des c ap acités physiques,
sen sorielles ou m en tales réduites, o u man quent
d’expérie n ce et de connai ssa nce s, sauf si e l le s o n t re çu
de l ’appa reil de la part d ’ une perso nne res ponsa b le de leur
sécurité.
avec l’appareil.
risq ue d’électro cutio n lors de l’ouverture du boîtier.
Toucher un câble sous te nsion peut causer des
éle ctro ch o cs m o rtels. Ne jamai s dé m o nter ou ou vrir l e
boît ier soi-m ême . Confier la réparation de l'appareil à du
personnel qualifié.
Ne pa s sert i r l e co rdo n d’ ali mentatio n et protéger des
dommages.
Avertissement ! Un câble d'al imentatio n endomm agé
autre perso nne qualifiée pour évite r tout danger.
Il n’y a aucune pièce réparable par l’utilisateur.
votre revendeur.
3. Directives gé nérale s
Se référer à la g ar an tie de service et de qualité Velleman® en
fin de ce mod e d'emploi.
Util iser cet appareil uniquement à
l'intérieur. P ro té ge r de la pluie, de l ’humidité et
des pr ojec t i ons d’ e au.
Pro tége r l’a ppa reil des chocs. Trai ter l'appa reil
av e c circo ns pe cti on penda nt l’o pé ra t io n.
V. 01 – 14/04/2014 15 ©Velleman nv
Page 16

CAMCOLMHA 9
1
2
support
d'al im en ta tion/vidé o
• Se familiariser avec le fonctionnement de l'appareil avant de
l'utiliser.
• Il est interdit de modifier l'appareil pour des raisons de sécurité.
Les domma ges o ccas io nn és pa r des mod if i cat i ons par le cl ient ne
tom bent pas sous la garan t ie.
• N’utiliser l'appareil qu’à sa fonction prévue. Un us age impropre
ann u le d'of f i ce la garan ti e.
• Les domma ges o ccas io nn és pa r des mod if i cat i ons à l'appareil par
le client, ne tombent pas sous la garantie et votre revendeur
déclinera toute responsabilité pour les problèmes et les défauts
qui en ré sultent.
• Re specte r les spé cifi ca ti o n s t e chniq ue s ind i qué es dans ce mod e
d'emploi.
• Utiliser un système de protect ion cont re la f oudr e, o u débranc her
la caméra en cas d'orage.
• Installe r et util iser la ca méra en respectant la légis lat ion et
la vie priv ée des tie rs.
• Garder ce mode d'emploi pour toute référence ultérieure.
4. Descriptio n
Se référer aux figures en page 2 de ce mode d'emploi.
ob jectif
3 co nne cteur
5. Installation de la caméra
1. Cho isi r un end roit de m o ntage po u r la cam é ra . S'assu re r :
o de ne jamais installer la caméra dans un endroit sujet à des
températures extrêmes et à des vi brations. d e ne j a ma i s
in sta lle r la c a m éra d a n s la pro x im i té d e d is po s i t if s de
refroidissement o u de cha uffage.
o d e n e jama is in s ta lle r la camé ra à p rox im i té de ch a m p s
électromagnétiques.
V. 01 – 14/04/2014 16 ©Velleman nv
Page 17

CAMCOLMHA 9
umière ( p. ex. porte métallique). Ceci pou rrait en dommag er l e
La manette de contrôle vous permet de configurer la caméra par le
Déplacer la manette vers le haut ou le bas pour
sélectionner un réglage.
Déplacer la manette vers la gauche ou la droite
o de ne pas pointer la caméra vers un objet réfléchissant la
l
cap teu r d' im age s .
2. Utiliser le support de montage [2] pour déterminer
l'emplacement des trous de montage. Percer les trous et fixer le
support.
Câblage
1. Connecter la fiche d’entrée [B] à l ’a lime nta tio n 1 2 VCC (non
incl.).
2. Connecter la fiche BNC [A] à un moniteur (non incl.).
Remarque : Po u r u n e qu a lité d'image o p t ima le , ga r d e r le s câ b le s
d'al im en ta tion et les câbles de vid éo a ussi courts que possib le .
Objectif
Pour régle r le zoom et la mise au po int, procéde r com m e su i t :
1. Utiliser une clé Allen pour desserrer soigneusement les vis de
l'objectif.
2. Pointer la caméra et régler l'objectif.
3. Se rre r lé gè reme nt la vis.
6. Emploi
menu à l'écran (O SD).
Em plo i gé nér a l
• Appuyer sur le bouton de la manette po ur
affi c her l e menu à l' éc r an (OSD ).
•
•
pour ajuster un réglage.
• Si un réglage contient un sous-menu, enfoncer
le bouton pour l' afficher.
Men u
Le menu à l'écran (OSD) contient les options suivantes :
Me nu Sous-menu Fonction
V. 01 – 14/04/2014 17 ©Velleman nv
Page 18

CAMCOLMHA 9
Ex p o s u re
Shutte r
Régler la vitesse d'obturateur
automatique de gain ( éteint, bas ,
(Dés)activer la plage dynamique.
Régler la compensation de contre
DPC Réglage de la vitesse de lecture
caméra.
Motion
(Dés)activer la détection de
le moniteur.
Réglage s pour protocole, d ébit en
O b je c tif Régler l'objectif sur CC, vidéo ou
Brigh tne ss Ré g le r la lum inos i té d ' ima g e .
AGC Régler le niveau de contrôle
WDR
Return ret our ner au niveau précé dent
Wh i te Ba l Atw1-
Manua l Sélection n er la balance des blancs
At w2
Rétroé clairage
Jour/Nuit Sélect i on ner l e mo de jour /nuit.
Sp e cia l Ca m Tit le Aff i cher ou ma squer le tit re de la
P riva cy Utiliser cette fonction pour
P ark Line A fficher ou masquer les lignes sur
I ma ge Ad j. P l us ieur s op tio n s po ur l' im a ge s u r
C o m m Ad j.
V. 01 – 14/04/2014 18 ©Velleman nv
manu el, avec des réglages
spé cif iq ue s pou r chaque mode .
(vitesse d'obturateur automatique
ou f ixe )
moyen, ha ut). AG C augmente
l'intensité d'image.
Sélect i onner l es réglages de
ba lance des blancs.
ma n ue lle
jour sur o ff/BLC /HLC
(DPC).
mouveme nts et défi n i r les
par am èt res p our la détectio n de
mouvements.
ma sq ue r une pa rt i e de l'im age . Pa r
exemple, la camé ra affiche un e
zon e où il est interdit d'e nregistrer.
le moniteur.
bauds, l'identification d'écran
(display ID), ...
-
Page 19

CAMCOLMHA 9
Ve rs io n
Ve rs io n du logicie l
Reset Rétablir les paramètres d'usine.
Exit Sauvegarder l es paramètres et
ca p te ur
CCD couleur 1/3" - Sony
rap po rt S /B
> 50 dB (AGC désactivé)
obturate ur électronique
de 1/50 à 1/1 00 000 s
ob jectif
f3.6mm / F2.0
(AGC)
balance des bla ncs
automatique
température de travail
de -10 °C à 55 °C
poids
70 g
Lang uage an g la i s o u ch ino is
quitter le menu.
7. Nettoyage et en tr etien
• Il n’y a aucune pièce réparable par l’utilisateur.
• Essuye r régulièrement l’appareil avec un chiffon se c non
pelucheux. Éviter l’u sage d’alcool et de solv ants.
8. Spécificat ions tech niques
no rm e IP -
nombre de pixels 752 (H) x 582 (V) - PAL
résolution 650 lig ne s TV
DSP Nex t ch ip NV R 2 09 0
éclairage mi n. 0.001 lux
LEDs IR max. portée IR max. -
angle d'obje ctif 79°
con t rôle de gai n autom atiqu e
s o rtie vid éo 1,0 Vpp com posite, 75 o hm
aud io non
alimentation 12 Vcc
courant 80 mA
oui
dimensions 30 x 33 x 30 mm
N' emplo yer cet appareil qu' avec des accessoires d'origin e. La
SA Velleman ne peut, dans la mes ure c onforme a u droit
V. 01 – 14/04/2014 19 ©Velleman nv
Page 20

CAMCOLMHA 9
support électronique que ce soit est interdite sans l’accord préalable
biente. No tire este aparato (ni las pilas, si las hubiera)
distribuidor o a la unidad de reciclaje local. Respete las leyes locales
manual antes de usar el aparato. Si el aparato ha sufrido algún daño
applic able êtr e tenue responsable d es dommages ou lésions
(direct s o u in directs) pouva nt rés ulter de l’utilisa tion de cet
appareil. P our p lus d'informations concernant cet a rticle et la
dernière version de ce mode d'emploi, consult er not re site
www .vell eman.eu. Les spéci fi cation s et le contenu de ce
mode d'emploi peu vent être modifiés sans avis préalable.
© D ROI TS D’A UTEU R
SA Velleman est l’ayant droit des droi ts d’auteur pour ce
mode d'emploi. Tous droits mondiaux réser vés. Toute
reproduction, traduction, copie ou d iffusion, intégrale ou partielle, du
conte nu de ce mode d'emploi par qu elque procé d é ou sur t out
écrit de l ’ayan t dro it.
MANUAL DEL USUARIO
1. Introducción
A los c iudadanos de la Unión Europea
Importantes in formac iones sobre el medio ambiente
concer niente a este producto
Es te sí mbolo en e s te aparat o o el embalaje indica que, si
tira la s muestras inservibles, podrían daña r el medio
am
en l a bas ura do m és t i ca; debe i r a una empresa
especiali zada en r ecicl aje. D evu el va este aparato a su
en r elaci ón con el medio am biente .
Si tiene dudas, contacte con las autoridades locales para
residuos.
¡Gracias por elegir Velleman! Lea atentament e las instrucciones del
e n e l t r a n s po rte no lo in s ta le y pó ngase en con tacto con su
distribuidor.
V. 01 – 14/04/2014 20 ©Velleman nv
Page 21

CAMCOLMHA 9
Es te aparato no es apto para p ersonas (niños i ncl.) con
stán bajo la vigilancia de una persona
Para proteger a los niños de los peligros de los aparatos
aparato us ted mismo. La r eparación debe llevarla a c abo
No aplaste el cable de alimentación y protéjalo contra
No agite el aparato. Evite usar excesiva fuerza
2. Instrucciones de segur idad
capa cidades físicas, sensoriales o m entales red ucidas ni
pe rsonas con una fa lta de experiencia y conocimientos del
producto , sal vo si e
qu e pueda g aranti zar la segurid ad.
eléctrico s , nu nca los deje solo s co n el apa ra to si n
supervisión.
riesg o de des cargas eléc tric as al abrir la c aja. Puede su frir
una pel ig rosa des ca rga eléctrica a l to ca r un cable
con e cta do a la red e l é ctri ca . No i nten te ab ri r ni reparar e l
un té cn ico cu a lifi cado .
posibles daños.
¡Ojo! Un ca ble de alimentación dañado debe ser
reemplazado por el distribuidor, un técnico u otra persona
cu al ificada para evi tar cu alqui er pelig ro.
El usuari o no habrá d e ef ec t uar el mant e nimiento de
ninguna pieza. Contacte con su distribuidor si necesita
pi eza s de reca m b io .
3. Normas ge nerales
Véase la Garantía d e s ervicio y calidad Velleman® al final de
es te manua l d el usua rio.
Util ice el aparat o sólo en interiores. No
expon ga este equipo a lluvia, humedad ni a
ningún tipo de salpicadura o goteo.
V. 01 – 14/04/2014 21 ©Velleman nv
d u ra n te el ma n e jo y la ins t a la ció n .
Page 22

CAMCOLMHA 9
1
ó pti ca
3
conexión alimentación/vídeo
Utilice el soporte [2] para determinar el lugar de los agujeros de
• Familiarícese con el funcionamiento del aparato antes de utilizarlo.
• Por razones de seguridad , las modificaciones no autorizadas del
aparato están prohibidas. Los daños causados por modificaciones
no au torizadas, no están cub iert os por la garantía.
• Utilice sólo el aparato para las aplic aciones descritas en este
manual. Su uso incorrecto anula la garantía completamente.
• Los daños causad os p or descuido d e las inst rucciones de
seguri dad de este man ual inv alidarán su gar antía y su distr ibuidor
no será r es ponsable de ni ng ún dañ o u otro s pr obl ema s
resultantes.
• No maneje el aparato fuera del rango indicado (véase
« Especificaciones » a finales de este ma nua l de l u s u a ri o).
• Utilic e un sistem a de protecc ión contra rayos o desco necte el
aparato de la red eléctrica en caso de una tormenta.
• Instale y uti lice la cámara a l respetar la le gis lac ión et la
vida privada de terceros.
• Guarde este manual del usuario par a cuando necesite consultarlo.
4. Descripción
Véa se l as figur as en l a página 2 de este man ual del u suario.
2 s oporte
5. Instalar la cámara
1. Seleccione un lugar de montaje adecuado la cámara Tenga en
cuenta la s siguientes d ire ctrices:
o Nunca instale la cámara en un lugar donde esté expuesta a
temperaturas extremas ni vibraciones. No instale el aparato
cerca de di spo si t i vo s de calefacció n o refri ge ración.
o Nun ca ins ta l e la cáma ra cerca de cam po s electro magnéti co s.
o Nunca dirija la cámara a un objeto reflectante (p.ej. puerta
metálica). Esto podría dañar el sensor de imagen.
2.
montaje. Taladre los agujeros y fije el soporte.
V. 01 – 14/04/2014 22 ©Velleman nv
Page 23

CAMCOLMHA 9
Mueva l a palanca d e m ando hac ia arriba o hacia
Mueva la palanca de mando hacia la izquierda o
Me nú
Submenú
Función
Ajustar la óptica: DC, vídeo o manual
Cableado
1. Conecte el conector de entrada [B ] a l a al i mentaci ón 1 2 VDC (no
incl.).
2. Conecte el conector BNC [A] a un monitor (no incl.).
Obse rvación : Pa ra una cal i da d ópt ima, los ca bles de
alimentación y los cables de vídeo deberían ser lo más cortos
posible.
Ópt ica
Para ajustar el z oom y el foco de la ópt i ca, pr oceda de l a forma
siguiente:
1. Utilice una llave Allen para desatornillar cuidadosamente los
tornillos de la óptica.
2. Dirija la cámara hacia la zona deseada y ajuste la óptica.
3. Vuelva a atornill ar cuidadosamente los t ornillos.
6. Funcio namie nto
La p alanca de mando le permite aj us tar lo s ajust es de la cámara e n
el m enú en pantall a ( OSD).
Uso gene ra l
• Pulse e l botón de la pa lanca de ma ndo para
vi suali zar el men ú en pan tall a ( OSD ) .
•
abajo para seleccionar un ajuste .
•
hac ia la derech a para cambiar un ajust e.
• Si un ajuste tiene un submenú, pulse el botón
para acc eder a él.
Men ú
El menú OSD incluye las siguiente s opciones:
Ó p tica
V. 01 – 14/04/2014 23 ©Velleman nv
con ajustes e specíficos para cada
modo.
Page 24

CAMCOLMHA 9
Brig htness
Ajustar el brillo.
ima gen.
Ba ck light
Ajusta r la com p ensa ción de luz de
detección de movi mient o.
Por ejemplo: la cámara visualiza una
P a rk L i n e
Visualizar u ocultar las líneas de
Image Ad j.
Incluye va ri a s opcio ne s pa ra l a
Ex p o s u re Shutte r Ajus tar la velocidad de l obtura dor
AGC Ajustar el control automático de
WDR Activ a r o de sa ctiva r la fu nción WDR
Retu rn Volver al menú anterior.
Wh i te Ba l A t w1 -
Manual Ajustar el balance de blancos de
At w2
Da y /Nig h t Ajus ta r la s co ndi ci on es de ca ptura de
DPC Ajustar e l control del pitch digit al.
Sp e cia l C am T i tle Mostrar u ocultar el nombre de la
Motion Act i v a r o de sa ctiva r la de tecció n de
Privacy Utilice esta opción para bloquear una
(ve loci da d aut om á tica o v e loci da d
fija)
gan ancia (desa ctivado, ba jo, medio,
alto). El control automático de
gan an cia aum enta la intensidad de la
(W ide D ynamic Range ) .
Se le cci o na r l os ajustes par a el
ba lance de blancos.
fo rma manual.
fondo: desac ti var /BLC/HLC
ima gen (dí a/noc he ).
cámara.
movimiento y definir los ajustes de
pa rte de la im a g e n y ha ce rla inv is ib le
zona públ i ca dónde no se pueda
gra bar.
aparca mient o en el monitor.
Comm Ad j. I n cluye ajustes para el protocolo, la
Language Inglés o chino
V. 01 – 14/04/2014 24 ©Velleman nv
ima ge n de l moni t o r.
ve locidad en ba ud io s, la I D de la
cámara, etc .
Page 25

CAMCOLMHA 9
Reset Volver a la configuración de fábrica
sensor de image n CCD Sony a color
de 1/3"
nú mero de píxel es
752 (H) x 582 (V) - PAL
re la ción se ña l/ruido
> 50 d B (AGC des a cti vado)
shutter electrónico
de 1/50 a 1/1 00 000 s
con trol automát i co de gan ancia
temp er atura de funci o na miento
dimensiones
30 x 33 x 30 mm
peso
70 g
Version Versión del software
Exit Almacenar los ajustes y salir del
menú.
7. Limpieza y mantenim iento
• El usuari o no habrá d e ef ec t uar el mant e nimiento de ni ng una
pieza.
• Li m p ie el aparato regularmen te c on un pa ño húmedo s i n pelusas.
No utilice alcohol ni disolventes.
8. Especif icac io nes
gra do de prote cción IP elem en to de imag en
reso lución 650 líne as TV
DSP Nex t ch ip NV R 2 09 0
iluminación mínima 0.001 lux
LEDs IR máx. alcance IR máx. -
ó pti ca f3.6mm / F2.0
ángulo de visión 79°
(AGC)
ba lance de blancos automático
sa lida de vídeo 1,0 Vpp compuesto, 75 ohm
aud io no
alimentación 12 Vdc
cor ri e n t e d e cons umo 80 mA
sí
de -10 °C a 55 °C
V. 01 – 14/04/2014 25 ©Velleman nv
Page 26

CAMCOLMHA 9
Util ice este a parato só lo con los accesorios originales.
Vell eman NV no será responsable de daños ni lesiones
causados por un uso (indebido) de este apa rato. Para más
infor mación sob r e este producto y la versión más reciente de
este manua l del usuario, visite nuestra página
www.ve llem an.eu. Se p ueden mod ificar las espec if icaciones y
el contenido de este manual sin previo aviso.
© DERECHOS DE AUTOR
Velleman NV dispone d e los derechos de autor para este
manual del usuar io. Todos los derecho s m undiales
reservados. Está e strictamente prohibido rep roducir, tradu cir,
cop iar, editar y g uardar este manual del u suario o par tes de ello s i n
previo permiso escrito del derecho habiente.
BEDIENUNGSANLEITUNG
1. Einführung
An alle Einwohner der Euro päischen Union
Wichtige Um weltinformatione n über d ieses Produkt
Die ses S ym bo l auf de m P roduk t oder de r Ve rpa cku ng zei g t
an, dass die Entso rgung diese s P rod uk tes na ch seinem
Leben sz ykl us de r Um wel t S cha den zuf üg e n kann.
Entsorgen Sie die Einheit (oder verwendeten Batterien)
nicht als unsortiertes Hausmüll; die Einheit ode r
verwen deten Batterien müs sen von einer spezialisierten Firma
zwecks R ecycl ing entsorgt werden. Diese Einheit muss an den
Händler od er ein örtliches Recycling-Unternehmen retourniert
werden. Respe kt ieren Sie die örtl ich en U mweltvorsc h riften.
Falls Z we ife l bestehen, wenden Sie sic h f ür
Entsorgungsrichtlinien a n I hre ö rtliche Behörde.
Vielen Dank, dass Sie sich für Velleman entschieden hab en! L e sen
Sie diese Bedienungs anleitung vo r Inbetrie bnahme sorgfä ltig durch.
Überprüfen Sie, ob Transportschäden vorliegen. Sollte dies der Fall
sein, verwenden Sie das Gerät nicht und wenden Sie sich an Ihren
Hä nd le r.
V. 01 – 14/04/2014 26 ©Velleman nv
Page 27

CAMCOLMHA 9
sensorisch oder geistig eingeschränkten Fähigkeiten, oder
für un erfahrene u nd u nwissende P erson en geeig n et, es sei
denn, diese wurden von einer schutzbefohlenen Person in
führe n. V er suche n Si e nie, s elbst da s G er ät zu öff n en oder
Achten Sie darauf, dass die Netzleitung nicht gequetscht
Ist der Stromkabel beschädigt, dann soll der
Her s teller, ei ne F achkr aft od er eine ander e geeignete
Es gib t keine zu wartend en T ei le. Bes tellen Sie eve ntuelle
Regen und Feuchte. Setzen Sie das Gerät keiner
2. Sicherheitshi nweise
Dieses Gerät ist nicht für Personen mit kö rperlich,
Bezug auf den Gebrauch des Geräts beaufsi ch tigt ode r
angeleitet.
Das Produkt ist kein Spielzeug, es gehört nicht in
Kinderhände . Lassen Sie in Anwesenheit von Kindern
besondere Vorsicht walten.
Stro m s chla gge fah r be im Öff ne n de s G e hä us es . Das
Berühren vo n unter Spannung stehenden Leitungen
könnte zu leb en sg efährlichen el e kt rische n Sc hlägen
demontiere n. Die Re p a rat i on da rf n u r von ei ne r Fachk raft
durchgeführt werden.
w er den kann.
Achtung!
Person das Kabel ersetzen.
Ersa tz t ei le be i Ih re m Fach hä ndler.
3. Allgemeine Richtlinien
Siehe Velleman® Service- und Qualitätsga ra ntie am End e d ieser
Bedienungsanleitu ng.
V. 01 – 14/04/2014 27 ©Velleman nv
Verw enden Sie das Gerät nur im
Innenbereich. Sch ü tz e n Sie da s Gerä t vor
Flüssigkeit wie z.B. Tropf- ode r Sprit z wa s se r,
aus .
Page 28

CAMCOLMHA 9
Vermeiden Sie Erschütterungen. Wenden Sie bei
Verwenden Sie eine Blitzschutzanlage oder trennen Sie das Gerät
2
Hal te ru ng
der Bedienun g k eine Gewalt an.
• N ehmen Si e d as Gerät ers t in Betrieb, nachdem Sie sich mi t
se i ne n Fu nk tio ne n ve rtrau t gem a ch t ha ben.
• Eigenmächtige Verände rungen sind aus Sicherheitsgründen
verboten. Bei Schäden verursacht durch eigenmächtige
Änd er ung en erlischt der Gar ant ieanspruc h.
• Verwenden Sie das Ger ät nur f ür Anwendungen be schrieb en in
dies er Be dien ungsanl eitung sonst k an n di e s zu Schäden am
Produkt führen und erli sc ht der Gara nt ieanspruch.
• Bei Schäden, die durch Nichtbeachtung der Bedienungsanleitung
ve ru rsa ch t werd e n , erl i scht de r Garan tie an spru ch. Fü r da ra us
resultierende Folgeschäden übernimmt der Hersteller keine
Haftung.
• Betreiben Sie die Kamera nicht außerhalb des vorgeschriebenen
Bereichs (siehe « Techni s che D a ten » am En d e de r
Bedienungsanleitu ng).
•
bei Gewitter vom Netz.
• Install ieren und ver we nden S ie das Gerät nic ht für illegale
Praktiken und beach ten Sie die Intims phäre aller.
• Bewahren Sie diese Bedie nungsanleitung für künftige
Einsichtna hme auf.
4. Beschreibung
Siehe Abbildungen, Seite 2 dieser Bedienungsanleitung.
1 O b je k t i v
3 Anschluss für
Stromverso rgung /Video
5. Die Hardware installieren
1. Wählen Sie eine n gee i gne ten Montageo rt au s. Beachten Sie
fo lg en de R ichtlin ie n:
V. 01 – 14/04/2014 28 ©Velleman nv
Page 29

CAMCOLMHA 9
ausgesetzt werden; Installieren Sie das Gerät nicht in der Nähe
Um den Zoom und den Fokus des Objektivs einzustellen, gehen Sie
Richten Sie die Kamera auf die gewünschte Zone und regeln Sie
Drücken Sie auf die Taste de s Joysticks, um das
Bewegen Sie den Joystick nach links o der nach
o Acht e n S ie bei der Wa h l des Ins ta l lationsorte s da rauf, dass da s
Gerät kei nen extreme n Temperaturen und Vibrati o nen
von einer Heizung oder einer Kühlung.
o Montieren Sie die Kamera nie in der Nähe von
elektrom agnetischen Feldern;
o Richten Sie die Kamera nie auf die Sonne oder andere
reflektierende Gegenstände. Dies kann der Bildsensor
beschädigen.
2. Verwenden Sie die Halterung [2] um die Position der
Montagelöcher zu bestimm en. Bohren Sie die Löcher und
befestigen Sie die Halterung.
Anschluss
1. Verbinden Sie den 12 VDC-Eingang [B] mit d e m 12 VDC-Netzteil
(nicht mitgeliefert).
2. Verbinden Sie den BNC-Stecker [A] mit einem Monitor (nicht
mitgeliefert).
Bemerk ung: Für eine optimale Bildqualität, halten Sie das
Strom- und Videokabe l möglichst kurz.
Objekt iv
wie f o lg t vor:
1. Verwenden Sie einen Innensechskantschlüssel, um die
Sc hr aub en vorsic ht ig zu lock er n.
2.
das Objektiv .
3. Ziehen Sie die Schrauben vorsichtig wieder an.
6. Bedienu ng
Mi t d em Jo ys tick kö n n e n Sie d ie Ei ns te l lu ng e n im O SD-Menü
einstellen.
Allgemeine A nwendung
•
OSD-Menü anz uzeigen.
• Bewegen Sie den J oysti ck nach ob en oder
unten, um eine Ei nstellung aus zuwählen.
•
V. 01 – 14/04/2014 29 ©Velleman nv
Page 30

CAMCOLMHA 9
Hat eine Einstellung ein Untermenü, dann
drücken Sie die Taste, um in das Untermenü zu
(autom at isch e oder fe s te
einstellen.
Helligkeit
Die Hellig keit einstell en.
erhöht die Intensität des
WDR
Die WDR-Funktion einzurückkehren.
Wh i te Ba l
At w1- At w2
Die Einstellungen für den
Ma nual
Den Weißabgleic h manuell
rec ht s, um die Ei nstellun ge n zu än d ern.
•
gelangen.
Men ü
Da s O SD-Me nü enthält fo lgend e O ptionen:
Me nü Untermenü Funktion
O b je k tiv Das Obj ektiv einst ellen :
Ex p o s u re Shutter Die Shutter-
DC, Video oder manuell
mit spezifischen
Einstellungen für jeden
Modus.
Geschwindigkeit
Schutter-Geschwindigkeit)
automatische
Verstärkun gsrege lung
(AGC)
Die auto matische
Verstärkun gsrege lung
(a us , n ie drig, m ittel,
ho ch ) einstellen. Die
automatische
Verstärkun gsrege lung
Bildes.
Return Zu m vorigen Me nü
ode r auss chalten.
Weißabgleich auswählen.
Ba ck light Die
V. 01 – 14/04/2014 30 ©Velleman nv
einstellen
Gegenlichtkompensation
einstellen: aus/BLC/HLC
Page 31

CAMCOLMHA 9
DPC Die digal ete Pitchanzeigen oder verstecken.
Die Bewegungserkennung
bestimmen.
Privacy
Verwend en Sie diese
des Bildes zu verbergen.
Image Ad j.
Enthält verschieden
Baudrate, ID , usw.
Ve rs io n
So ftwa re-Ve rsion
Exit Die Einstellungen
Tag/Nacht Die Tag / Nacht -
Sp e cia l Cam T i tle De n Kam e raname n
Motion
Bedingungen für d ie
Bilderfassung einstellen.
Kon trolle einstellen .
ein- oder a uss chalten und
die Einstellungen für die
Bewegungserkennung
Funktion, um einen Teil
Zu m Be is piel: b e i Anzeige
einer öffentl ichen Zon e,
wo ma n keine
Aufz eichnungen mac hen
P a rk Li ne Die Linie n zum P a rken
C om m Adj. Enthält Einstellungen für
da rf.
ein- oder ausblenden.
Op tione n für da s B i l d.
das Prot o koll, die
La nguage Englisch oder Chinesisch
Rücksetzung Auf Werkseinstellungen
7. Reinigung und Wartun g
• Es gib t keine zu wartend en T ei le.
V. 01 – 14/04/2014 31 ©Velleman nv
zurücksetzen.
spe iche rn un d das Menü
verlassen.
Page 32

CAMCOLMHA 9
IP-Schutzart
-
Aufnahme-Element
1/3" Sony CCD-Fa rbka m e ra
Sig nal/Rauschabs tand
> 50 dB (AGC aus)
Verstärkun gsrege lung (AGC )
Weißabgleich
automatisch
Be trieb s tem pe ra tu r
-10 °C bis 55 °C
Abmessungen
30 x 33 x 30 mm
Gewicht
70 g
• Verwenden Sie zur Rei nigung ein fe uchtes, fusselfrei es Tuch.
Verwenden Sie auf keinen Fall Alkohol oder irgendwelche
Lösungsmittel.
8. Techn ische Daten
Pixelanzahl 752 (H) x 582 (V) - PAL
Auflösung 650 TV-Zeilen
DSP Nex t ch ip NV R 2 09 0
Mindestbeleuchtung 0.001 lux
IR-LEDs max. max. IR-Bereich -
e lektro n is c h e r Ve r s ch luss 1/50 bis 1/100 000 Sek un de n
O b je k tiv f3.6mm / F2.0
Blickwinkel 79°
automatische
Video-Ausgang 1,0 Vpp 'co mp o site', 75 Oh m
Au dio ne in
Netzteil 12 Vdc
Stromverbra uch 80 mA
Verw enden Sie dieses Gerät nur mit or iginellen Zubehörteilen.
Vell eman NV übernimmt keine Haftung für Schaden oder
Verletzungen bei (fal s ch er) Anwendung di eses Gerätes. Für
mehr Informationen zu diesem Produkt und die neueste
Versi on dieser Bedi enungsanl eitung, siehe www.velleman.eu.
Alle Ä nderungen ohne vorherige A nkündigung vorbehalte n.
ja
V. 01 – 14/04/2014 32 ©Velleman nv
Page 33

CAMCOLMHA 9
© URHEBERRECHT
Velleman NV besitzt das Urheberrecht für diese
Bedienu ngsanleitung. A lle weltweit en Rechte vorbe ha lten.
Ohne vorherige schriftliche Genehmigung des Urhebers ist es nicht
ges tattet, diese Bedienungsanleit ung ganz oder in Tei len zu
repr o duzieren, zu k opieren, zu übersetzen, zu be ar be i t e n od er zu
speichern.
V. 01 – 14/04/2014 33 ©Velleman nv
Page 34

Velleman® Service and Quality Warranty
Since its foundation in 1972, Velleman®
acquired extensive experience in the
electronics world and currently distributes its
products in over 85 countries.
All our products fulfil strict quality
requirements and legal stipulations in the
EU. In order to ensure the quality, our
products regularly go through an extra
quality check, both by an internal quality
department and by specialized external
organisations. If, all precautionary measures
notwithstanding, problems should occur,
please make appeal to our warranty (see
guarantee conditions).
General Warranty Conditions Concerning
Consumer Products (for EU):
• All consumer products are subject to a 24month warranty on production flaws and
defective material as from the original date of
purchase.
• Velleman® can decide to replace an article
with an equivalent article, or to refund the
retail value totally or partially when the
complaint is valid and a free repair or
replacement of the article is impossible, or if
the expenses are out of proportion.
You will be delivered a replacing article or a
refund at the value of 100% of the purchase
price in case of a flaw occurred in the first
year after the date of purchase and delivery,
or a replacing article at 50% of the purchase
price or a refund at the value of 50% of the
retail value in case of a flaw occurred in the
second year after the date of purchase and
delivery.
• Not covered by warranty:
- all direct or indirect damage caused after
delivery to the article (e.g. by oxidation,
shocks, falls, dust, dirt, humidity...), and by
the article, as well as its contents (e.g. data
loss), compensation for loss of profits;
- consumable goods, parts or accessories
that are subject to an aging process during
normal use, such as batteries (rechargeable,
non-rechargeable, built-in or replaceable),
lamps, rubber parts, drive belts... (unlimited
list);
- flaws resulting from fire, water damage,
lightning, accident, natural disaster, etc.…;
- flaws caused deliberately, negligently or
resulting from improper handling, negligent
maintenance, abusive use or use contrary to
the manufacturer’s instructions;
- damage caused by a commercial,
professional or collective use of the article
(the warranty validity will be reduced to six
(6) months when the article is used
professionally);
- damage resulting from an inappropriate
packing and shipping of the article;
- all damage caused by modification, repair
or alteration performed by a third party
without written permission by Velleman®.
• Articles to be repaired must be delivered to
your Velleman® dealer, solidly packed
(preferably in the original packaging), and be
completed with the original receipt of
purchase and a clear flaw description.
• Hint: In order to save on cost and time,
please reread the manual and check if the
flaw is caused by obvious causes prior to
presenting the article for repair. Note that
returning a non-defective article can also
involve handling costs.
• Repairs occurring after warranty expiration
are subject to shipping costs.
• The above conditions are without prejudice
to all commercial warranties.
The above enumeration is subject to
modification according to the article (see
article’s manual).
Velleman® service- en kwaliteitsgarantie
Velleman® heeft sinds zijn oprichting in 1972
een ruime ervaring opgebouwd in de
elektronicawereld en verdeelt op dit moment
producten in meer dan 85 landen. Al onze
producten beantwoorden aan strikte
kwaliteitseisen en aan de wettelijke
bepalingen geldig in de EU. Om de kwaliteit
te waarborgen, ondergaan onze producten
op regelmatige tijdstippen een extra
kwaliteitscontrole, zowel door onze eigen
kwaliteitsafdeling als door externe
gespecialiseerde organisaties. Mocht er
ondanks deze voorzorgen toch een
probleem optreden, dan kunt u steeds een
beroep doen op onze waarborg (zie
waarborgvoorwaarden).
Page 35

Algemene waarborgvoorwaarden
consumentengoederen (voor Europese
Unie):
• Op alle consumentengoederen geldt een
garantieperiode van 24 maanden op
productie- en materiaalfouten en dit vanaf de
oorspronkelijke aankoopdatum.
• Indien de klacht gegrond is en een gratis
reparatie of vervanging van een artikel
onmogelijk is of indien de kosten hiervoor
buiten verhouding zijn, kan Velleman®
beslissen het desbetreffende artikel te
vervangen door een gelijkwaardig artikel of
de aankoopsom van het artikel gedeeltelijk of
volledig terug te betalen. In dat geval krijgt u
een vervangend product of terugbetaling ter
waarde van 100% van de aankoopsom bij
ontdekking van een gebrek tot één jaar na
aankoop en levering, of een vervangend
product tegen 50% van de kostprijs of
terugbetaling van 50 % bij ontdekking na één
jaar tot 2 jaar.
• Valt niet onder waarborg:
- alle rechtstreekse of onrechtstreekse
schade na de levering veroorzaakt aan het
toestel (bv. door oxidatie, schokken, val, stof,
vuil, vocht...), en door het toestel, alsook zijn
inhoud (bv. verlies van data), vergoeding
voor eventuele winstderving.
- verbruiksgoederen, onderdelen of
hulpstukken die onderhevig zijn aan
veroudering door normaal gebruik zoals bv.
batterijen (zowel oplaadbare als nietoplaadbare, ingebouwd of vervangbaar),
lampen, rubberen onderdelen,
aandrijfriemen... (onbeperkte lijst).
- defecten ten gevolge van brand,
waterschade, bliksem, ongevallen,
natuurrampen, enz.
- defecten veroorzaakt door opzet,
nalatigheid of door een onoordeelkundige
behandeling, slecht onderhoud of abnormaal
gebruik of gebruik van het toestel strijdig met
de voorschriften van de fabrikant.
- schade ten gevolge van een commercieel,
professioneel of collectief gebruik van het
apparaat (bij professioneel gebruik wordt de
garantieperiode herleid tot 6 maand).
- schade veroorzaakt door onvoldoende
bescherming bij transport van het apparaat.
- alle schade door wijzigingen, reparaties of
modificaties uitgevoerd door derden zonder
toestemming van Velleman®.
• Toestellen dienen ter reparatie aangeboden
te worden bij uw Velleman®-verdeler. Het
toestel dient vergezeld te zijn van het
oorspronkelijke aankoopbewijs. Zorg voor
een degelijke verpakking (bij voorkeur de
originele verpakking) en voeg een duidelijke
foutomschrijving bij.
• Tip: alvorens het toestel voor reparatie aan
te bieden, kijk nog eens na of er geen voor
de hand liggende reden is waarom het
toestel niet naar behoren werkt (zie
handleiding). Op deze wijze kunt u kosten en
tijd besparen. Denk eraan dat er ook voor
niet-defecte toestellen een kost voor controle
aangerekend kan worden.
• Bij reparaties buiten de waarborgperiode
zullen transportkosten aangerekend worden.
• Elke commerciële garantie laat deze
rechten onverminderd.
Bovenstaande opsomming kan eventueel
aangepast worden naargelang de aard
van het product (zie handleiding van het
betreffende product).
Garantie de service et de qualité
Velleman®
Depuis 1972, Velleman® a gagné une vaste
expérience dans le secteur de l’électronique
et est actuellement distributeur dans plus de
85 pays.
Tous nos produits répondent à des
exigences de qualité rigoureuses et à des
dispositions légales en vigueur dans l’UE.
Afin de garantir la qualité, nous soumettons
régulièrement nos produits à des contrôles
de qualité supplémentaires, tant par notre
propre service qualité que par un service
qualité externe. Dans le cas improbable d’un
défaut malgré toutes les précautions, il est
possible d’invoquer notre garantie (voir les
conditions de garantie).
Conditions générales concernant la
garantie sur les produits grand public
(pour l’UE) :
• tout produit grand public est garanti 24
mois contre tout vice de production ou de
matériaux à dater du jour d’acquisition
effective ;
• si la plainte est justifiée et que la réparation
ou le remplacement d’un article est jugé
Page 36

impossible, ou lorsque les coûts s’avèrent
disproportionnés, Velleman® s’autorise à
remplacer ledit article par un article
équivalent ou à rembourser la totalité ou une
partie du prix d’achat. Le cas échéant, il vous
sera consenti un article de remplacement ou
le remboursement complet du prix d’achat
lors d’un défaut dans un délai de 1 an après
l’achat et la livraison, ou un article de
remplacement moyennant 50% du prix
d’achat ou le remboursement de 50% du prix
d’achat lors d’un défaut après 1 à 2 ans.
• sont par conséquent exclus :
- tout dommage direct ou indirect survenu à
l’article après livraison (p.ex. dommage lié à
l’oxydation, choc, chute, poussière, sable,
impureté…) et provoqué par l’appareil, ainsi
que son contenu (p.ex. perte de données) et
une indemnisation éventuelle pour perte de
revenus ;
- toute pièce ou accessoire nécessitant un
remplacement causé par un usage normal
comme p.ex. piles (rechargeables comme
non rechargeables, intégrées ou
remplaçables), ampoules, pièces en
caoutchouc, courroies… (liste illimitée) ;
- tout dommage qui résulte d’un incendie, de
la foudre, d’un accident, d’une catastrophe
naturelle, etc. ;
- out dommage provoqué par une
négligence, volontaire ou non, une utilisation
ou un entretien incorrect, ou une utilisation
de l’appareil contraire aux prescriptions du
fabricant ;
- tout dommage à cause d’une utilisation
commerciale, professionnelle ou collective
de l’appareil (la période de garantie sera
réduite à 6 mois lors d’une utilisation
professionnelle) ;
- tout dommage à l’appareil qui résulte d’une
utilisation incorrecte ou différente que celle
pour laquelle il a été initialement prévu
comme décrit dans la notice ;
- tout dommage engendré par un retour de
l’appareil emballé dans un conditionnement
non ou insuffisamment protégé.
- toute réparation ou modification effectuée
par une tierce personne sans l’autorisation
explicite de SA Velleman® ; - frais de
transport de et vers Velleman® si l’appareil
n’est plus couvert sous la garantie.
• toute réparation sera fournie par l’endroit
de l’achat. L’appareil doit nécessairement
être accompagné du bon d’achat d’origine et
être dûment conditionné (de préférence dans
l’emballage d’origine avec mention du
défaut) ;
• tuyau : il est conseillé de consulter la notice
et de contrôler câbles, piles, etc. avant de
retourner l’appareil. Un appareil retourné
jugé défectueux qui s’avère en bon état de
marche pourra faire l’objet d’une note de
frais à charge du consommateur ;
• une réparation effectuée en-dehors de la
période de garantie fera l’objet de frais de
transport ;
• toute garantie commerciale ne porte pas
atteinte aux conditions susmentionnées.
La liste susmentionnée peut être sujette à
une complémentation selon le type de
l’article et être mentionnée dans la notice
d’emploi.
Garantía de servicio y calidad Velleman®
Desde su fundación en 1972 Velleman® ha
adquirido una amplia experiencia como
distribuidor en el sector de la electrónica en
más de 85 países. Todos nuestros productos
responden a normas de calidad rigurosas y
disposiciones legales vigentes en la UE.
Para garantizar la calidad, sometemos
nuestros productos regularmente a controles
de calidad adicionales, tanto a través de
nuestro propio servicio de calidad como de
un servicio de calidad externo. En el caso
improbable de que surgieran problemas a
pesar de todas las precauciones, es posible
recurrir a nuestra garantía (véase las
condiciones de garantía).
Condiciones generales referentes a la
garantía sobre productos de venta al
público (para la Unión Europea):
• Todos los productos de venta al público
tienen un período de garantía de 24 meses
contra errores de producción o errores en
materiales desde la adquisición original;
• Si la queja está fundada y si la reparación o
sustitución de un artículo no es posible, o si
los gastos son desproporcionados,
Velleman® autoriza reemplazar el artículo
por un artículo equivalente o reembolsar la
totalidad o una parte del precio de compra.
En este caso, usted recibirá un artículo de
Page 37

recambio o el reembolso completo del precio
de compra si encuentra algún fallo hasta un
año después de la compra y entrega, o un
artículo de recambio al 50% del precio de
compra o el reembolso del 50% del precio
de compra si encuentra un fallo después de
1 año y hasta los 2 años después de la
compra y entrega.
Por consiguiente, están excluidos entre
otras cosas:
- todos los daños causados directa o
indirectamente al aparato (p.ej. por
oxidación, choques, caída,...) y a su
contenido (p.ej. pérdida de datos) después
de la entrega y causados por el aparato, y
cualquier indemnización por posible pérdida
de ganancias;
- partes o accesorios, que estén expuestos
al desgaste causado por un uso normal,
como por ejemplo baterías (tanto
recargables como no recargables,
incorporadas o reemplazables), bombillas,
partes de goma, etc. (lista ilimitada);
- defectos causados por un incendio, daños
causados por el agua, rayos, accidentes,
catástrofes naturales, etc.;
- defectos causados a conciencia, descuido
o por malos tratos, un mantenimiento
inapropiado o un uso anormal del aparato
contrario a las instrucciones del fabricante;
- daños causados por un uso comercial,
profesional o colectivo del aparato (el
período de garantía se reducirá a 6 meses
con uso profesional);
- daños causados por un uso incorrecto o un
uso ajeno al que está previsto el producto
inicialmente como está descrito en el manual
del usuario;
- daños causados por una protección
insuficiente al transportar el aparato.
- daños causados por reparaciones o
modificaciones efectuadas por una tercera
persona sin la autorización explícita de
Velleman®;
- se calcula gastos de transporte de y a
Velleman® si el aparato ya no está cubierto
por la garantía.
• Cualquier artìculo que tenga que ser
reparado tendrá que ser devuelto a su
distribuidor Velleman®. Devuelva el aparato
con la factura de compra original y
transpórtelo en un embalaje sólido
(preferentemente el embalaje original).
Incluya también una buena descripción del
fallo;
• Consejo: Lea el manual del usuario y
controle los cables, las pilas, etc. antes de
devolver el aparato. Si no se encuentra un
defecto en el artículo los gastos podrían
correr a cargo del cliente;
• Los gastos de transporte correrán a carga
del cliente para una reparación efectuada
fuera del período de garantía.
• Cualquier gesto comercial no disminuye
estos derechos.
La lista previamente mencionada puede
ser adaptada según el tipo de artículo
(véase el manual del usuario del artículo
en cuestión).
Velleman® Service- und Qualitätsgarantie
Seit der Gründung in 1972 hat Velleman®
sehr viel Erfahrung als Verteiler in der
Elektronikwelt in über 85 Ländern aufgebaut.
Alle Produkte entsprechen den strengen
Qualitätsforderungen und gesetzlichen
Anforderungen in der EU. Um die Qualität zu
gewährleisten werden unsere Produkte
regelmäßig einer zusätzlichen
Qualitätskontrolle unterworfen, sowohl von
unserer eigenen Qualitätsabteilung als auch
von externen spezialisierten Organisationen.
Sollten, trotz aller Vorsichtsmaßnahmen,
Probleme auftreten, nehmen Sie bitte die
Garantie in Anspruch (siehe
Garantiebedingungen).
Allgemeine Garantiebedingungen in
Bezug auf Konsumgüter (für die
Europäische Union):
• Alle Produkte haben für Material- oder
Herstellungsfehler eine Garantieperiode von
24 Monaten ab Verkaufsdatum.
• Wenn die Klage berechtigt ist und falls eine
kostenlose Reparatur oder ein Austausch
des Gerätes unmöglich ist, oder wenn die
Kosten dafür unverhältnismäßig sind, kann
Velleman® sich darüber entscheiden, dieses
Produkt durch ein gleiches Produkt zu
ersetzen oder die Kaufsumme ganz oder
teilweise zurückzuzahlen. In diesem Fall
erhalten Sie ein Ersatzprodukt oder eine
Rückzahlung im Werte von 100% der
Kaufsumme im Falle eines Defektes bis zu
Page 38

1 Jahr nach Kauf oder Lieferung, oder Sie
bekommen ein Ersatzprodukt im Werte von
50% der Kaufsumme oder eine Rückzahlung
im Werte von 50 % im Falle eines Defektes
im zweiten Jahr.
• Von der Garantie ausgeschlossen sind:
- alle direkten oder indirekten Schäden, die
nach Lieferung am Gerät und durch das
Gerät verursacht werden (z.B. Oxidation,
Stöße, Fall, Staub, Schmutz, Feuchtigkeit,
...), sowie auch der Inhalt (z.B. Datenverlust),
Entschädigung für eventuellen
Gewinnausfall.
- Verbrauchsgüter, Teile oder Zubehörteile,
die durch normalen Gebrauch dem
Verschleiß ausgesetzt sind, wie z.B.
Batterien (nicht nur aufladbare, sondern
auch nicht aufladbare, eingebaute oder
ersetzbare), Lampen, Gummiteile,
Treibriemen, usw. (unbeschränkte Liste).
- Schäden verursacht durch Brandschaden,
Wasserschaden, Blitz, Unfälle,
Naturkatastrophen, usw.
- Schäden verursacht durch absichtliche,
nachlässige oder unsachgemäße
Anwendung, schlechte Wartung,
zweckentfremdete Anwendung oder
Nichtbeachtung von Benutzerhinweisen in
der Bedienungsanleitung.
- Schäden infolge einer kommerziellen,
professionellen oder kollektiven Anwendung
des Gerätes (bei gewerblicher Anwendung
wird die Garantieperiode auf 6 Monate
zurückgeführt).
- Schäden verursacht durch eine
unsachgemäße Verpackung und
unsachgemäßen Transport des Gerätes.
- alle Schäden verursacht durch
unautorisierte Änderungen, Reparaturen
oder Modifikationen, die von einem Dritten
ohne Erlaubnis von Velleman®
vorgenommen werden.
• Im Fall einer Reparatur, wenden Sie sich
an Ihren Velleman®-Verteiler. Legen Sie das
Produkt ordnungsgemäß verpackt
(vorzugsweise die Originalverpackung) und
mit dem Original-Kaufbeleg vor. Fügen Sie
eine deutliche Fehlerbeschreibung hinzu.
• Hinweis: Um Kosten und Zeit zu sparen,
lesen Sie die Bedienungsanleitung nochmals
und überprüfen Sie, ob es keinen auf de
Hand liegenden Grund gibt, ehe Sie das
Gerät zur Reparatur zurückschicken. Stellt
sich bei der Überprüfung des Gerätes
heraus, dass kein Geräteschaden vorliegt,
könnte dem Kunden eine
Untersuchungspauschale berechnet.
• Für Reparaturen nach Ablauf der
Garantiefrist werden Transportkosten
berechnet.
• Jede kommerzielle Garantie lässt diese
Rechte unberührt.
Die oben stehende Aufzählung kann
eventuell angepasst werden gemäß der
Art des Produktes (siehe
Bedienungsanleitung des Gerätes).
Legen Heirweg 33, 9890 Gavere, Belgium
Made in PRC
Imported by Velleman nv
www.velleman.eu
 Loading...