How it Works
Log In / Sign Up
Buy Points
How it Works
FAQ
Contact Us
Questions and Suggestions
Users
Vango
Loading...
O
Odyssey 500
Odyssey 600
Odyssey 800
Omega 250
Omega 350
Omega 450XL
Omega 600XL
Orava 500
Orava 600XL
Ostro 200
Ostro 300
P
Padstow 500
Palermo 800
Pembroke 600
Pop 200
Pop 200 DS
Pop 300 DLX
Pop 300 DS
Pulsar 200
Pulsar 300
R
Rapier 100
Ravello 500
Ravello 600
Rechargeable Lantern 24 LED
Rhapsody 800XL
Rivendale 800XL
Rock 200
Rock 300
Rock 400
S
Sabre 200
Sabre 300
Scimitar 200
Seaton 800
Sierra 300
Sigma 300
Sirocco 200
Sirocco 300
Solace 400
Solaris 400
Solaris 500
Solaris 600
Soul 100
Soul 200
Soul 300
Spectrum 500
Spectrum 600
Stanford 600
Stanford 800
Stelvio 200
T
Taiga 500
Taiga 600XL
Talas 100
Talas 200
Talas 300
Tempest 200
Tempest 300
Theta 300
Tour 200
V
V 400
V 500
V 600
Varkala 150
Varkala 280
Varkala 420
W
Woburn 400
Woburn 500
Z
Zenith 100
Zenith 200
Zenith 300
Zephyr 200
Zephyr 300
Loading...
Loading...
Nothing found
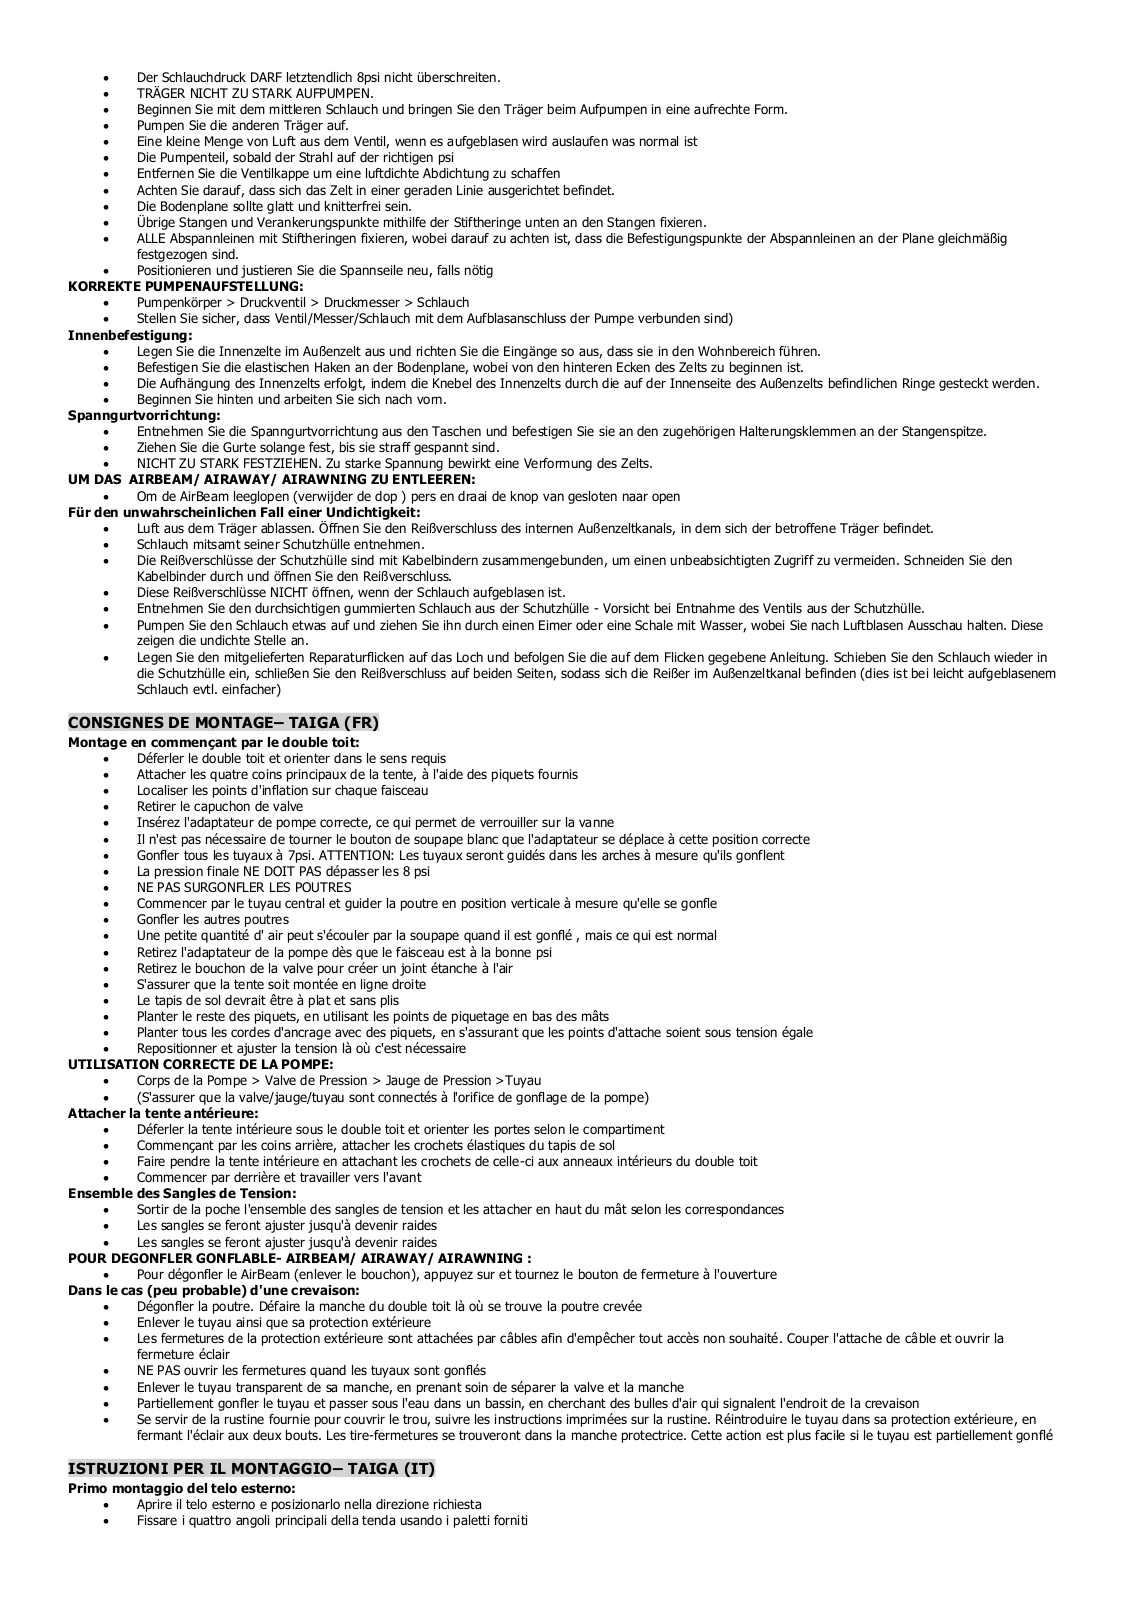
Taiga 600XL
User Manual [de]
3 pgs
251.74 Kb
0
Table of contents
Loading...
Vango Taiga 600XL, Taiga 500 User Manual [de]
...
Vango User Manual [de]
Download
Specifications and Main Features
Frequently Asked Questions
User Manual
Download
Loading...
+
hidden pages
Unhide
You need points to download manuals.
1 point = 1 manual.
You can buy points or you can get point for every manual you upload.
Buy points
Upload your manuals
 Loading...