

VALBERG PS310/E31, PS610/E31 User Manual
Safe Digital Lock PS310/E31, PS610/E31 USER MANUAL
www.promet-safe.com
SAFE DIGITAL LOCK
PS310/E31, PS610/E31
FOR MDTB SAFES
USER MANUAL
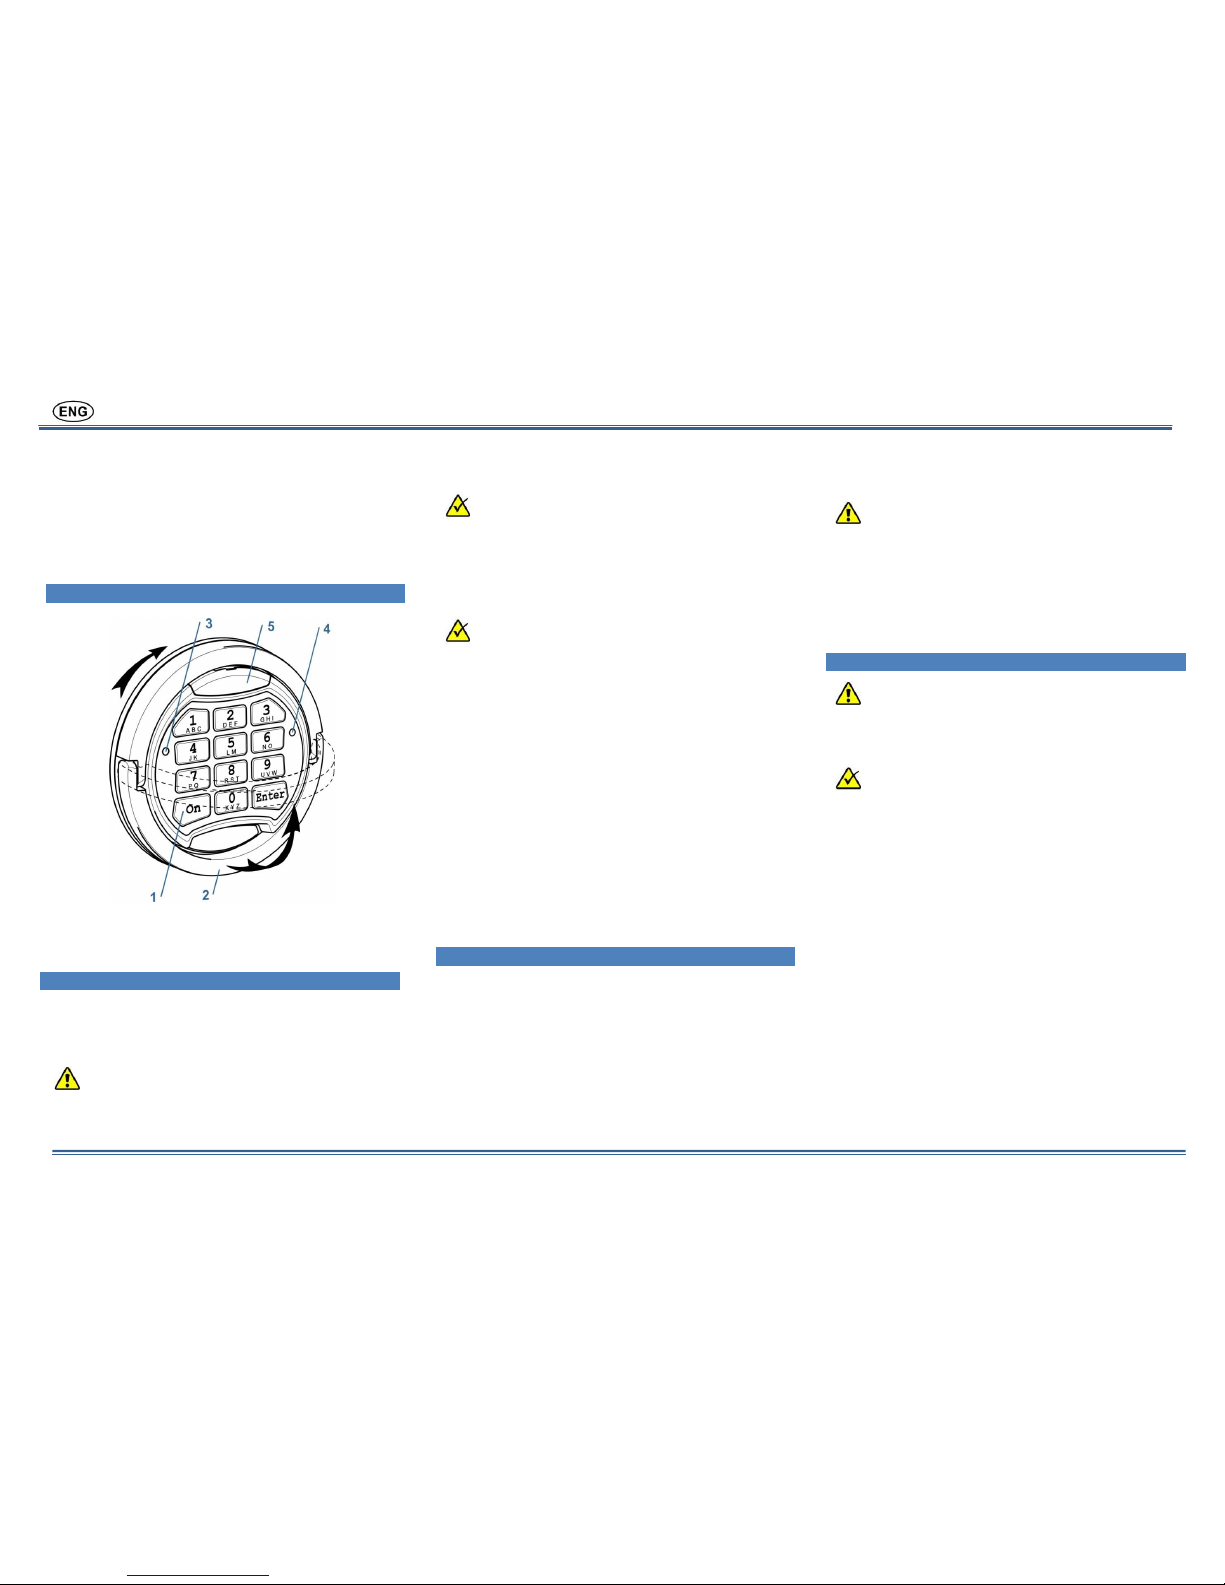
1 Main Components
Image 1.1 1 – Keypad, 2 – Folding handle, 3 –
Green LED [G], 4 – Red LED [R], 5 – Plastic cover
for emergency power
2 Definitions
2.1 Master Code [PIN1]
A set of numbers (from 6 to 8 digits) which
opens the lock and allows to operate the settings.
Before using the safe, please change the
factory Master code (see par.4.1). It is
strongly recommended to keep the master
code safe from unauthorized people.
No easily guessed numbers (birthdays, house
and phone numbers, etc.) or simple codes (1,
2, 3, 4, 5, 6) shall be chosen for the coding.
Factory Master Code:
1–2–3–4–5–6
2.2 User Code [PIN2]
A set of numbers from 6 to 8 digits which
opens the lock and has limited functions to change
the settings.
The lock with default factory settings does not
have the User code. Please see par.4.2 to set
the User code.
2.3 Signals
[G]1 Short single acoustic signal with single
green LED flash (3) – confirmation of the button
pressing on the keypad.
[G]2 Short double acoustic signal with
double green LED flash (3) – confirmation of
successfully finished operation.
[R]-- Long single acoustic signal with single
red LED flash (4) – error message on the user’s
actions.
[R]
5
Short acoustic signal sounds 5 times
with 5 red LED flashes (4) – low battery message.
Please see par.8.1 how to change the battery.
3 Main Functions
3.1 Opening the Lock
3.1.1 Opening with the Factory Master code
[ON][1][2][3][4][5][6][Enter]
3.1.2 Opening with the Master Code
[ON][PIN1][Enter]
3.1.3 Opening with the User Code
[ON][PIN2][Enter]
If the code is right, there will be a green LED
flash and it will be possible to open the door within 5
seconds by turning the handle (2) clockwise.
If you enter a wrong code three times in a
row, the lock will be blocked for 5 minutes.
The blocking of the lock will be indicated
periodical red LED flashes.
3.2 Closing the Lock
Close the door and turn the handle (2) anti-
clockwise until it stops.
4 Service Functions
It is strongly recommended to change the
settings of the lock with the door opened.
After code changing, the lock shall be tested
several times with the secure storage unit’s
door in open state.
The service functions will be unavailable in
case low power supply which is indicated by
the signals, please refer to par.2.3, [R]5.
4.1 Changing the Master Code [PIN1]
[ON] [Enter] [1] [Enter] [PIN1] [Enter]
[new PIN1] [Enter] [repeat new PIN1]
[Enter]
Checking the new Master code:
[ON][new PIN1][Enter]
4.2 Changing the User Code [PIN2] with the
Master Code [PIN1]
[ON] [Enter] [2] [Enter] [1-9 (user
number)] [Enter] [PIN1] [Enter]
[new PIN2] [Enter]
[repeat new PIN2] [Enter]
Checking the new User code:
[ON][new PIN2][Enter]
Safe Digital Lock PS310/E31, PS610/E31 USER MANUAL
www.promet-safe.com
4.3 Changing the User Code [PIN2] without the
Master Code
[ON] [Enter] [3] [Enter] [1-9 (user
number)] [Enter] [PIN2] [Enter]
[new PIN2] [Enter]
[repeat new PIN2] [Enter]
Checking the new User Code:
[ON][new PIN2][Enter]
4.4 Deleting the User Code
[ON] [Enter] [0] [Enter] [1-9 (user
number)] [Enter] [PIN1] [Enter]
5 Time Delay Function
5.1 Switching-on the Time Delay function
[ON] [Enter] [6] [Enter] [PIN1] [Enter]
[01-99 – delay time] [1-9 – time for
opening] [Enter]
F.e.: 092 – 9 minutes is delay time, 2 minutes
is time for opening
5.2 Opening the Lock with the Time Delay
[ON] [PIN1 or PIN2] [Enter] (Waiting
Delay Time. Acoustic signal will inform
about the end.)[PIN1 or PIN2] [Enter]
5.3 Switching-off the Time Delay function
[ON] [Enter] [6] [Enter] [PIN1] [Enter]
[000] [Enter]
6 Dual Code Function
6.1 Switching-on the Dual Code function
Before switching-on the function, make sure
you’re assigned a User Code [PIN2] see
par.4.2.
[ON] [Enter] [7] [Enter] [1-9 (user
number)] [Enter] [PIN1] [Enter]
6.2 Switching-off the Dual Code function
[ON] [Enter] [8] [Enter] [PIN1] [Enter]
6.3 Opening the Lock with the Dual Code
[ON] [PIN1] [Enter] [PIN2] [Enter]
If you have time delay, you should to wait
delay time before enter PIN2.
You have 60 seconds to enter PIN2 that’s
indicate [G]1 (см. п.2.3) every 5 seconds.
7 Mute/unmute
[ON] [Enter] [5] [Enter] [PIN1] [Enter]
8 Servicing
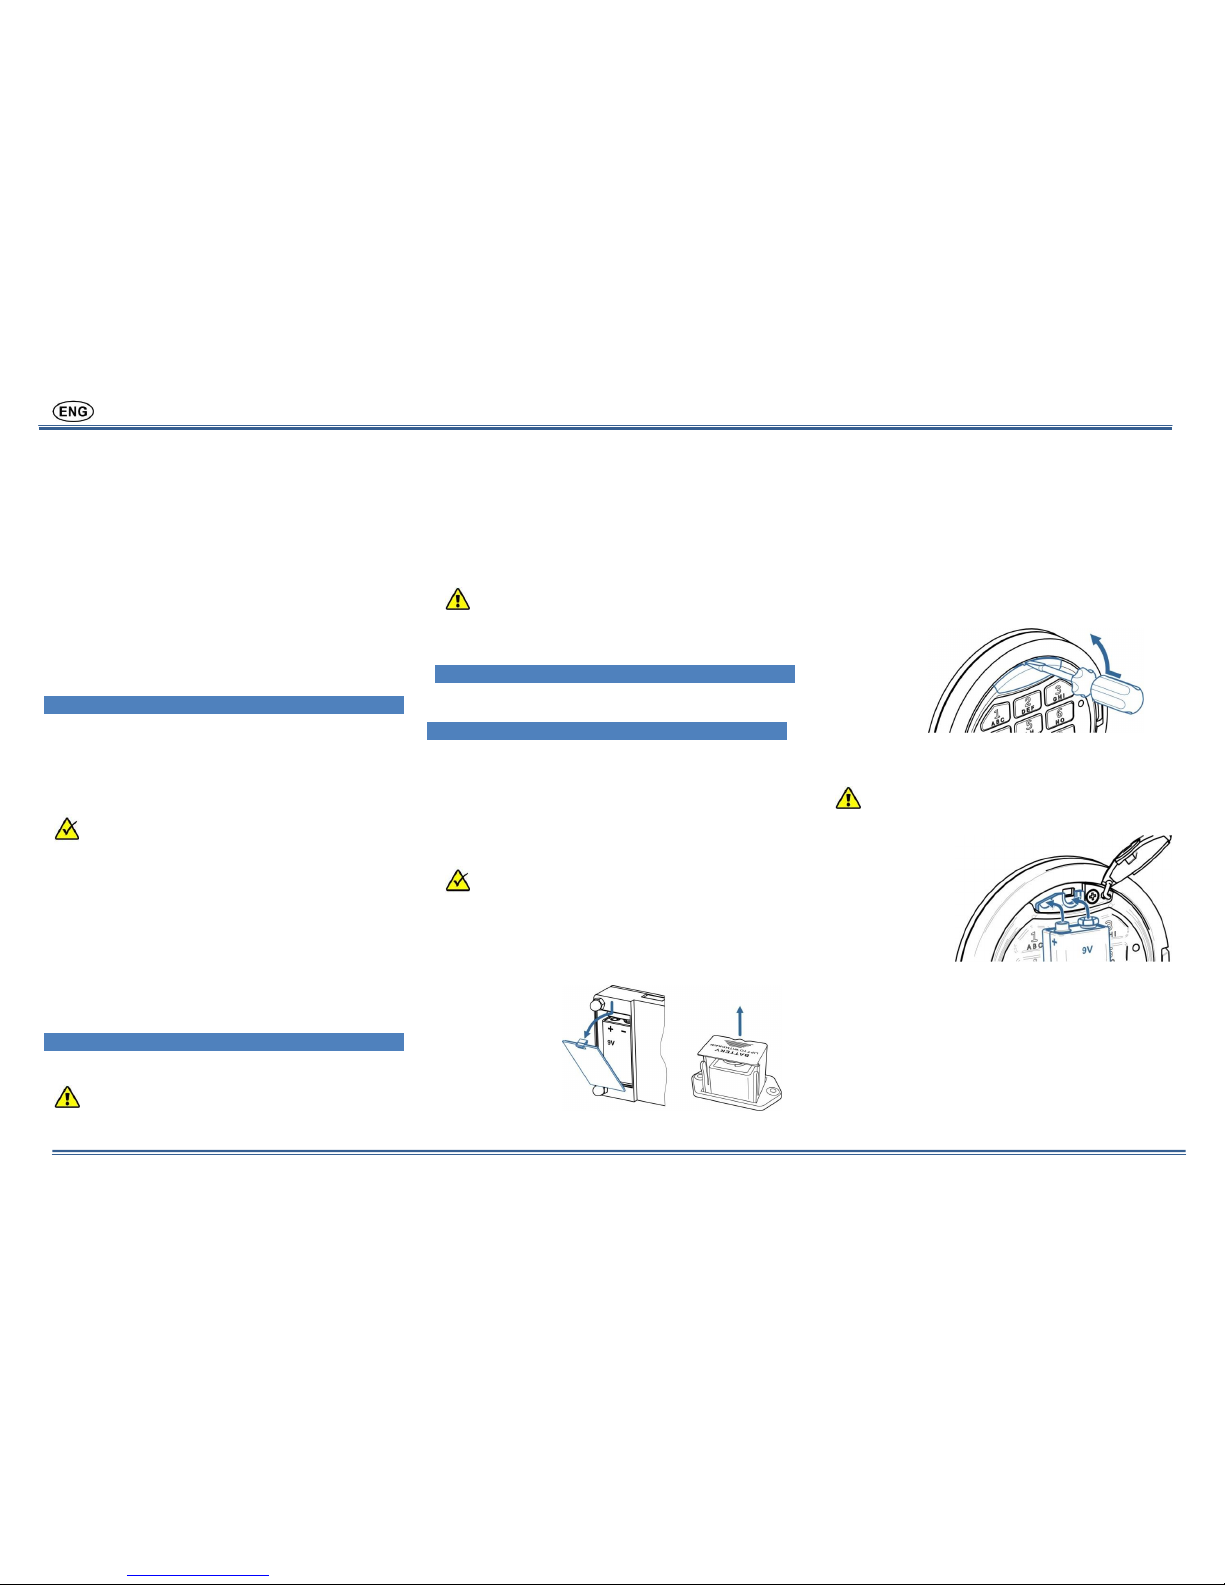
8.1 Changing the Battery
The battery is located on the inner side of the
door. Depending on the safe model, battery
could be either inside the lock battery
compartment (image 8.1a) or in a special pullout battery box (image 8.1b).
The exact location of the battery
compartment or the batter box could be
different depending on the safe model.
Take out the cover of the battery
compartment of the lock (see Image 8.1a. or
pull out the box (see Image 8.1b).
Image 8.1 a. b.
Install a new battery (9V, type 6LF22).
Take the cover or the box back to their
location.
8.2 Opening the lock when the Battery is
Discharged
Take a new battery (9V, type 6LF22).
Take out the plastic cover for emergency
power (5), see Image 8.2.
Image 8.2
Press the new battery to emergency power
pins and fix it in this position (see Image 8.3).
Do not make the battery’s contacts to the
metal parts of the lock in order to prevent
possible discharging of the battery.
Image 8.3
Enter the valid code on the keypad (1).
Disconnect the emergency battery, open
the door and change the discharged
battery, see par. 8.1
Edition 1/0 as of 24.04.2018
 Loading...