

Page 1

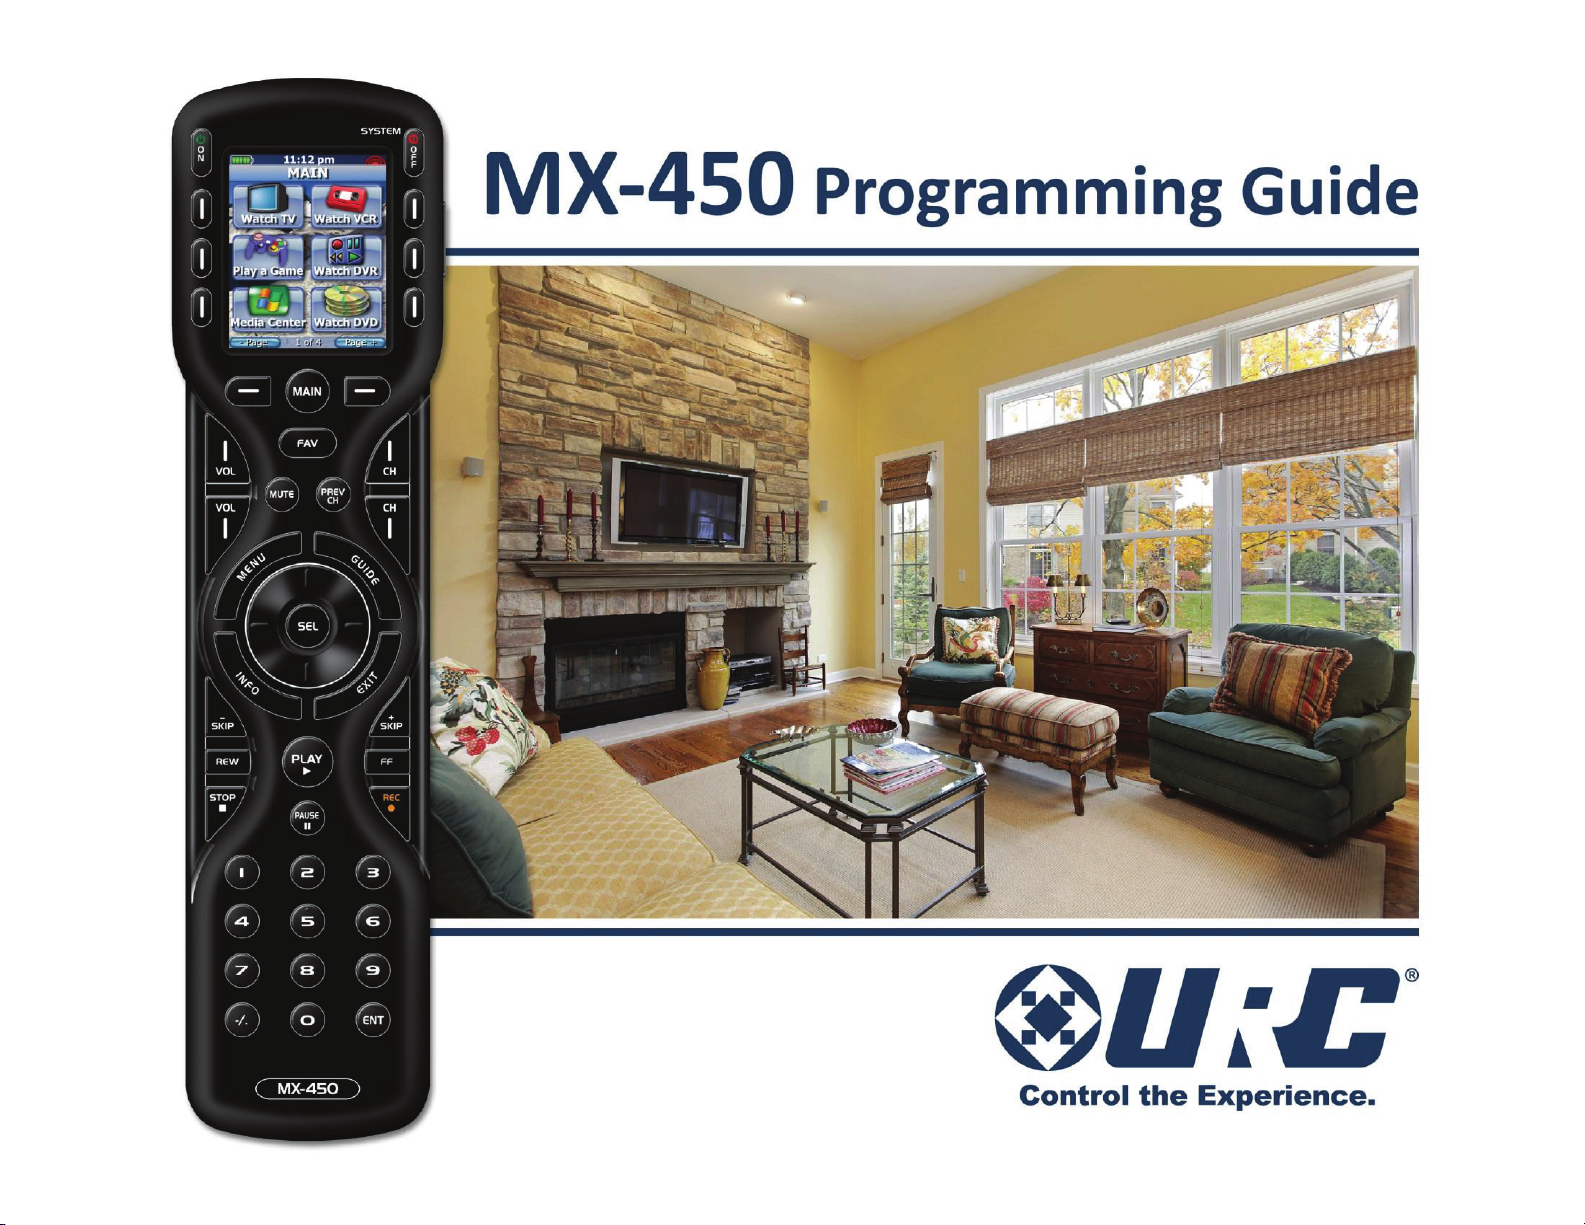
Operating Your System
With the MX-450
COMP L E TE
COMP L E TE
CO NTR O L
Univ ersal Remote Control
™
®
Page 2
This remote control was
Custom Programmed for you by:
For questions about your Custom Programming call:
Custom Programming of a complex home theater and/or a multi-room
system is one of the most challenging tasks within an audio/video installation. It involves an intimate knowledge of how the components interact
and exact details on the proper sequences of control.
Only a Complete Control dealer has the requisite experience and training
to quickly and effectively customize a remote control for true automated
operation.
Congratulations on your choice!
MX-450 Owners Manual © 2008 Universal Remote Control, Inc.
Front Cover Photo courtesy of Robert Ridenour of Connected Technologies,
www
.connected-technologies.com
The information in this manual is copyright protected. No part of this manual may
be copied or reproduced in any form without prior written consent from Universal
Remote Control, Inc.
UNIVERSAL REMOTE CONTROL, INC. SHALL NOT BE LIABLE FOR OPERATIONAL,
TECHNICAL OR EDITORIAL ERRORS/OMISSIONS MADE IN THIS MANUAL.
The information in this manual may be subject to change without prior notice.
Complete Control is a registered trademark of Universal Remote Control, Inc.
Entertainment Made Simple is a trademark of Universal Remote Control, Inc.
All other brand or product names are trademarks or registered trademarks of their
respective companies or organizations.
Printed in Korea
Universal Remote Control, Inc.
500 Mamaroneck Avenue, Harrison, NY 10528
Phone: (914) 835-4484 Fax: (914) 835-4532
Page 3

TABLE OF CONTENTS
Introduction 1
Backlighting 1
Optional RF “No Rules” Operation 2
Replacing the Batteries 3
Programming the MX-450 3
Selecting a New “Activity” 5
Using the MX-450 to Control an “Activity” 6
USA Limited Warranty Statement 7
Specifications 8
Contact Us 8
Page 4

MX-450 OWNERS MANUAL
Congratulations!
You’ve purchased a unique synthesis of hardware and software engineering,
the Complete Control MX-450. The MX-450 achieves a magnificent combination of power and flexibility, simplifying and automating operation of even the
most complex system.
User Configurable Screen and Button Lighting
A dedicated LIGHT button enables the user to backlight the buttons at any
time. User settings, accessible by pressing and holding the MAIN button
for 3 seconds, enable you to adjust how long the MX-450 stays lit (5 to 60
seconds).
Fast Professional Setup
The MX-450 sets up quickly via on-screen setup. Your installer simply
configures the remote for you using the MX-450 and his/her intimate
knowledge of how your system is configured and operated to completely
automate all operation and replace all of your A/V remote controls with
the MX-450.
Backlit Color LCD Screen Buttons
When you press any button, the color LCD screen lights up, which labels
the six buttons to either side of the screen. These button labels change
based on what you are watching or listening to. Thus, if you have selected Watch TV, you will see a list of buttons that are useful to that activity,
while if you select Watch DVD, the buttons will control the DVD.
LIGHT Button
Press the Light button on the
side of the MX-450 to backlight all of the buttons.
Page 1
Page 5
MX-450 OWNERS MANUAL
Optional RF “No Rules” Operation
In combination with a Complete Control RF Base Station, the MX-450 can
control your system without being in line-of-sight of the equipment.
To preserve good operation always utilize a Universal Remote Control
brand RF Base Station with RF Addressing. RF Addressing gives you the
ability to control equipment locations throughout your home, even if they
are concealed in other rooms or are behind closed doors.
1. The MX-450 sends radio
waves in every direction, so you
don’t have to point the remote
anymore!
2. The RFX-250 RF Sensor can be freely
positioned for optimal reception.
3. The MRF-350’s built-in Front Blaster sends commands to
components in the same cabinet space as the MRF-350.
4. Self-adhesive “Flashers” affix to the Infrared
sensors on the front panels of your components. The Flashers relay commands to components out-of-sight of the MRF-350’s Front
Blaster. The flashers plug in to the MRF-350’s
rear flasher line outputs via their 10 foot
cables. Uniquely, the MRF-350 can also connect to components with rear panel IR Inputs
via its adjustable IR Line Outputs.
Page 2
Page 6

MX-450 OWNERS MANUAL
Replacing the Batteries
Open the battery cover by pressing the release and pulling back the cover
on the back of the control. Remove the cover.
Observe the + and - polarity indications inside the battery compartment.
Place the four AA batteries into their positions in the battery compartment,
observing the + and - polarity indicators on the batteries.
Now, replace the battery cover by inserting the hinged end in first, then
snapping the cover back into place.
Programming the MX-450
To fully automate an audio/video system, the programmer must have a
detailed knowledge of each component and how the system is connected
and operated. We highly recommend that you use a professional
audio/video installer to program your MX-450 so you will be able to
enjoy all the benefits of the MX-450.
Programming Options
The MX-450 is programmed via on-screen setup menus. Simply press and
hold the MAIN button for 3 seconds to view the menus:
Basic Setup: Selecting this option enables you to replace all your
remotes by either searching the built in database or
learning commands one at a time from the original
remote for the device.
Advanced Setup: Do not attempt Advanced Setup until you have com-
pleted Basic. Advanced Setup enables you to copy and
paste groups of commands like Volume and Mute,
setup macros, customize labels, add/hide pages, erase
and setup RF Addressing.
Favorite Channels: Do not attempt to setup Favorite Channels until you
have completed Basic. Favorite channels are macros
that enable you to tune to a channel with one touch.
User Settings: Selecting this option lets you adjust how long the
screen or the buttons stay lit.
Display Tips: Select this option to turn on or off the built in Setup
Tips. Setup Tips are the programming manual for the
MX-450. They appear on the screen in context.
Page 3
Page 7

MX-450 OWNERS MANUAL
Programming Limitations
Before beginning Basic Setup, plan the layout of the MAIN pages. Create
each device in the position you want. You cannot change the position
later.
Copy and Paste enables you to copy a group of commands from one
device and paste them into another device (or all your devices). Typically
this is used to paste the Volume and Mute commands for your sound system into all of your other devices so that no matter what device you are
controlling, you can always adjust the volume. If macros are programmed,
it is recommended that you copy and paste the OFF macro into the OFF
buttons on every device. That way, whenever you press the OFF button,
the entire system will turn off.
Macro setup enables you to record a series of button pushes to any LCD
button or to the ON or OFF hard buttons. None of the other buttons can
be programmed with macros.
Add/Hide Pages and Buttons lets you hide any button or page of buttons
you don’t need.
Edit Labels provides you with the power to change any label to one that
you find more to your liking.
Erasing lets you erase any Macro or Learned command. Commands from
the database cannot be erased, only hidden.
RF Setup enables you to address each device to a particular RF base station and even a particular IR output. You can set the MX-450 to output
only IR for testing, or only RF for operation (highly recommended to avoid
oversaturating IR sensors on devices).
Favorite Channels let you setup macros to change channels only. They
cannot record any button pushes besides the number keys, the -/. button
or the ENT button. Do not attempt to record any other button.
User Settings control battery life. If you extend the time the buttons stay
lit, you dramatically curtail battery life. There is some effect on battery life
when you extend the LCD screen lighting, but it is not as dramatic.
Display Tips enables an experienced programmer to turn off the Setup
Tips. If no tips appear when you attempt setup, you can turn the Setup
Tips on again. Setup tips are the programming manual for the MX-450.
Page 4
Page 8

MX-450 OWNERS MANUAL
Selecting a New “Activity”
The MX-450’s MAIN button displays the activities you can control with
your MX-450. When you want to watch something else (a DVD movie, a
videotape or an HDTV broadcast), simply press the MAIN button and
select the new activity.
Your installer will have programmed the button you pressed to totally configure your system to watch or listen to whatever you selected. Now, the
screen will change, and all of the LCD buttons will be reconfigured to
give you full control of your system while watching or listening to your
selection!
When you press the MAIN
button, you can see the most
frequently used activities for
your home theater.
PAGE DISPLAY
At the bottom of the LCD screen, the
page display informs you if there are
other pages of buttons available.
Press either of the PAGE buttons to see any other available choices.
Page 5
Page 9

MX-450 OWNERS MANUAL
Using the MX-450 to Control an “Activity”
Once you’ve selected a new activity, the MX-450 displays the title of the
activity at the top of the screen. Below the title, the LCD displays the customized names of any special features you need for the activity. All the
hard buttons of the MX-450 have now changed to functions optimized for
this activity.
The Title displays
what activity you
can control.
Press either of the
PAGE buttons to
see any other available choices.
The Volume and
Mute buttons always
control the sound
regardless of what
screen is displayed.
The LCD button
labels describe
special features
for this activity.
The Channel and
Previous Channel
buttons will change
channels when you
have selected an
activity like Watch
CABLETV or
Watch SAT TV .
The transport buttons
(Play, Stop, Skip-, Skip+,
FF, REW and Pause)
operate when the selected activity requires them
(for example, if you
watch CABLETV with a
TiVo type of DVR, these
buttons will control the
built-in DVR, while if
you are watching a
DVD, these buttons will
control the DVD player).
The 4 way cursor
buttons enable you
to navigate on-
screen guides and
menus with ease.
The Number keypad
will enter numbers
for the activity you’ve
selected. Thus, for
watching Cable TV,
you use the number
keypad to enter chan-
nel numbers, while
when listening to CD,
the number keypad
enters track numbers.
Page 6
Page 10

MX-450 OWNERS MANUAL
USA Limited Warranty Statement
Your Universal Remote Control, when delivered to you in new condition, is warranted
against defects in materials or workmanship as follows: UNIVERSAL REMOTE CON-
TROL, INC. warrants this product against defects in material or workmanship for s period
of one (1) year and as set forth below. Universal Remote Control will, at its sole option,
repair the product using new or comparable rebuilt parts, or exchange the product for a
comparable new or rebuilt product. In the event of a defect, these are your exclusive
remedies.
This Limited Warranty covers only the hardware components packaged with the Product.
It does not cover technical assistance for hardware or software usage and it does not
cover any software products whether or not contained in the Product; any such software
is provided “AS IS” unless expressly provided for in any enclosed software Limited
Warranty.
To obtain warranty service, you must deliver the product, freight prepaid, in its original
packaging or packaging affording adequate protection to Universal Remote Control at the
address provided in the Owner’s Manual. It is your responsibility to backup any macro
programming, artwork, software or other materials that may have been programmed
into your unit. It is likely that such data, software, or other materials will be lost during
service and Universal Remote Control will not be responsible for any such damage or
loss. A dated purchase receipt, Bill of Sale, Installation Contract or other verifiable Proof
of Purchase is required. For product support and other important information visit
Universal Remote Control’s website: http://www
Customer Service Center (914) 835-4484.
This Limited Warranty only covers product issues caused by defects in material or workmanship during ordinary consumer use. It does not cover product issues caused by any
other reason, including but not limited to product issues due to commercial use, acts of
God, third-party installation, misuse, limitations of technology, or modification of or to
any part of the Universal Remote Control product. This Limited Warranty does not cover
Universal Remote Control products sold as USED, AS IS, REFURBISHED, so-called “B
STOCK” or consumables (such as batteries). This Limited Warranty is invalid if the factory-applied serial number has been altered or removed from the product. This Limited
Warranty is valid only in the United States of America. This Limited Warranty specifically
excludes products sold by unauthorized resellers.
.UniversalRemote.com or call the
LIMITATION OF REMEDIES
UNIVERSAL REMOTE CONTROL SHALL NOT BE LIABLE FOR ANY INCIDENTAL OR
CONSEQUENTIAL DAMAGES FOR BREACH OF ANY EXPRESS OR IMPLIED WARRANTY OR CONDITION ON THIS PRODUCT. IN NO EVENT SHALL UNIVERSAL REMOTE
CONTROL BE LIABLE, WHETHER IN CONTRACT OR IN TORT (INCLUDING NEGLIGENCE) FOR DAMAGES IN EXCESS OF THE PURCHASE PRICE OF THE PRODUCT,
ACCESSORY OR SOFTWARE, OR FOR ANY INDIRECT, INCIDENTAL, SPECIAL OR
CONSEQUENTIAL DAMAGES OF ANY KIND, OR LOSS OF REVENUE OR PROFITS,
LOSS OF BUSINESS, LOSS OF INFORMATION OR DATA, SOFTWARE OR APPLICATIONS OR OTHER FINANCIAL LOSS ARISING OUT OF OR IN CONNECTION WITH
THE ABILITY OR INABILITY TO USE THE PRODUCTS, ACCESSORIES OR SOFTWARE
TO THE FULL EXTENT THESE DAMAGES MAY BE DISCLAIMED BY LAW.
EXCEPT TO THE EXTENT PROHIBITED BY APPLICABLE LAW, THERE IS NO OTHER
WARRANTY EXPRESSED OR IMPLIED. UNIVERSAL REMOTE CONTROL WILL NOT BE
HELD RESPONSIBLE FOR STATEMENTS MADE BY OTHERS CONCERNING THE MER-
Page 7
Page 11

MX-450 OWNERS MANUAL
CHANTABILITY OR FITNESS FOR A PARTICULAR PURPOSE ON THIS PRODUCT.
Some states or jurisdictions do not allow the exclusion or limitation of incidental or consequential damages, or allow limitations on how long an implied warranty lasts, so the
above limitations or exclusions may not apply to you. This Limited Warranty gives you
specific legal rights and you may have other rights which vary from state to state or jurisdiction to jurisdiction. REV020708
Specifications
Microprocessor - ARM 7
LCD Screen - 2” TFT Color LCD (176 x 220 Pixels)
Memory - 32 Megabits of Flash Memory
Total Customization Capability - Up to 18 devices on 3 Main pages with
up to 8 pages for each device; plus up to eight pages of favorite channels
for a total of 155 pages.
Learning Capability - Standard frequencies (15kHz to 460kHz)
Macro Capability - Up to 255 steps each
IR Range (Line of Sight via Infrared): 30-50 feet, depending on the environment
RF Range (radio frequency): 50 to 100 feet, depending upon the environment
RF Frequency: 418MHz
Weight: 6.9 ounces (with battery loaded)
Size: 8” H x 2.25” W x 1.25” D
Batteries: Four AA Alkaline Batteries (included)
Battery Life: 18 Hours of continuous button pressing with backlighting
and LCD ON (months of use for most users). Users should expect some
variation based on the brand of alkaline batteries used.
Note: In actual use, the MX-450 protects itself if it gets stuck between
couch cushions (with a button being continuously pressed). After 30 seconds the MX-450 will turn off, and will not turn on again until the button
is released.
Contact Us
Need assistance or have questions?
Our Customer Service Support Center is here to help.
Call (914) 835-4484 to speak with a customer service
representative or email us at techsupport@universalremote.com
500 Mamaroneck Avenue, Harrison, NY 10528
Phone: (914) 835-4484 Fax: (914) 835-4532
www.universalremote.com
Page 8
Page 12
COMP L E TE
COMP L E TE
CO NTR O L
™
Univ ersal Remote Control
500 Mamaroneck Avenue, Harrison, NY 10528
Phone: (914) 835-4484 Fax: (914) 835-4532
www.universalremote.com
®
Page 13
Page 14

Congratulations!
You’ve purchased a unique synthesis of hardware and software engineering, the Complete Control MX-450. The MX-450 achieves a magnificent
combination of power and flexibility, simplifying and automating operation of even the most complex system.
MX-450 Owners Manual © 2011 Universal Remote Control, Inc.
The information in this manual is copyright protected. No part of this manual may be copied or reproduced in any form without prior written
consent from Universal Remote Control, Inc.
UNIVERSAL REMOTE CONTROL, INC. SHALL NOT BE LIABLE FOR OPERATIONAL, TECHNICAL OR EDITORIAL ERRORS/OMISSIONS MADE IN THIS
MANUAL.
The information in this manual may be subject to change without prior notice.
Complete Control is a registered trademark of Universal Remote Control, Inc.
All other brand or product names are trademarks or registered trademarks of their respective companies or organizations.
Universal Remote Control, Inc.
500 Mamaroneck Avenue, Harrison, NY 10528
Phone: (914) 835-4484 Fax: (914) 835-4532
Page 15

Table of Contents
Getting Started: Programming the MX-450
5
Advanced Setup: One-Touch Activities (Macros)
Standard Features
Optional Features
Tour: Navigating the MX-450
Overview: Setup Screen Overview
1
Basic Setup: Adding Devices
2
Basic Setup: Learn
6
7
8
9
10
11
Advanced Setup: Hide or Display Pages
Advanced Setup: Editing Labels
Advanced Setup: Erasing
Advanced Setup: RF Setup
Favorite Channels
User Settings
3
Basic Setup: Delete Device & Review Code Set
4
Advanced Setup: Copy & Paste
12
Display Tips
Glossary
Page 16

Getting Started
TV:
Sony KD-7FS170
Audio:
Denon AVR-2811
Cable:
AT-T Uverse
Programming the MX-450
Decide on the position of
each device on the
remote’s page(s).
Once a device is placed in a
position, it may not be
changed and must be
deleted and recreated.
For the best chance of success,
make sure you make a list of
the devices that you want to
control. This list should include
the manufacturer, the model
number of each device.
Make sure the batteries are
fresh/new.
Page 17

TV
e
e
e
e
g
Te
Ca
ER
EO
to
ON
St
Standard
Features
Unified Remote
Follow the steps in this guide to
program up to 20 remotes into
your new MX-450!
Instead of searching for the right
remote, it’ll be in your hand
already!
Backlit LCD Buttons
Pressing ANY button, or the
LIGHT button located on the right
side of the remote) and both the
screen and buttons illuminate!
Perfect for uninterrupted control,
even when the lights are low!
Light
Button
One-Touch Activities
Easily record the steps it takes
to perform your favorite
activities and record them on a
single button.
Next time you hit that button,
like TV, all the steps happen
automatically!
Favorites Pages
Make surfing the channels
easier by creating up to 8
pages of channel icons that go
directly to your favorite
network!
Single Button
Press
5
Switch TV to HDMI 1
4
Switch STEREO to CaTV
3
Power ON Cable Box
2
Power ON Television
1
Power ON Stereo
Intuitive Commands
Ensure that device pages contain
the commands necessary when
performing that activity.
For example, make sure that
when using the Cable TV page,
the volume buttons control the
correct device (usually the TV)
TV
Pag
Page
TV
Volume
&
TV
Channel
Cable
Cabl
Pag
Page
Cable
Volume
&
Cable
Channel
Cable
l
Cab
e
Pa
Page
TV
Volume
&
Cable
Channel
No PC Required
Computer programmed remotes
can get complicated, and not
everyone has a computer, or feels
comfortable using one!
You have all the tools you need to
program this remote…your
hands!
Page 18

Optional Features
No Rules Operation
Typically remotes use infra-red light for sending commands to
devices, the problem is that this method requires “line-of-sight” to
the device and DOES NOT work through walls, floors or cabinet
doors.
Use an optional RF base station to eliminate the need to point the
remote and the ability to control your gear through those cabinet
doors…or from another room!!
Optional RF Base Stations
MRF-260 MRF-350
Lighting Control
Who watches television or movies with all of the lights ON?
Are you the type of person that likes the lights to be OFF?
Imagine that control, right at your fingertips with URC Lighting
products; just replace your existing lighting with, easy to install,
URC Lighting and you are ready.
Imagine hitting a button on your remote and having the lights dim
just as the movie starts; even if the phone rings or there is a knock
on the door, a simple button press illuminates the surroundings.
Optional Lighting Products
In-Wall
Dimmer
Lamp
Dimmer
In-Wall
Switch
Page 19

Tour
PA
By default, these will send an
Volume & Channel
On/Off Buttons
On/Off command to the
device that is displayed
Navigating the MX-450
LCD Buttons
These on-screen icons are
accessed by using the
adjoining button
Controls
Convenient volume access
and easily scroll through
channels with Up, Down,
Previous or see a list of
Favorites.
Transport Controls
All of the commonly used
commands for controlling
DVRs, DVDs and other
recording devices
LCD Navigation
These will help you to
navigate between pages
(PAGE+, PAGE-) or return to
the main menu (MAIN)
5-Way Cursor
Easy navigation for your
device (Up, Down, Left, Right
& Select)
Page 20

Overview
Set-Up Screen Overview
The Main Setup Menu of the MX-450 is the heart of the remote.
This menu will serve as your guide as you to add your TV, DVD,
Satellite and other devices to the remote.
To enter the Main Setup Menu, press and hold the MAIN button for 3 seconds.
The following are descriptions of each of these submenus:
• Basic Setup: Add all of your devices to the remote by using the built-in library, or
learning commands directly from the original remote. More information can be
found…
• Advanced Setup (only used this section once Basic setup has been completed): in
this section you can edit button names, hide pages, create one-touch activities
(macros), etc. More information can be found…
• Favorite Channels: use this menu item to set icons and channel numbers for your
favorite networks
• User Settings: this option allows you to make adjustments of the remote’s
operation like brightness, contrast, light duration, etc. More information can be
found…
• Display tips: In this section you may enable or disable the Set-Up tips. Although
they are convenient when programming without a manual, you will not need
them for programming if you are using this documentation.
Page 21

1
Basic Setup
Adding Devices
Within the Search the Database section of Basic
Setup, we will add each of your devices or
components to the MX-450.
A
B
A.
Select Search the
Database to search
for device codes.
B.
Select an Icon
Position to save your
device by pressing a
screen button to
make your choice.
5-way cursor
Use
Arrows
and
Select (SEL)
to navigate.
C
C.
Select the
type of device by
pressing the UP or
DOWN buttons on
the remote’s
5-way cursor.
D
D.
Choose a device
icon by pressing
the LEFT or RIGHT
buttons to see
other icons.
Press select when
finished.
E
E.
Type in a name for
the device using the
number key’s
alphanumeric
equivalent
Page 22

Basic Setup
1
F
F.
Select the Brand of
your device by
pressing the UP and
DOWN buttons.
G
G.
Turn ON your device
and point the remote
toward it.
Press the UP or
DOWN buttons until
the device turns OFF.
Adding Devices
H
H.
Test the code by
pressing the
Power On, Vol+ & Ch+
If the device responds
to this code, press Pass.
If not, press Back to
find a better match.
(repeat step G.)
When a device is
Pass-ed the MX-450
will save the device
(blue progress bar
at the bottom of the
When FINISHED adding devices,
select NO then NEXT when asked to
setup another device.
I
I.
J.
Repeat this process
to add more devices
screen)
by selecting Ye s
then Next.
1
J
Page 23

2
Basic Setup
LEARN
Can’t find a code to control your device? Then
learn the commands into the MX-450 from the
original manufacturer’s remote.
C
B
A
A.
From the Basic Setup screen use
the 5-way cursor to select Learn.
Make sure to have the
original remote near by
with brand new batteries.
B.
Decide whether you want to save a
single command or an entire device’s
command set.
Select On the Main Menu to learn
commands to buttons like Power On
or Off.
Select Inside a Device to learn an
entire device or specific commands
within the device.
C.
Select a button where you want to
save a command or press a Page
button to navigate to a different page
to find a button there.
Page 24

Basic Setup
2
D
LEARN
E.
Press the button on the original
remote that you would like to
“teach” to the MX-450.
2
F
F.
After the command is learned, the remote
indicates either:
SAVED: blue progress bar indicates saving
E
D.
Screen will show READY,
indicating it is prepared to learn a
command.
Note: if the button is an on-
screen button, it will also appear
darkened in its “ready” state.
RETRY: command did not translate, try
again.
Place the remotes 2”-5” apart
from one another while learning.
If unsuccessful, try lowering the
lights in the room
Page 25

3
Basic Setup
Delete Device & Review Code Set
Delete a Device
If you want to delete a device
use the 5-way cursor to select
Delete a Device. Then press the
device’s button to delete it.
Review Code Set
If you would like to review the
saved code for each device, use
the arrows to select Review
Code Set.
This feature is for
custom install
professional use only.
Page 26

4
Advanced Setup
Copy & Paste
Ever wish you could lower the volume or better yet change
your television input without having to switch your audio
receiver or television remote? Now you can.
Groups
A
A.
From the Advanced Setup
screen, use the 5-way cursor to
select Copy & Paste.
B
B.
Select a group of commands to copy:
Volume, Channel, Play, Menu,
Power ON or Power OFF groups.
(in this example: Volume Group)
Power
ON
only
Volume
Group
Menu
Group
Play
Group
Power
OFF
only
Channel
Group
Page 27

y
if
v
waschosen
.
.
o
Advanced Setup
Copy & Paste
The process ends here if
The process ends here
To All Devices or Main & Fav
All Devices or Main &
T
was chosen.
If To One Device was chosen go to Step E.
If To One Device was chosen go to Step E
C
a
D
4
E
C.
Decide where you want to paste the
commands.
Select To One Device to use the
commands in one device.
Select To All Devices to use the
commands throughout every device.
Select To The Main & Fav to save the
commands onl
to the main page or
D.
Select a device to copy the
desired group FROM.
(in this example: Volume Group
FROM Audio)
E.
Select a device to paste the
desired group TO.
(in this example: Volume Group
FROM Audio TO Cable)
Page 28

Advanced Setup
5
One-Touch Activities (Macros)
One touch activities allow you to “record” multiple steps on
a single LCD button, like all of the commands necessary to
watch TV. Once programmed, a single button press will
execute all of the commands to complete the activity.
What’s an ACTIVITY?
an action the end-user wants to perform but
requires multiple steps to accomplish
What’s an MACRO?
programming these steps, in advance, so the
activity requires a single button press
example:
Watch Cable
TV ON
TV to HDMI 1
Cable Box ON
AVR ON
AVR to SAT/TV
A
A.
From the Advanced Setup screen
use the 5-way cursor to select
Macros.
B
B.
Select whether you would like to
Setup a New Macro
or Test/Edit Existing Macro.
Page 29

vice
,
s
e
.
Advanced Setup
One-Touch Activities (Macros)
5
Add Delays
Pressing the Pause button inserts a .5 sec
delay between commands.
If Inside a
If Inside a
Device is
C
chosen,
chosen,
select the
select the
device
device,
before
before
lecting th
selecting the
button
button.
End On A Page?
A recorded macro will also save its last location.
So, make sure you hit DONE on the page where
you want the macro to end.
D
E
C.
Decide where you would like the
macro button:
On the Main Menu
or
Inside a Device
Press Next.
Select the button where you want
to RECORD the macro.
This starts the recording process
D.
Record each step by navigating to
the command (using the MAIN
button) and PRESSING it.
When finished recording the
macro, save it by pressing Done.
E.
Page 30

6
f
nside a Device
de
or
h
Hide or Display Pages
If Inside a Device is chosen,
the next screen will give a choice of
e next screen will give a choice of
t
Hide or Display Pages
Hi
or Display Pages
or Hide or Display Buttons.
Hide or Display Buttons.
is chosen,
Advanced Setup
Want to hide a page of unnecessary commands?
What about hiding a device from a loved one?
Covert operation anyone?!
CQ Humor
A
A.
From the Advanced Setup
screen use the 5-way cursor
to select Hide or Display
Pages.
B
B.
Decide where the page to be hidden
is located:
On the Main Menu- go to Step C
or
Inside a Device- see tip, above.
C
C.
Select Hide or Display Pages or
Hide or Display Devices.
D
D.
Navigate to the button, page
or device to be hidden and
select YES to hide.
Page 31

7
Advanced Setup
Editing Labels
Make life easier by labeling buttons to say what YOU want! How about
renaming a button to a newly created activity? (i.e. TV to Watch TV)
Or, simply change the LOOK of an icon.
A
A.
From the Advanced Setup screen
use the 5-way cursor to select
Edit Labels.
B
B.
Decide on the location of the
button or device you would like to
rename by selecting On the Main
Menu, Inside a Device or Edit
Main Label (the title that appears
on top of the MAIN menu).
C
C.
Navigate to the button in the location
provided in the previous step and
PRESS it to rename.
Page 32

Advanced Setup
Editing Labels
These steps are only available if On the Main Menu is
selected in Step B.
D
E
7
F
D.
Select a device type, for the
icon, by using the
5 way cursor and select
buttons.
E.
Change the device icon by
pressing the left or right
cursor. Press Next to move
one.
F.
Type in a name for the
device using the number
key’s alphanumeric
equivalent. Press Next
when done.
Page 33

8
Advanced Setup
Erasing
Quickly erase unwanted activities (macros) and
learned commands anywhere on the remote.
A
A.
From the Advanced Setup screen
use the 5-way cursor to select
Erasing.
B
B.
Decide whether you want to
erase Macros or Learned
Commands.
C
C.
Select how you would like to
erase : One Button, All on 1
Device or All Everywhere.
Page 34

If Inside a Device is chosen,
f Inside a Device is chosen,
select the device that
select thedevicethat
contains the button to erase.
contains the button to erase.
D
Advanced Setup
Erasing
E
8
F
D.
Choose whether the location of
the button is On the Main Menu
or Inside a Device.
E.
Press a hard or soft button to
erase.
F.
An Erased confirmation will
indicate the macro or learned
command is no longer
programmed in the remote.
Page 35

9
.
A
Advanced Setup
RF Setup
Tired of leaving the cabinet doors open, just to control the
cable box? RF travels right through those doors, and even
An optional RF base station
n optional RF base station
such as a MRF-260 or MRF-350
h as a MRF
is necessary for this option.
is necessary for this option
260 or MRF
A
350
floors and walls! Add an optional RF base station for “no
rules” operation.
B
C
A.
From the Advanced Setup
screen use the 5-way cursor
to select RF Setup.
Decide whether you would like to use RF
control for EVERY device (All Devices Set
Same) or decide IR or RF for each device
(Each Device Differs)
If IR routing (see glossary) is required, you
must choose Each Device Differs
B.
C.
These four options are important as
they determine how communication
occurs between the remote, your
devices, and the RF base station. The
next page has more details regarding
each option.
Page 36

Advanced Setup
/R
9
RF Setup
To use a RF base station, the following options should be addressed:
IR or RF Signal: Turn OFF IR Signal (no need to point) and turn ON RF Signal (communicates with
base station.)
RF ID# (Address): Select an ID# between 1-F. The ID# identifies the base station to the remote. It is
important to select the same # on the RF base station. DO NOT SELECT ID# 0, as any RF remote can
control the base station. See next slide for further information.
Emitter (IR) Routing: Select an individual emitter number, by pressing the UP or DOWN soft
buttons, for each device selected. If All devices were selected leave as All lines.
Blaster On/Off: Decide whether the front-facing IR “blaster” should be ON or OFF. The Blaster On
option blasts the IR signal from the front of the RF base station.
Press Save for each modified option.
IR/RF signal RF ID Emitter Blaster IR
Page 37

RF Setup (base station)
Adjust the RF ID# dial to
reflect the selection made in
the remote’s RF Setup.
Advanced Setup
9
Note: DO NOT SELECT ID# 0, as
any RF remote can control the
base station
.
Plug the emitter
for each device
into its designated
IR OUTPUT.
Page 38

10
Favorite Channels
Favorite Channels
Hate relying on the cable channel guide to find your favorite
channels. Have trouble keeping track of cable’s ever-changing
lineup? Use the Favorite Channels option to showcase multiple
channels, up to six per page.
B
A
Create up to 8 pages of
eate up to
favorite channel icons,
favorite channel icons,
each page holds up to 6
each page holds up to
icons each.
iconseach.
pages
A.
From the Main Setup screen
use the 5-way cursor to select
Favorite Channels.
B.
Choose between
Adding/Edit Favs or Delete Favs
(previously created).
Note: If Delete Favs is selected,
you will have the option to delete
One Favorite Channel or All.
C
C.
Select a button position
then favorite channel icon
to save the channel.
Page 39

10
a
Favorite Channels
D
D.
Select for each category:
Label: rename the channel icon
Device: select the device where the favorite
channel is found
Channel: enter the channel number
(See below for details of each)
Label Device Channel L
Enter the channel
number using the
Enter the channel
name using the
alphanumeric
keypad.
Press Next to
return to Step D.
source device
containing the
number pad.
Press Next to
return to Step D.
Select the
channel to
add.
Page 40

11
A
User Settings
Like creature comforts? Modify your preferred
settings with the User Settings option.
B.
From the User Settings screen
use the 5-way cursor to select
a preference.
B
A.
From the Main Setup screen
use the 5-way cursor to select
User Settings.
Brightness: Change the level
between 0% - 100%
Auto Turn Off Timing: How many
seconds the light stays ON.
Color Screen
Button Lighting
Automatic On: ON
when LCD is ON, or
Always OFF
Auto Turn Off Timing:
How many seconds the
light stays ON.
Page 41

User Settings
%
ys
e
y
B.
From the User
B
Settings screen use
the 5-way cursor to
select an option,
one at a time.
11
System & Battery Info.
Power Remaining:
Power Remaining:
Change the level
Change the level
between 0% - 100%
between 0%
System Info: Displays
stem Info: Di
the memory usage.
the memory usage.
100
la
This option sets the remote to
his option sets the remote to
the original factory program.
the original factory program.
(All programming will be lost!)
(All programming will be lost!)
Press
Press Next then select Yes to erase.
xt then select
Factory Reset
to eras
Page 42

12
A
Display Tips
The Display Tips is your personal MX-450
programming tutorial.
B
A
A.
From the Main Setup screen
use the 5-way cursor to select
Display Tips.
B.
Use the 5-way cursor to turn
the display tips on or off.
Press Save when done.
Page 43

Glossary
A button that is physically ON the remote; it can be touched, pressed
A button that is represented by an on-screen representation, making it customizable to various levels. This button
may be activated by pressing it (if remote is a touchscreen) or the hard button that is adjacent to it (LCD, non
touchscreen)
An Liquid Crystal Display (LCD) screen with "soft" buttons that are backlit for easy
A code set is a series of commands (usually using infra
will automatically assign all commands in a code set to the appropriate "hard" buttons and create "soft" buttons
for the remaining commands in the code set.
Also called PUNCH THROUGH, this is the ability of a remote to allow the user to access commands from one
device when on the page of another device. A common usge is to place the TV volume commands on the CABLE
page to allow easy access of volume without returning to the TV page.
When a one-touch activity is created, there may be reason to add a pause before the following command is sent;
for example, when a Power ON command is sent to the TV, it may take 2
ready to accept another command. Using the PAUSE button will add .5 seconds, per press, to the command string.
Devices, or components, are considered to be any object that is, or can be, controlled by a remote.
Like an electronic assistant, Display Tips on the MX
450 will make suggestions or give instruction for certain steps
of the programming process.
When a code set is programmed onto the remote, some of the buttons may be inexplicably named with
unfamiliar terms. Use this feature to rename those buttons to more familiar sounding names.
An icon, or text field, that has the channel number of the network represented within it.
Term Definition
"Hard" Button
"Soft" Button
Backlit LCD buttons
-red) put together to control a single device. The MX-450
Code Set
Copy & Paste
Delays (Pause)
Devices (Components)
and is tactile
-3 seconds for the TV to start and be
-
viewing in low light conditions
Display tips
Edit Label
Favorite Channels
-
Page 44

Glossary
A page, or series of pages, with network names, or icons, representing favorite channels; when a channel is
selected, the remote will automatically send out the numeric commands to switch to the chosen network.
Hide or Display Pages/Buttons
When a code set is programmed onto the remote, some of the buttons/pages may be deemed unnecessary. Use
this feature to hide buttons, or pages of buttons, to the user.
These are pages that are found inside a device that has been added to the remote. By default, these are
populated by commands forTHAT device, however, with programming, these buttons can be made to perform
macros or commands from other devices.
Also called PUNCH THROUGH, this is the ability of a remote to allow the user to access commands from one
device when on the page of another device. A common
page to allow easy access of volume without returning to the TV page.
IR, or Infra
devices can "see" IR and be programmed to react to differennt IR strings.
The ability to record the infra
button on the smart remote.
Also called One Touch Activities, these are buttons (hard or soft) that trigger a recorded sequence of commands;
typically to perform a common function that would normally take many button presses (i.e. Watch TV, Watch DVD,
Listen to CD)
The MX
450 has different screen views. On the Main Menu are the screens that show devices or activities. Once a
device is chosen, the remote will typically jump to a page that is Inside a Device
Also called MACROS, these are buttons (hard or soft) that trigger a recorded sequence of commands; typically to
perform a common function that would normally take many button presses (i.e. Watch TV, Watch DVD, Listen to
CD)
Term Definition
Favorite Pages
Inside a Device
Intuitive Commands
Infra-Red (IR)
Learn
Macros
On the Main Menu
One-Touch Activities
-red is a low frequency of the non-visible light spectrum. Even though it is not visible to humans,
-red (IR) signal from one remote (usually the manufacturer's) and place it on a
-
usge is to place the TV volume commands on the CABLE
Page 45

Glossary
Some menus like the Main Menu, Device Menu and Favorites may have more than one page associated with
them. These buttons, found to the left, and right, of the Main button will navigate between those pages
This statement will appear on the LCD when the remote is ready to move on to the next step in the action or
programming
The record function is the first step to creating one touch activities (macros). While in record mode, every button
press is saved and added to the string of commands; once the SAVE/DONE button is pressed, the entire command
string is stored in the location determined by you.
This suggestion appears when the action you just tried to perform has failed. Usually retrying the step will solve
the problem
The MX
Using an RF base station allows commands to be sent through walls, floors and doors. RF also allows for native
command of URC lighting.
This acknowledgment will appear during some programming procedures to let you know that the action has been
completed
A unified remote that has capabilities to make its use more efficient, intuitive and automatic
A single remote control that combines other controllers into a single interface. Does not imply any intelligent
control, just combined control!
Term Definition
Page button
Ready
Record
Retry
-450 has the ability to control device via direct IR, or route the IR commands through an RF base station.
RF Setup
Saved
Smart Remote
Unified Remote
 Loading...