

Page 1

Page 2
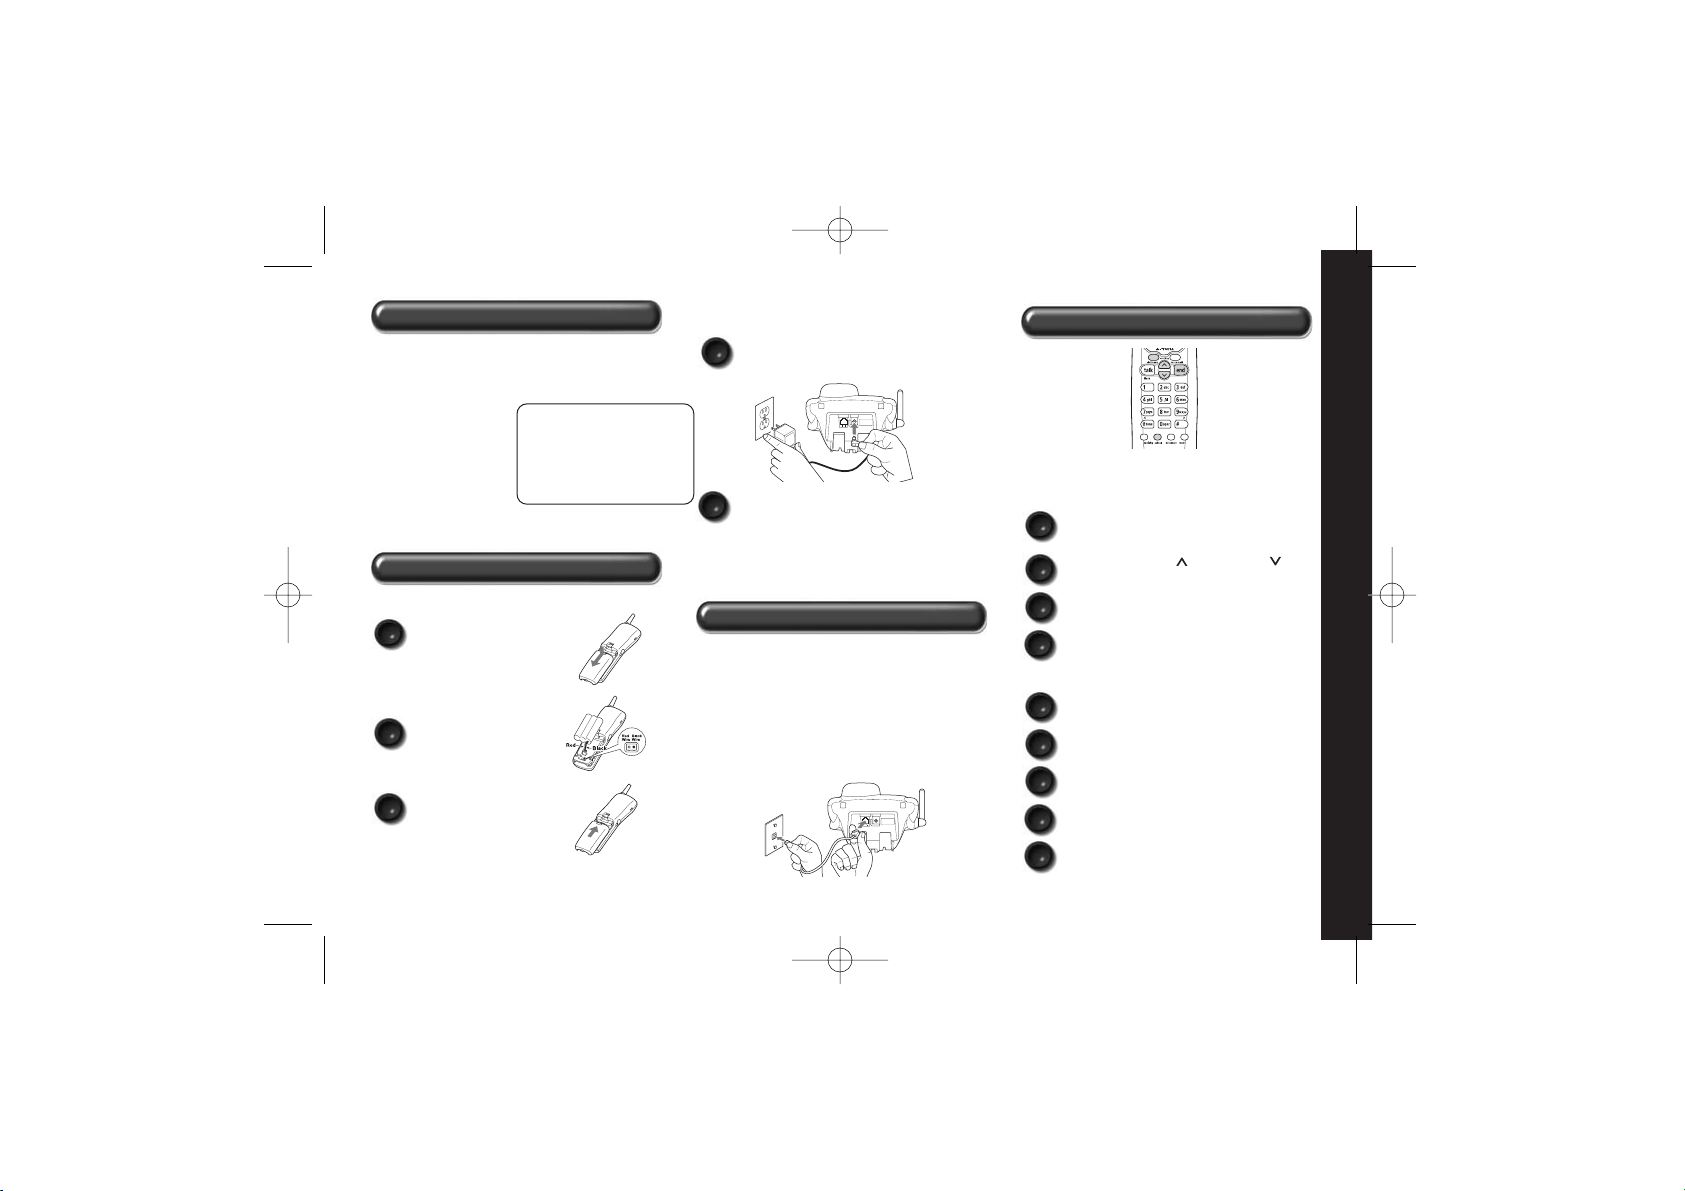
Step 2 Install and Charge the Handset Battery
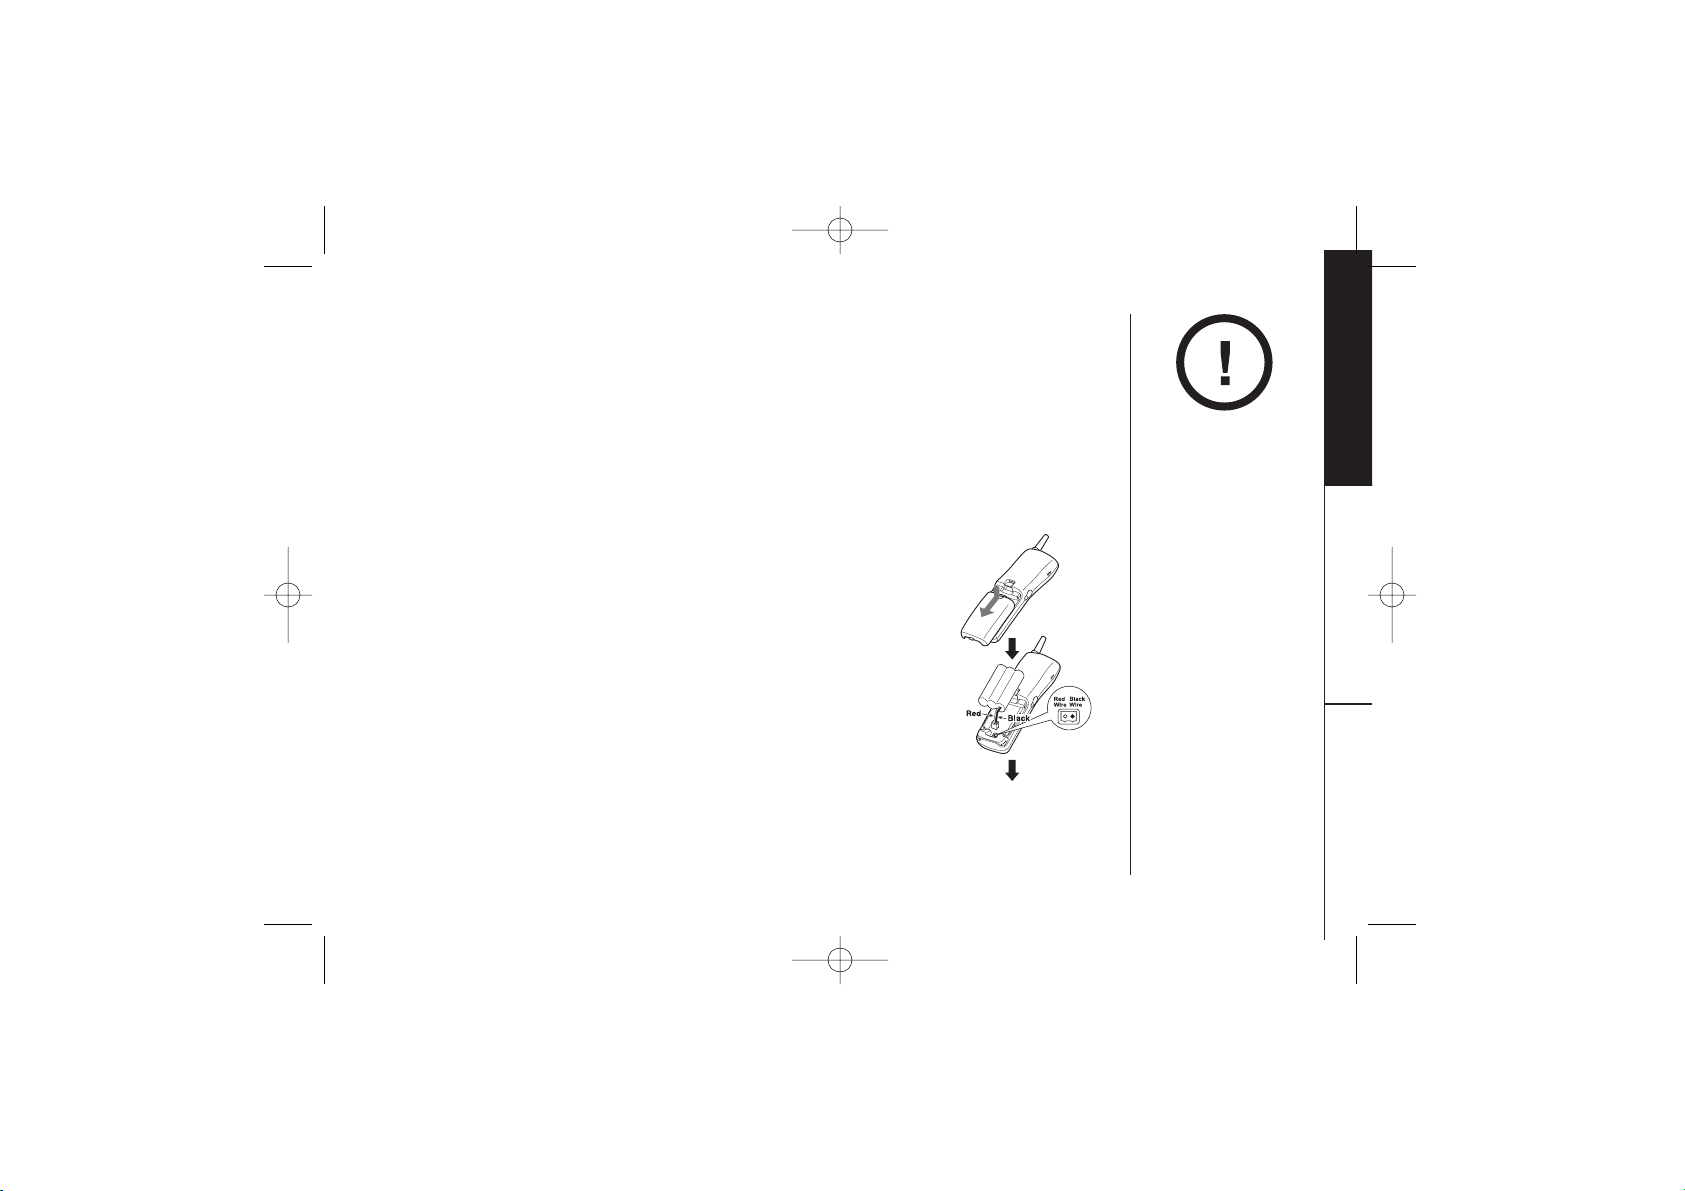
TO INSTALL THE HANDSET BATTERY
When the handset battery pack is fully charged,
after 15-20 hours of charging, plug the telephone
cord into the base unit and then into a telephone
wall jack.
Your phone is set for tone dialing. If your local
network requires pulse dialing, please see
“Choosing the dialing mode” on page 16.
A
Remove the cover.
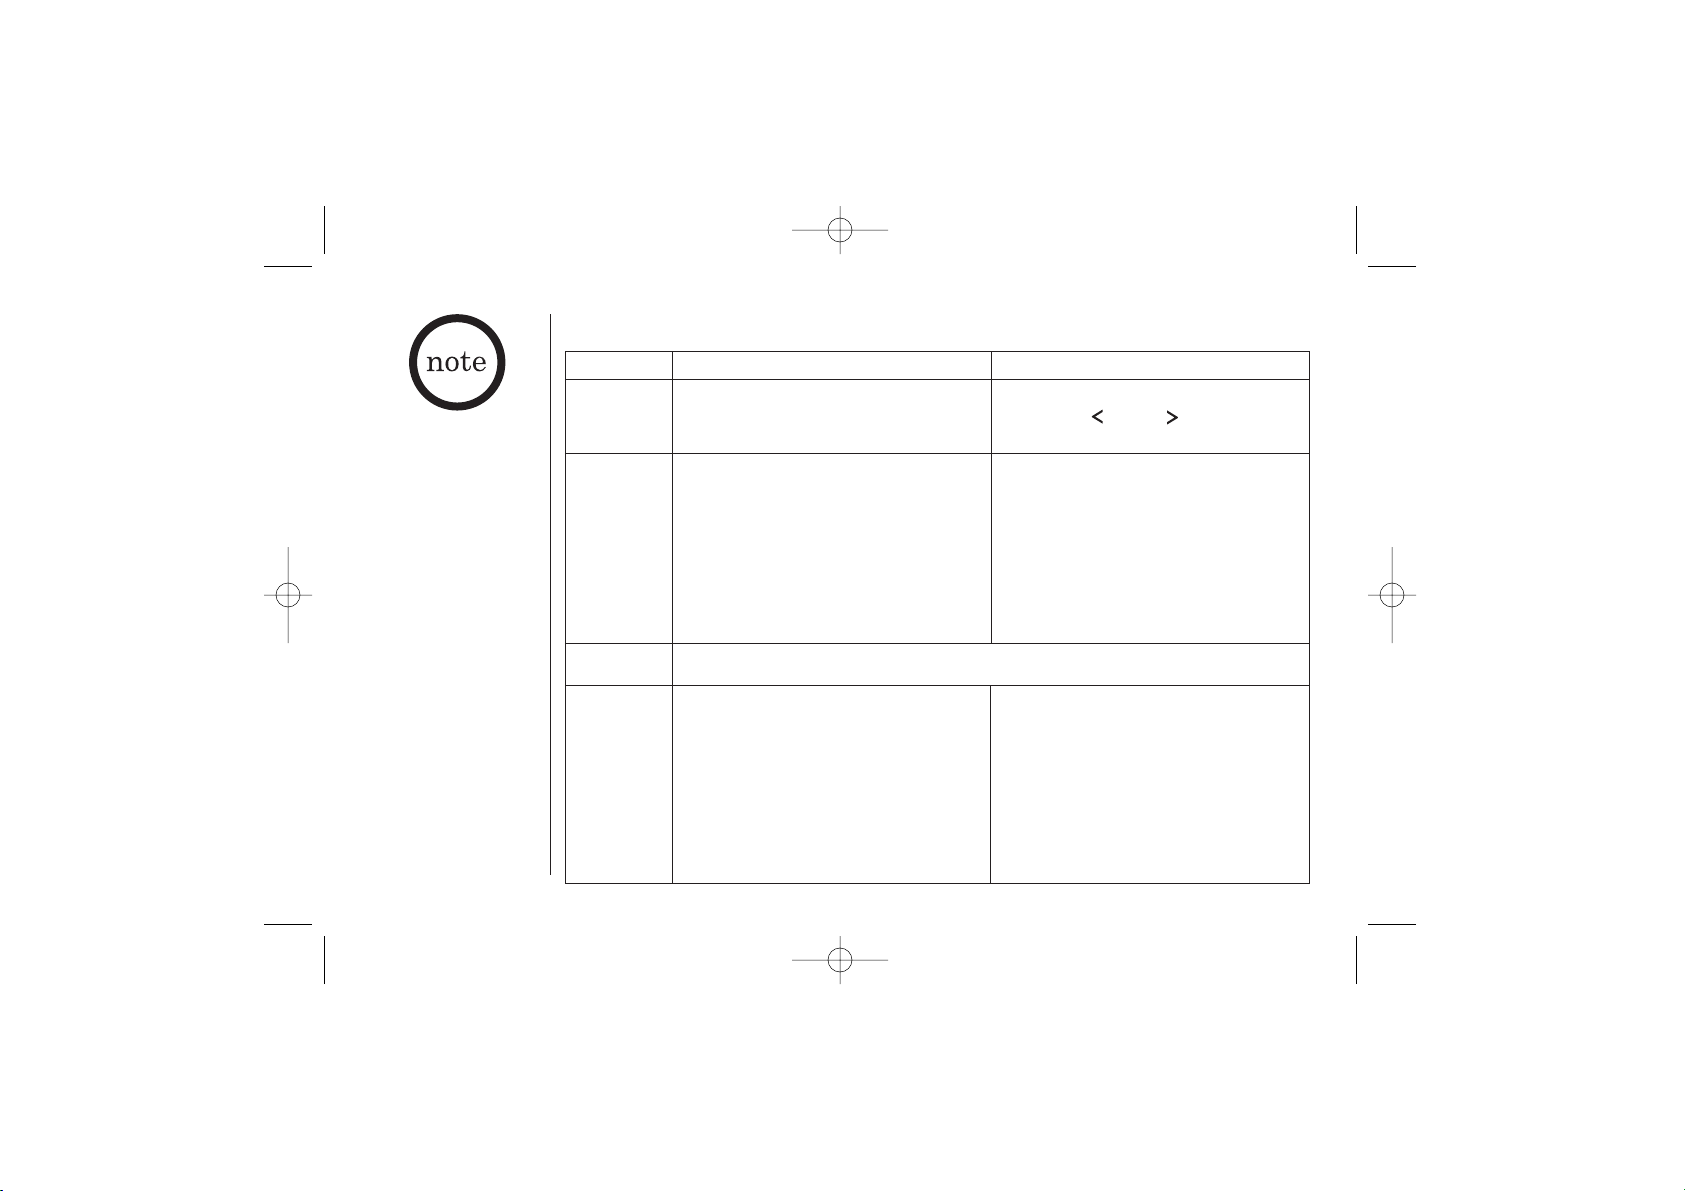
TO SET CALLER ID, LANGUAGE AND DIALING OPTIONS
A
Press and hold the cid/menu key.
B
Press the vol/ring/ or vol/ring/ key
to move the pointer to an option.
C
Press select to change the option setting.
D
Press end to exit, and return the handset
to the base.
OPTIONS INCLUDE
A
Auto Talk On/Off
B
CIDCW On/Off
(Caller id/call waiting)
C
Area Code Enter/Remove
D
Dial Pulse/Tone
D
Plug the AC adapter cord into the base
unit and then into a 120V AC outlet.
E
Place the handset in the base and charge
continuously for 15 - 20 hours before using
the phone.
B
Connect the battery pack
connector with the
correct polarity.
C
Replace the cover.
Note: Three Caller ID options are available: AutoTalk,
Caller ID on Call Waiting (CIDCW), and Area Code.
QUICK REFERENCE GUIDE
Step 3 Connect to Phone Line
Step 4
Setting Display Options
Uniden Parts Department at
(800) 554-3988
Hours: M-F 8:00 a.m. to
5:00 p.m. CST.
We can also be reached on
the web at www.uniden.com
Make sure you have received the following items in
the package. If any of these items are missing or
damaged, contact the Uniden Parts Department.
• Base unit
• Handset
• AC adapter
• Rechargeable battery
• Telephone cord
• Beltclip
• This Owner’s Manual
• Other Printed
Material
QUICK REFERENCE GUIDE [ 3]www.uniden.com
Step 1 Checking the Package Contents
E
Language Eng (English)/Fr (French)
EXT3165-01/22 1/22/03 7:37 PM Page 3
Page 3

[ 4 ] www.uniden.com
Contents
Quick Reference Guide 3
Welcome/Features 5
Controls and Functions 6
Getting Started
Setting up the Phone 8
Mounting the Base Unit on a Wall 13
Setting Menu Options 15
Basics
Making and Receiving Calls 18
Adjusting the Handset Ringer and
Earpiece Volume 19
Redial 20
Tone Dialing Switch-over 20
Traveling Out-of-Range 20
Selecting a Different Channel 21
Page 21
Flash and Call Waiting 21
Memory Dialing
Storing Phone Numbers and Names 22
Steps for Entering Names and Special Characters 24
Making Calls with Memory Dialing 25
Chain Dialing 26
Editing a Stored Name and/or Phone Number 27
Erasing a Stored Name and Phone Number 29
VoiceMail
Using One Touch VoiceMail Access 31
Caller ID Features
Caller ID 32
When the Telephone Rings 32
Viewing the Caller ID Message List 33
Deleting Information from the Caller ID List 34
Using the Caller ID List 36
Additional Information
Changing the Digital Security Code 38
Installing the Beltclip 38
Headset Installation 38
Note on Power Sources 39
Maintenance 39
Troubleshooting 40
General Information 43
Precautions & Warranty 44
I.C. Notice 46
Index 47
EXT3165-01/22 1/22/03 7:37 PM Page 4
Page 4
[ 5 ]www.uniden.com
Welcome
Congratulations on your purchase of the Uniden EXT3165 series. This cordless phone is
designed and engineered to exacting standards for reliability, long life, and outstanding
performance.
Note: Some illustrations in this manual may differ from the actual unit for
explanation purposes. The color of your cordless telephone may vary.
Be sure to visit our web site: www.uniden.com
Uniden®is a registered trademark of Uniden America Corporation.
AutoTalk, AutoStandby, UltraClear Plus, Random Code, and AutoSecure, are trademarks of
Uniden America Corporation.
Features
• 2.4 GHz Extended Range Technology
• 3 Line Backlit Display
• Caller ID and Call Waiting Caller ID
• One touch Access to Voicemail Box
• Message Waiting Indicator
• 20 Number Memory Dialing
• 32 Digit Redial
• Flash and Pause
• English or French Display Option
• Tone/Pulse Dialing
• Page/Find handset
• Up to 7 Hour Talk Time/
14 Day Standby Time
• Handset Earpiece and
Ringer Volume Control
• Hearing Aid Compatible
• 20 Channel Autoscan
As an ENERGY STA R
®
Partner, Uniden has determined that this product or
product models meets the E
NERGY STAR
®
guidelines for energy efficiency.
E
NERGY STAR
®
is a U.S. registered mark.
EXT3165-01/22 1/22/03 7:37 PM Page 5
Page 5

CONTROLS AND FUNCTIONS[ 6 ] www.uniden.com
1. Handset antenna
2. Beltclip hole
3. Optional headset jack
4. Handset battery compartment
5. Handset earpiece
6. LCD display
7. (Caller ID) cid/menu key
8. Talk/flash key
9.
*
/tone/ (left cursor) key
10. Redial/p (pause) key
11. Select key
12. Handset microphone and
ringer speaker
13. (Volume) vol/ring/ (up) key
14. Voicemail key
15. End key
16. (Volume) vol/ring/ (down) key
17. #/ (right cursor) key
18. (Memory) mem key
19. Delete/ch (channel) key
20. Handset charging contacts
Controls and Functions
EXT3165-01/22 1/22/03 7:37 PM Page 6
1
2
3
4
5
6
7
8
9
10
11
12
13
14
15
16
17
18
19
20
Page 6
CONTROLS AND FUNCTIONS [ 7 ]www.uniden.com
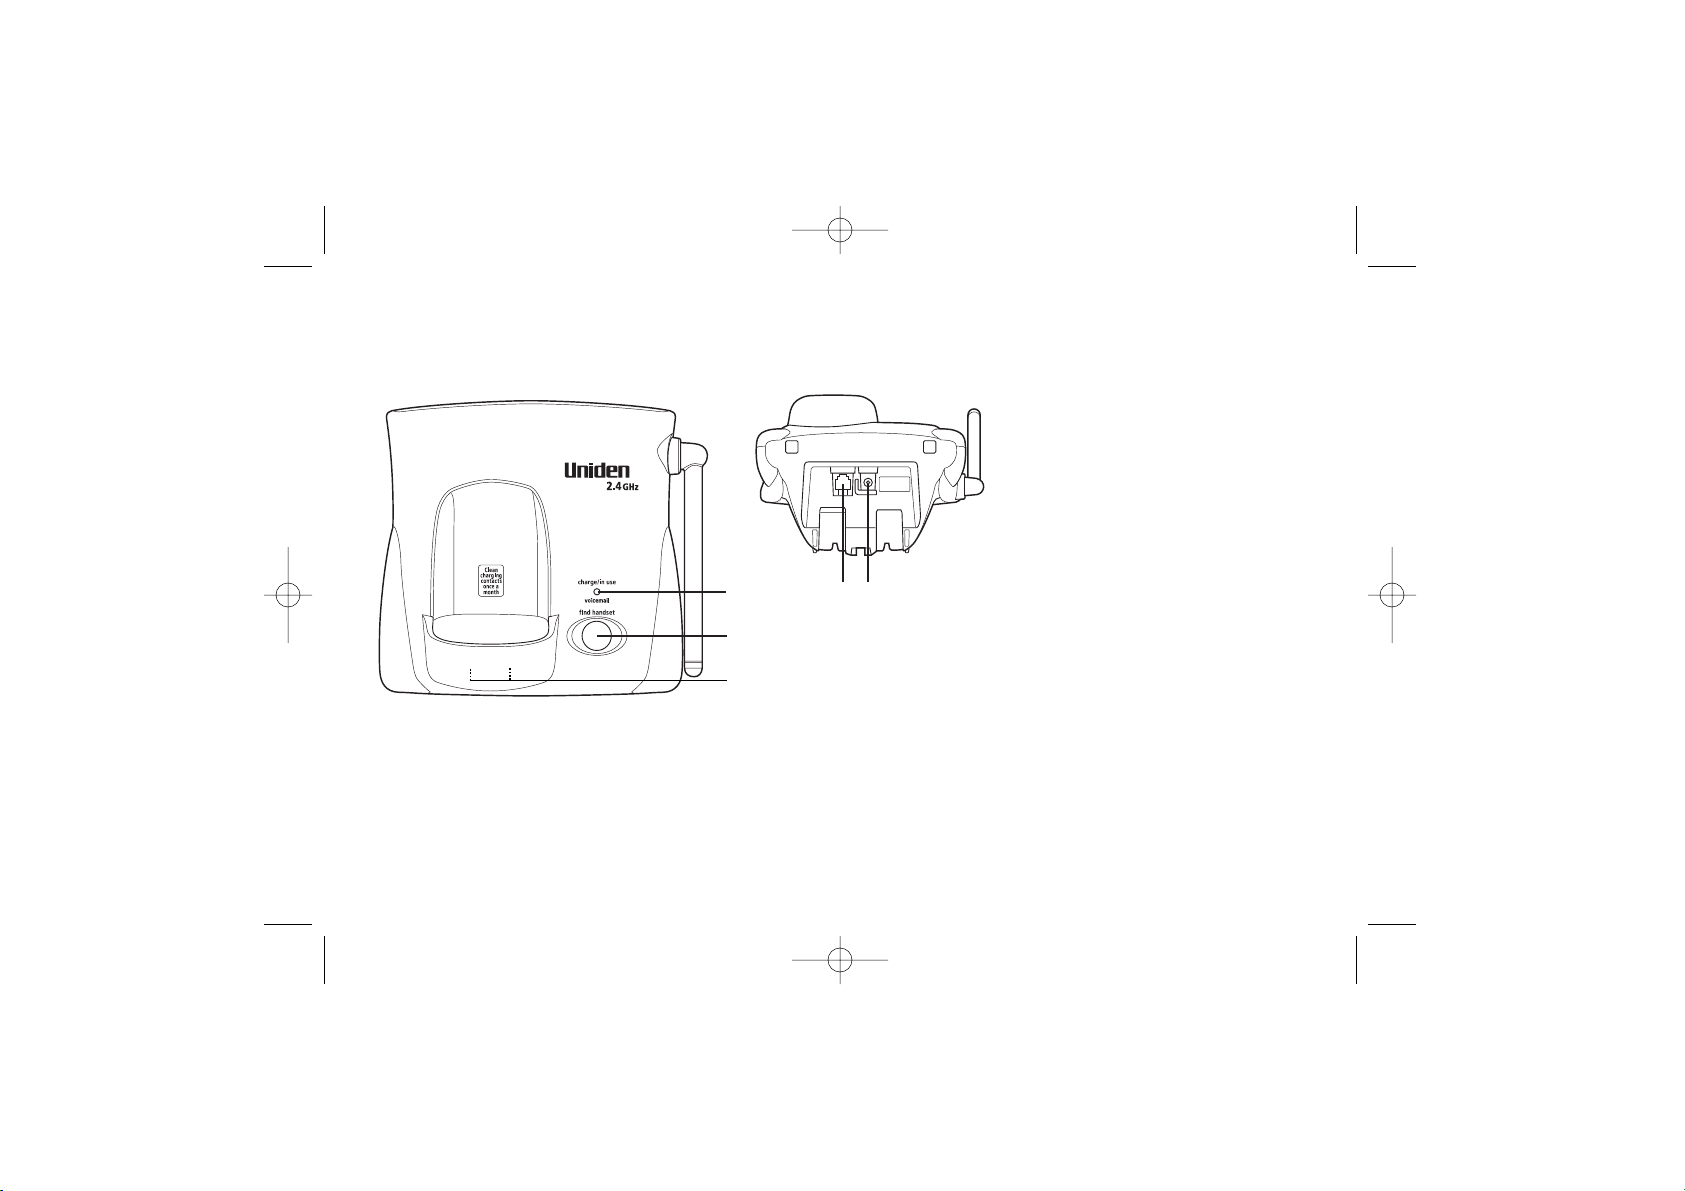
21. charge/in use/voicemail LED
22. Find handset key
23. Base charging contacts
24. Telephone line jack
25. DC IN 9V jack
EXT3165-01/22 1/22/03 7:37 PM Page 7
21 24 25
22
23
Page 7
GETTING STARTED[ 8 ] www.uniden.com
Setting up the Phone
Do the following steps:
A. Choose the best location C. Connect the base unit
B. Install the rechargeable battery pack into the handset
A. Choose the best location
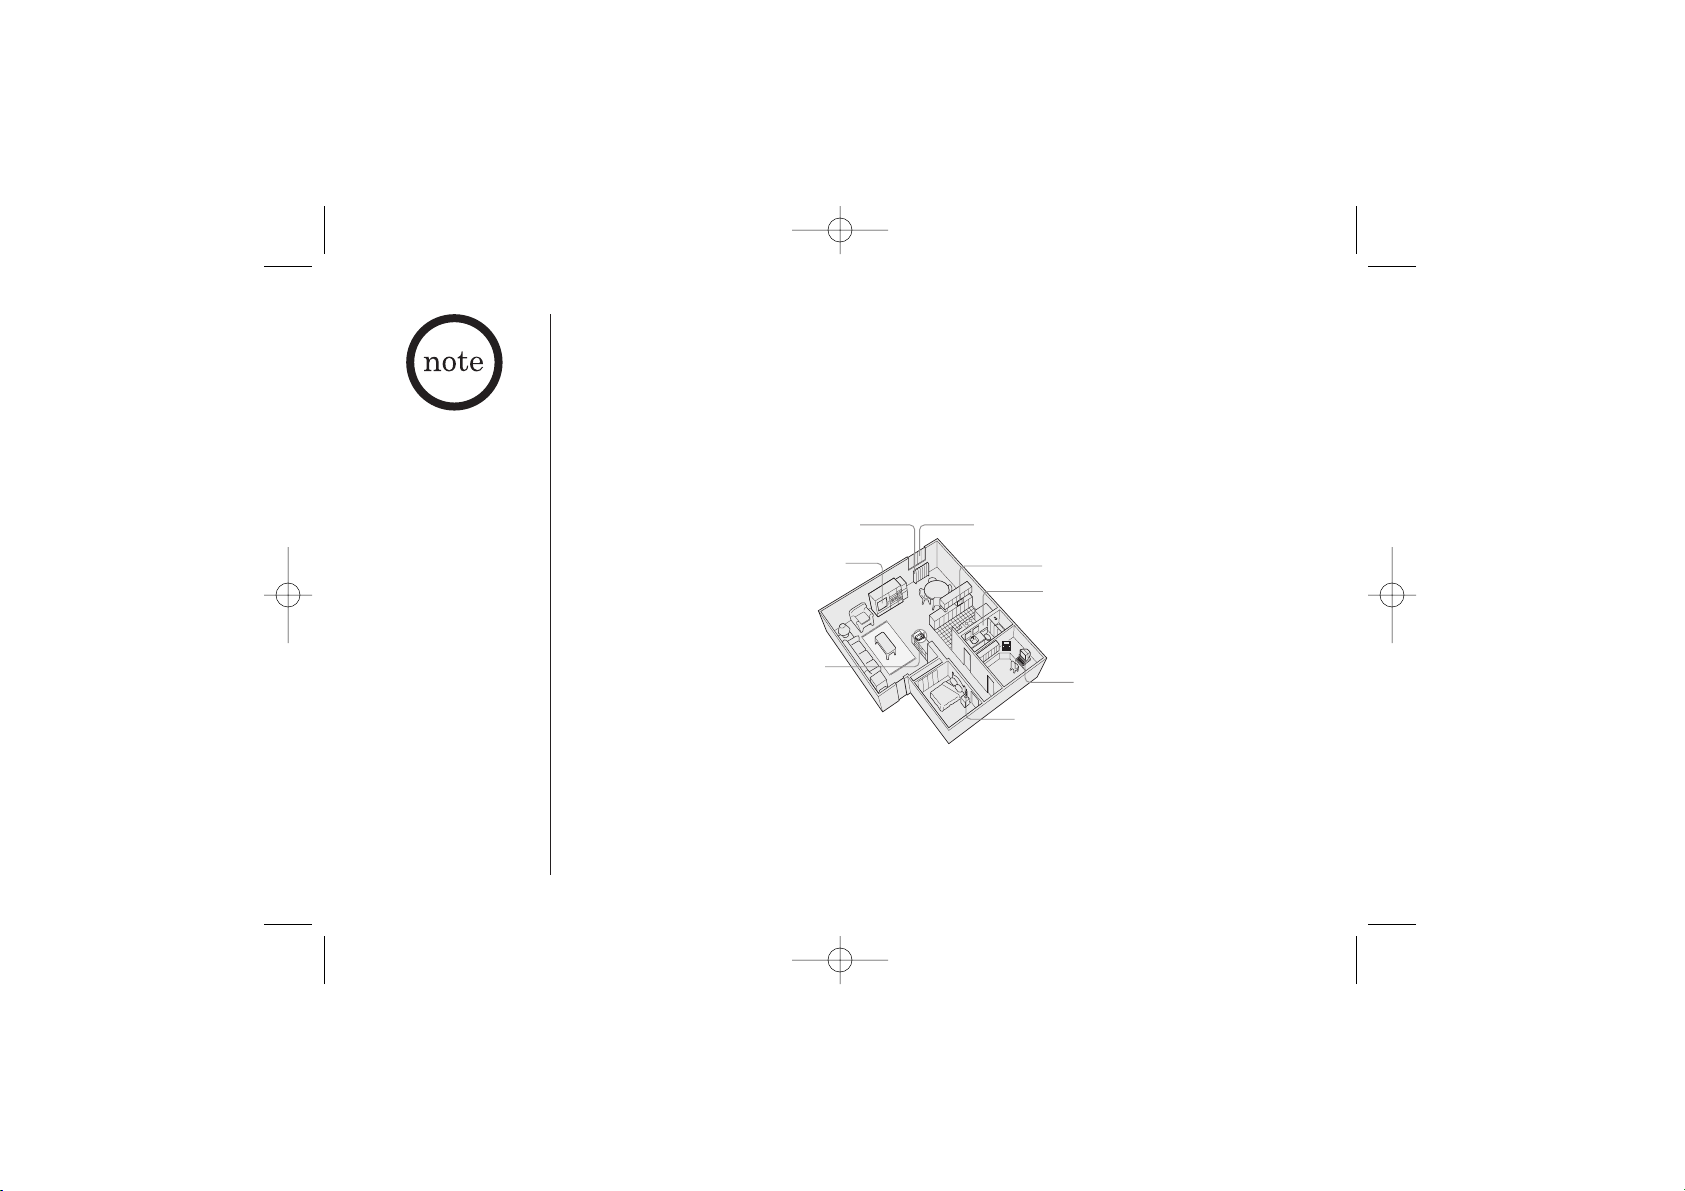
Before choosing a location for your new phone, read the INSTALLATION
CONSIDERATIONS included in the PRECAUTIONS AND IMPORTANT SAFETY INSTRUCTIONS
brochure. Here are some important guidelines you should consider:
• The location should be close to both a phone jack and a continuous power outlet
which is not switchable.
• Keep the base and handset away from sources of electrical noise such as motors,
microwave ovens, and fluorescent lighting.
• Be sure there is sufficient space to raise the base antenna to a vertical position.
• The base can be placed on a desk, tabletop, or mounted on a standard wall plate.
Avoid excessive moisture,
extremely low temperatures,
dust, mechanical vibration,
or shock
Avoid heat sources, such as radiators,
air ducts, and sunlight
Avoid television sets and other
electronic equipment
Avoid noise sources such as a window
by a street with heavy traffic
Avoid microwave ovens
Avoid personal computers
Avoid other cordless telephones
Choose a central location
If your home has
specially wired alarm
equipment connected to
the telephone line, be
sure that installing the
system does not disable
your alarm equipment.
If you have questions
about what will disable
your alarm equipment,
contact your telephone
company or a qualified
installer.
EXT3165-01/22 1/22/03 7:37 PM Page 8
Page 8
GETTING STARTED
GETTING STARTED [ 9 ]www.uniden.com
B. Install the rechargeable battery pack into the handset
The handset is powered by a rechargeable battery pack.
The battery recharges automatically when the handset is
placed in the base unit.
Charge the handset battery pack for at least 15-20
hours before using your new cordless telephone for the
first time! To maximize the charge capacity of your battery
pack, DO NOT plug the telephone cord into the base unit
and wall jack until the battery is fully charged.
1) Press down on the handset battery case cover (use the
finger indention for a better grip) and slide the cover
downward to remove.
2) Plug the battery pack connector (red & black wires) into
the small, black jack inside the battery compartment.
(The connector notches fit into the grooves of the jack only
one-way.) Match the wire colors to the polarity label in the
battery compartment, connect the battery and listen for
a click to insure connection.
3) Make certain you have made a good connection by slightly
pulling on the battery wires to insure that there is a secure
connection. If the battery connector is not securely
connected, the handset will not charge properly.
• Use only the Uniden
(BT-905)
rechargeable battery
pack supplied with
your cordless
telephone.
• Replacement batteries
are also available
through the Uniden
Parts Department at
(800) 554-3988,
Monday thru Friday
from 8:00 a.m. to
5:00 p.m. or online at
www.uniden.com
EXT3165-01/22 1/22/03 7:37 PM Page 9
Page 9
GETTING STARTED[ 10 ] www.uniden.com
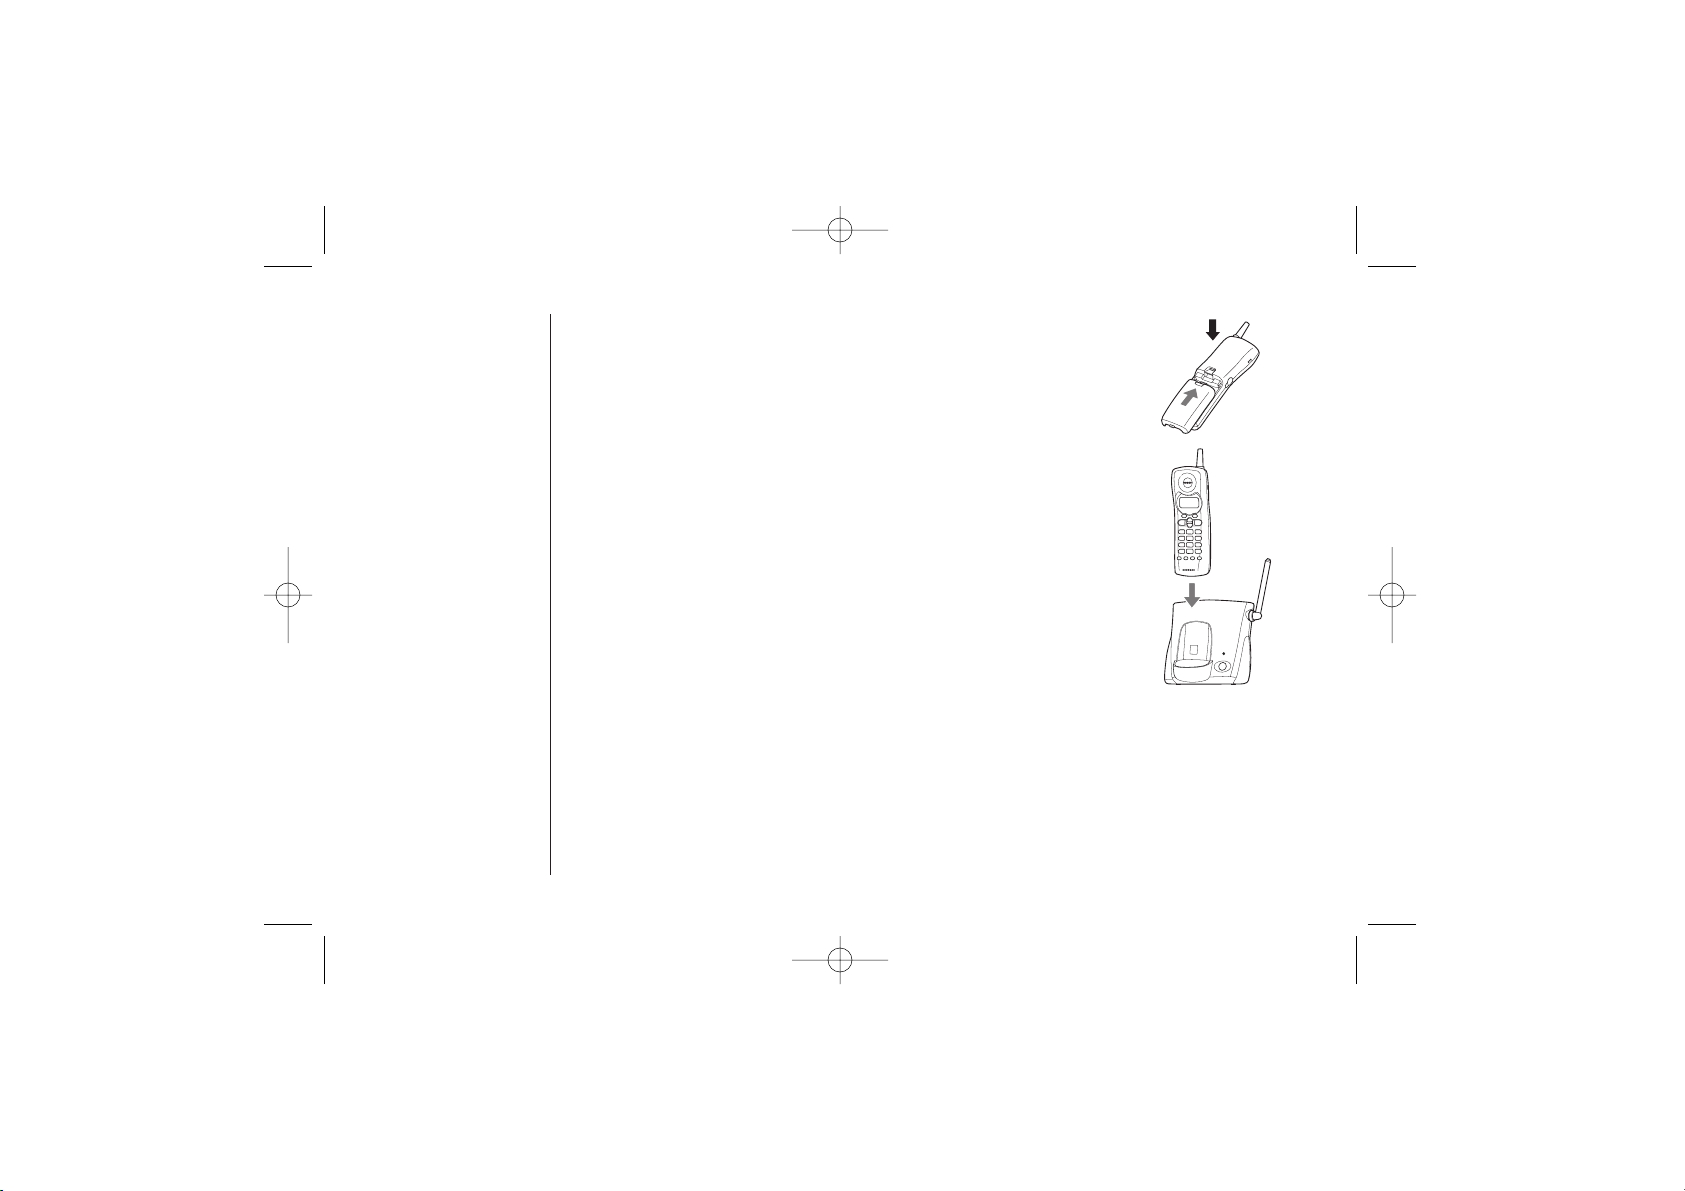
4) Place the battery case cover back on the handset by sliding
it upwards until it clicks into place.
5) Place the handset in the base unit for 15-20 hours without
interruption. The base unit’s LED light labeled (charge/in
use/voicemail) illuminates once the handset is placed in
the base. The LED light will illuminate regardless if the
battery pack is connected or not.
DO NOT rely on the LED light as an indicator that the
battery pack is connected and the handset is charging!
If the base charge/in use/voicemail LED light does not
illuminate:
• Check to see if the AC adapter is plugged into the base
unit and the electrical wall outlet properly. (Use only the
supplied AC adapter. Do not use any other AC adapter.)
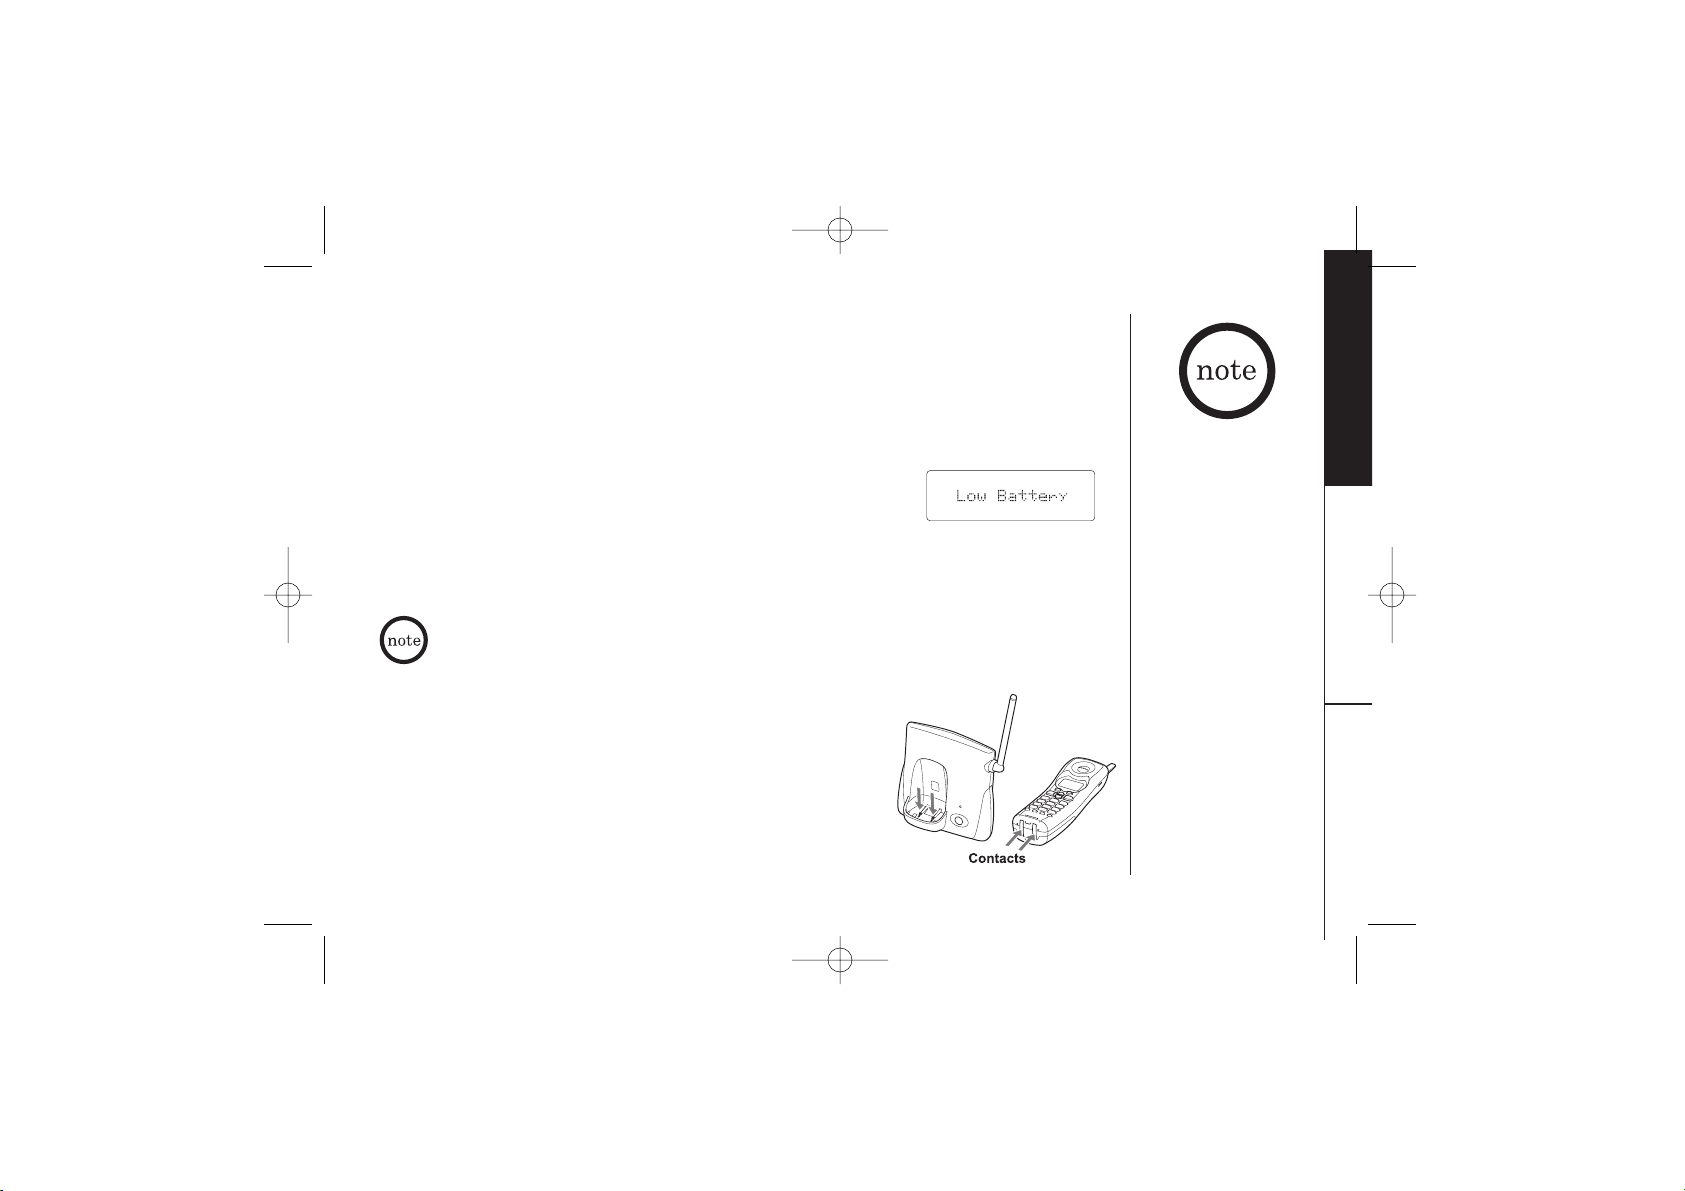
• Check to see if the handset is sitting correctly in the
base and making good contact with the base unit’s
charging contacts.
EXT3165-01/22 1/22/03 7:37 PM Page 10
Page 10
GETTING STARTED
GETTING STARTED [ 11]www.uniden.com
• Even when the
battery pack is not
being used, it will
gradually discharge
over a long period
of time. For optimum
performance, be sure
to return the handset
to the base unit after
a telephone call.
• Talk Mode The handset is off the
base and talk/flash
has been pressed
enabling a dial tone.
• Standby Mode The handset is not in
use, off the base and
talk/flash has not
been pressed. A dial
tone is not present.
Cleaning the charging contacts
To maintain a good charge, it is important to clean the
charging contacts on both the handset and base unit once
a month. Use a dry cloth or pencil eraser to clean. If the
contacts become very dirty, using water only, dampen a
cloth to clean the charging contacts. Then make sure to
go back over the charging contacts with a dry cloth before
returning the handset to the base to charge.
The last number dialed in the redial memory, as well as,
the names and the numbers stored in the memory
locations are retained for up to 30 minutes while you
replace the battery pack.
Low battery alert
When the battery pack is very low and needs to be charged,
the phone is programmed to eliminate functions in order to
save power. If the phone is not in use, ¨
Low Battery¨
appears on the LCD and none of the keys will operate.
If the phone is in use, ¨
Low Battery¨ flashes and the
handset beeps. Complete your conversation as quickly as
possible and return the handset to the base unit for charging.
Battery use time (per charge)
From fully charged (15-20 hours charge time)
• Up to seven hours continuous use during talk mode
• Up to fourteen days when the handset is in the standby mode
EXT3165-01/22 1/22/03 7:37 PM Page 11
Page 11
GETTING STARTED[ 12 ] www.uniden.com
Place the power cord so
that it does not create
a trip hazard or where
it could become chafed
and create a fire or
electrical hazard.
Use only the supplied
AD-446 AC adapter.
Do not use any other
AC adapter.
• Connect the AC adapter to a continuous power supply.
• Place the base unit close to the AC outlet so that you can unplug the AC adapter easily.
C. Connect the base unit
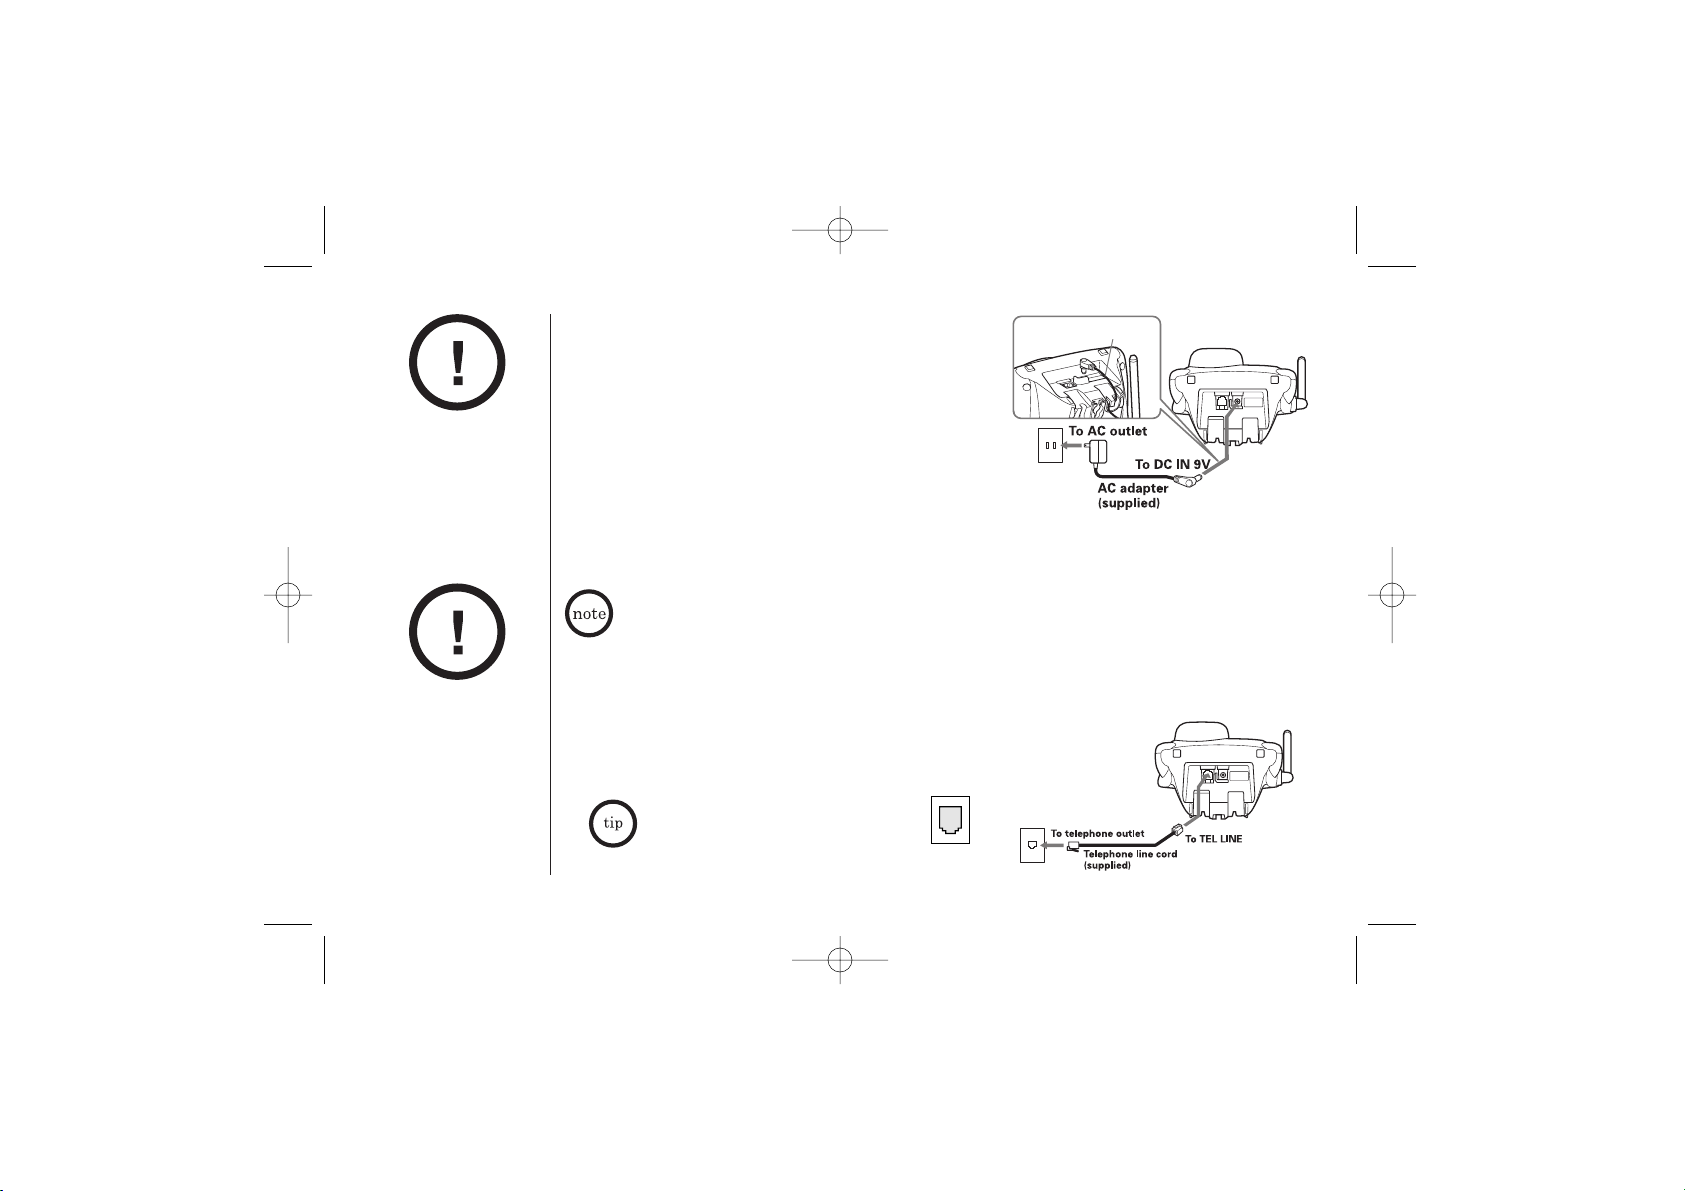
1) Connect the AC adapter to the DC IN 9V jack
and to a standard 120V AC wall outlet.
2) Set the base on a desk or tabletop, and
place the handset on the base unit.
3) Make sure that the charge/in use/voicemail LED illuminates.
If the LED does not illuminate, check to see that the AC adapter is plugged in
and that the handset makes good contact with the base charging contacts.
Route the cord.
• After installing the battery pack in the handset, charge your handset at least 15-20
hours before plugging into the phone line.
4) Once the handset battery packs are fully charged, connect the
telephone line cord to the TEL LINE jack and to a telephone
outlet once the handset is fully charged.
Modular
If your telephone outlet isn't modular,
contact your telephone company
for assistance.
EXT3165-01/22 1/22/03 7:37 PM Page 12
Page 12
GETTING STARTED
GETTING STARTED [ 13]www.uniden.com
Mounting the Base Unit on a Wall
Standard wall plate mounting
This phone can be mounted on any standard wall plate.
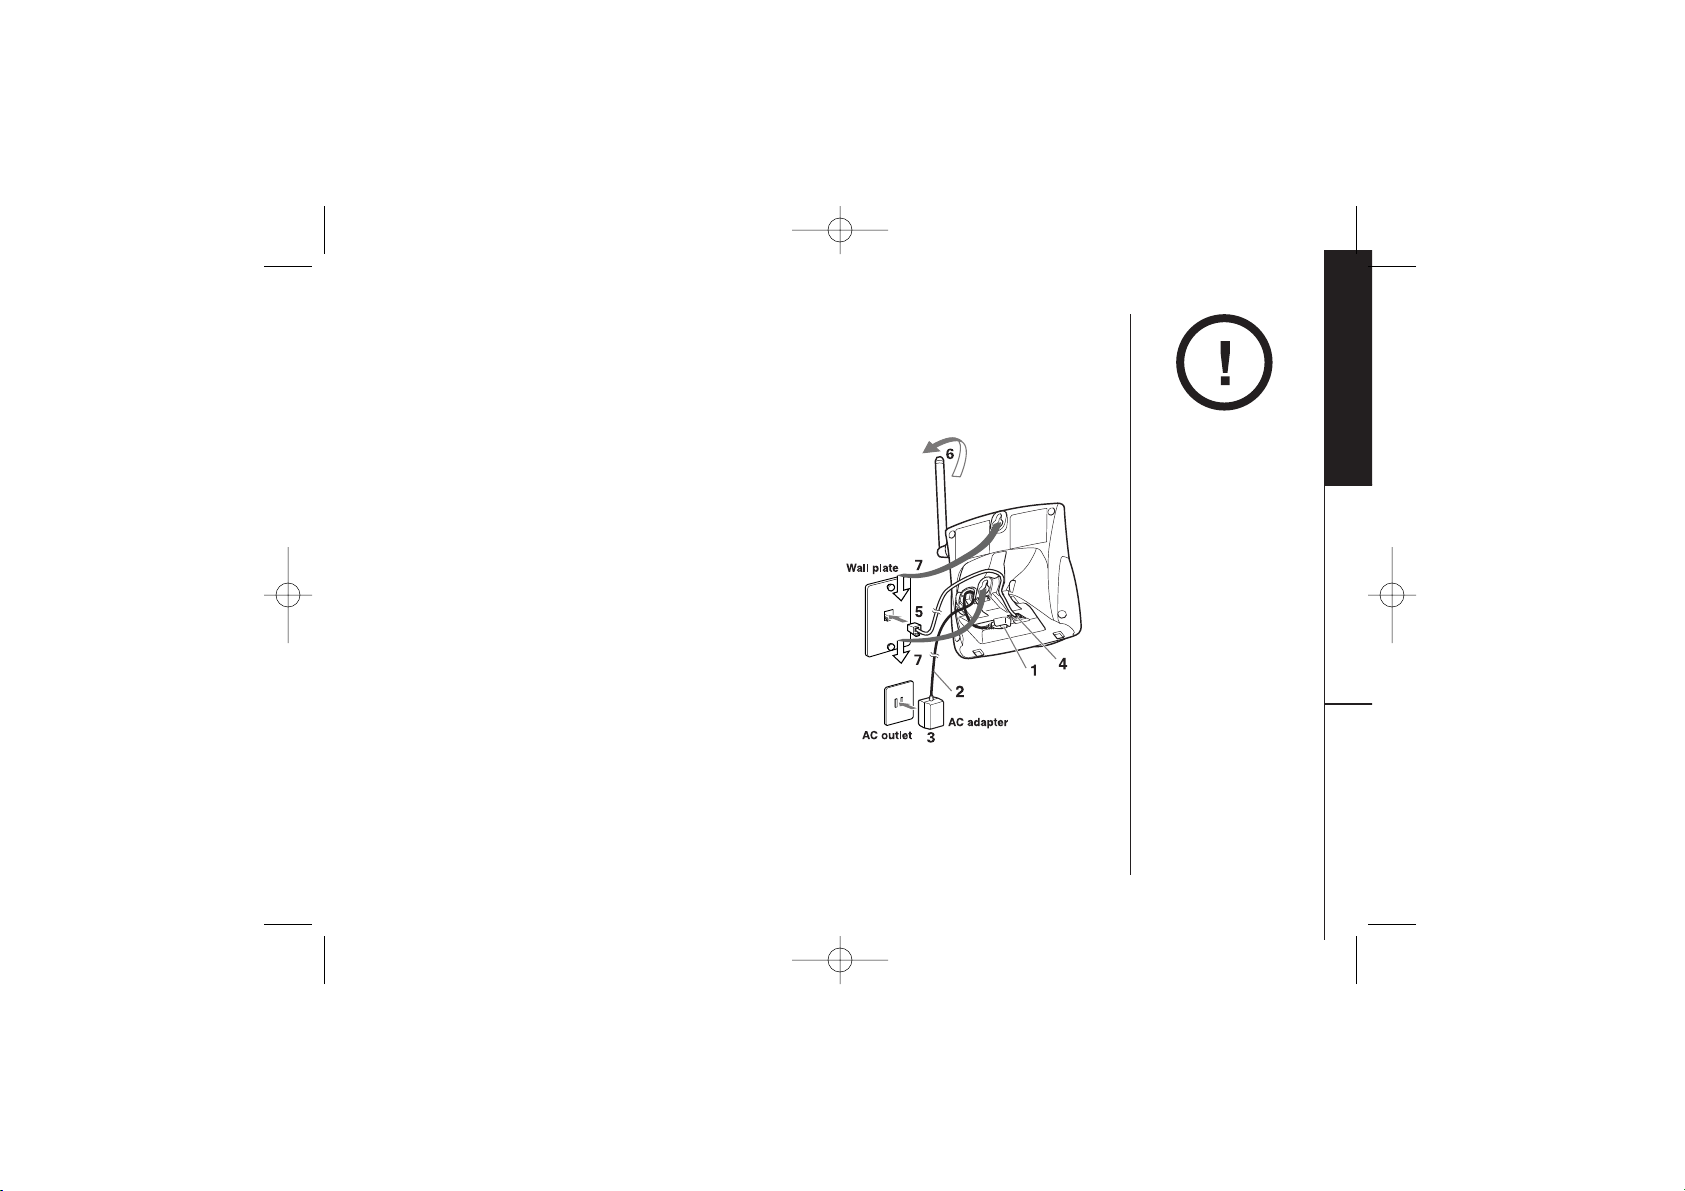
1) Plug the AC adapter into the DC IN 9V jack.
2) Wrap the AC adapter cord inside the molded
wiring channel as shown.
3) Plug the AC adapter into a standard 120V AC
wall outlet.
4) Plug the telephone line cord into the TEL LINE
jack. Wrap the cord inside the molded wiring
channel as shown.
5) Plug the telephone line cord into the telephone
outlet.
6) Raise the antenna to a vertical position.
7) Align the mounting slots on the base with the
mounting posts on the wall. Then push in and down
until the phone is firmly seated.
DO NOT use an AC
outlet controlled by
a wall switch.
EXT3165-01/22 1/22/03 7:37 PM Page 13
Page 13

GETTING STARTED[ 14 ] www.uniden.com
Direct wall mounting
If you don't have a standard wall plate, you can mount your phone directly to the
wall. Before doing this, consider the following:
• Avoid electrical cables, pipes, or other items behind the mounting location that
could cause a hazard when inserting screws into the wall.
• Try to mount your phone within 5 feet of a working phone jack to avoid excessive
lengths.
• Make sure the wall material is capable of supporting the weight of the base
and handset.
• Use #10 screws (minimum length of 1-3/8 inches) with anchoring devices suitable
for the wall material where the base unit will be placed.
1) Insert two mounting screws into the wall, (with their
appropriate anchoring device), 3-15/16 inches apart.
Allow about 1/8 of an inch between the wall and screw heads
for mounting the phone.
2) Refer to steps 1 through 7 on page 13 to mount the telephone.
EXT3165-01/22 1/22/03 7:37 PM Page 14
Page 14
GETTING STARTED
GETTING STARTED [ 15]www.uniden.com
Setting Menu Options
There are five setup options available. They are Caller ID options [AutoTalk, CIDCW
(Caller ID on Call Waiting), Area Code], Dial Mode and Language.
AutoTalk allows you to answer the phone without pressing the talk/flash button.
If the phone rings when AutoTalk is On, simply remove the handset from the base
and the phone automatically answers the call. If the phone rings when AutoTalk
is Off, you must press talk/flash to answer the call.
Caller ID options
To change your AutoTalk and CIDCW:
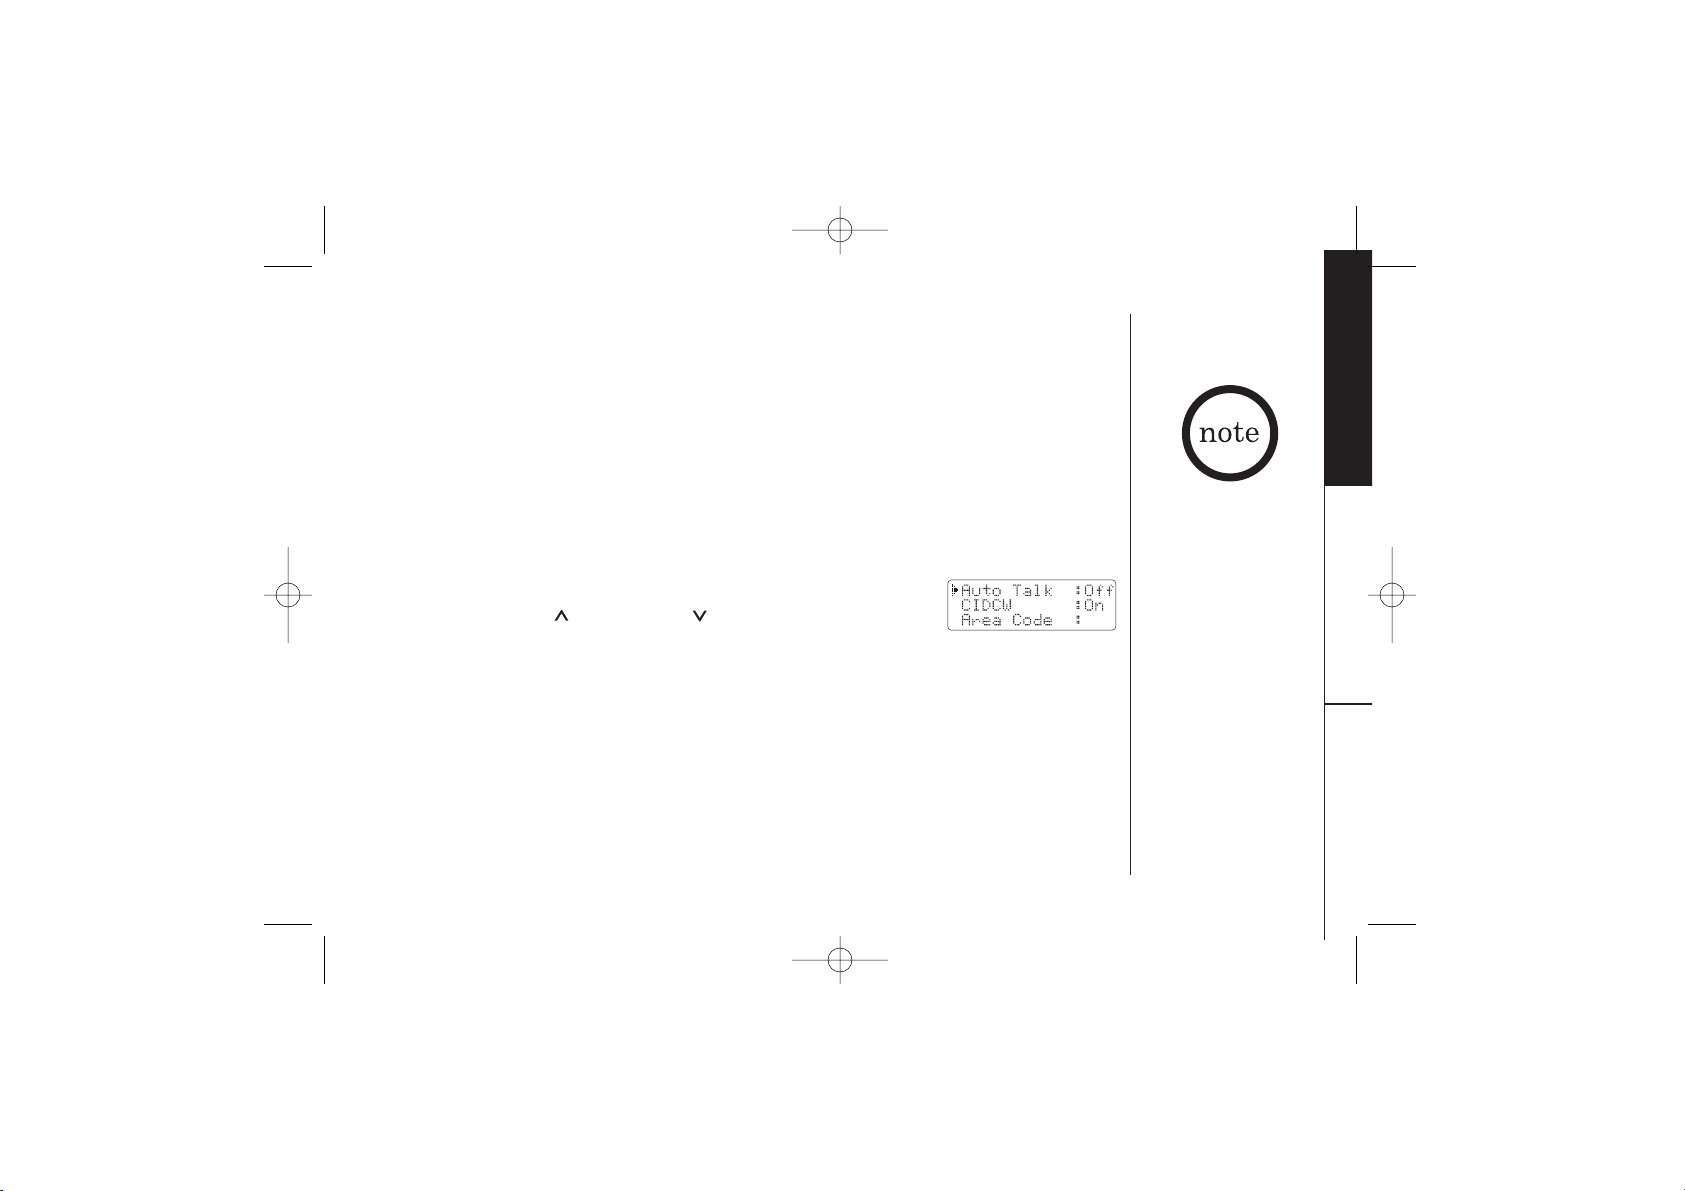
1) Press and hold cid/menu. The following screen appears.
2) Use the vol/ring/ or vol/ring/ key to move the pointer
to the selection that you would like to change.
Press select to toggle between ¨
On¨ and ¨Off¨ for AutoTalk and CIDCW.
3) Press end and return the handset to the base unit to complete the setting.
The handset returns to the standby mode.
To enter your Area Code
If you enter a 3-digit area code number in the
Area Code option, your local area
code does not appear in Caller ID messages. Do not program this option, if your
calling area requires 10-digit dialing. When reviewing Caller ID messages, you will
see only the local seven digit number. For calls received from outside your local area
code, you will see a full 10-digit number.
• If your calling area
requires 10-digit
dialing, do not
program this option.
• The Cordless phone
features include
AutoTalkTMand
AutoStandbyTM.
AutoStandby allows
you to hang up by
simply returning the
handset to the base.
EXT3165-01/22 1/22/03 7:37 PM Page 15
Page 15
GETTING STARTED[ 16 ] www.uniden.com
Make sure your battery
pack is fully charged
before choosing the
dialing mode.
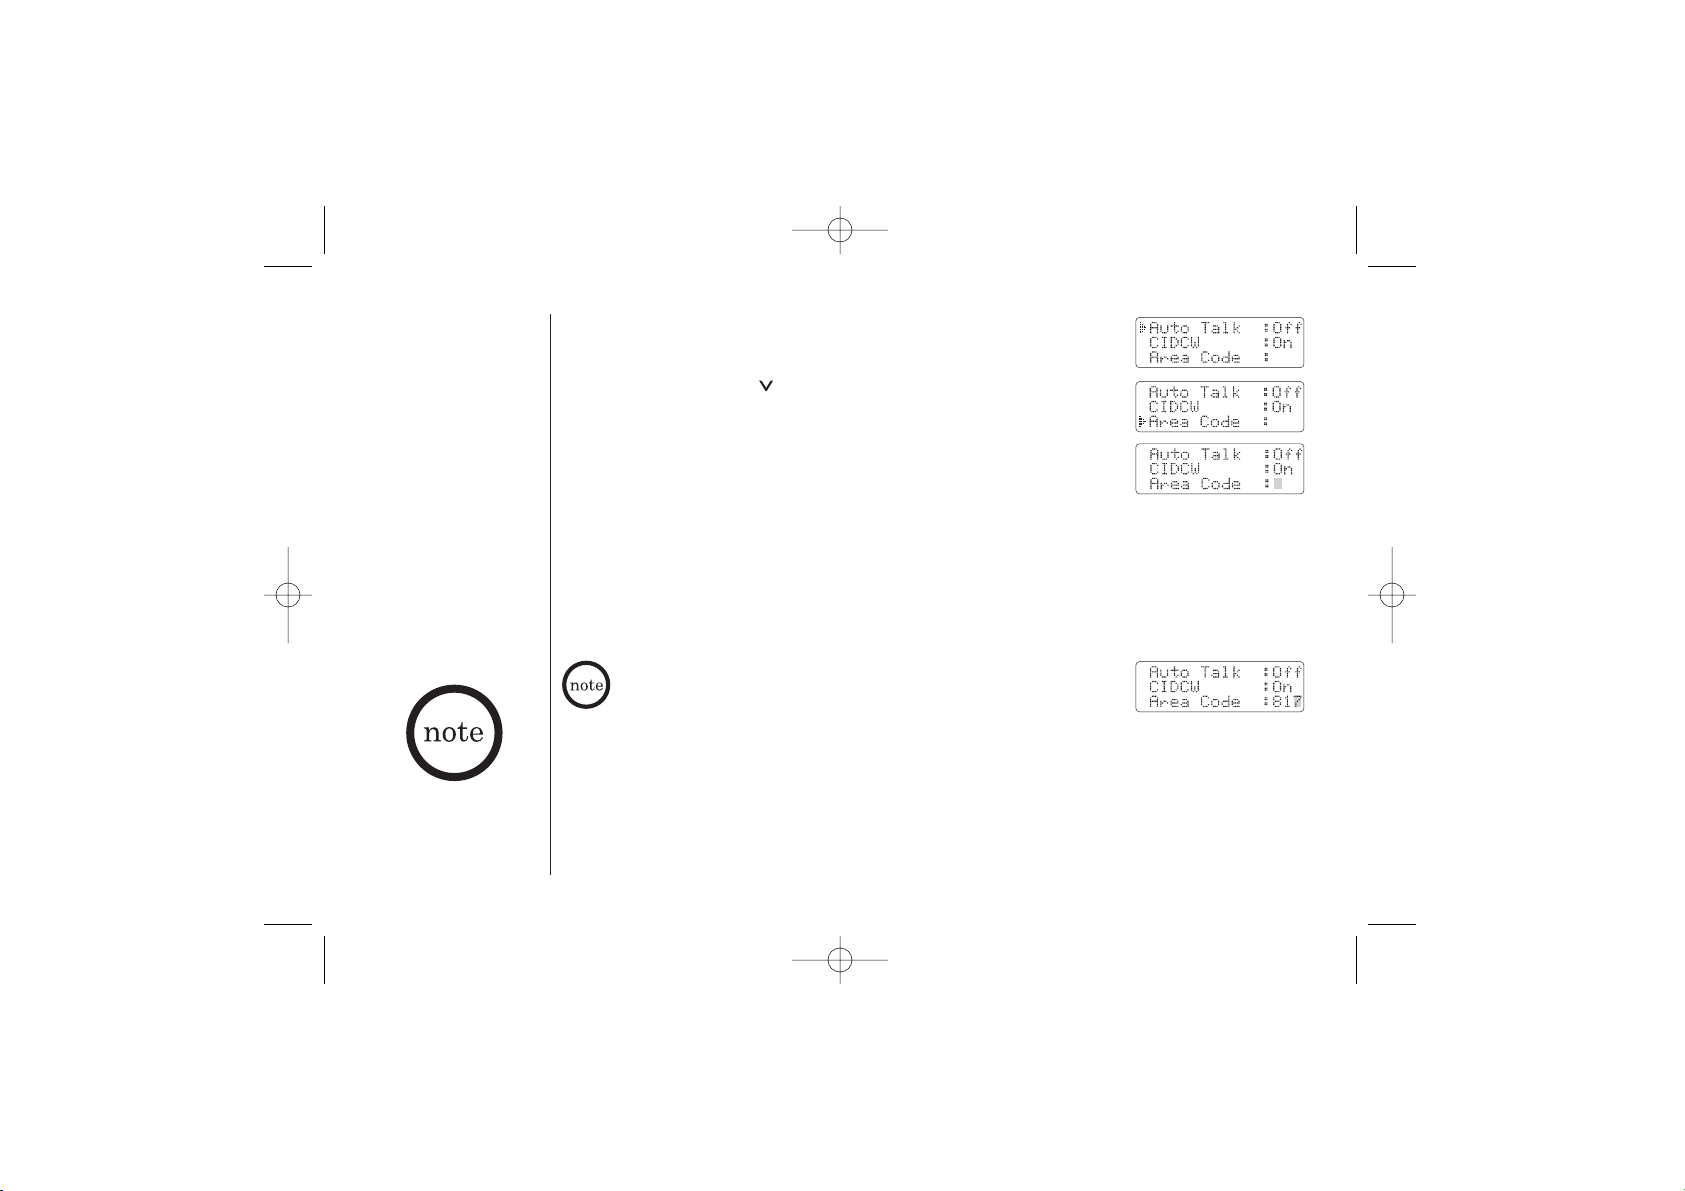
1) When the phone is in the standby mode, press and hold
cid/menu. The Caller ID setting screen appears.
2) Press the vol/ring/ key twice to select ¨
Area Code¨.
3) Press select.
4) Use the number keys (0 - 9), or delete/ch to enter the
3-digit area code.
5) Press select. A confirmation tone sounds and the displayed area code is entered.
6) Press end or return the handset to the base unit to complete the setting.
The handset returns to the standby mode.
When the area code has already been stored in memory, the
stored area code will be displayed. To change it, use the
delete/ch and number keys to enter the new area code.
Then press select. A confirmation tone sounds. To complete the
setting, press end or return the handset to the base unit.
Choosing the dialing mode
Most phone systems use tone dialing which sends DTMF tones through the phone
lines. However some phone systems still use pulse dialing such as in rural areas.
The default setting is tone dialing. Depending on your dialing system, set the mode
as follows:
EXT3165-01/22 1/22/03 7:37 PM Page 16
Page 16
GETTING STARTED
GETTING STARTED [ 17]www.uniden.com
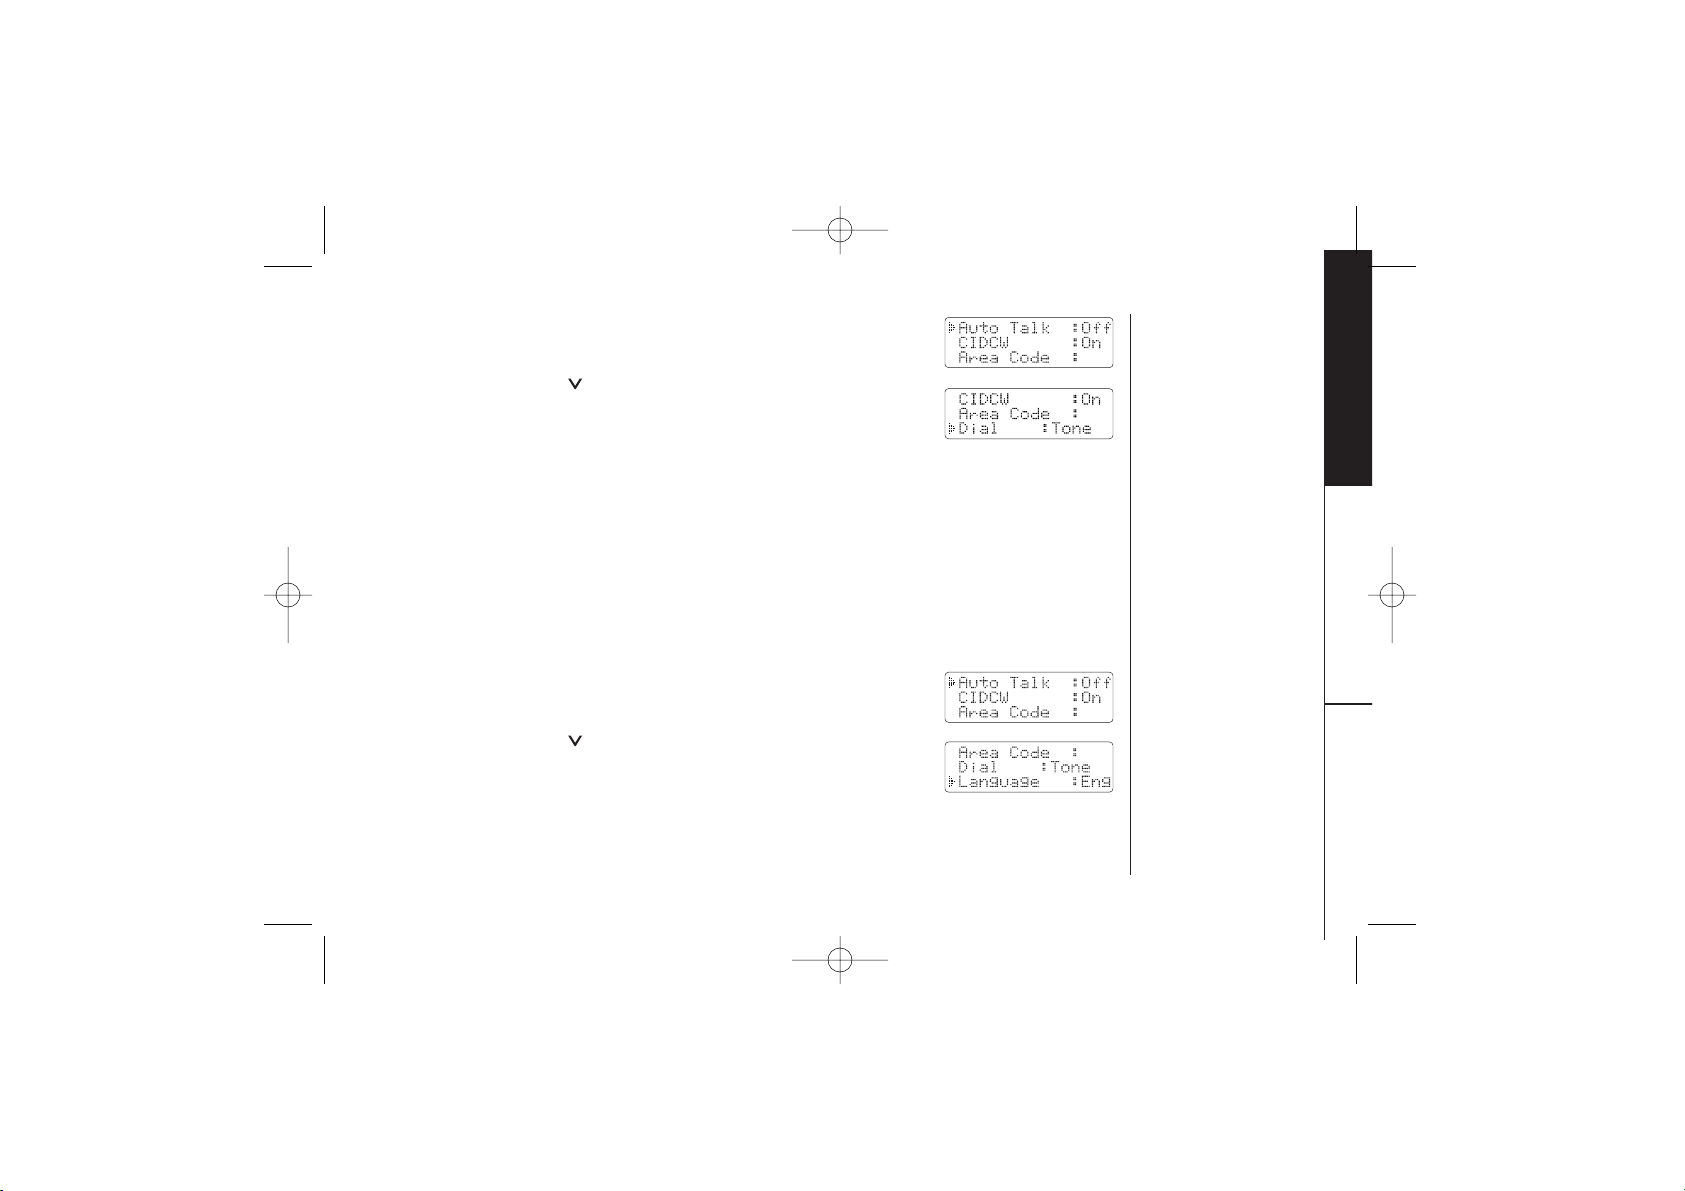
1) When the phone is in the standby mode, press and hold
cid/menu. The following screen appears.
2) Press the vol/ring/ key three times to select ¨
Dial¨.
3) Press select to toggle between ¨
Tone¨ and ¨Pulse¨ for
each setting.
4) Press end or return the handset to the base unit to complete the setting.
The handset returns to the standby mode.
• If you are not sure of your dialing system, set for tone dialing. Make a trial call.
If the call connects, leave the setting as is, otherwise set for pulse dialing.
• If your phone system requires pulse dialing and you need to send the DTMF tones for
certain situations during a call, you may "switch-over" to tone dialing. (Refer to
"Tone Dialing Switch-over" on page 20.)
Setting the language
1) When the phone is in the standby mode, Press and hold
cid/menu. The following screen appears.
2) Press the vol/ring/ key four times to select ¨
Language¨.
3) Press select to toggle between ¨
Eng¨ and ¨Fr.¨ for each
setting.
4) Press end or return the handset to the base unit to complete the setting. The
handset returns to the standby mode.
EXT3165-01/22 1/22/03 7:37 PM Page 17
Page 17
BASICS[ 18 ] www.uniden.com
Making and Receiving Calls
Pick up the handset (AutoTalk)
or pick up the handset and press
talk/flash.
1) Pick up the handset.
2) Press talk/flash.
3) Listen for the dial tone.
4) Dial the number.
OR
1) Pick up the handset.
2)
Dial the number, then press
talk/flash
.
1) Pick up the handset.
2) Press talk/flash.
3) Listen for the dial tone.
4) Press redial/p.
OR
1) Pick up the handset.
2) Press redial/p, then press
talk/flash.
Handset On Base Handset Off Base
To answer
a call
To make
a call
To hang up
To redial
Press talk/flash, any number,
*
/tone/ or #/ keys
(AutoTalk).
1) Press talk/flash.
2) Listen for the dial tone.
3) Dial the number.
OR
Dial the number, then press
talk/flash.
1) Press talk/flash.
2) Listen for the dial tone.
3) Press redial/p.
OR
Press redial/p, then press
talk/flash.
Press end or return the handset to the base (AutoStandby).
Refer to page 15
"Setting Menu Options"
to turn On the AutoTalk
feature if desired.
EXT3165-01/22 1/22/03 7:37 PM Page 18
Page 18
BASICS
BASICS [ 19]www.uniden.com
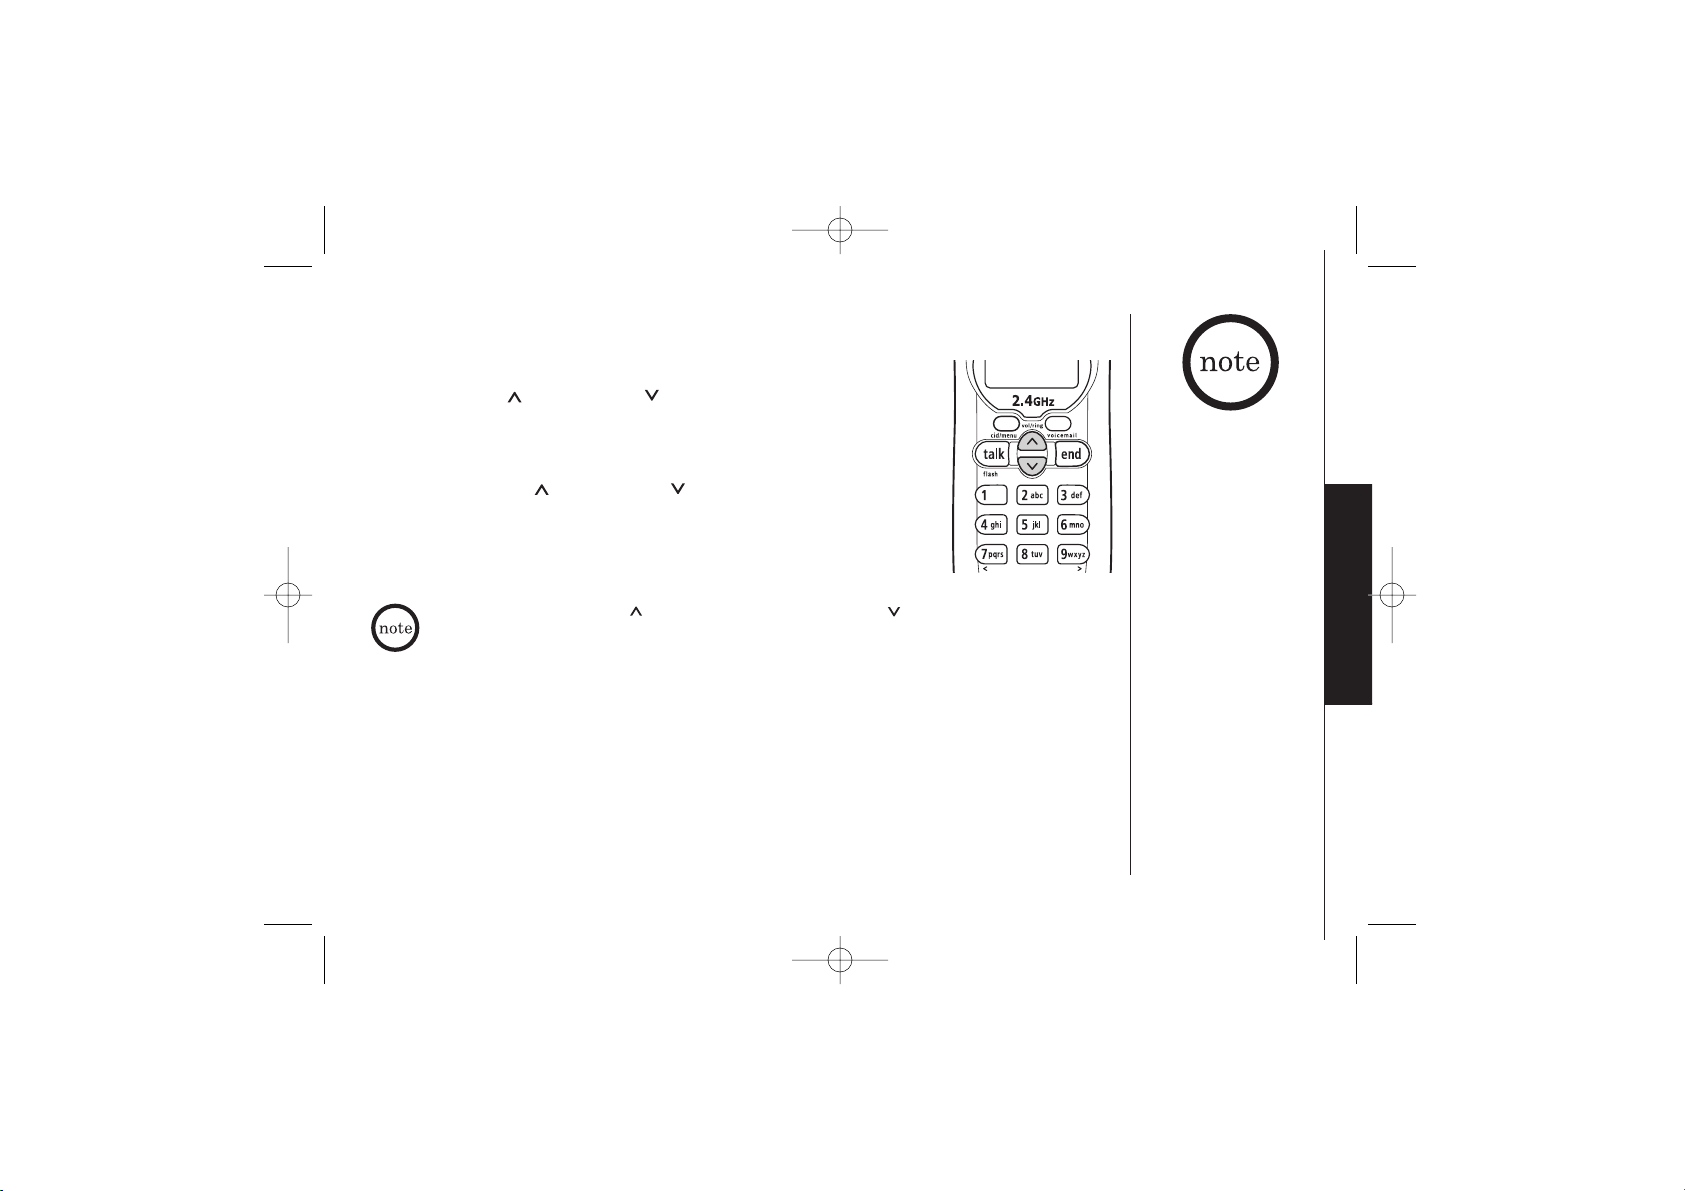
Adjusting the Handset Ringer and Earpiece Volume
Handset ringer tone and volume
Press vol/ring/ or vol/ring/ in standby mode to select one
of five ringer tones and volume combinations.
Earpiece volume
Pressing vol/ring/ or vol/ring/ during a call will change
the earpiece volume of the handset. This setting will remain in
effect after the telephone call has ended.
Temporarily Mute Ringer
If the handset is off the base, simply press the end key to temporarily mute the
incoming ring. The ringer will sound with the next incoming call.
When you press vol/ring/ in Maximum mode or vol/ring/ in
Low mode, an error tone sounds.
If you select “Ringer
Off”, “<Ringer Off>”
appears on the display
when you make or
receive calls, or when
charging the handset.
EXT3165-01/22 1/22/03 7:37 PM Page 19
Page 19
BASICS[ 20 ] www.uniden.com
Redial
The redial/p key redials the last number dialed. The redialed number can be up to
32 digits long.
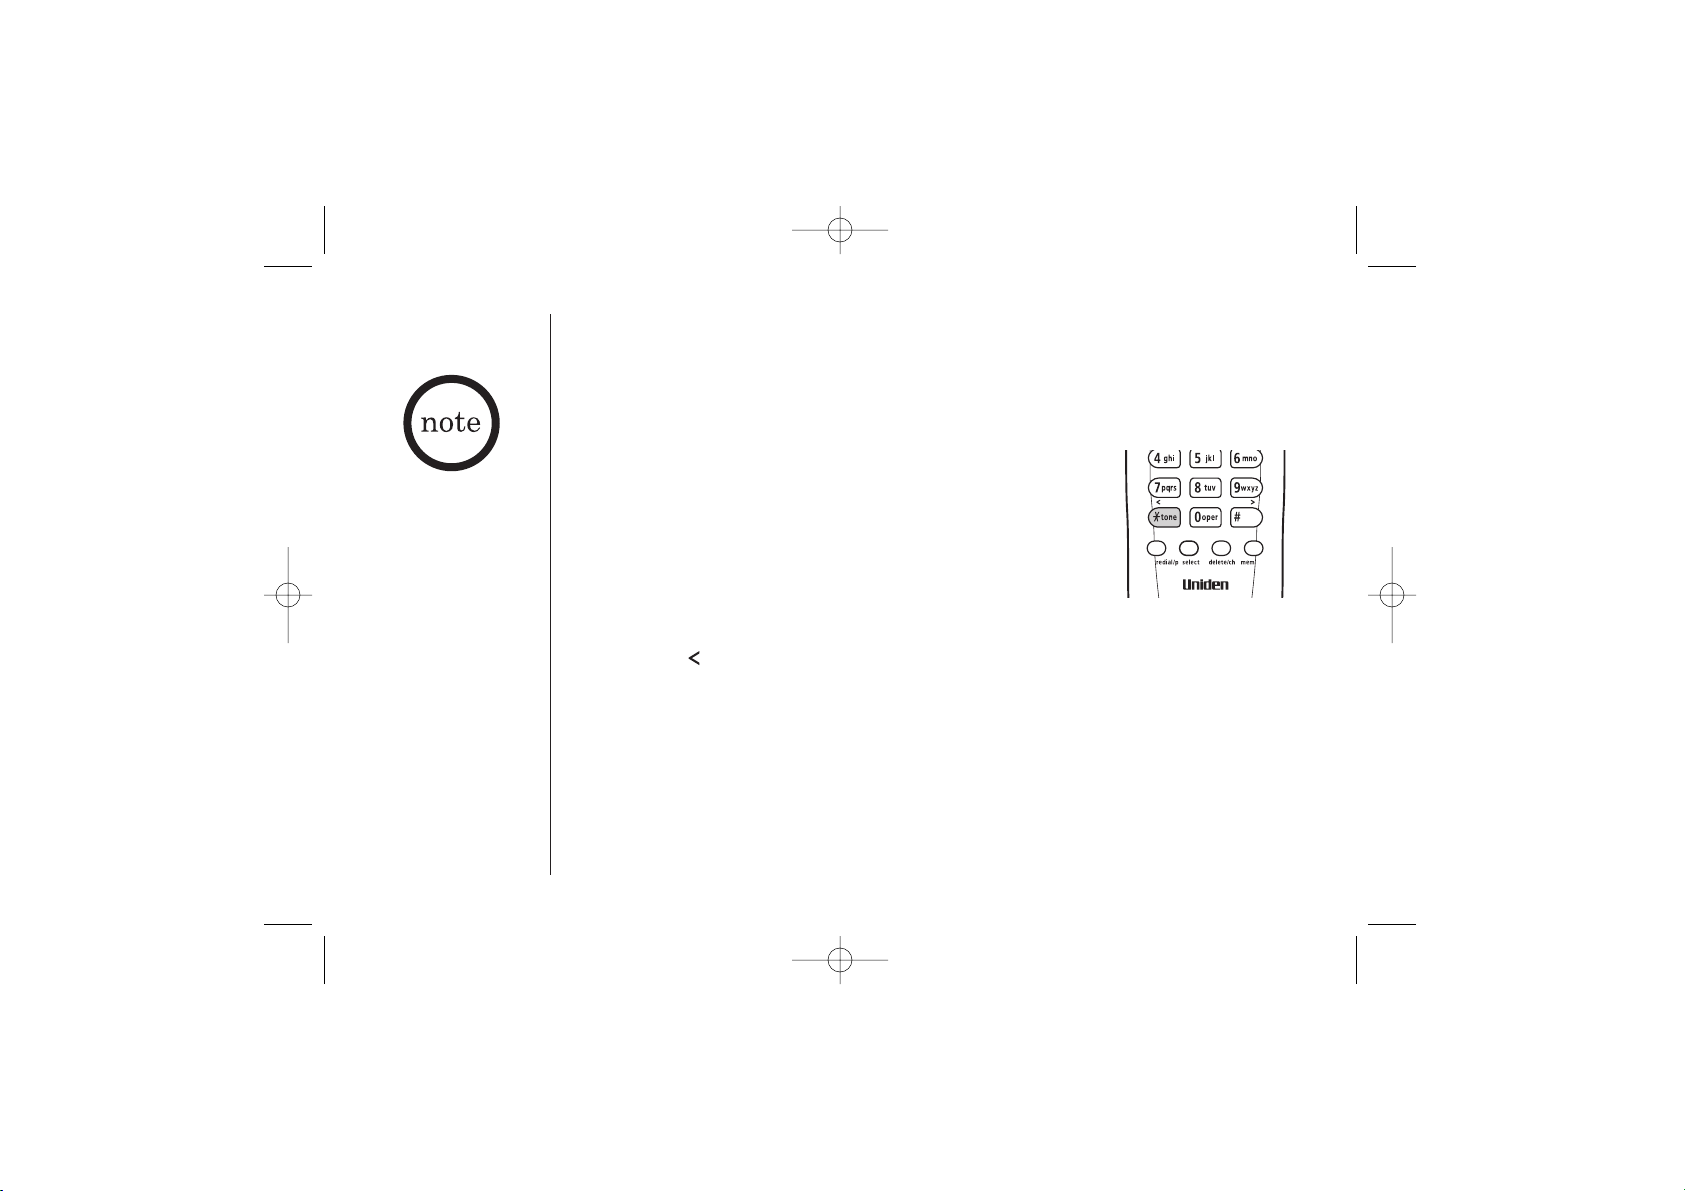
Tone Dialing Switch-over
Some telephone companies use equipment that requires
pulse dialing (sometimes referred to as rotary dialing).
If you need to enter tone dialing digits, you can switchover to tone dialing during the call. For example, entering
your bank account number after you have called your bank.
Initially make your call with the pulse dialing mode. Once your call connects, press
the
*
/tone/ key. Enter the desired number. These digits will be sent as tone
dialing. Once the call ends, the tone mode is canceled and pulse dialing mode
resumes.
Traveling Out-of-Range
During a call, as you begin to move your handset too far from your base unit, noise
increases. If you pass the range limits of the base unit, your call will terminate
within 1 minute.
• The tone feature only
applies when the dial
mode is set to pulse.
• This special number
can be stored in a
memory location. This
is referred to as Chain
Dialing (See page
27.)
EXT3165-01/22 1/22/03 7:37 PM Page 20
Page 20
BASICS
BASICS [ 21]www.uniden.com
The UltraClear Plus
TM
true compander circuitry
virtually eliminates
background noise. This
innovative technology,
together with 20
different channels,
provides you with the
best possible reception
during all your
conversations.
Flash and Call Waiting
If you have "Call Waiting" service and a call waiting tone
sounds while you are on a call, press talk/flash to accept
the waiting call. There is a short pause, then you will hear
the new caller. To return to the original caller, press
talk/flash again.
Page
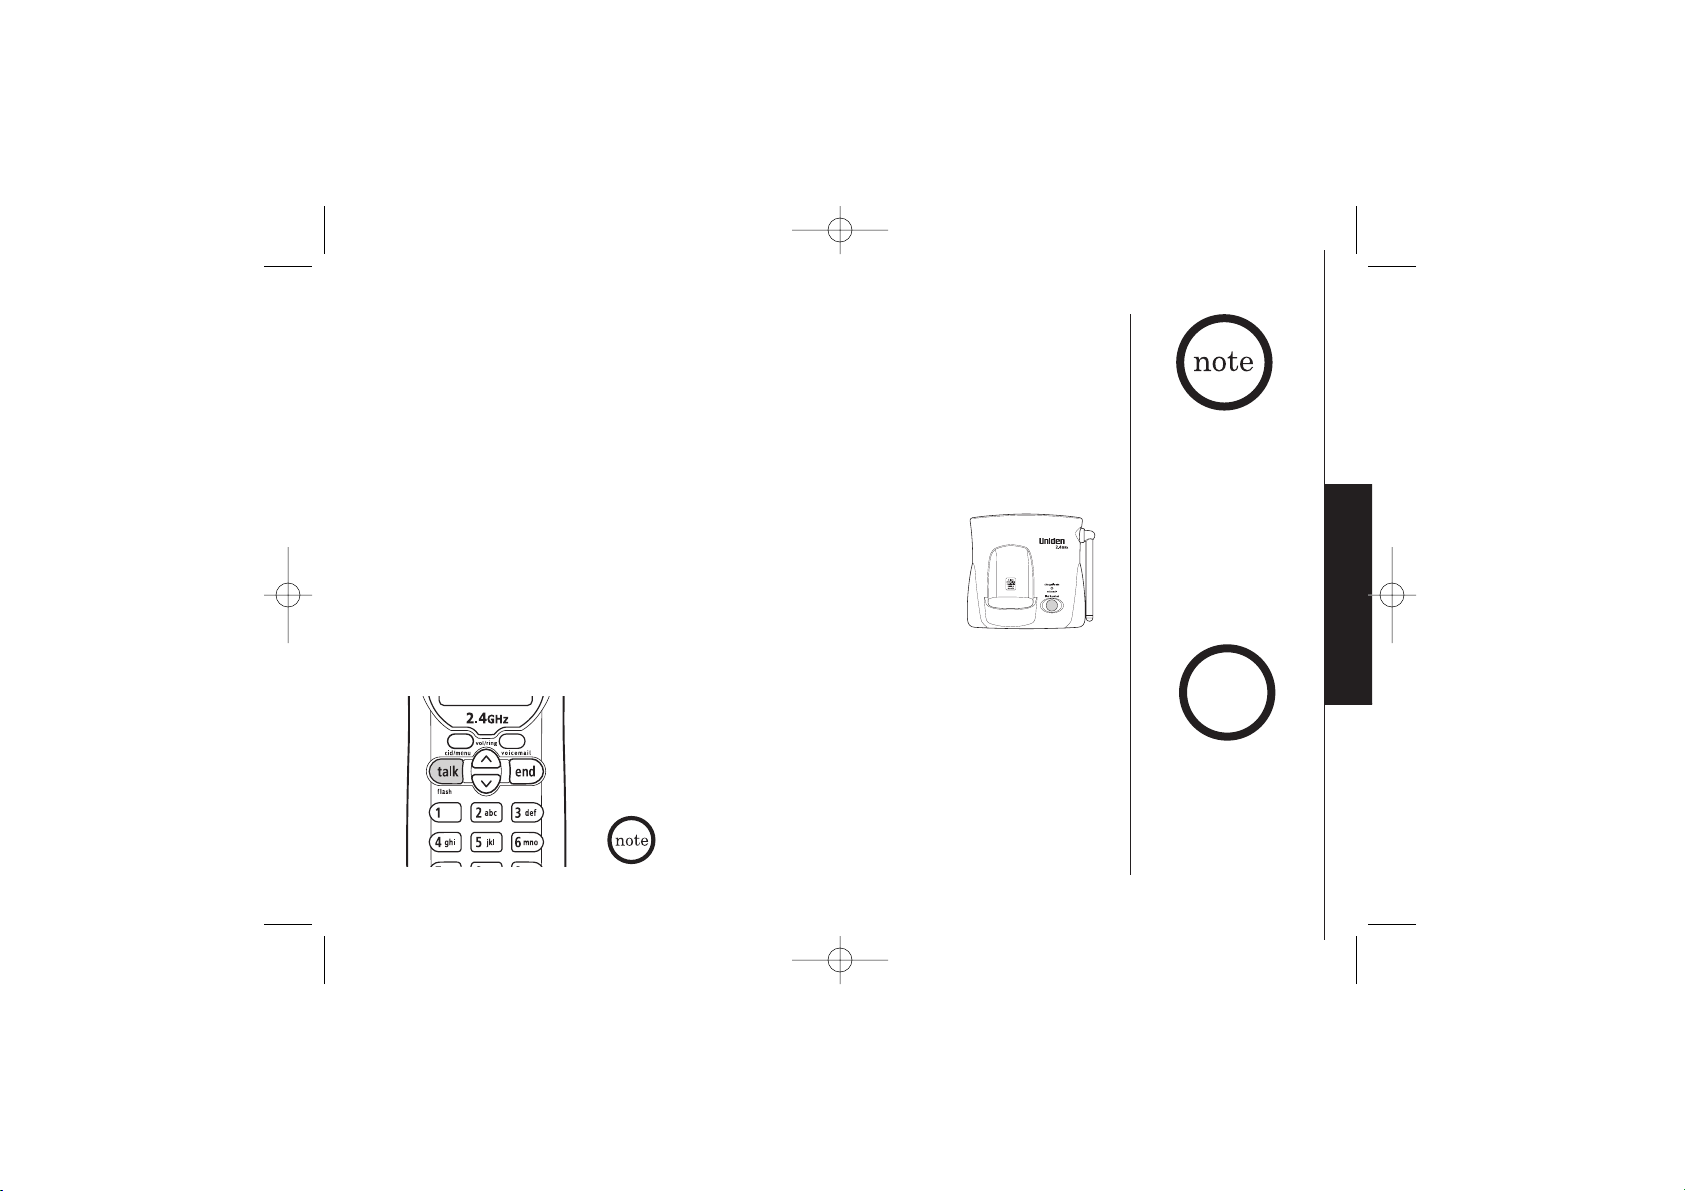
To locate the handset (while it's off the base), press
find handset on the base. The handset beeps for 60 seconds.
Paging is canceled when pressing any key or the handset is
returned to the base.
Selecting a Different Channel
If you encounter interference while using your phone, you can manually change the
phone´s channel for clear operation. This function works only when the phone is
in use. Press delete/ch. ¨
Scanning¨ appears on the display, indicating the phone
is changing to another channel. For more information on interference, refer to
"Precautions" on page 45.
You can cancel paging
by pressing the find
handset key on
the base.
hints
You must subscribe through your local telephone company to
receive Call Waiting Service.
EXT3165-01/22 1/22/03 7:37 PM Page 21
Page 21
MEMORY DIALING[ 22 ] www.uniden.com
Storing Phone Numbers and Names
Memory Dialing allows you to dial a number using just a few key presses.
Your cordless telephone stores up to 20 names/numbers in the handset.
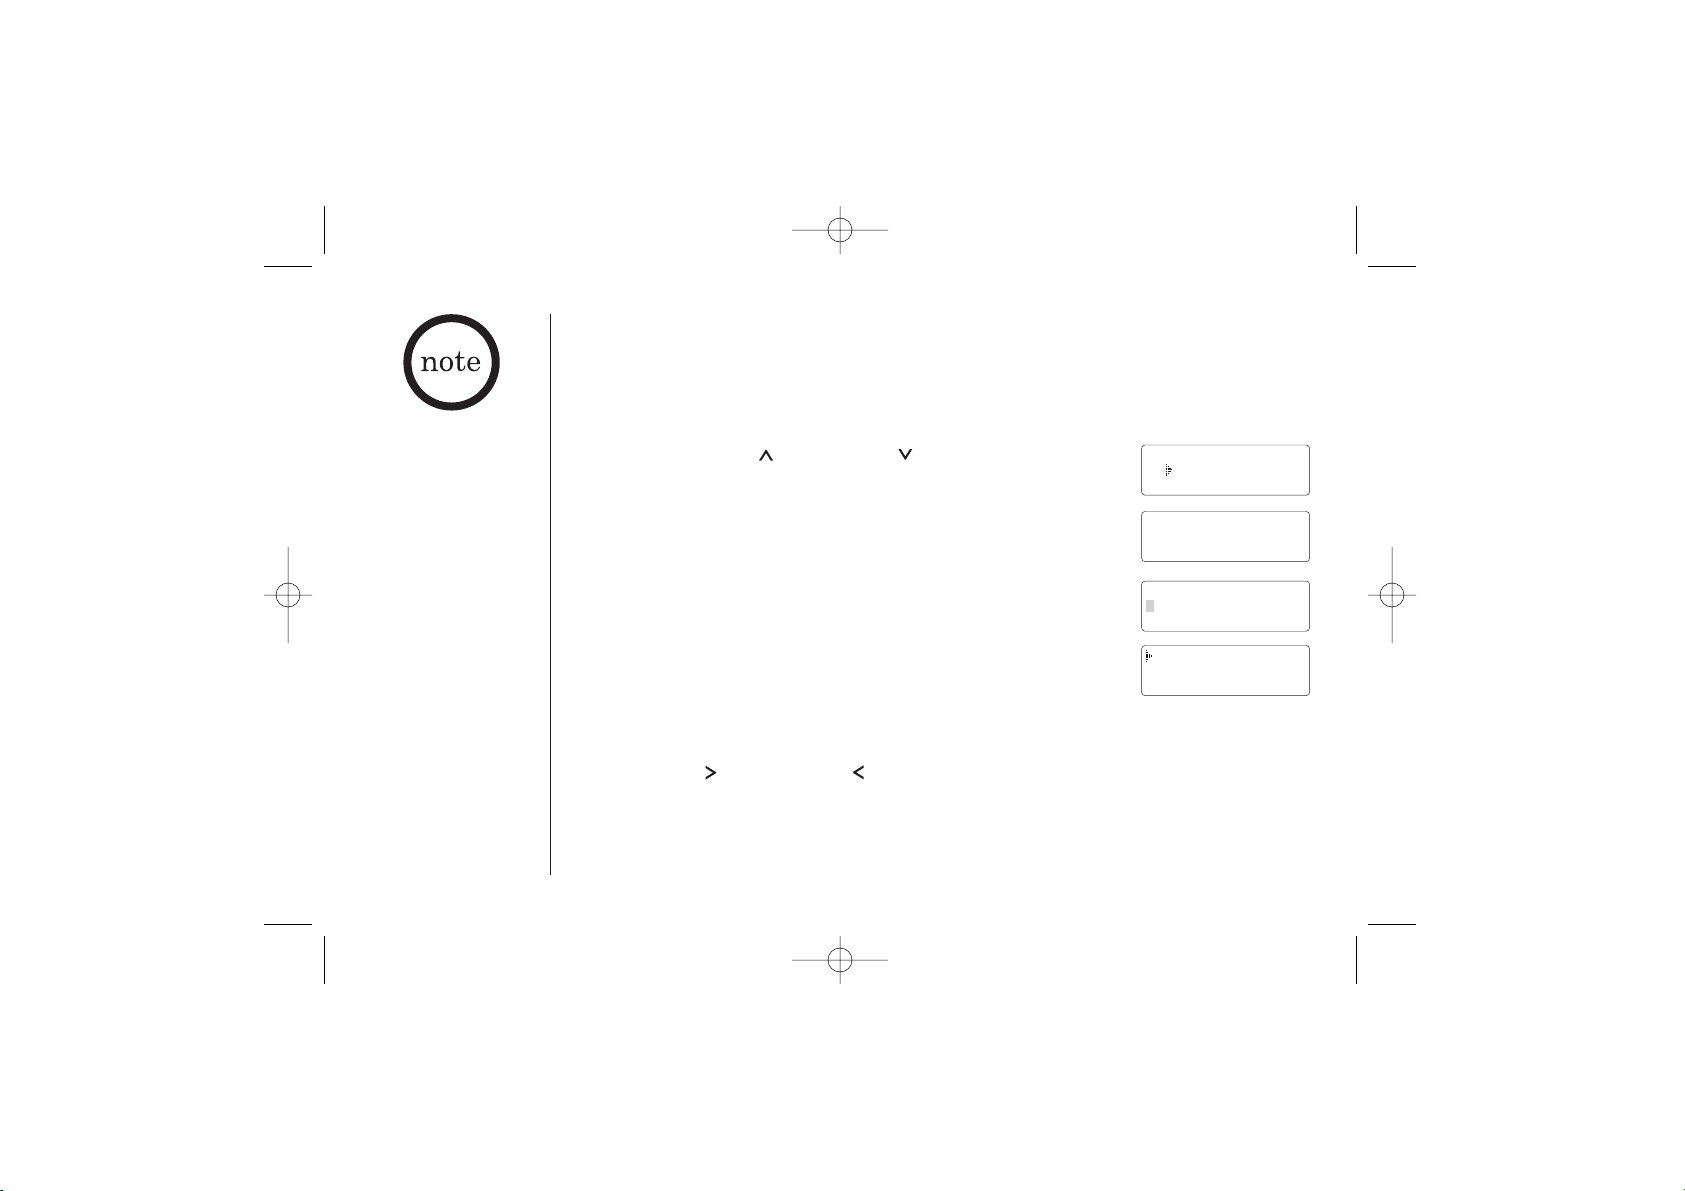
1) Press mem, ¨
Select Memory¨ is displayed.
2) Press the vol/ring/ or vol/ring/ key, or enter a number
(01 - 20) to select the memory location where you would
like to store the number.
3) Press mem or select.
4) Press mem or select. The following screen appears and a
cursor flashes indicating that the display is ready for the
name to be entered.
If this screen appears, the selected memory location is
already stored. Then you must either edit the entry in
this location, delete the entry in this location, or select
¨
Go Back¨ to choose another location.
5) To enter a name (up to 13 characters), use the number keys.
• See the "Steps for entering names and special characters". (See page 25).
• Use the #/ and
*
/tone/ key to move the cursor to the desired location.
• Use delete/ch to delete characters as needed.
• Press and hold delete/ch to delete all the characters.
• If a name is not required, go to step 6.
• In memory dialing
operation, you must
press a key within 30
seconds or the phone
will return to the
standby mode. If you
return the handset to
the base, the phone
will return to the
standby mode also.
• You have 30 seconds
after pressing mem to
enter the number you
wish to store.
Otherwise, an error
tone will sound.
EXT3165-01/22 1/22/03 7:37 PM Page 22
Select Memory
01
02 JOHN DOE
01:(Empty)
Press Select
to edit
Store Name
Edit Memory01
Delete Memory01
Go Back
Page 22
MEMORY DIALING
MEMORY DIALING [ 23]www.uniden.com
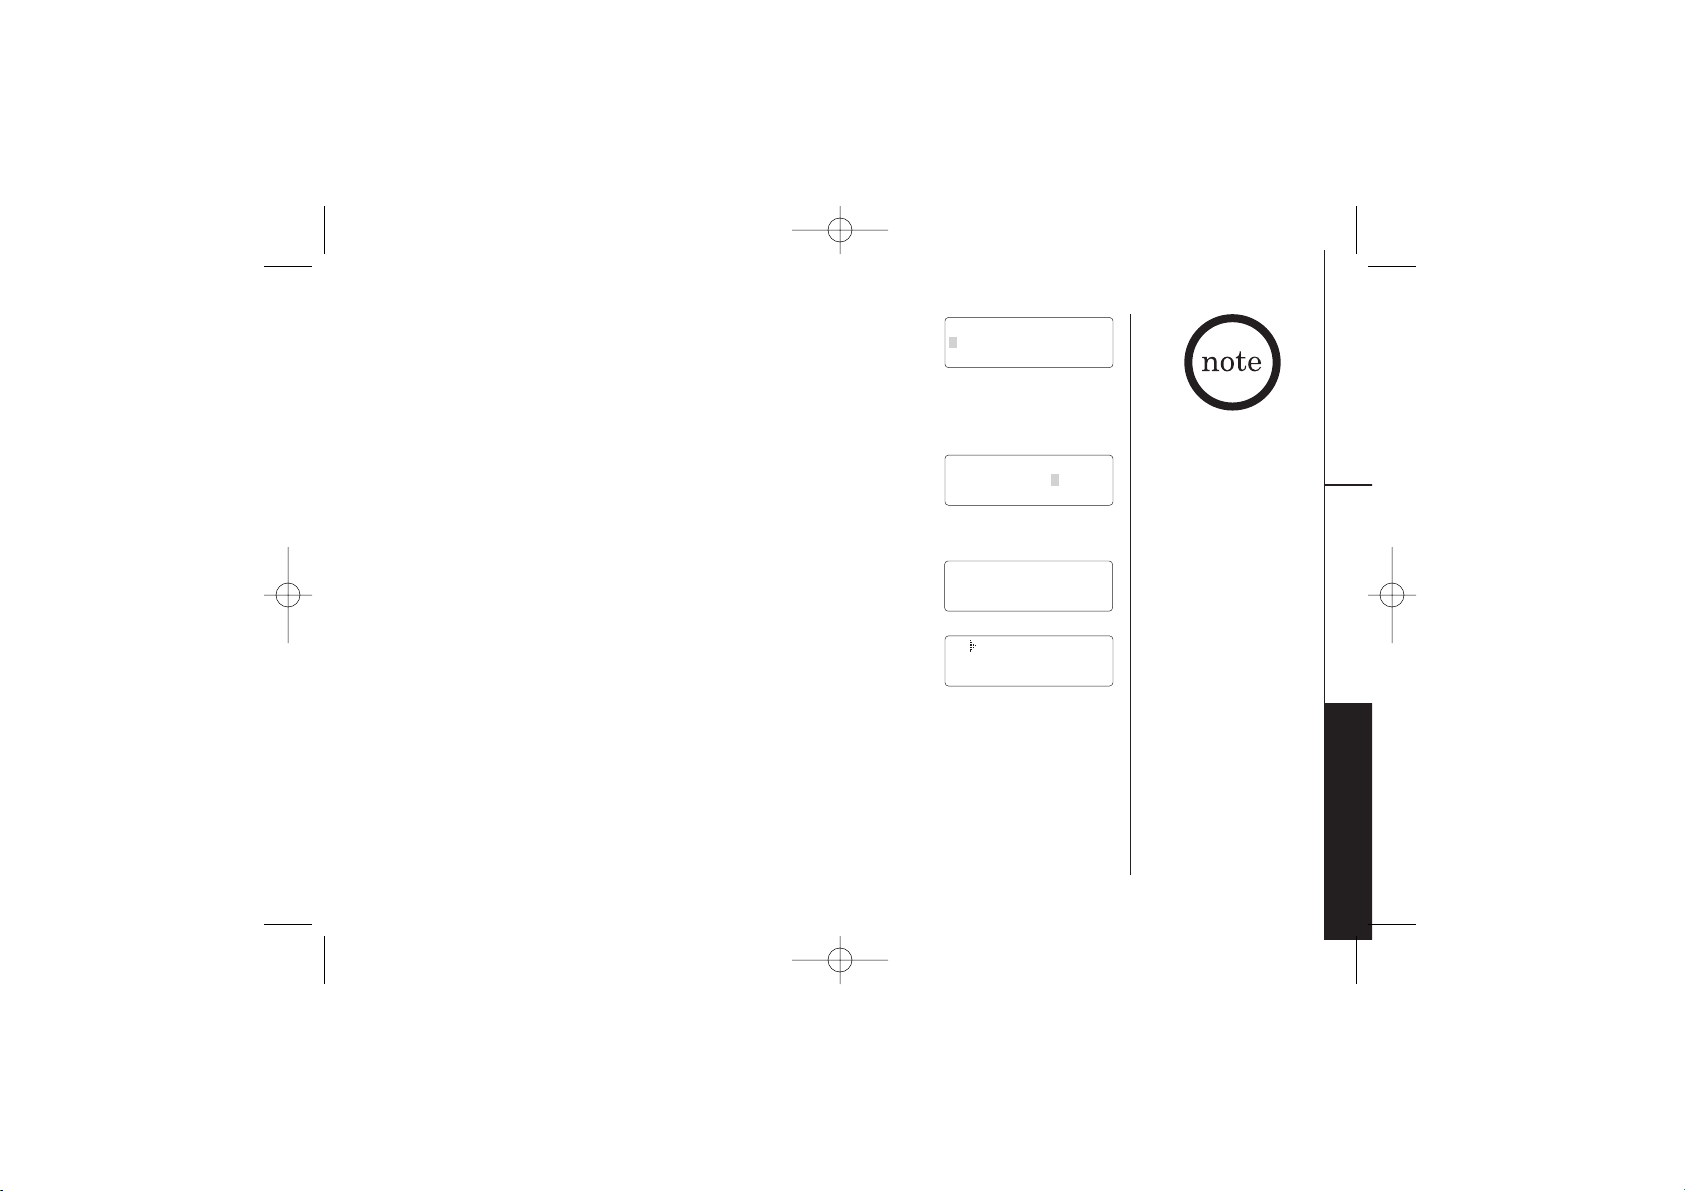
6) Press select. ¨Store Number¨ is displayed.
The cursor flashes indicating that the display is ready for
the number to be entered.
7) Use the number keys to enter the phone number.
The phone number cannot exceed 20 digits.
Use redial/p to enter a pause in the dialing sequence.
The display shows a ¨
P¨. Each pause counts as one digit and
represents a two second delay of time between the digits.
Use delete/ch to delete digits as needed.
8) Press select. You will hear a confirmation tone, and the
following screen appears. Memory storage is complete.
For example, if you store a name and number into memory
location number 01, the display shows ¨
Memory01 Stored¨.
After about 2 seconds, the following screen is displayed.
Repeat steps 2 - 8 to store more numbers.
9) Press end to return to the standby mode.
The pause feature is
useful for long distance
calling, credit card
dialing, or sequences
that require a pause
between digits.
EXT3165-01/22 1/22/03 7:37 PM Page 23
Store Number
Store Number
8007303456
Memory01 Stored
01 Movies
02 JOHN DOE
03 MOM AND DAD
Page 23
MEMORY DIALING[ 24 ] www.uniden.com
Steps for Entering Names and Special Characters
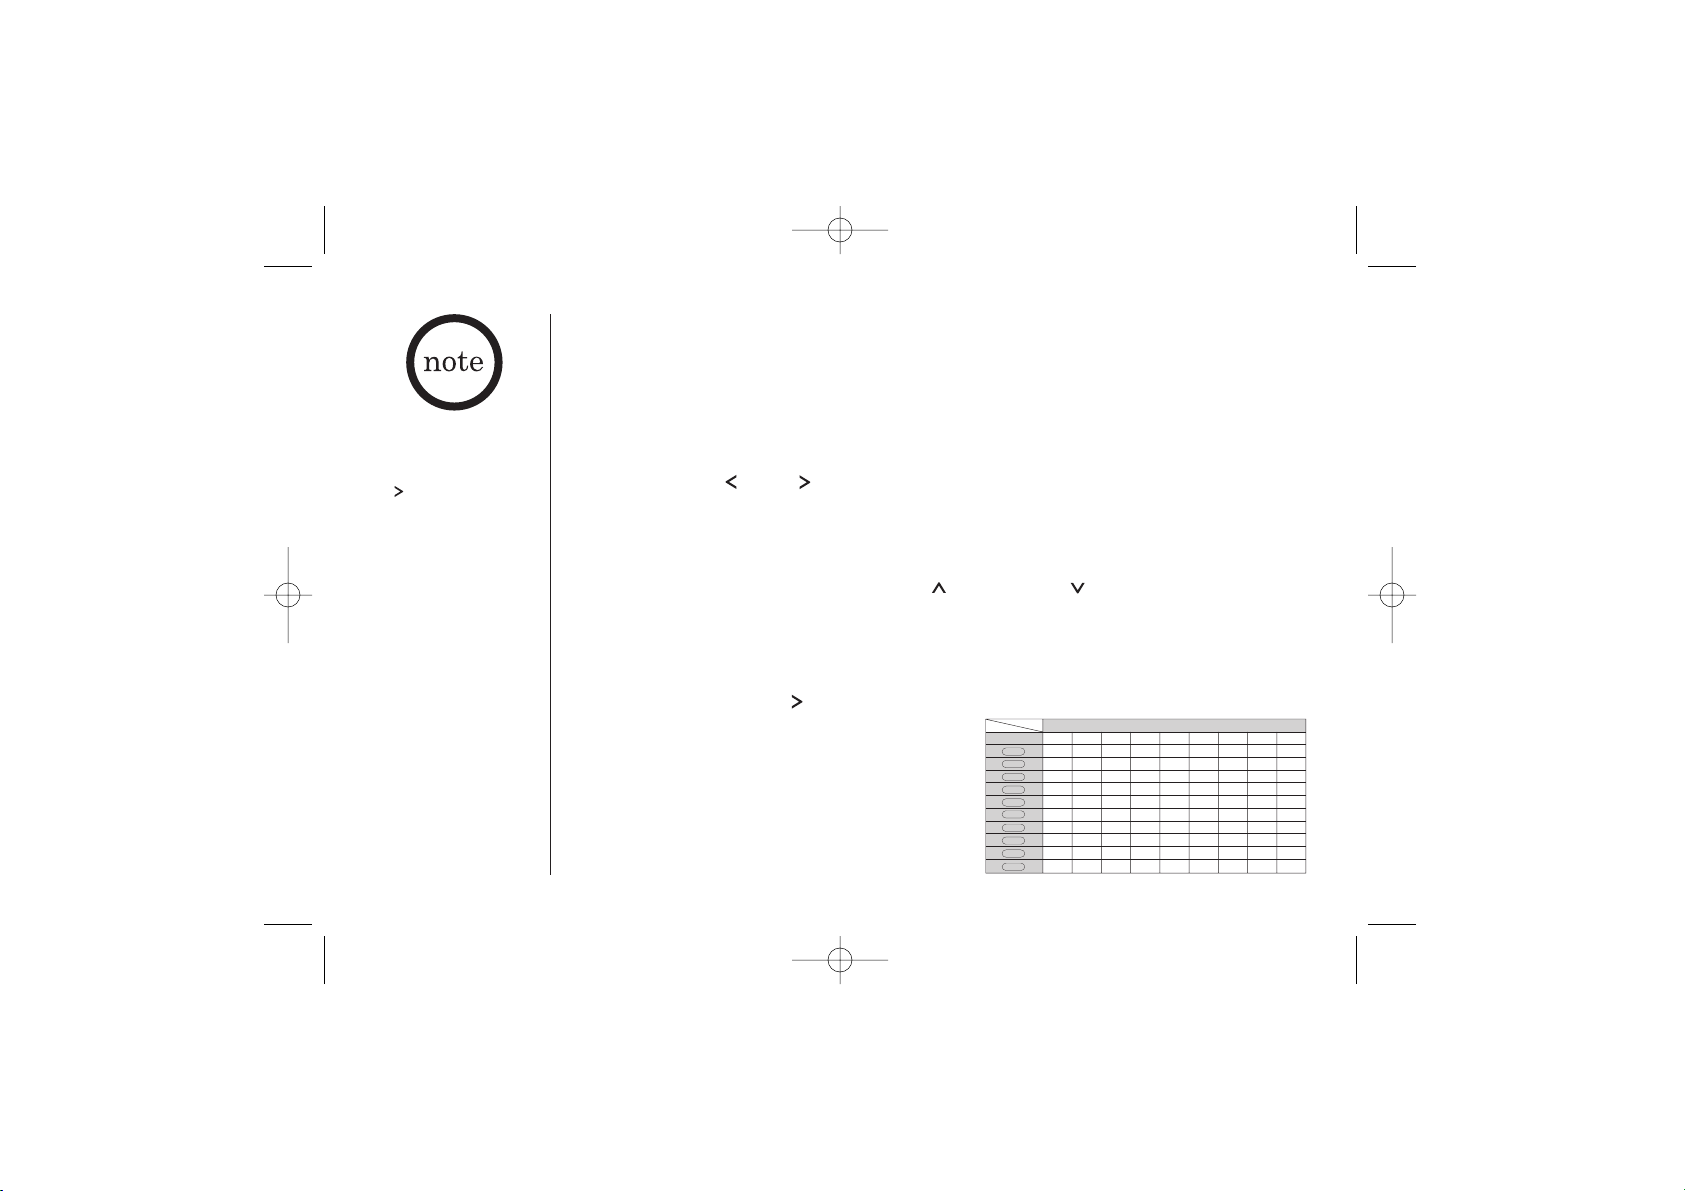
Refer to the letters on the number keys to select the desired characters.
With each press of a numeric key, the displayed character appears in the following
order: Upper case letters first, lower case letters next and finally the number
corresponding to the key.
If you make a mistake while entering a name
Use the */tone/ or #/ key to move the cursor to the incorrect character.
Press delete/ch to erase the wrong character, then enter the correct character.
To delete all characters, press and hold delete/ch.
For example, to enter Movies.
1) Pick up the handset. Press mem.
2) Enter a number or press the vol/ring/ or vol/ring/ key to select a memory
location.
3) Press mem or select.
4) Press mem or select. (When there is information already stored in the selected
memory location, ¨
Edit MemoryXX¨ is displayed. See page 28 for information
on “Editing a Stored Name and/or Phone Number”.)
5) Press 6 then press #/ to move the cursor to the right.
6) Press 6 six times.
7) Press 8 six times.
8) Press 4 six times.
9) Press 3 five times.
10) Press 7 eight times.
11) When finished, press mem or select.
To continue to store the telephone number,
proceed to step 7 on page 24.
If the next character
uses the same number
key, you must press
#
/
to move the
cursor over. Otherwise
the next time you press
the number key, it
changes the character
that was previously set.
EXT3165-01/22 1/22/03 7:37 PM Page 24
keys 1 2 3 4 5 6 7 8 9
1
1
ABCabc2
2
abc
DEFdef3
3
def
GHIghi4
4
ghi
JKLjkl5
5
jkl
6
mno
MNOmno6
PQRSpqrs7
7
pqrs
TUVtuv8
8
tuv
WXYZwxyz9
9
wxyz
*#-&()
0
Number of times key is pressed
(blank)
0
Page 24
MEMORY DIALING
MEMORY DIALING [ 25]www.uniden.com
• If you press select
before talk/flash, you
can confirm the name
and the number
stored in the selected
memory location.
• To exit the memory
function without
dialing, press end.
The handset returns
to the standby mode.
• Whenever you are
using a memory menu
screen, you must
press a key within 30
seconds or the phone
will return to the
standby mode.
Making Calls with Memory Dialing
Memory dialing from Standby Mode
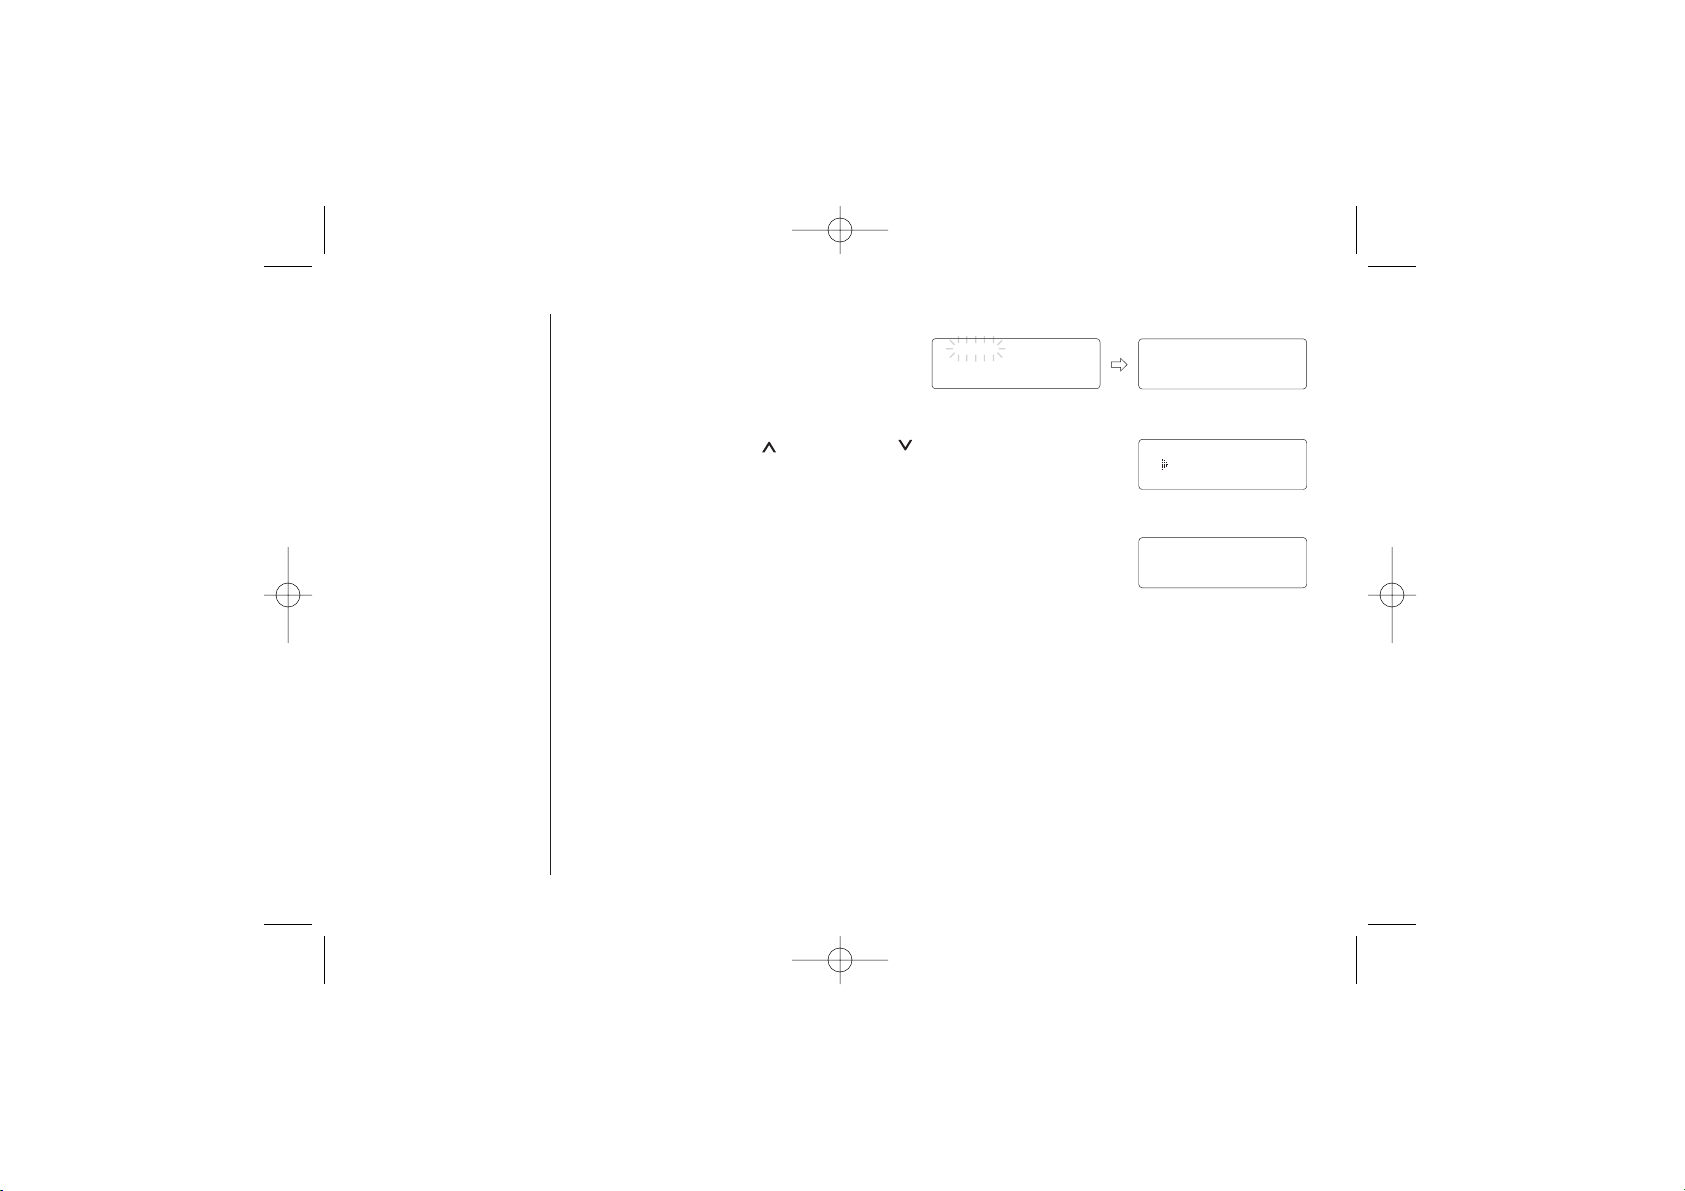
1) Press mem. The handset displays your programmed memory
locations.
2) Press the vol/ring/ or vol/ring/ key, or enter the number
(01 - 20) to select the memory location you would like to dial.
3) Press talk/flash. ¨
Talk¨ and the volume setting appear
on the display. Then the displayed number is dialed.
Pressing mem while the phone is in use:
You can view the memory list while you are talking on the phone.
The memory dialing screen shows in the display. The phone number in the memory will
be dialed when the select key is pressed.
EXT3165-01/22 1/22/03 7:37 PM Page 25
Select Memory
01 Movies
02 JOHN DOE
Talk
8007303456
Page 25
MEMORY DIALING[ 26 ] www.uniden.com
Memory dialing from Talk Mode
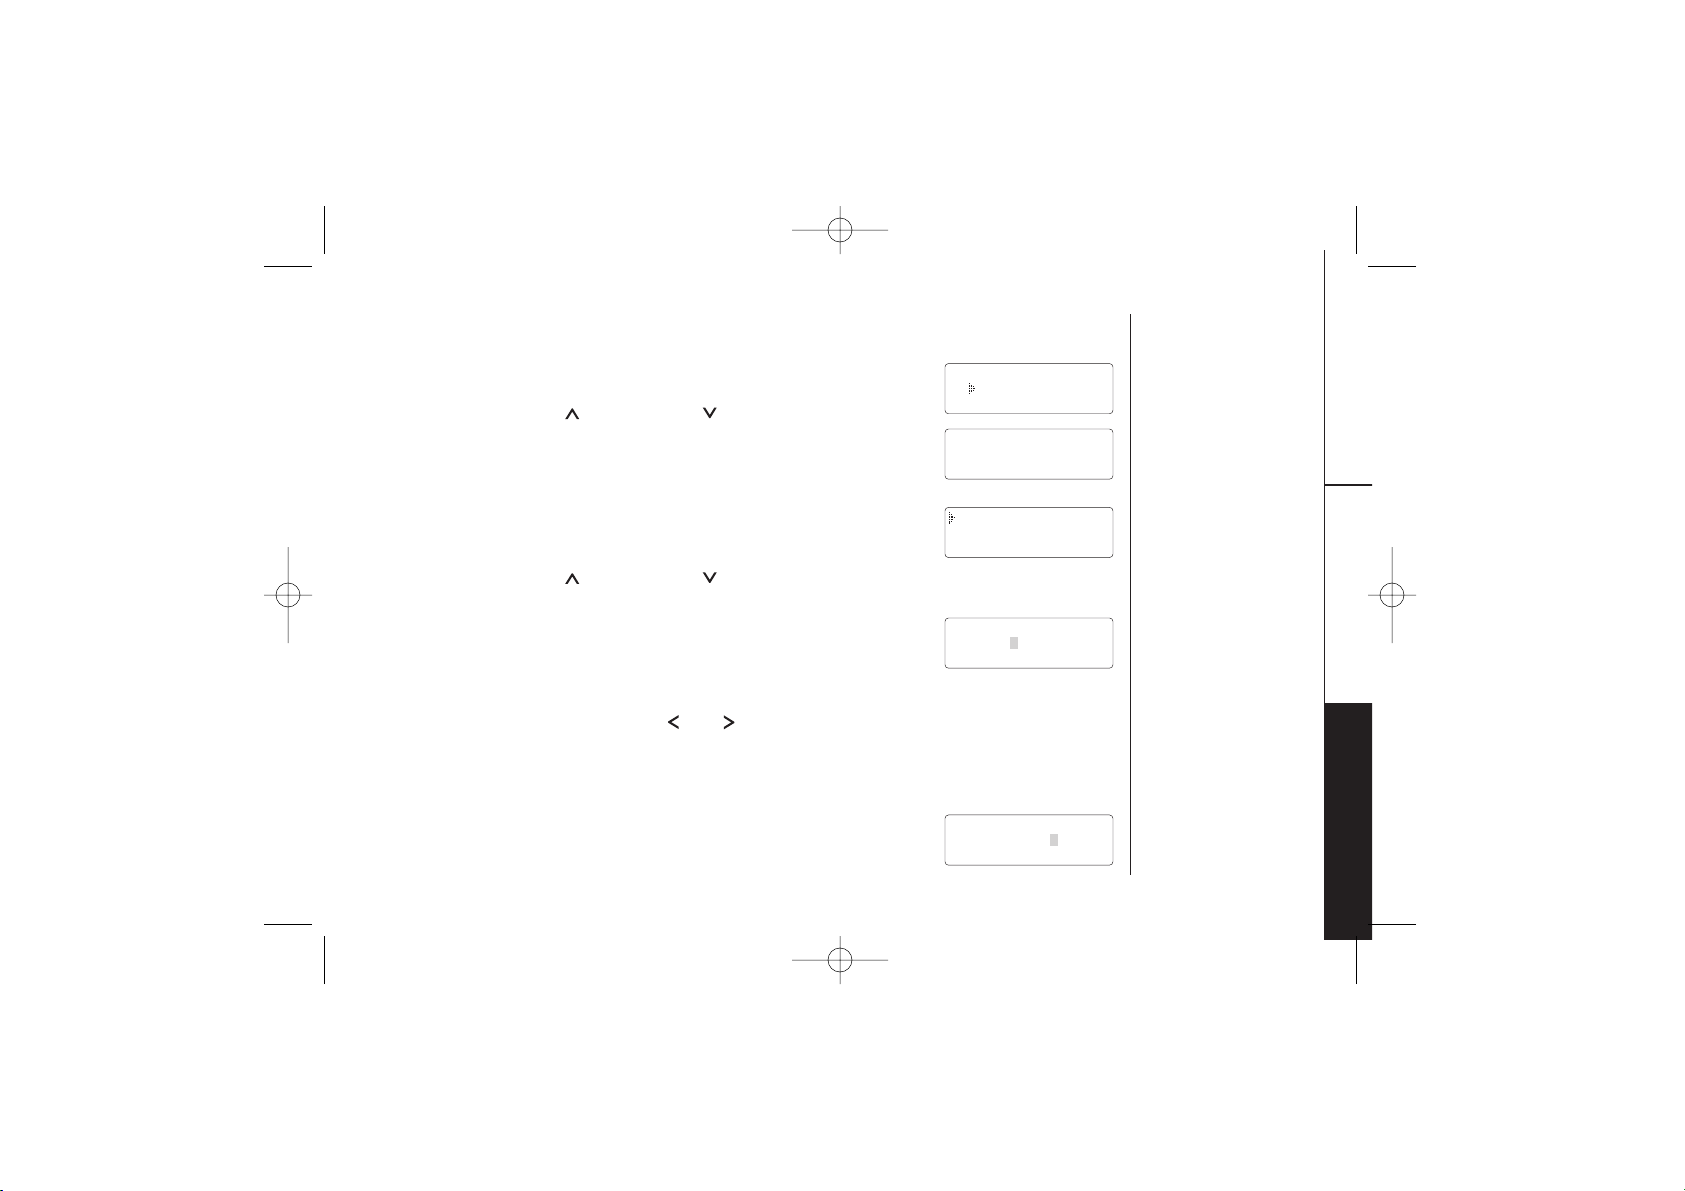
1) Press talk/flash. “
Talk” and the
volume setting appears.
2) Press mem.
3) Press the vol/ring/ or vol/ring/ key, or enter a number
(01 - 20) to select the memory location of the desired phone
number. The selected number and name is displayed. Then the
number is dialed.
4) The phone number in the memory will be dialed when the
select key is pressed.
5) To hang up, press end.
Chain Dialing
The memory locations on the handset are not limited to phone numbers. You can
also store a group of numbers (up to 20 digits) that you need to enter once your
call connects. This is referred to as Chain Dialing.
An example of this is a bank account number. Once you have called your bank, and
are prompted to enter the account number, simply press mem and the location
number where the special number has been stored.
Store your special number with an identifying name. (Refer to "Storing Phone
Numbers and Names" on page 23.)
EXT3165-01/22 1/22/03 7:37 PM Page 26
Talk
Talk
Volume High
Select Memory
01 Movies
02 JOHN DOE
Talk 0:35
8007303456
Page 26
MEMORY DIALING
MEMORY DIALING [ 27]www.uniden.com
Editing a Stored Name and/or Phone Number
1) Press mem, ¨ Select Memory¨ is displayed.
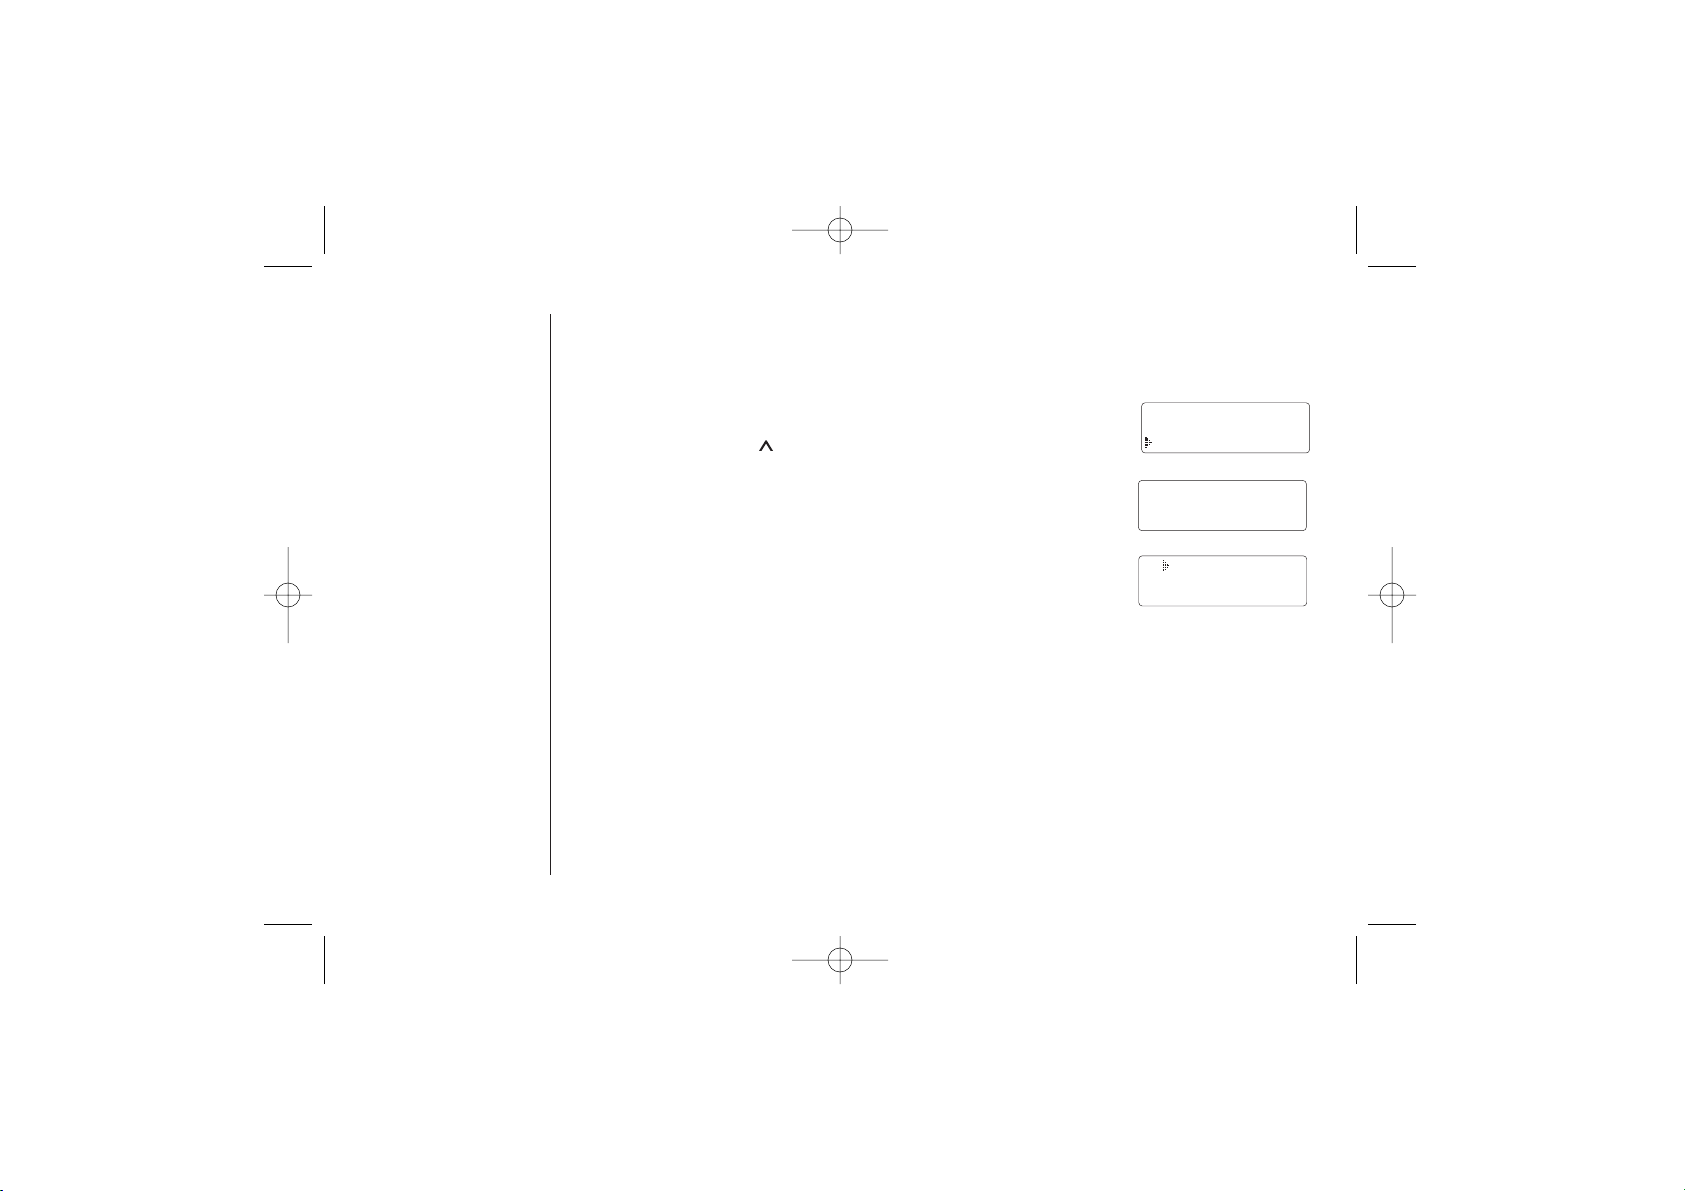
2) Press the vol/ring/ or vol/ring/ key, or enter a
number (01 - 20) to select the memory location you would
like to edit, and press mem or select.
3) Press mem or select.
The following screen appears with the memory location
number that you have selected in the display.
4) Press the vol/ring/ or vol/ring/ key to select ¨
Edit
MemoryXX
¨, then press mem or select. The following screen
appears. The cursor flashes indicating that the display is
ready for the name to be edited. When a name has not
been stored, the cursor appears at the beginning of the
second line.
5) Use the number keys,
*
/tone/ , #/ , or delete/ch to
edit the name. (See page 25.) To edit only the phone
number, skip this step.
6) Press mem or select. The following screen appears.
The cursor flashes indicating that the display is ready for
the number to be edited.
EXT3165-01/22 1/22/03 7:37 PM Page 27
Select Memory
01 Movies
02 JOHN DOE
01:Movies
8007303456
Edit Memory01
Delete Memory01
Go Back
Store Name
Movies
Store Number
8007303456
Page 27
MEMORY DIALING[ 28 ] www.uniden.com
7) Use the number key, redial/p or delete/ch to edit the phone
number. The phone number cannot exceed 20 digits. (See page 24.)
If you don´t want to change the phone number, skip this step.
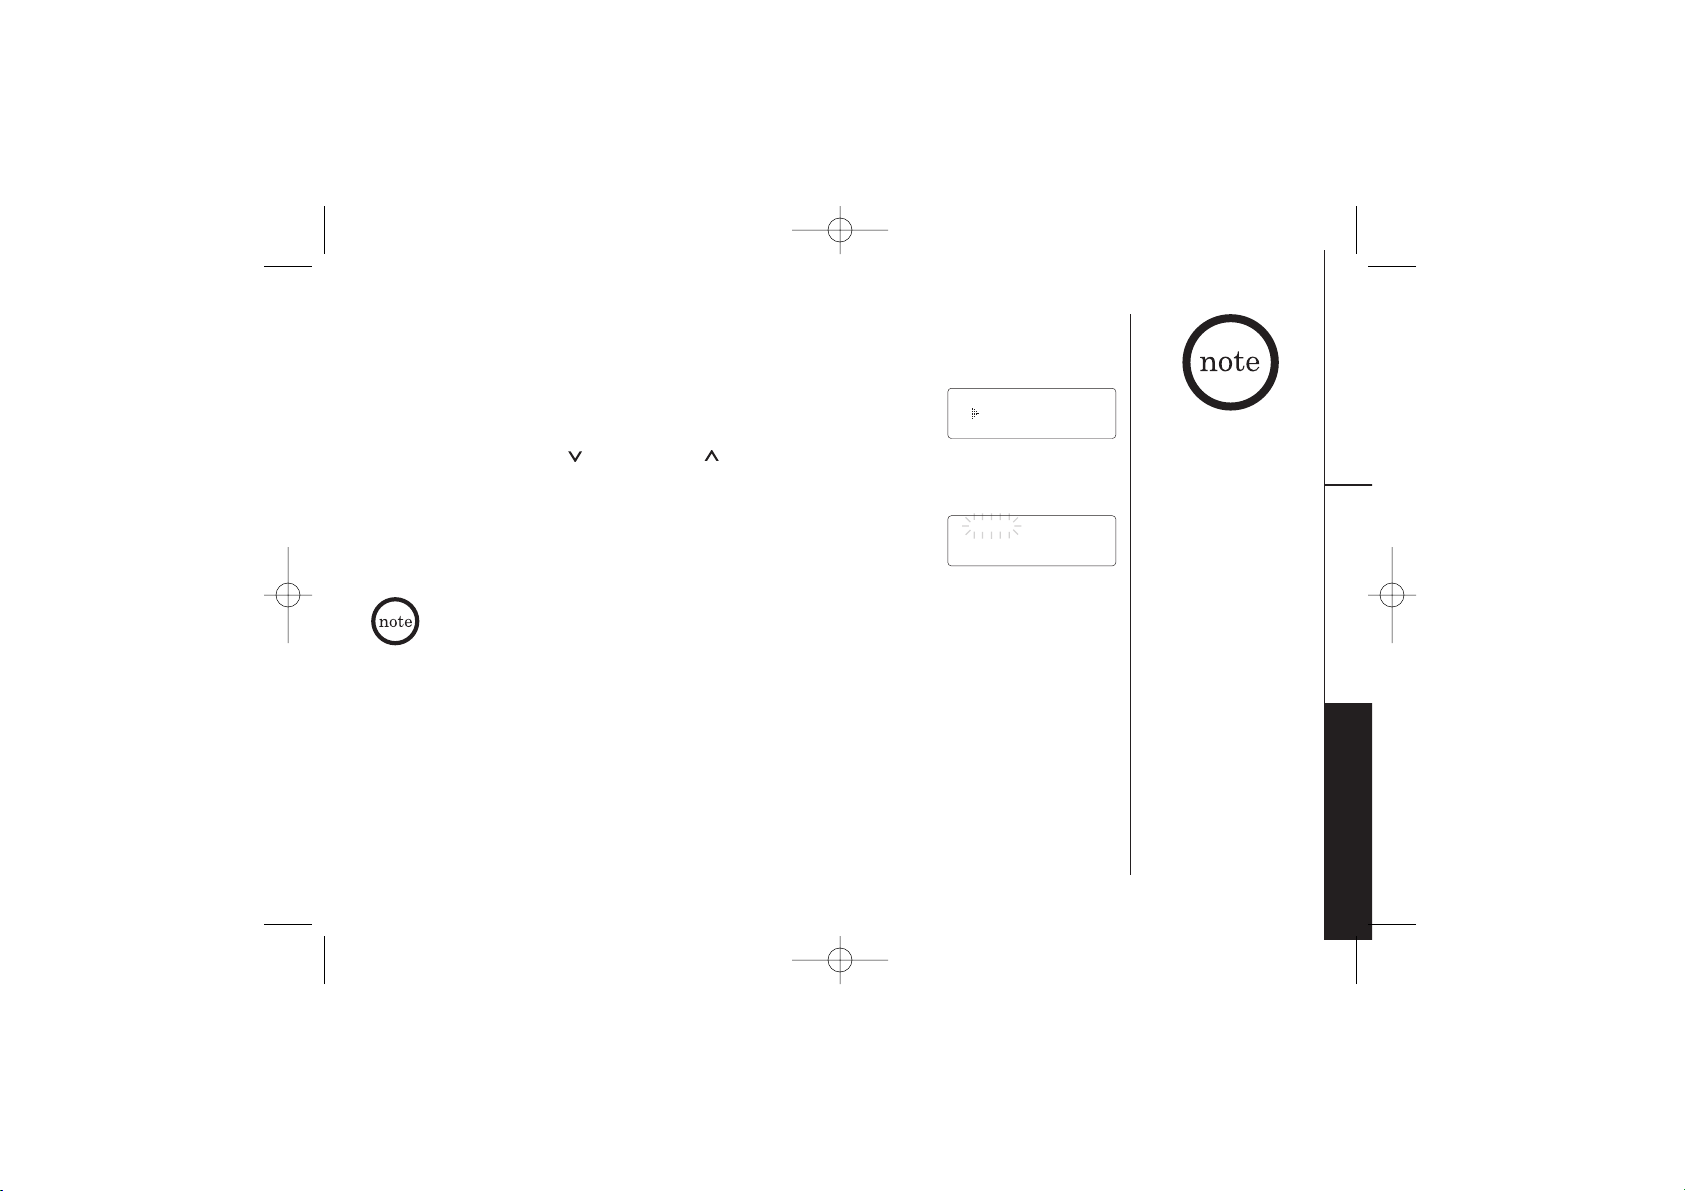
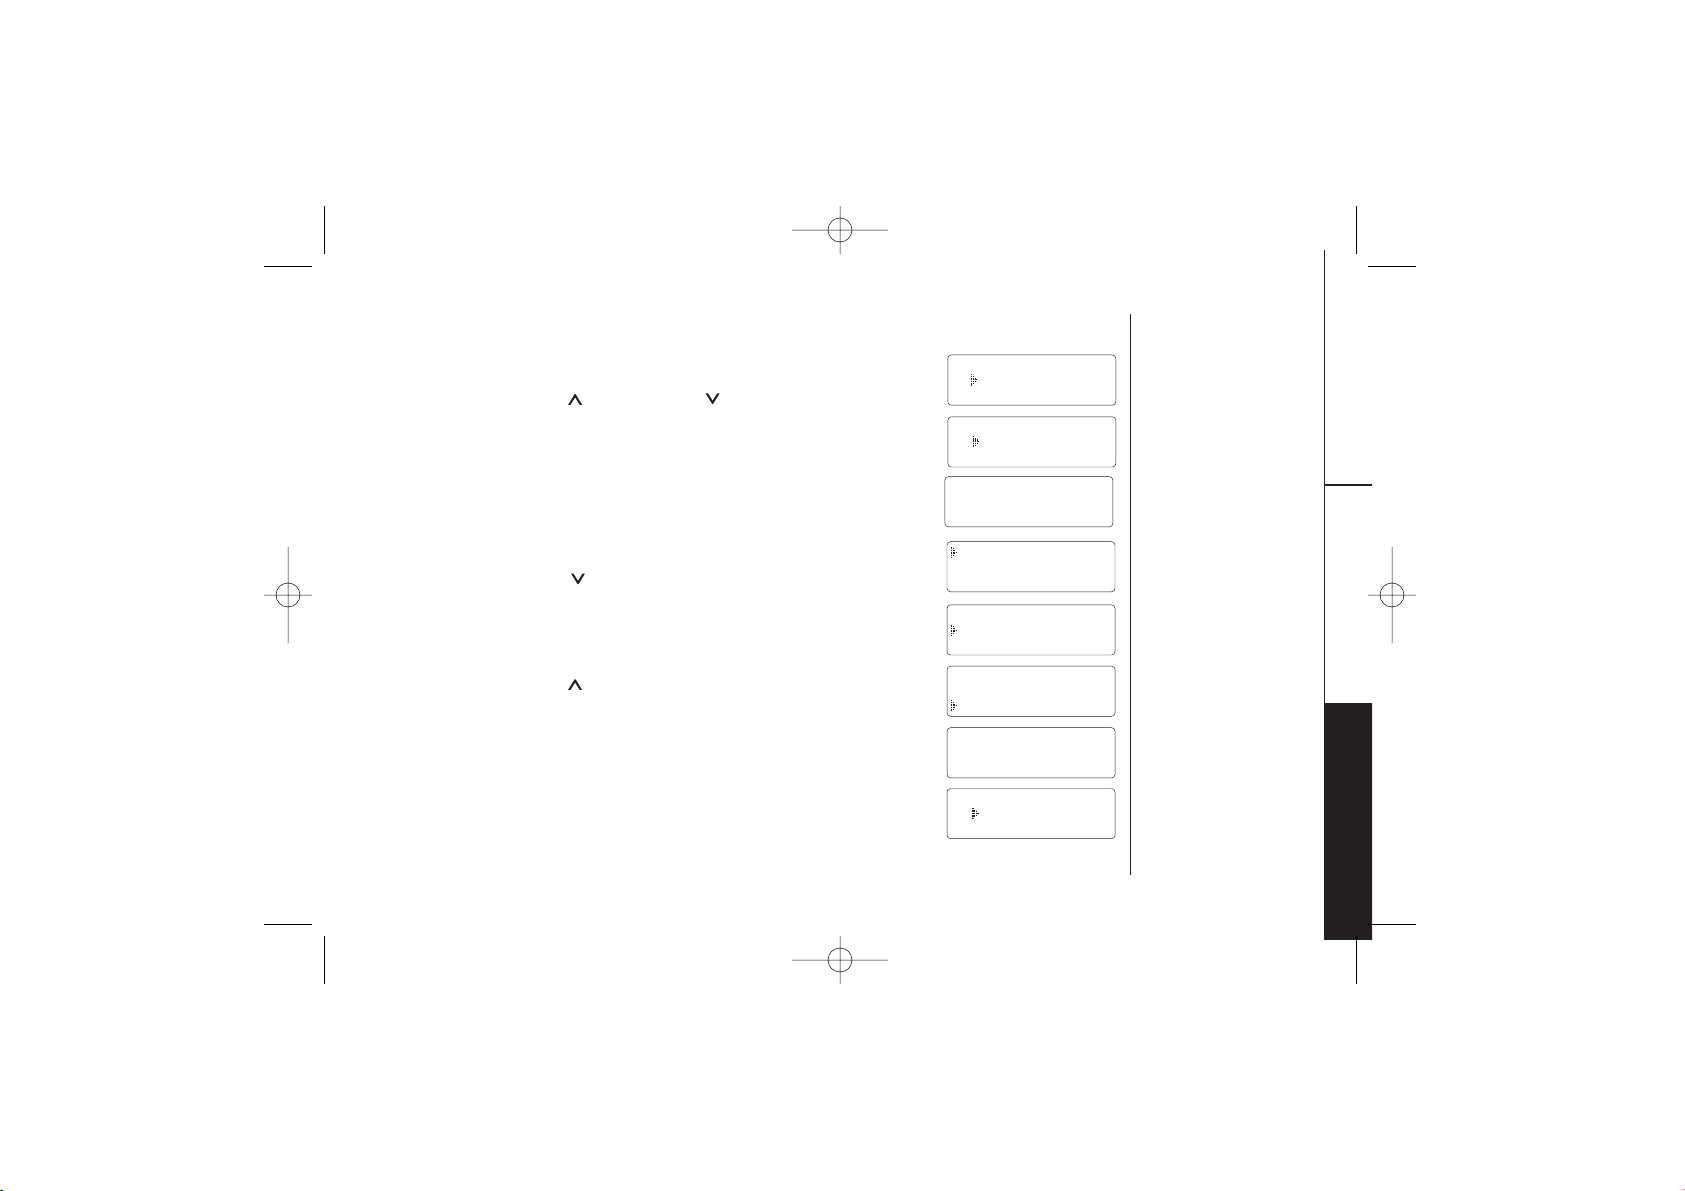
8) Press mem or select. If you changed either name or phone
number, a confirmation display shows up. If it is correct,
press the vol/ring/ key and press select again. You hear
a confirmation tone, and the following screen appears. The
memory storage is complete.
For example, if you store a name and number into memory
location number 01, the display shows ¨
Memory01
Stored
¨. After about 2 seconds, Select memory is
displayed.
9) Press end to return to the standby mode.
EXT3165-01/22 1/22/03 7:37 PM Page 28
Replace Memory?
Yes
No
Memory01 Stored
01 Movies
02 JOHN DOE
03 MOM AND DAD
Page 28
MEMORY DIALING
MEMORY DIALING [ 29]www.uniden.com
Erasing a Stored Name and Phone Number
1) Press mem, ¨ Select Memory¨ is displayed.
2) Press the vol/ring/ or vol/ring/ key, or enter a
number (01 - 20) to select the memory location you would
like to erase.
3) Press mem or select.
4) Press mem or select.
The following screen appears with the memory location
number that you have selected in the display.
5) Press the vol/ring/ key to move the pointer down to
¨
Delete MemoryXX¨ .
6) Press mem or select. The following confirmation screen
appears.
7) Press the vol/ring/ key to move the pointer to ¨
Yes¨.
8) Press select or delete/ch.
You hear a confirmation tone, and the following screen
appears.
9) After about 2 seconds, the display returns to the
Select memory screen. You may delete the information in
another memory location (return to step 2) or press end to
return to the standby mode.
EXT3165-01/22 1/22/03 7:37 PM Page 29
Select Memory
01 Movies
02 JOHN DOE
01 Movies
02 JOHN DOE
03 MOM AND DAD
02:JOHN DOE
5452930
Edit Memory02
Delete Memory02
Go Back
Edit Memory02
Delete Memory02
Go Back
Delete Memory02?
Yes
No
Memory02 Deleted
01 Movies
02
03 MOM AND DAD
Page 29
VOICE MAIL[ 30 ] www.uniden.com
Using One Touch Voice Mail Access
If you subscribe to voice mail service, you can use your phone to access your voice
mailbox. The charge/in use/voicemail indicator on the base of your phone flashes
whenever you have messages waiting in your voice mailbox. Just program the
voicemail key with your access number and you can get your messages at the touch
of a button. (The voice mail service provider will supply you with the access number.
This number may be simply a phone number. Refer to the provider’s literature.)
Programming your Voice Mail Access Number
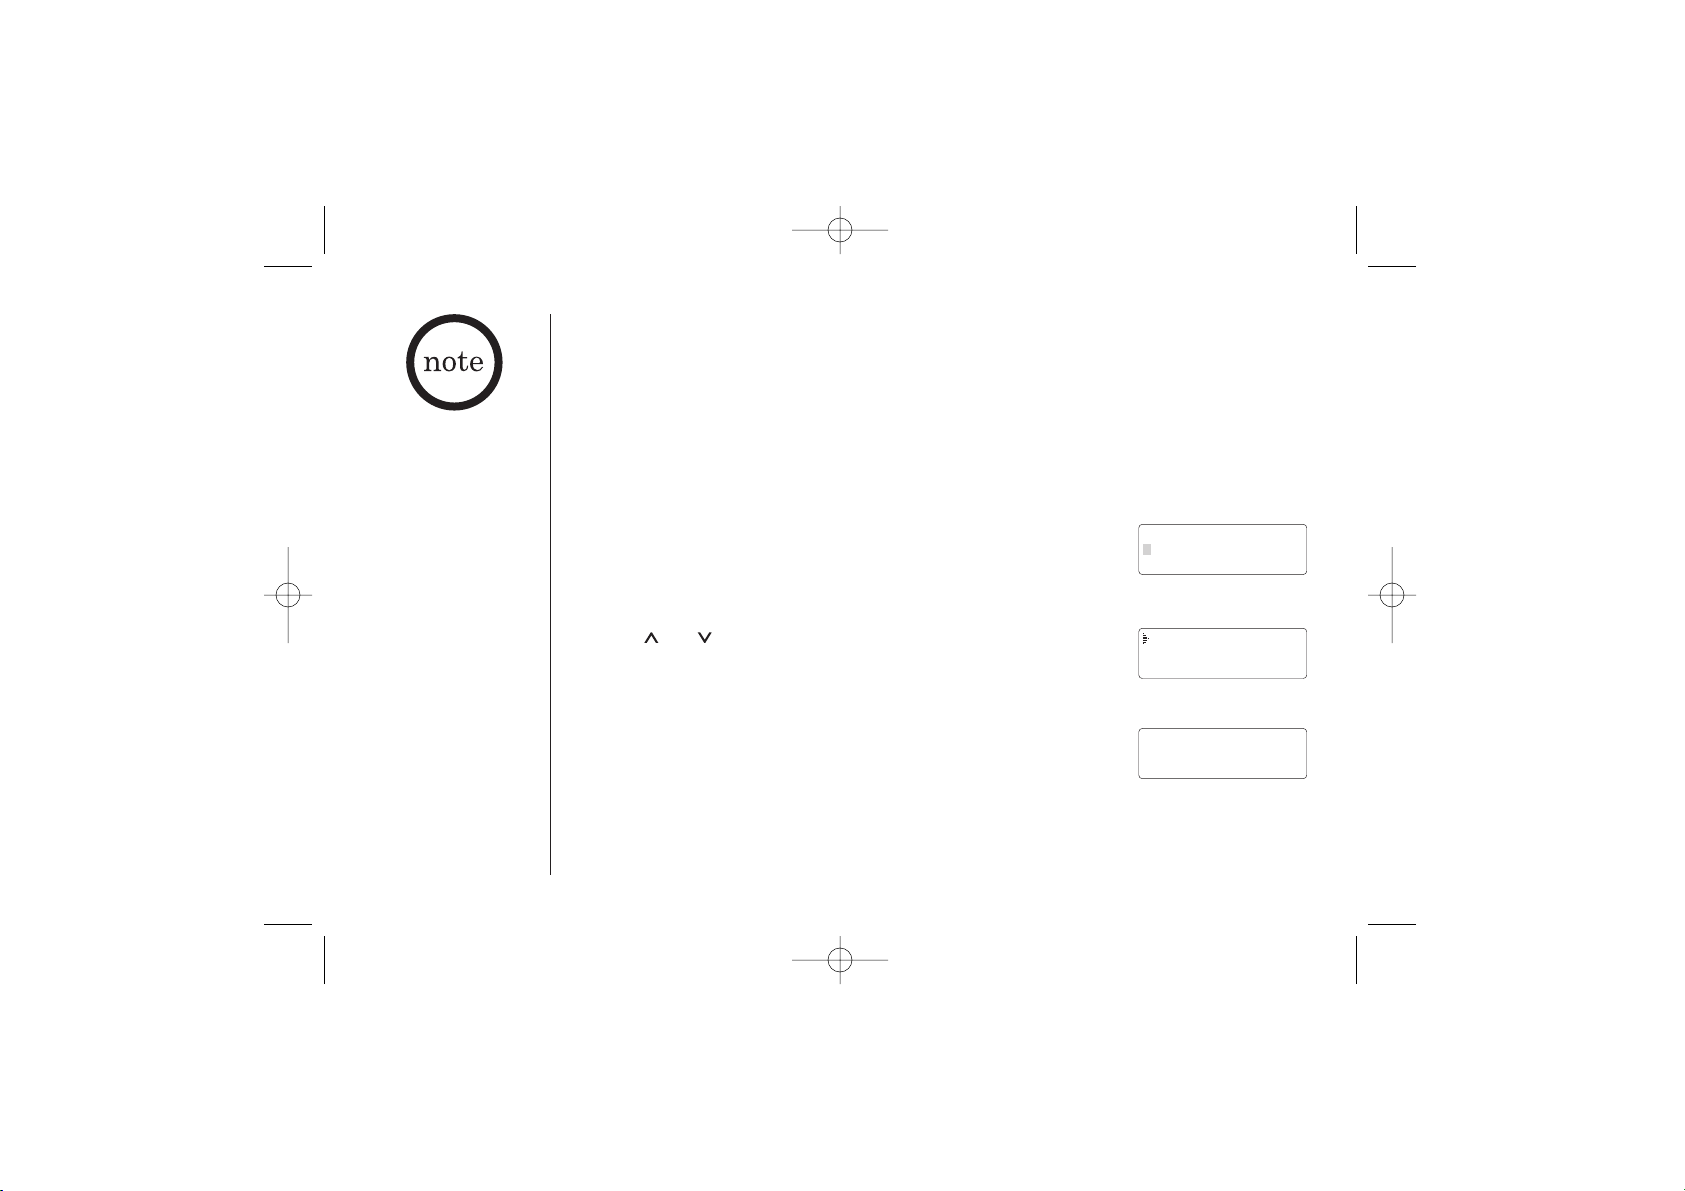
1) On the handset, press and hold voicemail for about
2 seconds. The following display appears:
If you have previously stored a number, the following
display appears:
Press or to select “
Edit Number”, then
press select.
2) Enter your personal access number.
3) Press select. A confirmation tone sounds and the following
display appears:
You must subscribe to
voice mail service from
your telephone company
in order to use this
feature. The voice mail
service company will
provide you with the
access number.
EXT3165-01/22 1/22/03 7:37 PM Page 30
Store Number
Store Number
Edit Number
Delete Number
Go Back
Store Number
Edit Number
Delete Number
Go Back
Number Stored
Store Number
Number Stored
Page 30
VOICE MAIL
VOICE MAIL [ 31]www.uniden.com
Deleting your Voice Mail Access Number
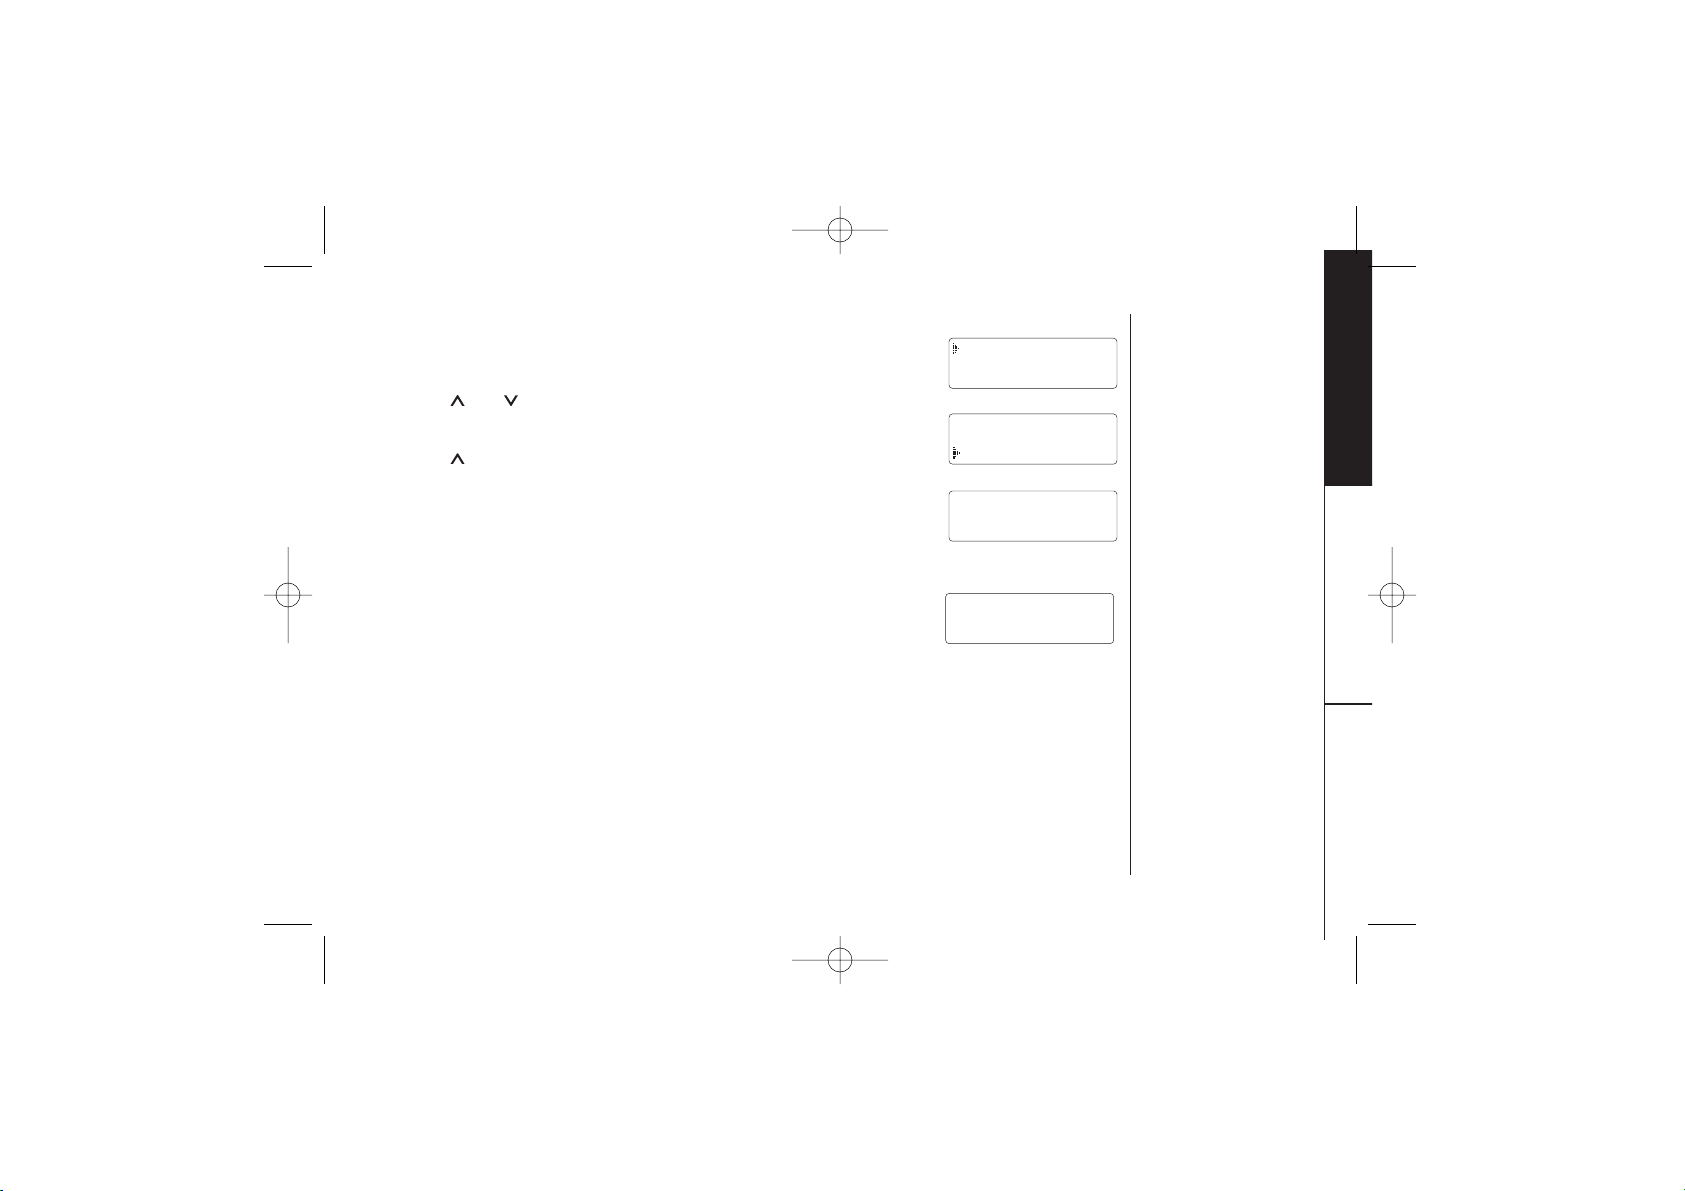
1) When the phone is standby mode, press and hold voicemail.
Following display appears.
2) Press or to select “
Delete Number”.
3) Press select. Following display appears.
4) Press to move the pointer to “
Yes”.
5) Press select or delete/ch.
A confirmation tone sounds and the following display appears.
After about 2 seconds, the handset returns to standby mode.
Dialing your Voice Mail Service
Once you’ve programmed your personal access number, you can
dial your mailbox with a touch of a button. When you have
messages, simply pick up the handset and press voicemail.
If you have not entered the access number or it has been deleted, when you press
voicemail, following display appears and an error tone sounds.
Message Waiting Indicator
The charge/in use/voicemail LED indicator on the base is designed to work with
voicemail service provided by your local telephone company. The indicator flashes
when you have new voice messages in your mailbox.
You may need to occasionally reset the indicator if it remains On after you retrieved
your messages. To reset the indicator, charge the handset and press and hold find
handset on the base for 5 seconds until the indicator stops flashing.
EXT3165-01/22 1/22/03 7:37 PM Page 31
Edit Number
Delete Number
Go Back
Delete Number?
Yes
No
Number Deleted
Store Number
No Number Stored
Press & hold key
to store number
Page 31
CALLER ID FEATURES[ 32 ] www.uniden.com
Caller ID
You must subscribe to Caller ID service to use this feature.
When the telephone rings, the Caller ID feature allows you to view the caller´s name
and phone number on the display before you answer the phone. The handset displays
the phone number of the incoming call, the name, and time. Additionally, you can
dial the displayed number and store the information for memory dialing. Make sure
you have turned on the Caller ID/Call Waiting feature. (See page 15.)
When the Telephone Rings
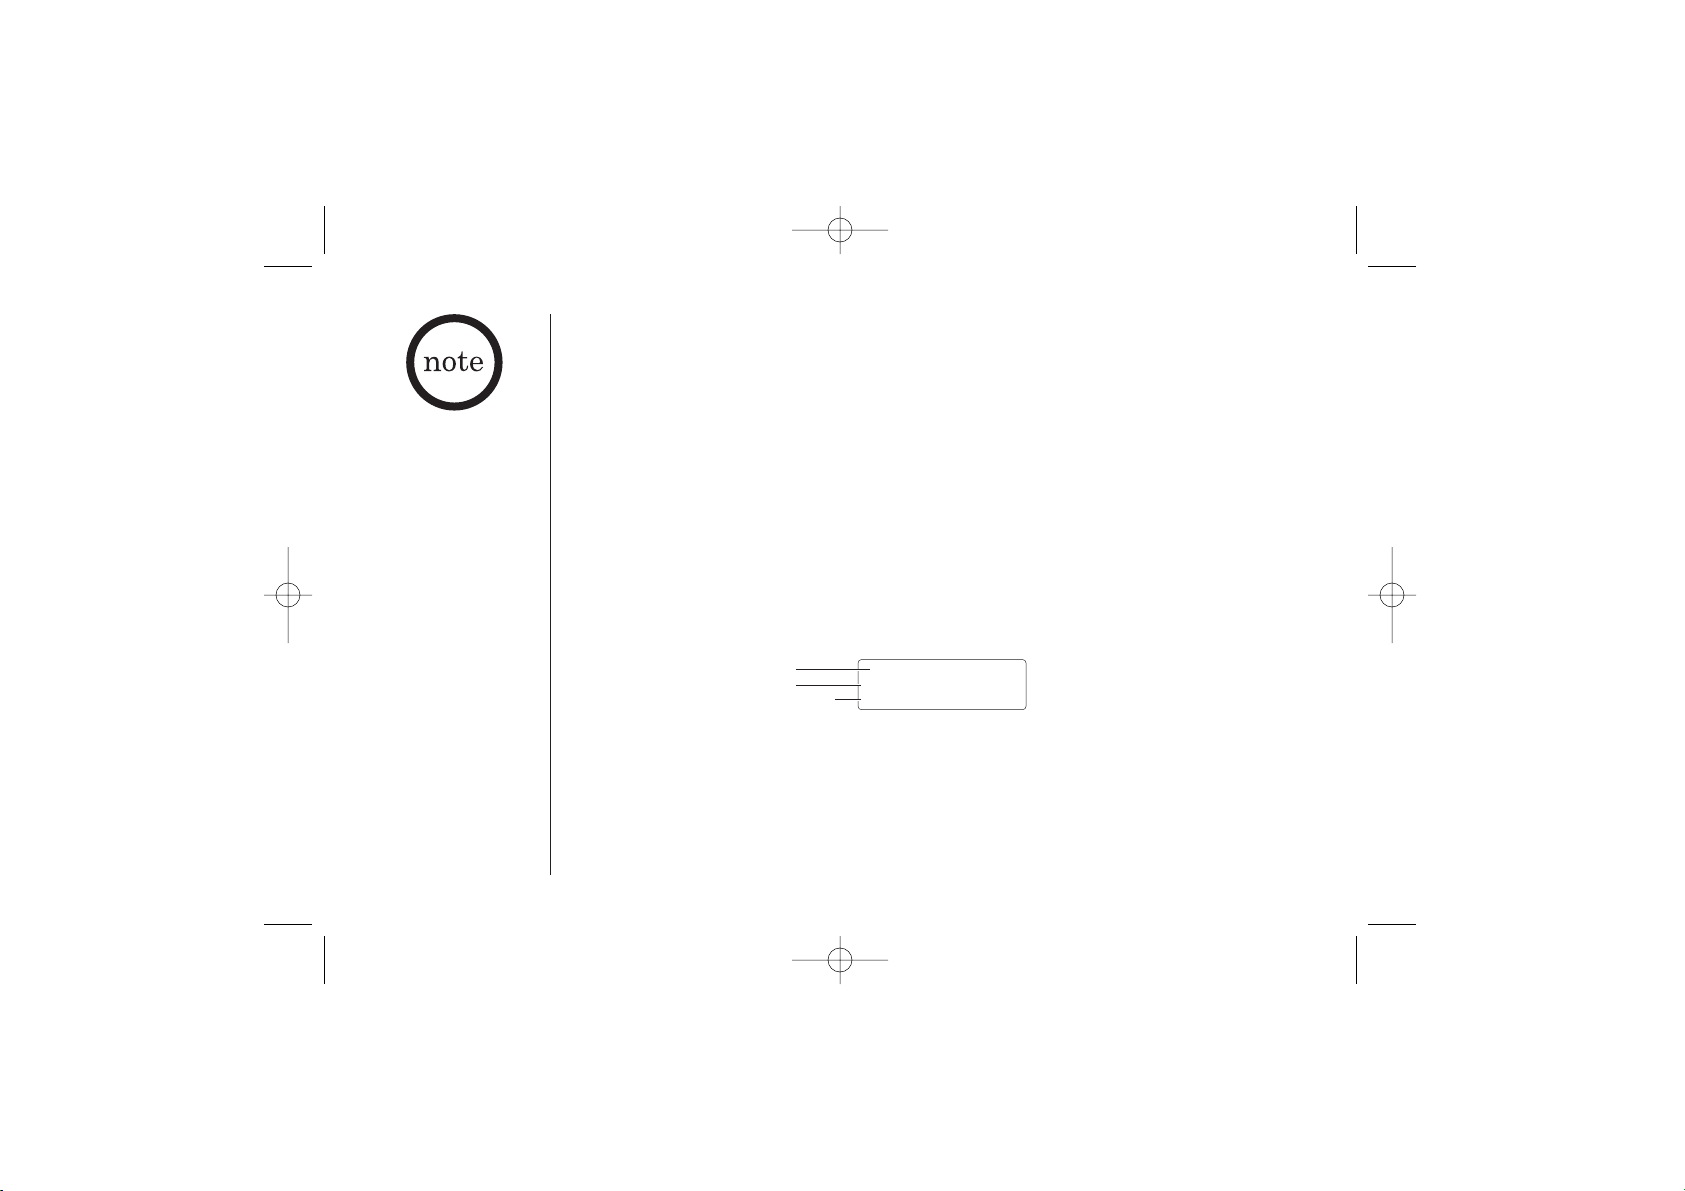
1) When the Caller ID message is received, the display shows the caller´s phone
number along with the date and time. The incoming call information is stored
in the Caller ID record. If the Caller ID service includes the caller´s name, the
caller´s name appears on the display (up to 15 letters).
You may receive any one of the following messages:
When invalid data is received “Incomplete Data”
When a private name is received “Private Name”
When a private number is received “Private Number”
When a unknown name is received “Unknown Name”
When a unknown number is received “Unknown Number”
• If you answer a call
before the Caller ID
message is received
(Example: before the
second ring), the
Caller ID message will
not appear.
• When the call is
received via a
telephone company
that does not offer
Caller ID service, the
caller´s phone
number and name
do not appear.
(This includes
international calls.)
• When the call is via
a private branch
exchange (PBX), the
caller´s phone
number and name
may not appear.
EXT3165-01/22 1/22/03 7:37 PM Page 32
The date and
time received
Caller's name
Caller's phone number
5/11 12:30PM
Jane Smith
214-555-1234
Page 32
CALLER ID FEATURES
CALLER ID FEATURES [ 33]www.uniden.com
Viewing the Caller ID Message List
The Caller ID list stores information for up to 30 incoming calls - even
unanswered calls.
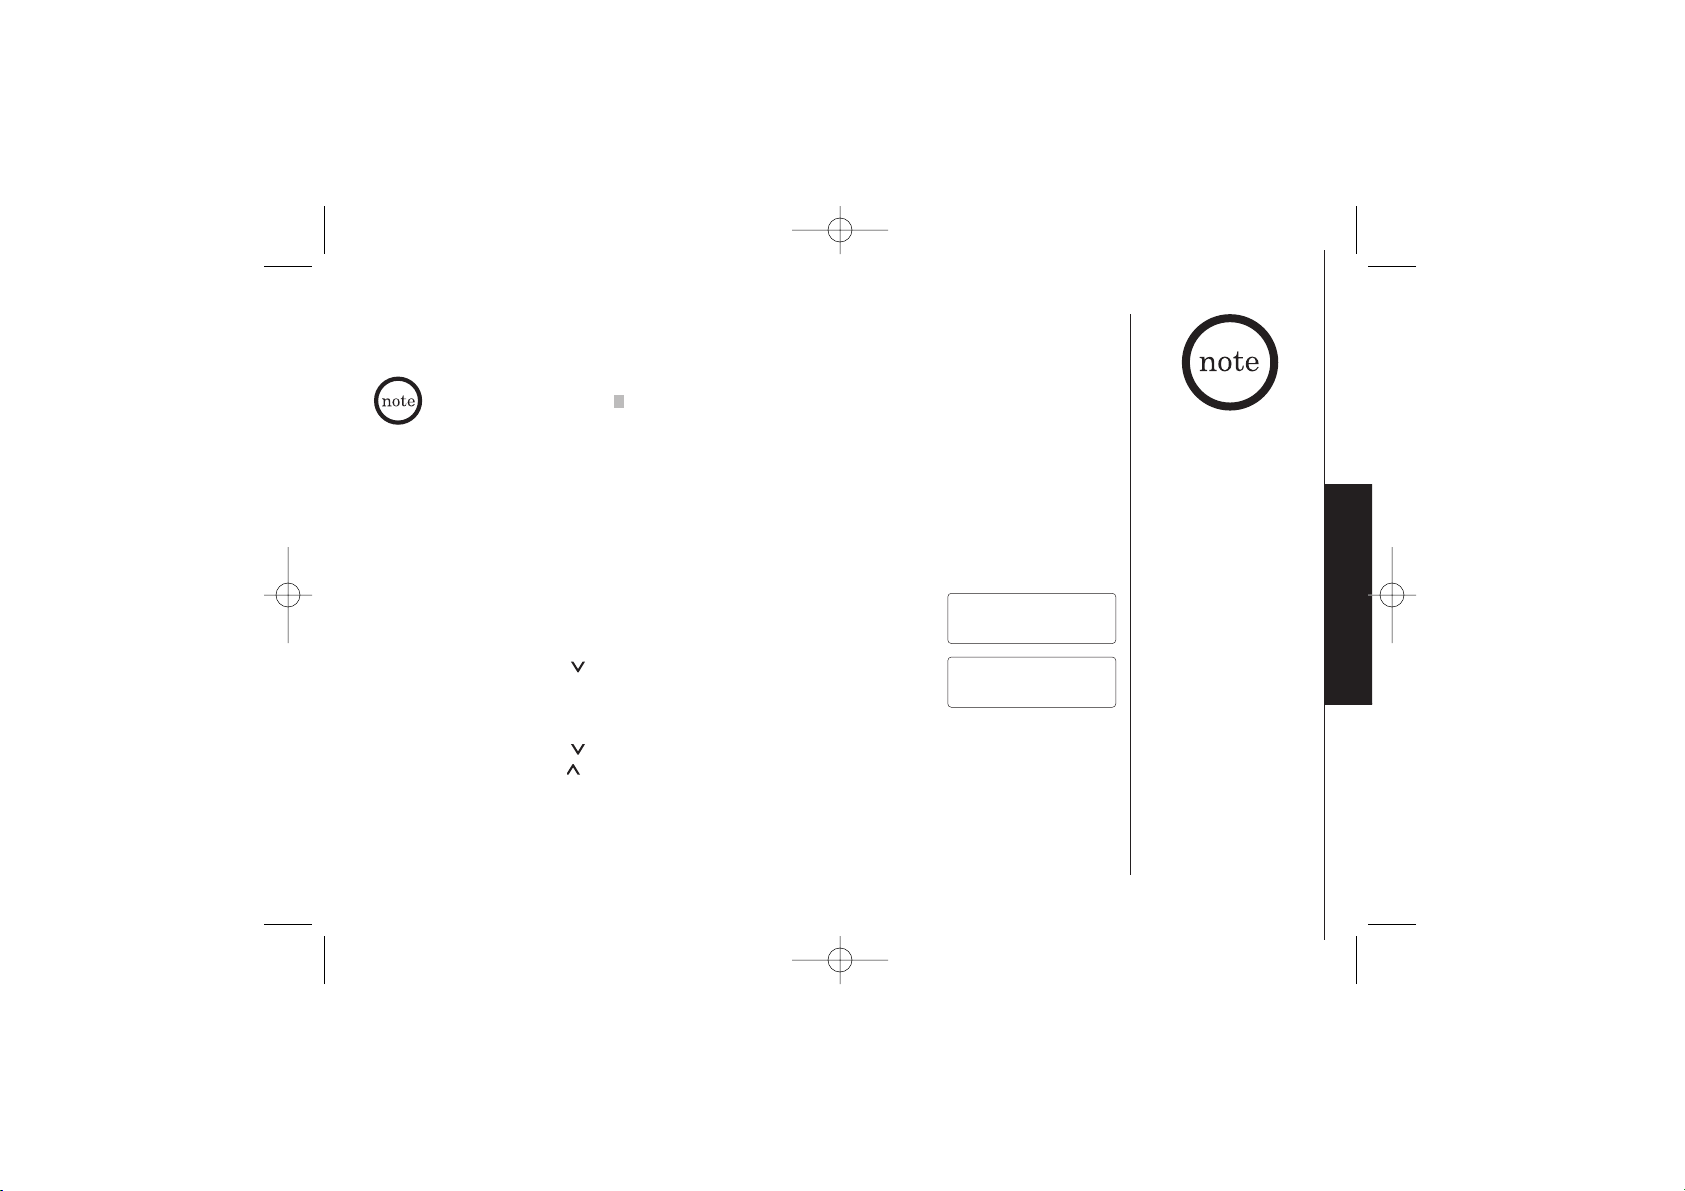
1) Press cid/menu.
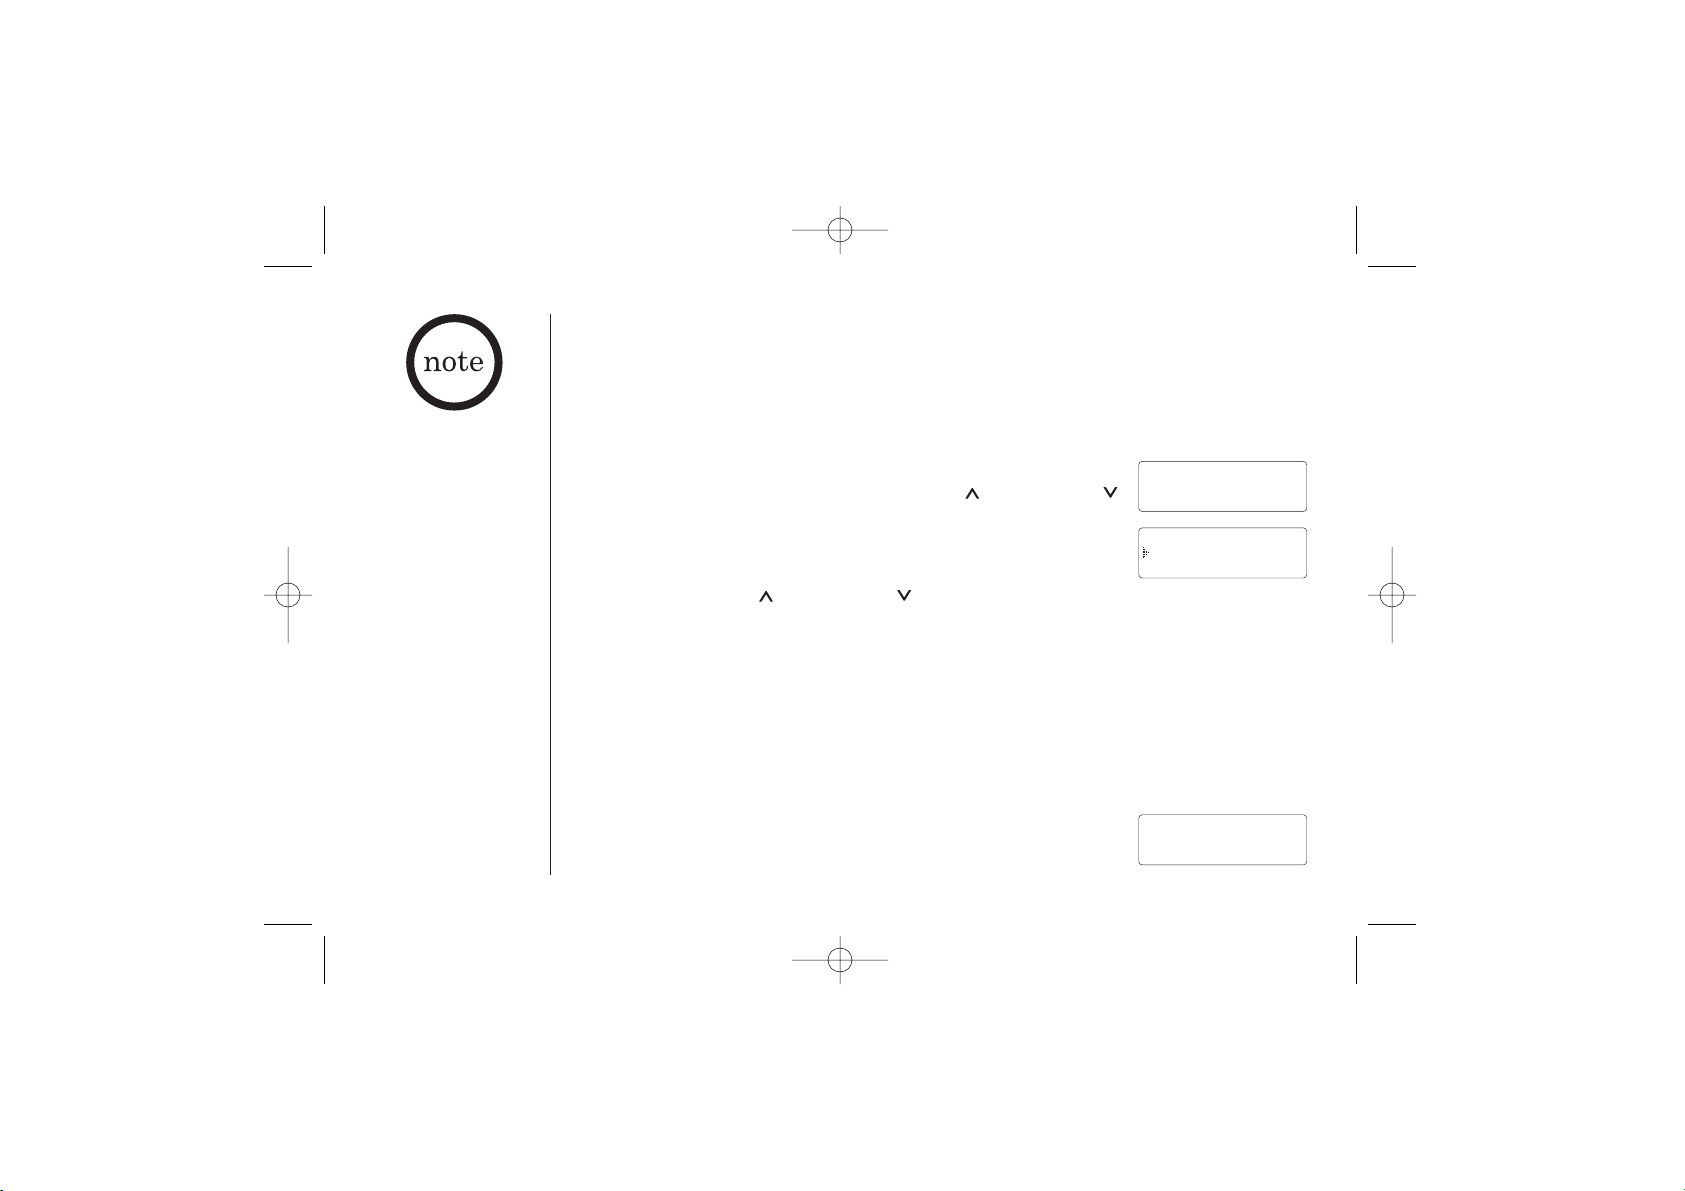
The summary screen appears. The screen shows the number
of new messages and total messages.
2) Press the vol/ring/ key to display the latest Caller ID
message.
3) Press the vol/ring/ key to see the next message. Or
press the vol/ring/ key to see the previous message.
4) Press end to return to the standby mode.
Data errors appear as ¨¨.
2) When you pick up the phone, the display changes to ¨Talk¨ . (AutoTalk feature
is set to on.)
• In Caller ID operation,
if no key is pressed for
more than 30 seconds,
an error tone sounds
and the telephone
returns to the
standby mode.
• If a call comes in via a
telephone system that
does not offer Caller
ID service, no
information is stored.
• Each message can be
up to 15 characters
for the phone number
and the name.
• The number of calls
from the same Caller
ID appears next to
the received time.
Once you view the
new message, the
number will
disappear.
EXT3165-01/22 1/22/03 7:37 PM Page 33
Caller ID
New :01
Total:02
5/17 12:30PM 03
Jane Smith
214-555-1234
Page 33
CALLER ID FEATURES[ 34 ] www.uniden.com
Deleting Information from the Caller ID List
The cordless phone stores up to 30 messages. If the phone receives the 31st
message, the oldest one in the list is automatically deleted. Caller ID data can also
be deleted manually.
Deleting a Caller ID message
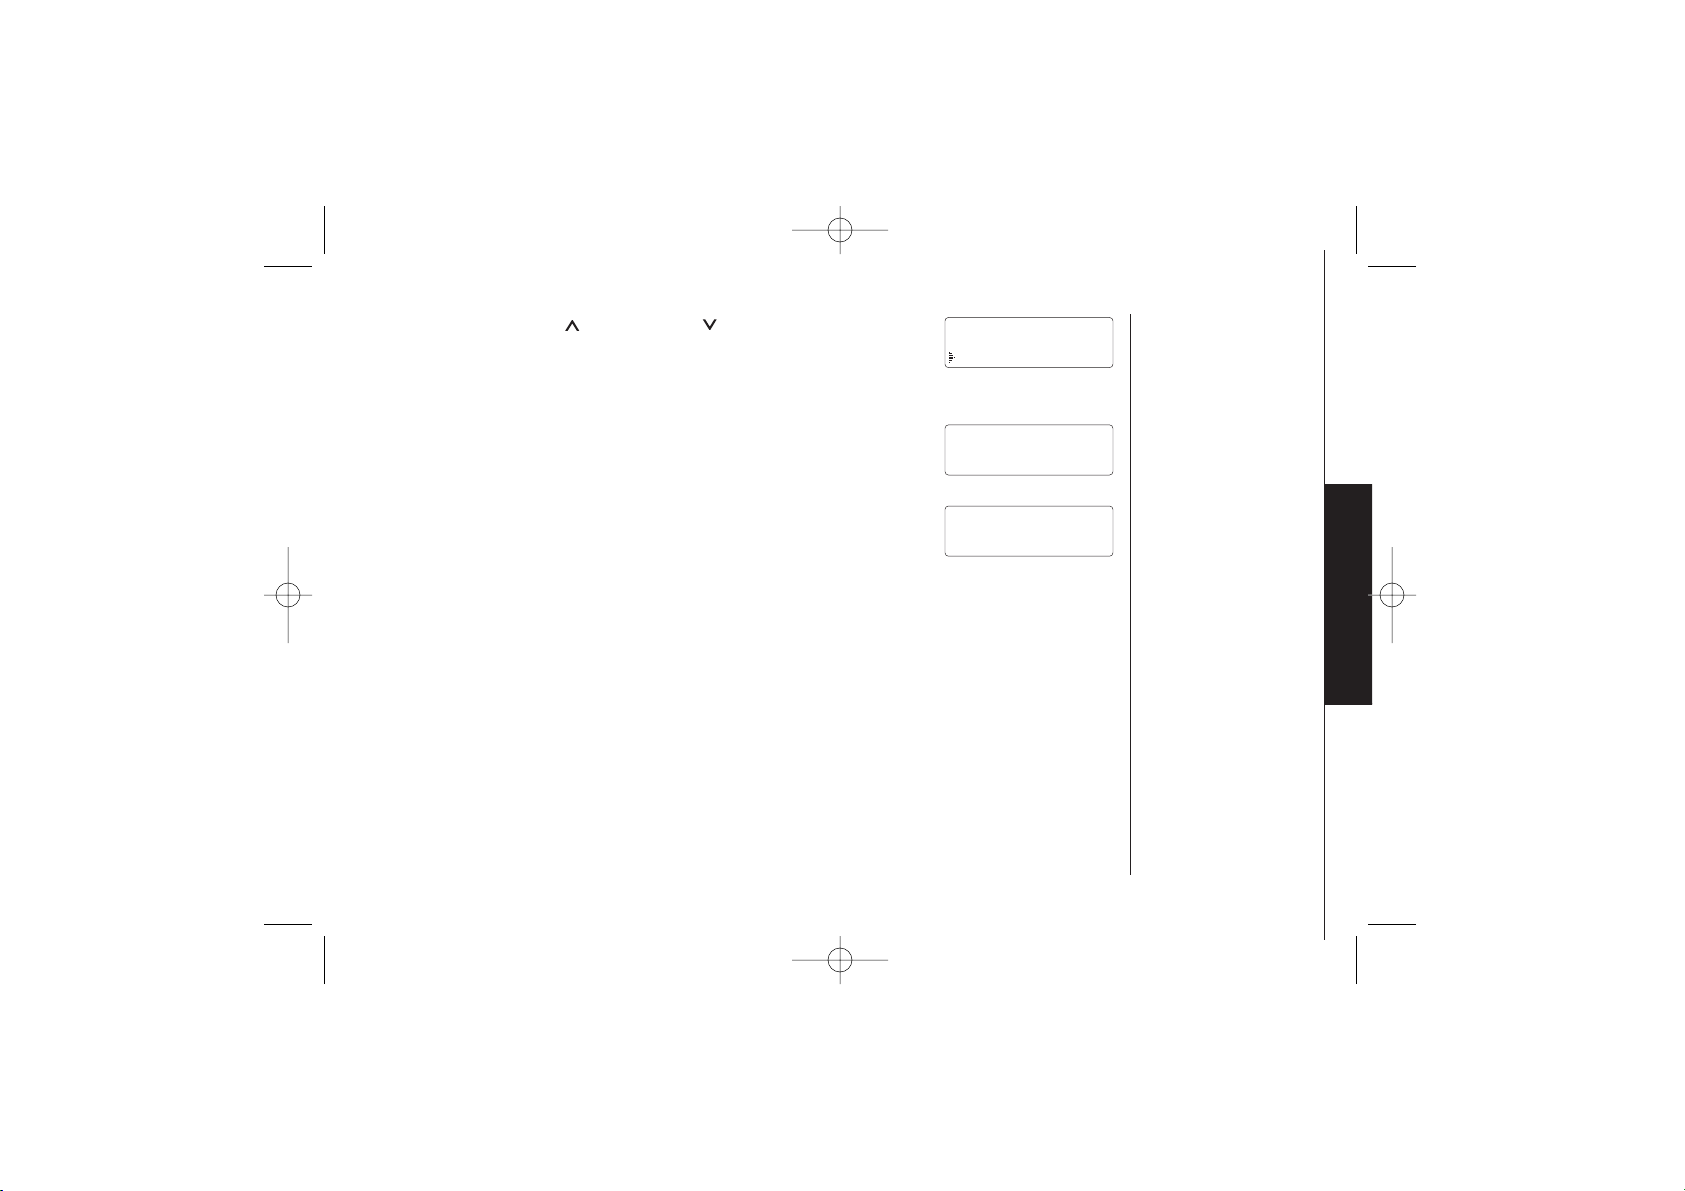
1) Press cid/menu. Display the message to be deleted from
the Caller ID list by pressing the vol/ring/ or vol/ring/
key.
2) Press delete/ch.
3) Press the vol/ring/ or vol/ring/ key to select ¨
Yes¨ or ¨ No¨.
4) Press select or delete/ch.
When the pointer is at ¨
Yes¨:
A tone sounds and the Caller ID message is deleted. The next Caller ID message is
then displayed.
When the pointer is at ¨
No¨:
The display returns to the Caller ID message.
Deleting all Caller ID names/numbers
1) Press cid/menu.
2) Press delete/ch.
• While using the
¨Delete All?¨ or
¨Delete Message?¨
screen if no key is
pressed for more than
30 seconds, an error
tone sounds and the
telephone returns
to the standby mode.
• If you get an
incoming call or page,
the deleting operation
is canceled and the
telephone returns to
the standby mode so
you can answer the
call or page.
EXT3165-01/22 1/22/03 7:37 PM Page 34
5/17 12:30PM 03
Jane Smith
214-555-1234
Delete Message?
Yes
No
Caller ID
New :01
Total:02
Page 34
CALLER ID FEATURES
CALLER ID FEATURES [ 35]www.uniden.com
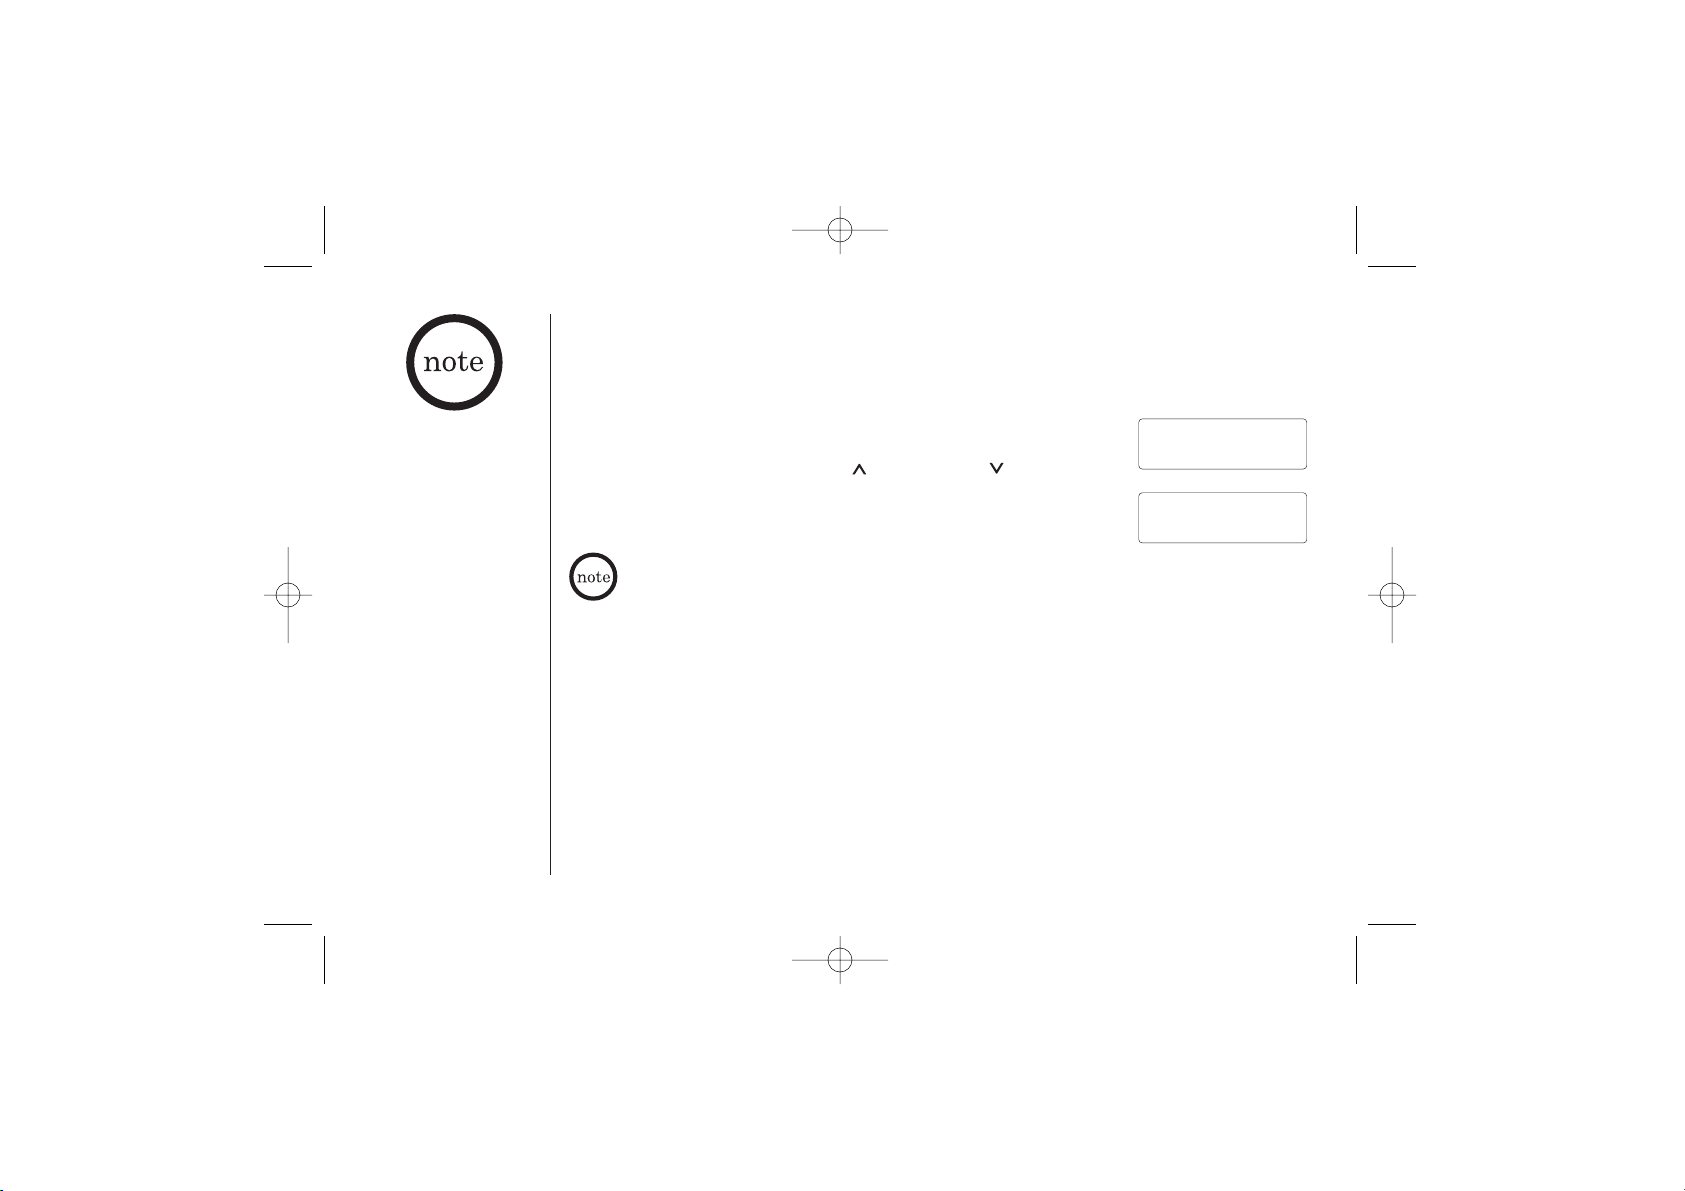
3) Press the vol/ring/ or vol/ring/ key to select ¨ Yes¨
or ¨
No¨.
4) Press select or delete/ch.
When the pointer is at ¨
Yes¨:
A tone sounds and all stored Caller ID messages
are deleted.
When the pointer is at ¨
No¨:
The display returns to the summary screen.
EXT3165-01/22 1/22/03 7:37 PM Page 35
Delete All?
Yes
No
Caller ID
Total:00
Caller ID
New :01
Total:02
Page 35
CALLER ID FEATURES[ 36 ] www.uniden.com
Pressing cid/menu while the phone is in use:
You can view the message list while you are talking on the phone.
The Caller ID message screen shows in the display. The phone number in the Caller ID
message will be dialed when the select key is pressed.
Using the Caller ID List
Calling a party from the Caller ID list
You can place a call from the Caller ID list. The cordless phone stores up to
30 messages.
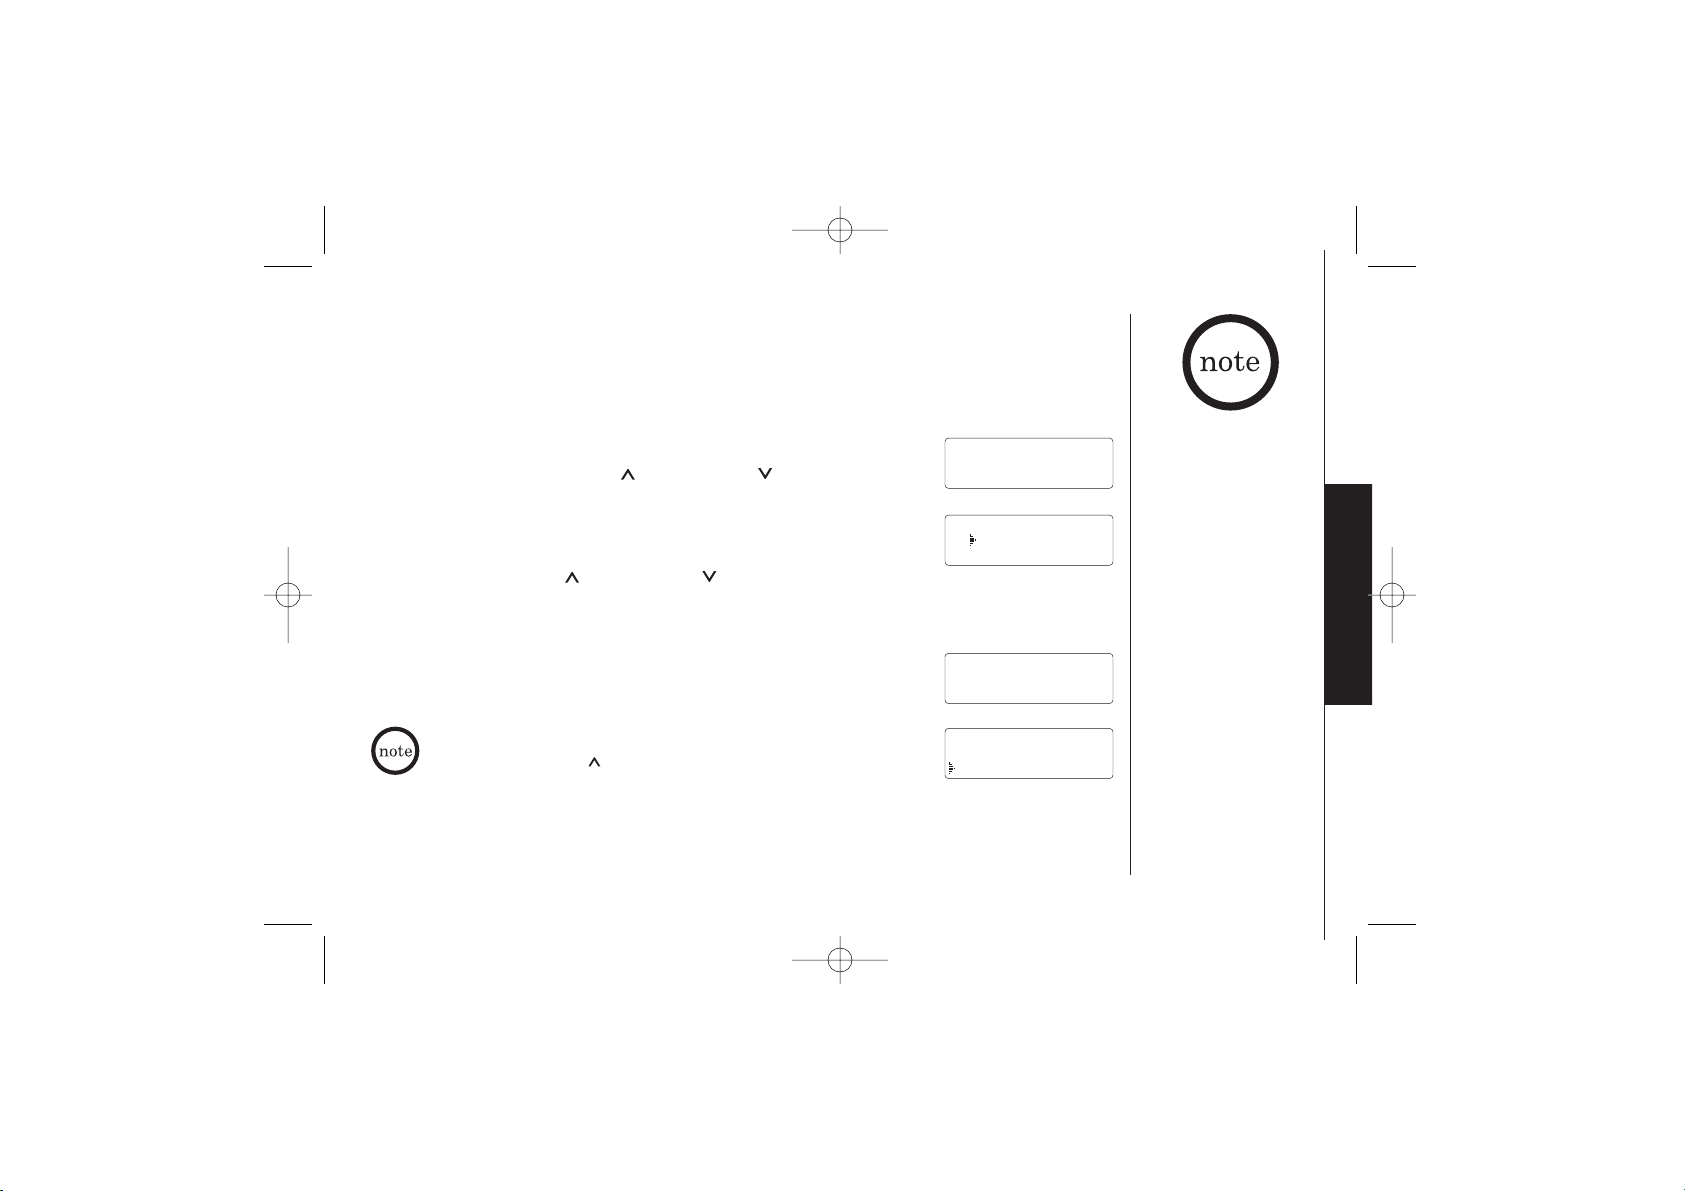
1) Press cid/menu. Select the phone number that you want to
dial by pressing the vol/ring/ or vol/ring/ key.
2) Press talk/flash. The displayed phone number dials
automatically.
Long Distance calls and Area Code Setting/Cancellation
Pressing 1 while the incoming Caller ID information is displayed (in step 1) will
place the prefix ¨
1¨ in the display to set up for a long distance call. Pressing 3 will
set or cancel an area code setting.
• You cannot make a
call from the Caller ID
list if your cordless
telephone is
connected to a
private branch
exchange (PBX).
• When a long distance
call has been set, ¨1¨
appears in the
display.
EXT3165-01/22 1/22/03 7:37 PM Page 36
5/17 12:30PM 03
Jane Smith
214-555-1234
Talk
2145551234
Page 36
CALLER ID FEATURES
CALLER ID FEATURES [ 37]www.uniden.com
Storing Caller ID messages in Memory dialing
Messages shown in the Caller ID list can be stored in memory dialing. Using the
incoming call information (i.e., Caller ID list), the phone number of the party on
the Caller ID list can be stored in memory.
1) Press cid/menu.
Select the phone number to be stored from the Caller ID list
by pressing the vol/ring/ or vol/ring/ key.
2) Press mem.
3) Press the vol/ring/ or vol/ring/ key or enter a number
(01 - 20) to select the memory location to be stored.
4) Press select.
You hear a confirmation tone, and the number is stored
in memory. The display returns to the Caller ID list.
If a message has already been stored in the selected memory
number location, a confirmation screen is displayed.
Press the vol/ring/ key to select ¨Yes¨. Press select to
overwrite. The display returns to the Caller ID list.
You cannot store a
Caller ID message if no
phone number appears
in the message.
EXT3165-01/22 1/22/03 7:37 PM Page 37
5/17 12:30PM 03
Jane Smith
214-555-1234
Select Memory
01
02 JOHN DOE
5/17 12:30PM 03
Jane Smith
214-555-1234
Replace Memory?
Yes
No
Page 37
ADDITIONAL INFORMATION[ 38 ] www.uniden.com
Changing the Digital Security Code
The digital security code is an identification code used to connect the handset and
the base unit. Normally, setting the code is not necessary. The first time you charge
your handset, the security code is automatically set.
In the rare situation that you suspect another cordless telephone is using the same
security code, you can change the code.
1) Remove the handset from the base unit. Press and hold find handset on the base.
2) While holding find handset, place the handset on the base unit, and leave the
handset on the base for more than 3 seconds. A new random security code is set.
Installing the Beltclip
To attach the beltclip
Insert the beltclip into the holes on each side of the handset. Press down until it clicks.
To remove the beltclip
Pull both sides of the beltclip to release the tabs from the holes.
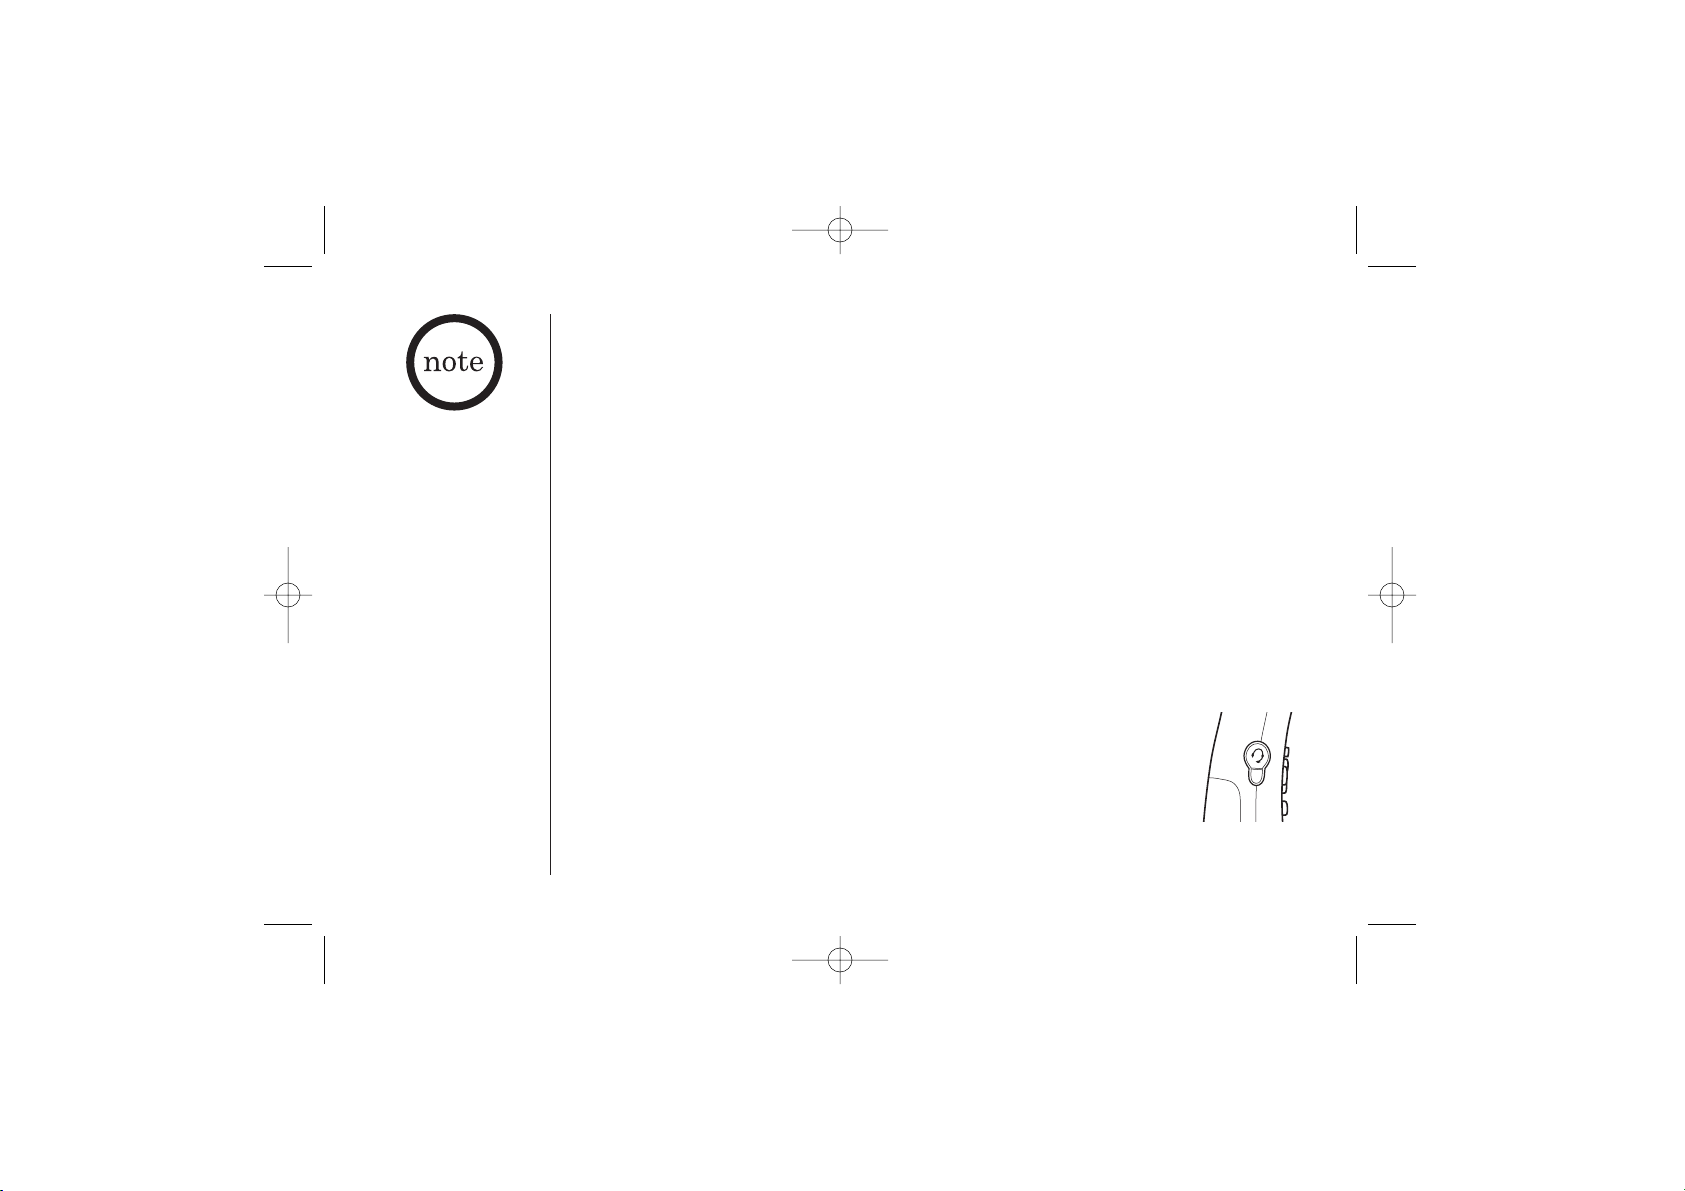
Headset Installation
Your phone may be used with an optional headset, the Uniden HS910.
To use this feature, insert the headset plug into the headset jack.
Your phone is ready for hands-free conversations.
(Headset may be purchased by calling the Uniden Parts Department or
visiting the web site, see QUICK REFERENCE GUIDE on page 3.)
• To protect you against
misbilled calls which
might result from your
phone being activated
by other equipment,
the cordless phone has
AutoSecureTMfeature
electronically locks
your phone when the
handset is in the base.
Also, the Random
CodeTMdigital security
which automatically
selects one of over
262,000 digital
security codes for the
handset and base.
• If the handset battery
pack is completely
discharged or the
battery pack is
removed, the digital
security code will be
lost. If this happens,
a new security code is
set automatically the
next time the battery
pack is charged.
EXT3165-01/22 1/22/03 7:37 PM Page 38
Page 38
ADDITIONAL
INFORMATION
ADDITIONAL INFORMATION [ 39]www.uniden.com
Note on Power Sources
Battery replacement and handling
When the operating time becomes short, even after a battery is recharged, please replace the battery.
With normal usage, your battery should last about one year. Please contact your place of purchase or the
Uniden Parts Department for a replacement battery.
Warning: To avoid the risk of personal injury or property damage from fire or electrical shock, only use the
Uniden battery model and Uniden adapter model specifically designated for this product.
Power Failure
During the period that the power is off, you will not be able
to make or receive calls with the telephone.
Caution
• Use only the specified Uniden battery pack (BT-905).
• Do not remove the battery from the handset to charge it.
• Never throw the battery into a fire, disassemble it, or heat it.
• Do not remove or damage the battery casing.
Caution
Do not use paint thinner,
benzene, alcohol, or other
chemical products.
Doing so may discolor the
surface of the telephone
and damage the finish.
Maintenance
When the handset or base unit becomes slightly dirty
Wipe with a soft, dry cloth.
When the handset or base unit becomes very dirty
Wipe with a soft cloth that has been dampened with diluted, neutral detergent.
Dry with a dry cloth.
When the charging contacts become very dirty on both the handset and
base unit
Using water only, dampen a cloth to clean the charging contacts. Then make
sure to go back over the charging terminals with a dry cloth before returning
the handset to the base unit to charge.
EXT3165-01/22 1/22/03 7:37 PM Page 39
Page 39
ADDITIONAL INFORMATION[ 40 ] www.uniden.com
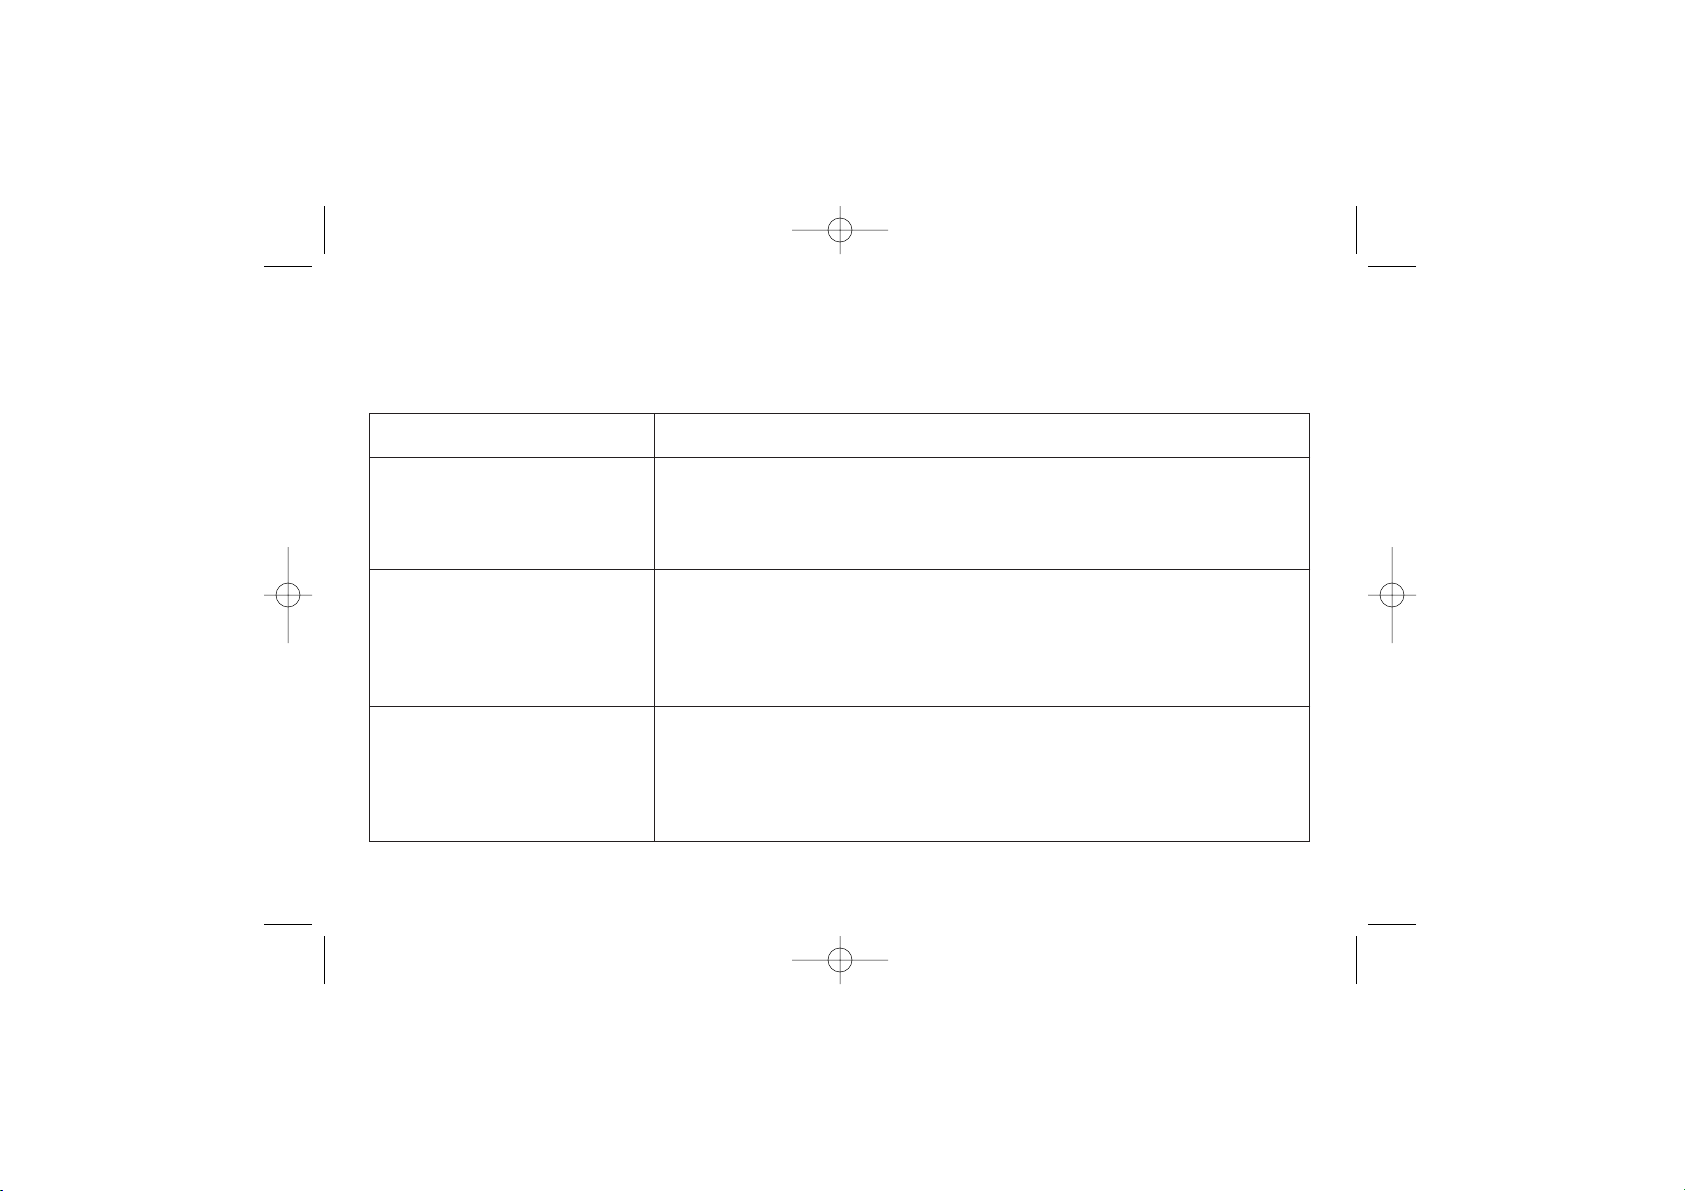
Troubleshooting
If your phone is not performing to your expectations, please try these simple steps first.
Symptom
The charge/in use/voicemail
LED won't illuminate when
the handset is placed in
the base.
The audio sounds weak
and/or scratchy.
Can't make or receive calls.
Suggestion
• Make sure the AC adapter is plugged into the base and wall outlet.
• Make sure the handset is properly seated in the base.
• Make sure the charging contacts on the handset and base are clean.
• Make sure that the base antenna is in a vertical position.
• Move the handset and/or base to a different location away from metal
objects or appliances and try again.
• Press delete/ch to help eliminate background noise.
• Make sure that you are not too far from the base.
• Check both ends of the base telephone line cord.
• Make sure the AC adapter is plugged into the base and wall outlet.
• Disconnect the AC adapter for a few minutes, then reconnect it.
• Change the digital security code (see page 39).
• Make sure that you are not too far from the base.
EXT3165-01/22 1/22/03 7:37 PM Page 40
Page 40
ADDITIONAL
INFORMATION
ADDITIONAL INFORMATION [ 41]www.uniden.com
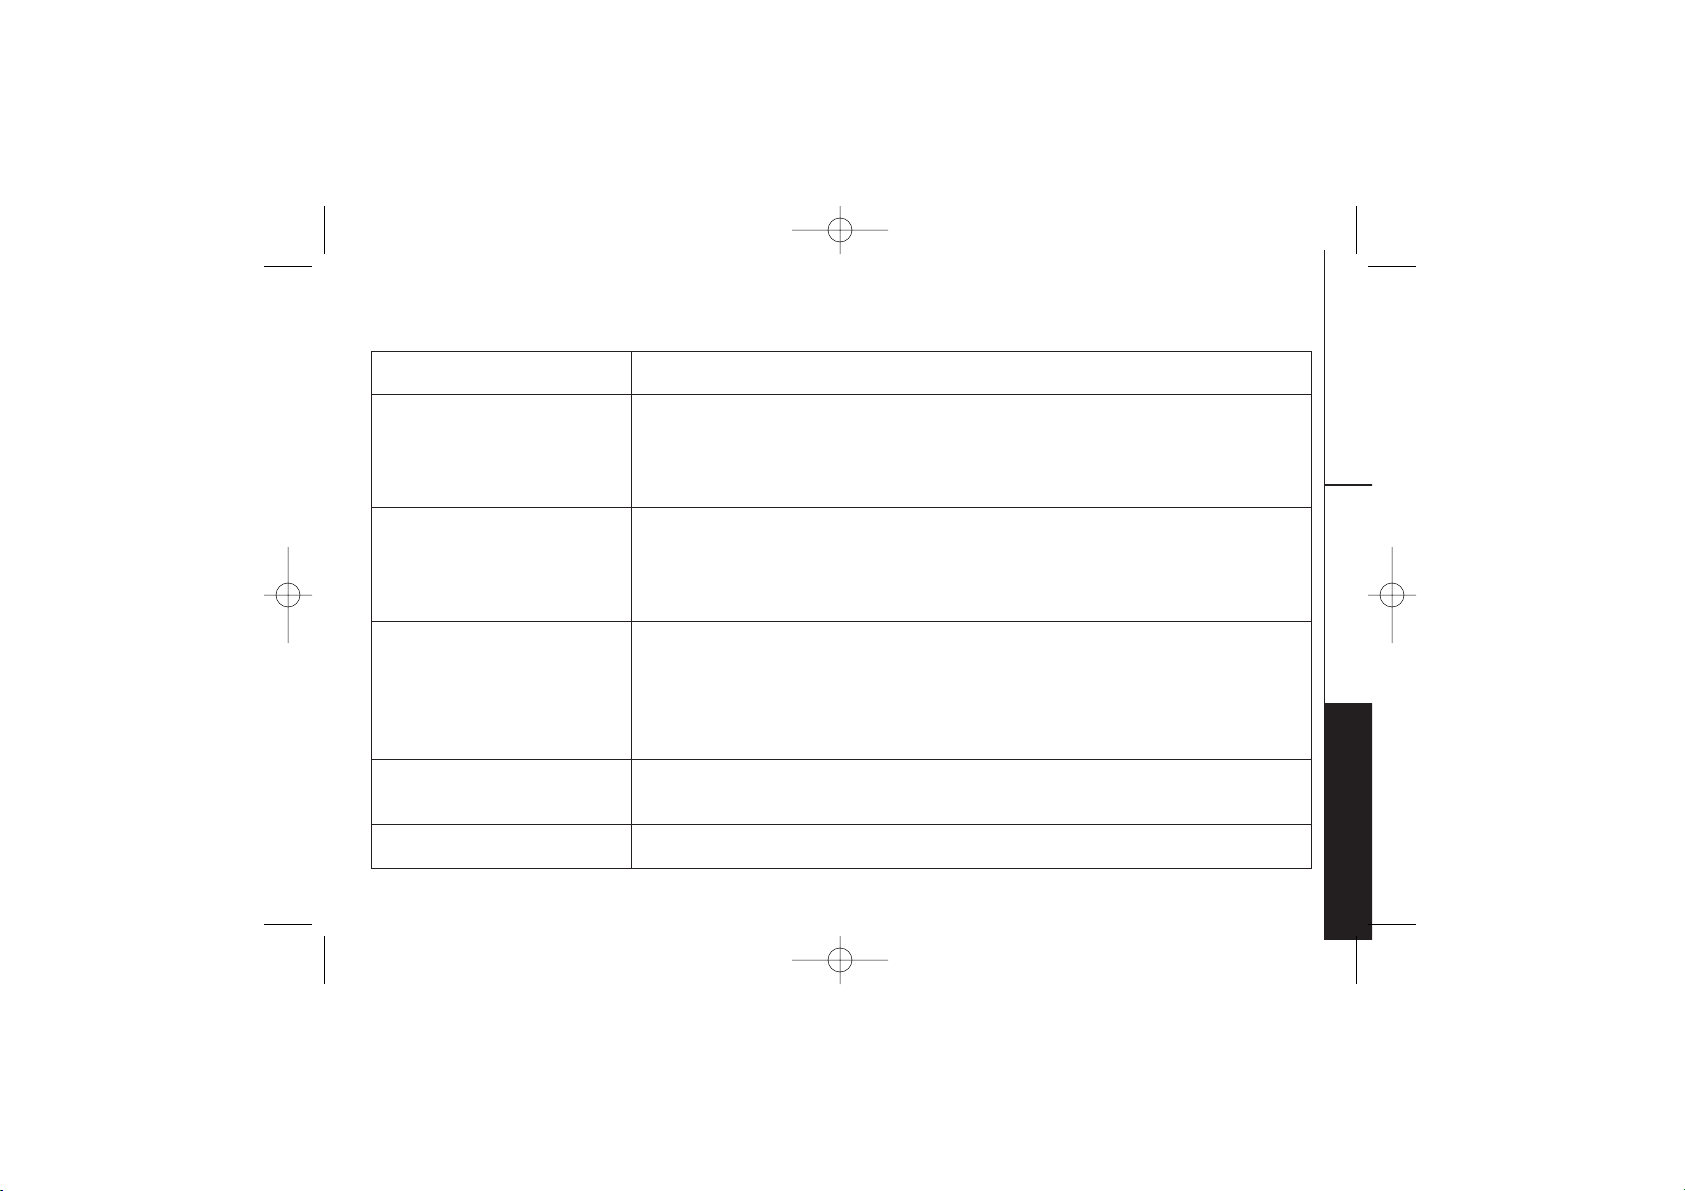
Symptom
The handset doesn't ring or
receive a page.
Severe noise interference.
The Caller ID does not
display.
Voice Message Indication
does not work.
If you still have a problem.
Suggestion
• The battery pack may be weak. Charge the battery for 15-20 hours.
• The handset may be too far away from the base unit.
• Place the base unit away from appliances or metal objects.
• Change the digital security code (see page 39).
• Keep the handset away from microwave ovens, computers, remote control
toys, wireless microphones, alarm systems, intercoms, room monitors,
fluorescent lights, and electrical appliances.
• Move to another location or turn off the source of interference.
• The handset was picked up before the second ring.
• The call was placed through a switchboard.
• Call your local telephone company to verify your Caller ID service
is current.
• Charge the handset.
• Contact your local telephone company to make sure that your telephone
receives FSK and SDT message signaling.
• Call our customer hotline at 1-800-297-1023.
EXT3165-01/22 1/22/03 7:37 PM Page 41
Page 41
ADDITIONAL INFORMATION[ 42 ] www.uniden.com
Case
If the handset or base is exposed to
moisture or liquid, but only affects the
exterior plastic housing.
If moisture or liquid has entered the
plastic-housing (i.e. liquid can be
heard in the phone or liquid has
entered the handset battery
compartment or vent openings on the
base).
Action
Wipe off the liquid and use as normal.
Handset:
1. Remove the battery cover and leave it off for ventilation.
2. Remove the battery pack by disconnecting.
3. Leave the battery cover off and the battery pack disconnected for at least 3 days.
4. Once completely dry, reconnect the battery pack and the battery cover.
5. Recharge the handset’s battery pack for 20 hours in the base unit before using the phone.
Base:
1. Disconnect the AC adapter from the base unit, cutting off electrical power.
2. Disconnect the telephone cord from the base unit.
3. Let dry for at least 3 days.
IMPORTANT: You must unplug the telephone line while recharging the battery pack to
avoid charge interruption.
CAUTION:
DO NOT use a microwave oven to speed up the drying process. This will cause permanent
damage to the handset, base and the microwave oven.
After following these steps, if your cordless telephone does not work, please send to:
Uniden America Corporation
Parts and Service Division
4700 Amon Carter Blvd.
Ft. Worth, TX 76155
1-800-554-3988. Monday through Friday
8 a.m. to 5 p.m. CST
Liquid Damage
Moisture and liquid can damage your cordless phone. In case of accidental submersion, please read the
following steps.
EXT3165-01/22 1/22/03 7:37 PM Page 42
Page 42
ADDITIONAL
INFORMATION
ADDITIONAL INFORMATION [ 43]www.uniden.com
General Information
The phone complies with FCC Parts 15 and 68.
Operating temperature: -10° to 50° C (+14°F to +122° F)
AC Adapter Information
AC Adapter part number: AD-446
Input Voltage: 120V AC 60Hz
Output Voltage: 9V DC 210 mA
Battery Information
Battery part number: BT-905
Capacity: 600 mAH, 3.6V
Battery use time (per charge)
From fully charged
Talk mode duration: Up to 7 hours
Standby mode duration: Up to 14 days
Recharge your phone on a regular basis by returning the handset to the base after each phone call.
When the operating time becomes short, even after the battery is recharged, please replace the battery.
With normal usage, the battery should last about one year.
A replacement Uniden adapter and battery may be purchased at your local Uniden dealer or by contacting
the Uniden Parts Department (800) 554-3988. Hours are from 8:00 a.m. to 5:00 p.m. Central Time, Monday
through Friday. We can also be reached on the web at www.uniden.com.
Specifications, features, and availability of optional accessories are all subject to change without prior
notice.
• To avoid damage to the phone use only Uniden AD-446 and BT-905 with your phone.
• If the handset is left off of the base, the actual Talk mode duration will be reduced respective to the amount of time the handset
is off the base.
EXT3165-01/22 1/22/03 7:37 PM Page 43
Page 43
ADDITIONAL INFORMATION[ 44 ] www.uniden.com
Precautions!
Before you read anything else, please observe the following:
Warning!
Uniden America Corporation DOES NOT represent this unit to be
waterproof. To reduce the risk of fire, electrical shock, or damage
to the unit, DO NOT expose this unit to rain or moisture.
Rechargeable Nickel-Cadmium Battery Warning
• This equipment contains a rechargeable nickel-cadmium battery.
• Cadmium is a chemical known to the State of California to cause
cancer.
• The rechargeable nickel-cadmium battery contained in this
equipment may explode if disposed of in a fire.
• Do not short-circuit the battery.
• Do not charge the rechargeable nickel-cadmium battery used in this
equipment in any charger other than the one designed to charge
this battery as specified in the owner’s manual. Using another
charger may damage the battery or cause the battery to explode.
Rechargeable Nickel-Cadmium
Batteries Must Be Recycled or
Disposed of Properly
• Uniden voluntarily participates in an RBRC®
industry program to collect and recycle nickel-cadmium batteries at
the end of their useful life, when taken out of service within the
United States.
The RBRC® program provides a convenient alternative to placing
used nickel-cadmium batteries into the trash or municipal waste
stream, which is illegal in some areas.
• Through the RBRC® program, Uniden makes it easy for you to drop
off the used battery at local retailers of replacement nickel-cadmium
batteries. You may also contact your local recycling center for
information on where to return the used battery. Please call 1-8008-BATTERY for information on Ni-Cd battery recycling in your area.
Uniden's involvement in this program is part of its commitment to
protecting our environment and conserving natural resources.
• RBRC® is a registered trademark of the Rechargeable Battery
Recycling Corporation.
Uniden works to reduce lead content in our PVC coated cords in our
product and accessories.
WARNING: The cords on this products and/or accessories contain
lead, a chemical known to the State of California to cause birth defects
or other reproductive harm. Wash hands after handling.
Important Safety Instructions
When using your telephone equipment, these basic safety precautions
should always be followed to reduce the risk of fire, electrical shock,
and injury to persons:
1. Read and understand all instructions.
2. Follow all warnings and instructions marked on the product.
3. Unplug this product from the wall outlet before cleaning. Use a dry
cloth for cleaning without liquid or aerosol cleaners.
4. Do not use this product near water; for example, near a bathtub,
wash bowl, kitchen sink or laundry tub, in a wet basement, or near a
swimming pool.
5. Do not place this product on an unstable cart, stand, or table.
The telephone may fall, causing serious damage to the unit.
6. Slots and openings in the cabinet and the back or bottom are
provided for ventilation. To protect the product from overheating,
these openings must not be blocked or covered. This product should
never be placed near or over a radiator or heat register. This product
should not be placed in a built-in installation unless proper
ventilation is provided.
7. This product should be operated only from the type of power source
indicated on the marking label. If you are not sure of the type of
power supply to your home, consult your dealer or local power
company.
8. Do not allow anything to rest on the power cord. Do not locate this
product where the cord will be damaged by persons walking on it.
9. Do not overload wall outlets and extension cords, as this can result
in the risk of fire or electrical shock.
10.Never push objects of any kind into this product through cabinet
slots, as they may touch dangerous voltage points or short out parts
that could result in a risk of fire or electric shock. Never spill liquid
of any kind on the product.
11.To reduce the risk of electric shock, do not disassemble this product.
Take it to qualified service personnel when service or repair work is
required. Opening or removing covers may expose you to dangerous
voltages or other risks. Incorrect reassembly can cause electric shock
when the appliance is subsequently used.
12.Unplug this product from the wall outlet and refer servicing to
qualified service personnel under the following conditions:
A. When the power supply cord is damaged or frayed.
B. If liquid has been spilled into the product.
C. If the product has been exposed to rain or water.
D. If the product does not operate normally when following the
operating instructions. (Adjust only those controls that are
covered by the operating instructions. Improper adjustment
of other controls may result in damage and will often require
extensive repair work by a qualified technician.)
E. If the product has been dropped or the cabinet has been
damaged.
F. If the product exhibits a distinct change in performance.
13.Do not use the telephone to report a gas leak in the vicinity
of the leak.
Additional Battery Safety Precautions
Caution! To reduce the risk of fire or injury to persons by the
battery, read and follow these instructions:
1. Use only the Uniden battery pack specified in the owner’s manual.
2. Do not dispose of the battery pack in a fire. The cell may explode.
Check the nickel-cadmium battery disposal package insert for
disposal instructions.
3. Do not open or mutilate the battery pack. Released electrolyte is
corrosive and may cause damage to the eyes or skin. It may be toxic
if swallowed.
4. Exercise care in handling the battery in order not to short the
battery with conducting materials such as rings, bracelets, and keys.
The battery or conductor may overheat and cause burns.
5. Charge the battery pack provided with or identified for use with this
product only in accordance with the instructions and limitations
specified in the owner’s manual provided for this product.
6. Observe proper polarity orientation between the battery pack and
battery charger.
SAVE THESE INSTRUCTIONS!
Important Electrical Considerations
Unplug all electrical appliances when you know an electrical storm is
approaching. Lightning can pass through your household wiring and
damage any device connected to it. This phone is no exception.
The FCC Wants You To Know
Changes or modifications to this product not expressly approved by
Uniden, or operation of this product in any way other than as detailed
by the owner’s manual, could void your authority to operate this
product. Your telephone compiles with Part 68 of FCC Rules. You must,
upon request, provide the FCC registration number and the REN to your
telephone company. Both numbers are on the base unit.
NOTE: You must not connect your phone to:
• coin-operated systems
• most electronic key telephone systems
Range
Your new phone is designed to achieve the maximum possible range by
transmitting and receiving according to the highest specifications set
forth by the FCC. We have rated this phone to operate at a maximum
distance with the qualification that the range depends upon the
environment in which the telephone is used. Many factors limit range,
and it would be impossible to include all the variables in our rating.
The Maximum Range rating of this phone is meant to be used as a
means of comparison against other range claims.
The exclamation point within an equilateral triangle is
intended to alert the user to the presence of important
operating and maintenance (servicing) instructions in
the literature accompanying the appliance.
EXT3165-01/22 1/22/03 7:37 PM Page 44
Page 44

ADDITIONAL
INFORMATION
ADDITIONAL INFORMATION [ 45]www.uniden.com
Telephone Line Problems
The FCC has granted the telephone company the right to disconnect
service in the event that your phone causes problems on the telephone
line. Also, the telephone company may make changes in facilities and
services which may affect the operation of your unit. However, your
telephone company must give adequate notice in writing prior to such
actions to allow you time for making necessary arrangements to
continue uninterrupted service.
If you are having trouble with your telephone service, you must first
disconnect your phone to determine if it is the cause of your problem.
If you determine that it is the cause, you must leave it disconnected
until the trouble has been corrected.
Radio Interference
Radio interference may occasionally cause buzzing and humming in your
cordless handset, or clicking noises in the base. This interference is
caused by external sources such as TV, refrigerator, vacuum cleaner,
fluorescent lighting, or electrical storm. Your unit is NOT DEFECTIVE.
If these noises continue and are too distracting, please check around
your home to see what appliances may be causing the problem.
In addition, we recommend that the base not be plugged into a circuit
that also powers a major appliance because of the potential for
interference. Be certain that antenna on the unit is fully extended.
In the unlikely event that you consistently hear other voices or
distracting transmissions on your phone, you may be receiving radio
signals from another cordless telephone or other source of interference.
If you cannot eliminate this type of interference, you need to change to
a different channel.
Finally, it should be noted that some cordless telephones operate at
frequencies that may cause interference to nearby TVs and VCRs.
To minimize or prevent such interference, the base of the cordless
telephone should not be placed near or on top of a TV or VCR.
If interference is experienced, moving the cordless telephone farther
away from the TV or VCR will often reduce or eliminate the interference.
More Than One Cordless Telephone
If you want to use more than one cordless telephone in your home,
they must operate on different channels. Press the channel key to select
a channel that provides the clearest communication.
Cordless Telephone Privacy
Cordless telephones are radio devices. Communications between the
handset and base of your cordless telephone are accomplished by means
of radio waves which are broadcast over the open airways. Because of
the inherent physical properties of radio waves, your communications
can be received by radio receiving devices other than your own cordless
telephone unit. Consequently, any communications using your cordless
telephone may not be private.
Installation Considerations
Selecting a Location
Before choosing a location for your new phone, there are some
important guidelines you should consider:
• The location should be close to both a phone jack and continuous
power outlet. (A continuous power outlet is an AC outlet which does
not have a switch to interrupt its power.)
• Keep the base and handset away from sources of electrical noise
such as motors or fluorescent lighting.
• Be sure there is sufficient space to fully extend the base antenna.
• The base can be placed on a desk or tabletop or mounted on a
standard telephone wall plate.
• You should charge your new phone for 15-20 hours before
completing the installation or using the handset.
Telephone Line Outlets
There are two types of phone outlets:
Modular Jack
Most phone equipment available now uses modular jacks. Phone cords
are fitted with a molded plastic connector which plugs into this type
of jack. If you do not have modular phone jacks, contact your local
telephone company for information about their installation.
Hardwired Jack
Some equipment is wired directly to a phone jack, and these types of
installations require a modular jack converter. This type of installation
is not difficult; however, you should contact your Uniden telephone
dealer or a telephone supply store for advice about the proper adapter
or converter for your particular situation.
Connecting the Telephone Cords
Consider these safety guidelines before connecting the telephone cords:
Caution!
• Never install telephone wiring during a lightning storm.
• Never touch uninsulated telephone wires or terminals unless the
telephone line has been disconnected.
• Use caution when installing or modifying telephone lines.
Applying Power to the Base
This phone requires an AC outlet, without a switch to interrupt power,
and the included AC adapter. To relieve strain on the DC plug when the
phone is placed on a desk or table, wrap the power cord around the
strain relief notch on the back of the base.
NOTE: Place the power cord so that it does not create a trip
hazard, or where it could become chafed and create a
fire or other electrical hazards.
One Year Limited Warranty
Important: Evidence of original purchase is required for warranty service.
WARRANTOR: UNIDEN AMERICA CORPORATION (“Unide n”)
ELEMENTS OF WARRANTY: Uniden warrants, for one year, to the original
retail owner, this Uniden Product to be free from defects in materials
and craftsmanship with only the limitations or exclusions set out below.
WARRANTY DURATION: This warranty to the original user shall terminate
and be of no further effect 12 months after the date of original retail
sale. The warranty is invalid if the Product is (A) damaged or not
maintained as reasonable or necessary, (B) modified, altered, or used as
part of any conversion kits, subassemblies, or any configurations not
sold by Uniden, (C) improperly installed, (D) serviced or repaired by
someone other than an authorized Uniden service center for a defect or
malfunction covered by this warranty, (E) used in any conjunction with
equipment or parts or as part of any system not manufactured by
Uniden, or (F) installed or programmed by anyone other than as
detailed by the owner’s manual for this product.
STATEMENT OF REMEDY: In the event that the product does not conform
to this warranty at any time while this warranty is in effect, warrantor
will either, at its option, repair or replace the defective unit and return
it to you without charge for parts, service, or any other cost (except
shipping and handling) incurred by warrantor or its representatives in
connection with the performance of this warranty. Warrantor, at its
option, may replace the unit with a new or refurbished unit. THE
LIMITED WARRANTY SET FORTH ABOVE IS THE SOLE AND ENTIRE
WARRANTY PERTAINING TO THE PRODUCT AND IS IN LIEU OF AND
EXCLUDES ALL OTHER WARRANTIES OF ANY NATURE WHATSOEVER,
WHETHER EXPRESS, IMPLIED OR ARISING BY OPERATION OF LAW,
INCLUDING, BUT NOT LIMITED TO ANY IMPLIED WARRANTIES OF
MERCHANTABILITY OR FITNESS FOR A PARTICULAR PURPOSE. THIS
WARRANTY DOES NOT COVER OR PROVIDE FOR THE REIMBURSEMENT OR
PAYMENT OF INCIDENTAL OR CONSEQUENTIAL DAMAGES. Some states do
not allow this exclusion or limitation of incidental or consequential
damages so the above limitation or exclusion may not apply to you.
LEGAL REMEDIES: This warranty gives you specific legal rights, and you
may also have other rights which vary from state to state. This warranty
is void outside the United States of America and Canada.
PROCEDURE FOR OBTAINING PERFORMANCE OF WARRANTY: If, after
following the instructions in the owner’s manual you are certain that
the Product is defective, pack the Product carefully (preferably in its
original packaging). The Product should include all parts and accessories
originally packaged with the Product. Include evidence of original
purchase and a note describing the defect that has caused you to return
it. The Product should be shipped freight prepaid, by traceable means,
to warrantor at:
Uniden America Corporation
Parts and Service Division
4700 Amon Carter Blvd. Fort Worth, TX 76155
(800) 297-1023, 8 a.m. to 5 p.m. Central, Monday through Friday
EXT3165-01/22 1/22/03 7:37 PM Page 45
Page 45

ADDITIONAL INFORMATION[ 46 ] www.uniden.com
I.C. Notice
TERMINAL EQUIPMENT
NOTICE: This equipment meets the applicable Industry Canada Terminal Equipment Technical Specifications.
This is confirmed by the registration number. The abbreviation, IC, before the registration number signifies
that registration was performed based on a Declaration of Conformity indicating that Industry Canada
technical specifications were met. It does not imply that Industry Canada approved the equipment.
NOTICE: The Ringer Equivalence Number (REN) for this terminal equipment is marked on the equipment
itself. The REN assigned to each terminal equipment provides an indication of the maximum number of
terminals allowed to be connected to a telephone interface. The termination on an interface may consist
of any combination of devices subject only to the requirement that the sum of the Ringer Equivalence
Numbers of all the devices does not exceed five.
RADIO EQUIPMENT
The term “IC:” before the radio certification number only signifies that Industry Canada technical
specifications were met.
Operation is subject to the following two conditions: (1) this device may not cause interference, and
(2) this device must accept any interference, including interference that may cause undesired operation
of the device. “Privacy of communications may not be ensured when using this telephone”.
EXT3165-01/22 1/22/03 7:37 PM Page 46
Page 46

ADDITIONAL
INFORMATION
ADDITIONAL INFORMATION [ 47]www.uniden.com
A
AC adapter information ...................................... 43
Adjusting ringer and earpiece volume.................... 19
B
Battery pack
Information .................................................. 43
Install .......................................................... 9
Maintenance ............................................ 11, 39
Preparing and charging .................................. 12
Replacement and handling .............................. 39
Beltclip installation .......................................... 38
C
Caller ID
Caller ID service .............................................. 32
Call Waiting .................................................. 21
Deleting ...................................................... 34
Setting Caller ID options ................................ 15
Using .......................................................... 36
Viewing........................................................ 33
Channel .......................................................... 21
Connection ...................................................... 12
D
Dial mode........................................................ 16
Digital security code ........................................ 38
E, F, G
Earpiece volume................................................ 19
General information .......................................... 43
H
Headset installation .......................................... 38
I, J, K, L
I.C. Notice ...................................................... 46
Interference .................................................... 45
Language ........................................................ 17
M, N, O
Maintenance .................................................... 39
Making a call .................................................. 18
Memory dialing
Editing a stored name
and/or phone number .................................... 27
Erasing a stored name
and phone number.......................................... 29
Making calls with memory dialing...................... 25
Storing phone
numbers and names ........................................ 22
Mounting on a wall .......................................... 13
P, Q
Package contents................................................ 3
Paging............................................................ 21
Precautions...................................................... 44
Quick reference guide .......................................... 3
R
Receiving a call................................................ 18
Redialing a call .......................................... 18, 20
Ringer tone and volume .................................... 19
S
Setting menu options ........................................ 15
Setting up the handset........................................ 9
Setting up the phone .......................................... 8
T, U , V, W, X , Y, Z
Technical information ........................................ 43
Troubleshooting................................................ 40
Voicemail ........................................................ 22
Warranty ........................................................ 45
EXT3165-01/22 1/22/03 7:37 PM Page 47
Page 47
At Uniden, we´ll take care of you!
If you need any assistance with this product, please call our Customer Hotline at
1-800-297-1023
PLEASE DO NOT RETURN THIS PRODUCT TO THE PLACE OF PURCHASE.
Our Uniden representatives will be happy to help you with any matters regarding
the operation of this unit, available accessories, or any other related matters.
Thank you for purchasing a Uniden product.
Hours: M-F 8:00 AM to 5:00 PM CST.
For information on the accessibility features of this product, please call
1-800-874-9314 (V/TTY)
EXT3165-01/22 1/22/03 7:37 PM Page 49
?
Accessibility
 Loading...