

Page 1
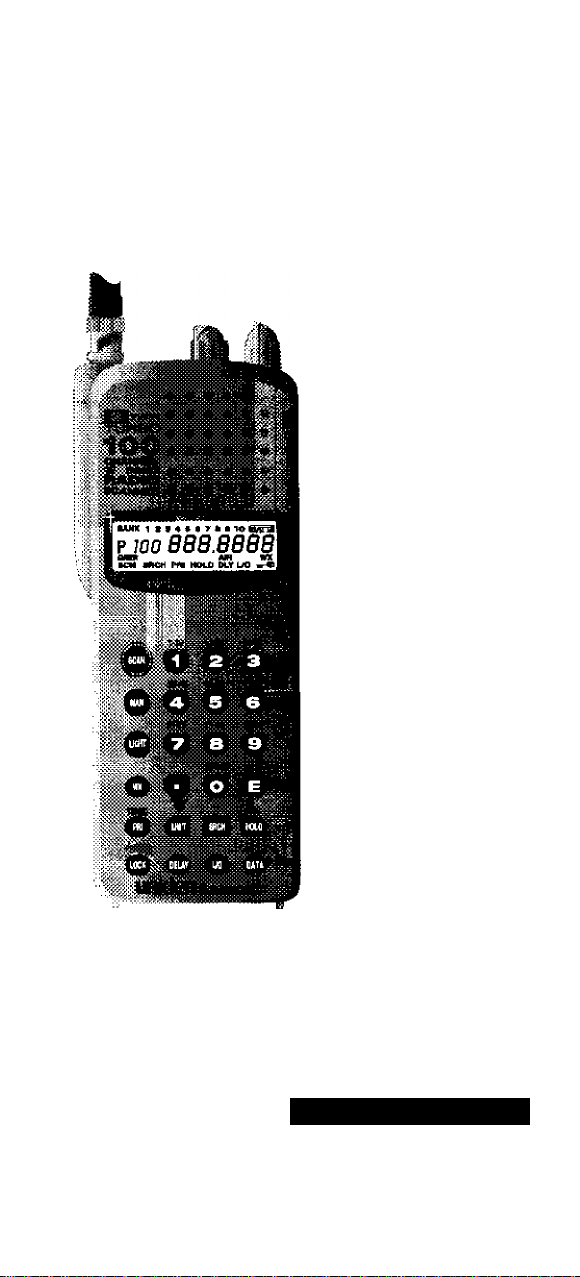
UBC120XLT
100-Channel
Programmable
Twin Turbo
Hand-Held
Auto Scanner
OPERATING GUIDE
Page 2

PRECAUTIONS
Before you use this scanner, please read and observe the follcwing:
■ WARNING'
Uniden DOES NOT represent this unit to be
waterproof. To reduce the risk of fire or electrical
shock, DO NOT expose this unit to rain or moisture.
■ IMPORTANT!
Be sure to use only the supplied earphone, or a
stereo headset of the proper impedance (32£i). Use
of an incorrect earphone or stereo headset may be
potentially hazardous to your hearing.
■ WARNING:
Set the Volume to a comfortable audio level coming
from the speaker before plugging in fhe supplied
earphone or a stereo headset of the proper
impedance (32il). Otherwise you might experience
some discomfort or possible hearing damage if the
Volume suddenly becomes too loud because of the
Volume Control or Squelch Control setting. This may
be particularly true of the type of earphone that is
placed in the ear canal.
■ NICKEL-CADMIUM BATTERY WARNING
• This equipment contains a Nickel-Cadmium Battery.
• The Nickel-Cadmium Battery contained in this
equipment may explode if disposed of in a fire.
• Do not short circuit the battery.
• Do not charge the Nickel-Cadmium Battery used
in this equipment with any other AC
Adaptor/Charger other than the one designed to
charge this battery (AAD-2500U). Using another
charger may damage the battery, or cause the
battery to explode.
Uniden'^ and Bearcai^ are a registered trademarks of Uniden Corporakon.
Page 3

Table of Contents
I
About Your New UBC 120XLT
What is Scanning?..............................................................2
What is Searching?
Types of Communication....................................................3
Where to Obtain More information
Unpacking
Feature Highlights.................................................................5
Controls and Indicators
Setup
..............
Charging the Battery Pack................................................10
Mounting the Flexible Antenna
Installing the Belt Clip
Using fhe Earphone.........................................................11
Programminjg Channels
Programming By Manual Entry
Deleting a Stored Frequency............................................15
Scanning
Priority Scan......................................................................17
Delay.................................................................................17
Locking Out Channels.......................................................18
Looking for “Locked Out” Channels
Weather Channel Scanning
Searching
Using DATA Skip..............................................................20
Search Frequency Skip
Programming With SEARCH
Care and Maintenance........................................................22
Replacing the Battery Pack..............................................22
Location............................................................................23
Cleaning............................................................................23
Repairs.............................................................................23
Birdies...............................................................................24
Proper Care of Your Scanner
Trouble^ooting
Optional Accessories and Replacement Parts
Technical Specifications....................................................27
.........................................................................
..............................................................................
............................................................................
............................................................
......................................................................to
..................................................................
.............................................
.....................................
.......................
......................................................
....................................................
..............................................
...................................................
..........................................
.................................6
.........................................
.........................................
..................................
..........................................
................
10
11
14
20
21
21
24
25
26
2
2
4
4
12Operation Overview......................................................
f4
16
f 8
19
Page 4

About Your New UBC 120XLT
Tbe UBC 120XLT is a brand new stale-of-the-art information
radio with automatic scanning capabilities. It can store
frequencies such as police, fire/emergency, marine, air,
amateur, and other communications into 10 banks of 10
channels each. And you can scan all 100 channels at super
fast Turbo Scan speed.
With the UBC 120XLT, you can search for frequencies at fast
speed. You can also search v.h.f, frequencies at super fast
Turbo speed.
What is Scanning?
Unlike standard AM or FM radio stations, most two-way
communications (listed below) do not transmit continuously.
The UBC 120XLT scans programmed channels at the rate of
nearly 100 channels per second until it finds an active
frequency.
Scanning stops on an active frequency, and remains on that
channel as long as the transmission continues. When the
transmission ends, the scanning cycle resumes until another
transmission is received. Or, you can select an optional Delay
so the scanner stays on the channel for 2 more seconds after
the transmission stops, waiting for another transmission,
before resuming scanning.
While the UBC 120XLT is scanning channels, it is in “SCAN
Mode". When you stop the scanning with @, it is in “SCAN
HOLD Mode".
What is Searching?
The UBC 120XLT can search each of 9 bands to find active
frequencies. This is different from scanning, because you can
search for frequencies that have not been programmed into
your UBC 120XLT. You can choose between two speeds for
the search feature. With Turbo Search, a new feature for
Uniden scanners, you can search the v.h.f. FM bands at up to
3 times the normal speed.
When the UBC 120XLT ts searching for active frequencies, it is
in “SEARCH Mode" or‘TURBO SEARCH Mode.” When you
stop the search with (HOLD), it is in “SEARCH HOLD Mode”.
With both Turbo Scan and Turbo Search, your UBC 120XLT is
truly a Twin Turbo Scanner.
Page 5

Types of Communication
You will be able to monitor communication such as:
» Police and fire department {including rescue and
paramedics)
» Weather broadcasts
» Business/industrial radio
» Motion picture and press relay
» Utility
» Land transportation frequencies, such as trucking firms,
buses, taxis, tow trucks, and railroads
» Marine and amateur (ham radio) bands
» Air band
And many more in the following 9 Bands:
Frequency Range Steps Mode Transmission
I
66.0-8S MHz
108-137 MHz 12.5 kHz AM Aircraft Band,
137-144 MHz 5 kHz NFM Land Mobile
144-148 MHz 5 kHz NFM 2 Meter Amateur
148-174 MHz 5 kHz NFM VHF High Band
406-420 MHz 12.5 kHz NFM
420-450 MHz 12.5 kHz NFM 70 cm Amateur
450-470 MHz 12.5 kHz NFM UHF Standard
470-512 MHz 12,5 kHz
5 kHz MFM VHF Low band
Band
Land Mobile
Band
Band
NFM Land Mobile
Page 6

Unpacking
Carefully check the contents against this list:
■ UBC 120XLT Twin Turbo Scanner
■ Rubber Antenna
■ AC Adaptor/Charger (AAD-2500U)
■ Earphone
■ Belt Clip
■ Battery (BP-120), installed
■ This Operating Guide
if any items are missing or damaged, contact your place of
purchase immediately.
Please read this Operating Guide thoroughly before operating
the scanner.
Page 7

Feature Highlights
♦ Twin Turbo Scan & Search —This lightning-fast
technology enables the UBC 120XLT to scan nearly 100
channels per second. Search speed is selectable
between 100 and 300 steps per second. (300 steps per
second only in bands with 5 KHz steps.) Because the
frequency coverage is so large (see previous section for
band listing), very fast scanning and searching are
essential. That is why we combined our latest
technology — Twin Turbo — into the UBC 120XLT.
♦ 100 Channels You can program each of these memory
channels to store one frequency.
♦ 9 Bands, 10 Banks Includes 9 Bands, including
Aircraft. 10 Banks of 10 channels each are useful for
storing similar frequencies in order to maintain faster
scanning cycles.
♦ 66 MHz - 512 MHz Indicates the range of frequencies
that can be searched within the bands of your scanner.
(Note; The frequency coverage is not totally continuous
from 66 MHz to 512 MHz.)
♦ 10 Priority Channels You can assign one Priority
Channel in each Bank. Assigning priority channels
allows you to keep track of activity on your most
important channel(s) while monitoring other channels for
transmissions. (Priority Channels are initially set in the
first channel in each Bank.)
♦ Weather Channels Lets your scanner function as a
weather information radio.
Note: Currently, the Weather Service is not provided in
Australia. ' .
♦ Unique Data Skip Allows the scanner to skip over
unwanted data transmissions and reduces birdies.
♦ Memory Backup The stored channels are retained in
memory for at least 3 days, and typically 14 days, when
the Battery Pack is removed from the scanner.
I
Page 8

Controls and Indicators
Antenna Connect the rubber antenna to this BNC
Connector connector and turn clockwise until it locks.
Earphone Plug the supplied earphone into this jack for
Jack private listening. When the earphone is
SQUELCH Adjust this control to set the scan threshold
Control fo eliminate the background rushing
ON-OFF/ Use this control to turn the scanner on or off,
VOLUME snd to adjust the volume.
Control
connected, the internal speaker is
disconnected.
Note the warning on the inside Front Cover
and on page 11.
noise heard in the absence of an incoming
signal. See the Operation Section for
adjustment procedure,
Front View
(Refer to the foldout illustration inside the Back Cover)
Complete explanations of the use of these keys are in the
Scanning section, page 16, and Searching section, page 20.
1. LCD DISPLAY — The liquid crystal display (LCD)
shows the current channel and frequency. It also
displays the mode, status, and bank indicators.
A. Scan Type Indicator — Indicates BANK Scan
operation,
B. Channel Number — Indicates the current channel
that the scanner is on.
Page 9

c.
D.
E.
F.
G.
H.
2. Press @ to start scanning all programmed channels
that are not locked out. (SCAN moves across the display
during scanning.)
3. In SCAN Mode, press to stop scanning. (HOLD
appears on the display.) After you stop the scanner,
press @ again to resume scanning.
Memory Bank Numbers — Each Memory
Bank consists of 10 channels that you can
select or deselect during scanning operation,
using the numeric keypad. When you select a
Bank, its number appears on the display. When
you deselect a Bank, its number di^pears
from the display. When you press @ to stop
scanning, only the Bank of the current channel
appear^
Low Battery Indicator — Appears on the
display when the Battery Pack is low and needs
recharging.
Frequency Indicator — 7-digits plus decimal
indicate the frequency being received by the
scanner.
Mode Indicators (Only the active mode(s)
are displayed dunng operation.)
Indicates DATA SKIP activated
during SEARCH.
SCN
SRCH
PRI
HOLD
DLY
L/0
WX
irC Indicates the keypad is locked.
Priority Channel Indicator — P appears
when the scanner stops on a Priority Channel.
Indicates SCAN Mode.
Indicates SEARCH Mode. Flashes
when in TURBO SEARCH Mode.
tndicates"PRIORITY SCAN Mode.
Indicates SCAN HOLD or SEARCH
HOLD
Indicates DELAY is activated.
In SCAN Mode indicates the channel
shown is “Locked Out”.
In SEARCH Mode indicates the
frequency shown is “Locked Out".
Indicates WEATHER SCAN Mode.
I
Page 10

4. Press (LIGHT) to turn the display backlight ON for 15
seconds. Press (UGKT) again to manually turn the light
OFF.
5. Use (V) to enter the decimal point when programming a
frequency into a channel. If you make an entry error,
press (J) key twice to erase the entry, and start over
again.
6. There are 7 Preprogrammed weather channels
Press ( WX ) to find the active weather channel in
your area. WX appears on the display in Weather Mode,
7. Use to set the limits of a range of frequencies for
Search Mode. When Search is stopped. In SCAN
HOLD Mode, use this key to go down to the next
channel. Use T to go down in frequency,
8. While Scanning, press to enter the PRIORITY
SCAN Mode. (PRI appears on the display.) While
Searching, press (PRI ) (TURBO) to toggle between 100
steps and 300 steps per second. (When in TURBO
SEARCH Mode, SICH flashes on the display.)
9. Press (PEUf) to turn ON or OFF the automatic 2-second
delay during scanning or searching for active
frequencies. (In Delay Mode, DLY appears on the
display.) In this mode, when the scanner monitors an
active frequency, searching or scanning will not resume
until transmission stops for 2 seconds.
10. Press and ho/<J(L0CX). ir* appears on the display and
you hear two beeps. This disables the keypad and
prevents any accidental key entries. To enable the
keypad, press and hold (lXK). tt* disappears from the
display and you hear two beeps.
11. NUMERIC KEYPAD — Use these keys to program a
channel for scanning. Also use to access a channel
directly with During SCAN Mode, use these keys to
select or deselect any of the 10 memory banks. (Only
the selected bank indicator(s) appear on the display.)
Note: You cannot deactiva te all 10 banks at the
same time.
Page 11

Key Bank Channel
1 1 -10
(D
2 11 -20
®
3 21 -30
4 31 -40
5
6 51 -60
®
7
®
8
®
9 81 - 90
®
10
®
12. Press (D to store a displayed frequency into any
displayed channel.
13. Press |SRCH[to start a search within frequency limits
specified by you.
14. In SEARCH Mode, press (tioL^ to stop searching. In
Scan Mode, press (HOLD) to stop scanning. When
Search is stopped, use
In SCAN HOLD Mode, use this key to go up to the
next channel.
15. Press (LiO ) to “Lock Out” or prevent scanning of the
displayed channel, including Priority Channels. (L/0
appears on the display.) To unlock a channel, press
(lP) again. (W} can be used in Scan or SEARCH
Modes.
16. Use (data) to skip data signals and unmodulated carriers
when in SEARCH Mode, This feature is not active in the
Air Band,
41 -50
61 -70
71 -80
91-100
A to go up in frequency.
I
Page 12

Setup
The UBC 120XLT comes with a rechargeable Nickel-Cadmium
Battery Pack. When fully charged, this Battery Pack will
supply up to 12 hours of dependable use. (With the Squelch
control in “closed” position.)
Before using the UBC 120XLT for the first time, or whenever
the LOW BATTERY Indicator appears on the LCD display, I
you should fully charge the Battery Pack.
Note: When the Battery Pack is low, the Low Battery
Indicator will start to blink. Afterabout tOminutes, the
scanner will shut itself off to prevent the battery from
becoming completely discharged.
Before charging, you must first install the Battery Pack
according to the steps below.
Charging the Battery Pack
1.
Plug the AC Adaptor/Charger {AAD-2500U} into the
Charging Jack located on the Left side of the
UBC 120XLT . (You can use the scanner while it is
charging,)
WARNING! Use only an AACh2500U AC Adaptor/
Charger, (or one of the optional Cigarette
Lighter Power Cords listed on page 26). Any
other AC Adaptor or external cord or power plug
having over-voltage or reversed polarity can
cause overheating or damage to f/te circuitry.
2. Plug the AC Adaptor/Charger into a standard AC outlet.
To fully charge the battery, leave the Adaptor/Charger
connected for 14 to 16 hours.
When charging is complete, disconnect the Adaptor/
3.
Charger from the AC outlet and from the Battery Pack.
Note: Dtscorjnecf the AC AdaptorX/harger from the unit
during a power failure.
Mounting the Flexible Antenna
Place the end of the antenna onto the BNC connector on top
of the scanner and turn clockwise until tight.
10
Page 13

Installing the Belt Clip
Place the Belt Clip on
the mounting area on
the back of the
scanner, making sure
the holes in the clip
line up with the
threads in the back of
the scanner.
2. Insert the 2 screws into the corresponding holes and
tighten.
CAUTION: Do not tighten the screws too tight. You could
damage the case or clip.
Using the Earphone
The PHONE jack at the top of the UBC 120XLT is a standard
3.5mm stereo phone jack. You can use either the supplied
earphone, ora stereo headset. The output of this jack is
monaural audio, but you will hear it in both headphones of a
stereo headset.
IMPORTANT!
Be sure to use only the supplied earphone, or stereo headset
of the proper impedance (32ÎÏ.) Use of an incorrect earphone
or stereo headset may be potentially dangerous to your
hearing.
I
WARNING:Do not plug in the earphone or head
phones before setting the Volume Control. You
might experience some hearing damage if the
Volume suddenly becomes too loud because of
the volume Control or Squelch Control setting.
This is particularly true of the type of earphone that
is placed in the ear canal.
11
Page 14

Operation Overview
Note; Before operating the UBC^20XU for Ню first tíme,
make sure you have fully charged the Battery Pack,
1. Before turning on the scanner, rotate the Squelch
Control fully clockwise,
2. Turn the scanner on by rotating the On-Off/Voiume
Control clockwise until you hear a click. Turn the
Volume Control a small amount clockwise to a low
listening level.
3. You should hear either a "rushing” noise or some
communications. If you are monitoring a transmission,
wait until it stops before adjusting the Squelch Control.
4. Readjust the volume to a comfortable listening level.
5. Turn the Squelch Control counterclockwise just until the
rushing noise disappears. At the squelch threshold,
any incoming signal just slightly stronger than the noise
will open the squelch. Any communication that is
received will open the Squelch, and stop scanning or
Searching.
Note: If squelch is set too tight, that is, too far
counterclockwise from the threshold point, a much
stronger signal is required to open the squelch. If squelch
is set on a point clockwise from the threshold, you will hear
a constant sound (noise, if no signal is present.) The
scanner will not scan.
The UBC 120XLT has 100 memory channels, each of which
can be programmed to store one frequency. The channels are
divided into ten 10-channel banks, useful for storing similar
frequencies in order to maintain faster scanning cycles.
You can monitor communication in one of two ways:
■ SCAN If you have programmed channels, you can
scan alt programmed channels in the selected bank(s),
except locked out channels. When scanning stops on
an active frequency, it remains on that channel as long
as the transmission continues. When the transmission
stops, the UBC 120XLT resumes scanning, If the Delay
Mode is on, the scanner remains on the same channel
for 2 more seconds, waiting for a responding
transmission. If there is no responding transmission
within 2 seconds, the scanning cycle resumes.
Any channels that are not programmed (000.0000) are
skipped during scan.
12
Page 15

When the UBC 120XLT is in SCAN Mode, the display will look
something like this:
BANK 1 23456789 10
14
SCN PRI
■ SEARCH The Search function is d//ferenffrom Scan.
When you select a frequency band to search, the
scanner searches for any active frequency within the
lower and upper limits you specify. When an active
frequency is found, the scanner stops on that frequency
as long as the transmission lasts. If the Delay Mode is
on, the scanner remains on the same channel for 2
more seconds, waiting for a responding transmission. If
there is no responding transmission within 2 seconds,
the search cycle resumes.
When the UBC 120X1.T is in SEARCH Mode, the display will
look something like this:
BANK 2
seen
14 406.0000
OAfA
SRCH HOLD DLY
I
13
Page 16

Programming Channels
Before you can scan, you must program the channels within a
bank. You can store one frequency per channel, up to 100
channels.
Note: If appears on the display (keypad Locked),
unlock the keypad by pressing and ho/d/ng (T^until
ir* disappears and you hear two beeps.
There are two ways to program a channel:
■ Manually select a channel and frequency, using the
numeric keypad.
■ Search a band to find an active frequency, and then
directly store it into a selected channel. {See the
Search section, page 21.)
Programming By Manual Entry
1. Select a frequency.
Example: Program 125,2500 MHz into Channel 18.
2. Make sure the scanner is in the SCAN Mode. If it is in
the SRCH Mode, press @l.
3. Press @ to stop scanning.
4. Press (TXD@ 9°Channel 18.
5. Enter the frequency number using the numeric keypad,
(Be sure to include the decimal point.) As soon as you
enter the first digit of the frequency, the channel number
begins to blink.
© © ® ® © ©•
if you make a mistake and want to clear the entry, press
twice and re-enter the frequency,
14
Page 17

6. Press (e) to store the entry. The channel number on
the display stops blinking.
(BANK“
18 1ES2500
7.
If that frequency is already stored in another channel,
you will hear a "beep", and the other channel number
will appear on the display.
If you want to store the frequency in the selected
channel (18) as well, press (?) again. Or, press (£)
twice and enter another frequency for the currently
selected channel. The channel number on the display
stops blinking.
Note: Any frequency already stored in any channel
will automatically be replaced by the new one.
8.
If you try to enter a frequency that is outside of the 9
Bands, you will hear a "beep”, and the word "Error"
appears on the display.
Press (J) twice and re-enter the correct frequency.
9.
To program another channel, repeat the above
procedures.
AIR
HOLD
I
Deleting a Stored Frequency
To delete a frequency from a channel:
1.
Display the channel and frequency to be deleted.
2.
Press (T) on the numeric keypad.
3.
Press (^. The current channel is erased, and the
display shows 000.000.
Note: That channel wilt be skipped during scanning.
15
Page 18

Scanning
Note: When you turn the scanner on it will always
be in SCAN Mode.
1.
Look at the lower left corner of the display. If SCN is not
displayed, press @i. The UBC120XLT should begin
scanning.
2.
If HOLD appears at the bottom of the display, press
@1 to begin scanning.
The indicators for the selected Banks (1 through 10) appear on
the display. The indicator of the Bank currently being
monitored flashes, While the UBC 120XLT is scanning, the
word SCAN moves across the display.
Scanning stops on any active channel that is not “Locked Out”,
and displays the Channel Number and frequency. Scanning
resumes automatically after the transmission stops.
3. You can deselect any bank(s) from being scanned by
entering the number of the bank. The deselected bank
indicator(s) disappear from the display, and those
channels will not be scanned. This procedure helps to
speed up the scanning cycle.
Note: One Bank must always be active. You cannot
deactivate alt 10 banks at the same time, if you try
to deactivate all 10 Banks, Bank 1 will automatically
be active.
4. To restore any bank for scanning, just enter its number
again. The bank indicator will reappear on the display.
5. To stop scanning any time, press @. (HOLD appears
on the display.) The scanner remains on the displayed
channel, and only the bank indicator for that channel
appears. Press to resume scanning.
6. When you are stopped at a channel, you can press ▼ to
step down a channel, or A to step up a channel. Press
and hold either key to rapidly step through the
channels.
Note: You do not skip a locked out f'UO") channel
when you use ▼ or A,
16
Page 19

To access a specific channei:
1. Press
2. Enter the channel number using the numeric keys.
3. Press @1 again.
Priority Scan
The UBC 120XLT has 10 Priority Channels, 1 per Bank.
Initially, these are the first channel in each Bank. (e.g.
Channel 1, Channel 11, Channel 21, and so on.) The scanner
checks the Priority Channel(s) every 2 seconds during the
Scan cycle. If a transmission is received, the scanner will stop
at that channel. If the Priority Channel in any Bank is “Locked
Out’”, it will be skipped during scanning.
You can move the Priority to any other channel in a Bank as
follows:
1. Go directly to that channel using any of the methods
described above.
2.
Press and hold ( PflT) for at least 2 seconds. You will
hear a "beep", and P will appear on the display to the
left of the new channel number. That channel will now
be the Prionty Channei for that Bank. (The P will no
longer appear for the previous Priority Channel.)
To activate Priority Scan, press ( PRI ). The PRI indicator will
appear at the bottom of the display. To deactivate Priority
Scan, press ( PH ) again. The PRI indicator will disappear from
the bottom of the display.
I
Delay
Normally the scanner will resume scanning when a
transmission stops. If you want to remain on a channel until a
responding transmission is received, activate the DELAY
feature. This feature can be active in SCAN, SEARCH, and
WEATHER Modes.
1.
Press (DEUy). The DLY indicator appears at the bottom
of the display. The scanner will now pause 2 seconds
after transmission stops before resuming scanning.
2. Press (OEUy) again to deactivate Delay. The DLY
indicator disappears from the bottom of the display.
17
Page 20

Locking Out Channels
You may have programmed certain channels that you do not
want to hear every time you scan. These are channels that
are busy a major portion of the time, and the scanner stops at
the channel(s) often enough to interrupt the scan cycle. You
can Lock Out those channels so they are not scanned.
1. Go directly to that channel using any of the methods
described above.
2. Press ( ÜÓ). 170 appears at the lower right of the
display.
That channel is now “Locked Out” of the scanning cycle.
However, you can access that channel at any time using one
of the Direct Channel Access methods.
To put the channel back in the scanning cycle:
1. Go directly to the desired channel.
2. Press (LP ). The 170 indicator now disappears from
the display, and the channel is no longer “Locked Out”.
You can lock out any or all of the Priority Channels the same
way as other channels. If you lock out ali Priority Channels
you will see this message:
BANK 1
P ch
If you want to put all the *Locked-Out" channels of an active
bank back to the scanning cycle, press @ to put scanning
on HOLD. Press and holdO^keY for at least two seconds.
You will hear two beeps and all channels, except empty
channels (000.0000 MHz), are returned to the scanning
cycle. Press @ to resume scanning.
L oc
HOLD
Out
uo
Looking for “Locked Out” Channels
During scanning, you will not see "Locked channels. To
look for "Locked Out" channels, first press to stop
scanning. Then use A or ▼ to step through the Bank. You
will see 170” on the display to indicate a “Locked Out" channel.
18
Page 21

Weather Channel Scanning
The UBC 120XLT is designed to search for your local
weather channel(s) from 7 preprogrammed channels.
1. Press ( Ш )to begin Weather Search, WX appears at
the right side of the display and the word SCAN moves
across the display.
2.
When the Weather Search finds an active channel in
your area, the scanner stops at that frequency.
3.
To stay at that frequency, press (нас). To resume
Weather Search, press (wiQ again.
It is possible that you may be able to hear more than one
Weather broadcast in your area. If the broadcast sounds
weak and distant, press ( ~WX) again to look for a closer
station. Or, press A or T to move to another station.
4. To exit Weather Mode, press I
In some parts of the country, you may not be able to
monitor weather broadcasts, such as in low-lying areas.
Normally a higher location wiil improve the reception.
Note: Currently the Weather Service is not provided in
Australia.
I
19
Page 22

Searching
Thie UBC 120XLT can search bands you specify to fnd desired
frequencies if you do not have a Frequency Directory handy,
or if new stations have been added since the Directory was
published.
Press to stop scanning.1,
Use the numeric keypad to enter the towesf frequency
2.
of the range you want to search.
3. Press
4. Enter the highest frequency of the range you want to
search.
5. Press
6. Press |srch|.
During a Search, press (1^ to activate TURBO
SEARCH. This increases the Search Speed to 300
steps per second in those bands that have 5 KHz steps.
(See the table on page 3 for the Band Chart.) When
you activate TURBO SEARCH, the SRCH indicator
flashes. Press ( pT )again to deactivate TURBO
^ARCH.
7,8.Press (H^j at any time to stop the search on a
frequency. Press [iitCHl again to resume searching.
When Search is stopped, you can press A or T to
move up or down 1 frequency step. (See the table on
page 3 for the step size of each Band.)
Using DATA Skip.
A scanner will normally stop on any transmission it receives. This
meansthe UBC120XLT willstopon Data signals and unmodulated
transmissions. You can skip these frequencies during Search,
Press (dat4^ to activate the DATA Skip feature. The DATA
indicator appears on the display. The scanner may pause
momentarily at an unwanted signal, but will resume searching
in 2 or 3 seconds. To deactivate DATA Skip, press
(datj^again. The DATA indicator disappears from the display.
Note: DATA Skip does not function on the AiR Band.
The DfffA indicator wili not appear on the display
even if this feature is activated.
20
Page 23

Search Frequency Skip.
The scanner may stop at certain frequencies dunng Search
that you do not want to hear. You can program up to 10 Skip
Frequencies into the UBC 120XLT, When the scanner stops at
one of these frequencies during Search, press ( LB ). That
frequency is now “memorised" and will be skipped during any
Search. The scanner wilt then search to find other active
frequencies.
Caution: If you attempt to lock out more than 10
frequencies, you will overwrite those frequencies
already stored in the Search Skip Memory.
Programming With SEARCH
The Search feature enables you to rapidly search for active
frequencies within band limits you specify. When an
interesting frequency is found, you can store it in a channel
using the procedure below.
1. Press l@.
2. Use the keypad to select the channel you wish to store
a frequency in.
3. Press to access that channel.
4. Use the keypad to enter the lowest frequency of the
band you wish to search.
5. Press IJMr^.
I
6. Enter the highest frequency ci the band you wish to search.
7. Press tiMiT).
8, Press SRCH
9. When Search stops on a desired frequency, press
(hold) to stay on that frequency. The channel you
chose above will be blinking on the display.
(1Ш< (2
1ЧЧ0Б.0000
SRCH HOLD DLY
10. To store the displayed frequency in that channel, press
(?). The channel number on the display stops blinking.
Repeat this procedure to store other frequencies found in the
SEARCH Mode.
21
Page 24

Care and Maintenance
Replacing the Battery Pack
1. Turn the On-OffA/olume Control OFF.
2. Turn the scanner over
so you are looking at
the back.
3, Press in on the ribbed
area and slide the
Battery Cover down
and off.
4. Caretully unplug the Battery Pack and lift it out of the
case.
5, Carefully plug in the new Battery Pack, observing the
proper polarity. (The RED wire should be on the
right as you plug it in.) Although the plug is keyed to
reduce the chance of inserting it wrong, make sure
the wires are in the correct position before pushing it
in all the way. DO NOT FORCE THE PLUG IN.
22
Page 25

6. Insert the Battery
Pack by placing the
side with the label in
the case first. Make
sure it is seated
within the case before
replacing the Battery
Cover.
7. Replace the Battery
Cover by putting the
two tabs in the
corresponding
opening and sliding it
upward until it locks in
place.
Location
■ If strong interference or electrical noise is received,
relocate the scanner or its antenna away from the
source of the noise. A higher elevation, if possible, may
provide better reception.
■ Do not use the scanner in high-moisture environments
such as the kitchen or bathroom.
■ Avoid placing the unit in direct sunlight or near heating
elements or vents.
I
Cleaning
■ Disconnect the power to the unit before cleaning.
■ Clean the outside of the scanner with a mild detergent.
■ To prevent scratches, do not use abrasive cleaners or
solvents. Be careful not to rub the LCD window.
■ Do not use excessive amounts of water.
Repairs
Do not attempt any repair. The scanner contains no
serviceable parts. Contact the Uniden Service Division or
take it to a qualified repair technician.
23
Page 26

Birdies
All scanners are subject to receiving undesired signals or
birdies. If your scanner stops during SEARCH Mode and no
sound is heard, it may be receiving a birdie. Birdies are
internally generated signals inherent in the electronics of the
scanner. Use the Search Skip feature to skip the unwanted
frequencies.
Proper Care of Your Scanner
Use only an AAD-2500U AC Adaptor/Charger, (or one of the
optional Cigarette Lighter Power Cords listed on page 26)
with your scanner.
Do not leave the AC Adaptor/Charger plugged in for long
periods.
Avoid placing the scanner in direct sunlight or near heating
elements or vents.
Also, do not subject the scanner to continuous sub-zero
temperatures. If the scanner is exposed to temperatures
below -20‘'C or above 60“C, the liquid crystal display may
temporarily cease to function properly, or can become
permanently damaged.
24
Page 27

Troubleshooting
If your UBC 120XLT is not performing properly, try the steps
listed below.
PROBLEM SOLUTION
Scanner won't work.
Imprqcer reception.
Scan won’t stop.
Scan won’t start.
Search won’t start.
Check the power connections.
Check the volume and squelch.
Make sure the power switch is
turned on.
Check the antenna connection.
You may be in a fringe area.
Reposition the scanner.
Adjust the Squelch Control.
Check the antenna connection.
It is possible that none of the
programmed frequencies are
active at the time.
Make sure there are some
programmed channels.
Adjust the Squelch Control,
Adjust the Squelch Control.
I
Keypad won’t work.
If you still cannot get satisfactory results and want additional
information, or to return the unit for service, please call or write
to the Uniden Service Division. The address and
phone number are listed in the Warranty (at the end of this
manual).
Check the Keypad Lock.
25
Page 28

Optional Accessories and
Replacement Parts
The following optional accessories and replacement parts for
your UBC120XLT are avaii^le from your local Uniden
Dealer or through the Uniden Service Division by calling;
(02) 599-3100,8:30 AM to 5:00 PM, Monday through Friday.
ITEM
Spare Battery Pack BP-120
Replacement Rubber Antenna AT-218
Earphone
AC Adapter/Charger
Leather Carrying Case
Straight Cigarette Lighter Power Cord (fused)
Coiled Cigarette Lighter Power Cord (fused) UA-502A
Belt Ciip with 2 screws
UBC 120XLT Operating Guide
PART NO.
EP-009
AAD-2500U
LC-120
UA-502
BCK-150
OMBC120
26
Page 29

Technical Specifications
Channels:
Banks;
WX:
Frequency Coverage
66.0 to 88 MHz (NFM)
108.00 to 137 MHz (AM)
137.00 to 144.00 MHz (NFM)
144.00 to 148.00 MHz (NFM)
148.00 to 174.00 MHz (N FM)
406.00 to 420.00 MHz (NFM)
420.00 to 450.00 MHz (NFM)
450.00 to 470.00 MHz (NFM)
470.00to512.00 MHz (NFM)
Scan Rate:
Search Rate:
Scan Delay:
Audio Output:
100
Total 10 Banks
10 Channels each
7 Programmed Channels
100 channels per sec. Max.
(Turbo SCAN Mode)
100 steps per sec. (Normal SEARCH Mode)
300 steps per sec. (TURBO SEARCH Mode)
2 seconds
180 mW nominal into 8il internal speaker
30 mW nominal into 32£2 stereo headphones
8 mW nominal into 64ii supplied earphone
Antenna:
Operating
Temperature;
Size:
Weight:
Power
Requirements:
Rubber antenna included
-20''C to +60“C
64 mm iW) X 45 mm (D) x 310 mm (H)
(with antenna attached)
357 g
4.8V DC (internal battery or AC Adaptor/
Charger)
13.8V DC (with optional Cigarette Lighter
Power Cord properly connected.)
Steps
5 kHz
12.5 kHz
5 kHz
5 kHz
5 kHz
12.5 kHz
12.5 kHz
12.5 kHz
12.5 kHz
I
Features, specifications, and avaiiability of optional
accessoiies are all subject to change without notice.
27
Page 30

Warranty
Uniden UBC 120XLT Scanning Receiver
Australian i Year Warranty
Note: Please keep your sales docket as it provides evidence of
warranty.
WARRANTOR; Unklen Australia PCy. Limited ACN 001 865 498
ELEMENTS OF WARRANTY: Uniden warrants to the original retail
owner (or the duration of this wan-arty, its UBC 120XLT Scanning
Receiver (hereinafter referred to as the Product), to be free from
defects in materials and craftsmanship with only the limitations or
exclusbns set out below.
WARRANTY DURATION; This warranty to the original retail owner
only, shall terminate and be of no further effect ONE (1) Year after the
date of originat retail sale. This warranty wilt be deemed invalid if the
product is; (A) Damaged or not maintained as reasonable and
necessary, (B) Modified, altered or used as part of any conversion kits,
subassemblies, or any configurations not sold by Unit^n, (C) Improp
erly installed, (D) Repaired by someorre other than an authorized
Uniden Repair Agent tor a detect or malfunction covered by this
warranty, (E) Used in conjunction with any equipment or parts or as
part of a system not manufactured by Uniden, (F) Install^, pro
grammed or serviced by anyone other than an authorized Uniden
Repair Agent, (G) Where the Serial Number label of the product has
been removed or damaged beyond recognition.
PARTS COVERED: This warranty covers for 1 year, the UBC 120XLT
Scanning Receiver Unit only. NiCd Battery, AC Adaptor/Charger,
Rubber Antenna, Earphone. Belt Clip, and other accessories are
covered for 90 days.
STATEMENT OF REMEDY; In the event that the product does not
conform to friis warranty at any time while this warranty is in effect, the
warrantor at its discretion, will repair the defect or replace the product
and return it to you without charge for parts and service.
THIS WARRANTY DOES NOT COVER OR PROVIDE FOR THE
REIMBURSEMENT OR PAYMENT OF INCIDENTAL OR CONSE
QUENTIAL DAMAGES
WARRANTY CARD: If a warranty card has been included with this
product then please till it in and return it to us within 14 days of
purchase. Your name and serial number of the product wil) ttien be
registered in our database and this will help us process your claim with
greater speed and efficiency should you require warranty service.
PROCEDURE FOR OBTAINING PERFORMANCE OF WARRANTY:
In the event that the Product does not conform to this warranty, the
Product should be shipped or delivered, freight pre-paid, with evidence
of original purchase, (eg/ a copy of the sales docket), to the warrantor
at;
UNIDEN AUSTRALIA PTY. LIMITED
345 Princes Highway, Rockdale, NSW 2216
Customers in other States should ship or deliver the Product
freight pre-paid to their rtearest Uniden Authorized Repair Centre.
(Contact Uniden for the nearest Warranty Agent to you)
SERVICE DIVISION
Ph (02) 599 3100 FAX (02) 599 3278
Page 31

BANK 1 23456789 10
®-P 100 888.888
OAfA AIR
SON SRCH PRI HOLD DLY UO iÜ4pP-@
о о о о о
E03TWIN О О О О О О
TURBO О О О О О О
Ì1®© о О О О О О
d>
"51
(*>
a>
(D-
CHANNEL
SOMNER о о о о о о
-0
------
о о о о о о
МО 1НР 2I-«
® ®@
3t4o 4М0 Si-m
® ®®
«■П ТИС IMO
® ®®
*
----
, fblOO
-------
^ fH« ,
........
(s>
d>
Unidöl üBonotó*
к
(цГГ^Ояй—
Page 32

uniden
©1994 Uniden Australia Pty. Limited. All rights reserved.
UBZZ01239FZ Printed in the Philif>ptnes
 Loading...