

Page 1
User Guide
Ulead Systems, Inc.
January 2003
Page 2

First English edition for MediaStudio Pro version 7, January 2003
© 1992–2003, Ulead Systems, Inc.
All rights reserved. No part of this publication may be reproduced or transmitted in any form or by any
means, electronic or mechanical, including photocopying, recording, or storing in a retrieval system, or
translated into any language in any form without the express written permission of Ulead Systems, Inc.
Software license
The software described in this document is furnished under a License Agreement which is included
with the product. This Agreement specifies the permitted and prohibited uses of the product.
Licenses and trademarks
Ulead, Ulead Systems logo, MediaStudio and MediaStudio Pro are registered trademarks and/or trademarks of Ulead Systems, Inc. All other product names and any registered and unregistered trademarks
mentioned in this manual are used for identification purposes only and remain the exclusive property of
their respective owners.
Sample files
Files provided as samples on the program CD can be used for personal demonstrations, productions and
presentations. No rights are granted for commercial reproduction or redistribution of any sample files.
North & South America
Ulead Systems, Inc.
http://www.ulead.com
E-mail: info@ulead.com
Japan
Ulead Systems, Inc.
http://www.ulead.co.jp
E-mail: info@ulead.co.jp
Germany
Ulead Systems GmbH
http://www.ulead.de
E-mail: info@ulead.de
International
Ulead Systems, Inc.
http://www.ulead.com
http://www.asiapac.ulead.com
http://www.ulead.com.tw
E-mail: info@ulead.com.tw
China
Ulead Systems, Inc.
http://www.ulead.com.cn
E-mail: info@ulead.com.cn
Page 3

Table of Contents
Introduction
Welcome to MediaStudio Pro . . . . . . . . . . . . . . . . . . . . . . . . . . . . . . . . . . . . . . . . . . . 15
Getting started . . . . . . . . . . . . . . . . . . . . . . . . . . . . . . . . . . . . . . . . . . . . . . . . . . . . . . . . . . . . . 16
Help! . . . . . . . . . . . . . . . . . . . . . . . . . . . . . . . . . . . . . . . . . . . . . . . . . . . . . . . . . . . . . . . . . . . . . 16
The manual . . . . . . . . . . . . . . . . . . . . . . . . . . . . . . . . . . . . . . . . . . . . . . . . . . . . . . . . . . . . . . . 16
More info . . . . . . . . . . . . . . . . . . . . . . . . . . . . . . . . . . . . . . . . . . . . . . . . . . . . . . . . . . . . . . . . . 17
Installation . . . . . . . . . . . . . . . . . . . . . . . . . . . . . . . . . . . . . . . . . . . . . . . . . . . . . . . . . . . . . . . . 17
Installing Acrobat Reader . . . . . . . . . . . . . . . . . . . . . . . . . . . . . . . . . . . . . . . . . . . . . . . . . . . . . . . 18
Running the programs . . . . . . . . . . . . . . . . . . . . . . . . . . . . . . . . . . . . . . . . . . . . . . . . . . . . . . . . . . 18
Read Me . . . . . . . . . . . . . . . . . . . . . . . . . . . . . . . . . . . . . . . . . . . . . . . . . . . . . . . . . . . . . . . . . . . . 18
What's new? . . . . . . . . . . . . . . . . . . . . . . . . . . . . . . . . . . . . . . . . . . . . . . . . . . . . . . . . . . . . . . 19
Real-time software preview capability in Video Editor . . . . . . . . . . . . . . . . . . . . . . . . . . . . . . . . . 19
MPEG-1, MPEG-2 and Windows Media Format native editing . . . . . . . . . . . . . . . . . . . . . . . . . . . 19
Audio enhancement and mixing control . . . . . . . . . . . . . . . . . . . . . . . . . . . . . . . . . . . . . . . . . . . . 19
Realtime output . . . . . . . . . . . . . . . . . . . . . . . . . . . . . . . . . . . . . . . . . . . . . . . . . . . . . . . . . . . . . . . 20
Rich title feature . . . . . . . . . . . . . . . . . . . . . . . . . . . . . . . . . . . . . . . . . . . . . . . . . . . . . . . . . . . . . . 20
Video capture enhancement . . . . . . . . . . . . . . . . . . . . . . . . . . . . . . . . . . . . . . . . . . . . . . . . . . . . . 20
16:9 Widescreen format . . . . . . . . . . . . . . . . . . . . . . . . . . . . . . . . . . . . . . . . . . . . . . . . . . . . . . . . 20
Scene detection enhancement . . . . . . . . . . . . . . . . . . . . . . . . . . . . . . . . . . . . . . . . . . . . . . . . . . .20
Support Dolby AC-3 encoding and decoding . . . . . . . . . . . . . . . . . . . . . . . . . . . . . . . . . . . . . . . . 21
Improved integration . . . . . . . . . . . . . . . . . . . . . . . . . . . . . . . . . . . . . . . . . . . . . . . . . . . . . . . . . . . 21
Sony MICROMV support . . . . . . . . . . . . . . . . . . . . . . . . . . . . . . . . . . . . . . . . . . . . . . . . . . . . . . . . 21
Support for Pentium 4 and dual CPUs . . . . . . . . . . . . . . . . . . . . . . . . . . . . . . . . . . . . . . . . . . . . . . 21
Enhanced navigation . . . . . . . . . . . . . . . . . . . . . . . . . . . . . . . . . . . . . . . . . . . . . . . . . . . . . . . . . . . 22
DVD/VCD authoring . . . . . . . . . . . . . . . . . . . . . . . . . . . . . . . . . . . . . . . . . . . . . . . . . . . . . . . . . . . 22
Tutorials
Tutorial 1: Video Capture . . . . . . . . . . . . . . . . . . . . . . . . . . . . . . . . . . . . . . . . . . . . . . . 25
Setting up the DV device control . . . . . . . . . . . . . . . . . . . . . . . . . . . . . . . . . . . . . . . . . . . . . . . . . . 26
Tutorial 2: Video Editor . . . . . . . . . . . . . . . . . . . . . . . . . . . . . . . . . . . . . . . . . . . . . . . . . 27
The basics . . . . . . . . . . . . . . . . . . . . . . . . . . . . . . . . . . . . . . . . . . . . . . . . . . . . . . . . . . . . . . . . 28
Creating your first video project . . . . . . . . . . . . . . . . . . . . . . . . . . . . . . . . . . . . . . . . . . . . . . . . . . 28
Adding clips to your project . . . . . . . . . . . . . . . . . . . . . . . . . . . . . . . . . . . . . . . . . . . . . . . . . . . . . 29
Page 4

Working with clips . . . . . . . . . . . . . . . . . . . . . . . . . . . . . . . . . . . . . . . . . . . . . . . . . . . . . . . . . . . . 30
Applying transition effects . . . . . . . . . . . . . . . . . . . . . . . . . . . . . . . . . . . . . . . . . . . . . . . . . . . . . . . 31
Previewing your work . . . . . . . . . . . . . . . . . . . . . . . . . . . . . . . . . . . . . . . . . . . . . . . . . . . . . . . . . . 31
Artistic and creative techniques . . . . . . . . . . . . . . . . . . . . . . . . . . . . . . . . . . . . . . . . . . . . . . 33
Applying a video filter . . . . . . . . . . . . . . . . . . . . . . . . . . . . . . . . . . . . . . . . . . . . . . . . . . . . . . . . . . 33
Creating a moving path . . . . . . . . . . . . . . . . . . . . . . . . . . . . . . . . . . . . . . . . . . . . . . . . . . . . . . . . . 34
Changing the audio level of an audio track . . . . . . . . . . . . . . . . . . . . . . . . . . . . . . . . . . . . . . . . . . 35
Advanced techniques . . . . . . . . . . . . . . . . . . . . . . . . . . . . . . . . . . . . . . . . . . . . . . . . . . . . . . . . . . 36
Customizing a transition effect . . . . . . . . . . . . . . . . . . . . . . . . . . . . . . . . . . . . . . . . . . . . . . . . . . . 36
Using Moving Paths . . . . . . . . . . . . . . . . . . . . . . . . . . . . . . . . . . . . . . . . . . . . . . . . . . . . . . . . . . . . 37
Synchronizing audio to video . . . . . . . . . . . . . . . . . . . . . . . . . . . . . . . . . . . . . . . . . . . . . . . . . . . . 38
Auto Slideshow . . . . . . . . . . . . . . . . . . . . . . . . . . . . . . . . . . . . . . . . . . . . . . . . . . . . . . . . . . . . . . . 39
Pixel aspect ratio management . . . . . . . . . . . . . . . . . . . . . . . . . . . . . . . . . . . . . . . . . . . . . . . . . . . 40
Recording back to a DV device from the Timeline . . . . . . . . . . . . . . . . . . . . . . . . . . . . . . . . . . . . 41
Tutorial 3: Video Paint . . . . . . . . . . . . . . . . . . . . . . . . . . . . . . . . . . . . . . . . . . . . . . . . . 43
Getting to know Video Paint . . . . . . . . . . . . . . . . . . . . . . . . . . . . . . . . . . . . . . . . . . . . . . . . . . 44
Creating your first project . . . . . . . . . . . . . . . . . . . . . . . . . . . . . . . . . . . . . . . . . . . . . . . . . . . . . . . 44
Working with images in an edit window . . . . . . . . . . . . . . . . . . . . . . . . . . . . . . . . . . . . . . . . . . . . 45
Customizing your brushes . . . . . . . . . . . . . . . . . . . . . . . . . . . . . . . . . . . . . . . . . . . . . . . . . . . . . . 46
Working over multiple frames . . . . . . . . . . . . . . . . . . . . . . . . . . . . . . . . . . . . . . . . . . . . . . . . . . . . 47
Common techniques . . . . . . . . . . . . . . . . . . . . . . . . . . . . . . . . . . . . . . . . . . . . . . . . . . . . . . . .49
Applying a video filter . . . . . . . . . . . . . . . . . . . . . . . . . . . . . . . . . . . . . . . . . . . . . . . . . . . . . . . . . . 49
Cloning an image . . . . . . . . . . . . . . . . . . . . . . . . . . . . . . . . . . . . . . . . . . . . . . . . . . . . . . . . . . . . . 50
Creating a video matte . . . . . . . . . . . . . . . . . . . . . . . . . . . . . . . . . . . . . . . . . . . . . . . . . . . . . . . . . 51
Advanced techniques . . . . . . . . . . . . . . . . . . . . . . . . . . . . . . . . . . . . . . . . . . . . . . . . . . . . . . .52
Performing an erase effect . . . . . . . . . . . . . . . . . . . . . . . . . . . . . . . . . . . . . . . . . . . . . . . . . . . . . . 52
Performing an advanced power duplication . . . . . . . . . . . . . . . . . . . . . . . . . . . . . . . . . . . . 53
Creating background sets . . . . . . . . . . . . . . . . . . . . . . . . . . . . . . . . . . . . . . . . . . . . . . . . . . . . . . . 54
Retouching images . . . . . . . . . . . . . . . . . . . . . . . . . . . . . . . . . . . . . . . . . . . . . . . . . . . . . . . . . . . . 56
Advanced macros: Creating a laser beam effect . . . . . . . . . . . . . . . . . . . . . . . . . . . . . . . . . . . . . 57
Advanced cloning: Disappearing act . . . . . . . . . . . . . . . . . . . . . . . . . . . . . . . . . . . . . . . . . . . . . . .58
Tutorial 4: CG Infinity . . . . . . . . . . . . . . . . . . . . . . . . . . . . . . . . . . . . . . . . . . . . . . . . . . 59
Common techniques . . . . . . . . . . . . . . . . . . . . . . . . . . . . . . . . . . . . . . . . . . . . . . . . . . . . . . . .60
Drawing regular shapes . . . . . . . . . . . . . . . . . . . . . . . . . . . . . . . . . . . . . . . . . . . . . . . . . . . . . . . . 60
Creating and distorting text objects . . . . . . . . . . . . . . . . . . . . . . . . . . . . . . . . . . . . . . . . . . . . . . . 61
Applying gradients to your objects . . . . . . . . . . . . . . . . . . . . . . . . . . . . . . . . . . . . . . . . . . . . . . . . 62
Manipulating objects . . . . . . . . . . . . . . . . . . . . . . . . . . . . . . . . . . . . . . . . . . . . . . . . . . . . . . . . . . 63
Creating a corporate logo . . . . . . . . . . . . . . . . . . . . . . . . . . . . . . . . . . . . . . . . . . . . . . . . . . . . . . . 64
Animating objects . . . . . . . . . . . . . . . . . . . . . . . . . . . . . . . . . . . . . . . . . . . . . . . . . . . . . . . . . . . . . 65
Page 5

Advanced techniques . . . . . . . . . . . . . . . . . . . . . . . . . . . . . . . . . . . . . . . . . . . . . . . . . . . . . . .66
Creating mattes . . . . . . . . . . . . . . . . . . . . . . . . . . . . . . . . . . . . . . . . . . . . . . . . . . . . . . . . . . . . . . . 66
Creating a corporate logo (advanced) . . . . . . . . . . . . . . . . . . . . . . . . . . . . . . . . . . . . . . . . . . . . . .67
Controlling the timing of multiple objects . . . . . . . . . . . . . . . . . . . . . . . . . . . . . . . . . . . . . . . . . . .68
Performing fades and distortions over time . . . . . . . . . . . . . . . . . . . . . . . . . . . . . . . . . . . . . . . . . 69
Video Capture
Chapter 1: Getting started . . . . . . . . . . . . . . . . . . . . . . . . . . . . . . . . . . . . . . . . . . . . . . 73
Understanding the basics . . . . . . . . . . . . . . . . . . . . . . . . . . . . . . . . . . . . . . . . . . . . . . . . . . . 74
Preparing video for display . . . . . . . . . . . . . . . . . . . . . . . . . . . . . . . . . . . . . . . . . . . . . . . . . . .76
Capture Plug and Play . . . . . . . . . . . . . . . . . . . . . . . . . . . . . . . . . . . . . . . . . . . . . . . . . . . . . . . . . . 76
Connecting to an analog video source . . . . . . . . . . . . . . . . . . . . . . . . . . . . . . . . . . . . . . . . . . . . . 76
Previewing video from your video source . . . . . . . . . . . . . . . . . . . . . . . . . . . . . . . . . . . . . . . . . . . 77
Setting preview options . . . . . . . . . . . . . . . . . . . . . . . . . . . . . . . . . . . . . . . . . . . . . . . . . . . . . . . . . 77
Defining audio input when capturing analog video . . . . . . . . . . . . . . . . . . . . . . . . . . . . . . . . . . . . 78
Improving video signal when capturing analog video . . . . . . . . . . . . . . . . . . . . . . . . . . . . . 79
Calibrating your display . . . . . . . . . . . . . . . . . . . . . . . . . . . . . . . . . . . . . . . . . . . . . . . . . . . . . . . . 79
Adjusting color with your video capture board . . . . . . . . . . . . . . . . . . . . . . . . . . . . . . . . . . . . . . . 82
Customizing Video Capture . . . . . . . . . . . . . . . . . . . . . . . . . . . . . . . . . . . . . . . . . . . . . . . . . . 83
The chapter in review . . . . . . . . . . . . . . . . . . . . . . . . . . . . . . . . . . . . . . . . . . . . . . . . . . . . . . . 84
Chapter 2: Capturing video . . . . . . . . . . . . . . . . . . . . . . . . . . . . . . . . . . . . . . . . . . . . . 85
Tips for capturing good video and audio . . . . . . . . . . . . . . . . . . . . . . . . . . . . . . . . . . . . . . . . 86
Getting the right hardware . . . . . . . . . . . . . . . . . . . . . . . . . . . . . . . . . . . . . . . . . . . . . . . . . . . . . . . 86
Using compression . . . . . . . . . . . . . . . . . . . . . . . . . . . . . . . . . . . . . . . . . . . . . . . . . . . . . . . . . . . . 87
Techniques for improving your video captures . . . . . . . . . . . . . . . . . . . . . . . . . . . . . . . . . . . . . . . 87
Techniques for improving your audio captures . . . . . . . . . . . . . . . . . . . . . . . . . . . . . . . . . . . . . . . 88
Capturing videos and images . . . . . . . . . . . . . . . . . . . . . . . . . . . . . . . . . . . . . . . . . . . . . . . . . 88
Customizing your capture options . . . . . . . . . . . . . . . . . . . . . . . . . . . . . . . . . . . . . . . . . . . . . . . .92
Capturing from a DV camcorder using an IEEE-1394 (FireWire card) interface card . . . . . . . . . 93
Seamless DV Capture . . . . . . . . . . . . . . . . . . . . . . . . . . . . . . . . . . . . . . . . . . . . . . . . . . . . . . . . . . 94
Controlling the DV camcorder . . . . . . . . . . . . . . . . . . . . . . . . . . . . . . . . . . . . . . . . . . . . . . . . . . . 95
Direct MPEG capturing from a DV camcorder . . . . . . . . . . . . . . . . . . . . . . . . . . . . . . . . . . . . . . . 96
Direct WMV capturing . . . . . . . . . . . . . . . . . . . . . . . . . . . . . . . . . . . . . . . . . . . . . . . . . . . . . . . . . . 97
Capturing video based on a profile . . . . . . . . . . . . . . . . . . . . . . . . . . . . . . . . . . . . . . . . . . . . . . . . 98
Editing and customizing a video profile . . . . . . . . . . . . . . . . . . . . . . . . . . . . . . . . . . . . . . . . . . . 100
Scanning a DV tape . . . . . . . . . . . . . . . . . . . . . . . . . . . . . . . . . . . . . . . . . . . . . . . . . . . . . . . . . . 101
Dropped frames . . . . . . . . . . . . . . . . . . . . . . . . . . . . . . . . . . . . . . . . . . . . . . . . . . . . . . . . . . . . . 103
Page 6

Capturing single frames . . . . . . . . . . . . . . . . . . . . . . . . . . . . . . . . . . . . . . . . . . . . . . . . . . . . . . . 103
Capturing a sequence of still frames . . . . . . . . . . . . . . . . . . . . . . . . . . . . . . . . . . . . . . . . . . . . . 104
Capture history . . . . . . . . . . . . . . . . . . . . . . . . . . . . . . . . . . . . . . . . . . . . . . . . . . . . . . . . . . . . . . 105
Capturing a color palette when capturing analog video . . . . . . . . . . . . . . . . . . . . . . . . . . 106
Changing a file’s properties . . . . . . . . . . . . . . . . . . . . . . . . . . . . . . . . . . . . . . . . . . . . . . . . . . . . 107
Marking video sequences for capturing . . . . . . . . . . . . . . . . . . . . . . . . . . . . . . . . . . . . . . . 109
Viewing and editing a batch list . . . . . . . . . . . . . . . . . . . . . . . . . . . . . . . . . . . . . . . . . . . . . . . . . .110
Capturing marked video sequences . . . . . . . . . . . . . . . . . . . . . . . . . . . . . . . . . . . . . . . . . . . . . . . 111
Capture plug-ins . . . . . . . . . . . . . . . . . . . . . . . . . . . . . . . . . . . . . . . . . . . . . . . . . . . . . . . . . . 111
The chapter in review . . . . . . . . . . . . . . . . . . . . . . . . . . . . . . . . . . . . . . . . . . . . . . . . . . . . . .112
Video Editor
Chapter 1: Getting started . . . . . . . . . . . . . . . . . . . . . . . . . . . . . . . . . . . . . . . . . . . . . 115
Understanding the workplace . . . . . . . . . . . . . . . . . . . . . . . . . . . . . . . . . . . . . . . . . . . . . . . 116
Standard toolbar . . . . . . . . . . . . . . . . . . . . . . . . . . . . . . . . . . . . . . . . . . . . . . . . . . . . . . . . . . . . . .117
Timeline toolbar . . . . . . . . . . . . . . . . . . . . . . . . . . . . . . . . . . . . . . . . . . . . . . . . . . . . . . . . . . . . . .117
Working with video projects . . . . . . . . . . . . . . . . . . . . . . . . . . . . . . . . . . . . . . . . . . . . . . . . 118
Creating a new video project . . . . . . . . . . . . . . . . . . . . . . . . . . . . . . . . . . . . . . . . . . . . . . . . . . . . .118
Customizing a video project . . . . . . . . . . . . . . . . . . . . . . . . . . . . . . . . . . . . . . . . . . . . . . . . . . . . .119
Project settings . . . . . . . . . . . . . . . . . . . . . . . . . . . . . . . . . . . . . . . . . . . . . . . . . . . . . . . . . . . . . . 120
4:3 and 16:9 display management . . . . . . . . . . . . . . . . . . . . . . . . . . . . . . . . . . . . . . . . . . . . . . . . 121
Saving a project as a template . . . . . . . . . . . . . . . . . . . . . . . . . . . . . . . . . . . . . . . . . . . . . . . . . . 121
Saving a video project . . . . . . . . . . . . . . . . . . . . . . . . . . . . . . . . . . . . . . . . . . . . . . . . . . . . . . . . . 12 2
Packaging a video project . . . . . . . . . . . . . . . . . . . . . . . . . . . . . . . . . . . . . . . . . . . . . . . . . . . . . . 122
Smart Relink . . . . . . . . . . . . . . . . . . . . . . . . . . . . . . . . . . . . . . . . . . . . . . . . . . . . . . . . . . . . . . . . 122
Saving the layout . . . . . . . . . . . . . . . . . . . . . . . . . . . . . . . . . . . . . . . . . . . . . . . . . . . . . . . . . . . . . 122
Using the Production Library . . . . . . . . . . . . . . . . . . . . . . . . . . . . . . . . . . . . . . . . . . . . . . . . 123
Placing clips into the Production Library . . . . . . . . . . . . . . . . . . . . . . . . . . . . . . . . . . . . . . . . . . 123
Using the Storyboard . . . . . . . . . . . . . . . . . . . . . . . . . . . . . . . . . . . . . . . . . . . . . . . . . . . . . . . . . 124
Working with folders . . . . . . . . . . . . . . . . . . . . . . . . . . . . . . . . . . . . . . . . . . . . . . . . . . . . . . . . . . 125
Drag and drop . . . . . . . . . . . . . . . . . . . . . . . . . . . . . . . . . . . . . . . . . . . . . . . . . . . . . . . . . . . . . . . 125
Viewing Production Library thumbnails . . . . . . . . . . . . . . . . . . . . . . . . . . . . . . . . . . . . . . . . . . . 126
Adding effects to the Production Library . . . . . . . . . . . . . . . . . . . . . . . . . . . . . . . . . . . . . . . . . . . 127
Working with the Timeline . . . . . . . . . . . . . . . . . . . . . . . . . . . . . . . . . . . . . . . . . . . . . . . . . . 127
Inserting clips . . . . . . . . . . . . . . . . . . . . . . . . . . . . . . . . . . . . . . . . . . . . . . . . . . . . . . . . . . . . . . . 127
Inserting video, audio and image clips . . . . . . . . . . . . . . . . . . . . . . . . . . . . . . . . . . . . . . . . . . . . 128
Voice Over . . . . . . . . . . . . . . . . . . . . . . . . . . . . . . . . . . . . . . . . . . . . . . . . . . . . . . . . . . . . . . . . . 129
Extracting extra audio tracks . . . . . . . . . . . . . . . . . . . . . . . . . . . . . . . . . . . . . . . . . . . . . . . . . . . 130
Page 7

Push Away insertion . . . . . . . . . . . . . . . . . . . . . . . . . . . . . . . . . . . . . . . . . . . . . . . . . . . . . . . . . . 131
Inserting title, color, and silence clips . . . . . . . . . . . . . . . . . . . . . . . . . . . . . . . . . . . . . . . . . . . . 132
Working with tracks . . . . . . . . . . . . . . . . . . . . . . . . . . . . . . . . . . . . . . . . . . . . . . . . . . . . . . . . . . 133
Determining the visibility of clips . . . . . . . . . . . . . . . . . . . . . . . . . . . . . . . . . . . . . . . . . . . . . . . . 134
Displaying clips on the Timeline . . . . . . . . . . . . . . . . . . . . . . . . . . . . . . . . . . . . . . . . . . . . . . . . . 134
Zooming in/out on the Timeline . . . . . . . . . . . . . . . . . . . . . . . . . . . . . . . . . . . . . . . . . . . . . . . . . . 135
General Timeline and Summary Timeline . . . . . . . . . . . . . . . . . . . . . . . . . . . . . . . . . . . . . . . . . 136
Using the Quick Command Panel . . . . . . . . . . . . . . . . . . . . . . . . . . . . . . . . . . . . . . . . . . . . . . . . 138
Inserting Ulead video file types . . . . . . . . . . . . . . . . . . . . . . . . . . . . . . . . . . . . . . . . . . . . . . . . . . 139
Inserting UIS files . . . . . . . . . . . . . . . . . . . . . . . . . . . . . . . . . . . . . . . . . . . . . . . . . . . . . . . . . . . . 139
Converting files . . . . . . . . . . . . . . . . . . . . . . . . . . . . . . . . . . . . . . . . . . . . . . . . . . . . . . . . . . . 140
Smart Check & Convert . . . . . . . . . . . . . . . . . . . . . . . . . . . . . . . . . . . . . . . . . . . . . . . . . . . . . . . . 140
Batch Convert . . . . . . . . . . . . . . . . . . . . . . . . . . . . . . . . . . . . . . . . . . . . . . . . . . . . . . . . . . . . . . . 141
Customizing Video Editor . . . . . . . . . . . . . . . . . . . . . . . . . . . . . . . . . . . . . . . . . . . . . . . . . . . 142
The chapter in review . . . . . . . . . . . . . . . . . . . . . . . . . . . . . . . . . . . . . . . . . . . . . . . . . . . . . . 148
Chapter 2: Editing clips . . . . . . . . . . . . . . . . . . . . . . . . . . . . . . . . . . . . . . . . . . . . . . . 149
Making selections in the Timeline . . . . . . . . . . . . . . . . . . . . . . . . . . . . . . . . . . . . . . . . . . . . 150
Using the Clip Selection tool . . . . . . . . . . . . . . . . . . . . . . . . . . . . . . . . . . . . . . . . . . . . . . . . . . . . 150
Using the Time Selection tool . . . . . . . . . . . . . . . . . . . . . . . . . . . . . . . . . . . . . . . . . . . . . . . . . . . 151
Using the Track Selection tool . . . . . . . . . . . . . . . . . . . . . . . . . . . . . . . . . . . . . . . . . . . . . . . . . . 152
Using the Track buttons . . . . . . . . . . . . . . . . . . . . . . . . . . . . . . . . . . . . . . . . . . . . . . . . . . . . . . . 152
Grouping clips . . . . . . . . . . . . . . . . . . . . . . . . . . . . . . . . . . . . . . . . . . . . . . . . . . . . . . . . . . . . . . 153
Working with clips . . . . . . . . . . . . . . . . . . . . . . . . . . . . . . . . . . . . . . . . . . . . . . . . . . . . . . . . 153
Pasting attributes . . . . . . . . . . . . . . . . . . . . . . . . . . . . . . . . . . . . . . . . . . . . . . . . . . . . . . . . . . . . 154
Snapping to clips . . . . . . . . . . . . . . . . . . . . . . . . . . . . . . . . . . . . . . . . . . . . . . . . . . . . . . . . . . . . 155
Splitting the audio from video clips . . . . . . . . . . . . . . . . . . . . . . . . . . . . . . . . . . . . . . . . . . . . . . . 155
Changing the speed of clips . . . . . . . . . . . . . . . . . . . . . . . . . . . . . . . . . . . . . . . . . . . . . . . . . . . . 155
Reversing the frames of a clip . . . . . . . . . . . . . . . . . . . . . . . . . . . . . . . . . . . . . . . . . . . . . . . . . . 156
Relinking clips . . . . . . . . . . . . . . . . . . . . . . . . . . . . . . . . . . . . . . . . . . . . . . . . . . . . . . . . . . . . . . 156
Calibrating video clips . . . . . . . . . . . . . . . . . . . . . . . . . . . . . . . . . . . . . . . . . . . . . . . . . . . . . . . . 156
Freezing a frame . . . . . . . . . . . . . . . . . . . . . . . . . . . . . . . . . . . . . . . . . . . . . . . . . . . . . . . . . . . . . 15 7
Setting field options for video clips . . . . . . . . . . . . . . . . . . . . . . . . . . . . . . . . . . . . . . . . . . . . . . . 158
Using A/B Roll Editing mode . . . . . . . . . . . . . . . . . . . . . . . . . . . . . . . . . . . . . . . . . . . . . . . . . . . . 159
Working with cues . . . . . . . . . . . . . . . . . . . . . . . . . . . . . . . . . . . . . . . . . . . . . . . . . . . . . . . . 160
Placing project cues . . . . . . . . . . . . . . . . . . . . . . . . . . . . . . . . . . . . . . . . . . . . . . . . . . . . . . . . . . 160
Placing clip cues . . . . . . . . . . . . . . . . . . . . . . . . . . . . . . . . . . . . . . . . . . . . . . . . . . . . . . . . . . . . 161
Locating clips . . . . . . . . . . . . . . . . . . . . . . . . . . . . . . . . . . . . . . . . . . . . . . . . . . . . . . . . . . . . 162
Locating an empty time slot . . . . . . . . . . . . . . . . . . . . . . . . . . . . . . . . . . . . . . . . . . . . . . . . . . . . 163
Trimming clips . . . . . . . . . . . . . . . . . . . . . . . . . . . . . . . . . . . . . . . . . . . . . . . . . . . . . . . . . . . . 163
Trimming in the Source window . . . . . . . . . . . . . . . . . . . . . . . . . . . . . . . . . . . . . . . . . . . . . . . . . . 164
Page 8

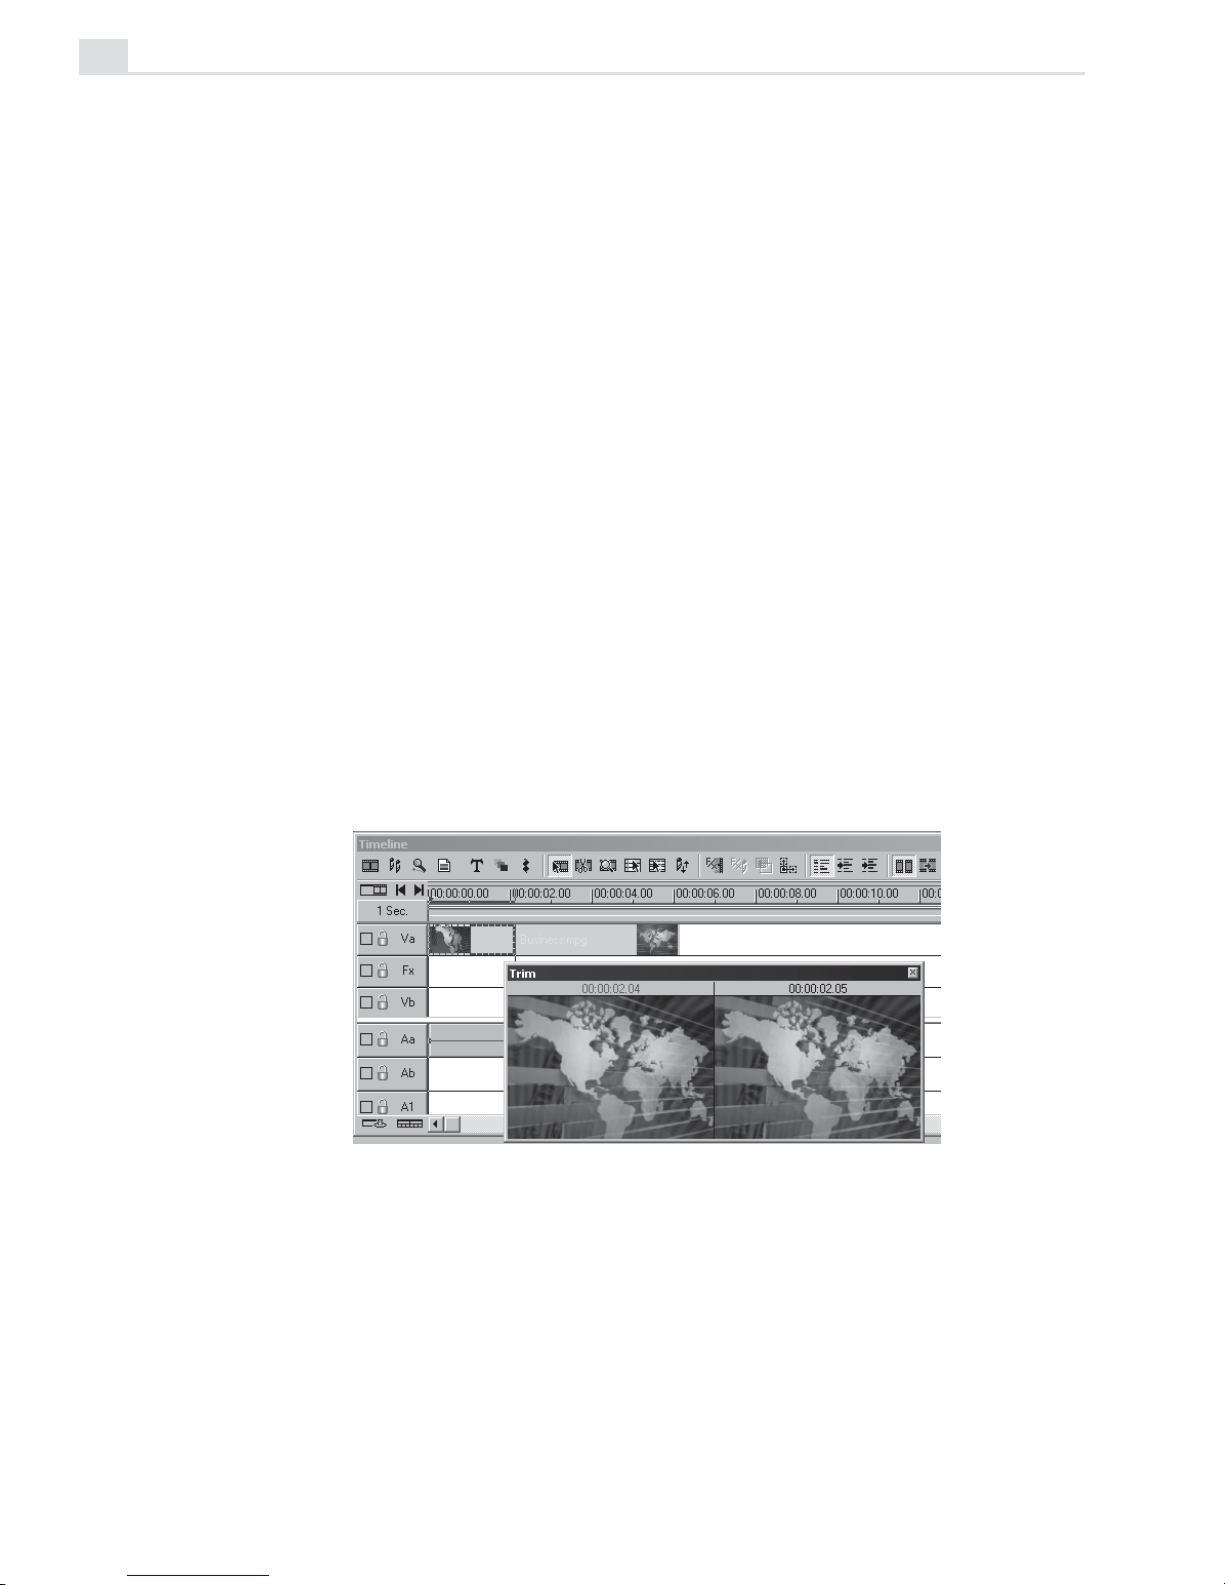
Using the Trim window . . . . . . . . . . . . . . . . . . . . . . . . . . . . . . . . . . . . . . . . . . . . . . . . . . . . . . . . . 165
Using the Scissors tool to trim clips . . . . . . . . . . . . . . . . . . . . . . . . . . . . . . . . . . . . . . . . . . . . . . 165
Defining trim options . . . . . . . . . . . . . . . . . . . . . . . . . . . . . . . . . . . . . . . . . . . . . . . . . . . . . . . . . . 166
Smart Trim . . . . . . . . . . . . . . . . . . . . . . . . . . . . . . . . . . . . . . . . . . . . . . . . . . . . . . . . . . . . . . . . . 166
Ripple Editing . . . . . . . . . . . . . . . . . . . . . . . . . . . . . . . . . . . . . . . . . . . . . . . . . . . . . . . . . . . . . 167
Ripple Editing examples . . . . . . . . . . . . . . . . . . . . . . . . . . . . . . . . . . . . . . . . . . . . . . . . . . . . 168
Automatically trimming an inserted clip (No Ripple) . . . . . . . . . . . . . . . . . . . . . . . . . . . . . . . . . 168
Inserting a clip into a full Timeline (Ripple) . . . . . . . . . . . . . . . . . . . . . . . . . . . . . . . . . . . . . . . . 168
Inserting clips into the middle of an existing clip . . . . . . . . . . . . . . . . . . . . . . . . . . . . . . . . . . . . 169
Using the Source window . . . . . . . . . . . . . . . . . . . . . . . . . . . . . . . . . . . . . . . . . . . . . . . . . . . 170
Previewing your work . . . . . . . . . . . . . . . . . . . . . . . . . . . . . . . . . . . . . . . . . . . . . . . . . . . . . . 174
Previewing . . . . . . . . . . . . . . . . . . . . . . . . . . . . . . . . . . . . . . . . . . . . . . . . . . . . . . . . . . . . . . . . . . 175
Instant Play . . . . . . . . . . . . . . . . . . . . . . . . . . . . . . . . . . . . . . . . . . . . . . . . . . . . . . . . . . . . . . . . . 175
Using DV SmartPlay . . . . . . . . . . . . . . . . . . . . . . . . . . . . . . . . . . . . . . . . . . . . . . . . . . . . . . . . . . 177
Performing scrub previews . . . . . . . . . . . . . . . . . . . . . . . . . . . . . . . . . . . . . . . . . . . . . . . . . . . . . 178
Previewing on an external device . . . . . . . . . . . . . . . . . . . . . . . . . . . . . . . . . . . . . . . . . . . . . . . . 179
Managing preview files . . . . . . . . . . . . . . . . . . . . . . . . . . . . . . . . . . . . . . . . . . . . . . . . . . . . . . . . 179
The chapter in review . . . . . . . . . . . . . . . . . . . . . . . . . . . . . . . . . . . . . . . . . . . . . . . . . . . . . . 180
Chapter 3: Using effects . . . . . . . . . . . . . . . . . . . . . . . . . . . . . . . . . . . . . . . . . . . . . . . 181
Using transition effects . . . . . . . . . . . . . . . . . . . . . . . . . . . . . . . . . . . . . . . . . . . . . . . . . . . . 182
Transition effects basics . . . . . . . . . . . . . . . . . . . . . . . . . . . . . . . . . . . . . . . . . . . . . . . . . . . . . . 182
Customizing a transition . . . . . . . . . . . . . . . . . . . . . . . . . . . . . . . . . . . . . . . . . . . . . . . . . . . . . . . 184
Fade to black . . . . . . . . . . . . . . . . . . . . . . . . . . . . . . . . . . . . . . . . . . . . . . . . . . . . . . . . . . . . . . . 18 5
Audio transitions . . . . . . . . . . . . . . . . . . . . . . . . . . . . . . . . . . . . . . . . . . . . . . . . . . . . . . . . . . . . . 187
Using key frame controls . . . . . . . . . . . . . . . . . . . . . . . . . . . . . . . . . . . . . . . . . . . . . . . . . . . 188
Video overlay effects . . . . . . . . . . . . . . . . . . . . . . . . . . . . . . . . . . . . . . . . . . . . . . . . . . . . . . 190
Overlay key types . . . . . . . . . . . . . . . . . . . . . . . . . . . . . . . . . . . . . . . . . . . . . . . . . . . . . . . . . . . . 192
Understanding Alpha Channels . . . . . . . . . . . . . . . . . . . . . . . . . . . . . . . . . . . . . . . . . . . . . . . . . . 193
Using Gamma correction . . . . . . . . . . . . . . . . . . . . . . . . . . . . . . . . . . . . . . . . . . . . . . . . . . . . . . 194
Working with mattes . . . . . . . . . . . . . . . . . . . . . . . . . . . . . . . . . . . . . . . . . . . . . . . . . . . . . . 195
Creating image and video mattes . . . . . . . . . . . . . . . . . . . . . . . . . . . . . . . . . . . . . . . . . . . . . . . . 195
Using Grayscale mattes . . . . . . . . . . . . . . . . . . . . . . . . . . . . . . . . . . . . . . . . . . . . . . . . . . . . . . . 196
Applying video filters . . . . . . . . . . . . . . . . . . . . . . . . . . . . . . . . . . . . . . . . . . . . . . . . . . . . . . . 197
Video filter samples . . . . . . . . . . . . . . . . . . . . . . . . . . . . . . . . . . . . . . . . . . . . . . . . . . . . . . . . . . 198
Global filters . . . . . . . . . . . . . . . . . . . . . . . . . . . . . . . . . . . . . . . . . . . . . . . . . . . . . . . . . . . . . . . . 198
Applying a regional matte to a video filter . . . . . . . . . . . . . . . . . . . . . . . . . . . . . . . . . . . . . . . . . . 200
Creating a moving path . . . . . . . . . . . . . . . . . . . . . . . . . . . . . . . . . . . . . . . . . . . . . . . . . . . . . 202
Creating 3D moving paths . . . . . . . . . . . . . . . . . . . . . . . . . . . . . . . . . . . . . . . . . . . . . . . . . . . . . . 206
Page 9

Managing key frames on a moving path . . . . . . . . . . . . . . . . . . . . . . . . . . . . . . . . . . . . . . . . . . . 207
Inserting an image with moving path attributes . . . . . . . . . . . . . . . . . . . . . . . . . . . . . . . . . . . . . . 208
Applying audio filters . . . . . . . . . . . . . . . . . . . . . . . . . . . . . . . . . . . . . . . . . . . . . . . . . . . . . . 209
Changing the audio level of an audio clip . . . . . . . . . . . . . . . . . . . . . . . . . . . . . . . . . . . . . . . . . . 210
Adding a soundtrack . . . . . . . . . . . . . . . . . . . . . . . . . . . . . . . . . . . . . . . . . . . . . . . . . . . . . . . . . . 210
Creating titles . . . . . . . . . . . . . . . . . . . . . . . . . . . . . . . . . . . . . . . . . . . . . . . . . . . . . . . . . . . . 212
The chapter in review . . . . . . . . . . . . . . . . . . . . . . . . . . . . . . . . . . . . . . . . . . . . . . . . . . . . . . 216
Chapter 4: Creating and outputting your files . . . . . . . . . . . . . . . . . . . . . . . . . . . . . 217
Creating a movie . . . . . . . . . . . . . . . . . . . . . . . . . . . . . . . . . . . . . . . . . . . . . . . . . . . . . . . . . . 218
Determining your video save options . . . . . . . . . . . . . . . . . . . . . . . . . . . . . . . . . . . . . . . . . . . . . 219
Cropping video files . . . . . . . . . . . . . . . . . . . . . . . . . . . . . . . . . . . . . . . . . . . . . . . . . . . . . . . . . . 222
Performing a batch video creation . . . . . . . . . . . . . . . . . . . . . . . . . . . . . . . . . . . . . . . . . . . . . . . 224
Analyzing a video file’s data rate . . . . . . . . . . . . . . . . . . . . . . . . . . . . . . . . . . . . . . . . . . . . . 225
Creating an audio file . . . . . . . . . . . . . . . . . . . . . . . . . . . . . . . . . . . . . . . . . . . . . . . . . . . . . . 227
Audio Mixing Panel . . . . . . . . . . . . . . . . . . . . . . . . . . . . . . . . . . . . . . . . . . . . . . . . . . . . . . . . . . . 228
Grouping audio tracks . . . . . . . . . . . . . . . . . . . . . . . . . . . . . . . . . . . . . . . . . . . . . . . . . . . . . . . . 232
Modifying volume controls in real time . . . . . . . . . . . . . . . . . . . . . . . . . . . . . . . . . . . . . . . . . . . . 233
Frame by Frame Audio Preview . . . . . . . . . . . . . . . . . . . . . . . . . . . . . . . . . . . . . . . . . . . . . . . . . 234
Creating an image sequence . . . . . . . . . . . . . . . . . . . . . . . . . . . . . . . . . . . . . . . . . . . . . . . . 235
Creating an Edit Decision List (EDL) file . . . . . . . . . . . . . . . . . . . . . . . . . . . . . . . . . . . . . . . 236
Posting timecode . . . . . . . . . . . . . . . . . . . . . . . . . . . . . . . . . . . . . . . . . . . . . . . . . . . . . . . . . . . . . 237
Outputting to analog video tape . . . . . . . . . . . . . . . . . . . . . . . . . . . . . . . . . . . . . . . . . . . . . . 238
Creating a VCD . . . . . . . . . . . . . . . . . . . . . . . . . . . . . . . . . . . . . . . . . . . . . . . . . . . . . . . . . . . . 240
Creating an SVCD . . . . . . . . . . . . . . . . . . . . . . . . . . . . . . . . . . . . . . . . . . . . . . . . . . . . . . . . . 241
Creating a DVD . . . . . . . . . . . . . . . . . . . . . . . . . . . . . . . . . . . . . . . . . . . . . . . . . . . . . . . . . . . . 241
Creating MPEG-2 files . . . . . . . . . . . . . . . . . . . . . . . . . . . . . . . . . . . . . . . . . . . . . . . . . . . . . . 242
Creating WMV/ QuickTime streaming file . . . . . . . . . . . . . . . . . . . . . . . . . . . . . . . . . . . . . . 243
Exporting to Ulead DVD MovieFactory . . . . . . . . . . . . . . . . . . . . . . . . . . . . . . . . . . . . . . . . . 245
Exporting to Ulead DVD-VR Wizard . . . . . . . . . . . . . . . . . . . . . . . . . . . . . . . . . . . . . . . . . . . 245
Working with a Digital Video camcorder . . . . . . . . . . . . . . . . . . . . . . . . . . . . . . . . . . . . . . 246
External preview plug-in architecture . . . . . . . . . . . . . . . . . . . . . . . . . . . . . . . . . . . . . . . . . . . . . 247
The chapter in review . . . . . . . . . . . . . . . . . . . . . . . . . . . . . . . . . . . . . . . . . . . . . . . . . . . . . . 248
Page 10

Video Paint
Chapter 1: Getting started . . . . . . . . . . . . . . . . . . . . . . . . . . . . . . . . . . . . . . . . . . . . . 251
Understanding the basics . . . . . . . . . . . . . . . . . . . . . . . . . . . . . . . . . . . . . . . . . . . . . . . . . . 252
Working with the Filmstrip panel . . . . . . . . . . . . . . . . . . . . . . . . . . . . . . . . . . . . . . . . . . . . . . . . 254
Working with edit windows . . . . . . . . . . . . . . . . . . . . . . . . . . . . . . . . . . . . . . . . . . . . . . . . . . . . . 255
Saving your work . . . . . . . . . . . . . . . . . . . . . . . . . . . . . . . . . . . . . . . . . . . . . . . . . . . . . . . . . . . . . 255
Opening files into Video Paint . . . . . . . . . . . . . . . . . . . . . . . . . . . . . . . . . . . . . . . . . . . . . . . . . . 256
Starting a new Video Paint project . . . . . . . . . . . . . . . . . . . . . . . . . . . . . . . . . . . . . . . . . . . . . . . 257
Creating a video or image file . . . . . . . . . . . . . . . . . . . . . . . . . . . . . . . . . . . . . . . . . . . . . . . . . . . 25 8
Performing Cut and Copy operations . . . . . . . . . . . . . . . . . . . . . . . . . . . . . . . . . . . . . . . . . . . . . 259
Performing a paste operation . . . . . . . . . . . . . . . . . . . . . . . . . . . . . . . . . . . . . . . . . . . . . . . . . . . 259
Duplicating changes over frames . . . . . . . . . . . . . . . . . . . . . . . . . . . . . . . . . . . . . . . . . . . . . . . . 260
Placing cues . . . . . . . . . . . . . . . . . . . . . . . . . . . . . . . . . . . . . . . . . . . . . . . . . . . . . . . . . . . . . . . . 262
Viewing edit windows . . . . . . . . . . . . . . . . . . . . . . . . . . . . . . . . . . . . . . . . . . . . . . . . . . . . . . 263
Zooming on an image . . . . . . . . . . . . . . . . . . . . . . . . . . . . . . . . . . . . . . . . . . . . . . . . . . . . . . . . . 263
Using the Global Viewer . . . . . . . . . . . . . . . . . . . . . . . . . . . . . . . . . . . . . . . . . . . . . . . . . . . . . . . 264
Fitting an image in the edit window . . . . . . . . . . . . . . . . . . . . . . . . . . . . . . . . . . . . . . . . . . . . . . . 265
Working with frames in a project . . . . . . . . . . . . . . . . . . . . . . . . . . . . . . . . . . . . . . . . . . . . 265
Inserting frames . . . . . . . . . . . . . . . . . . . . . . . . . . . . . . . . . . . . . . . . . . . . . . . . . . . . . . . . . . . . . 266
Duplicating frames . . . . . . . . . . . . . . . . . . . . . . . . . . . . . . . . . . . . . . . . . . . . . . . . . . . . . . . . . . . 267
Deleting frames . . . . . . . . . . . . . . . . . . . . . . . . . . . . . . . . . . . . . . . . . . . . . . . . . . . . . . . . . . . . . . 267
Replacing frames . . . . . . . . . . . . . . . . . . . . . . . . . . . . . . . . . . . . . . . . . . . . . . . . . . . . . . . . . . . . 267
Customizing Video Paint . . . . . . . . . . . . . . . . . . . . . . . . . . . . . . . . . . . . . . . . . . . . . . . . . . . . 269
The chapter in review . . . . . . . . . . . . . . . . . . . . . . . . . . . . . . . . . . . . . . . . . . . . . . . . . . . . . . 274
Chapter 2: Painting . . . . . . . . . . . . . . . . . . . . . . . . . . . . . . . . . . . . . . . . . . . . . . . . . . . 275
Working in different display modes . . . . . . . . . . . . . . . . . . . . . . . . . . . . . . . . . . . . . . . . . . 276
Normal mode . . . . . . . . . . . . . . . . . . . . . . . . . . . . . . . . . . . . . . . . . . . . . . . . . . . . . . . . . . . . . . . . 276
Ruby Mask mode . . . . . . . . . . . . . . . . . . . . . . . . . . . . . . . . . . . . . . . . . . . . . . . . . . . . . . . . . . . . 276
Onionskin mode . . . . . . . . . . . . . . . . . . . . . . . . . . . . . . . . . . . . . . . . . . . . . . . . . . . . . . . . . . . . . 278
No Source Video mode . . . . . . . . . . . . . . . . . . . . . . . . . . . . . . . . . . . . . . . . . . . . . . . . . . . . . . . . 279
Making selections . . . . . . . . . . . . . . . . . . . . . . . . . . . . . . . . . . . . . . . . . . . . . . . . . . . . . . . . . 280
Understanding the selection marquee . . . . . . . . . . . . . . . . . . . . . . . . . . . . . . . . . . . . . . . . . . . . . 280
Selecting in the Composite and Paint Layer modes . . . . . . . . . . . . . . . . . . . . . . . . . . . . . . . . . . 281
Selecting regularly shaped areas . . . . . . . . . . . . . . . . . . . . . . . . . . . . . . . . . . . . . . . . . . . . . . . . 281
Selecting irregularly shaped areas . . . . . . . . . . . . . . . . . . . . . . . . . . . . . . . . . . . . . . . . . . . . . . . 282
Selecting an area containing similar colors . . . . . . . . . . . . . . . . . . . . . . . . . . . . . . . . . . . . . . . . 283
Adding to or subtracting from a selection area . . . . . . . . . . . . . . . . . . . . . . . . . . . . . . . . . . . . . . 284
Page 11

Moving a selection area marquee (mask) . . . . . . . . . . . . . . . . . . . . . . . . . . . . . . . . . . . . . . . . . . 285
Working with color . . . . . . . . . . . . . . . . . . . . . . . . . . . . . . . . . . . . . . . . . . . . . . . . . . . . . . . . 285
Using the Color palette . . . . . . . . . . . . . . . . . . . . . . . . . . . . . . . . . . . . . . . . . . . . . . . . . . . . . . . . 286
Selecting colors from the Color Picker pop-up menu . . . . . . . . . . . . . . . . . . . . . . . . . . . . . . . . . 287
Selecting colors with the Eyedropper tool . . . . . . . . . . . . . . . . . . . . . . . . . . . . . . . . . . . . . . . . . . 288
Loading and saving color tables . . . . . . . . . . . . . . . . . . . . . . . . . . . . . . . . . . . . . . . . . . . . . . . . . 288
Using the Painting tools . . . . . . . . . . . . . . . . . . . . . . . . . . . . . . . . . . . . . . . . . . . . . . . . . . . . 289
Specifying Brush panel attributes . . . . . . . . . . . . . . . . . . . . . . . . . . . . . . . . . . . . . . . . . . . . . . . . 290
Filling an area with color . . . . . . . . . . . . . . . . . . . . . . . . . . . . . . . . . . . . . . . . . . . . . . . . . . . . . . . 294
Transforming selections . . . . . . . . . . . . . . . . . . . . . . . . . . . . . . . . . . . . . . . . . . . . . . . . . . . 294
Using the Clone tool . . . . . . . . . . . . . . . . . . . . . . . . . . . . . . . . . . . . . . . . . . . . . . . . . . . . . . . 295
Using the Retouch tool . . . . . . . . . . . . . . . . . . . . . . . . . . . . . . . . . . . . . . . . . . . . . . . . . . . . . 296
Recording macros . . . . . . . . . . . . . . . . . . . . . . . . . . . . . . . . . . . . . . . . . . . . . . . . . . . . . . . . . 298
Applying filters . . . . . . . . . . . . . . . . . . . . . . . . . . . . . . . . . . . . . . . . . . . . . . . . . . . . . . . . . . . . 301
Previewing your work . . . . . . . . . . . . . . . . . . . . . . . . . . . . . . . . . . . . . . . . . . . . . . . . . . . . . . 302
Performing a flick preview . . . . . . . . . . . . . . . . . . . . . . . . . . . . . . . . . . . . . . . . . . . . . . . . . . . . . . 302
Performing a preview . . . . . . . . . . . . . . . . . . . . . . . . . . . . . . . . . . . . . . . . . . . . . . . . . . . . . . . . . 303
The chapter in review . . . . . . . . . . . . . . . . . . . . . . . . . . . . . . . . . . . . . . . . . . . . . . . . . . . . . . 304
CG Infinity
Chapter 1: Getting started . . . . . . . . . . . . . . . . . . . . . . . . . . . . . . . . . . . . . . . . . . . . . 307
Understanding the basics . . . . . . . . . . . . . . . . . . . . . . . . . . . . . . . . . . . . . . . . . . . . . . . . . . 308
Understanding objects . . . . . . . . . . . . . . . . . . . . . . . . . . . . . . . . . . . . . . . . . . . . . . . . . . . . . . . . 310
Starting a new CG Infinity project . . . . . . . . . . . . . . . . . . . . . . . . . . . . . . . . . . . . . . . . . . . . . . . . 310
Changing the background of an edit window . . . . . . . . . . . . . . . . . . . . . . . . . . . . . . . . . . . . . . . . . 311
Changing the view of an edit window . . . . . . . . . . . . . . . . . . . . . . . . . . . . . . . . . . . . . . . . . . . . . . 312
Viewing objects . . . . . . . . . . . . . . . . . . . . . . . . . . . . . . . . . . . . . . . . . . . . . . . . . . . . . . . . . . . . . . 312
Saving your work . . . . . . . . . . . . . . . . . . . . . . . . . . . . . . . . . . . . . . . . . . . . . . . . . . . . . . . . . . . . . 313
Creating video and image files . . . . . . . . . . . . . . . . . . . . . . . . . . . . . . . . . . . . . . . . . . . . . . . . . . 313
Performing Cut and Copy operations . . . . . . . . . . . . . . . . . . . . . . . . . . . . . . . . . . . . . . . . . . . . . 313
Performing a paste operation . . . . . . . . . . . . . . . . . . . . . . . . . . . . . . . . . . . . . . . . . . . . . . . . . . . 314
Controlling the alignment of objects . . . . . . . . . . . . . . . . . . . . . . . . . . . . . . . . . . . . . . . . . . 315
Displaying rulers . . . . . . . . . . . . . . . . . . . . . . . . . . . . . . . . . . . . . . . . . . . . . . . . . . . . . . . . . . . . . 315
Displaying grid and guides . . . . . . . . . . . . . . . . . . . . . . . . . . . . . . . . . . . . . . . . . . . . . . . . . . . . . 315
Aligning objects . . . . . . . . . . . . . . . . . . . . . . . . . . . . . . . . . . . . . . . . . . . . . . . . . . . . . . . . . . . . . 316
Customizing CG Infinity . . . . . . . . . . . . . . . . . . . . . . . . . . . . . . . . . . . . . . . . . . . . . . . . . . . . . 317
The chapter in review . . . . . . . . . . . . . . . . . . . . . . . . . . . . . . . . . . . . . . . . . . . . . . . . . . . . . . 318
Page 12

Chapter 2: Working with objects . . . . . . . . . . . . . . . . . . . . . . . . . . . . . . . . . . . . . . . . 319
Defining an object’s style . . . . . . . . . . . . . . . . . . . . . . . . . . . . . . . . . . . . . . . . . . . . . . . . . . . 320
Setting your default object style . . . . . . . . . . . . . . . . . . . . . . . . . . . . . . . . . . . . . . . . . . . . . . . . . 323
Creating text and shape objects . . . . . . . . . . . . . . . . . . . . . . . . . . . . . . . . . . . . . . . . . . . . . 323
Using the Text tool . . . . . . . . . . . . . . . . . . . . . . . . . . . . . . . . . . . . . . . . . . . . . . . . . . . . . . . . . . . 324
Using the Shape tool . . . . . . . . . . . . . . . . . . . . . . . . . . . . . . . . . . . . . . . . . . . . . . . . . . . . . . . . . . 325
Using the Freehand tool . . . . . . . . . . . . . . . . . . . . . . . . . . . . . . . . . . . . . . . . . . . . . . . . . . . . . . . 326
Using the Path tool . . . . . . . . . . . . . . . . . . . . . . . . . . . . . . . . . . . . . . . . . . . . . . . . . . . . . . . . . . . 327
Selecting and transforming objects . . . . . . . . . . . . . . . . . . . . . . . . . . . . . . . . . . . . . . . . . . 328
Selecting multiple objects . . . . . . . . . . . . . . . . . . . . . . . . . . . . . . . . . . . . . . . . . . . . . . . . . . . . . . 329
Grouping objects . . . . . . . . . . . . . . . . . . . . . . . . . . . . . . . . . . . . . . . . . . . . . . . . . . . . . . . . . . . . 329
Layering objects . . . . . . . . . . . . . . . . . . . . . . . . . . . . . . . . . . . . . . . . . . . . . . . . . . . . . . . . . . . . . 329
Moving objects . . . . . . . . . . . . . . . . . . . . . . . . . . . . . . . . . . . . . . . . . . . . . . . . . . . . . . . . . . . . . . 330
Transforming objects . . . . . . . . . . . . . . . . . . . . . . . . . . . . . . . . . . . . . . . . . . . . . . . . . . . . . . . . . 330
Using the Envelope tool . . . . . . . . . . . . . . . . . . . . . . . . . . . . . . . . . . . . . . . . . . . . . . . . . . . . . . . . 331
Adjusting shapes . . . . . . . . . . . . . . . . . . . . . . . . . . . . . . . . . . . . . . . . . . . . . . . . . . . . . . . . . . 332
Creating a moving path . . . . . . . . . . . . . . . . . . . . . . . . . . . . . . . . . . . . . . . . . . . . . . . . . . . . . 334
Changing the shape of a moving path . . . . . . . . . . . . . . . . . . . . . . . . . . . . . . . . . . . . . . . . . . . . . 335
Changing the size and style of an object over time . . . . . . . . . . . . . . . . . . . . . . . . . . . . . . . . . . 336
Changing the speed of an object . . . . . . . . . . . . . . . . . . . . . . . . . . . . . . . . . . . . . . . . . . . . . . . . 337
Timing the movement of objects . . . . . . . . . . . . . . . . . . . . . . . . . . . . . . . . . . . . . . . . . . . . . . . . . 338
The chapter in review . . . . . . . . . . . . . . . . . . . . . . . . . . . . . . . . . . . . . . . . . . . . . . . . . . . . . . 340
Audio Editor
Chapter 1: Getting started . . . . . . . . . . . . . . . . . . . . . . . . . . . . . . . . . . . . . . . . . . . . . 343
Understanding the basics . . . . . . . . . . . . . . . . . . . . . . . . . . . . . . . . . . . . . . . . . . . . . . . . . . 344
Playing audio files . . . . . . . . . . . . . . . . . . . . . . . . . . . . . . . . . . . . . . . . . . . . . . . . . . . . . . . . . . . . 346
Creating a new edit window . . . . . . . . . . . . . . . . . . . . . . . . . . . . . . . . . . . . . . . . . . . . . . . . . . . . . 346
Saving files . . . . . . . . . . . . . . . . . . . . . . . . . . . . . . . . . . . . . . . . . . . . . . . . . . . . . . . . . . . . . . . . . 347
Converting files . . . . . . . . . . . . . . . . . . . . . . . . . . . . . . . . . . . . . . . . . . . . . . . . . . . . . . . . . . . . . . 348
Viewing waveforms . . . . . . . . . . . . . . . . . . . . . . . . . . . . . . . . . . . . . . . . . . . . . . . . . . . . . . . . . . . 348
Dragging-and-dropping to Video Editor . . . . . . . . . . . . . . . . . . . . . . . . . . . . . . . . . . . . . . . . . . . 350
Recording sound . . . . . . . . . . . . . . . . . . . . . . . . . . . . . . . . . . . . . . . . . . . . . . . . . . . . . . . . . . 350
Tips for determining audio quality . . . . . . . . . . . . . . . . . . . . . . . . . . . . . . . . . . . . . . . . . . . . . . . . 352
Customizing Audio Editor . . . . . . . . . . . . . . . . . . . . . . . . . . . . . . . . . . . . . . . . . . . . . . . . . . . 353
The chapter in review . . . . . . . . . . . . . . . . . . . . . . . . . . . . . . . . . . . . . . . . . . . . . . . . . . . . . . 354
Page 13

Chapter 2: Editing audio files . . . . . . . . . . . . . . . . . . . . . . . . . . . . . . . . . . . . . . . . . . . 355
Creating selection areas . . . . . . . . . . . . . . . . . . . . . . . . . . . . . . . . . . . . . . . . . . . . . . . . . . . 356
Creating precise selections . . . . . . . . . . . . . . . . . . . . . . . . . . . . . . . . . . . . . . . . . . . . . . . . . . . . 357
Working with cues . . . . . . . . . . . . . . . . . . . . . . . . . . . . . . . . . . . . . . . . . . . . . . . . . . . . . . . . 357
Managing cues . . . . . . . . . . . . . . . . . . . . . . . . . . . . . . . . . . . . . . . . . . . . . . . . . . . . . . . . . . . . . . 358
Clearing audio data . . . . . . . . . . . . . . . . . . . . . . . . . . . . . . . . . . . . . . . . . . . . . . . . . . . . . . . . . . . 359
Inserting audio data . . . . . . . . . . . . . . . . . . . . . . . . . . . . . . . . . . . . . . . . . . . . . . . . . . . . . . . . . . 360
Sound sweetening . . . . . . . . . . . . . . . . . . . . . . . . . . . . . . . . . . . . . . . . . . . . . . . . . . . . . . . . . 361
Changing the audio level . . . . . . . . . . . . . . . . . . . . . . . . . . . . . . . . . . . . . . . . . . . . . . . . . . . . . . . 361
Changing pitch . . . . . . . . . . . . . . . . . . . . . . . . . . . . . . . . . . . . . . . . . . . . . . . . . . . . . . . . . . . . . . 362
Quantizing a waveform . . . . . . . . . . . . . . . . . . . . . . . . . . . . . . . . . . . . . . . . . . . . . . . . . . . . . . . . 363
Working with silence . . . . . . . . . . . . . . . . . . . . . . . . . . . . . . . . . . . . . . . . . . . . . . . . . . . . . . . . . 363
Removing background noise . . . . . . . . . . . . . . . . . . . . . . . . . . . . . . . . . . . . . . . . . . . . . . . . . . . 364
Calibrating files recorded from different sources . . . . . . . . . . . . . . . . . . . . . . . . . . . . . . . . . . . . 365
Mixing tracks . . . . . . . . . . . . . . . . . . . . . . . . . . . . . . . . . . . . . . . . . . . . . . . . . . . . . . . . . . . . . 365
Removing a mixed track . . . . . . . . . . . . . . . . . . . . . . . . . . . . . . . . . . . . . . . . . . . . . . . . . . . . . . . 366
Applying special effects . . . . . . . . . . . . . . . . . . . . . . . . . . . . . . . . . . . . . . . . . . . . . . . . . . . . 367
Performing a fade . . . . . . . . . . . . . . . . . . . . . . . . . . . . . . . . . . . . . . . . . . . . . . . . . . . . . . . . . . . . 367
Changing speed . . . . . . . . . . . . . . . . . . . . . . . . . . . . . . . . . . . . . . . . . . . . . . . . . . . . . . . . . . . . . 368
Performing a stereo pan . . . . . . . . . . . . . . . . . . . . . . . . . . . . . . . . . . . . . . . . . . . . . . . . . . . . . . . 369
Reversing a file . . . . . . . . . . . . . . . . . . . . . . . . . . . . . . . . . . . . . . . . . . . . . . . . . . . . . . . . . . . . . . 369
Performing an echo . . . . . . . . . . . . . . . . . . . . . . . . . . . . . . . . . . . . . . . . . . . . . . . . . . . . . . . . . . . 370
Performing a cross fade . . . . . . . . . . . . . . . . . . . . . . . . . . . . . . . . . . . . . . . . . . . . . . . . . . . . . . . 371
Using DirectX Audio and DMO Audio Effect plug-ins . . . . . . . . . . . . . . . . . . . . . . . . . . . . . . . . . 371
The chapter in review . . . . . . . . . . . . . . . . . . . . . . . . . . . . . . . . . . . . . . . . . . . . . . . . . . . . . . 372
More Programs
Ulead DVD MovieFactory . . . . . . . . . . . . . . . . . . . . . . . . . . . . . . . . . . . . . . . . . . . . . . 376
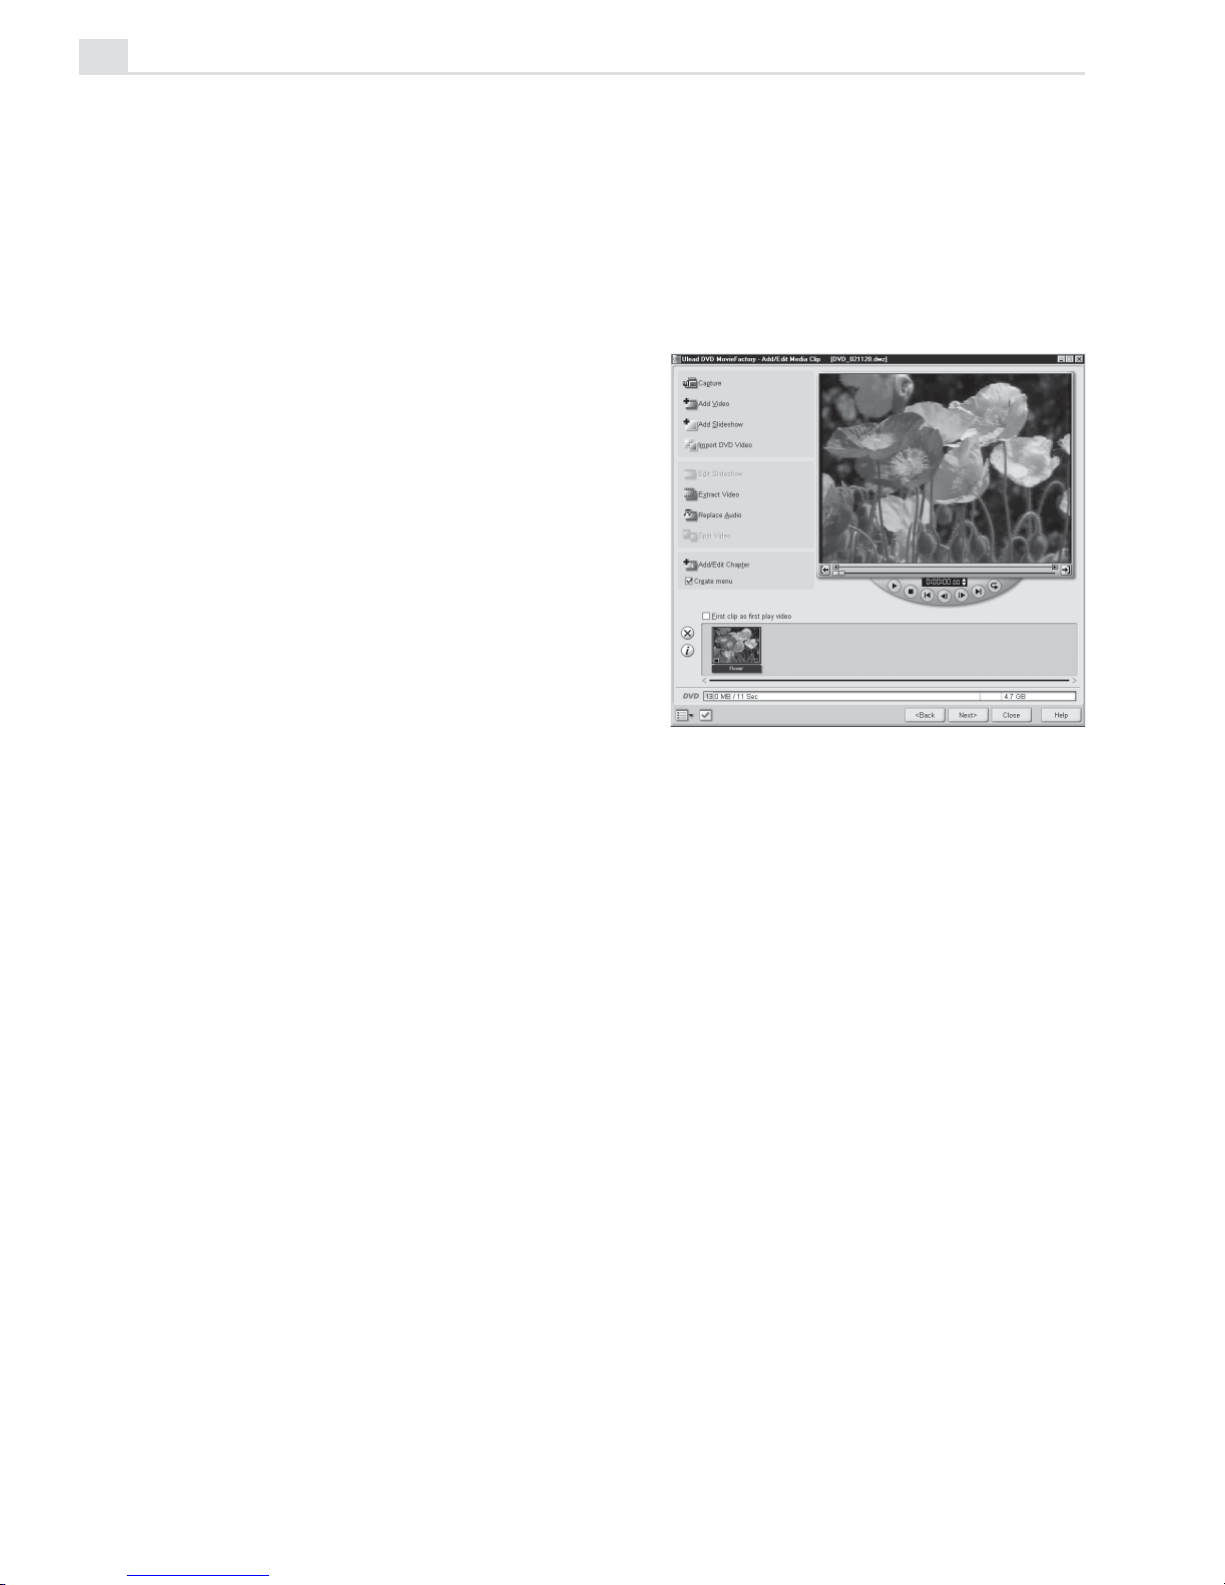
Getting around Ulead DVD MovieFactory . . . . . . . . . . . . . . . . . . . . . . . . . . . . . . . . . . . . . . . 376
Which task should you choose? . . . . . . . . . . . . . . . . . . . . . . . . . . . . . . . . . . . . . . . . . . . . . 377
Working on a project . . . . . . . . . . . . . . . . . . . . . . . . . . . . . . . . . . . . . . . . . . . . . . . . . . . . . . 378
Add videos or slideshows . . . . . . . . . . . . . . . . . . . . . . . . . . . . . . . . . . . . . . . . . . . . . . . . . . . . . . 378
Capture settings . . . . . . . . . . . . . . . . . . . . . . . . . . . . . . . . . . . . . . . . . . . . . . . . . . . . . . . . . . . . . 379
Trim a video . . . . . . . . . . . . . . . . . . . . . . . . . . . . . . . . . . . . . . . . . . . . . . . . . . . . . . . . . . . . . . . . . 382
Edit video or slideshow . . . . . . . . . . . . . . . . . . . . . . . . . . . . . . . . . . . . . . . . . . . . . . . . . . . . . . . . 383
Extract video . . . . . . . . . . . . . . . . . . . . . . . . . . . . . . . . . . . . . . . . . . . . . . . . . . . . . . . . . . . . . . . . 384
Replace audio . . . . . . . . . . . . . . . . . . . . . . . . . . . . . . . . . . . . . . . . . . . . . . . . . . . . . . . . . . . . . . . 385
Split a video . . . . . . . . . . . . . . . . . . . . . . . . . . . . . . . . . . . . . . . . . . . . . . . . . . . . . . . . . . . . . . . . . 385
Page 14

Add/Edit chapters . . . . . . . . . . . . . . . . . . . . . . . . . . . . . . . . . . . . . . . . . . . . . . . . . . . . . . . . . . . . 385
Setup menus . . . . . . . . . . . . . . . . . . . . . . . . . . . . . . . . . . . . . . . . . . . . . . . . . . . . . . . . . . . . . . . . 387
Preview your movie . . . . . . . . . . . . . . . . . . . . . . . . . . . . . . . . . . . . . . . . . . . . . . . . . . . . . . . . . . . 388
Output your movie . . . . . . . . . . . . . . . . . . . . . . . . . . . . . . . . . . . . . . . . . . . . . . . . . . . . . . . . . . . . 389
Ulead DVD-VR Wizard . . . . . . . . . . . . . . . . . . . . . . . . . . . . . . . . . . . . . . . . . . . . . . . . . 390
Step 1: Select a file to export . . . . . . . . . . . . . . . . . . . . . . . . . . . . . . . . . . . . . . . . . . . . . . . . . . . 39 0
Step 2: Add Program . . . . . . . . . . . . . . . . . . . . . . . . . . . . . . . . . . . . . . . . . . . . . . . . . . . . . . . . . . 391
Step 3: Select Playlist . . . . . . . . . . . . . . . . . . . . . . . . . . . . . . . . . . . . . . . . . . . . . . . . . . . . . . . . . 391
Step 4: Edit Playlist (All) . . . . . . . . . . . . . . . . . . . . . . . . . . . . . . . . . . . . . . . . . . . . . . . . . . . . . . . 392
Step 5: Edit Playlist . . . . . . . . . . . . . . . . . . . . . . . . . . . . . . . . . . . . . . . . . . . . . . . . . . . . . . . . . . . 392
Step 6: Playback Simulation and Output . . . . . . . . . . . . . . . . . . . . . . . . . . . . . . . . . . . . . . . . . . 392
Appendix
Background information . . . . . . . . . . . . . . . . . . . . . . . . . . . . . . . . . . . . . . . . . . . . . . . 395
The world of analog video . . . . . . . . . . . . . . . . . . . . . . . . . . . . . . . . . . . . . . . . . . . . . . . . . . . 396
Inside the video signal . . . . . . . . . . . . . . . . . . . . . . . . . . . . . . . . . . . . . . . . . . . . . . . . . . . . . . . . 396
How analog video is displayed . . . . . . . . . . . . . . . . . . . . . . . . . . . . . . . . . . . . . . . . . . . . . . . . . . 397
The world of digital video . . . . . . . . . . . . . . . . . . . . . . . . . . . . . . . . . . . . . . . . . . . . . . . . . . . 397
Inside digital video . . . . . . . . . . . . . . . . . . . . . . . . . . . . . . . . . . . . . . . . . . . . . . . . . . . . . . . . . . . 398
Working with the data rate . . . . . . . . . . . . . . . . . . . . . . . . . . . . . . . . . . . . . . . . . . . . . . . . . . . . . . 398
Understanding the frame rate . . . . . . . . . . . . . . . . . . . . . . . . . . . . . . . . . . . . . . . . . . . . . . . . . . . 399
Understanding the frame size . . . . . . . . . . . . . . . . . . . . . . . . . . . . . . . . . . . . . . . . . . . . . . . . . . . 399
Understanding data types . . . . . . . . . . . . . . . . . . . . . . . . . . . . . . . . . . . . . . . . . . . . . . . . . . . . . . 399
Understanding video compression . . . . . . . . . . . . . . . . . . . . . . . . . . . . . . . . . . . . . . . . . . . . . . . 40 0
Aspect Ratio . . . . . . . . . . . . . . . . . . . . . . . . . . . . . . . . . . . . . . . . . . . . . . . . . . . . . . . . . . . . . . . . 401
Frame type . . . . . . . . . . . . . . . . . . . . . . . . . . . . . . . . . . . . . . . . . . . . . . . . . . . . . . . . . . . . . . . . . 402
DV Type-1 . . . . . . . . . . . . . . . . . . . . . . . . . . . . . . . . . . . . . . . . . . . . . . . . . . . . . . . . . . . . . . . . . . 402
DV Type-2 . . . . . . . . . . . . . . . . . . . . . . . . . . . . . . . . . . . . . . . . . . . . . . . . . . . . . . . . . . . . . . . . . . 402
WMV . . . . . . . . . . . . . . . . . . . . . . . . . . . . . . . . . . . . . . . . . . . . . . . . . . . . . . . . . . . . . . . . . . . . . . 402
On USB and IEEE-1394 (Firewire) capture cards . . . . . . . . . . . . . . . . . . . . . . . . . . . . . . . . . . . . 403
System Tweaks . . . . . . . . . . . . . . . . . . . . . . . . . . . . . . . . . . . . . . . . . . . . . . . . . . . . . . . . . . . . . . 403
Shortcuts . . . . . . . . . . . . . . . . . . . . . . . . . . . . . . . . . . . . . . . . . . . . . . . . . . . . . . . . . . . 407
Index . . . . . . . . . . . . . . . . . . . . . . . . . . . . . . . . . . . . . . . . . . . . . . . . . . . . . . . . . . . . . . 423
Page 15

INTRODUCTION
15
Introduction
Welcome to MediaStudio Pro
Congratulations on purchasing Ulead MediaStudio Pro, the ultimate
video editing solution for desktop professionals and digital video
enthusiasts. Built around a powerful suite of versatile and high
performance programs, MediaStudio Pro is the first choice for
anyone wanting to w ork with video. MediaStudio Pro offers Realtime
MPEG Capture, Realtime Preview and Realtime Output. W ith intuitive controls and seamless integration, creating video has never
been easier or more accessible.
In this introduction you will learn about:
•
Using the MediaStudio Pro documentation ..............................................
p.16
•
Installing MediaStudio Pro on your system ..............................................
p.17
•
Running MediaStudio Pro programs.........................................................
p.18
•
What's new in MediaStudio Pro ..................................................................
p.19
Page 16

MEDIASTUDIO PRO USER GUIDE
16
Getting started
MediaStudio Pro is a high caliber , professional level video editing software
suite. More than just a simple video editor, it is truly a complete digital
studio, encompassing computer graphics effects, rotoscope animation, and
other amazing filters and effects. Acclaimed by industry experts as being the
most intuitive and easy to use video editing software around, it is a powerful
program that needs ample time to master. Our best advice to you is to begin
first by browsing through this manual, then reading the sections you are
interested in. Now, you are ready to fire up the program and give it a try. We
strongly recommend working through the Tutorials section of this manual
and checking out the sample projects found in the Samples folder of
MediaStudio Pro before really digging into the advanced stuff. Once the
basics are covered, you should be able to begin editing your own movies in
just half a day.
Help!
As you work, you will certainly have many questions that can be quickly
answered by accessing the extensive online Help. Hold your mouse over an
object in the program that you have a question about and press [
F1] on the
keyboard. Every item has a help topic associated with it, so this is a surefire
way to get instant answers. You can also look at the bottom of these topics
(which are usually just simple definitions of the item) and find links to
Related Topics. Check the Index of both the Help and the manual to get to
topics quickly.
The manual
We consider the Online Help to be a definitive reference for instant and
comprehensive information about every aspect of MediaStudio Pro. It is not
meant to be read through as a complete document. The manual, on the other
hand, is much more readable but is meant as an introduction and is limited in
scope. It contains a broad overview of all of the program modules with
detailed step-by-step instructions covering all of the basic functions, clearly
outlining the most commonly used tasks.
Page 17

INTRODUCTION
17
More info
Once you’ve played with the program a little and can already edit clips,
apply transitions, and add a title or two, you might want to return to the
manual for tips, tricks, and ideas. The companion CD has hundreds of
samples and additional tutorials. The MediaStudio Pro Web site
(www.ulead.com/msp/runme.htm) also has a number of additional
resources.
There are also a few private Web sites that have great tutorials and sample
projects. One of the best is the MediaStudio User’s Group, or MUG, at
www.mugcentral.com. This is the home base for the MUG mailing list,
which you can subscribe to at this site. Everyday, dozens of users, including
quite a few video professionals, ask and answer questions in an amazingly
useful forum.
Installation
The MediaStudio Pro installation program runs from within Windows and
contains complete instructions to take you through the installation process.
To install MediaStudio Pro:
1. Read the license agreement that comes with the MediaStudio Pro
package. The license agreement contains important legal requirements
that you need to be aware of. If you agree to abide by it, continue with
the installation.
Note:
Please take a moment to fill out the registration card during installation.
Becoming a registered user entitles you to product updates and upgrade information,
as well as technical support. Y ou can also instantly register online (electronically)
after installing the program.
2. Insert the MediaStudio Pro CD into your CD-ROM drive. Windows
should detect the CD and then automatically run the installation program.
If the automatic detection feature is turned off, use Windows Explorer to
run the SETUP.EXE program directly from your CD-ROM drive.
Page 18

MEDIASTUDIO PRO USER GUIDE
18
Installing Acrobat Reader
An electronic copy of this user guide is also available in the Adobe Acrobat
format (P
ORTABLE DOCUMENT FORMAT - PDF). To view this, first run the
AR500ENU.EXE file (in the DRIVERS folder of the first MediaStudio Pro
CD) and follow the installation instructions. After successfully installing the
Reader program, run the program and click File: Open to open the file
MSPMANUAL.PDF. You can then view the user guide online.
Running the programs
To run the MediaStudio Pro programs, click on the appropriate command in
the Start: Programs: Ulead MediaStudio Pro 7 submenu. This submenu
may differ depending on the choices you made during installation. If you are
already working in any of these programs, the easiest method to run another
MediaStudio Pro program is by using the Switch menu, located on the right
of the Menu bar.
Read Me
In the fast paced world of software, change occurs almost daily. While we
have tried to keep this manual as up-to-date as possible, there will inevitably
be some things that did not make it into the book by press time. Please
browse through the Read Me file installed in the MediaStudio Pro directory
to find out about the latest notes, drivers, and troubleshooting tips.
Page 19
INTRODUCTION
19
What's new?
Capture, edit and create videos like a professional by using the all-improved
MediaStudio Pro 7. A comprehensive tool designed to help you create your
videos with ease and flexibility. Through its enhanced and added features, you
can make movies like those done by professionals.
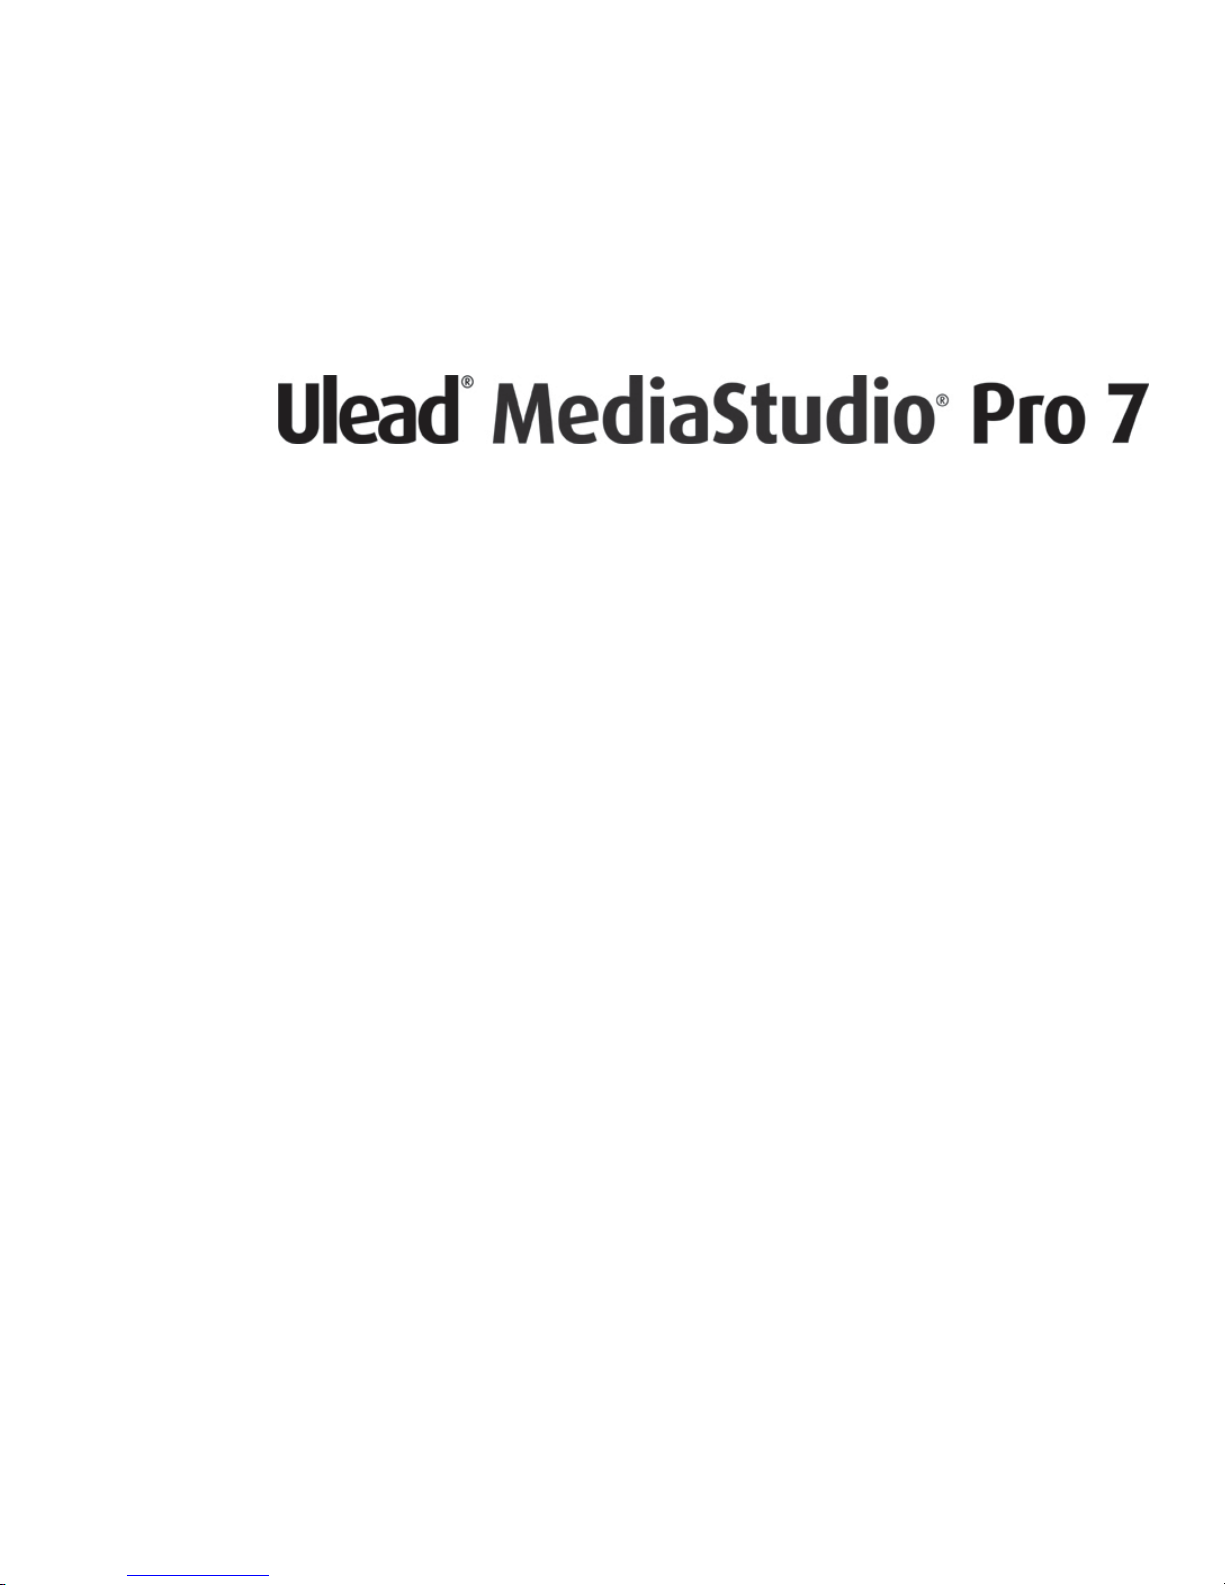
Real-time software preview capability in Video Editor
Play back a project in real-time, without
waiting to render preview files. Video Editor
can render and play back up to five layers of
video, filters and transitions in real-time,
allowing the user to immediately see the result
of an edit, without having to wait for a render.
Realtime performance however, depends on
the processor's speed and available memory.
MPEG-1, MPEG-2 and Windows Media
Format native editing
DVD and SVCD parameters can be difficult to set manually. Using presets,
users can quickly and easily create DVD and SVCD compliant files. There are
also options for RealMedia and Windows Media Format files for streaming on
the Web, and users can create and save their own encoding template for future
use. The variety of formats allows the user to deliver to virtually any output
device without having to go through intermediate and time consuming
transcoding processes.
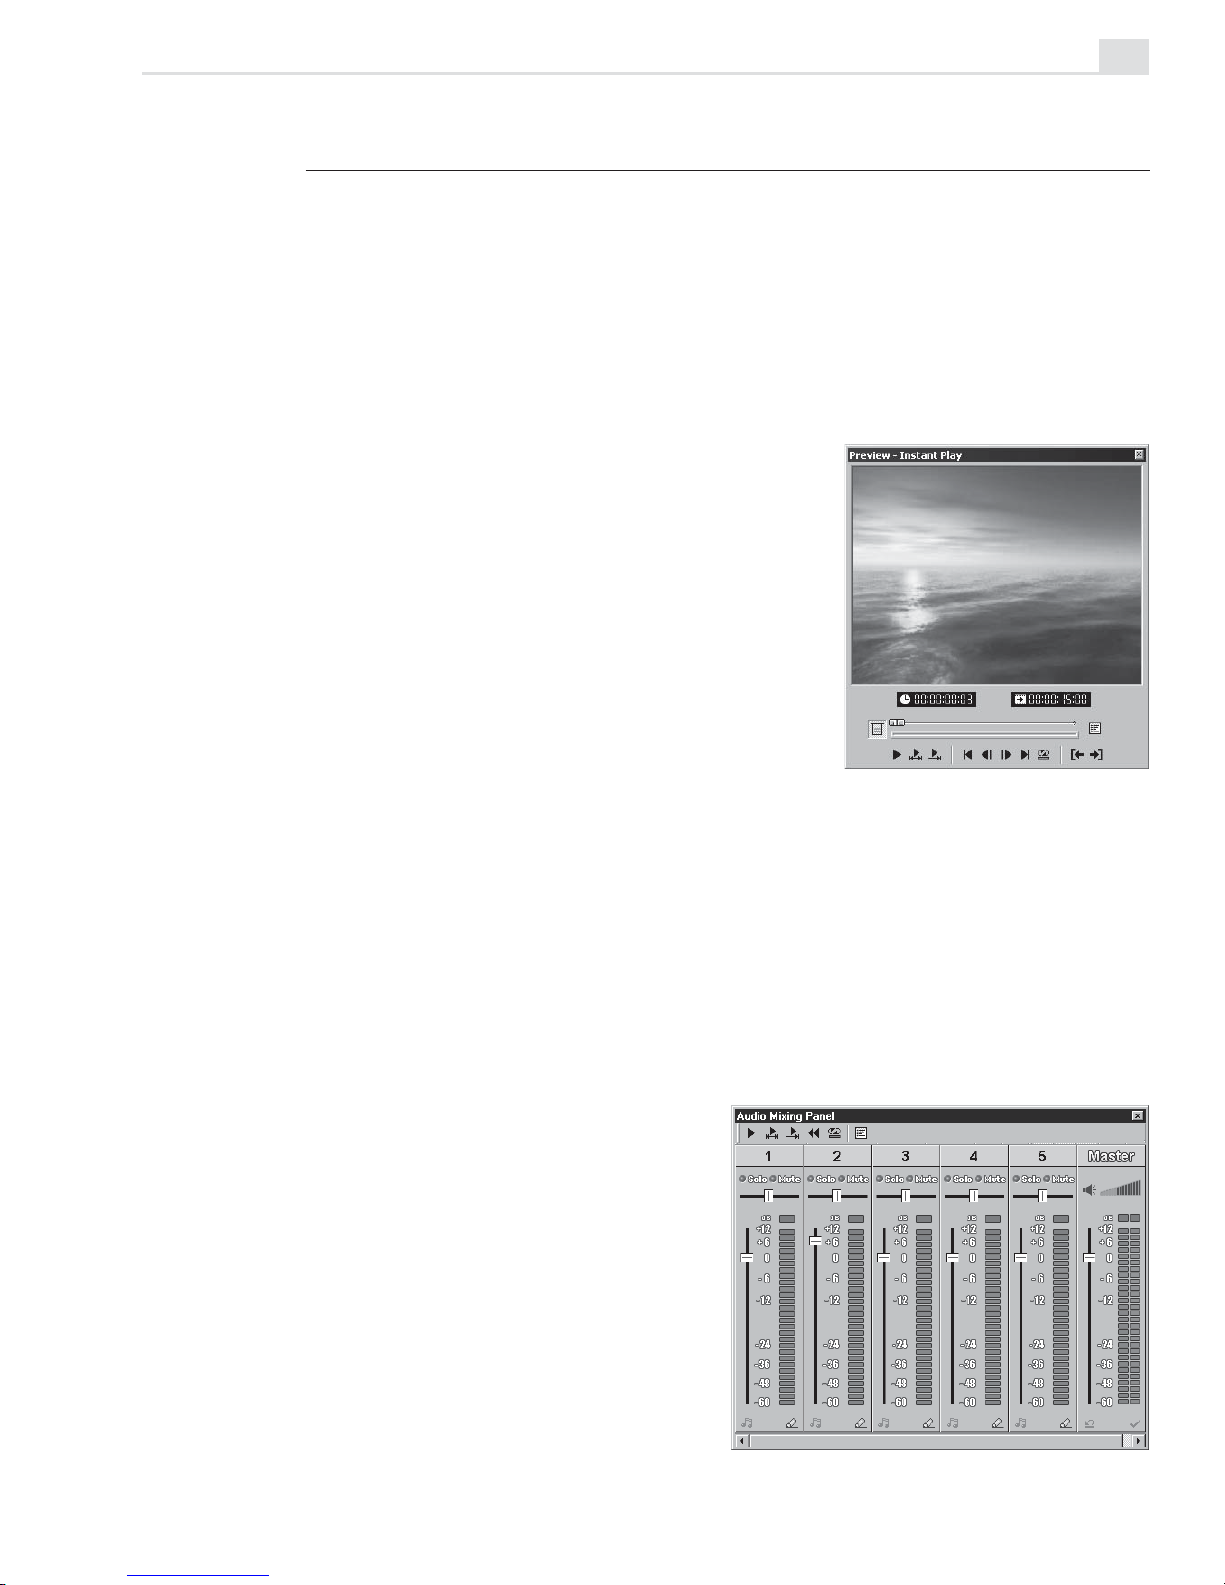
Audio enhancement and
mixing control
Audio mixing panel allows user to
adjust and pan audio volume in real
time, while frame by frame audio
preview allows much greater and
more intuitive control.
Page 20
MEDIASTUDIO PRO USER GUIDE
20
Realtime output
Output directly from the timeline, either to DV Camcorder, or to TV/VCR
with appropriate TV out display card. You don't need to wait for projects to
render!
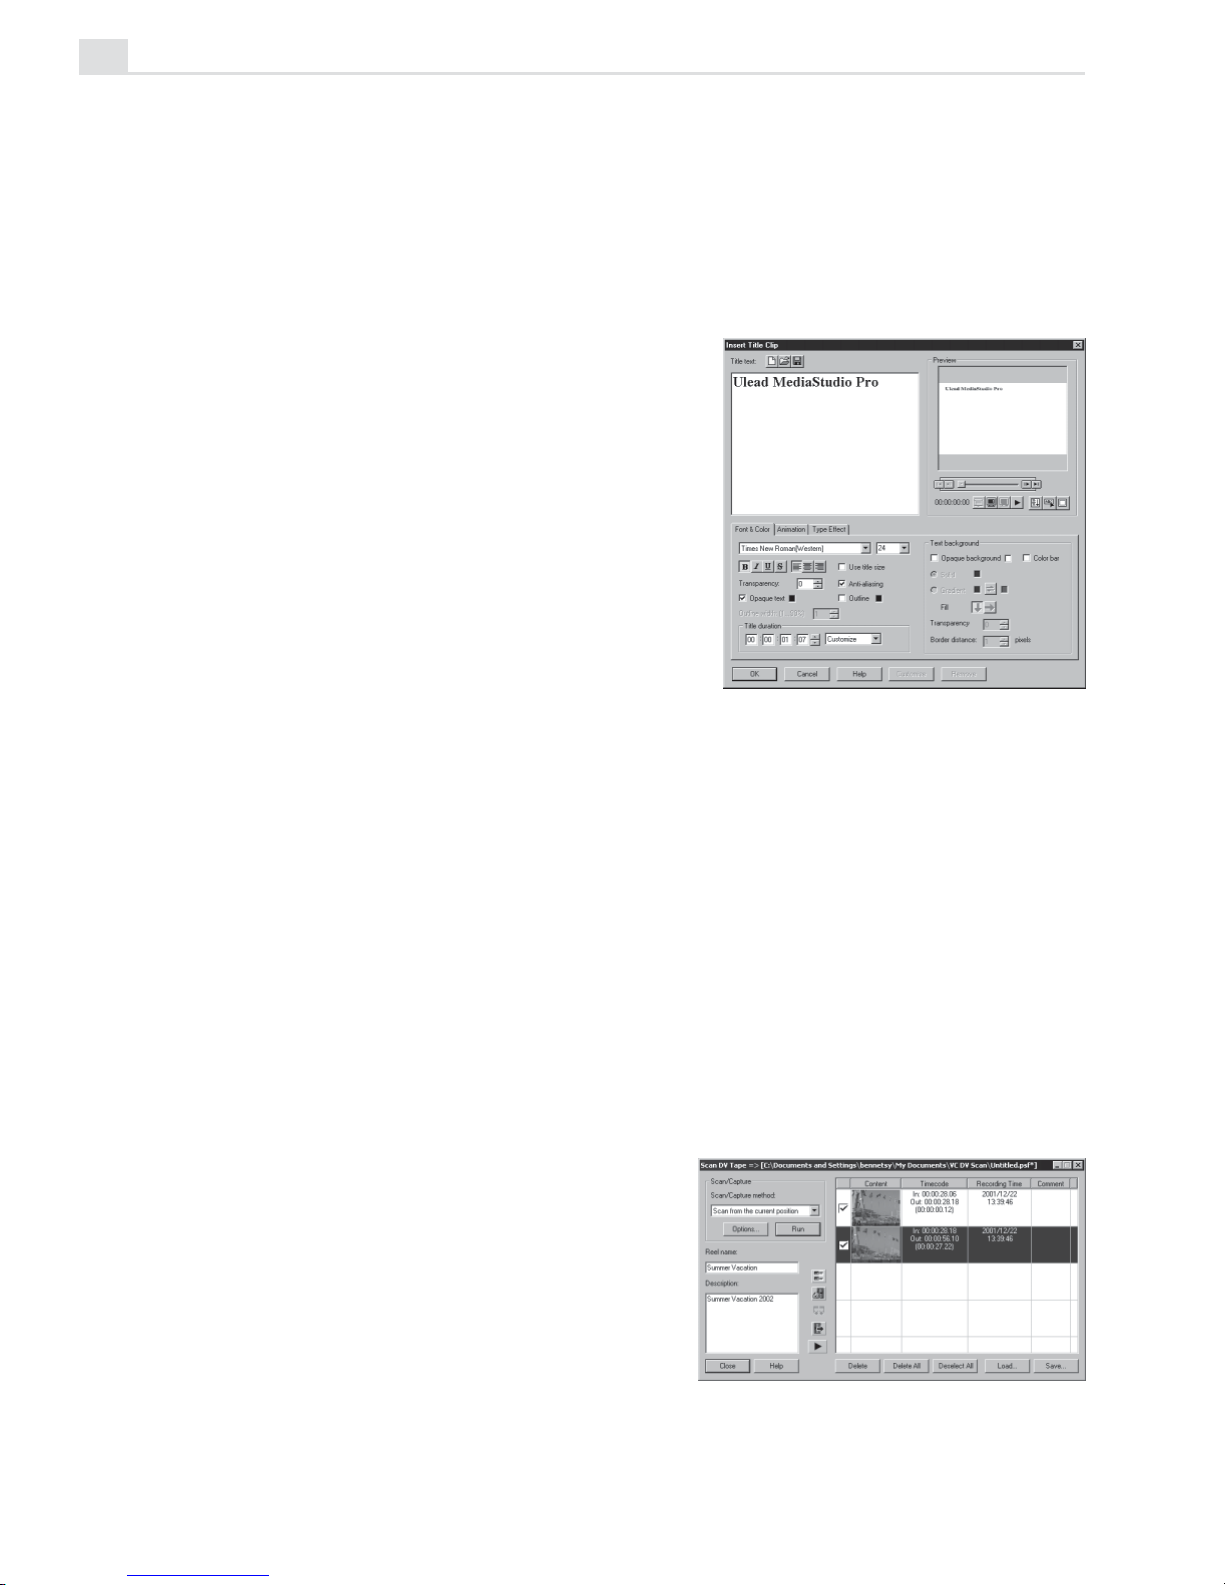
Rich title feature
The title dialogue box has been made
clearer, and special title effects and
animations have been added. Together
with new coding to improve the image
quality of titles, users now have more
professional, as well as more eye
catching title options at their disposal.
Video capture enhancement
MediaStudio Pro allows Realtime capture, via FireW ire, of a variety of
formats such as Native DV, MPEG-1, MPEG-2 and Windows Media
Format.
16:9 Widescreen format
Capture, edit, and output in the increasingly popular 16:9 Widescreen
format.
Scene detection enhancement
Scene Detection makes clip
preparation and management much
faster and easier. Scan an entire DV
tape in 5 minutes. Scene detection
identifies individual clips and provides
a thumbnail list of the entire tape
contents. Save as a DV Album which
provides a log of the entire tape for
future reference.
Page 21
INTRODUCTION
21
Support Dolby AC-3 encoding and decoding
Encode and decode Dolby AC-3 audio. Allows users to create sound tracks,
especially useful in the creation of DVDs.
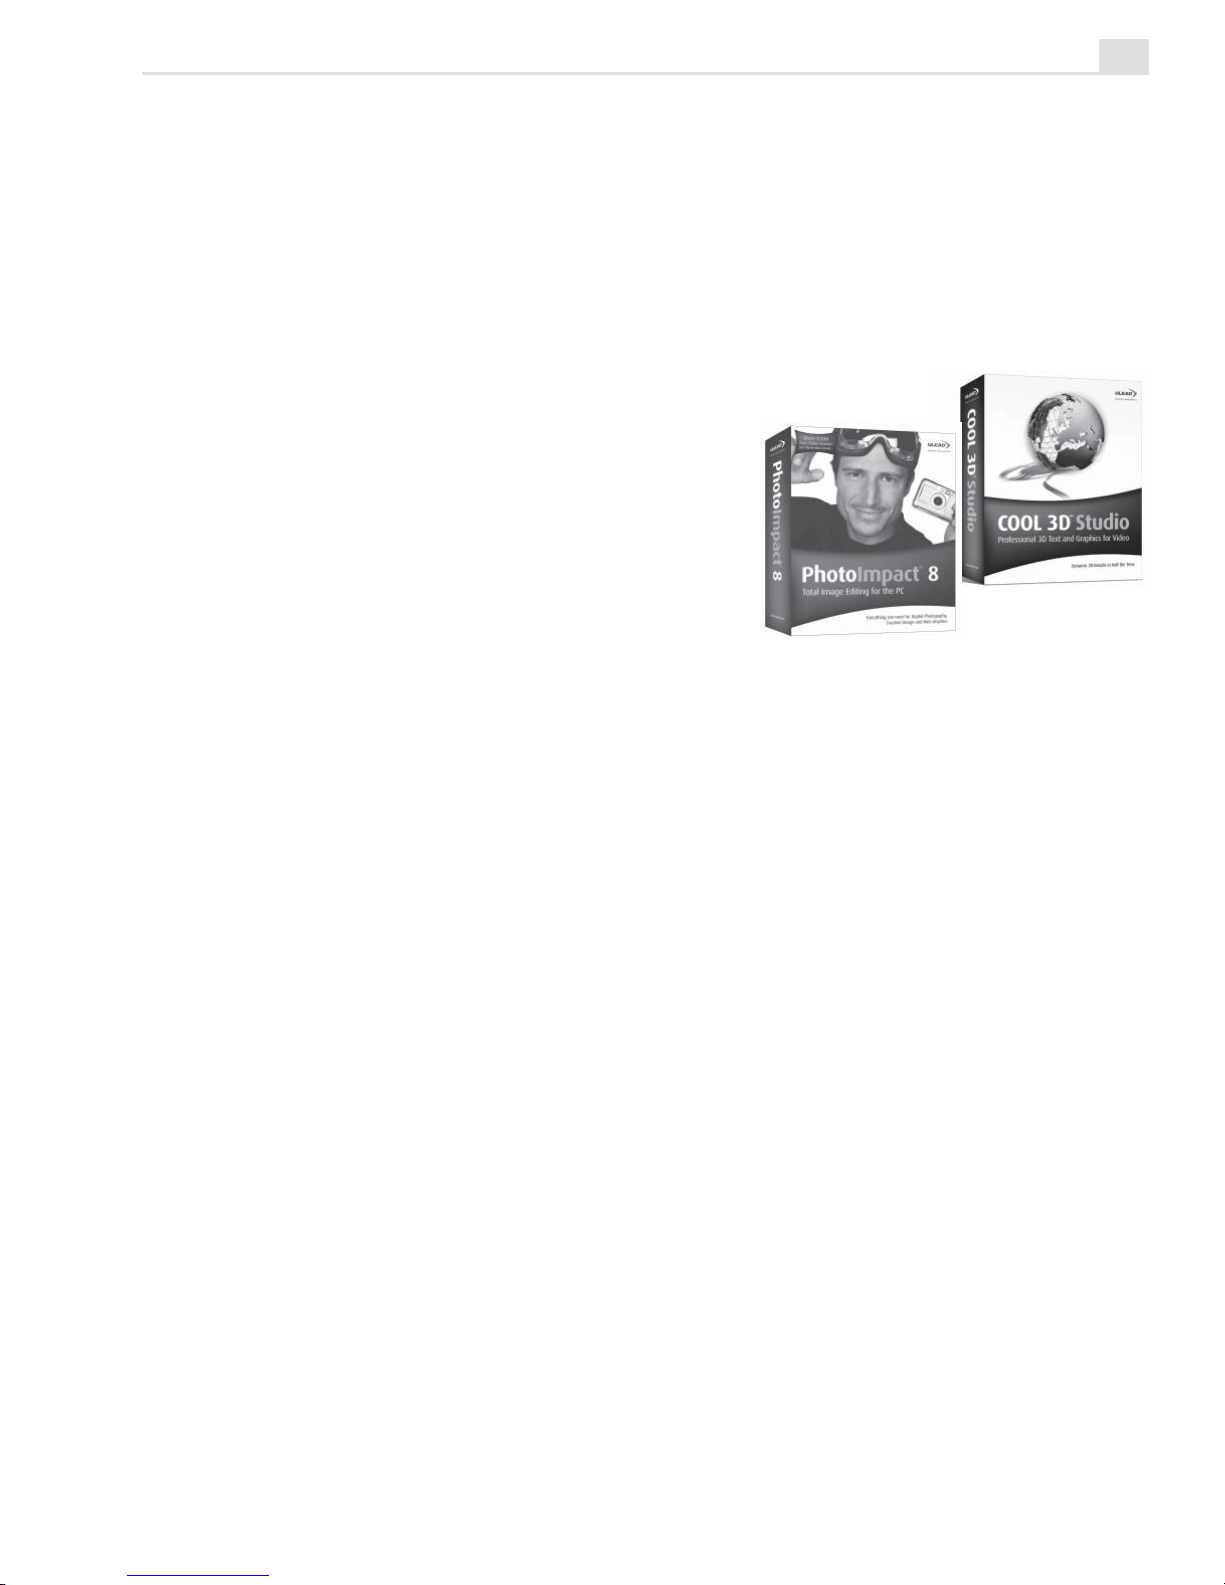
Improved integration
Enhanced titling options include
support for Flash animations,
integration with Ulead PhotoImpact 8
and Ulead’s improved vector based
COOL 3D Studio, for the widest
range of texture, 3D and movement
options in titles and graphic objects.
This offers greatly enhanced
creativity and usability , especially for
3D titles and objects, filters and
effects, and Internet output.
Sony MICROMV support
Sony’s super-small MICROMV camcorders use a proprietary MPEG-2
codec, which MediaStudio Pro allows users to capture, edit, and convert to
DVD-ready MPEG-2.
MICROMV users have so far had very limited options with editing and
output of their video material. MediaStudio Pro is the first full-featured video
editor to offer support for this format.
Support for Pentium 4 and dual CPUs
Media Studio Pro’s scaleable architecture takes full advantage of high-speed
Pentium 4 and dual CPUs, resulting in significant performance boosts.
These products are not included in
MediaStudio Pro
Page 22
MEDIASTUDIO PRO USER GUIDE
22
Enhanced navigation
Summary Timeline tool lets user see entire production at a glance, making it
much easier for the user to locate a particular clip or position in the project.
This is especially useful for long-form projects.
DVD/VCD authoring
Ulead DVD MovieFactory LE is
included and integrated. This is a
complete VCD/DVD authoring
package, with templates for
backgrounds, menus, etc., including a
Runtime player that the user can burn
on to disc.
Page 23

Page 24

Page 25

T utorial 1
In this tutorial you will learn about:
•
Setting up the device control .....................................................................
p.26
•
Capturing digital video (DV) ......................................................................
p.26
Video Capture
Video Capture is where you'll begin. Hook up your camcorder and
you're ready to captur e video to your computer for professional
editing. MediaStudio Pr o supports direct Digital Video (DV), native
MPEG capturing, and DV device contr ol, giving you more creative
freedom.
Page 26

MEDIASTUDIO PRO USER GUIDE
26
Setting up the DV device control
Control your DV device using the program’s Control bar.
To set up the DV device control:
1. Connect your DV device using an IEEE-1394 FireWire interface card
then turn it ON. Set it to Play or VCR mode. Refer to your camcorder ’s
manual for specific instructions.
2. Run Video Capture. Video Editor will detect your device automatically.
3. To check if Video Editor detected your device correctly, click Setup:
Device Control.
4. Click the Current device list in the Device Control dialog box.
5. Select your device. This will vary depending on your hardware (e.g. MS
1394 Device Control).
6. After you have selected your device control, test if you can control your
DV device using the Control bar. If you can't control it, go back to the
Device Control dialog box and select another device.
To capture digital video (DV):
1. Connect your digital capture device (e.g. DV camcorder) to your PC via
the IEEE-1394 FireWire interface card.
2. Turn your device ON and set it to Play or VCR mode.
3. Run Video Capture.
4. Click Setup: Switch Capture Plug-in. In the dialog box select a capture
plug-in to use from the Current capture plug-in list (e.g. Ulead
DirectShow Capture Plug-in).
5. Click Setup: Device Control and set up your device control. (See To
set up the DV device control procedure).
6. Click Capture: Video. In the dialog box, select the capture options you
want then click OK. To select the capture DV type, click Properties.
7. A dialog box will prompt you to start capturing, click OK when you are
ready to capture.
8. Depending on the options you selected in the Capture Video dialog box,
you may need to press [
ESC] or click the mouse to stop capturing.
Page 27

Video Editor
Video Editor is where you combine all the elements from the other
MediaStudio Pro programs to create a final video pr oduction. Here
you can insert your files and then arrange them into their playing
sequence, adding impressive transition effects, overlays and
moving paths as you go.
T utorial 2
In this tutorial you will learn about:
•
Creating video projects ..............................................................................
p.28
•
Working with clips.......................................................................................
p.30
•
Adding special effects ................................................................................
p.33
Page 28

MEDIASTUDIO PRO USER GUIDE
28
The basics
Video Editor is a rich, professional editing tool. As such, it can take some
time to truly master. We're going to try, however, to walk you through the
complete process of creating a finished movie as quickly and professionally
as possible.
Creating your first video project
The critical first step to making movies is to create a project. A project is
simply a small file that collects and controls the details of your movie. It is
not a finished movie, but rather is the workspace where you build your
movie. You can save changes to a project and make as many edits as you
want without affecting your source material.
To create a new project:
1. Run V ideo Editor. Click File: New.
2. In the New dialog box, select an Existing project template. (You can
also open this dialog box at any time by clicking the New button).
3. Click OK.
When you save your project, you will save it as a *.DVP file, which can be
opened only in MediaStudio Pro. Selecting a project type is a one time event,
but it can be a complicated process that depends on what country you are in
(PAL or NTSC) and your eventual final movie format (e.g. Streaming
Internet Video or DV). If needed, click the Create button in the New dialog
box (or File: Project Settings) to customize these settings and save them
as a new project template. Please refer to your capture board's manual for
specific advice and see pages 118 and 217 for additional information. You
can then save this customized information (from any project) as a template
by clicking File: Save Project Template.
Page 29
TUTORIAL TWO: VIDEO EDITOR
29
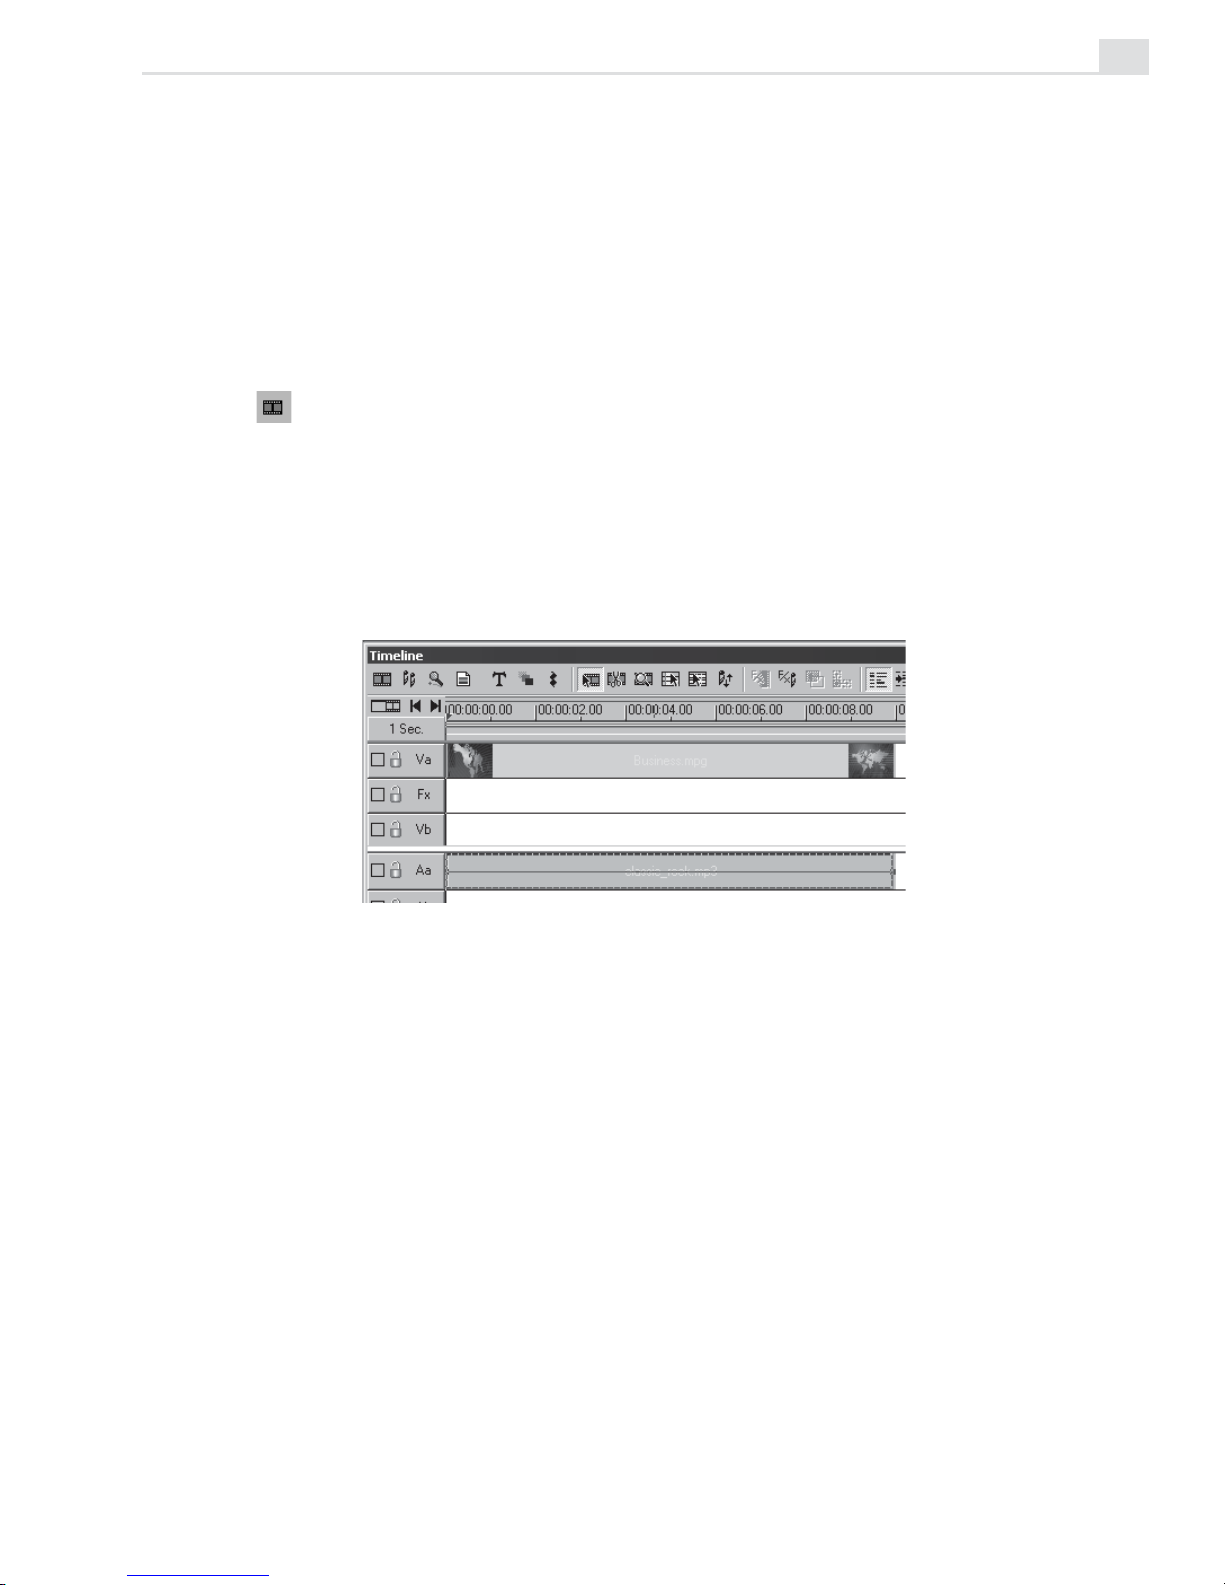
Adding clips to your project
The Timeline is the heart of Video Editor. This is where you put video,
audio, and other media files that will make up your movie. Daunting at first
glance, it is amazingly easy to use. You can also see how long each video/
audio segment is and how it relates to other parts of your project.
To insert files into the Timeline:
1. Click the Insert Video button on th e Timeline toolbar to open the
Insert V ideo File dialog box.
2. Browse for a video file (clip). There are a number of sample files on the
MediaStudio Pro CD or use a file you have previously captured.
3. Click Open.
4. Move your cursor to the beginning of the Va track and click.
How your Timeline should look
Try repeating the above procedure with another video clip, this time
inserting it into the Vb track just below the first clip. Any material placed in
lower tracks appears over, or on top of, clips placed in the higher tracks.
Therefore, if you make the clip in Vb overlap Va, the material on the Va track
will be partly or totally hidden. This is an important concept, because clips
will often overlap to create overlays, titles, and transition effects.
Page 30
MEDIASTUDIO PRO USER GUIDE
30
Working with clips
Any media file in a project is referred to as a clip. Clips can be images,
videos, sound files, titles or colors. Changing the order of clips or
positioning clips on the Timeline is a natural and intuitive process: just dragand-drop. The power of editing video on your computer comes in part from
the ability to edit with frame accuracy. Although there are a number of
techniques you can use, the following is one of the easiest.
To trim a video clip:
1. Select a video clip on the Timeline by clicking on it.
2. Move the cursor to the very right edge of the clip. The cursor should
change to a double arrow.
3. Click and drag the edge to the left to trim it.
This will shorten the clip in the project and on the Timeline, but will not alter
the original source clip in any way. You can use the "-" and "+" keys to
zoom in and out for more precise trimming. The Trim window (click
Window menu: Trim window) is also an ideal way to accurately trim clips.
T rimming a clip using the T rim window
Page 31

TUTORIAL TWO: VIDEO EDITOR
31
Applying transition effects
Transition effects between scenes in a movie are a ubiquitous part of any
video production. Whether you stick with a simple cross-fade or go for any
one of the hundred or so fancier special effects, this is sure to be one of the
more fun parts of editing.
To create a transition effect:
1. Insert one clip into Va and another into Vb. Make sure the clip in Vb
overlaps the one in Va by about a second.
2. Go to the Transition Effect folder in the Production Library. (Click
Window: Production Library if it is not already visible.)
3. Browse for the transition effect thumbnail you want to use.
4. Drag the effect to the Fx track where the two clips overlap.
5. In the dialog box that opens, set up the details of your effect. In most
cases, you may not have to change anything.
6. Click OK.
Performing a Flow transition effect between two clips
Previewing your work
Previews are an important aspect of any video project as they allow you
to see how your work is developing. The process of creating a movie or a
preview is called rendering and, depending on the speed of your computer,
this can take some time. MediaStudio Pro is a sophisticated piece of
engineering, and by previewing often, you can actually speed up the
rendering process. The details of the preview are determined by your
Project settings, so it is important to make sure those are set up correctly.
Previewing takes place in the Preview window. You can use the controls
there to play, rewind, fast-forward or step through your movie. It is often
the case that you will only want to preview a small portion of your movie,
Page 32

MEDIASTUDIO PRO USER GUIDE
32
like the transition effect you just added on the previous page. MediaStudio
Pro allows you to view your work without rendering with Instant
Playback. When enabled, you can preview the contents of your Timeline in
real-time through an external monitor or a DV camcorder, the same time it is
playing on your computer monitor.
To perform a partial preview:
1. Click Window: Preview Window if the Preview window is not already
open.
2. Click on the Trim bar. Then, drag the handles on either side of the Trim
bar to set the duration of the preview.
3. Click the Play the Preview Range button.
To perform Instant Playback:
1. Select a clip on the Timeline.
2. Click the Preview Window Menu on the bottom right side of the
preview window then select Instant Play.
3. Click Play to preview the clip, along with your modifications (i.e. applied
video filters, transition effects, etc.) without rendering.
Performing a partial preview . Notice that the preview range is
represented as a blue line both within the Preview window and
at the top of the Timeline.
Page 33

TUTORIAL TWO: VIDEO EDITOR
33
Artistic and creative techniques
Beyond the everyday work discussed in the previous section, Video Editor
also contains a host of remarkable tools you can use either to clean up your
video or to create special creative touches.
Applying a video filter
Video filters are effects which you can apply to clips in order to change
their appearance or style. You can improve the color balance of a clip (or
remove the color all together) or make the video look like a painting. Filters
are applied over each frame in a clip. By specifying different start and end
values, you can control the intensity and speed of a filter as it moves from
the first frame to the last.
To apply a video filter:
1. Select the Video Filter: 2D Mapping gallery from the Production
Library and drag-and-drop the Ripple filter onto a clip in the video
track of the Timeline. The Ripple dialog box opens.
2. In the Direction group box, select the From center option and in the
Frequency group box, select the Medium option.
3. Set the Level slider to 20. (This controls how much of a ripple effect
appears at the first frame of the clip.)
4. Click the End key frame and select a level of 360. (This controls how
much of a ripple effect appears at the last frame of the clip.)
Note:
Click the Lock button so you can preview the clip with or without the effect
applied to it.
5. Click OK to close the dialog box and apply the filter.
Applying a Ripple filter to a video clip
Page 34

MEDIASTUDIO PRO USER GUIDE
34
Creating a moving path
During your video editing work, you will often make use of moving paths
to enable video clips to move over another in the background clip. These
clips can move in any number of different directions, changing shape and
size, and even rotating in three dimensions.
To create a moving path:
1. Insert a clip into one of the overlay tracks (V1-V99).
2. From the Production Library, select the Moving Path: 2D Basic
gallery.
3. Drag-and-drop the 2D Basic thumbnail onto a clip in a video overlay
track of the Timeline. The 2D Basic Moving Path dialog box opens.
4. Adjust the path in the Motion control box.
5. Click the Play button to preview the path.
6. Click OK to close the dialog box and apply the moving path.
Performing a 2D Basic moving path
Drag the control points to the
position where you want the
moving clip to enter (S) and
exit (E) the scene.
Preview the path animation
by clicking the Play button.
Page 35

TUTORIAL TWO: VIDEO EDITOR
35
Changing the audio level of an audio track
In Video Editor, you can change an audio track’s audio level directly from
the Timeline by adjusting its baseline. By changing the audio level of an
audio clip from the Timeline, you can quickly perform fade in and out
effects as well as temporarily adjust audio levels as you work.
To change the audio level of an audio clip:
1. Select the audio clip whose audio level you want to change.
2. Click on the baseline of the clip. A control point is placed on the base
line at the cursor position.
3. Drag the control point upward to increase audio level; do wnward to
decrease it. Place additional control points to determine where to start
and end your changes. (To remove a control point, drag it off the top
or bottom edge of the clip.)
Note:
Hold down the [
SHIFT
] key while dragging a control point to view a precise
volume indication as a percentage (%) and in decibels (dB).
Changing the audio level of
an audio clip from the Timeline
While you can manually fade clips in and out with the above method, you
can automatically cross-fade the audio between two overlapping clips with
just three clicks.
To cross-fade the audio:
1. Click the Audio Cross-fade
button.
2. Click on one of the two
overlapping audio clips.
3. Click on the other clip.
T wo clips with audio cross-fade
Page 36

MEDIASTUDIO PRO USER GUIDE
36
Advanced techniques
Many effects in MediaStudio Pro can be precisely controlled and animated
using key frames. You can set the degree of the effect from the start to
the end frame of your clips. MediaStudio Pro then interpolates the effect
between the key frames.
Customizing a transition effect
You can control the transition from one clip to another by adjusting the key
frame settings. This allows you to create effects such as wipe, peel, or split
screen. Below is an example of how to create a split screen.
To create a split screen effect:
1. Insert a clip into Va and another into Vb.
2. From the Transition Effect gallery, click the Slide folder. Then, drag the
Side thumbnail to the Fx track.
3. Set the Transition degree to 50% for the Start key frame.
4. Click the End key frame and set the Transition degree to the same
value as the Start key frame. Since the key frame settings are the same,
there is no animation interpolated between them.
5. Select From Vb to Va.
6. Click OK to apply the effect.
T ransition effect locked at
50% for the first and last key
frames, creating a split
screen effect
Page 37

TUTORIAL TWO: VIDEO EDITOR
37
Using Moving Paths
Moving Paths are invisible lines that an overlay clip can follow during an
animation. In the simplest case, a clip can move from a starting key frame
position to an ending one. More complex Moving paths can rotate and zoom
clips in three dimensions.
To create a Picture-in-Picture:
1. Place a clip for the background on the Va track, and the clip to appear
as the foreground directly over it in an overlay track (V1).
2. From the Production Library, drag-and-drop the Right Upper thumbnail
from the Picture in Picture folder onto the clip in the overlay track. The
2D Basic Moving Path dialog box opens.
3. Click the Keep aspect ratio option and enter a new width value of
one-third the size of the original in the Width spin box for both the
start and end key frames.
4. Drag the Start control point to the location where you want the
overlay video to appear.
5. Click on the End control point. Manually enter the X and Y positions to
match the Start control point. Since the key frame settings are the same,
there is no animation interpolated between them.
6. Click OK to close the dialog box and apply the path.
Creating a video window using a moving path
Moving paths can be applied to a video clip. This tool can also be used on
image and title clips.
Page 38

MEDIASTUDIO PRO USER GUIDE
38
Synchronizing audio to video
One essential aspect of audio editing is synchronizing actions and events
with sound, such as matching subtitles to dialogue or the crackle of
burning wood with a fire.
To synchronize audio to video:
1. Click the Display Mode button to open the Time line Display Mode
dialog box. Select the Show cue bar options in both the Video and
Audio group boxes and click OK.
2. Insert both the audio and video clips you want to synchronize into the
Timeline.
3. Double-click on the audio clip to open it in the Source window. Play
back the clip and when you hear the sound you wish to synchronize
the video clip to, press [
F5]. This places a cue on the cue bar above the
waveform. Click the Apply button and then close the Source window.
4. Repeat this procedure to add a cue in the video clip.
5. Click the Next Edit Point button (or press [PAGE DOWN]) repeatedly until
the Vertical preview line is lined up with the audio cue.
6. Move the video clip and align the video cue with the audio cue. Click
View: Ruler Unit and change the time measurement to have a larger
view of the Timeline for easier and more precise lining up of the video
and audio cues.
Synchronizing audio to video
Page 39

TUTORIAL TWO: VIDEO EDITOR
39
cues
Auto Slideshow
MediaStudio Pro allows you to use your images in creating a slideshow. You
can easily create a mini-presentation using your favorite pictures to appear in
sync with your chosen background music.
To automatically create a slideshow:
1. Click Import Image File to import images into the Production Library.
2. Load your preferred audio track in the Production Library then drag-
and-drop it into the timeline.
3. Click Play in the Preview window to listen to the music. Press [F5] to
create cues. Doing this will indicate when you want a particular image to
appear, in sync with your chosen audio track.
4. Click Production Library: Media
Library: Storyboard. Click Import
Image File to import the image files you
want to use for your slideshow.
5. Right-click on an image in the
Storyboard then select Add A/B Roll.
The Add to A/B Roll dialog box appears.
6. In Add to A/B Roll, click Overlap then
enter the overlap duration in seconds.
Check the Use default transition effect
option then click Select to invoke the
Transition Effect dialog box.
7. Choose your transition effect then click OK.
8. Select Synchronize with cues in the Add to A/B Roll dialog box.
9. Click OK. The slideshow is automatically placed in the Timeline.
Notice that the images are placed in sync with the cues that you have created.
Page 40

MEDIASTUDIO PRO USER GUIDE
40
Pixel aspect ratio management
A pixel (picture element) is one point in an image, composed of three dots:
red, blue, and green. Monitors display an image by dividing it into
thousands/ millions of pixels arranged in rows or columns. They are so
close together, they seem to form a single shape. The image’s display
quality is then dependent on its resolution and the maximum number of
pixels it can display .
The aspect ratio is the relative horizontal and vertical sizes of an object. If
an object has an aspect ratio of 2:1 then it is wider than it is tall. This term
also refers to an image’s display resolution. For instance, an image with a
800x600 resolution has an aspect ratio of 4:3. The standard aspect ratio for
traditional television sets and computer monitors is 4:3 while the aspect
ratio for high-definition, wide-screen digital systems is 16:9.
To convert 16:9 aspect ratio videos to 4:3 aspect ratio:
1. Open the file with the display aspect ratio of 16:9 in the Production
Library then place it on the Timeline.
2. Click File: Project Settings: Edit to open the Project Options dialog
box.
3. In the Video Editor tab, select Perform non-square rendering.
4. In the General tab, select 4:3 from the Display aspect ratio drop-down
list then click OK.
Note:
MediaStudio Pro automatically detects the aspect ratio information of your
video file if it is available.
5. Click OK to close the Project Settings dialog box.
6. Select the clip in the Timeline then click Clip: Media Source Options.
7. In the dialog box, set the Stretch mode to Keep aspect ratio. Then
Click OK.
Note:
T o learn what the options inside the S tretch mode list mean, consult the
online help.
8. Preview your file in the Preview window to see how the converted video
looks like then select File: Create - Video to create the video file.
Page 41

TUTORIAL TWO: VIDEO EDITOR
41
Recording back to a DV device from the Timeline
MediaStudio Pro allows you to record back to a DV device from the
Timeline. This means that you can export the contents of your Timeline
directly to a tape using the appropriate output device. In this tutorial, we'll
use a DV camcorder.
To record back to a DV device from the Timeline:
1. Click File: Project Settings - Edit to open the Project Options dialog
box.
2. Select the type of compression you’d like to use from the Compression
drop-down list in the AVI tab.
3. Specify the type of data track from the drop-down list under the
General tab. If it’s just a sound track, select the Audio Only option. If
it’s all video, select the Video Only option. If it’s a combination of both,
select the Video and Audio option.
4. Specify the frame type, the frame size, and the display aspect ratio
(whether it be 4:3 or 16:9) in the General tab.
5. Specify the TV standard and the number of overlay tracks in the Video
Editor tab.
The left image represents a video with the Stretch mode set to Stretch while the
image on the right represents a video with the Stretch mode set to Keep aspect ratio.
The video on the left was stretched to fit the screen causing the video to be distorted.
The video on the right is using the correct aspect ratio and therefore it is not distorted.
Page 42

MEDIASTUDIO PRO USER GUIDE
42
6. Set the options according to your preferences (e.g., set the audio format
to DV Audio-NTSC/PAL in the Audio Format dropdown list in the AVI
tab, etc.) then click OK.
7. Click OK to close the Project Settings dialog box.
8. Connect your DV camcorder to your computer then turn it on.
9. Click File: Select Device Control to make sure that the proper device is
connected. Select the appropriate DV device then click OK.
10. Click File: Print to Tape - Timeline then choose whether you’d like to
print the entire project or the selected preview range.
11.Click OK to begin recording the contents of your Timeline to your tape.
MediaStudio Pro will automatically render your project.
12. When the rendering process is finished, click Record on your DV
camcorder. When the program goes through playback, the video will be
exported to your DV device.
Page 43

Video Paint
Video Paint is the program where you add all the effects of your
animation and rotoscope individual frames of a video project. With
it, you can create such effects as laser blasts, background mattes,
and cloned actors and props.
T utorial 3
In this tutorial you will learn about:
•
Getting to know Video Paint......................................................................
p.44
•
Common techniques .................................................................................
p.49
•
Advanced techniques ................................................................................
p.52
Page 44

MEDIASTUDIO PRO USER GUIDE
44
Getting to know Video Paint
Video Paint is a special effects animation program that allows you to paint
(rotoscope) over the frames in a video. These animations can range from
the simple, such as signing your name across an opening title sequence, to
the complex, such as painting background sets and removing video noise.
Creating your first project
In Video Paint, you can create a project from scratch, such as building
background sets, or opening an existing video or image file to work on.
When opening a video file, you can choose which frames in the sequence
to open, rather than having to open several hundreds at one time. This
ability to partially edit video can be a great time saver and allows you to
perform edits quickly without draining system resources.
To open a video file for editing:
1. Click the Open Video File button on the Standard toolbar to open the
Open Video File dialog box and select any video file from the Samples
folder of your MediaStudio CD.
2. Click the Duration button to open the Duration dialog box.
3. Drag the Preview slider to locate the first frame of the sequence you
want to open and click the Mark-In button. Now find the last frame
and click the Mark-Out button. (At first, it is best to open just one or
two seconds of video until you are more comfortable with how Video
Paint works.) When happy with your selection, click OK to return to
the Open V ideo File dialog box.
4. Click Open to open the video as a clip in Video Paint. Each frame of
the clip appears in the Filmstrip panel, with the first frame displayed as
an image in an edit window.
Filmstrip panel
Page 45

TUTORIAL THREE: VIDEO PAINT
45
Working with images in an edit window
The edit window displays the image of the currently selected frame in a
Video Paint project. Once displayed, you can begin working on the image
by selecting or painting over parts of it. At any given time, you will be
working in one of two modes: Composite or Paint Layer. Which mode
you choose depends on the type of work you are doing as well as the type
of effect you want to create.
To work on an image in an edit window:
1. Click the Paint tool on the Tool panel and start painting over an image
in an edit window.
2. Switch to the Shape Selection tool and then drag over part of the
image to select it. As you drag, a selection marquee appears outlining
the area included in the selection. When finished, move the selection to
a new location on the image. (This selection is now referred to as a
floating selection and appears in the Paint Layer.)
3. To better see the Paint Layer, click the No Source Video button on the
Standard toolbar. The image disappears from view, leaving only the
background film color plus your edits.
4. Click the Normal button on the Standard toolbar to return the image
into view and then click the Paint Layer Mode button on the Standard
toolbar.
5. Create another selection area, making sure that it includes your edits,
and then click the Shrink Mode button on the Attribute toolbar. The
selection marquee changes to select only your edits, leaving the
underlying image untouched.
Creating a selection in Composite Mode (left) and Paint Layer Mode (right)
Page 46

MEDIASTUDIO PRO USER GUIDE
46
Customizing your brushes
Most of your work in Video Paint will be done with the paint, clone, and
retouch tools. Each of these tools has various attributes which determine
the way they work as well as how they apply paint. These attributes are
specified in the Brush panel and a number of presets can also be selected
from various galleries in the Production Library.
To create a felt-tip pen brush:
1. Click the Paint tool on the Tool panel and then select the Marker
brush from the Attribute toolbar. (If the brush panel does not automatically appear, click the Show/Hide Brush Panel button in the Attribute
toolbar.)
2. In the Shape tab of the Brush panel, click the Lock button and then
adjust either the vertical or horizontal slider tabs until the Height and
Width spin boxes read 7. Once completed, set the Brush Angle to 0
and the Soft Edge to 34.
3. In the Options tab, set the Application method to Pigment, and then
click the Freehand button. (Also set the Transparency and the Wet
Control both to 0, if not already set.)
4. In the Color tab, right-click the color square and select a color from
the available palette or from a color picker.
5. In the Advanced tab, set a Spacing of 5 and then click the Fade Out
button and set the fade to 0.
The Marker brush has now been customized as a felt-tip pen.
6. Click the Save Options button on the Attribute toolbar and assign a
name and Production Library folder to store the new brush. To use the
brush again, or any other preset, find its corresponding thumbnail in the
Production Library folder and then double-click it.
Painting with a customized brush
Page 47

TUTORIAL THREE: VIDEO PAINT
47
Working over multiple frames
One of Video Paint's strengths is its ability to allow you to copy edits over
multiple frames. For example, you can paint a line and then have that line
appear in the same position and at the same size over all frames in the
project, or have it progressively appear over each successive frame. The
two operations you will use most often to perform these tasks are power
duplication and macro recording.
To perform a power duplication:
1. Paint over an image in an edit window.
2. Click Edit: Power Duplicate to open the Power Duplicate dialog box.
3. Select the Paint Layer option in the Source group box and the Apply
after current frame option in the Apply group box. In the same group
box, set the duration to cover the number of frames you want your
edits to appear over. (The default is the maximum number of frames in
your project.)
4. Click OK to apply your edits over the specified number of frames. (If
the number of frames exceeds the value specified in the Clear undo
history for multiple frame actions option in the Preferences dialog
box, a message box appears indicating that if you continue, all undo
history will be discarded to help improve performance.)
Duplicating an edit over multiple frames
Page 48

MEDIASTUDIO PRO USER GUIDE
48
To perform and apply a macro:
1. Click the Paint tool on the Tool panel . Select the brush to paint with
from the Attribute toolbar and then specify the brush's attributes in the
Brush panel.
Note:
Y ou can only perform macro recording using the Paint and Retouch tools.
2. Click the Recording button on the Attribute toolbar. The edit window
is centered in the workspace and a message box appears preparing for
recording.
3. Click OK and start painting over an image. When finished, click the
Recording button again to end the recording. The Add To Library
dialog box opens prompting you to specify the folder and location to
store your macro. (You can also give it a name and description.)
4. Click OK. The macro is saved to the proper location and the edits are
removed from the edit window.
Note:
To have the macro play back automatically, select the Play macro after
recording option in the Preferences dialog box.
5. Click the Production Library button on the Standard toolbar and
locate the folder you saved the macro to.
6. Double-click the thumbnail of the macro to apply it to the active edit
window. The Macro Playing Options dialog box opens.
7. Specify the number of frames to apply the macro over in the Number
of frames spin box.
8. Click the Progressive option in the Playing method group box to have
the macro play back progressively over the specified number of
frames.
9. Click OK . The macro plays back over the specified number of frames.
Applying a macro progressively over multiple frames
Page 49

TUTORIAL THREE: VIDEO PAINT
49
Common techniques
Now that you have the essentials of Video Paint out of the way, let's take a
look at some of the more common techniques used to add special effects
to a video production. These techniques are the stepping stones to creating
Hollywood-style illusions and effects.
Applying a video filter
The video filters you can apply in Video Paint are the same as those in
Video Editor. The difference lies in how you apply them and how to
determine which frames within the project are affected.
To apply a video filter:
1. Drag over the Preview bar in the Filmstrip panel to select the frames
you want to apply the filter to. (If you want to apply the filter to the
entire clip, make no selection.)
2. Select the Video Filter: Camera Lens gallery from the Production
Library and drag-and-drop the Kaleidoscope filter onto the edit window containing the image you want to apply the effect to. The Kaleidoscope dialog box opens.
3. Drag the View circle on the Original preview image and place it
where you want the effect to start.
4. Click on the End key frame and drag the View circle to where you
want the effect to end. (You can have the view move over the image in
a number of different directions by placing additional key frames and
adjusting the view circle's position accordingly.)
Note:
Click the Lock button to automatically update the Preview window when
you change frames in the Original window.
5. Click OK to close the dialog box and place the filter.
Applying the Kaleidoscope video filter
Page 50

MEDIASTUDIO PRO USER GUIDE
50
Cloning an image
Cloning is a great way to quickly duplicate an object or feature in one
frame and replicate it over other frames in the sequence. For example,
you could remove an annoying object by cloning over it with parts of the
background, or create the impression of more stars in a night scene by
cloning additional stars into the background.
To clone an image:
1. Click the Clone tool on the Tool panel and select a brush from the
Attribute toolbar. Then, specify the brush's attributes in the Brush
panel. (In the Options tab of the Brush panel, click the Absolute
button, if it is not already selected.)
2. Move to the image you want to clone. Then whil holding down the
[SHIFT] key, click over the object or feature you want to clone. A
crosshair pointer appears indicating the area to be cloned.
3. Start painting where you want the object or feature to appear. As you
paint, a brush head marquee appears around the crosshair pointer
indicating the portions of the image being cloned.
4. Move to another area of the image and click again to clone the same
object or feature. Keep repeating this until you have cloned as many
objects or features you want. When finished, click Edit: Power
Duplicate to apply the exact same edits over other frames in the
project.
Cloning an image to remove part of the background
Page 51

TUTORIAL THREE: VIDEO PAINT
51
Creating a video matte
Mattes are a useful part of video editing and are used primarily with the
overlay and video filter effects of Video Editor. In Video Paint, you can
create single image mattes or video mattes. Image mattes require you to
simply paint over one frame in an edit window and then save it as an
image file or as a single frame in a Video Paint file. Video mattes are
created in the same way, except that you can paint over multiple frames
and then save your edits as a video file or a Video Paint file.
To create a video matte:
1. Click the New button on the Standard toolbar to open the New dialog
box.
2. Set the duration, frame rate and frame size to that of the video you
want to apply the matte to and click OK. The dialog box closes and a
new project is created. (Use the default settings if you do not yet have
a Video Editor project to work with.)
3. Click the Lasso tool on the Tool panel and then click the Anti-alias
button on the Attribute toolbar.
4. Create a selection area with the size you want for your matte, and then
right-click and choose the Soft Edge command from the pop-up menu.
In the dialog box that appears, enter a value of 15 for the soft edge and
click OK. The dialog box closes and the selection changes to incorporate the soft edge.
When you apply the matte in Video Editor, the soft edge is treated as a
Grayscale mask, with lighter areas appearing more transparent and
darker areas less transparent.
5. Click Edit: Fill and select black as the fill color and click OK. The fill
is applied to the selection area. You can now copy and paste the fill on
each successive frame, changing its position slightly to create a moving
matte.
Creating a video matte
Page 52

MEDIASTUDIO PRO USER GUIDE
52
Advanced techniques
Advanced techniques build on the methods and procedures you learned
earlier in the lesson. With them, you can create such effects as translucent
ghosts, wild virtual background sets, and disappearing people.
Performing an erase effect
In Video Paint, you can use the painting tools to erase as well as apply
paint. Erasing paint is useful if you want to remove excess paint from an
image or to create certain effects, such as removing a solid fill color to
reveal an underlying video.
To perform an erase effect:
1. Select the frame from where you want the effect to begin and then
click Edit: Fill to open the Fill dialog box.
2. Select the color you want to use as the fill from the Color group box
and enter 15 in the Transparency spin box.
3. Click OK to close the dialog box and apply the fill. (Once applied,
duplicate, by using power duplicate, the fill over the number of frames
you want to include in the effect.)
4. Click the Paint tool on the Tool panel and then select the type of brush
you want to use from the Attribute toolbar.
5. Specify the various attributes of the brush in the Brush panel and then,
in the General Shape tab, click the Erase button.
Note:
If you are using a WACOM® UltraPen, you can erase by simply turning
the pen upside down when you draw.
6. Start painting on the image. As you paint, the fill is removed revealing
the underlying image. (If you want the effect to appear progressively
on each frame, perform a macro recording.)
Performing an erase effect
Page 53

TUTORIAL THREE: VIDEO PAINT
53
Performing an advanced power duplication
Power duplication is not just useful for copying the paint layer or an
image across hundreds of frames. You can also create special effects.
With the Transparency feature of Power Duplication, you can paste an
image over an entire video and give it the appearance of fading in or fading
out. This is useful for creating “ghosts” and other similar effects.
To perform an advanced duplication:
1. Select the edit window which contains the edits you want to duplicate
and then click Edit: Power Duplicate to open the Power Duplicate
dialog box.
2. Select the Paint Layer option in the Source group box.
3. Select the After current frame option in the Apply group box. In the
Duration spin box, enter the number of frames on which the edits will
appear. (The default number represents all frames in the project.)
4. Move to the Start tab and enter a value of 50 in the Transparency spin
box, then click the End tab and enter the same transparency. Enter a
value of 99 in the X spin box to move the edits horizontally. (To move
the edits vertically, change the Y value.)
5. Click OK to apply the duplication.
Performing an advanced duplication
Page 54

MEDIASTUDIO PRO USER GUIDE
54
Creating background sets
While Video Paint allows you to paint over and enhance the frames of a
video, you can also use it to create background sets. These background
sets are then placed into Video Editor as the underlying clip for any blue
screen clips you may have. You can create background sets by painting
over an original video or by using some of the animation filters available in
V ideo Paint.
To create an animated background set [1]:
1. Create a new project and then select half of the frames by dragging
over the Preview bar in the Filmstrip panel.
2. Drag-and-drop the Animation Texture thumbnail from the Video
Filter: Special folder in the Production Library to the edit window of
your new project. The Animation Texture dialog box opens displaying
various options for controlling the display and movement of a texture.
3. Select thumbnail 11 from the Pattern group box and then click on the
End key frame in the Key frame controller to jump to the last frame in
the sequence. (Click the Lock button so that the Preview image
changes.)
4. Select thumbnail 11 from the Pattern group box again and then click
the Palette ramp image to open the Palette Ramp Editor dialog box.
Select the CMYK thumbnail and click OK to return to the Animation
Texture dialog box.
5. Enter a value of -1.5 in the Amplitude slider and click OK to apply the
filter. (You can experiment with each of the other sliders to see how
they affect the texture.) Once applied, repeat the procedure, but this
time, select the remaining frames in the sequence and reverse the order
of the texture so that it appears to be repeating itself.
Creating an animated texture background
Page 55

TUTORIAL THREE: VIDEO PAINT
55
To create a background set [2]:
1. Click the Open button on the Standard toolbar and select the file
FISH.TIF from the SAMPLES\TUTORIAL folder of the MediaStudio Pro
CD. Once it is displayed in the workspace, open the SKY.TIF file from
the same location.
2. Click the Magic Wand tool and in the Similarity spin box on the
Attribute toolbar, enter in a value of 25.
3. Select the edit window containing the image of the fish, and then drag
over the fish to create a selection, starting from the tail and moving
toward the head. If you have more sea than fish selected, try again, or
decrease the Similarity range.
4. Switch to the Lasso tool and, holding down the [S] key, draw around
the areas of the sea which are included in the selection. Doubleclicking then deselects these areas. Keep doing this until all areas of the
sea are no longer part of the selection. (If you need to add areas of the
fish to the selection area, hold down the [
A] key.) When finished, copy
and paste the fish into the edit window containing the image of the sky.
5. Switch to the Transformation tool and click the Resize button on the
Attribute toolbar. A bounding box appears around the fish. Holding
down the [SHIFT] key, drag one of the handles of the bounding box and
resize the fish so that it appears larger.
6. Switch to the Shape Selection tool and position the fish to the bottom
left of the edit window. Now, paste in another three fish and resize
them, each one slightly smaller than the other, and position them over
the image in the edit window. You can also create a video window for
later use as an overlay clip in Video Editor by creating a selection area
and filling it with a solid color .
Creating a background set (left) with video window (right)
Page 56

MEDIASTUDIO PRO USER GUIDE
56
Retouching images
The Retouch tool is a powerful tool that allows you to ‘touch-up’ areas
of an image to improve its appearance or to create a particular effect. For
example, you could enhance the color of someone's eye, blur jagged edges
an object may have, or adjust the highlights and midtones of an image to
improve its color.
To retouch an image:
1. Click the Open button on the Standard toolbar and select the
BACKGRD.TIF file from the
SAMPLES\TUTORIAL folder of the
MediaStudio Pro CD.
2. Click the Retouch tool and select the Blur brush from the Attribute
toolbar.
3. In the Shape tab of the Brush panel, specify a small brush size with no
soft edge, and in the Options tab set the blur value to one.
4. Zoom in on the edit window containing the background image and
begin painting over the edges of the largest fish. As you paint, notice
how the jagged edges are blended into the background. Once finished,
move to the other fish and retouch them where necessary.
5. Switch to the Saturation brush and in the Options tab of the Brush
panel, set the saturation value at 60.
6. Drag over the head of the largest fish to increase the saturation of the
colors and make them more vivid. Once you're done, move on to the
others and adjust them accordingly.
The background image (left) enhanced with the Retouch tool (right)
Page 57

TUTORIAL THREE: VIDEO PAINT
57
Advanced macros: Creating a laser beam effect
One of the coolest effects you can create in Video Paint is the laser beam
effect. Using the built-in macro recording capabilities, you can paint the
laser beam, record it, and then apply it progressively across an entire
range of frames. Once you've recorded a macro, you can save it to the
Production Library for later use.
To create a laser beam effect:
1. Open the video you want to apply the laser beam effect to. In the
Filmstrip panel, click the frame where you want to start creating the
laser beam.
2. Select the Paint tool you want to use to create the laser beam. In the
Options tab of the Brush panel, click the Straight Line button. Set the
laser's color in the Color tab and the brush's height and width in the
Shape tab.
3. Click the Recording button and then click OK. The edit window is
centered in the workspace.
4. In the edit window, draw the laser beam from the starting reference
point to the ending reference point.
5. Click the Recording button again to stop recording. The Add To
Library dialog box appears. Enter the name and annotation for your
laser beam macro, select the Custom folder, and click OK.
6. In the Production Library, select the Macro: Custom folder and find
your new macro. Drag-and-drop it into the edit window. The Macro
Playing Options dialog box opens.
7. Enter the number of frames you want to apply the macro to. Select the
Progressive Playing method and click OK. The dialog box closes and
the macro is applied to the clip.
An example of a laser beam effect
Page 58

MEDIASTUDIO PRO USER GUIDE
58
Advanced cloning: Disappearing act
You can combine the Cloning ( see page 50), Power Duplicating (see page
53), and the Macro Recording (see page 57) capabilities of Video Paint to
create the effect of a person disappearing. Before you try this though, you
have to know information about blue screens (see page 192). You also need
a suitable background for the video to play against. For best results, you
should probably use a still image for the background.
To create a disappearing act:
1. In Video Editor, overlay your blue screen video on top of a background
image and render the clip as a new video file with no compression.
2. In Video Paint, click the Open Video File button on the Standard
toolbar to open the clip you just created (video window). Then, open
the original background in a second edit window (background window).
3. Click the Clone tool on the Tool panel. In the Options tab of the
Brush Panel, click the Frame button and with the [
SHIFT] key, click
anywhere on the background window.
4. In the video window, paint over the person you want to disappear.
5. Next, duplicate, by using power duplicate, the paint layer of the video
window you just cloned across every frame of the video.
6. Click the Painting tool on the Tool panel and select Paint Brush.
7. In the Shape tab of the Brush panel, click the Eraser mode button and
then the Recording button.
8. When the Macro Recording begins, erase the paint layer you just
cloned in.
9. Click the Recording button again and save the macro to the Macro:
Custom folder.
10. To apply the macro to your video, drag-and-drop its thumbnail from
the Production Library into the e d it w i ndow and define its application
properties in the Macro Playing Options dialog box.
An example of a disappearing act
Page 59

CG Infinity
CG Infinity is where you create dazzling title sequences and exciting graphics animation. With CG Infinity's tools, you can send text
and objects flying into the third dimension. This tutorial is designed to give you everything you need to get started at creating
your own CG sequences.
T utorial 4
In this tutorial you will learn about:
•
Common techniques .................................................................................
p.60
•
Advanced techniques ................................................................................
p.66
Page 60

MEDIASTUDIO PRO USER GUIDE
60
Common techniques
This section includes some of the more common techniques you will
perform using CG Infinity. Many of these lessons assume you are starting
with a new edit window in CG Infinity.
Drawing regular shapes
The quickest way to get started in CG Infinity is to begin creating simple
shapes. While simple in design, you can easily create impressive results by
combining shapes and changing their styles to produce different colors
and effects.
To draw a logo using regular shapes:
1. Click the Shape tool and select or deselect the following buttons on
the Attribute toolbar:
• Rectangle (select)
• Draw From Center (deselect)
• Equal Sides (deselect)
2. In Preview mode, draw a rectangular path within the frame of the edit
window and in the Object Style Panel, set the fill color to blue with no
line color or shadow.
3. Switch to the Ellipse option on the Attribute toolbar and create a long
elliptical path.
4. Using the Object tool, position the new path so that its middle starts at
the bottom left corner of the rectangular path and, if necessary, resize
it so that it is wide enough to go over to the right side of the rectangular path. (Set the fill color to white with no line color or shadow.)
5. Switch back to the Ellipse tool and click the 1:1 button on the At-
tribute toolbar and create a small circle path at the lower right corner
of the rectangular path.
Creating a logo using regular shapes
Page 61

TUTORIAL FOUR: CG INFINITY
61
Creating and distorting text objects
One of the more powerful aspects of CG Infinity is its ability to create
impressive titles for use as images or in video projects. Once a title is
created, you can distort it in a variety of ways and apply various colors
and gradients to give it a more polished look and feel.
To create and distort a text object:
1. Select the Text tool and click anywhere in the edit window.
2. Enter the text of your title. (Add a new line by pressing the [ENTER]
key.) To change the text alignment, font or any other characteristics,
select the text and then choose the appropriate options from the
Attribute toolbar .
3. Switch to the Envelope tool. A red border appears around the text as
well as nodes on the corners and edges of the border.
4. Drag the nodes to adjust the envelope. Each time you select a node,
two control handles appear which you can adjust independently. Keep
adjusting the nodes and handles until you are happy with the result. If
you are not sure about the type of distortion you want to create, select
a preset from the Envelope gallery in the Production Library and drop
it onto the text. The text automatically distorts itself to the path of the
envelope.
Creating and distorting a text object
Page 62

MEDIASTUDIO PRO USER GUIDE
62
Applying gradients to your objects
In CG Infinity, you can apply gradients to any fill or line color, producing
a variety of lighting and shading effects. These gradients are created in the
Magic Gradient dialog box, which is found in many of the MediaStudio
Pro programs, and are extremely versatile.
To apply a gradient to an object:
1. Select the object or objects you wish to apply the gradient to and click
the Gradient button in the Color tab of the Object Style panel.
2. Click the Gradient square to open the Magic Gradient dialog box.
3. Click the Edit button in the Palette ramp group box to open the
Palette Ramp Editor dialog box and select the CD thumbnail and then
click OK. The dialog box closes and the color ring in the Magic
Gradient dialog box changes to reflect the new palette.
4. Drag on the Hue shift to change the hue of the color ring and then
click the eighth button in the Mode group box to select the style of the
gradient. (When you click a button, its number is displayed next to the
title of the group box.)
5. Click OK to close the dialog box and apply the gradient.
Applying a gradient to an object
Page 63

TUTORIAL FOUR: CG INFINITY
63
Manipulating objects
CG Infinity allows you to alter an object's intrinsic shape to make it more
dynamic. It also gives you more flexibility to make your titles and graphic
objects really stand out. Both text objects and graphic objects can be
warped and changed, but if you change a text object too much, you may
not be able to edit the text later.
To manipulate objects:
1. Open the file
LOGO1.UCG file from SAMPLES/TUTORIAL folder on the
MediaStudio Pro CD.
2. Click the Object tool and select the rectangular object. Then click the
Perspective button on the Attribute toolbar.
3. Drag the top right-hand side node upwards to about one-third of the
original size, towards the direction of the left-hand node to change the
object's perspective.
4. Duplicate the object and then click the Resize button on the Attribute
toolbar and drag the left side of the object to the right, flipping it. (To
make sure it is the same size as the original, enter its width in the
Width spin box on the Attribute toolbar.)
5. Switch to the Shape tool and create a rectangular shape the size of the
original object, filling it with a solid dark blue color. Switch back to the
Object tool and click the Slant button on the Attribute toolbar and
then drag upward on one of the right side nodes to match the angle of
the object with the original.
6. Click the Send to Back button on the Standard toolbar to place the
object behind the others. Repeat step 5 on the left side node for the
mirrored object, except fill it with a solid light blue color.
7. Finish the effect by positioning the ball object in the center of the other
objects.
Manipulating objects
Page 64

MEDIASTUDIO PRO USER GUIDE
64
Creating a corporate logo
CG Infinity is ideal for creating corporate logos, which you can use in
your video projects or for other purposes, such as presentations, CDROMs, and Web pages. In this lesson, we will create a ‘head’ logo for a
fictional company called “Interface Designs.”
To create a corporate logo:
1. Select the Shape tool and create a rectangular shape with a red fill
color and no line color or shadow.
2. Switch to the Adjust tool and select the Add Node button on the
Attribute toolbar and click in the center of the left side path segment
as well as the center of the bottom path segment to place additional
nodes.
3. Click the Remove Node button on the Attribute toolbar and click on
the bottom left corner node. The node is removed from the path and
the object changes shape.
4. Click Edit: Duplicate to make a copy of the current object, giving it a
yellow fill color with no line color. Then switch to the Object tool and
drag the left side over to the right, flipping the object. (To get the same
width, enter its original value in the Width spin box.) When finished,
place both objects side by side.
5. Add four more rectangular objects (for the cap, left eye, left nose, and
left mouth). Give each a yellow fill color (no line color) and then place
accordingly on the background object. (For the nose object, remove
the top right corner node to create the appropriate angle as in step 3.)
6. Duplicate each of the objects (except the cap line) and drag them to the
other side of the face, changing their fill color to red. (For the nose
object, you will have to flip it as in step 4.)
7. Create another rectangular object for the cap. Then switch to the
Object tool and click the Slant button on the Attribute toolbar to angle
the cap off to the side and then add text with a shadow to finish off the
project.
Page 65

TUTORIAL FOUR: CG INFINITY
65
Animating objects
A central component to working with objects is being able to animate
them. You do this with the Moving Path tool and you can animate objects
linearly or have them follow any path you set.
To animate objects:
1. Select the object you want to animate and then position it where you
want to start its movement.
2. Select the Moving Path tool. Start and End control points appear at
the center of the object. Then, drag on the center of the object. As you
drag, the End control point follows the path of your mouse. Releasing
your mouse then creates the moving path.
3. Click the Play button on the Time Control panel to see how your
animation looks.
If you want to change the position of the control points, click the
Adjust Moving Path button on the Attribute toolbar and click on the
point concerned. (You may need to click twice before moving a control
point depending on the type of path created.) To create a curved path,
click the Curve Segment button on the Attribute toolbar and then drag
on a control point. (For greater control, you may need to add more
nodes by clicking on the path with the Add Node option selected from
the Attribute toolbar .)
Animating an object
Page 66

MEDIASTUDIO PRO USER GUIDE
66
Advanced techniques
After you have mastered the basics of CG Infinity, you are ready to move
on to the more advanced methods and techniques. Using the procedures in
this section will give you a deeper understanding of how CG Infinity
works and allow you to expand and enhance your work even more.
Creating mattes
In CG Infinity, you can create two types of mattes: solid color and
gradient. Solid color mattes are the easiest and simply require you to
draw a shape and then fill the shape with a different color from the
background. Gradient mattes require a little more work.
To create a gradient matte:
1. Select the tool you wish to create the path with and draw the shape of
the matte in the edit window.
2. Select the Gradient Transparency button in the General tab of the
Object Style panel and click on the Gradient square to open the
Gradient Transparency dialog box.
3. Move the Start and End sliders to determine the number of grays. To
change the direction of the gradient, drag on the sample preview. The
angle you drag at determines the angle of the gradient. (White is fully
transparent, black is fully opaque and grays are in between.)
4. Click OK to close the dialog box and apply the gradient. (The default
fill color should be set to black.)
Grayscale gradient matte
Page 67

TUTORIAL FOUR: CG INFINITY
67
Creating a corporate logo (advanced)
This is an advanced technique for creating a complex corporate logo. It is
slightly more complicated than the technique presented on page 64. If you
have not looked at the previous tutorial on making a corporate logo, then
do that first, and then return to this lesson.
To create a more complex corporate logo:
1. Select the Shape tool and create a circular path in the center of the
edit window (fill with red and no line color or shadow). Duplicate the
object and resize it so that it is slightly larger than the original, filling
this object with white. Repeat the process, this time making a circle
which is approximately twice the size of the original and placing it at
the back, with the bottom lower than the other two.
2. Create a rectangular object that is the same color as the smaller circle
and place it over the bottom of the large circle, creating a break.
3. Switch to the Adjust tool and add two nodes to the left and right of
the top node on the larger circle. Click the Adjust Path button on the
Attribute toolbar and drag the center node upward.
4. Click the Cusp node button on the Attribute toolbar and drag the left
control handle downward to increase the angle of the curve. When
happy with the angle, do the same to the right control handle.
5. Switch to the Object tool and select the Gradient button for the Fill
color in the Object Style panel. Click on the Gradient square to open
the Magic Gradient dialog box.
6. Click the Edit button and select the CD thumbnail and change the hue
value to 314. Click Add to place the new style as a new thumbnail in
the Palette Ramp dialog box.
7. Click OK and click the fifteenth button in the Mode group box to
select the style of the gradient. Move to the Sample window and drag
on the sample image to reposition the focus to the left of the window.
Once finished, click OK to close the dialog box.
8. Duplicate the object, and set it to have a line color with no fill color.
(Make the line color different from the others for better contrast.)
Once changed, resize the object slightly so that it fits just inside the
Page 68

MEDIASTUDIO PRO USER GUIDE
68
outline of the larger circle. (For this, it is best to use the Width and
Height spin boxes on the Attribute toolbar with the Keep Aspect
Ratio button pressed.)
9. Change the Line color to a Gradient and select the palette ramp
thumbnail you previously added.
10.Repeat steps 5 through 9 for the inner circle.
11. To finish, add text and place it in the center circle. Give it the same
gradient as the others, except this time in the Palette Ramp Editor
dialog box, remove several of the color nodes that appear around the
color circle in the Palette ramp sample window. (Do this by rightclicking over a node and selecting Delete.) Remove the darker ones
first and then drag the remaining nodes so that the darker colors appear
to the left of the circle and the lighter ones to the right. When finished,
click OK and then select the fifteenth button in the Mode group box
and drag on the image in the sample window to have the light source
appear from the top right. Also, change the slope value to 200 degrees
in the bottom Slope dial. Click OK to close the dialog box and apply the
fill.
Creating a more complex corporate logo
Controlling the timing of multiple objects
Sometimes you'll want to create a title or animation clip that contains
multiple objects moving independently of each other. To accomplish this,
you can take advantage of the Motion Tool and the Time Control panel.
1. Open the LOGO2.UCG file from SAMPLES/TUTORIAL folder on the
MediaStudio Pro CD.
Page 69

TUTORIAL FOUR: CG INFINITY
69
2. Select the Moving Path tool and click the object on the left side, then
drag the End control point to the center of the screen. (Show your
Rulers and Guides to use guidelines to help you align the object.)
Note:
All moving path actions must be done with the Moving Path tool selected.
Do not switch tools during this procedure.
3. Move the Time control slider to the last frame and click the Add Key
frame control point button.
4. Drag the key frame back to the 1 second mark. This makes the
object finish its movement at the 1 second mark.
5. Repeat the same procedure with the object on the right side, dragging
the End control point so that the two sides of the face touch.
6. Click the white line on the left and drag its End control point to the
center of the edit window.
7. Move the slider to the 1 second mark and add a key frame. (This is
the time you want the object to commence its movement.) Place your
pointer on the object in the edit window and drag it back so that it is in
the same place as the Start point. Move the slider to the last frame in
the Time Control panel and add a key frame and then move this key
frame back to the 2 second mark. (This is where the object ends its
movement.)
8. Repeat the same technique for the text at the top of the frame, starting
the movement at the 2 second mark and ending at the 3 second mark.
Controlling the timing of multiple objects
Performing fades and distortions over time
The Motion tool and Time Control panel allow you to control an object's
transparency and size over time. This lets you create text or objects that
come flying in from the distance or fading in out of nothing.
To perform a fade and distortion over time:
1. Open the LOGO3.UCG file from SAMPLES/TUTORIAL folder on the
MediaStudio Pro CD.
Page 70

MEDIASTUDIO PRO USER GUIDE
70
2. Select the main logo and click the Moving Path tool. (It is best to do
these procedures in Wireframe mode to speed up the editing pro-
cess.)
Note:
All moving path actions must be done with the Moving Path tool selected.
Do not switch tools during this procedure.
3. Select the Start key frame in the Time Control panel and, clicking the
Resize button on the Attribute toolbar, enter 580 in the Width spin
box. (Click the Keep Aspect Ratio button to ensure the height changes
proportionally.) After resizing, drag on the object to position the letter
CG in the middle of the edit window frame.
4. Go to the last frame and click the Add Key frame button and then
drag the key frame back to the 2 second mark.
5. Click the Resize button on the Attribute toolbar and enter 68 in the
Width spin box. (Click the Keep Aspect Ratio button to ensure the
height changes proportionally.) After resizing, position the object in the
center of the edit window frame.
6. Click on the letter A and then click on the Start key frame in the
Time Control panel.
7. Drag the transparency control point to the top of the transparency
graph and then move the slider to the 2 second mark and add another
key frame. Then, at 7 frame mark, add another key frame. For this key
frame, set the transparency to 0% by dragging the transparency point
to the bottom of the transparency graph.
8. Repeat the same process for the title text, except start the fade in at the
3 second mark, finish at the 4 second mark.
9. Select the text at the bottom of the logo and set it to appear at the
00:04:07 (without a fade effect). To do this, place a key frame at the
00:04:06 mark, and then another at the 00:04:07 mark and then change
the transparency accordingly.
Performing a fade and distortion over time
Page 71

Page 72

Page 73

Getting started
Video Capture is the program where many of your video creations
begin. Here you can view and capture ‘live’ video from a variety of
different sour ces such as VCRs, TVs, DVDs or DV camcor ders. Once
captured, you can then play back those files or take them into Video
Editor to start constructing your own video project.
Chapter 1
In this chapter you will learn about:
•
Understanding the basics .........................................................................
p.74
•
Preparing video for display .......................................................................
p.76
•
Improving your video signal .....................................................................
p.79
•
Customizing Video Capture .....................................................................
p.83
Page 74

MEDIASTUDIO PRO USER GUIDE
74
Understanding the basics
Video Capture is designed to work in conjunction with an installed video
source. This can be an external video device connected to your PC using an
analog capture board, digital video interface card (e.g. IEEE-1394) or USB
port. If you do not have a video source installed, you can still use Video
Capture to play back existing video files.
Once you have your video source connected and playing, the video
automatically appears in the Video Capture video window. Otherwise, the
video window displays a color bar test pattern instead.
Video Capture's program window
Page 75

VIDEO CAPTURE: CHAPTER ONE
75
Standard toolbar
Control bar
Video window
Save a
video file
Open a
video file
Playback mode
Capture mode
Video display
Audio format
Video format
Capture property
setting
Video source
MPEG settings
Rewind through
a video
Go forward
through a video
Go to the
previous frame
Play a video
repeatedly
Go to the
last frame
Go to the
first frame
Go to the
next frame
Mark in the start
of a selection
Mark out the
start of a
selection
Record a
video
Play back
a video
Stop playing
a video
Note:
Depending on the video source connection used, some commands and buttons
in Video Capture may not be applicable and may be grayed out.
Capture a frame to
the clipboard
Capture a frame to
a file
Select capture
template
Scan DV tape
Capture a video
color palette
Page 76

MEDIASTUDIO PRO USER GUIDE
76
Preparing video for display
The first step on your way to displaying video is getting your video source
to communicate with your PC. This involves connecting the source to the
PC via analog capture board, digital video interface card, or USB port, and
adjusting Video Capture so that it is ‘tuned in’ using the correct settings.
The following sections describe how to do this, along with ways to
improve video display and audio characteristics.
Capture Plug and Play
Video Capture automatically detects any Plug and Play video devices (such
as a DV camcorder via IEEE-1394 FireWire capture card or a USB PC
camera) connected to the computer. The moment the device is switched on,
Video Capture prompts a message asking if you want to use the new device.
Connecting to an analog video source
If your video capture board is correctly installed, running pictures should
immediately appear in the video window of Video Capture. If this does not
happen, then you need to tune Video Capture to your video source. To do
this, click Setup: Video Source. The Video Source dialog box opens with
various options that allow you to connect to a video channel and specify
the type of video source you have, as well as the television standard it
operates on (these options may differ depending on your video capture
board). In general, you should at least be able to select your video source,
such as Composite or S-video and a broadcast signal, such as NTSC, PAL
or SECAM.
Note:
If you are unsure about any of these options, or how they work, refer to your
video capture board's instruction manual.
Page 77

VIDEO CAPTURE: CHAPTER ONE
77
Previewing video from your video source
Preview your video in your videos device before capturing them into your
PC. To preview the video in your camcorder, switch to Capture mode. You
can do this by clicking the Capture icon on the Standard toolbar or selecting
View: Capture.
For DV devices connected to the PC via an IEEE-1394 FireWire card, make
sure that you set the proper Device Control and Capture Plug-in for you
to be able to control your DV device using the Control bar and for you to
also display the video in your DV camcorder on your monitor.
To view existing or captured video, simply switch to Playback mode by
clicking the Playback icon on the Standard toolbar or selecting View:
Playback.
Note:
If you are only viewing video (not necessarily capturing), you may want to hide
certain features, such as the toolbars, for a cleaner look and feel. To hide these, or
show them once hidden, select the appropriate option in the T oolbars
&
Panels
dialog box, opened by clicking View: Toolbars
&
Panels or by right-clicking on
any displayed toolbar or panel.
Setting preview options
When previewing video in Capture
mode, Video Capture allows you to
control the frame rate and frame size
with the Preview Options dialog box
(opened by clicking View: Preview
Options). When changing the frame
size, keep in mind the aspect ratio (16:9
or 4:3) of the video source. The aspect
ratio is important so that the video can
be displayed without any distortion.
Preview Options dialog box
Page 78

MEDIASTUDIO PRO USER GUIDE
78
Resizing the program window
Whenever you change the frame size in Video Capture, the video window
resizes itself accordingly. To resize the program window for optimum
viewing, drag its borders to widen or lengthen it, or maximize to take full
advantage of your monitor’s screen size. You can also click View: Center
to resize the program window to fit snugly around the video window or
center it on your screen.
Defining audio input when capturing analog video
If your video source has a soundtrack, it too can be captured with the
video. Once captured, it will play back in synchronization with the video.
Exactly how sound is captured depends on a combination of factors,
namely: the video source, the video capture board, and the sound card
installed in your computer. In general, the video capture board handles the
capturing of video frames while your sound card captures the audio
portion. Video Capture then merges this information into the resulting
video file.
To define audio input:
1. Click the Audio Format button on the Standard toolbar or Setup:
Audio Format to open the Audio Format dialog box. (This command is
disabled when your PC has no sound card and your video capture
board does not support audio.)
Audio Format dialog box
2. In the Name combo box, select an option for the audio data. The
attributes of the option are displayed in the Attributes combo box.
(You can also select a new combination of audio attributes directly
from this combo box.)
Page 79

VIDEO CAPTURE: CHAPTER ONE
79
If you define new attributes and wish to save them for later use, click
the Save As button. The Save As dialog box opens allowing you to
assign a name to the attributes. Clicking OK saves the attributes and
the specified name appears in the Name combo box.
3. Click OK. The dialog box closes and the audio attributes are now set
for your next capture.
Note:
Any sound you hear over your speakers is not affected by the selections
made with this command. T o hear the changes, you need to have a sound mixer
utility that provides a monitor function. If you have a mixer, you can mix your own
soundtrack by combining the output from MIDI, W A VE, CD-ROM, and other
external sources (such as your VCR).
Improving video signal when capturing analog video
The job of your video capture board is to convert an incoming analog
video signal into a digitized format that your computer can read. Once
your video is displayed, you may find that the colors do not appear as
vibrant or are darker than you expected. Such examples indicate that your
video capture board and the video source are not properly adjusted or
calibrated. By having a well calibrated display, you can capture and see
video (particularly color) as it was originally recorded.
Calibrating your display
To get the best possible calibration, your video source needs to be able to
generate a color test pattern. These are often found in more expensive and
professional video cameras which allow videographers to record the
pattern onto video tape before they start recording a particular event.
Later, they can then match this pattern to another display device to ensure
that the colors recorded by the camera can be faithfully reproduced on
that device, such as a computer monitor or a television set. If your video
source does not have test pattern generation capability, then you will be
unable to accurately calibrate your display. You can, however, adjust the
colors using your video capture board’s own controls (see page 80).
Note:
Color calibration is not necessary if you are using a DV capture card and DV
source.
Page 80

MEDIASTUDIO PRO USER GUIDE
80
To calibrate your display:
1. Make sure that the test pattern recorded on the video source appears in
the video window of Video Capture and click Setup: Color Calibration. This opens the Color Calibration dialog box displaying two color
meters: a Vectorscope and a Waveform monitor. A preview window
displaying the current frame of the video source appears in the upper
right hand corner. (It is a good idea to pause your video playback at
this stage.)
Color Calibration dialog box
The Vectorscope indicates the hue and saturation values of the colors
in the test pattern. The Waveform monitor displays the video source’s
color signal broken down into its component parts: Composite,
Chroma, Luma , and Parade. Composite displays all the component
parts combined, Chroma (shown in green) the color values and Luma
(shown in white) the brightness values. Parade uses a different
method from the others and is applicable for video capture boards
which have support for the parade method. The preview window is a
small representation of the current frame in the video window. The red
slider tab indicates the horizontal scan line from which the colors
evaluated in the test pattern are taken.
Note:
See page 82 for a chart outlining typical color values of a well calibrated
display.
2. Move the red slider next to the preview window so that it intersects
each distinct color in the test pattern. (If you have a vertical pattern
then there is no need to change it.)
Page 81

VIDEO CAPTURE: CHAPTER ONE
81
3. Click the Get Image button. The vectorscope and waveform monitor
redraw indicating the various color values at the point indicated by the
scan line.
In a well calibrated display, the green lines on the vectorscope should
touch the white squares and the graph in the waveform monitor should
display a staircase pattern (see page 80 for a typical example). If they
do not, then you need to adjust the settings using the software supplied
with your video capture board.
4. Leaving the Color Calibration dialog box open, click Setup: Video
Display to open the Display dialog box. This dialog box allows you to
adjust various color values such as hue, saturation, brightness, and
contrast.
It is important to keep both dialog boxes open so that any changes in
the Setup dialog box can be reflected in the Color Calibration dialog
box. To view these changes, you need to make sure that the preview
test pattern in the Color Calibration dialog box redraws itself regularly.
To do this, set the Get video frame for every option in the Color
Calibration dialog box to 1 second. This ensures that at every second
the preview test pattern refreshes itself, thereby reflecting any adjustments you make. (If the test pattern only appears for a short time,
click the Get Image button after each adjustment to refresh the
preview window.)
5. Adjust the various color values in the Video Display dialog box and look
at the Color Calibration dialog box to see how your changes affect the
preview test pattern. Once the vectorscope and waveform monitor
show a properly calibrated display, close both dialog boxes and prepare
for capturing.
When adjusting color values, keep in mind the following:
• Changing hue rotates the green lines on the vectorscope clockwise or
counterclockwise (depending on the degree of change)
• Changing saturation affects the depth of the lines, with low saturation
appearing closer to the center and high saturation closer to the edges
• Changing brightness and contrast affects the waveform in different
ways depending on your choice of options in the Video Display dialog
box.
Page 82

MEDIASTUDIO PRO USER GUIDE
82
Note:
If you cannot satisfactorily calibrate your hardware, you can still artificially
readjust the video clip (after it’s been successfully captured) using the Color
Calibration command in Video Editor (see page 156).
Typical calibration settings
At 75% amplitude, with 100% saturated RGB color bars, your color values
should resemble the following:
White Yellow Cyan Green Magenta Red Blue Black
Red 191 191 0 0 191 191 0 0
Green 191 191 191 191 0 0 0 0
Blue 191 0 191 0 191 0 191 0
When looking at a composite waveform in the waveform monitor, the
typical settings are about:
White Yellow Cyan Green Magenta Red Blue Black
100 65 50 50 30 20 20 0
Note:
White and black should always be 100 and 0 respectively, though the other
colors may vary slightly .
Adjusting color with your video capture board
If you cannot use color calibration, your video capture board should still
provide controls that allow you to adjust the contrast, color, and position
of any video displayed from an external video source. The Video Display
button on the Standard toolbar and the Setup: Video Display or Setup:
Video Source command (depending on your video capture board) give you
access to these controls. If you are not sure how to use them, refer to the
documentation that accompanied your video capture board.
Page 83

VIDEO CAPTURE: CHAPTER ONE
83
Customizing Video Capture
You can customize the way you work in Video Capture using the
Preferences dialog box, opened by double-clicking the Status bar or by
clicking File: Preferences
[F6]. Control various aspects of Video
Capture’s behavior, such as playing files whenever opened, specifying the
shuttle speed, or defining the background color of the workspace.
PREFERENCES DIALOG BOX
1. Play file when opened plays a video file immediately upon opening in the
workspace. When clear , the file opens on the first frame.
2. Return to first frame after playing
resets the video sequence to the first frame
once the clip finishes playing. When clear, the video stop s on the last frame.
3. Display frame numbers when playing
shows each frame number in the Status
bar as it is being displayed. When clear, only the st arting frame number is shown.
4. Display capture options before capturing
opens the Capture Video Dialog
box every time you click the Record button. When clear, Video Capture begins
recording immediately .
5. Image capture deinterlace downsamples captured images to minimize the file
size.
6. Use Split dialog box for capture settings centralizes the capture properties
with settings derived from different dialog boxes (e.g., Input Source).
7.
Number of recently opened files specifies how many file names are stored in
the Recent History list found in the File menu.
8. Maximum shuttle speed
sets the maximum speed possible when shuttling
through a video file. In general, set a higher speed for longer files and a lower
speed for shorter files.
9. Workspace background sets a background color or a bitmap image (BMP) as
the background in the Video Capture workspace.
1
2
3
4
5
6
7
8
9
Page 84

MEDIASTUDIO PRO USER GUIDE
84
The chapter in review
Here are some key points and tips to remember from this chapter:
• Preview your video directly from its video source by clicking Capture on
the Standard toolbar (see page 77).
• When viewing in Preview mode, set the frame size and frame rate of
the video in the Preview Options dialog box (see page 77).
• Calibrate Video Capture to your video source before capturing (see
page 79).
• Use the File: Preferences command to customize the Video Capture
working environment (see page 83) .
Page 85

Capturing video
The first step in creating your own video production is capturing the
source material. This can be made up of several minutes of video or
simply individual frames that you want to incorporate into the other
projects you are working on.
Chapter 2
In this chapter you will learn about:
•
Tips for capturing good video and audio .................................................
p.86
•
Capturing video and images .....................................................................
p.88
•
Capturing from a DV camcorder ...............................................................
p.93
•
Seamless DV capture ................................................................................
p.94
•
Controlling the DV camcorder ...................................................................
p.95
•
Scanning a DV tape .................................................................................
p.101
•
Capturing a color palette.........................................................................
p.106
Page 86

MEDIASTUDIO PRO USER GUIDE
86
Tips for capturing good video and audio
Capturing video utilizes a huge chunk of the computer’s memory and it puts
your system resources to the test. The better your system is, the better the
results will be. Below are some guidelines for the type of system setup that
works best for video capturing. Reading this will help you optimize your
machine’s potential and create the best captured videos possible.
Getting the right hardware
There are three key components to capturing video that account for much
of the demand on a system's resources. They are the video capture board/
card, the CPU, and the hard drive. Each is equally important and a
bottleneck in any one will adversely affect the performance of the others.
The video capture board converts the original analog video source into
digital data. In general, the faster this board is, the faster video can be
digitized and then used by your computer. While the video capture board
handles video input, it is the CPU which handles the delivery. The faster
the CPU is, the more video (as data) can be processed and thus the better
captured video file.
If you have a DV camcorder, you will need to use an IEEE-1394 (FireWire)
interface card. DV capture cards provide device control over the source and
complete transfer of video data between the tape and your hard drive.
Once the video has been processed by the CPU, it is written on your hard
drive. If you try capturing a full frame with full motion video, your hard
drive may not be able to keep up. As a result, your computer will end up
either dropping or skipping frames. It is recommended that you use at least
a 7200 RPM IDE drive. If necessary, use a RAID (Redundant Array of
Independent disks) hard drive system.
Page 87

VIDEO CAPTURE: CHAPTER TWO
87
Using compression
As previously mentioned, a second of video requires a lot of disk space
(30MB of disk space). No conventional hard drive can transfer that much
data with sufficient speed, and it is only through compression that desktop
systems can manage to work with video. All in all, there are two types of
compression one can use in capturing video: hardware-based and
software-based.
Hardware-based compression (e.g. MJPEG or MPEG) relies on the
additional memory of the video capture board to compress video. This
provides the smallest file sizes with the best quality. The only disadvantage
of using this type of compression is that the video you’ve captured can only
be played back in machines with a similar setup.
Software-based compression (e.g. Cinepak and Indeo) is handled by your
system, which has to share the job of compressing with anything else
running. While software-based compression is unable to match the
compression ratios of hardware-based compression, this type of
compression is device-independent and therefore compatible on a variety of
machines. You can play back the captured video on most computers. This
makes software-based compression the ideal choice for video intended for
distribution on other machines via CD-ROM or the Internet.
Techniques for improving your video captures
Even if you don’t have the ideal system for capturing video, you can still
achieve good results by working around the limitations of what you have.
For example, you can:
• Close all other programs that may be running in the background to free
up as much CPU resources as possible.
• Regularly defragment your hard drive with a utility such as Windows
Disk Defragmenter from the Systems Tools menu. (Fragmented drives
force the hard drive to slow down as it has to seek available free space
to save a file.)
Page 88

MEDIASTUDIO PRO USER GUIDE
88
• Dedicate a separate hard drive for your video captures, or a separate
partition on an existing hard drive.
• Capture at the best quality possible and then resample down if
necessary. Resampling up creates (interpolates) new data which results
in lower quality than the original.
Apart from controlling how your system performs, you can also set up
Video Capture to optimize your captures using the Advanced tab of the
Capture V ideo dialog box. Here you will find several options dedicated to
enhancing capture performance, such as allocating additional memory
buffers, specifying chunk granularity (data pack size), freeing up RAM
and synchronizing video to audio.
For more video capturing tips, please refer to the appendix (see page 403).
Techniques for improving your audio captures
When capturing audio there are three areas that you can control which
determine the size and quality of the audio file. They are the sampling rate,
sample size, and the number of channels. CD quality audio has a sampling
rate of 44KHz, a 16-bit sample size, and two channels (or stereo). If you
intend to play back your video over low quality speakers, then capturing at
this level is not necessary. You may find a mono, 11KHz 8-bit file more
practical. Also, if you are capturing background music, then it may not be
necessary to capture it at the same time you are capturing the video – you
can always add it later as an audio track in Video Editor. (For speech, this
is possible but it will require more effort later in Video Editor to
synchronize the audio with the video.)
Capturing videos and images
Once you have set up the video window to display your desired video or
image, you are ready to capture. Before doing so, it is suggested that you
Page 89

VIDEO CAPTURE: CHAPTER TWO
89
shut down all other programs running in the background or defragment your
hard drive to achieve optimum results.
To capture a video sequence or an image from an analog source:
1. With Video Capture open, start playing the video from your video
source. (The video should appear in the video window of Video Capture. If it does not, check the connection to your video source and
your video capture board setup.)
2. Click the Record button on the Control bar or Capture: Video [F5] to
open the Capture Video dialog box.
If the Display capture options before capturing option is cleared in
the Preferences dialog box, Video Capture begins capturing immediately
using your current settings.
Capture Video dialog box
3. Specify the desired frame rate in the Frame rate spin box. (If
capturing full motion video from a drop-frame NTSC device, specify
the fractional frame rate of 29.97.)
Remember that the higher the frame rate, the more demand on your
resources and the greater the size of the resulting video file. As a
Page 90

MEDIASTUDIO PRO USER GUIDE
90
guideline, 15 frames per second for NTSC devices is a good place to
start and 12 frames per second for PAL devices. If your video has a lot
of movement and panning, then you may need a higher frame rate to
avoid any jerkiness.‘Talking head’ shots and video with little movement
can often get away with a much lower frame rate.
4. Select the Exactly match the specified frame rate option to ensure
that the capture maintains the frame rate (essential if you are capturing
drop-frame video). Leave this option clear for general or non-time
critical captures.
The actual captured frame rate may differ from the specified frame rate
due to rounding or synchronization errors. While this is not detrimental
in most cases, you may find that it slightly affects the timing of larger
video sequences.
5. In the Capture Method group box, select the appropriate method for
capturing. Auto captures video according to the time specified in the
Auto spin box while Auto with no time limit continues capturing until
you press the [
ESC] key. If you want to perform single frame captures,
then select the Manual option. If you have a controllable device, select
the Device control option. (For more on capturing with a controllable
device, see page 95)
If you select the Manual option, you can define aspects of the capture
by clicking on the Settings button. This opens the Manual Capture
Settings dialog box from which you can choose between two capturing
modes: Auto and Manual. Auto allows you to specify the duration
between captures while Manual allows you to control the timing of the
capture directly. If you select the Auto option, the Duration group box
is enabled with further options for defining how many frames are to be
captured in total. If you want to capture continually, select the No limit
option.
Manual Capture Settings dialog box
Page 91

VIDEO CAPTURE: CHAPTER TWO
91
6. Select the Capture audio option to capture audio along with your video.
(This is disabled if you do not have a sound card, your video capture
board does not have sound capabilities, or you are performing a manual
capture.)
Note:
If you want to change the current audio and video characteristics, click the
respective Audio and Video buttons.
7. Select the Auto-naming option to save each capture as consecutively
numbered files. This file takes its name from the file name in the
following File entry box, replacing the last four characters with sequential numbers. For example, if the file name you specify is called
"VID", captured files will be called, VID0001, VID0002, and so on.
8. Enter the name to save the file to in the File entry box.
9. Select the Save to library option to save the captured file to a library
in V ideo Editor.
If you save a file to the library, you can then go straight to Video Editor
and drag-and-drop the file into a video project. This is also useful for
batch captures as the library creates an icon for each captured file
which you can then use to storyboard and arrange before placing your
work into a video project.
10.Click OK. Video Capture begins capturing according to your settings.
If you chose to capture manually, the Manual Capture dialog box opens
displaying two buttons, Next and Cancel. Click Next to capture a
single frame: Cancel to end capturing.
Notes:
•
When you click OK to start capturing, there may be a slight delay before any
capture takes place. This is because many machines first clear all available
memory . For best results, start your capture a few seconds before the video
you want to record appears in the video window .
•
If you are in Preview mode when capturing the displayed video, the video may
freeze. If this happens, click Capture: Display When Capturing. This
allows the video to continue displaying while capturing. (This may , however ,
adversely affect the performance of your capture as it requires additional
resources and as such frames may be dropped.)
Page 92

MEDIASTUDIO PRO USER GUIDE
92
1
2
3
Customizing your capture options
In the Capture Video dialog box, the Advanced tab contains options that
allow you to customize the way that each capture is performed. By
carefully selecting these options to match your system’s performance, you
can significantly improve overall capture results.
CAPTURE VIDEO DIALOG BOX: ADV ANCED T A B
1. Display message box before capturing displays a confirmation message
dialog box after you have clicked OK. (This is useful if you want to wait before
capturing.) When clear, capturing starts immediately after clicking OK. (This
option has no effect when the selected capture method is Manual or Device
Control.)
2. Play video file after capturing plays back each file after capturing. Leave this
clear if you want to continue viewing your video source after capturing.
3. Synchronize video with audio ensures that during capture, the video portion
maintains correct timing with the audio portion. When clear , both captures are
done independently by your system, which may result in bad synchronization
between audio and video data, particularly if the audio is a ‘talking head’. If the
audio is background music, then selecting this option has little effect.
4. Display message if dropped frames exceed displays a report after capturing
whenever the specified dropped frame threshold has been met. For general
capturing, specify 10%. (If you frequently get dropped frames, try capturing at a
lower quality .) Set this to 100% if you do not mind dropped frames or are only
capturing low resolution files.
4
5
6
7
8
Page 93

VIDEO CAPTURE: CHAPTER TWO
93
5. Preallocate the capture file creates a temporary file to place your captured
video sequences in. This improves performance as the hard drive does not have to
search for free space to store video data. (This size should match or exceed your
estimated capture size.)
6. Chunk granularity matches the size of each data chunk to be captured with
your target hard drive’s cluster size. Matching sizes ensures more efficient data
transfer and thus improves capture performance. (In most cases, use the default
unless you have a reason not to.)
7. Number of video buffers (1-1000) sets aside additional buffer memory to help
improve captures. (In most cases, use the default unless you know how much
buffer space you can afford.)
8. Default lets Video Capture automatically determine the best settings for your
system. Click this when you do not know what options to specify or are unsure
about your system’s setup.
Capturing from a DV camcorder using an IEEE-1394 (FireWire
card) interface card
MediaStudio Pro allows you to save your files in a DV file format of your
choice. There are two types DV file format: Type 1 and Type 2. Now, you
can pick which type of format you want your project to have by clicking
the appropriate selection in Options.
Microsoft defines two methods of storing DV video data in AVI files, type 1
and type 2. Accordingly, Video Editor fully supports both DirectShow and
VFW codec for DV type 1 and type 2 format. For OHCI compliant IEEE-
1394 capture cards, select the DV Video Encoder type 1 codec in the
Compression tab in the Video Save Options dialog box.
To capture from a DV camcorder with an IEEE-1394 interface card
1. Connect your DV camcorder to the IEEE-1394 interface card. Follow
the instructions of your capture card.
2. Turn your camcorder on and set it to Play mode (or VTR/VCR mode).
3. Run Video Capture.
4. Click Capture: Video or click Record to display the Capture Video
dialog box.
Page 94

MEDIASTUDIO PRO USER GUIDE
94
5. Select the method to use in capturing:
• Select Device Control to automatically control the entire capturing
process from Video Capture.
• Click Batch to mark the clips you want to capture and specify a file
name for each clip. Refer to the “Capturing video by batch” procedure
for details.
• Select Auto or Auto with no time limit to capture a clip starting from
the current frame.
Note:
When Auto with no time limit is selected, you have the option to select
Seamless Capture under Advanced tab, to help you save a video into another
video file once it reached a size of 4GB, since that is the maximum size under the
F A T32 file system in your hard drive.
6. Type a file name in the File entry box, or click Browse to find other files
or folders. You can also set the type of AVI you want to produce after
capturing. Click Properties and select DV Type-1 or Type-2. Click OK.
7. Click OK to start capturing. Press [
ESC] to stop capturing anytime. Video
Capture should have automatic control (“device control”) of your
camcorder and should play your tape. The output from the camcorder
should be visible in the Preview window on your computer.
Note:
Sometimes, Video Capture can lose its connection with your camcorder if it
is turned off or disconnected. When this happens, the IEEE-1394 Firewire
(interface card) resets. Y ou may have to close Video Capture and open it again to
re-establish a connection.
Seamless DV Capture
When using the DirectShow driver, the maximum file size is 4GB under the
FAT 32 file system in your hard drive. Yet, you can go beyond this limitation
when using Windows 2000, Windows NT and Windows XP with a NTFS
formatted hard drive partition that allows a file size to exceed 4GB.
Seamless capture gets around this 4GB file size limitation. Once a DV AVI
file reaches 4GB, the remaining video is automatically saved as an another
file. The capturing process remains uninterrupted no matter how long the
video footage is.
Page 95

VIDEO CAPTURE: CHAPTER TWO
95
To enable Seamless Capture:
1. Make sure the DirectShow capture plug-in is selected and a DV driver is
used.
2. Select Seamless capture in the Advanced page of the Capture video
dialog box then click the Options button.
3. In the Seamless Capture Options dialog box, specify the desired
maximum video file size in the Cut file when file size reaches box.
4. Select the Cut when scene is detected option and select the desired
method.
• Always Cuts the file whenever there is a scene change.
• At file size limitation Cuts the file when the size reaches the value in
the Cut file when file size reaches box.
• At first scene after Cuts the file when the captured video file size
exceeds the value entered in the box.
5. Click OK.
Controlling the DV camcorder
MediaStudio Pro allows you to play, stop, or pause the DV tape by using the
Control bar or the keyboard hotkeys. Other play controls such as
forward, rewind, and go to the next or previous frame are also available.
You can also preview the DV camcorder tape at different speeds through the
use of the Shuttle Control. Choose between 1/10, 1/5, x1 (normal), and x2
(fast) speed options.
Shuttle Control
Page 96

MEDIASTUDIO PRO USER GUIDE
96
To control your DV camcorder using the Control bar:
1. Make sure your DV camcorder is connected to your system and that the
proper Device control and Capture plug-in have been set.
2. Click the appropriate button on the Control bar to control your DV
camcorder within MediaStudio Pro:
• Fast Rewind
to quickly go to the frame(s) near the beginning of the
video.
• Fast Forward
to quickly go to the frame(s) near the end of the
video.
• Previous Frame to go to the frame prior to the current one.
• Next Frame
to go to the frame following the current one.
• Start to go to the first frame of the video.
• End
to go to the last frame of the video.
• Repeat
to play the video in a continuous loop.
• Mark-in
to set the current frame as the starting point of a video
selection.
• Mark-out
to set the current frame as the ending point of a video
selection.
Direct MPEG capturing from a DV camcorder
You can directly capture MPEG files from your DV camcorder by switching
your capture plug-in to Ulead DSW MPEG Plug-in. This makes MPEG
capturing easier and hassle-free.
To directly capture to MPEG format:
1. Connect your DV camcorder to your IEEE-1394 interface card.
Note:
When acquiring video from an analog source, be sure that the analog
capture card you are using supports RGB or YUV capture.
2. Turn your camcorder on and set it to Play mode (or VTR/VCR mode).
Page 97

VIDEO CAPTURE: CHAPTER TWO
97
3. Run Video Capture and click Setup: Switch Capture Plug-in.
4. Select Ulead DSW MPEG Capture Plug-in.
5. To begin capturing, click Record on the Control Bar, or click Capture:
Video when working in Capture mode.
6. Specify the Capture method and click Properties to define the video
and audio capture settings of the MPEG file. Click OK to return to the
Capture V ideo dialog box.
7. Enter a file name for the video. Click Browse to locate the target directory.
8. Click OK to start capturing. If you want to start capturing immediately
after pressing Record, clear Display capture options before capturing
in Preferences dialog box.
9. To stop capturing, press [
ESC]. If you have specified the length of
capturing under Capture Method, MediaStudio Pro automatically stops
the capturing process for you.
Direct WMV capturing
Now you can capture directly from an analog source or DV camcorder
straight to Windows Media Video (WMV). WMV is an extensible file
format that handles synchronized multimedia data and supports “live
content” transmission over a wide array of networks. Selecting this will
automatically convert your video to a WMV file. Note that when you click
Setup: Video Capture Property Settings, you will see Select (available
only when the WMV plug-in is selected) instead of Advanced at the bottom
of the dialog box.
To directly capture to WMV format:
1. Connect your DV camcorder to your IEEE-1394 interface card.
Note:
When acquiring video from an analog source, be sure that the analog
capture card you are using supports RGB or YUV capture
2. Turn on your camcorder and set it to Play mode (or VTR/VCR mode).
Page 98

MEDIASTUDIO PRO USER GUIDE
98
3. Run Video Capture and click Setup: Switch Capture Plug-in.
4. In Current capture plug-in, select Windows Media Format Capture
Plug-in.
5. To begin capturing, click Record on the Control Bar, or click Capture:
Video when working in Capture mode.
6. Specify the Capture method to use and click Properties to define the
video and audio capture settings of the WMV file. After that, click OK to
return to the Capture Video dialog box.
7. Enter a file name for the video. Click Browse to locate the target
directory. You also have the option to select a different profile to generate
the WMV file.
Note:
If you want to use another profile in capturing a DV video straight to WMV
format, click Setup: Video Capture Property Setting. In the dialog box, click Select
Profile to select from the list of available profiles installed in your computer.
8. Click OK to start capturing. If you want to start capturing immediately
after pressing the Record button, clear Display capture options before
capturing in Preferences dialog box.
9. To stop capturing, press [Esc]. If you have specified the length of
capturing under Capture Method, MediaStudio Pro automatically stops
the capturing process for you.
Capturing video based on a profile
The quality of a WMV file depends on the profile it is using. A Profile
covers various attributes for a Windows Media Format file such as bit rate,
number and type of streams, compression quality, frame size and so on.
When capturing a video directly to WMV format, MediaStudio Pro uses the
default profile to complete the capturing process. You also have the option
to select other profiles to attain preferred captured file quality.
Page 99

VIDEO CAPTURE: CHAPTER TWO
99
To capture video based on a profile:
1. Connect your DV camcorder to your IEEE-1394 interface card.
Note:
When acquiring video from an analog source, be sure that the analog
capture card you are using supports RGB or YUV capture.
2. Turn your camcorder on and set it to Play mode.
3. Run Video Capture and click Setup: Switch Capture Plug-in.
4. In Current capture plug-in, select Windows Media Format Capture
Plug-in.
5. Click Setup: Video Capture Property Settings. In the dialog box, click
Select to open Select Profile.
6. Select the profile you want to use for capturing. The generated WMV file
will depend on the profile that you pick. Click OK.
7. To begin capturing, click Record on the Control Bar, or click Capture:
Video when working in Capture mode.
8. Specify the Capture method then click Properties to define the video
and audio capture settings of the WMV file. Click OK to return to the
Capture V ideo dialog box.
9. Enter a file name for the video. Click Browse to locate the target
directory. You also have the option to select a different profile to generate
the WMV file.
Note:
If you want to use another profile in capturing a DV video straight to WMV
format, click Setup: Video Capture Property Settings. In the dialog box, click
Select Profile to select from the list of available profiles installed in your
computer.
10. Click OK to start capturing. If you want to start capturing immediately
after pressing Record, clear Display capture options before capturing
in Preferences dialog box.
11.To stop capturing, press [
ESC]. If you have specified the length of
capturing under Capture Method, MediaStudio Pro automatically stops
the capturing process for you.
Page 100

MEDIASTUDIO PRO USER GUIDE
100
Editing and customizing a video profile
Profile Selection lists all the profiles available in your system. You can use
the Manage Profile to edit, create, remove, and duplicate a profile.
System-defined profiles cannot be edited. However, You can create a
customized one base from it. A Custom profile can be edited by clicking
Edit and changing specific profile attributes.
You can also create a new profile by clicking New. This will lauch a task
wizard that will guide you in creating your profile.
To edit and customize a profile:
1. Connect your DV camcorder to your IEEE-1394 interface card.
Note:
When acquiring video from an analog source, be sure that the analog
capture card you are using supports RGB or YUV capture.
2. Turn your camcorder on and set it to Play mode (or VTR/VCR mode).
3. Run Video Capture and click Setup: Switch Capture Plug-in.
4. In Current capture plug-in, select Windows Media Format Capture
Plug-in.
5. Click Setup: Video Capture Property Settings. In the dialog box, click
Select to open Select Profile.
6. Under Select Profile, click Customize.
7. Manage Profiles lists all the available profiles installed in your computer.
The profiles are categorized into two types: System defined profiles
and Custom profiles. Simply click Edit to modify attributes of a
Custom profile.
Note:
System-defined profiles cannot be edited directly . Y ou must create a copy
before editing the corresponding attributes. T o do this, select a system defined
profile and then click Copy. Select the created copy of the profile and then click
Edit to modify the attributes. Clicking Edit invokes Edit Profile. It will guide you
in specifying your preferred attributes.
8. Under General Information, specify a reference name for the created
or edited profile in Name of Profile.
9. Select the media types supported by the profile in Source types.
 Loading...