

Page 1

TABLE OF CONTENTS
Getting Started . . . . . . . . . . . . . . . . . . . . . 2
Solo Controls . . . . . . . . . . . . . . . . . . . . . . . 4
Introduction . . . . . . . . . . . . . . . . . . . . . . . . 5
Main Menu . . . . . . . . . . . . . . . . . . . . . . . . . 8
Single-Player Game . . . . . . . . . . . . . . . . . . . 8
Multiplayer . . . . . . . . . . . . . . . . . . . . . . . . 19
Warranty . . . . . . . . . . . . . . inside front cover
Technical Support . . . . . . . . . inside back cover
1
Page 2
GETTING STARTED
System Requirements
Supported OS:
Processor:
recommended). Game optimized for Dual-processor-enabled computers.
RAM:
1 GB
Video Card:
recommended) (see supported list*)
Sound Card:
containing Dolby
DirectX Version:
DVD-ROM:
Hard Drive Space
Peripherals Supported:
Multiplay:
*Supported Video Cards at Time of Release
ATI®RADEON®X1600/X1800/X1900
®
NVIDIA
Laptop versions of these cards may work but are NOT supported.
These chipsets are the only ones that will run this game. Additional chipsets may be
supported after release. For an up-to-date list of supported chipsets, video cards, and
operating systems, please visit the FAQ for this game on our support website at:
http://support.ubi.com.
NOTICE:
with some disc and virtual drives.
®
NVIDIA
Interactive Content Encoder required for Dolby Digital audio.
Windows®XP (only)
3 Ghz Pentium®4 or AMD Athlon™ 3000 (3.5 Ghz Pentium 4 or Athlon 3500
DirectX®9.0c-compliant, Shader 3.0-enabled 128 MB video card (256 MB
DirectX®9.0c-compatible (EAX™ recommended). PC audio solution
®
Digital Live required for Dolby Digital audio.
9.0c or higher (9.0c included on disc)
4x DVD-ROM or faster
: 8 GB
Mouse, keyboard
Broadband connection with 128 kbps upstream or faster
GeForce™ 6600/6800/7300/7600/7800/7900
This game contains technology intended to prevent copying that may conflict
nForce™ or other motherboards/soundcards containing the Dolby®Digital
through each step of the setup and installation process of the game. Once you have
created a directory for Splinter Cell Double Agent, the game is installed on your
hard drive. The game automatically asks you if you want to install DirectX 9.0c (April
update). You cannot play Splinter Cell Double Agent without DirectX 9.0c or higher on
your computer. If you already have DirectX 9.0c or higher, simply check the No
button and DirectX will not be installed. If you are not sure, click Yes, and the
DirectX installer will perform its own verification.
3. After installing the game, select Ubisoft/Tom Clancy’s Splinter Cell Double
Agent/Play Splinter Cell Double Agent from your computer’s Start menu, or doubleclick the Play Splinter Cell Double Agent shortcut on your desktop. Doing either
starts the game.
Note:
The Splinter Cell Double Agent DVD must be in your DVD-ROM drive to start the game.
Uninstalling Splinter Cell Double Agent
To uninstall Tom Clancy’s Splinter Cell Double Agent, follow these simple steps:
• Select Ubisoft/Tom Clancy’s Splinter Cell Double Agent/Uninstall Splinter Cell Double
Agent from your computer’s Start menu.
• If you uninstall Tom Clancy’s Splinter Cell Double Agent, all previously saved games
will remain on your hard drive unless you answer Yes to the “Delete all configuration
and saved game files?” question.
• You can also uninstall Tom Clancy’s Splinter Cell Double Agent by using the
Add/Remove Programs control panel in Windows.
Installation
Installing Tom Clancy’s Splinter Cell Double Agent™
To install Tom Clancy’s Splinter Cell Double Agent, follow these simple steps:
1. Insert the Splinter Cell Double Agent DVD into your DVD-ROM drive. The Autorun
menu should appear. If the Autorun menu does not automatically appear, doubleclick on the My Computer icon located on your desktop and then double-click on the
icon that corresponds to your computer’s DVD-ROM drive. The Autorun menu should
now appear.
2. Click on Install Splinter Cell Double Agent. The installation wizard now walks you
2
3
Page 3

SOLO CONTROLS
INTRODUCTION
Keyboard Controls
s
¡
∞
•
1
2
3
4
W,A,S,D
Q
R
E
Left/right
q
Left/right
Ç
Z
X
C
e
Menu/cancel
OPSAT
Quick Save
Quick Load
Zoom/scope
Night vision
Thermal vision
Wave vision
Move character/Navigation
Contextual moves
Reload
Equip/use
Jump
Inventory
Quick OPSAT
Whistle
Posture
Action
Action/confirm
Num Pad Controls
j,i,l,k
2,4,6,8
1
0/f
./y
Move character/Navigation
Move character/Navigation
End
Posture
Whistle
Mouse Controls
Move mouse Move camera, menus, and UI navigation
Left mouse button Primary fire / knife kill
Right mouse button Alternative fire / knock out
Middle mouse button Equip/use (click), Zoom in/out, Accelerate/decelerate (roll)
4
Story
Once, Sam Fisher was an agent of Third Echelon, assigned to infiltrate strongholds
belonging to enemies of National Security, gather information, and, where necessary, use
his training to neutralize those enemies.
But times are changing. America’s enemies are looking at new options, finding ways to
make themselves more deadly. In order to stay one step ahead of its targets, Third Echelon
is also changing, although Colonel Irving Lambert and Assistant Director Williams may be
trying to steer in two different directions. And while Sam Fisher’s foes are evolving and his
allies are in flux, very soon Fisher’s own life is also going to undergo a dramatic and
permanent change. And once that happens, nothing will ever be the same again.
With his life turned upside down, Sam Fisher is on a new mission unlike any he has ever
been sent on before. Where he used to penetrate defenses and gather information from
the outside, now he’s on the inside, working with those he’s sworn to destroy and finding
enemies among his allies. He’s risking everything for the sake of the greater good, even
if it costs him his identity – or his life.
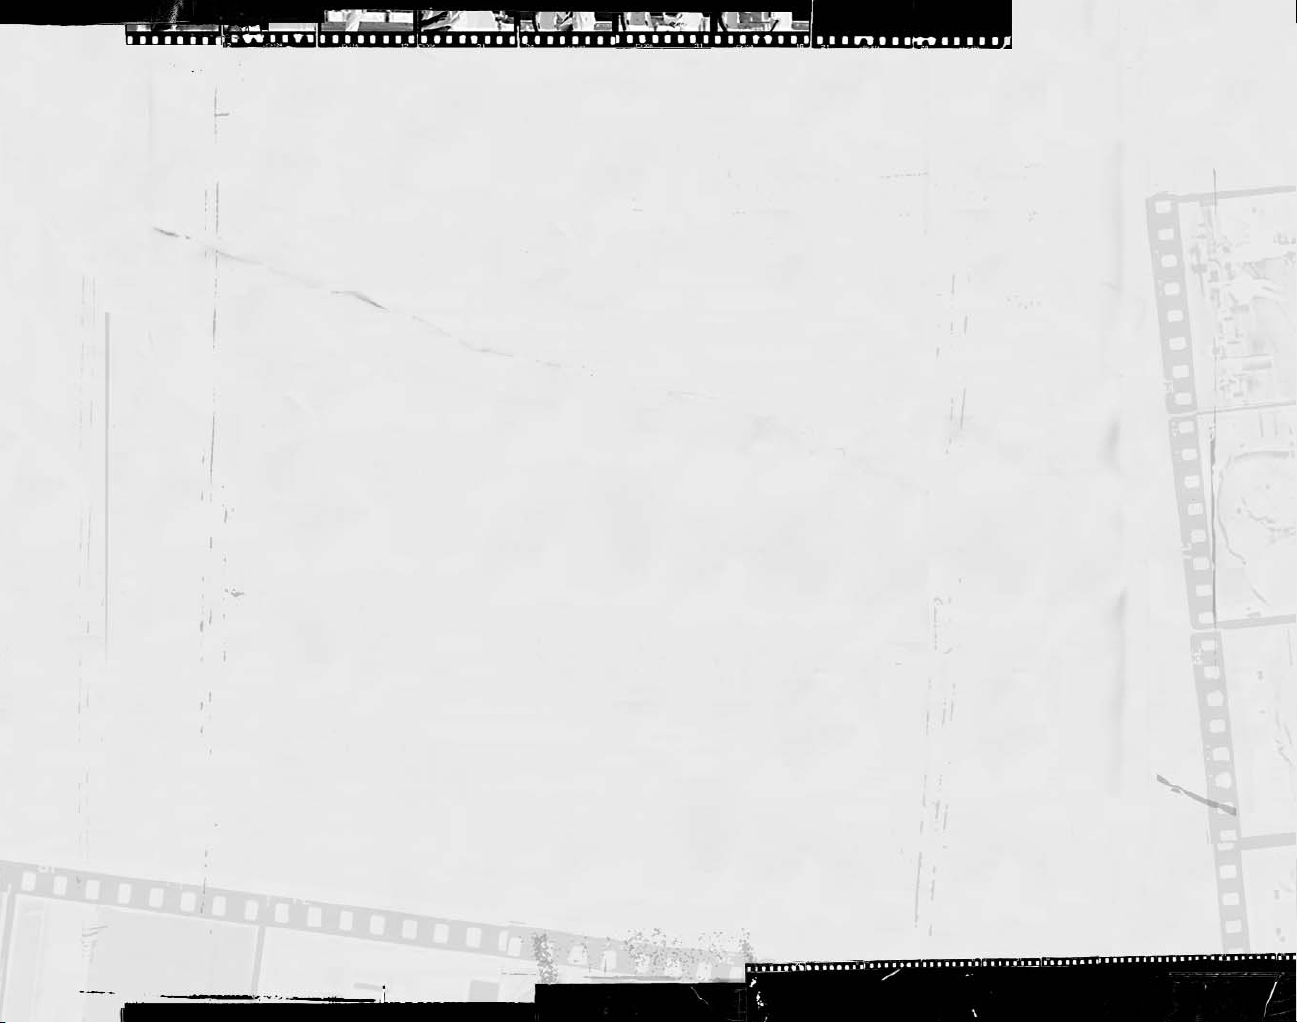
Characters
Sam Fisher – Field Operative
Born: Classified
Height: 5’10’’
Weight: 170 lbs
As a Splinter Cell, an agent of Third Echelon, the NSA’s most secret
subgroup, Sam Fisher has been trained to secure his country’s
defense by mounting a good offense. In addition to their weapons
and hand-to-hand training, Splinter Cells use the latest high
technology and espionage techniques to infiltrate sensitive
locations, retrieve information, and execute operations the U.S.
government cannot acknowledge.
Fisher has been on the front lines of espionage through several key decades of world
history. He has not only survived but excelled in his field through hard work, insatiable
curiosity, and brutal honesty. He has little time for polite niceties and even less for lies.
He is quiet, instinctive, and observant, somebody who watches from the outside.
But in order to achieve the discipline necessary for his work, Fisher has had to bury
certain parts of himself. He is a man of few words, a man with a strange and slightly
dark sense of humor, a man with an adult daughter whom he loves but hardly knows. He
is truly himself only when he is on the job – he has, in a sense, become what he does.
This is where his world makes sense, where there are allies and enemies, and the
difference has always been simple and clear...until now.
5
Page 4
Colonel Irving Lambert
Born: 1961, Bat Cave, North Carolina
Height: 6’2’’
Weight: 270 lbs
Lambert is the Third Echelon director in charge of all field
operations, answering only to one man. He became involved in the
intelligence community as a young man, rising quickly in rank and
responsibility. Serving in the Persian Gulf before and during Desert
Storm, he coordinated intelligence and ran double agents. He
moved on to Third Echelon, where he spearheaded the ambitious
Splinter Cell program. Those missions scored several impressive successes, due in large
part to the involvement of Lambert’s subordinate and friend Sam Fisher. Although still a
popular and well-connected man in Washington, D.C., Lambert’s recent proposals for
changes in National Security structures and procedures have turned him into a political
hot potato – and a potential liability.
Emile Dufraisne
Born: 1956, Opelousas, Louisiana
Height: 5’9”
Weight: 160 lbs
The product of a wealthy, traditional upbringing, Emile Dufraisne
was always destined for great things. His belief that America
needs to change in a fundamental way moved him to create the
JBA, a group devoted to bringing about change through the
destruction of the current, decadent order. Some would call him a
terrorist, but Emile considers himself a patriot.
Enrica Villablanca
Born: 1977, Highland Beach, Florida
Height: 5’7”
Weight: 125 lbs
Once she was finished getting her doctorate, Enrica discovered she
didn’t really know what to do with her life. She did have very strong
ideas about societal problems, and when she went looking for
solutions to them she found the JBA. As the only woman in the
group, Enrica hides her uncertainty behind walls of professional
competence and disdain.
Carson Moss
Born: 1972, Tulsa, Oklahoma
Height: 6’2”
Weight: 245 lbs
Of all the JBA members, Moss has been with Emile the longest.
Emile is also the only person Moss respects, and he uses his
position as the JBA’s head of security to bully everyone else –
except for Enrica. Although Emile once considered Moss to be
perfectly reliable, recent security lapses have started to create a
rift between them.
Jamie Washington
Born: 1979, Dothan, Alabama
Height: 5’11”
Weight: 165 lbs
Jamie is a study in contrasts. On the one hand, he’s generally
cheerful and easy-going around the people he likes. Once he
decides he likes someone, he’s a friend for life, unswervingly loyal.
On the other hand, he’s a vicious, cruel man who enjoys inflicting
violence on other people, especially those who can’t fight back.
Hisham Hamza
Born: 1979, Washington, D.C.
Height: 5’9”
Weight: 165 lbs
Relatively young for a man of his position, Hamza is part of a new initiative within the
Department of Defense: The Interdepartmental Operative. Nominally a member of the CIA,
Hamza’s capacity for quick learning made him an excellent early candidate to act as a
field liaison between the CIA and the NSA. Although still youthful and arrogant, his
versatility is likely to make him a great agent one day.
769
Page 5
MAIN MENU
From the initial startup screen, you can select one of two modes, or view the game
credits:
•
Single-player (Solo mode)
•
Multiplayer
•
Credits
Single-Player Menu
While in this menu, you will be able to choose from the following options:
• Load Game:
on the Load Game screen will be those for the selected profile.
• New Game:
game. When starting a new game, you can set your difficulty level to Easy, Normal,
or Hard.
• Training:
psychological review of Sam Fisher’s competence in the field.
• Options:
Select and load a previously saved game. The only games displayed
Allows a player who has selected or created a profile to start a new
Review the basic concepts of Splinter Cell Double Agent, in the form of a
Adjust the video and control settings.
Multiplayer Menu
Play the Versus or Co-op Challenges mode over the Internet or a Local Area Network
(LAN). For details, see page 19.
SINGLE-PLAYER GAME
Sam’s Actions and Movements
Some of Sam’s stealth moves are described below. Depending on your play style, you’ll
find some very useful for different situations.
Basic Moves
Crouching
Press the posture key to crouch. Movement is slower, but quieter, and
Sam is less visible while crouched.
Climbing
To climb a pipe, ladder, vertical cable, or fence, simply walk into it.
Press the posture key to jump off. You can also slide down pipes and
ladders by pressing
S
.
Close Attack
You can choose between lethal (primary attack key) attacks and nonlethal (secondary attack key) attacks when you’re close to the enemy.
Back to Wall
Click the contextual move key when standing or crouched to put Sam’s
back to the wall. Sam is less visible with his back to a wall. Click
contextual move key again to revert to a normal position.
Back-to-Wall Peeking
While in a back-to-wall position next to a corner, you can peek by pushing and holding
the contextual move key in the direction of the corner. From this position, you can equip
your pistol by pressing the equip/unequip key. If an enemy is approaching, you can also
perform a corner grab (see instructions in next section).
Enter Vent
Press the action key when near a vent to move Sam into it.
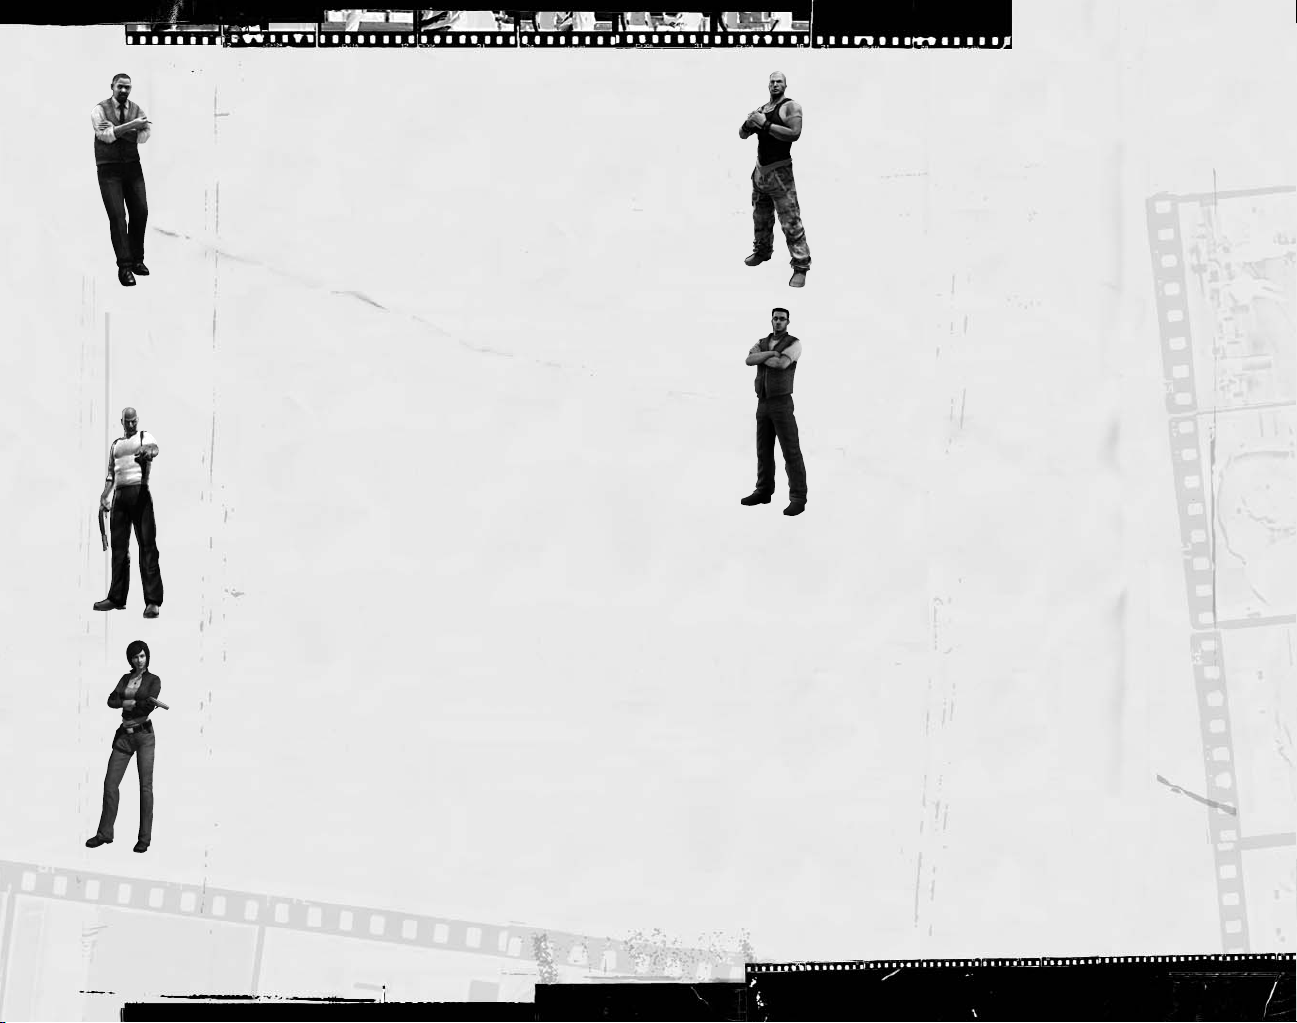
Wall Hang
Jump by pressing the jump key to grab and hang from ledges above
Sam’s head. Sam can move left and right as well as pull himself up if
there is room. Press and hold the down directional key or press the
posture key to let go of a ledge.
Hand-over-Hand
Jump by pressing the jump key to grab and hold a horizontal pipe.
Bring Sam’s legs up to clear obstacles by pressing the jump key. Press
posture key to let go of the pipe.
Zip Line
Jump by pressing the jump key to grab hold of a sloped wire or zip
line. Sam will slide down automatically. Raise Sam’s legs by pressing the
jump key. Press
Throw Object
Once Sam has an item in hand, press Eto get ready to throw. A reticle appears in the
middle of the screen. Aim the reticle at the spot where you want to throw the object.
Pressing the primary attack key will throw the object. Sam can throw grenades or
objects he picks up in the environment.
Swimming
At select points in the game, Sam can swim underwater. The controls are different from
when Sam is moving on land. Use the directional keys to move and the mouse to steer;
press the jump key to ascend and to exit the water. Press
For an extra burst of speed, press
C
to let go.
.
E
to descend.
C
8
Page 6

Advanced Moves
Advanced moves are just as critical as basic moves. Mastering these will allow Sam to
move through his environment with much greater safety and precision. Many of these
advanced moves are combinations that allow Sam to attack. For information on equipping
and using weapons, refer to the Weapons, Gadgets, and Items section.
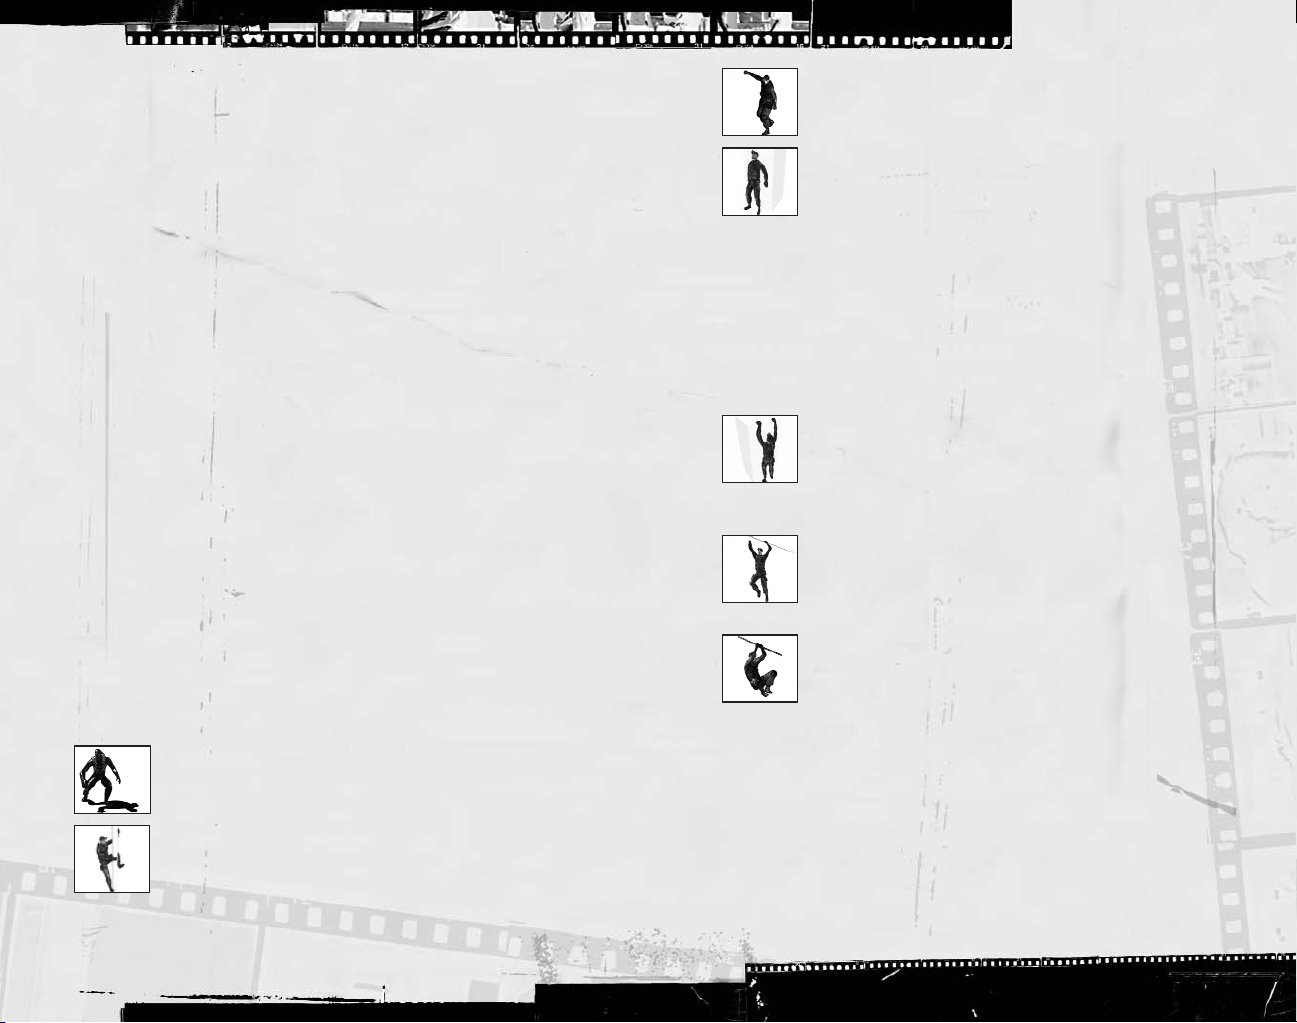
Split Jump
If Sam is in a corridor that is not too wide and is relatively high, he can
perform a split jump by facing the wall and pressing the jump key to
jump. Press
performing drop attacks on enemies.
Drop Attack
If you can get above an enemy and drop down on him, you will knock
him out.
Split-Jump Shooting
Sam can equip and fire his weapon while in the split jump position.
Press
E
Rappelling
To rappel, stand near the hook point indicated in the interaction window
menu and select the Rappel interaction. Sam can move up and down the
rope. Press the jump key to kick off the wall.
Rappel Shooting
Sam can equip and use a firearm or directional microphone while
rappelling. Press
Hanging Shooting
Sam can equip and fire his pistol while hanging from a pipe. With his
legs down, he will shoot forward; with his legs up, he will hang upside
down and shoot backward. Press
from a pipe.
Inverted Neck Snap
Perform this move when holding a horizontal pipe or while suspended
from a rope with legs up. To attack a non-player character (NPC), press
the primary attack key for a lethal attack and the secondary attack key
for a non-lethal knockout attack. Press
feet below the pipe or rope.
to drop. This position is particularly suited to
C
to equip the selected weapon.
to equip the selected weapon.
E
to equip the pistol while hanging
E
twice to return Sam to his
C
Switch Shoulder
While in the Aiming mode, use the directional keys to switch your weapon from one
shoulder to another. This way you will be able to aim at any angle.
Bash Door
When you choose Bash Door in the Interaction menu, Sam will quickly break through to
another room. Note that this move will make some noise, but it can also knock out an
enemy on the other side. Get your weapon out before bashing the door, if needed.
Open Door Stealth
If you want to make sure no one hears you, open the door in a stealthy way. You can
make Sam open/close the door as fast as you want using the directional keys.
Lock Picking
Sam will need to pick the locks on certain doors. Lock
picking takes time, but is quiet and cannot be detected.
To pick a lock, press two adjacent directional keys until
you see and hear the first pin begin to move. This
means the directional keys are in the correct quadrant.
Continue pressing the directional keys, keeping in the
correct quadrant, to release one of the pins. Repeat
until all pins are released.
Break Lock
If Sam is in a hurry, he can use his knife to break open locked doors. To do this, simply
select the Break Lock interaction. Beware – this is noisy, and broken locks will attract
attention.
Optic Cable
Select this option in the Interaction menu to pass a small optic cable under the door.
Through the OPSAT, you’ll be able to see through to the other side. You can direct the
cable’s lens using the mouse. Night, wave, and thermal vision are accessible as normal.
Press
C
to exit.
Non-Player Character–Linked Moves
Sam has several special moves that can only be performed on NPCs (non-player
characters). Getting close to an enemy without being detected is necessary to execute
these moves.
Move Body
Sam can hide dead or unconscious bodies in order to prevent them
from being discovered. Select the Body interaction to carry a body.
Press the action key to put the body down quietly, or simply press the
jump key to drop it in a hurry. You can also press
quickly and equip your weapon at the same time.
to drop the body
E
10
11
Page 7
Grabbing
Grab an NPC by sneaking up close undetected and pressing the
. In this position, you can knock the enemy out by pressing
the secondary attack key, or kill him by pressing the primary attack key.
Human Shield
While holding an enemy, you can press Eto equip your pistol and fire
at other enemies, using the enemy you are holding as a human shield.
Interrogation
Some NPCs can be interrogated for useful information. While holding an
NPC, press the to select the Interrogate interaction to make
him talk. Interrogations reveal all sorts of information that will help you
on your missions.
Corner Grab
While in the back-to-wall peeking position, Sam can quickly grab an NPC who approaches
from the opposite side, and put him in a submission hold. From this position, Sam can
interrogate the NPC (if the option is available), then dispatch him in a lethal or non-lethal
fashion.
Water Stealth Kill
While Sam is swimming adjacent to a shoreline, he can pull unsuspecting enemies from
the edge and drown them. When an enemy approaches, the Interaction icon will appear.
Press the to execute the move.
Ice Smash Kill
In certain underwater spots, Sam is able to spot enemies overhead through ice. When
the interaction icon appears, press the to punch through the ice, pull the
enemy down, and stab him in the heart.
In-Game Interface
3
4
5
4
5
1. Objective bar:
6
7
1
3
6
7
1
Displays the next goal to reach in your mission.
2. Interaction / Weapon and Gadget Selection system:
can interact with an object (weapon or gadget) or a person in the environment
(interaction). Press the to interact with the object when you see an
interaction icon on the screen. Press and hold the to choose from
multiple interactions.
3. Quick OPSAT:
A multifunction watch, the Quick OPSAT is the hub between the
Sticky Camera and the SATCOM map.
4. Trust meter:
Indicates your trust level with the NSA and JBA (for more on this,
see the Trust section).
5. Visibility indicator:
Colored indicators on the HUD show you how well-hidden
Sam is, based on visibility and how much noise he’s making. So keep out of sight,
and stay quiet!
• Solid green:
• Solid yellow:
While in the shadows, Sam is completely hidden.
Sam is lit and visible.
• Flashing green/yellow:
– Sam is still either hidden or visible (green or yellow).
– The flashing indicates danger; enemies are searching for Sam.
– If Sam moves into shadow during combat and enemies lose track of him, the
visibility indicator will turn green but flash until the enemy has finished searching.
2
2
Appears when you
12
13
Page 8

– Flashing also indicates that Sam has been partially spotted before combat,
allowing him to make a quick escape before being fully seen.
• Flashing red:
6. Selected Weapon, Gadget, Item, and Ammo:
currently selected weapon. Displays how much ammo you have in one magazine, as
well as your total ammo.
7. Regeneration icon:
health gradually regenerates and disappear once he is back at full strength.
Sam is in combat; enemies can see and fire at Sam.
Displays the name of your
This icon appears when Sam is injured. It will flash as Sam’s
Trust System
Most missions will force you to choose between supporting the priorities of the JBA or
the NSA. Depending on how you play the game, your trust level with both groups will go
up or down.
The level of trust you earn for either side will have implications, including how other
characters treat you, and what equipment and upgrades you can access.
Visually, the trust system is represented by bars that fill up or empty depending on the
group you are supporting or undermining. The game is effectively over if either of the
two bars drops to a zero value.
In-Game Pause Menu
Press the skey to access the in-game Pause menu. From here, you can navigate
the below functions. Return to the game by pressing
• Quick Save:
matter of seconds.
• Save:
• Load:
Load Game option.
• Restart Mission:
• Quick Retry:
is closest to your current progress.
• Options:
• Quit:
asked to confirm this choice.
Quickly save your current progress and be back in the game in a
Save your current game session and decide which save slot you want to use.
Load a previously saved game. You can also load your quick saves using the
Restart the current level from the beginning.
Restart from the last checkpoint reached or save game, whichever
Adjust the video and controller settings.
Quit your current game session and go back to the Main Menu. You will be
C
or
s
again.
OPSAT (Operational Satellite Uplink)
The OPSAT is a compact, wrist-mounted PDA designed
for military use. It enables Sam to receive mission
objectives and updates.
During the game, press
access the Pause/OPSAT menu. You can resume by
pressing
or ¡again.
C
to pause the game and
¡
• Objectives:
get more details on the objectives.
• Map:
• Data:
– Image
– Email
– Sound file
• Profiles:
• Equipment:
Displays the current goals for your mission. Press the to
Show a 3D map of the area of operations.
The data that you recovered in-game is displayed here, in various menus:
Displays all the information Sam has gathered on the JBA members so far.
See Sam’s current equipment.
Weapons, Gadgets, and Items
Heat/Night/Wave Vision Goggles
Since the beginning of Third Echelon’s Splinter Cell®program, operatives have been
outfitted with dual-purpose night- and heat-vision goggles – an indispensable tool for
covert infiltration operations.
• Heat Vision:
• Night Vision:
• Wave Vision:
Sam to quickly spot all electricity-using objects.
To access the inventory of weapons and gadgets, press and hold the inventory key. Use
the mouse or the directional keys to select the desired piece of equipment; release the
inventory key to confirm. Press
To switch quickly between the SC-20K and the pistol, press the inventory key quickly.
SC-20K Rifle
Click the zoom key to enter or leave Scope mode.
SC-20K Scope Mode
While in Scope mode, you can fire as normal. You can hold your breath to line up a
steadier shot by pressing and holding the secondary attack key. Sam can only hold his
breath for a limited amount of time before he must breathe again.
SC-20K Launcher
This attachment allows Sam to launch different devices, each with its own
characteristics.
The launcher can shoot three types of projectiles:
Press number key 2to activate heat vision.
Press number key 1to activate night vision.
Press number key 3to activate wave vision, a mode that allows
to equip or de-equip the selected weapon.
E
The SC-20K is Sam’s main weapon. It fires standard NATO
5.56 x 45 mm rounds. Each magazine contains 30 rounds.
Fire by pressing the primary attack key. Press once to
shoot a single round. Hold to keep firing automatically.
14
15
Page 9

Sticky Shocker
•
The Sticky Shocker releases an electrical surge when it hits its target.
•
If you shoot a Sticky Shocker into a pool of water, the water and any
NPCs in contact with it will be affected by the electricity.
Sticky Camera
•
The Sticky Camera is used for surveillance operations.
•
Once a camera is launched, the perspective will automatically switch to
that of the camera.
•
Once the camera reaches its designated target, you can control its point of view,
allowing Sam to get a better view of the surroundings.
•
The camera has zoom capabilities (control with the zoom key) and thermal, wave,
and night vision lenses.
•
Press Eto make the camera emit noise that will attract the attention of NPCs.
•
Press the jump key to make the camera release a poisonous gas. The gas will affect
any NPCs nearby and render them unconscious. Once the gas is used, the camera is
destroyed.
Airfoil Ring
•
Fires a reusable plastic disc and can knock out NPCs if fired at the head.
•
Sam can pick up used Airfoil Rings on the floor.
5-7 Pistol – OCP (Optically Channeled
Potentiator)
The 5-7 SC Pistol comes with a single-action trigger and a
suppressor. Fire a single shot by pressing the primary attack key.
OCP:
This device is connected to the 5-7. It can be used to disable electronic devices
for a short period of time. Lights, cameras, and computers can all be affected. A light
on the side of the 5-7 will indicate whether the OCP hit a proper target. A green light
indicates a successful hit while a red one indicates that the OCP had no effect on the
targeted object. Press the primary attack key to activate.
20-round magazine. It is equipped with a silencer / flash
Other Equipment
For descriptions of other equipment, see the Equipment menu in the in-game Pause menu.
Rewards
Gadgets that aid stealth will be rewarded based on successful completion of objectives in
a stealthy manner.
Gadgets are awarded at the end of the mission (mission debriefings detail newly awarded
equipment).
Hacking Gameplay
Hacking is performed directly on objects that can be hacked. Hacking allows you to
access otherwise inaccessible information.
•
The hacking interface is composed of four columns of numbers and a valid code line
of four numbers at the bottom.
•
A timer at the top gives the amount of time before the hacking attempt fails. If the
hack fails, an alarm will be triggered.
•
Two warning lights at the top indicate the number of attempts Sam can make before
failing the attempt and triggering an alarm.
•
Each column determines one of the four code elements. Sam must find the four
correct code elements to hack the system.
•
The hacking device will automatically search for the correct code. Each time it finds
a potentially valid number in one of the columns, it will freeze it. Once a column is
composed entirely of frozen numbers, it will be validated and one of the four code
elements will be validated.
•
This process might take longer than the authorized time given by the timer at the
top. You can speed up the process by manually validating a frozen number using the
highlighted cursor, which can be moved up and down and left and right in all the
columns. Select a number and press the to validate it. If it is a frozen
code element, the column is immediately validated and it appears in the code
element screen. If it was an un-frozen number the entire column is reinitialized and
a warning light is triggered.
•
When all the code elements are validated, the hack is successful.
•
You can abort a hacking attempt at any time by pressing the posture key.
•
Failing a hack attempt or aborting when the time is in the red zone will sound an alarm.
Safe-Cracking Gameplay
•
Alternately turn the combination dial from left to right to align the tumblers inside
the safe. When the tumblers are aligned, the lock is released and the safe opens.
•
To turn the dial, press the left and right directional keys. This makes the dial rotate,
driving the inner wheels – first the outermost wheel, then the one immediately next
to it, and so on until the outer wheel starts rotating.
•
When the closest wheel is about to reach the correct position, a small light will start
to flash; when it reaches the correct position this light will stay on. Release the
directional key to set the wheel where it is, then turn it in the opposite direction to
start the rotating process again until the second closest wheel is at the correct
position.
•
CAUTION: If you turn the tumblers too far in the same direction the outer wheel will
start rotating again and all progress made on the lock will be reinitialized.
•
Following the same process you must set all three wheels in position. When the last
wheel is locked into position, release the directional key – the safe opens.
16
17
Page 10

Mine Assembling Gameplay
Sam may be asked to assemble mines. The detonator must be inserted in the mine using
a mechanical arm.
•
Use the primary attack key to control the speed and vertical direction of the
mechanical arm. This allows you to place the detonator in the mine.
•
Simultaneously use the directional keys to compensate for vibration in order to place
the detonator in the very center of the mine.
Email Decrypting Gameplay
To decrypt an email, Sam must use his logic in order to decipher the code used by the
sender to protect the message. The system of protection appears as a virtual cube
divided into 24 tiles. A blue tile indicates a correct value; a red tile indicates an incorrect
value.
•
Use the primary attack key to rotate the cube on the horizontal axis and the
secondary attack key to rotate the cube on the vertical axis
•
Use the directional keys to select a specific tile.
•
Use the action key to increment the value of the code on each tile.
•
Once all the tiles are set to the right value, the cube will open and reveal its hidden
content.
Bomb Defusal Gameplay
Defusing a bomb is achieved by using a mechanical arm to remove the detonator from
its core. The explosive in the bomb is highly sensitive to heat and must be kept to a
subzero temperature. In addition, the bomb core, a vertical tube, is protected by an
array of laser beams.
•
Use the primary attack key to control the speed and vertical direction of the
mechanical arm. This allows you to grab the detonator.
•
When this is done, slowly release pressure on the primary attack key to bring the
detonator up out of the core tube; simultaneously use the directional keys to
compensate for vibration in order to avoid touching the laser beams.
•
Make sure you reach the top or cancel your operation before the temperature
reaches the critical level.
End Mission Screen
Objective Review
At the end of each mission, you will be given feedback on the objectives of the completed
mission. Each objective will be assigned one of three possible statuses: Canceled, Failed,
or Completed. This will affect your trust level.
Rewards
At the end of each mission, you will be given rewards depending on your trust level.
Make sure you get them all!
Mission Statistics
Here you can check specific statistics from your mission, including the number of kills,
civilians knocked out, alarms triggered, etc. A success score will be displayed for the
level you just finished.
MULTIPLAYER
Game Principle
The multiplayer game is based on two opposing teams of up to three players each: Spies
versus Upsilon Mercenaries. Spies must infiltrate heavily guarded buildings, hack highly
protected servers, and bring the stolen data back to their base. Upsilon Mercenaries
must spot intruders, track down and eliminate them, and keep their systems secure.
Game Modes
Versus Mode
This mode opposes two teams of three players each (up to three human Spies against up
to three human or bot Upsilon Mercenaries). A game is split in two phases: Infiltration
and Exfiltration.
SPIES USPILON FORCES
GOAL Reach the mission objectives, Protect the mission objectives and
hack them, and bring back two eliminate any intruder.
complete files to the control drone.
VICTORY Two files secured or all Mercenaries All spies killed or time limit reached
eliminated within the time limit. before two files are secured by the
Spies.
INFILTRATION Reach the objectives, hack them, Protect the objectives by preventing
and complete one file. the Spies team from hacking them.
Track the enemies and kill them.
EXFILTRATION Bring the complete file back to Retrieve the stolen file by eliminating
your control drone. the intruder before he reaches the
drop zone (control drone).
Control Drone
The Control Drone will display video guides for your first games, and is the
place to secure hacked data.
18
19
Page 11

Complete File
Only complete files brought back to the drone will be secured.
Objective Icon
There are four objectives per map, displayed as colored icons: red, yellow,
blue, and green.
Co-op Challenges Mode
Team up with 1–2 Spies to play various missions against AI Bot Mercenaries. Objectives
vary with the different challenges:
TYPE OF CHALLENGE Co-op Challenge Objectives
TRAINING COURSE
FILES RACE
MAXIMUM PERCENTAGE
25% MAX
DOUBLE AGENT
BEST AGENT
At the end of each challenge, you’ll be granted a score depending on your performance
and the results.
Good scores can be rewarded with a bronze, silver, or gold medal.
Achieving the first six challenges will allow you to unlock new challenges.
Stay tuned online for special events!
Tutorial Challenge.
Download and secure a complete file within the time limit.
Team Challenge.
files for your team within the time limit.
Team Challenge.
time limit. No need to download complete files or to secure them.
Team Challenge.
team within the time limit. Every objective will only deliver 25% of
a complete file.
Individual Challenge.
the other Spies. Download and secure two files to achieve the
mission.
Individual Challenge.
within the time limit. No need to download complete files or to
secure them. Remember: you’re competing against the other Spies.
Play a 1-on-1 game against a bot.
Download and secure as many complete
Download as much data as possible within the
Download and secure two files for your
Play against the bots and also against
Download as much data as possible
MULTIPLAYER CONTROLS
Press
to view and configure the keyboard, mouse, and pad controls.
Spy
• Contextual Actions:
• Escape Moves:
• Hacking:
• Binoculars:
Upsilon Mercenary
Contextual Actions:
actions including open the gadgets stock, use its grapnel, perform a finish move, etc.
• Snipe Mode:
• Torchlight:
• Berserk:
Gadgets and Equipment
Spy Gadgets
A spy can only carry a single gadget in his inventory. Gadgets can be swapped and
reloaded near the control drone by opening the gadgets stock.
Gadgets Stock Smoke Grenade Flash Grenade Jammer Health Needles
at any time while playing to open the in-game menu, where you will be able
s
actions, including open gadgets stock, grab a mercenary, and begin hacking.
(through windows and fake ceilings, over low walls, etc.).
Toggle your hacking unit (by default, press the left mouse button) to see
hackable items: lights, keypads, Mercenary, objectives. Press the right mouse button
(default) to begin hacking.
down to zoom in and out.
to zoom in and out.
Use the mouse wheel to reduce or increase the torchlight scope.
The Mercenary can be grabbed by the spy but he’s not defenseless; he
can perform a close-range move and stun a spy nearby, even from behind.
Depending on the context, a Spy can perform various
A spy can perform escape moves when the context allows
Press the mouse wheel to activate the binoculars and move it up or
Depending on the context, a mercenary can perform various
Press the mouse wheel to enter snipe mode then move it up or down
20
Open to
swap or
reload your
gadgets.
Throw to create a
smoke cloud and
use it as cover.
Throw to dazzle
a facing
Mercenary.
Throw to
deceive the
Mercenaries
nearby.
Use on yourself
or to heal one
of your
teammates.
21
Page 12
Spy Equipment
Night Vision Goggles
Night vision goggles amplify the ambient light, particularly emissions from the lower end
of the infrared spectrum.
Thermal Vision Goggles
Thermal vision goggles amplify the upper part of the infrared spectrum – namely heat.
This vision mode displays heat sources in red on the screen.
Spy Hacking Device
The Hacking device lets spies hack electronic devices or destroy windows and lights
using wireless communication technology. Use it to download data from servers, hack
digital locks, turn lights off, etc.
Upsilon Mercenary Gadgets
A mercenary only has a single gadget in his inventory. Flying drones and grenades can
be reloaded by opening the gadgets stock.
Gadgets Stock Drone
Open to reload your gadgets and equipment. Use a flying drone to track a spy
in inaccessible areas. The drone
has an auto destruction system to
eliminate the nearest targets.
Upsilon Mercenary Equipment
Torchlight
The torchlight can be used to peer into dark places in search of intruders.
EMF (Electromagnetic Field) Vision
Use EMF Vision to locate interference given off by electronic devices. If an object with
functioning electronics (the Spy using special vision or his hacking device for example) is
within the field of vision, it is picked up by EMF Vision and displayed in white.
Automatic Motion Captor
With Motion Captor, you can “reveal” air turbulence created by Spies or objects in
motion. Whenever a moving object is located, a frame appears around it, making it easier
to distinguish. If the object disappears from the direct field of vision, the frame gradually
disappears. AMC is always on.
Snipe Mode
You can use the sniper scope on your weapon.
Fragmentation Grenades
Use high-explosive grenades to get rid of intruders decisively.
Proximity Detector
The Upsilon gear includes a built-in proximity detector. It includes a range indicator, a
visual outlining when the spy is in sight, and a sound signal.
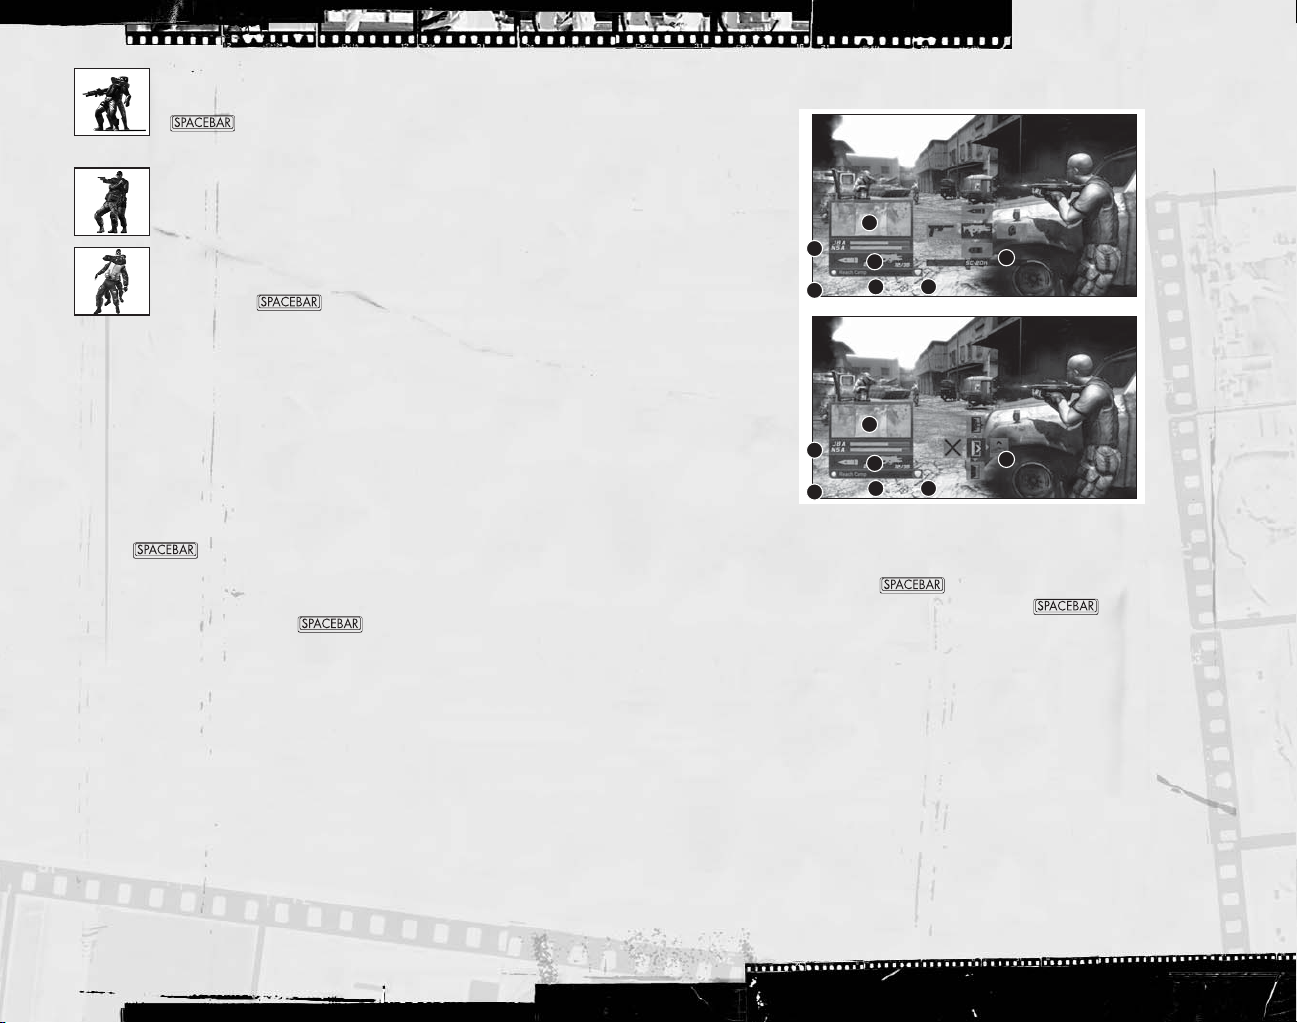
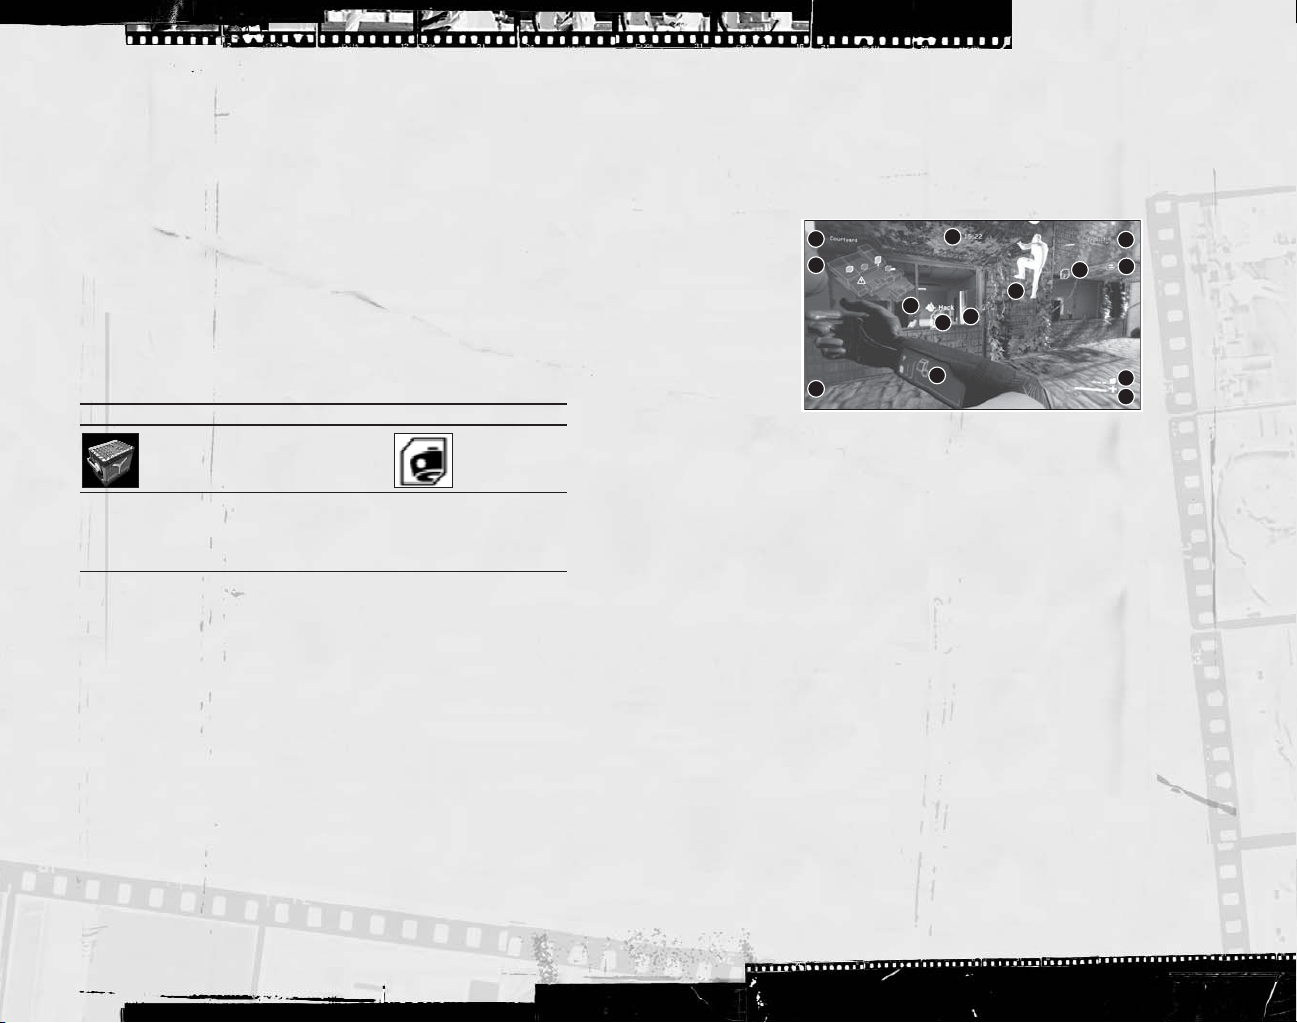
Multiplayer HUD
Spy HUD
1
2
12
1. Area name
2. Minimap:
(white points), Control Drone, ECC, etc. A hacked terminal will flicker on the map.
3. Timer:
4. Spies’ name:
5. Objectives:
6. Ghost:
7. Enhanced Reality Objectives icons:
objective and the signal strength from your position. The stronger the signal, the
faster you hack.
8. Contextual menu:
9. Hacking device:
device: action to perform, speed of download, etc.
10. Hacking device’s locked target:
feasible target at the center of the screen. The locked target is highlighted in blue.
11. Hacking device’s potential target:
Possible targets are highlighted gray.
12. Game messages:
13. Current gadget:
14. Health bar:
Press
Press
Press
Displays objectives locations (small cubes), positions of your teammates
Remaining game time.
Displays the currently hacked data for each Spy.
Displays the already secured files.
Displays the way to objectives.
Shows a possible action or move, and the corresponding button.
When a spy uses his hacking device, he sees information on his
Displays various game hints.
Displays the current gadget and remaining units.
Player’s remaining health.
to open the Strategic Map, which displays the current game status and level map.
¡
through •to customize your HUD.
∞
to access the game options.
s
3
7
8
10
9
The hacking device automatically locks the closest
6
11
Display the relative position of each
Possible target for the hacking device.
4
5
13
14
22
23
Page 13
Upsilon Mercenary HUD
1
2
9
1. Area name
2. Minimap:
Displays objectives locations (small cubes), positions of your teammates
(white points), ECC, etc. A hacked terminal will flicker on the map.
3. Timer:
4. Spies’ name:
5. Objectives:
6. Reticle:
Remaining game time.
Displays the currently hacked data for each spy.
Displays the already secured files.
Displays weapon precision, obstacle proximity.
7. Grenades ammunition:
8. Automatic Motion Captor:
9. Game messages:
10. Proximity radar:
Displays various game hints.
Detects the Spies in proximity. The closer a spy is, the faster
the frequency of the sounds. Displays three different ranges: (10 meter, 7.5 meter,
and 5 meter).
11. Current gadget:
Press
to open the Strategic Map, which displays the current game status and level map.
¡
Press
Press
through •to customize your HUD.
∞
to access the game options.
s
Displays the current gadget and remaining units.
3
6
7
10
8
Remaining grenades in your weapon.
Outlines Spy when in sight.
4
5
11
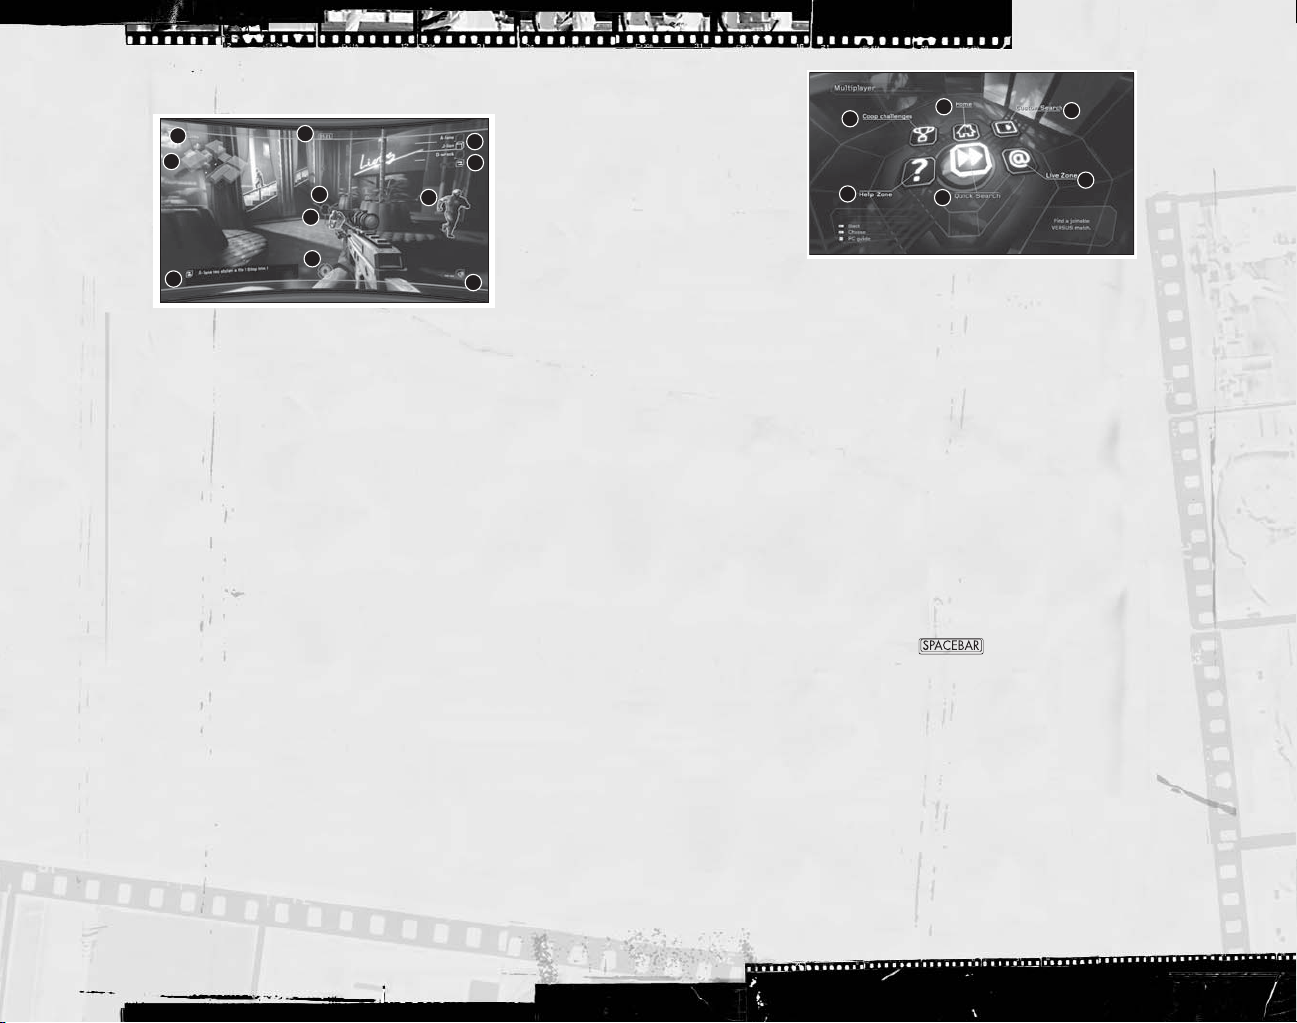
1. Home:
Options and characteristics that relate to your profile.
• Progression:
5
4
1
2
Advancement in your game. Your rank, your capacities,
3
6
your statistics.
• Bonus:
• Profile Management:
2. Quick Search:
3. Custom Search:
Unlocked bonuses.
Switch, create, or delete profiles.
Join the first game available.
Set your preferences (map and character choice) and
join/create a corresponding game session.
4. Co-op Challenges:
5. Help Zone:
6. Live Zone:
List of available challenges.
See help videos and tips.
Browse the latest news about Splinter Cell Double Agent Multiplayer.
Also manage your friend list.
NOTE:
Tutorial Co-op Challenges are the best way for new players to discover the game.
Player or Ranked Matches
Splinter Cell Double Agent Multiplayer includes Player or Ranked matches.
In the Multiplayer menu, press the to switch from Player matches to Ranked
matches. Ranked matches will impact your statistics and ranking.
Multiplayer Menu
NOTE:
Throughout the multiplayer menus, press Enter or left mouse button to validate
your choice,
n
or right mouse button to go back to the previous menu or
cancel an action. You will be asked to create a profile the first time you launch the
multiplayer game. Just type in the name you wish to use and confirm.
To play against or with gamers from all over the world select:
• Play Online:
• Play on LAN:
To play via the Internet using the DemonWare game service.
To play over a Local Area Network.
24
25
Page 14

Game Lobby
From the lobby, you see each player’s status: Connected, Ready, or Waiting. Every player
slot is represented by a cube. A blue/orange cube is an occupied slot. Select it and
validate to compare your game statistics with your opponent’s.
The Teams
The three cubes on the left of the screen are the Spies team.
The three cubes on the right are the Upsilon team.
Setting Up for Online Play
After selecting Play Online, enter your Ubisoft®account name, password, and Online Key,
then click on Confirm to get connected.
Click on Create a New Account if you don’t have a Ubisoft account yet. This will launch
and direct your Internet browser to the appropriate page.
NOTE:
Select the Save Password option if you want the game to remember your
password. Validate the Auto-login option to automatically log in to the game using your
Ubisoft account. These options can be found in the Profile Management menu.
From the Profile page, you can also consult the recent players list and your friend list.
To add a player with whom you played recently, access the recent players menu. Select
the player on the left part of the screen and select Send Invitation on the right part.
To join a friend, access your friend list menu, select a player on the left part of the
screen and select Join on the right part.
While in the lobby, use your friend list to send an invitation (to join your game) to one of
your friends. While inside a game session, press the
menu; from there, you will be able to manage your friend list and recent player list as well.
IMPORTANT NOTE:
using a firewall on your computer. Here are the ports you’ll have to open in order to
play (consult your firewall documentation):
[UDP] 8888 and 8889
[UDP] 3074
[TCP] 3074
The first two ports can be configured via the default.ini file.
You may encounter difficulties connecting to DemonWare if you’re
key to access the in-game
s
26
27
Page 15

Tom Clancy’s Splinter Cell Double Agent
™
Proof-of-Purchase
© 2006 Ubisoft Entertainment. All Rights Reserved. Splinter Cell, Splinter Cell Double Agent, Sam Fisher, the Soldier
Icon, Ubisoft, Ubi.com, and the Ubisoft logo are trademarks of Ubisoft Entertainment in the U.S. and/or other
countries. Uses Bink Video. ©1997–2006 by RAD Game Tools, Inc. This game incorporates technology of Massive
Incorporated (“Massive”) that enables certain in-game objects (e.g., advertising) to be temporarily uploaded to your
pc or console and replaced in-game while connected online. As part of that process, no personally identifiable
information about you is collected and only select non-personally identifiable information is temporarily logged. No
logged information is used to determine any personally identifiable information about you. For full details see
http://www.massiveincorporated.com/privacy.htm.
28
Page 16

It’s not just a game.
Read the explosive
books based on Ubisoft’s
bestselling video game series,
Tom Clancy’s Splinter Cell
He is sharp, nearly
invisible, and deadly. He
has the right to spy, steal,
destroy, and assassinate to
protect American
freedoms. His name is Sam
Fisher. He is a Splinter Cell.
Sam Fisher works alone.
But he fights for us all.
®
®
.
The Prima Games logo is a registered trademark of
Random House, Inc., registered in the United States
and other countries. Primagames.com is a
registered trademark of Random House, Inc.,
registered in the United States.
Also available:
Tom Clancy’s Splinter Cell
Tom Clancy’s Splinter Cell:
Operation Barracuda
Available
November 7, 2006
Available wherever books are sold or at penguin.com
DAVID MICHAELS
WRITTEN BY
and
 Loading...