

Page 1
Page 2

Installation Installation
MINIMUM SYSTEM REQUIREMENTS
Please ensure that your computer meets the minimum system requirements of this game which
are specified below and on the packaging.
Operating system: Windows® 2000/XP•
CPU: Intel Pentium 4® 2.2 GHz or equivalent processor•
RAM: 512 MB or better•
Graphics card: Direct 3D-compatible with a minimum of 64 MB Video RAM and at least •
compatible with Pixel Shader 1.1
Hard disk space: at least 3.5 GB free•
DVD-ROM drive 4X speed•
Sound card: DirectX® 9.0c compatible•
DirectX® 9.0c•
Network: TCP/IP compatible•
Internet: Broadband Internet Connection required•
Mouse and keyboard•
INSTALLATION
Start Windows®.1.
Close all programs and applications which are running in the background (including virus 2.
scanners).
In order to install 1701 A.D. on your computer, insert the DVD into the DVD-ROM disk 3.
drive and wait until the Autostart menu appears.
Note: If the Autostart menu does not appear automatically, click on the START button in 4.
the Windows® taskbar and select RUN. Enter “D:\1701.exe” in the dialog box and then
click on OK. e Autostart menu appears. If your DVD-ROM disk drive should have a
different drive letter than “D”, please change the letter in the dialog box accordingly.
en click on INSTALL and subsequently – after you have read the general installation 5.
information – on CONTINUE.
If you have not yet installed DirectX® 9.0c, the installation program automatically requests 6.
you to install DirectX® 9.0c. Please hereby follow the instructions on the screen and subsequently restart the computer.
e latest DirectX® version or at least DirectX® 9.0c must be installed on your PC in order to
guarantee the fault-free functioning of 1701 A.D.
You can find further information on DirectX® on the official website at http://www.microsoft.
com/directx.
UNINSTALLATION/REINSTALLATION OF THE GAME
If problems occur during playing, the game was not installed correctly or if you just want to
uninstall 1701 A.D., click on START in the Windows® taskbar and select UNINSTALL in the
1701 A.D. program directory in order to correctly uninstall the game.
Proceed according to the instructions in the Installation section in order to reinstall the game
after it has been uninstalled.
PLAYING
Close down all open programs and background applications (including virus scanners).1.
Insert the 1701A.D. game DVD in your DVD-ROM drive. e Autostart menu 2.
should appear. Click here on PLAY and set sail.
If this is your first time playing 1701A.D., enter the serial number which can be found on 3.
the back page of this manual and set sail.
NOTE: If the Autostart menu does not start automatically, you can access 1701 A.D. either via
the Windows® “Start Menu”(default is: START/Programs/1701 A.D.).
NOTE: e original game DVD must be inserted in your DVD-ROM disk drive while you
are playing 1701 A.D.
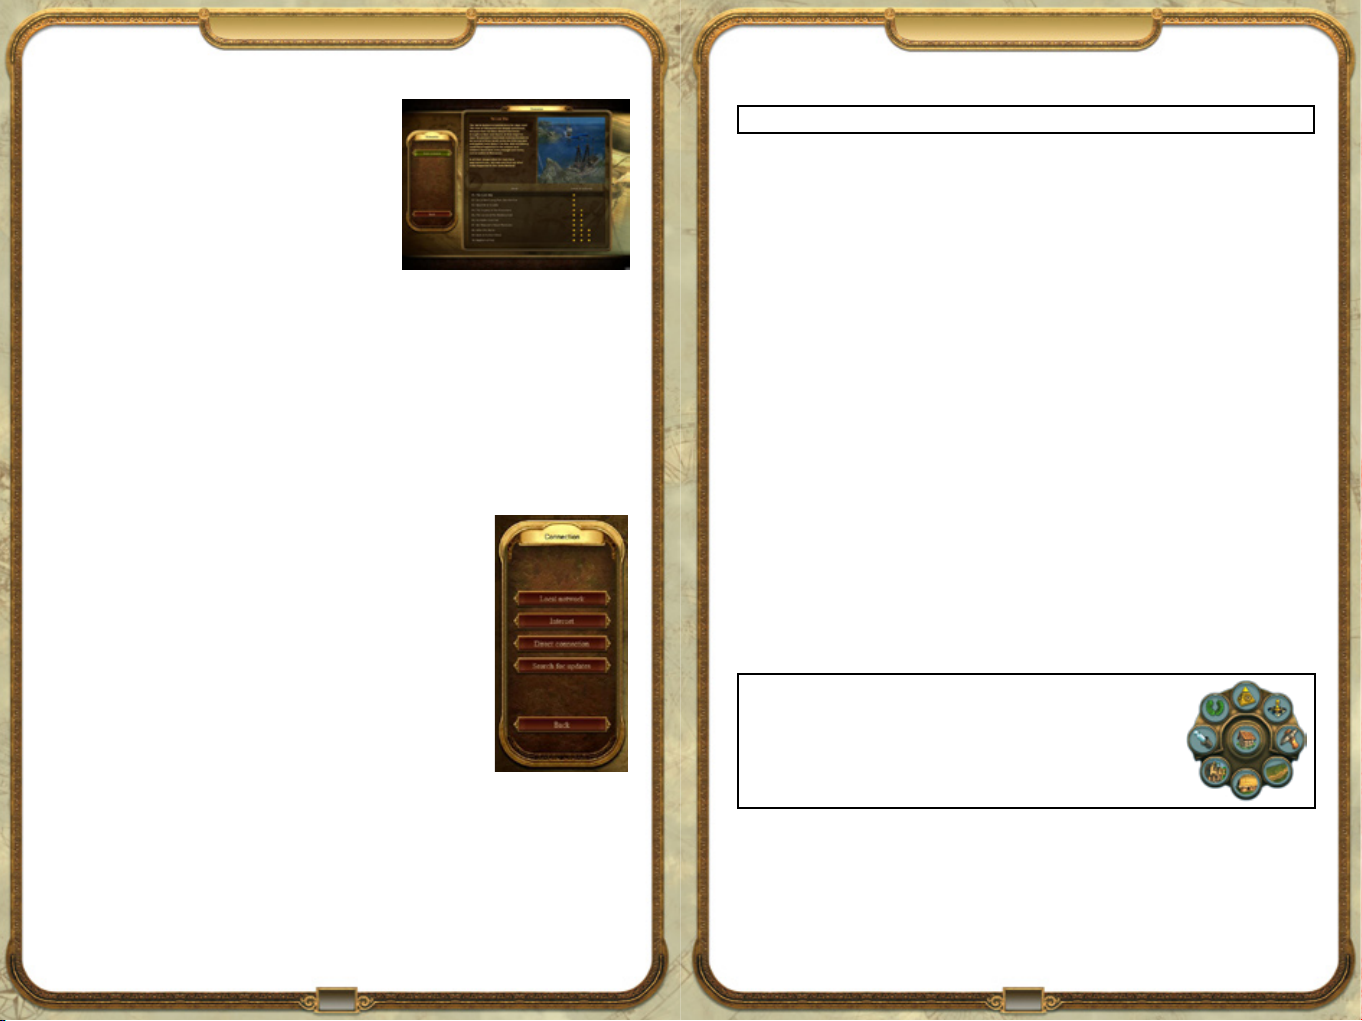
NOTE: To install 1701 A.D. e Sunken Dragon, follow the same installation instructions
while using e Sunken Dragon DVD-ROM.
WHAT IS DirectX®?
DirectX® is an integral part of Windows® 2000 and XP which enables Windows® to access
certain interfaces of your PC very quickly and thus allows newer games to be run optimally. New
technologies such as the latest 3D-graphic cards are also optimally supported by DirectX®.
Page 3
Contents Contents
Introduction.. . .. . .. .. .. .. . .. .. .. .. . .. .. .. .. . .. .. .. .. . .. .. .. . .. .. .. 7
1. ANNOpedia. . .. .. .. .. .. . .. .. .. .. . .. .. .. . .. .. .. .. . .. .. .. .. . .. .. . 8
2. Game Screen.. . .. . .. .. .. .. . .. .. .. .. . .. .. .. .. . .. .. .. . .. .. .. .. . .. . 8
3. THE MENUS .. .. .. .. .. . .. .. .. .. . .. .. .. .. . .. .. .. .. . .. .. .. . .. .. . 9
3.1 Creating a profile . . .. .. .. .. . .. .. .. . .. .. .. .. . .. .. .. .. . .. .. .. . 9
3.2 Start menu . . .. .. .. .. .. . .. .. .. .. . .. .. .. . .. .. .. .. . .. .. .. .. . .. . 9
3.3 Profile management... .. .. .. .. .. . .. .. .. .. . .. .. .. .. . .. .. .. . .. 9
3.4 Options .. . .. .. .. . .. .. .. .. . .. .. .. .. . .. .. .. .. . .. .. .. .. . .. .. .. . 10
Graphics . . .. .. .. .. . .. .. .. . .. .. .. .. . .. .. .. .. . .. .. .. .. . .. .. .. . 10
Sound . . .. .. .. . .. .. .. .. . .. .. .. .. . .. .. .. .. . .. .. .. . .. .. .. .. . .. 10
Interface .. . .. . .. .. .. .. . .. .. .. . .. .. .. .. . .. .. .. .. . .. .. .. .. . .. . 10
Keyboard layout . . .. . .. .. .. .. . .. .. .. .. . .. .. .. . .. .. .. .. . .. .. . 10
High score list .. . .. . .. .. .. .. . .. .. .. .. . .. .. .. .. . .. .. .. .. . .. .. . 10
Credits.. . .. . . .. . .. . .. .. .. .. . .. .. .. .. . .. .. .. .. . .. .. .. . .. .. .. . 10
4. GAME MODES . . .. .. .. .. . .. .. .. . .. .. .. .. . .. .. .. .. . .. .. .. .. . .. 11
4.1 Introduction .. . .. .. .. . .. .. .. .. . .. .. .. .. . .. .. .. .. . .. .. .. . .. .. 11
4.2 Single player . . .. .. .. . .. .. .. .. . .. .. .. . .. .. .. .. . .. .. .. .. . .. .. . 11
Continuous play .. .. .. . .. .. .. .. . .. .. .. . .. .. .. .. . .. .. .. .. . .. . 11
Scenarios . . .. .. . .. .. .. .. . .. .. .. . .. .. .. .. . .. .. .. .. . .. .. .. .. . .. 12
Playground . .. .. . .. .. .. .. . .. .. .. .. . .. .. .. . .. .. .. .. . .. .. .. .. . 12
4.3 Multi-player mode .. .. .. .. .. . .. .. .. .. . .. .. .. . .. .. .. .. . .. .. .. 12
5. OPERATION .. . .. .. .. . .. .. .. .. . .. .. .. . .. .. .. .. . .. .. .. .. . .. .. .. 13
5.1 Game screen .. .. .. .. .. .. . .. .. .. .. . .. .. .. .. . .. .. .. . .. .. .. .. . . 13
5.2 Keyboard layout . . .. .. .. .. . .. .. .. .. . .. .. .. .. . .. .. .. .. . .. .. .. 14
Changeable key commands . . .. . .. .. .. .. . .. .. .. .. . .. .. .. .. . . 14
Permanent key commands . . .. .. . .. .. .. .. . .. .. .. .. . .. .. .. .. . 14
6. DISCOVERING . . .. .. .. . .. .. .. .. . .. .. .. .. . .. .. .. .. . .. .. .. . .. .. 15
7. POPULATING . .. .. .. .. .. . .. .. .. . .. .. .. .. . .. .. .. .. . .. .. .. .. . .. 15
7.1 First steps .. .. . .. .. .. .. . .. .. .. .. . .. .. .. .. . .. .. .. .. . .. .. .. . .. . 15
7.2 Population level .. . .. .. .. .. . .. .. .. .. . .. .. .. .. . .. .. .. .. . .. .. .. 16
7.3 Inhabitants’ requirements .. .. .. . .. .. .. .. . .. .. .. .. . .. .. .. . .. . 16
7.4 Civilization levels . .. .. .. . .. .. .. .. . .. .. .. .. . .. .. .. .. . .. .. .. .. 16
Table: Civilization Levels........ . .. .. .. .. . .. .. .. .. . .. .. .. .. . .. 17
7.5 Taxes .. . .. . .. .. .. .. . .. .. .. .. . .. .. .. . .. .. .. .. . .. .. .. .. . .. .. .. .17
8. BUILDINGS .. . .. . .. .. .. .. . .. .. .. .. . .. .. .. .. . .. .. .. .. . .. .. .. . .. 18
8.1 Constructing buildings . .. .. . .. .. .. .. . .. .. .. .. . .. .. .. .. . .. .. . 18
Effective area . .. .. .. .. .. . .. .. .. .. . .. .. .. . .. .. .. .. . .. .. .. .. . .. 18
Building costs .. .. . .. .. .. .. . .. .. .. .. . .. .. .. .. . .. .. .. .. . .. .. .. 18
Operating costs .. . .. .. . .. .. .. .. . .. .. .. . .. .. .. .. . .. .. .. .. . .. . 19
Activation . . .. .. . .. .. .. .. . .. .. .. .. . .. .. .. .. . .. .. .. .. . .. .. .. . . 19
Alignment . . .. .. . .. .. .. .. . .. .. .. .. . .. .. .. . .. .. .. .. . .. .. .. .. . 19
Enhancing .. . .. .. .. .. . .. .. .. .. . .. .. .. .. . .. .. .. .. . .. .. .. . .. .. 19
Demolishing .. .. .. .. .. .. . .. .. .. .. . .. .. .. .. . .. .. .. . .. .. .. .. . . 19
Closing down .. . .. .. . .. .. .. . .. .. .. .. . .. .. .. .. . .. .. .. .. . .. .. . 20
Workload .. . .. .. .. . .. .. .. .. . .. .. .. .. . .. .. .. .. . .. .. .. . .. .. .. . 20
8.2 Building types . .. .. .. .. . .. .. .. .. . .. .. .. .. . .. .. .. .. . .. .. .. .. . 20
Roads and paths . .. .. .. . .. .. .. .. . .. .. .. .. . .. .. .. .. . .. .. .. .. . 20
Public buildings . . .. .. .. .. . .. .. .. .. . .. .. .. . .. .. .. .. . .. .. .. .. . 21
Market buildings . . .. .. .. . .. .. .. . .. .. .. .. . .. .. .. .. . .. .. .. .. . . 21
Production buildings . . .. .. .. .. . .. .. .. . .. .. .. .. . .. .. .. .. . .. .. 21
Research buildings .. .. .. . .. .. .. .. . .. .. .. .. . .. .. .. . .. .. .. .. . . 21
Further building types . .. .. .. .. .. . .. .. .. .. . .. .. .. . .. .. .. .. . . 21
9. SHIPS . . .. . .. .. .. .. . .. .. .. .. . .. .. .. .. . .. .. .. . .. .. .. .. . .. .. .. .. . . 22
9.1 Building and repairing ships . . .. .. .. . .. .. .. . .. .. .. .. . .. .. .. . 22
9.2 Ship’s actions . .. .. .. .. . .. .. .. .. . .. .. .. .. . .. .. .. .. . .. .. .. .. . .. 22
Moving .. .. .. . .. .. .. .. . .. .. .. .. . .. .. .. . .. .. .. .. . .. .. .. .. . .. . 22
Loading or unloading of goods or troops .. . .. .. .. .. . .. .. .. .. 22
Grouping .. .. . .. .. .. .. . .. .. .. .. . .. .. .. .. . .. .. .. .. . .. .. .. . .. . 23
Attacking . . .. .. .. .. . .. .. .. .. . .. .. .. . .. .. .. .. . .. .. .. .. . .. .. .. 24
Escorting . . .. .. .. . .. .. .. .. . .. .. .. .. . .. .. .. . .. .. .. .. . .. .. .. .. 24
9.3 Ship types . .. . .. .. .. .. . .. .. .. .. . .. .. .. . .. .. .. .. . .. .. .. .. . .. .. 24
10. TRADING . .. .. .. .. . .. .. .. .. . .. .. .. . .. .. .. .. . .. .. .. .. . .. .. .. .. 25
10.1 Discovering trade partners .. .. . .. .. .. .. . .. .. .. .. . .. .. .. .. . 25
10.2 Passive trading . . .. .. . .. .. .. .. . .. .. .. . .. .. .. .. . .. .. .. .. . .. . 25
10.3 Active trading . . .. . .. .. .. .. . .. .. .. . .. .. .. .. . .. .. .. .. . .. .. . 25
10.4 Trading routes .. . .. .. .. . .. .. .. . .. .. .. .. . .. .. .. .. . .. .. .. .. . 26
10.5 e courier ship .. . .. .. .. .. . .. .. .. . .. .. .. .. . .. .. .. .. . .. .. . 27
10.6 Balance .. .. . .. .. .. . .. .. .. .. . .. .. .. .. . .. .. .. .. . .. .. .. .. . .. . 27
11. DIPLOMACY . . .. .. .. .. .. . .. .. .. . .. .. .. .. . .. .. .. .. . .. .. .. .. . .. 28
11.1 Diplomacy screen . .. .. . .. .. .. .. . .. .. .. . .. .. .. .. . .. .. .. .. . 28
11.2 Contracts . .. .. .. . .. .. .. .. . .. .. .. .. . .. .. .. . .. .. .. .. . .. .. .. . 28
Peace treaty... . .. .. .. .. . .. .. .. . .. .. .. .. . .. .. .. .. . .. .. .. .. . .28
Trade agreement .. .. . .. .. .. . .. .. .. .. . .. .. .. .. . .. .. .. .. . .. . 29
Alliance pact . . .. . .. .. .. .. . .. .. .. . .. .. .. .. . .. .. .. .. . .. .. .. . 29
Declaration of war . .. .. . .. .. .. . .. .. .. .. . .. .. .. .. . .. .. .. .. . 29
11.3 Tribute .. . .. .. .. . .. .. .. . .. .. .. .. . .. .. .. .. . .. .. .. .. . .. .. .. . 29
11.4 Foreign cultures .. . .. .. . .. .. .. . .. .. .. .. . .. .. .. .. . .. .. .. .. . 30
11.5 Fraternization .. . .. .. . .. .. .. .. . .. .. .. .. . .. .. .. .. . .. .. .. . .. . 30
11.6 e pirates . . .. .. .. . .. .. .. .. . .. .. .. .. . .. .. .. .. . .. .. .. . .. .. . 30
11.7 Secret diplomacy . .. . .. .. .. .. . .. .. .. .. . .. .. .. .. . .. .. .. . .. .30
12. RESEARCH . . .. .. .. .. .. . .. .. .. . .. .. .. .. . .. .. .. .. . .. .. .. .. . .. .. 31
Page 4
13. BATTLE .. .. .. .. .. . .. .. .. .. . .. .. .. . .. .. .. .. . .. .. .. .. . .. .. .. .. . 31
13.1 Controlling troops . . .. .. .. . .. .. .. .. . .. .. .. . .. .. .. .. . .. .. .. 31
Training troops . . .. .. .. . .. .. .. .. . .. .. .. . .. .. .. .. . .. .. .. .. . 31
Moving troops . . .. .. .. . .. .. .. .. . .. .. .. .. . .. .. .. . .. .. .. .. . . 32
Starting an attack .. . .. .. .. .. . .. .. .. .. . .. .. .. .. . .. .. .. . .. .. 32
14. EVENTS .. .. . .. .. .. .. . .. .. .. .. . .. .. .. .. . .. .. .. .. . .. .. .. . .. .. .. 33
14.1 Guests of honor . .. .. .. .. . .. .. .. .. . .. .. .. .. . .. .. .. .. . .. .. 33
14.2 Disasters.. . .. . .. .. .. .. . .. .. .. . .. .. .. .. . .. .. .. .. . .. .. .. .. . . 33
1701 A.D. THE SUNKEN DRAGON MANUAL.. .. .. .. . .. .. .. . 34
Technical Support.. . .. .. . .. .. .. .. . .. .. .. . .. .. .. .. . .. .. .. .. . .. .47
Credits.. . .. . .. .. .. .. . .. .. .. .. . .. .. .. .. . .. .. .. . .. .. .. .. . .. .. .. . 48
Software License.. . .. .. . .. .. .. .. . .. .. .. . .. .. .. .. . .. .. .. .. . .. .. 52
Copyrights. . .. .. .. .. . .. .. .. .. . .. .. .. .. . .. .. .. .. . .. .. .. . .. .. .. .59
IntroductionContents
1701 A.D.
It was a glorious time for discoverers and conquerors in the days when
the power of a nation was dependant on a mighty fleet of ships and
the glory of a queen was proportionate to the extent and continuous
expansion of her sovereign territory. Back then, a handful of brave
seafaring men raised anchor and set sail – underway to transcend the
boundaries or their known horizons and discover new worlds.
Some may have branded these intrepid explorers as fools, but with a
trusty ship and a Queen’s blessing they confounded all sceptics with
noble dreams of freedom, prosperity and immortality. ey followed the
westerly winds and sailed with the dolphins until they finally reached
fertile land. Many busy hands set to work immediately and founded a
profitable and large settlement – from almost nothing. ey dedicated
all their commitments and hopes to the founding of new colonies, boldly
confounding all adversities and set-backs in order to create a new home
in far-away lands and to prove all doubters wrong.
e adventurers finally created a new and influential colony in the New
World hallmarked by profitable trade, wise diplomatic maneuvering
and continual attention to the needs of the people.
It wasn’t easy, and it wasn’t always safe, but to those who lived by the
spirit of discovery and the will of progress, it was most certainly worth
it.
is is their story …
7
Page 5
8
9
ANNOpedia e Menus
1. ANNOpedia
You can reference the ANNOpedia in game help function for comprehensive information in
addition to this handbook. is can be accessed at all times via the game menu (open with
the Esc key) or even quicker via the F1 key. Everything you’ll ever need to know about 1701
A.D., can be found here.
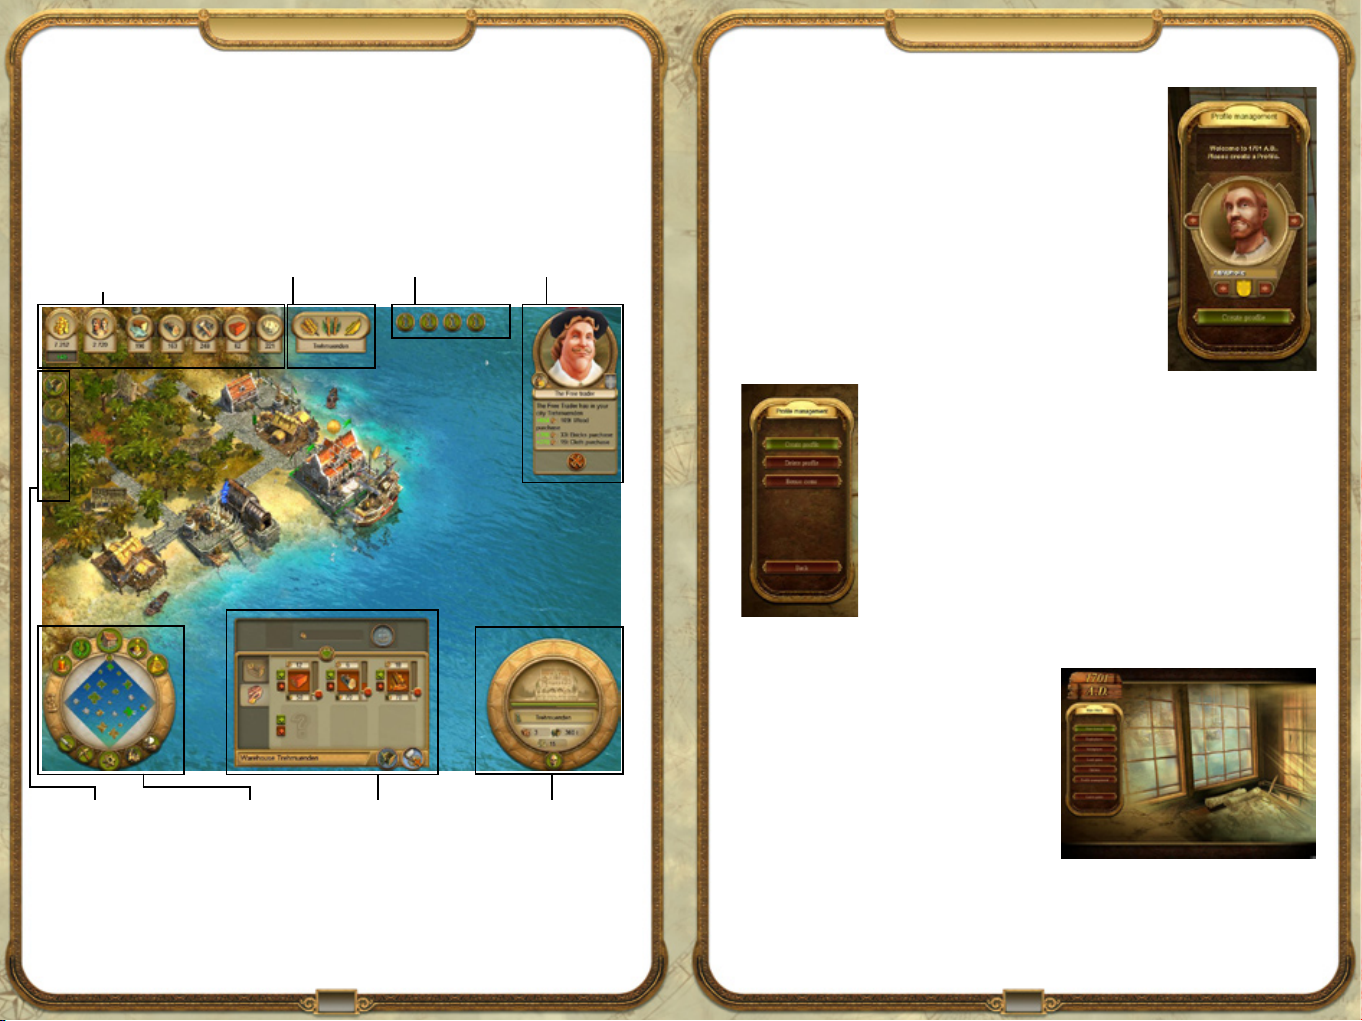
2. Game Screen
is is a short overview of the main elements of the game screen for those of you who can’t wait.
e Info bar
informs you about your
account, the number of
inhabitants and the stocks
in the settlement’s stores.
e Fertility display
tells you which plants
and raw materials you
can harvest on this island.
e Direct help function
shows you an introduction to the functions
currently being used.
e other players can
interact with you via the
Portrait window.
3. THE MENUS
Before you start your adventure in the 1701 A.D. world, you should
take the opportunity to adapt the game to your desired graphic
display and to configure the operation.
Note: Your PC will be analyzed when the game is first started and
a corresponding graphic profile will be created automatically by the
program.
3.1 Creating a Profile
When you play 1701 A.D. for the first time, you will be asked to
create a player profile. To do this, please select the portrait and colour
with which you want to appear in the game and enter your player
name. From then on the Start Menu will be shown first whenever
you start the game.
3.2 Start Menu
Once this menu is displayed you can Start the introduction in order to
familiarise yourself with the game or start a game straight away in Single
player or Multiplayer mode. More information on this can be found in
the Game modes chapter.
In addition to this, you can also continue a game you have saved via the
Load game dialog and create a new player profile via Profile Management. e menu option Leave game brings you back to your Windows®
desktop.
e News Bar reports
on current developments
in the 1701 A.D. game
world.
e Central Button Area
contains the minimap
and access to the Building
and Diplomacy menus,
Strategic map, Research
menu, Special actions,
Options menu and
Logbook.
e Object menu shows
information on selected
objects. Here you can
start actions such as
building and passive
trading.
e Preview window
informs you on the
currently selected object.
You can also control
troops here.
3.3 Profile Management
You can create a new game character and give it a
player portrait in Profile management. Your actions
will be announced to the other player in the multiplayer mode via this portrait.
e ANNOholic profile is the default setting.
Click on the Create profile button and enter a
new name. Eight different player colours are available with which your settlements and units are
depicted in the game. You confirm your selection
with a click on Create profile. You can also Delete
a Profile here.
Page 6

10
11
e Menus Game Modes
3.4 Options
You can adjust the game using many settings to match the power and specific features of your
computer via Options. In addition to this you can adapt the control of the building process
and the behaviour of the camera.
Graphics
e game graphics can be set to the levels Low, Medium, High and Very High. You can also
individually adjust the various graphic options. Please confirm your selection with OK.
Note: e setting options available can vary from this table depending on the system configuration of your PC.
Sound
Here you can influence the volume in general and continuously adjust the sound settings for
the subsections of the overall sound backdrop.
Interface
You can adjust the displays and the operation to match your personal preferences.
Here you can additionally switch on or off (or reset) the Direct help function, continuously
adjust the Scroll speed and set the Autosave interval so automatic saving happens every 60
or 30 minutes or not at all.
Tip: If you prefer the traditional control for building, as was used in both previous versions, switch the
Simplified Building option off.
Tip: Activating the right-click menu makes an effective method of accessing the most important menus
and building options in 1701 A.D. available to you.
Keyboard layout
Here you can adapt the changeable keyboard layouts to suit your personal preferences. An
overview of the changeable and non-changeable keyboard layouts can be found in Chapter 5
Operation.
High score list
e high score list contains all the points that you have scored with your profile up to date. All
medals already won are also displayed next to the players’ names.
4. GAME MODES
1701 A.D. features a single player mode with a number of variations. Additionally you can
explore the 1701 A.D. world together with other 1701 A.D. players and measure yourself
against them in the multiplayer mode via a LAN or the Internet.
4.1 Introduction
e four tutorial modules introduce the game principle, the operation and the most important
game elements. It is highly recommended to complete all four tutorials before beginning the
game.
When you have completed the introduction, you can select the Practice game option in the
next menu. e introductory map is kept open for you in a Practice game. e goals of the
introduction are defined as game goals and you can choose your own path to accomplish
them.
Note: In addition to the introductory game, 1701 A.D. also features the DIRECT HELP
feature in the normal game. A corresponding icon appears at the top of the screen for every
new action and a text window is opened when this icon is left-clicked. You can activate or
deactivate Direct Help in the Interface options.
4.2 Single player
e Single player mode in 1701 A.D. features the Continuous play mode which really is at the
core of 1701 A.D. Whilst the adventure comes to an end sometime in the other game modes,
the continuous play mode offers unlimited playing fun. Alternatively 1701 A.D. offers
you ready-made scenarios in which you can experience a story and face various challenges in order to give the adventure a happy end.
Continuous play
You can create games that suit your taste in the Start Menu of the
Continuous play mode. From the size of the game map to the level of
Start capital, and the degree of difficulty to the conditions for victory
– here you can determine in detail how you want to experience your
1701 A.D. game.
Note: Medals are rewards which you get when you reach certain game targets. You can win bronze,
silver or gold medals according to the level of difficulty of the game.
Credits
is menu displays the names of the people who were involved in developing this game.
Page 7
12
13
Game Modes Operation
Scenarios
e Scenarios present you with special tasks in the
1701 A.D. world. e game procedure is similar to
the Continuous play mode, but the game world and
assigned mission Scenario are predefined in the form of
a story. Each Scenario has a prescribed end and is linked
to a points award that is defined according to certain
criteria. e goal is therefore to successfully complete the
Scenario with the highest amount of points.
Select a Scenario from the list at the bottom of the screen; a description of the tasks is shown
in the upper half of the screen. e stars next to the Scenarios indicate the degree of difficulty
with which this Scenario is rated.
Playground
e Playground mode allows you to build up your settlement as you wish without having to
consider pirates, subjects and other subtleties. Build a town according to your own taste. You
are provided with an island and all building options are open to you right from the beginning.
No queen will discipline you if your castle is just a bit too magnificent and no subject will
demonstrate if you don’t want to build a weaving mill.
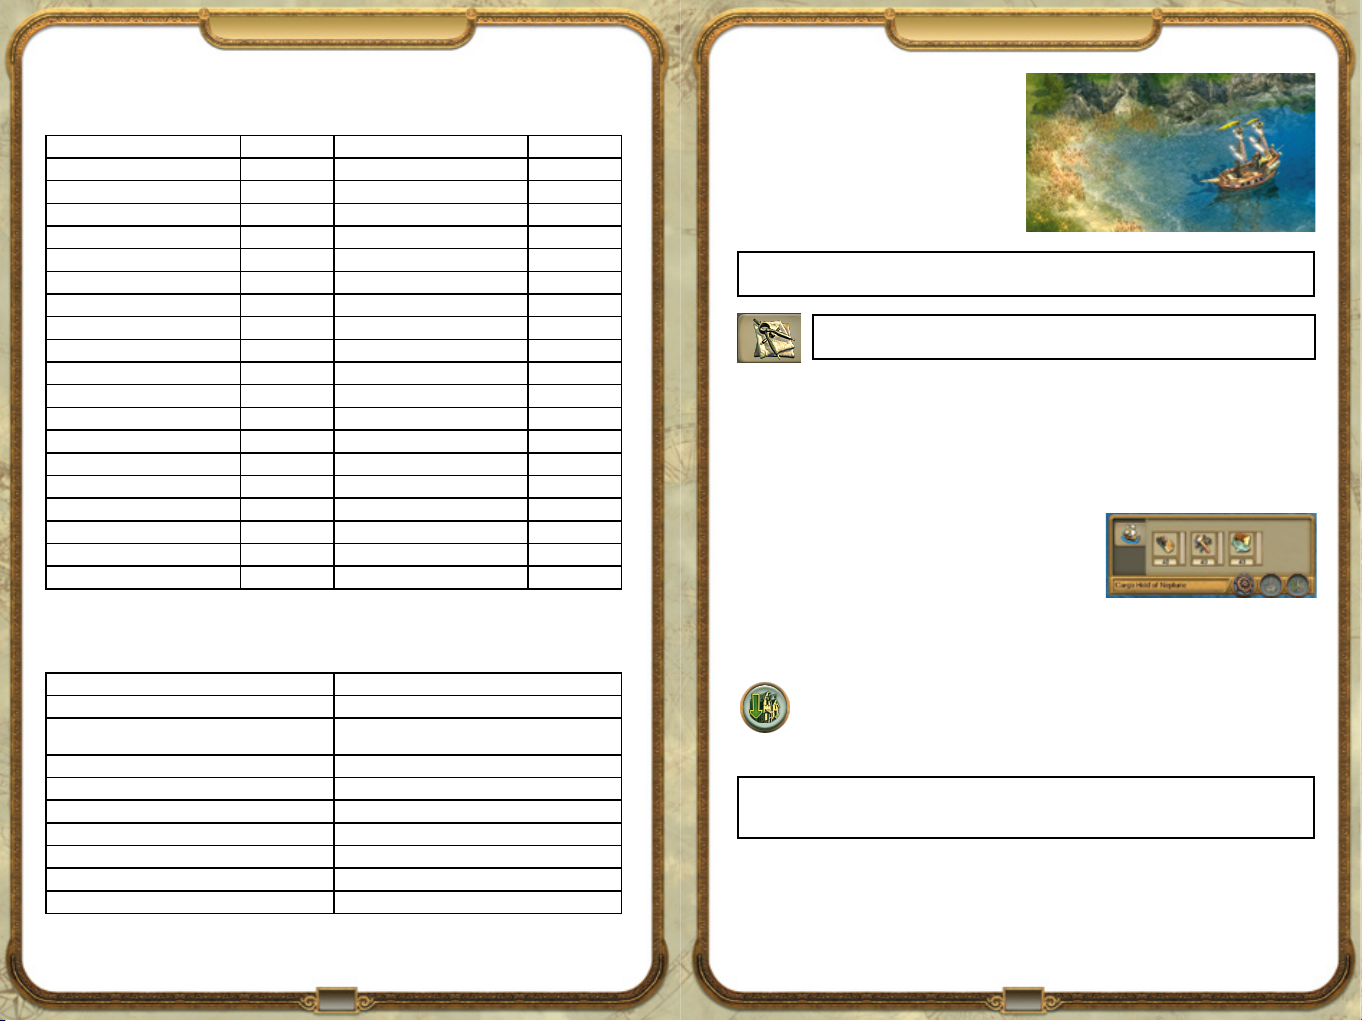
4.3 Multi-player mode
Up to four players can simultaneously immerse themselves in a world of
discovery and conquest in 1701 A.D.’s Multi-player mode. You can start
a multi-player game in three ways:
All players who are connected via a network can play with or •
against each other via the Local Network option.
If you select the • Internet option, you will be linked to the
GameSpy® Network which will connect you with other 1701 A.D.
game enthusiasts anywhere in the world.
Last but not least you can make contact with other players with a •
Direct connection via an Internet connection. In order to do this,
you will need the IP address of the server on which you want to
play.
Just as in the Single player game, settings are possible in Multi-player mode for regulating victory
conditions, the game world and computer opponents. In addition to the random maps, and
special Multi-player maps, there is also a cooperative mode in which you can build up a settlement
together with a fellow player.
NOTE: One DVD per PC with its own respective serial number is required for Multi-player games.
5. Operation
Once you have decided on a game mode, adjusted your personal settings and started a game,
1701 A.D. can be almost completely operated with a mouse and available shortcuts for many
commands and menus.
You can open all menus, select and build all buildings and mark all units with your left mouse
button. You can also select several units or ships in one go by keeping the left mouse button
depressed and dragging a frame around the desired group.
Clicking back into the game or pressing the Escape button closes all menus. If no menus are
open, the game options are displayed when the Escape key is pressed.
Tool tips give you helpful hints throughout the entire game. Whether it is a building with
angry inhabitants, an enterprise with production problems or a menu item in the Continuous
play options, if you leave the mouse pointer positioned over the object for a moment, a transparent window containing a help text is displayed.
All menu elements are also equipped with Tool tips.
5.1 Game screen
e game screen shows you everything that is happening in the island world of 1701 A.D.
You can zoom in or out using the mouse wheel or alternatively use the F2-F4 keys or Page Up
and Page Down. You can rotate the game screen in a clockwise or counter-clockwise direction
using the Y and X keys. You can also do this by moving the mouse to the left or right whilst
keeping the mouse wheel depressed.
TIP: e right-click menu – When you need to move quickly with regard to
the control in 1701 A.D., you are well advised to use this option: if it is activated, a radial menu is opened containing the most important menu points
and buildings. When you click on one of the symbols, either the respective
menu is opened or you can build the respective building directly. You can
activate the right-click menu in the Options under Interface.
Page 8
14
15
Operation Discovering
5.2 Keyboard layout
Changeable key commands
Open Annopedia F1 Rotate camera clockwise y
Close-up camera F2 Rotate camera counter-clockwise x
Medium camera F3 Zoom in Page up
Long-range camera F4 Zoom out Page down
Strategic map F5 Align camera to the North Home
Diplomacy menu F6 Rotate building clockwise . (period)
Research menu F7 Rotate building counter-clockwise , (comma)
Logbook F8 Change building model (only house) c
Special action menu F9 Delete buildings and units Del
Quicksave F10 Enhance house u
Quickload F12 Jump to current event Space bar
Pause p Open construction menu b
Screenshot Print Screen Pipette mode n
Increase playing speed + Demolition mode v
Reduce playing speed - Check through ships Tab
Scroll forward Arrow up Check through warehouses k
Scroll back Arrow down Exchange troops t
Scroll left Arrow left Multiplayer chat Enter
Scroll right Arrow right Message to ally Backspace
Postcard view Scroll Lock Activate/lock camera End
Permanent key commands
ese key commands cannot be changed.
Open Options menu Escape or Alt + o
End game (with safety query) Alt + F4 or Alt + q
Set production status for all buildings of this type on the
island
Do not automatically store raw materials in warehouse Shift or Ctrl + Build warehouse (ship)
Camera to warehouse without selecting Shift + Warehouse symbol in central menu
Select warehouse without camera jump Ctrl + Warehouse symbol in central menu
Camera to ship without selecting Shift + Ship symbol in central menu
Select ship without camera jump Ctrl + Ship symbol in central menu
Save selected units/buildings under numbers 0-9 Ctrl + 0-9
Select units/buildings saved to numbers 0-9 0-9
Shift + Left-click on Closing down production
6. DISCOVERING
Before you begin populating an island, you
should first undertake an exploratory journey.
Explore a number of islands with your ship in
order to get a better picture of their composition and their natural resources before you
decide where you want to settle.
Note: If you have chosen the Game setting Easy and have activated the Start with warehouse option,
you will already begin on an island chosen randomly.
TIP: e free trader offers various maps of the island world for sale. You can buy small,
medium and large island maps or uncover the entire map.
7. POPULATING
Once you have found a suitable island, you can begin with building your settlement. Your main
focus should thereby be on fulfilling the needs of your people as your settlement will only grow
and flourish if this is the case.
7.1 First steps
At the beginning of a game you are always equipped with
the materials that you require to start off with. If you have
selected the option Start with warehouse, tools, wood and
food are already contained in storage; if you start on the
high seas, the goods can be found in the hold of your ship
and are automatically unloaded as soon as you build a warehouse. e next steps see you build
roads, production chains, houses and public buildings so that your population can flourish
and prosper.
In order to build a warehouse, sail as close as possible to a sandy spot on the coast.
e Build warehouse symbol should appear in the action menu of your ship. Click
on it and locate the building which appears at your mouse pointer on the coast with
a left-click. Please note that only one warehouse can be built per island.
TIP: If you keep the Shift key pressed when building a warehouse, no further building material will
be transferred into the warehouse. You can use your remaining building material on another island for
another warehouse.
Page 9
16
17
Populating Populating
7.2 Population level
Differing numbers of inhabitants can be accommodated in the houses according
to the civilisation level: for example only eight people can live in a pioneer’s house
whereas 20 inhabitants can live in a citizen’s house. e inhabitants will start to
move out and leave the island if they are unhappy but if they are happy, more and
more inhabitants move in until each house has reached its inhabitant limit.
Tip: Do not delay in building houses so that as many inhabitants as possible move in. For the more
inhabitants you have, the more income you receive in taxes.
If the preconditions for a progression to the next level have been met, your inhabitants will
automatically enhance the houses provided they have sufficient building materials. As your
population develops itself further there is also the possibility of upgrading existing buildings,
e.g. the market building or the warehouse, to a higher level.
Note: You can deny access to building material for the population by clicking on the
building material symbol in the house menu. As soon as a house is ready to progress to the
next level, a green arrow above it starts to flash. You thus have control over the building
material and population growth.
7.3 Inhabitants’ requirements
Your inhabitants will require more and more goods as
the population level increases in order to remain satisfied and to be able to progress to next higher civilisation level. You can obtain these goods by building
production chains and by trading. Your population
also has social needs which can be satisfied by building
corresponding public buildings. For this to be the case,
the houses must be located within the effective area of
these buildings.
In order to find out more information on your inhabitants’ requirements, click on one of the
houses. You can now see the goods and buildings which the inhabitants of this house require
for long-term settling and for progression to the next civilization level.
You can also gain an overview of the mood of the entire
population via a click on the village centre. A menu is
then displayed which shows you the number of inhabitants and also the mood of the population according
to their respective civilization levels (via the respective
portrait) as well as the requirements of the individual
levels.
7.4 Civilization levels
Each civilization level reflects the cultural and economic level of development of your population. ere are five civilization levels in 1701 A.D., which each include new buildings and
production possibilities for you. Your inhabitants do not progress to the next civilization level
until their requirements have been satisfied. However the higher the inhabitant’s level, the more
difficult it is to satisfy their needs in order to retain the current civilization level or progress to
a higher level.
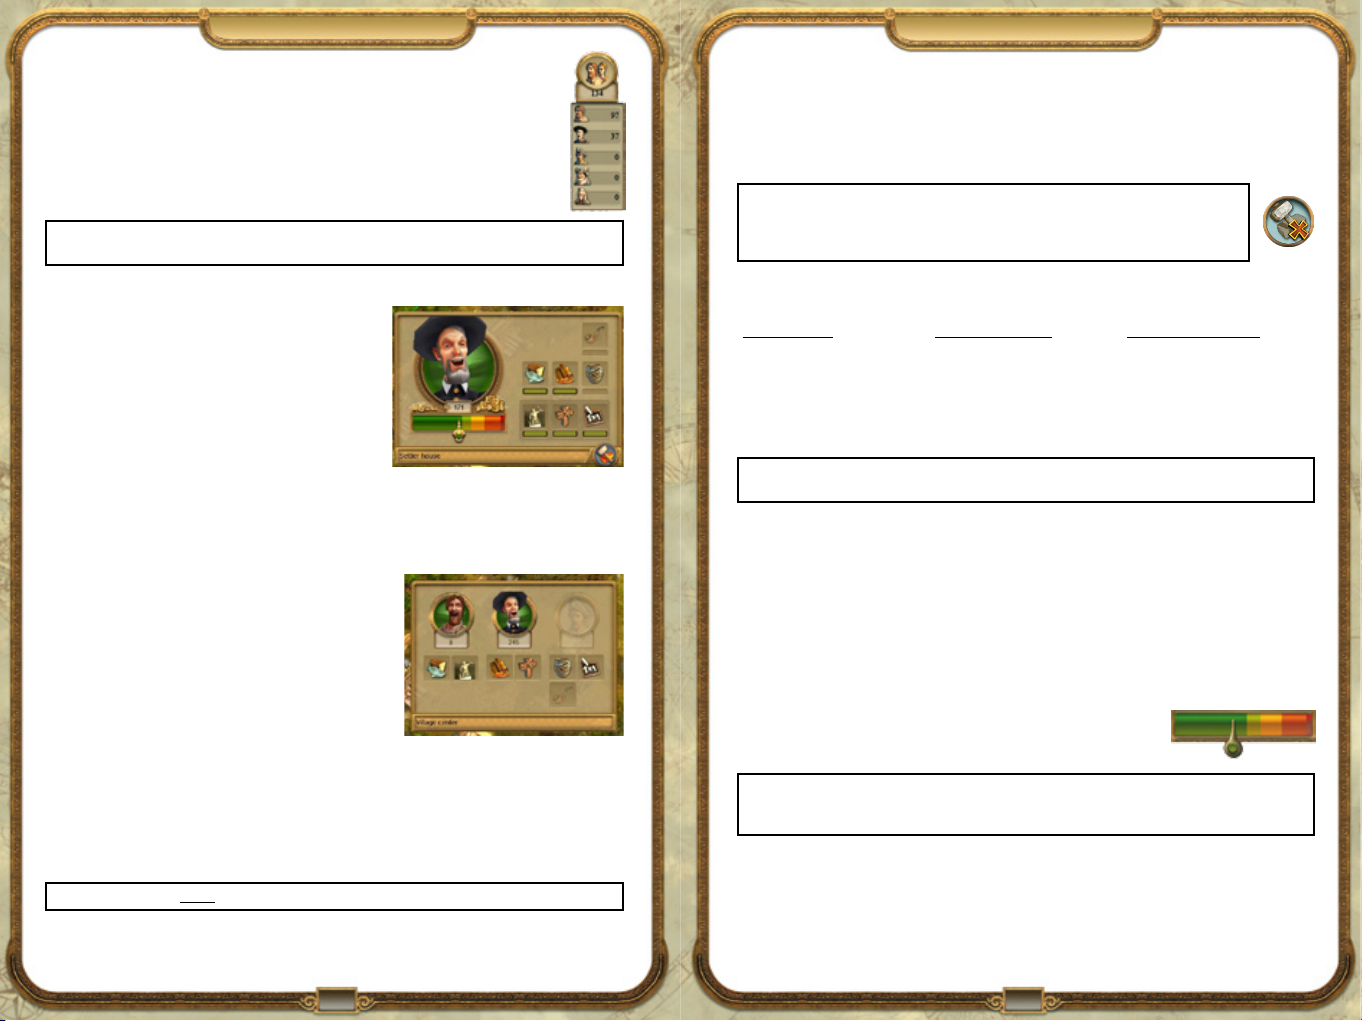
Table: Civilization levels:
Civilization level Requirements: Goods Requirements: Buildings
Pioneers Food Village Centre
Settlers Cloth Chapel
Citizens Alcohol & Tobacco School
Merchants Lamp oil & Chocolates eatre
Aristocrats Colonial Goods Senate
Tip: You should secure the supply of goods which are relevant for level retention and progress as soon
as possible in order to prevent shortages in supplying your population in advance.
7.5 Taxes
Taxes are your most important source of income. You have the possibility of determining the
level of taxes which the inhabitants of your islands have to pay via the so-called “tax load”. You
can find the tax load in every house menu and your setting there is valid for the entire population at the civilization level of the currently selected house.
You can control the level of taxation with the depressed mouse key. e color of the tax load
shows you the effects a tax rise or tax drop would have on the satisfaction of the population. High taxes are marked in red shading and may annoy your inhabitants so much that
many types of demonstrations of resentment may result. Low taxes
are marked in green shading and are of course much better accepted
by your population.
Note: e maximum satisfaction of your inhabitants must be guaranteed in order for them to progress
to the next highest civilization level. In order to realize this you must adjust the taxes so that the inhabitants experience the highest level of satisfaction in addition to fulfilling their requirements.
Note: New houses will always be set to the Pioneer level.
Page 10
18
19
Buildings Buildings
8. BUILDINGS
Construction belongs to your most important tasks as a founder of settlements in
the 1701 A.D. world. You can select buildings and locate them in the game world
via the construction menu. You can access the construction menu with a click on
the building symbol in the Central button area.
8.1. Constructing buildings
Buildings are split into three categories within each level:
Public buildings and roads (on the left).1.
Production buildings (in the centre).2.
Buildings, which have yet to be made 3.
available via research (on the right).
Select the desired building with a leftclick and it is then transferred to the
mouse-pointer and is ready to be built.
You can now locate it in the game world
with a second left-click. If you want to
build another building, click on the corresponding symbol in the construction menu again and
repeat the process. e construction menu can be closed with the Escape key, a left-click on the
game world or on the button.
Effective area
e effective area is the sphere of action of buildings
and units. It is displayed as soon as you have selected
the building and it is attached to your mouse pointer.
e size and function of the effective area varies
according to the building type.
Tip: You can achieve the most effective expansion of your settlement area by locating new market
buildings in such a way that the effective areas of these market buildings only slightly overlap. e effective area of the new market building is displayed in green as long as the contact to the current effective
area is maintained.
Building costs
e construction of buildings costs money and building materials. You can find out how much
you will need to pay for a certain object if you keep the mouse located over a building button
in the construction menu. e costs and building materials available for the respective building
are displayed in green text with missing materials in red.
Operating costs
Specified buildings incur running costs. ese include fortresses, educational buildings, farms
and plantations. You can monitor operating costs in the preview window via a click on the
respective building.
If you shut down a building you therefore also reduce your operating
costs. Please note that only manufacturing chains can be closed down.
Schools, churches or the fire brigade also incur operating costs but
cannot be closed down after they have been built.
Activation
Buildings are activated based on respective civilization level and number of inhabitants.
Buildings which have not yet been activated are displayed in grey shading in the construction
menu. is means that you cannot yet construct this building.
If you locate the mouse pointer over one of the grey-marked building fields in the construction
menu, the required number of inhabitants for its construction will be displayed. Some buildings are only activated if they have already been researched in a research building.
Alignment
Buildings automatically rotate themselves to the correct building position when the building
location has been selected, but you can also rotate and align the position of the building manually in 90° steps via the Period and Comma keys.
Tip: You can select from one of the five different inhabitant houses of the Pioneers by pressing the
V key.
Enhancing
Some buildings, for example the market building and the warehouse, can be
enhanced if you have progressed to higher civilization levels since it was built. e
storage capacity of the entire island is thereby increased and in the case of the warehouse, also the number of tradeable goods. In order to do this, click on the button at the top
edge of the preview window.
Demolishing
You can make room for new buildings or remove enterprises from the game world
that you no longer require with the Demolish function. Activate the demolish
mode via a left-click on the Demolish button (hatchet) on the Minimap. A small
hatchet is displayed at the mouse pointer. Left-clicking on a building causes it to collapse and it
disappears forever from the game world. A (quick) right-click will interrupt this action.
Alternatively you can also select the Demolition mode in the preview window via a
click on the skull symbol. Depending on the degree of difficulty you will be refunded
all, half or no building costs at all.
Page 11

20
21
Buildings Buildings
Closing down
You can temporarily close down some buildings by clicking on the “zZz” symbol in
the respective building menu. You can thus save the operating costs for this building
and if you keep the Shift key depressed at the same time, all buildings of this type
will be closed down.
Workload
Most manufacturing chains require two production units in order to supply the final goods.
You can check the workload of an enterprise in
the respective building menu. e percentage
display shows how efficiently the manufacuring
chain is working.
Tip: All the fields of the enterprise can be used by left-clicking on the Optimize button in
the building menu of the enterprise, as long as they do not overlap with other enterprises.
8.2 Building types
e following building types are available for construction in 1701 A.D:
(You can find more detailed explanations of the military buildings in Chapter 13 - Battle.)
Roads and paths
Roads and paths connect your buildings with each other. Enterprises that produce
end-products must be connected to a road for transport to warehouses.
Click on the respective road symbol in the Construction menu. Select the starting point for the
path and its direction is then defined by the subsequent movement of the mouse. Locate the
finishing point for the path with a second left-click.
Public buildings
Public buildings are those buildings that your population requires to satisfy their social needs.
ese include the village center and the chapel at the beginning of the game. An increasing
number of public buildings will become available for building in the Construction menu
according to your civilization level.
Market buildings
Your warehouse and your market buildings combine to form your stores and every additional
market house increases your storage capacity. is principle works across the whole island so
if a certain good is available on an island, it can be supplied by any market building. You must
however use ships for transporting goods to other islands.
Tip: e more market buildings you construct in a town, the more market wagons ensure the regular
collection of your produced goods. More market buildings therefore mean higher operating costs, but
also higher storage capacities and faster collection.
Tip: If a certain good should be very urgently required, you can activate an immediate pick-up in the
respective enterprise. e next free market wagon will then collect the goods from this enterprise right
away.
Production buildings
Production buildings serve the manufacturing of goods and raw material recovery as well as the
production of building materials. At the start you can choose from the lumberjack’s hut, the fisherman’s hut and the hunting lodge. As the game progresses you will find further buildings in your
construction menu that will become important to satisfy the growing needs of your population.
Note: Not all buildings in a production chain can always be built on the same island – perhaps because
the necessary fertility is lacking. In this case, you must transport the required intermediate goods to the
final enterprise.
Research buildings
Schools and universities fulfill the requirement of your population for education and enable
research. If you have researched a certain skill, you can use it anywhere in the game world,
irrespective of what island it was researched on.
Further building types
Coastal buildings:• Some buildings can only be built on the coast. ese include the
warehouse as well as all buildings dedicated to fishing and shipping.
Mines:• Mines can be set up to access the supplies of raw materials.
Military buildings: • ese buildings serve defense purposes and the protection of your
settlement.
Ornamental installations: • e ornamental installations serve to make your town more
attractive and are activated progressively from Citizen level onwards.
Splendour buildings: • ese mighty and splendid buildings are only available at
Aristocrat level. e castle with its various components and the lighthouse are
classified as splendour buildings, and create the best preconditions for a visit by
the Queen.
Page 12

22
23
9. SHIPS
Ships Ships
In the 1701 A.D. world, your ships can explore sea passages, discover new trading partners and
transport goods and troop units from one island to the next.
9.1 Building and repairing ships
You need a shipyard in order to build a ship, and you will also
require wood, cloth, money and (for some types of ships) cannons.
e number of ships which you can set sail with depends on the
total number of your inhabitants.
Once you have all materials necessary, click on the respective
shipyard and select the desired ship’s type from the menu. Click again on the respective ship’s
symbol in order to interrupt the construction.
You can have a ship repaired in your shipyard or in the shipyard of an allied partner. Just click
on the ship to be repaired and send it to the shipyard with a right-click.
9.2 Ship’s actions
Moving
Once you have selected a ship, you can move it in two different
ways:
e movement command is activated via a left-click in the ship’s 1.
menu which displays the mouse pointer as a ship’s wheel. A
further click on the game world or minimap signifies marching orders.
A right-click on a location in the game world or Minimap issues a direct movement 2.
command.
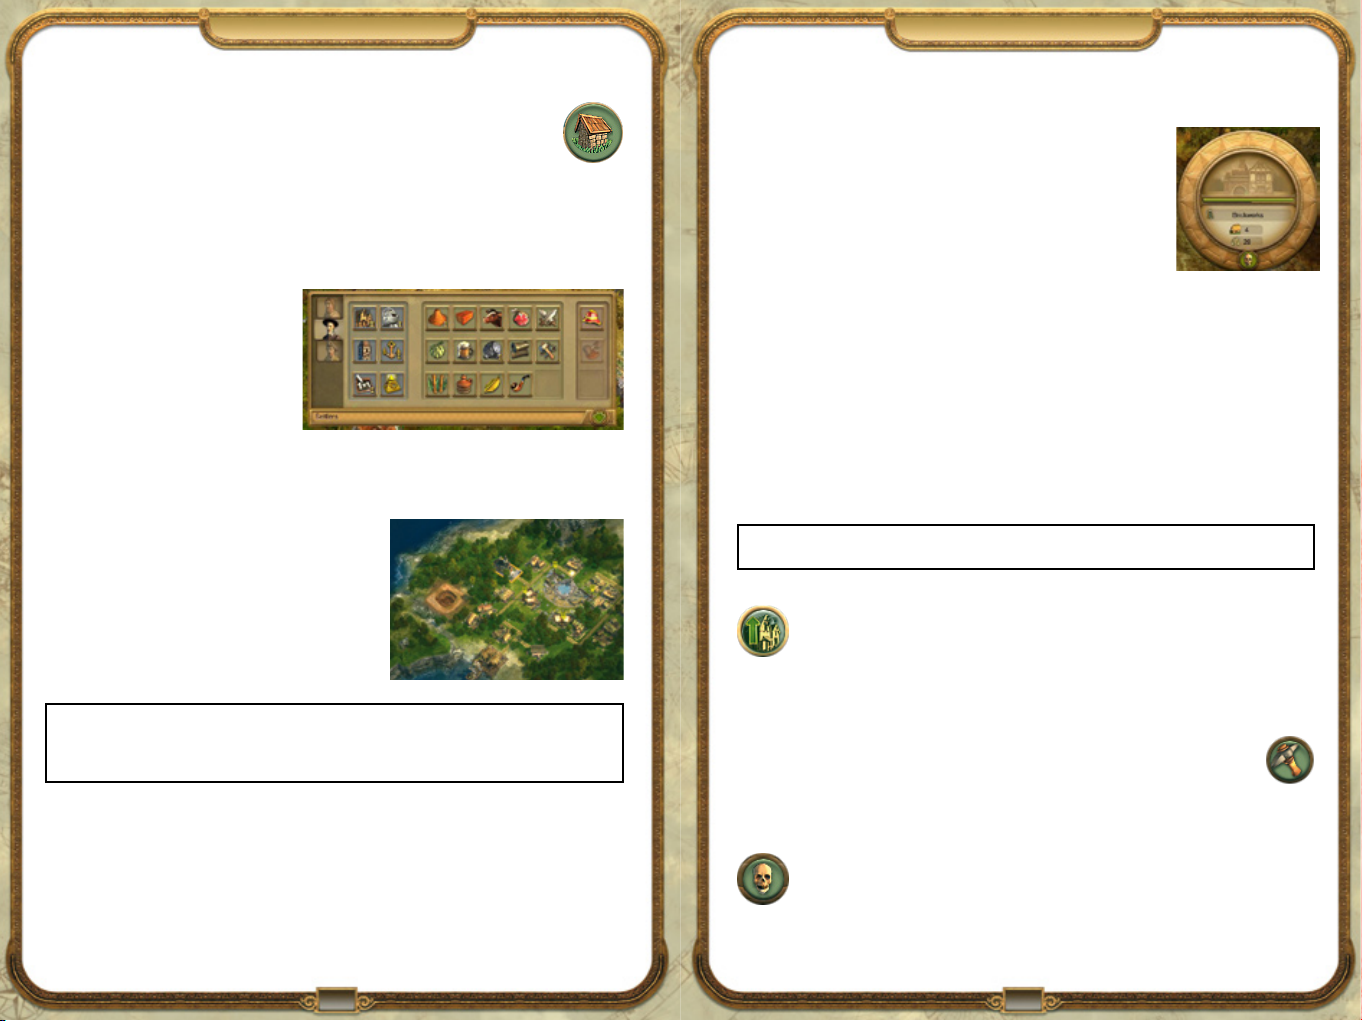
Loading or unloading of goods or troops
If one of your ships drops anchor next to your warehouse or one of your trading
partners, you can load or unload goods between the warehouse and the ship via
the goods transfer tab. e goods transfer menu displays the storage area of the
warehouse at the top and cargo hold of the ship at the bottom.
First set the quantity of goods to be loaded to one
ton, ten tons or the entire quantity available respectively by clicking on the corresponding symbol.
Now transfer the set quantity of these goods to a free
cargo hold of the ship via a further left-click on a
goods symbol in the store.
Likewise goods can be transported from the ship to
the warehouse by selecting the respective cargo hold
and quantity to be unloaded.
Tip: You can also automate the loading and unloading of the ship for goods which you regularly
transport with a trading route.
You can also take on troops on your own ships in order to transport them to other islands. e
boarding of troops is possible anywhere where there are flat coastal sections. In order to board a
unit of troops, you must select it with a left-click. Now a button appears in the preview window
of the troop unit for boarding it onto a ship. Click on this button and select the ship on which
you would like to load your troops.
For disembarking, the ship is first selected. All troops on board are disembarked to the
marked location on the beach with a click on the button Disembark troops.
If one of your ships has to retreat in the face of
attackers, you can increase its speed by throwing
the goods loaded overboard. e mouse pointer
changes when it is positioned over a full cargo hold
and thus indicates that you can throw these goods
overboard. e entire contents of this cargo hold
are lost with a right-click. ereafter a flotsam box containing the goods appears on the water
near the ship. If you are quick enough and your opponents don’t get there first, you can collect
the goods again later. is also works with troops: If you right-click on troops in the ship’s
menu while you are at sea, they get thrown overboard! ey save themselves on barrels and float
around as castaways on the water. Do not however wait too long before you rescue your people,
otherwise they will drown in the water or become shark bait.
Grouping
In order to group several ships together, select the desired ships with a left-click. Keep the Ctrl
key depressed while you press the keys 1, 2 etc. in order to assign the groups to a number key.
You can subsequently select the respective group by pressing the corresponding number.
Page 13

24
25
Ships Trading
10. TRADING
If you press the respective number twice quickly, the group is selected and shown in the centre
of the screen section.
When a ship is left-clicked while the Shift is
depressed, this means that it will be subsequently
added to or removed from the selection.
e altered selection must subsequently be reassigned the group number. In order to be able to
better differentiate the various groups, all grouped
units have a small number on their banner.
Attacking
You can attack enemy ships as soon as
you have sighted them. If you have selected one or several or your own ships, the
mouse pointer changes as it moves over enemy troops, ships and buildings and thus
displays that they can be attacked.
e attack command can be issued in two different ways:
e attack command is activated via a left-click in the ship’s menu and executed 1.
via a second left-click on enemy troops, ships or buildings.
e attack is executed directly with a right-click on the opposing unit.2.
Escorting
You can use this command to give your own ships an escort. e escort follows the unit as
protection and attacks approaching opponents automatically. First select the unit which should
act as the escort.
e escort command can now be issued in two ways:
Activate the 1. Escort command with a left-click in the ship’s menu. e mouse
pointer changes its appearance and you can assign the escort with a click on the
unit to be protected.
e escort can be directly assigned with a right-click on the unit to be protected 2.
when the ship is already selected.
A ship can be escorted by as many other units as you desire. e escort is not finished until a
corresponding command is given.
9.3 Ship types
A variety of ship types which can differ greatly in hold capacity, susceptibility to damage and
speed are available for your adventure in the 1701 A.D. world. e ship’s speed is also additionally influenced by the current cargo load.
Sooner or later the inhabitants in your settlement will require goods that you cannot produce
yourself, Or you’ll have too much of a certain good and want to sell your surplus at a profit –
time to trade!
10.1 Discovering trade partners
e Free Trader is the first and most reliable trading partner in 1701
A.D. You have a trade agreement with him as soon as the game has
started. He visits all warehouses regularly with his ships, and supplies
required goods or buys goods he is offered. Furthermore, he offers a
special service; he sells maps to reveal part of the island world. Other
trade partners can include foreign tribes, computer players or human
players, but you must first draw up a trade agreement in order to enter
into trading relations with them (See chapter 11 - Diplomacy).
Tip: You can give the trading route an individual name by clicking on the previous name in
the strategic map menu with the left mouse key and giving the trading route a new name.
Note: Foreign tribes do not leave their island and therefore are reliant on trading partners coming to
their warehouse. Continuous trade with these tribes offers various advantages to the player.
10.2 Passive trading
e simplest method for trading is Passive trading. Conducting all your business
from you own warehouse, you allow all players engaged in trade agreements to see
your goods available for commerce.
10.3 Active trading
Active trading describes the possibility of selling and buying at foreign
warehouses. Active trading is only possible with a ship and an existing
trade agreement. Active trading has the advantage that you can determine the timing of the exchange of goods yourself and are not dependent on a visit by trading partners.
If your ship is located near the warehouse of a trading partner, select
the Goods transfer tab in the ship’s menu, via which the sale or
purchase of goods takes place. Only goods which are stored on board
ship and which have been tendered by the other player for purchasing
can be sold. You can recognise a demand by the green colour of the
goods field in the warehouse of your trading partner. In the same way goods can only be
purchased that the other players offer for sale; they are marked in red. e ship must have
sufficient free cargo hold capacity for this.
Tip: You can see which goods a trading partner offers for sale or purchasing by a click on his warehouse.
us you can load your ship accordingly before you leave. is also works on the strategic map.
Page 14

26
27
Trading Trading
10.4 Trading routes
Strategic map
with warehouses
Route
Trading routes
according to
numbers
Create route
Warehouse
window 1
with goods
Warehouse window 2 Ships list
Goods transfer and trading can be automated using trading routes. You can only set
up trading routes between the warehouses of your own settlements and the settlements of foreign tribes and other players with whom you have a trading agreement.
In order to create a trading route, open the strategic map and click on the ship’s wheel at the
left underneath the map. Alternatively you can also open the menu for trading routes
from the ship’s menu. A warehouse window opens in which you can select the first
stop of your trading route from a list. Alternatively you can also click on a warehouse
in the strategic map.
Now select the goods which you want to load or
unload at the first stop. In order to do this, click on
the red or green arrow in order to open the goods
overview. You can determine the desired level of
stored goods on the ship using the sliding bar – for
example if you want to sell the entire quantity of a
good on board, set the bar to zero.
Views
military, ships, warehouses on/off
10.5 e courier ship
e courier ship enables the express collection of goods that have been selected via passive trade
for purchasing. You must research into the courier ship via education before you can use this
possibility for immediate delivery.
Tip: Remember that while delivering goods with courier ship is very quick, it is also very expensive!
Furthermore the courier ship can also be attacked by enemies and may even be sunk.
10.6 Balance
e balance is the difference between the income and expenditure of all your
islands and is specified in gold coins. e info bar at the top left of the screen shows
your total balance as soon as you click on the coins symbol. e balance value is
displayed in green as long as more money is earned than spent. If expenses exceed
income, it will be colored in red.
e current income and expenditure of an individual island can be checked specifically in the respective warehouse or market building.
At the same time a second warehouse windows opens in which you can specify the final destination of the trading route from the list above. You once again have the alternative of selecting
the destination directly on the strategic map.
Page 15

28
29
Diplomacy Diplomacy
11. DIPLOMACY
All interactions with third parties affecting a player’s
reputation are termed Diplomacy. Players discovered in the island world are displayed in the
Diplomacy Menu. Here you can negotiate
on agreements and tributes. e higher
your prestige with other players, the
easier it is to reach agreements with
them.
11.1 Diplomacy screen
e Diplomacy screen represents
your relations to other players and
foreign tribes and you can open it
with a left-click on the wreath symbol
in the Central button area.
You then see a circle with the
portrait of your game figure in
the centre; the representatives of
all civilizations and foreign tribes are aligned
around you.
e colors of the connecting lines to your portrait indicate your reputation with the respective
player, and the small circle to the right and left underneath the portrait shows the color of the
player on the map and the diplomacy status between the two of you. If a another player has a
request for you, a small letter is displayed above the agreement status symbol at the portrait.
If you click on one of the portraits of the fellow players, it moves the centre
of the menu and your portrait appears at the top in the circle. You can now
interact with this player. e vertical bar to the left shows your reputation with
this player, and the three symbols on the right show the current agreement
status and options for improvements or cancellation.
Underneath the portrait in the center, you have the possibility of demanding for or
awarding tributes as well as requesting ally aid if an alliance pact exists.
11.2 Contracts
Peace treaty
A peace treaty is a precondition in order to draw up a trade agreement. e prevailing
peace can be ended at any time by both contractual partners by a declaration of
war.
Trade agreement
Basically all inhabitants in the 1701 A.D. world with whom one is at peace can be
persuaded to enter into trade agreement. It depends on your reputation with a given
player, whether he accepts or rejects an offer of an agreement. Sometimes a player
will demand a tribute before he is prepared to accept an agreement.
When your own portrait is in the center of the Diplomacy Menu, click on the purse symbol
and subsequently on the prospective contractual partner and he will then be offered a trade
agreement. If you are presented with an offer of this kind, you can accept it with a click on the
green tick. If your contract offer is accepted, the purchase and sales offers of the trading partner
can be viewed in his warehouse. e trade agreement can be cancelled by both sides at any
time. In this case the peace treaty will become active again.
Alliance pact
e Alliance pact enables military support from fellow players in addition to mutual
trade. Alliances are only available between players with existing trade agreements. In
order to offer an alliance, click on the symbol with the two hands in the Diplomacy
menu and then click on the desired alliance partner.
An alliance offers you many advantages:
Areas which your allied partners have already explored are shown on your minimap.•
Damaged ships are automatically also repaired in the wharfs of your allies.•
You can also request help from your allies in case of war.•
Declaration of war
Diplomatic relations with fellow players can also be abruptly terminated. Before you
can attack fellow players and expel them from the world, you must first officially
declare war on them. is is carried out via a left-click on the sword symbol and
subsequently selecting the battle opponent. e selected player is then automatically
also in a state of war.
You can only end a war by offering a peace treaty. In order to do this, click on the dove symbol
and the respective player. Whether an opponent accepts an offer of peace depends on your
current player reputation and may well involve a tribute demand.
11.3 Tribute
You can demand or pay tributes in the Diplomacy Menu. Note:
A tribute demand inevitably lowers your reputation, independent
of whether the tribute is accepted or not, and a tribute payment
to others can increase your reputation.
Warning: e pirates are a bad lot and you are at war with them right from the beginning of
the game! So be careful when you meet them as they will attack you straight away.
Page 16

30
31
Diplomacy Research and Battle
12. RESEARCH
11.4 Foreign cultures
Foreign tribes inhabit islands which they never leave. ey are however
prepared to enter into diplomatic relations with other inhabitants in the
island world and engage in trade. ey extend their trust to players they
judge to be reliable, and this results in special trading advantages – for
to the Special Ability of the tribe. Should you wage war with them, however, beware those
“Special Abilities” yourself!
11.5 Fraternization
Fraternization with foreign tribes corresponds to an alliance pact between fellow players. e
main difference is that foreign tribes cannot provide military aid as they cannot leave their
island. In order to fraternize with a foreign tribe, click on the patriarch of the foreign tribe in
your Diplomacy Menu and select the option Offer fraternization to the right of their portrait.
If fraternization is accepted, the foreign tribe will offer you – in addition to better prices for
conventional trading goods – one of the four colonial goods for purchasing. In addition you
can also see the Special Action of the foreign tribe via your Diplomacy Menu and a and use it
against your enemies via a click on the action displayed.
11.6 e Pirates
Ramirez and his pirates are on hunt to capture ships throughout the
entire island world. e belligerent buccaneers live in remote pirate
lairs which are well guarded and they attack anyone who approaches
their ships or their lair.
e pirate warehouse can be viewed at any time as soon as you have
discovered the pirate island and the transferral of goods is carried out
in the same way as for trading with other computer players. You must first impress Ramirez
however, by destroying foreign cultures and winning his esteem. If you succeed, he will enter
into an alliance with you and you can immediately buy all colonial goods from him. But watch
out: an alliance with Ramirez drastically reduces your prestige with all other players.
11.7 Secret Diplomacy
e Secret Diplomacy Menu, enables you to access
researched Lodge activities and Special Actions.
You thus have a variety of possibilities for
harassing annoying competitors.
You must first build a Lodge house in order to be able
to use Lodge activities. You will then find a spy in the
Special Action menu who is prepared for action immediately. You can research into all other Lodge activities subsequently in school or at university. Special activities cannot be
used against foreign tribes.
example the possibility of purchasing colonial goods - and enables access
Knowledge is power.
You can purchase or enhance new buildings, units and acquisitions with the help of Research.
Additionally, you can only acquire certain buildings and capabilities as well as some military
units via Research. is requires either a school, available from the Settler level, or the university available from the Merchant level.
Every Research project costs knowledge – the unit of measurement for research speed - in
addition to gold, and the more inhabitants a settlement has, the quicker a Research project
can be completed.
13. BATTLE
„If you want peace, prepare yourself for war“ went the
old Roman saying, and this applies to the world of
1701 A.D. as well. us, depending on the level of
difficulty selected for your computer counterparts,
you should consider protecting your island against
enemy attacks at all costs.
Tip: If you are a peaceful player and do not provoke anyone, you will not be attacked by an opponent.
e pirates and the computer player Count Igor Yegorov are however exceptions to this rule.
13.1 Controlling troops
A life bar is situated above all military units. You can use this to see the health status of your
units at any time. e color green means completely healthy; if this bar starts to empty during
battle conditions, your unit’s bar will change color to red proportional to the extent of the
damage suffered.
Training troops
e training of the troops is carried out in the military buildings. You can
see which units you can train there and which goods (cannons or weapons)
are required for this in the respective building menu. Only one troop unit
can be housed per millitary location at a time, however multiple units in
different locations can train simultaneously.
Note: e maximum number of troops which you can train in a military building depends
on the current population level of the island. e troop limit can however be raised by
researching into the military draft.
Page 17

32
33
Battle Events
Moving troops
You can move your troop units via a mouse click on the game world or Minimap. Rivers
are crossed if bridges are available, plateaus are accessed via ramps and only mountain
ranges and cliffs represent insurmountable barriers.
After you have selected a troop unit, you can issue a movement command in two ways:
A click in the units menu activates the movement command and the mouse pointer changes 1.
its appearance. e command is executed via a second click to a free location in the game
world or Minimap.
e movement command can be executed directly with a right-click to a free loca-2.
tion in the game world or Minimap.
Starting an attack
You can attack opposing military units as soon as you see them.
If you have selected one of your units, the mouse pointer changes appearance over
enemy troops, ships and buildings and thus indicates they can be attacked. You can
issue the command to attack in two ways:
e attack command will be activated via a left-click in the units menu and executed via a 1.
second left-click on the opposing troops, ship or building.
e attack can be directly initiated via a right-click on the opposing units.2.
TIP: You can attack a fellow player with whom you are not at war by keeping the Shift key depressed
and clicking on his units or a building. is results in a declaration of war and the immediate
commencement of battle.
e units selected can be grouped together by assigning them a group number with the key
combination Ctrl + number (1,2,3, ... 0). e individual groups can be later activated by
pressing the corresponding number (1,2,3, ... 0). All units have their group number on their
banner in order to be able to better differentiate the various groups.
14. EVENTS
Not everything can be planned in the 1701 A.D. world and Fate has pleasant as well as
unpleasant surprises in store for you.
14.1 Guests of honor
You will be visited by various guests of honor on your island who bring incentives
and presents for the duration of their visit to increase the satisfaction of the inhabitants. You can always find the guests of honor in the village centre.
ere are nine different guests of honor including the Queen. She is however a special case.
When the Queen pays you a visit, you must be able to offer her something.
Your town must contain aristocrats as well as a castle and a lighthouse. is is
the first step towards your own independence. It is not until you have paid a
certain amount of tributes to the Queen, or you have caused her entire fleet
to retreat in battle that the Queen will grant you your independence.
14.2 Disasters
Natural disasters occasionally disrupt the peaceful island life. ey happen
randomly and have devastating effects on buildings and the population.
e following catastrophes can inflict themselves on your island world:
Earthquakes
Fire
Clicking on a unit with the Shift key depressed means that it is
subsequently added to the selection or that it is removed from it.
You must subsequently reassign it the group number again.
Tip: If your troops have been decimated by battle, you can merge units of the same type in order to
regain the original battle strength, as you cannot “repair” your units. In order to do this, select units of
the same troop type and then click on the Group troops symbol in the selection menu.
Plague
A Plague of rats
Volcano
Hurricane
Page 18

34
35
New featuresContents
1. NEW FEATURES IN THE ADDON
1701 A.D.
e Sunken Dragon
e story continues…
Nice to have you aboard!
1. NEW FEATURES IN THE ADDON. . .. .. .. .. . .. .. .. . .. .. .. 35
1.1 Computer player profiles. .. .. .. .. . .. .. .. .. . .. .. .. . .. .. .. .. . . 35
1.2 Trader assignments ....... .. . .. .. .. .. . .. .. .. . .. .. .. .. . .. .. .. .. 37
1.3 Catastrophe: Meteor....... . .. .. . .. .. .. .. . .. .. .. .. . .. .. .. .. . .. 38
1.4 Ornamentals....... . .. .. . .. .. .. .. . .. .. .. .. . .. .. .. . .. .. .. .. . .. . 38
1.5 Campaign medals . . .. . .. .. .. .. . .. .. .. .. . .. .. .. .. . .. .. .. .. . . 39
2. THE CAMPAIGN. . .. .. . .. .. .. . .. .. .. .. . .. .. .. .. . .. .. .. .. . .. .. 39
3. THE EDITOR. . .. .. . .. .. .. .. . .. .. .. . .. .. .. .. . .. .. .. .. . .. .. .. .. 40
3.1 e Start. .. .. .. .. . .. .. .. .. . .. .. .. .. . .. .. .. .. . .. .. .. . .. .. .. .. 40
3.2 e Wizard. . .. .. . .. .. .. .. . .. .. .. . .. .. .. .. . .. .. .. .. . .. .. .. .. 41
3.3 e World editor. . .. .. . .. .. .. .. . .. .. .. . .. .. .. .. . .. .. .. .. . .. . 42
Folder: Map details.. .. . .. .. .. . .. .. .. .. . .. .. .. .. . .. .. .. .. . 42
Folder: Game settings.. . .. .. .. .. . .. .. .. .. . .. .. .. . .. .. .. .. 43
Folder: Conditions for victory. . .. .. .. . .. .. .. .. . .. .. .. .. . . 43
3.4 Using User content. . .. .. .. . .. .. .. .. . .. .. .. .. . .. .. .. . .. .. .. .. 45
Technical Support.. . .. .. . .. .. .. .. . .. .. .. . .. .. .. .. . .. .. .. .. . .. .47
Credits.. . .. . .. .. .. .. . .. .. .. .. . .. .. .. .. . .. .. .. . .. .. .. .. . .. .. .. . 48
Software License.. . .. .. . .. .. .. .. . .. .. .. . .. .. .. .. . .. .. .. .. . .. .. 57
Copyrights. . .. .. .. .. . .. .. .. .. . .. .. .. .. . .. .. .. .. . .. .. .. . .. .. .. .59
1.1 Computer player profiles
Finn Hallqvist
Difficulty level: Normal
Gender: Male
Type: Adventurer
Finn Hallqvist fulfils the ideal of the romantic hero
who despairs of the world in his passionate outbursts.
He is the only child in a modest Trading family. His
father was often away on his travels and brought
home with him stories of distant lands. is sparked
off in Finn a passion for the world of the sagas found
in ancient and Far Eastern mythology. He spent long
nights poring over old books and tomes to learn more
about the legendary Temples and magical Artifacts.
Not that the Hallqvists would have seriously believed in the sorcery or the power of the ancient
gods! On the contrary, they were simple, god-fearing folk. But as Finn’s knowledge of the
wonders of the world increased his normal life lost its magic and he fled into a dream world
of his own.
Some years later Finn decided to go off in search of secret Treasures and Artifacts himself.
Supported by the family savings, he equipped a Ship and mounted his first Expedition shortly
afterwards. Finn’s family considered him a hopeless daydreamer, but preferred to let their
emotionally unstable son spend the entire family fortune rather than force him to face reality!
Grace Bonnet
Difficulty level: Hard
Gender: Female
Type: Adventurer/Scoundrel
Little is known about Grace Bonnet’s early life.
Many say she was the only daughter of an affluent
Diplomat, others maintain that Grace is a highly
gifted orphan who has learned to lie her way through
life. However, all agree that no one would expect
the degree of cool cunning she displays from someone
with a face as angelic as Grace Bonnet’s.
Page 19

36
37
New features New features
Grace is only too well aware of the effect this surprise has on others and enjoys exploiting it
to the full. Her beauty and charming eloquence are of enormous advantage, especially in her
shady Trade transactions; transactions which were on the whole large scale smuggling. Grace
commands an impressive Trade fleet which also includes numerous Warships for protection
and she operates from an extensive well-built base. According to the standards of those times,
one might term her independent moral conduct dubious, but that would seriously offend this
self-aware young woman’s well-developed sense of honor. And riding roughshod over Grace’s
sensibilities has never been a good idea–for anyone …
Diego del Torro
Difficulty level: Hard
Gender: Male
Type: Villain
Diego del Torro maintains strict silence as to his
past. However, the only thing that is known for sure
is that he grew up on the streets of a run-down port
City in the poorest of circumstances. Left to fend for
himself, Diego survived by petty crime and thieving
at Sea. His sole motivating force was his one burning
ambition: to shake off the squalor of his early life and to
become the most powerful man in the world.
Diego saw his chance during his training as Lodge Spy. As an apprentice of the arcane arts he
lived an ordered life for the first time, but obeying the rules was also new to him; the rules of
the Lodge. Conflicts were inevitable, as Diego had never learned to give in to others, and he
soon managed to offend many of the people around him. e only things that saved his neck
time and time again were his amazing talents and the Master of the Lodge’s sincere hope that
he would one day be much wiser in his actions.
e more Diego del Torro realised that the Lodge was allowing him to flout its rules, the more
he exploited this leeway. Over time, his unscrupulous nature led him to rise ever higher in the
Lodge hierarchy and to soon become one of the organization‘s leading members. While he
outwardly continued to carry out particularly tricky assignments allocated to the Lodge, he
secretly worked to attain the rank of Grand Master. Diego did not shrink from blackmail, coercion, robbery, arson and even murder. at would be painfully felt by, among others, Grand
Master Nadasky, the poisoned husband of the widow Nadasky...
After his appointment as the Grand Master, Diego finally tried to subjugate his Lodge brothers;
a scheme as daring as it was unsuccessful. He had overstepped the mark; Diego was expelled
from the Lodge and has sworn vengeance. In his eyes, the ends justify the means.
Horatio
Difficulty level: Normal
Gender: Male
Type: Trader
Horatio was always a little different from the
others. As a child from a prosperous patrician
family, his remarkable nature and his inventiveness were recognised and encouraged at an early
age. Yet Horatio ended his expensive University education prematurely and, to his family‘s
horror, set off for the New World where he hoped
to find peace and tranquillity. To his chagrin, however,
word quickly spread of his talents and he found it
necessary to frequently move house. Even now that he has
reached an almost biblical age, Horatio has still not really settled
down.
While he regularly indulges in the creature comforts, Alcohol in particular, Horatio invents
the most unusual devices, quite naturally and seemingly effortlessly and almost as a by-product
of his hedonistic intoxication. Yet Horatio renounces this genius only too readily, as the lazy
Inventor prefers to gorge himself and stay up all night than to fulfil the expectations of those
around him by carrying out serious scientific Research as man of learning.
Horatio’s senile stubbornness is already clear to see in that, to this day, the irascible Inventor has
constantly disowned his wealthy origins. Not a soul in the New World knows his full name!
1.2 Trader assignments
Besides the tried-and-tested and familiar types of Trader assignment, the add-on contains two
completely new types of Trader assignment as described below.
Damage
A Trader’s Ship is stranded and drifting somewhere on the high Sea. It is laden with valuable
Cargo that the player must convey to the Free trader. e player must deliver certain Goods to
the damaged Ship to obtain the Cargo.
Page 20

38
39
New features e Campaign
Escort
A Free trader’s Ship must be escorted to the edge of the Map. Once it has been
escorted safely off the Map, a box then appears in its place containing documentation attesting to the fact that the player has escorted the Ship safely. e assignment is considered as completed when the documentation is returned to the Trader.
1.3 Catastrophe: Meteor
e Meteor is a new catastrophe. It is active in
the endless game if the “Catastrophes” setting
is enabled. e lighting changes, the weather
grows stormy and wind strength increases;
these signs all herald an approaching Meteor.
Small rocks, sparks and ash rain down from
the sky over the target area and burn up before
they hit the ground. e animals and people
immediately run away in terror.
A dark shadow looms over the target area and
becomes larger as a dull rumble grows louder. e
Meteor strikes in the target area and then remains stuck in the ground. Huge circular shock
waves emanate from the area of impact and smaller rocks break away and are hurled against
any objects in the vicinity. e Meteor destroys everything in the target area and all the routes
running through the target area are cut off.
After the Meteor has left a trail of destruction in its wake and has sunk into the ground, still
rumbling and smoking, the player can then concentrate on rebuilding the Settlement.
1.4 Ornamentals
All of the Ornamentals that can be used to
beautify the City in this add-on can be accessed
through the Building menu at Civilization level
“Aristocrats.”
Rose bush
e delightful rose bush is an add-on Ornamental at the Aristocrat level. e player can position it in the same way as a hedge; the
only exception is the automatic placing of an arch over the entrance to
Streets and routes in the same manner as the Gatehouse in a wall.
Aviary
e decorative aviary is an add-on Ornamental at the Aristocrat level. It
is a sort of oversized, “art nouveau” bird cage in which the birds can fly
around freely. Parrots and doves flutter around in it.
Bird bath
e attractive bird bath is an add-on Ornamental at the Aristocrat level. e bird bath’s style
is reminiscent of art nouveau. e bird bath may occasionally attract a peacock and the doves
also like to visit it from time to time.
1.5 Campaign medals
Once they have completed all 11 missions in the Campaign, the successful player will receive
the Campaign medal. e color of the medal depends entirely on the lowest difficulty level at
which the player has accomplished one of the missions. e Campaign itself, similar to each of
the 11 missions, can be played at the “easy”, “normal” or “hard” difficulty levels.
Example:
You have completed all the missions at “normal” and you only have to revert to the “easy” difficulty
level in mission 4 to complete it. You therefore receive the bronze Campaign medal. However, had you
completed all the missions in “medium”, you would have received the silver medal.
2. THE CAMPAIGN
e Campaign can be accessed via the Start menu Single player/Campaign. Here, the Campaign
world Map occupies most of the right side of the screen. e player’s journey through the
Campaign’s story can therefore be viewed at any time.
When starting the Campaign for the first time the starting mission is always automatically
selected; subsequently it is always the mission you selected last. e individual mission buttons
are only unlocked one after the other as the missions are completed.
e difficulty levels easy, normal or hard can be selected using a toggle button. e “Start
mission” button loads the mission that has been selected on the Map.
In 11 exciting missions the Campaign tells the story of a hero who is played by the player.
In the role of the hero, the player sets out to help an old friend in a very mysterious and
intriguing affair.
e player will experience countless adventures during their travels and will meet old friends
and make new ones. e story is full of unexpected twists and turns, intrigues and power
struggles. e classic 1701 A.D. elements are all here: Discovery, Building, Trade, Diplomacy
and Military elements are reflected in the individual missions and will constantly present the
player with new challenges.
Each of the 11 missions is riddled with numerous sub-quests to provide seasoned gamers with
additional challenges!
e Campaign story centers on a hero of legend, because they tend to lead much braver and
more magical lives than those in real life. Yet the hero in the Campaign really has a legendary
account of what happened to him, and he is telling it to everyone who will listen, even though
it may seem like he is exaggerating from time to time...
Page 21

40
41
e Campaign e Editor
It all began when Finn Hallqvist asked him for assistance. Our hero was to help him find the
Eye of the Dragon, a legendary Artifact. Finn’s inspirational flashes of genius and our hero’s
technical skills had the potential to make the two a very successful team. Fired up by his enthusiasm for the Artifact, he set sail. If only he had known then how things would turn out…
but he was young and fearless. And a few weeks later, when he reached the godforsaken Island
where Finn had established his Base, destiny took its course...
3. THE EDITOR
3.1 e Start
Start the editor by clicking on “World-Editor.exe” in the 1701 A.D. directory folder or in the
game menu itself via “Single player>User content>Start World editor”.
Click on “Create Map” to open the full World editor, including all the functions, and to •
create your own individual Archipelago.
Click on “Open Map” to load a Map previously created in the editor.•
Here, you can also close or exit the current dialog or the entire editor.
3.2 e Wizard
Once the Wizard has been started, the maverick Inventor will appear and will proceed to guide
you expertly through the creation of your own Archipelago. e Roman numerals at the top of
the Wizard screen correspond to the sections below:
I. Here you can select if you would like your game world to be large, medium or small.
II. Now select the size of the Islands: large, medium or small.
III. You then determine the quantity of Raw materials available in your Archipelago: many,
normal or few.
IV. Here you can set the difficulty level in your Archipelago to easy, normal or hard.
V. Here you can select the Foreign cultures who may also settle the Archipelago along with you.
You can choose Tetonka, Liang Wu, Poxacóatl, Amir Sahir, the Free trader, Ramirez and his
gang of Pirates and the Queen.
VI. Now select up to three computer players who may also settle the ANNO Archipelago with
you. Apart from the opponents already familiar from the classic version, there are also four new
characters to choose from and who are listed and described in 1.1 above.
VII. Now select if you would like to start out in the New World with a Ship or with a
Warehouse.
Here you can create a Map with the help of the Wizard (chapter 3.3), create an entirely new
Map (chapter 3.2) or open an existing Map.
Click on “Create Map with Wizard” to hand over the majority of the work to the Wizard •
and leave it to create a Map according to your instructions.
VIII. Click the blank field to give your Archipelago a name. You can let your imagination run
wild here.
IX. Congratulations! You have successfully completed the creation of your own Archipelago
with the help of the Wizard and can now click on “Start 1701 A.D.” to start a new game and
embark on your journey into the New World.
Click on “Edit world” to open the World editor which you can use to make changes to any
properties of your Islands, or to the whole Archipelago.
e next chapter describes how to use the World editor.
Page 22

42
43
e Editor e Editor
3.3 e World editor
Creating a new world:
Click on create “File/New Map” to lay out a new Archipelago.
Here you can now set:
e Map size•
e name of your Map•
How you would like to describe it.•
e difficulty level you would like to assign to it.•
e light profile prevalent in the north, middle and south of the Island.•
You can set the Map size by ticking the relevant field and you can then select one of the sizes
available.
You can enter the name you have chosen for the Archipelago in the field below and the Map
description in the field below that one, although the latter is not mandatory to create the Map.
e difficulty level you have assigned to the Map has no effect on the Map creation, but it will
enable you to provide an estimation if you want to swap your Maps with other 1701 A.D.
players. Select the difficulty level using one, two or three stars.
You also have various light profiles available; select a light profile by ticking “North”, “Middle”
or “South”.
Initially, your Ship is the only thing you will see in central area of the screen. You can set your
Ship’s starting position in the Archipelago by clicking it with the left mouse button, holding
the button down and then relocating the Ship. You can also position the Ship as a Warehouse
on the coast of one of the Islands you are creating. Once you have created an Island, you can
place the Ship on a stretch of coast on the Island and it will become a Warehouse, which you
then own at the start of the game.
You will also see three folders to the left of the screen as described below.
Folder: Map details
Here you can set the following:
e amount of your Seed capital•
e amount of the refund of construction costs•
e Pirate strength in the Archipelago•
e catastrophes•
e amount of the entire Map revealed at the start of the game.•
Folder: Game settings
Here you can set the following:
From one to three computer player profiles against whom you would like to compete.•
From one to four Foreign cultures who will settle the Archipelago with you.•
e Free trader, Ramirez, the Pirates and/or the Queen.•
Folder: Conditions for victory
Just like in the classic version of 1701 A.D., in the add-on World editor you can also set the
conditions that must be fulfilled to win the game. You can combine the various conditions in
any way you like, thereby raising or lowering the difficulty level.
Achieve Independence: Free spirits can tick this game objective to enable it. It is up to •
you whether you want to buy yourself free by paying Tributes or if you want to impress the
Queen by destroying the Royal fleet!
Last survivor: In this setting, the last survivor in the Archipelago wins the game.•
Pirate pact: A Fraternization with the Pirates leads you to victory.•
Greatest Wealth: the game is won with 500,000, 150,000 and 75,000 Gold coins in the •
Exchequer.
Largest Settlement: You win the game if you can build a City which is then home to •
20,000, 10,000 or 2,000 Inhabitants.
Trader assignments: Victory is yours after 30, 10 or 3 successfully completed Trader •
assignments. e Trader assignments must be enabled for you to do this.
Build a Castle: Dedicated builders win by building 30, 10 or even only 3 Castle elements.•
Settle Islands: Settle 90%, 60% or 30% of your Archipelago to win.•
Accumulate Colonial goods: Amass 150, 75 or 25 tons of Colonial goods and victory is •
yours.
e GUI contains additional features that are available to you at any time.
Start:
Here you can, from top to bottom:
Use the Wizard to create a new Map•
Create a new Map•
Open an existing Map•
Save the current Map•
Save the current Map as a new Map•
Close the Map and also•
Exit the editor.•
Page 23

44
45
e Editor e Editor
Edit:
Here you can:
Create a new Island or •
Modify the Map features.•
Options:
Here you can, from top to bottom:
Zoom in•
Zoom out•
Show the Resources on individual Islands•
Display the Fertilities on individual Islands and•
Display (or not) the Start dialog at startup (by ticking).•
Window:
Here you can, from top to bottom:
Display the Island data•
View the game settings•
Monitor the Fertilities and Resources•
Display a list of the Islands and•
Reset the window positions.•
Creating an Island:
You can create a new Island either by clicking on the icon in the icon bar under the header
“Edit/Create new Island” or simply by right-clicking on the empty Sea in the centre of the
screen and then clicking “Create new Island“.
Here you can choose from a vast number of Islands. ere are special northern and southern
Islands as well as other Island elements that you can access under the header “Miscellaneous”.
Select any Island and click “Create” to place it on the Archipelago. You can now repeat this
process with as many Islands as will fit on your Map. If you want to create an Island and then
immediately exit the Island selection menu, click on “Create & close” and then click “Close”
to exit the entire Island menu.
Any Island you have already selected will automatically be placed on the Archipelago first. Use
drag & drop whenever you wish to move any Islands available on the Map to where you think
they should be located.
Under the header Fertilities, you can now allocate up to three Fertilities on a single Island
by ticking the relevant places. Only the Fertility “Whales” can be added to the three existing
Fertilities on an Island.
You can tick the relevant field to modify the Island‘s light profile. You can also determine for
each individual Island whether or not it should be visible at the start of the game by ticking (or
not) the field “Island visible at startup”.
Right-click on any of the Island’s Resources to change or delete them individually.
e Resource properties window will then appear.
If you now adjust the slider bar by holding down the left mouse button and moving the bar left
or right, you will change the quantity of the corresponding Resource on the Island. If you tick
“Inexhaustible”, this Resource will never run out provided that, similar to Clay pits or Mines,
you take the appropriate actions.
Clicking the small arrrow beside the Resource type allows you to toggle between the Resources
Marble, Ore, Gold and Gems on the Island, and to change their quantity or set their deposit
levels to “Inexhaustible”.
Right-click on the Island itself to display the Island menu, where you can delete the entire
Island or just a single Resource, rotate the Island clockwise or anti-clockwise and distribute the
Island’s Resources randomly.
3.4 Using User content
You can use custom Archipelagos that you yourself have created by selecting “User content”
from the Single player or Multiplayer menu in the game.
You will then see a list of all the worlds you have created.
You can also normally find the worlds you have created yourself in the folder
“\1701 A.D.\UserContent”.
Edit Island:
To the right of the Map itself you will see where you can edit the Island data.
To do this, first select an Island. e name of the Island will now appear in the top window to
the right of the screen. Simply change the name if you decide you don‘t like the one it has.
Page 24

46
47
Notes
Technical Support
Technical Support
Aspyr Technical Support
To register your copy of this game please go to:
http://www.aspyr.com/register
If you are having problems installing or using this software, we want to help. You should read
through the manual and the Readme file on the game disc before contacting Aspyr Technical Support.
Please ensure that your computer meets the minimum system requirements that are listed on the
bottom of the box. Our Technical Support representatives will not be able to help customers whose
computers do not meet these requirements. So that we can better help you, please have the following
information ready:
-Complete product title
-Exact error message reported (if any)
-A brief description of the problem
-Your computer’s processor type and speed (Pentium 4 3.0-3.8GHz, Celeron 1.1 -1.8 GHz etc.)
-Amount of RAM (MB, GB)
-Make and model of your video card (ATI, Nvidia)
-Speed of your CD-ROM or DVD-ROM drive(16x, 4x, etc.)
-Operating System (Windows XP, Windows 2000 etc.)
Contact us over the Internet:
If, after reviewing all the known issues in this Readme file, you are still having difficulties, please visit
our online technical support page at http://support.aspyr.com/, and click on the “Browse Knowledgebase” link. If your problem is not currently listed under “Game Issues” , then please gather all
information regarding the problem, including attempts to resolve the problem, error messages, and
computer specifications and open a support ticket located at http://support.aspyr.com. is form will
then be sent to Aspyr Media Technical Support.
Contact us by Phone:
You can also contact us by phone by calling (512) 708-8100. Note that this number is for technical
assistance only. No hints or tips will be given out over the Technical Support line. When calling our
Technical Support line, please make sure you are in front of your computer and prepared to provide all
necessary information about your computer.
You can also contact Aspyr Technical Support by mail:
Aspyr Media, Inc.
P.O. Box 5861
Austin, TX 78763-5861
Page 25

48
49
Credits Credits
1701 A.D. CREDITS
RELATED DESIGNS
PRODUCTION DIRECTOR .. .. .. .. . .. .. .. .. .. .. .. . .. .. .. .. .. .. omas Pottkämper
PROJECT MANAGER . . .. .. .. .. .. . .. .. .. .. .. .. . .. .. .. .. .. .. .. . .. Oliver Staude-Müller
LEAD GAME DESIGNER . .. .. .. .. .. . .. .. .. .. .. .. .. . .. .. .. .. .. .. . Dirk Riegert
LEAD GAME PROGRAMMER .. .. .. .. .. .. .. . .. .. .. .. .. .. . .. .. .. omas Stein
. . .. .. .. .. .. .. .. . .. .. .. .. .. .. . .. .. Kevin Zellner
LEAD RD3D-ENGINE PROGRAMMER . . .. .. .. .. .. . .. .. .. .. .. Burkhard Ratheiser
ART DIRECTOR .. . .. .. .. .. .. . .. .. .. .. .. .. . .. .. .. .. .. .. . .. .. .. .. . Sebastian Steinberg
GRAPHIC PRODUCER . .. .. .. .. .. .. .. . .. .. .. .. .. .. .. . .. .. .. .. .. Jens Vielhaben
LEAD LEVEL DESIGNER . .. .. .. .. .. .. . .. .. .. .. .. .. .. . .. .. .. .. .. Jan Lenski
LEAD TESTER . . .. .. .. .. .. .. . .. .. .. .. .. .. . .. .. .. .. .. .. .. . .. .. .. .. Stephan Beier
GAME DESIGN CONSULTANT . . .. .. .. .. . .. .. .. .. .. .. . .. .. .. .. Wilfried Reiter
GAME PROGRAMMER . .. .. .. .. .. .. . .. .. .. .. .. .. . .. .. .. .. .. .. . . Ralf Brauchle
. . .. .. .. .. .. .. .. . .. .. .. .. .. .. . .. .. .. .. .. . Torben Fugger
. . .. .. .. .. .. .. .. . .. .. .. .. .. .. . .. .. .. .. .. . Tobias Hummrich
. . .. .. .. .. .. .. .. . .. .. .. .. .. .. . .. .. .. .. .. . Martin Mais
. . .. .. .. .. .. .. .. . .. .. .. .. .. .. . .. .. .. .. .. . Marcus Pukropski
. . .. .. .. .. .. .. .. . .. .. .. .. .. .. . .. .. .. .. .. . Christian Rösch
. . .. .. .. .. .. .. .. . .. .. .. .. .. .. . .. .. .. .. .. . Joachim Schaub
. . .. .. .. .. .. .. .. . .. .. .. .. .. .. . .. .. .. .. .. . Jörg Treschau
ADDITIONAL GAME PROGRAMMING . . .. .. .. .. .. . .. .. .. .. .. Sebastian König
. . .. .. .. .. .. .. .. . .. .. .. Sebastian Stauß
RD3D-Engine PROGRAMMER .. .. .. .. . .. .. .. .. .. .. . .. .. .. .. .. .. Robert Eichhorn
. . .. .. .. .. .. .. .. . .. .. .. .. .. .. . .. .. Frank Hoffmann
. . .. .. .. .. .. .. .. . .. .. .. .. .. .. . .. .. Sven Janusch
. . .. .. .. .. .. .. .. . .. .. .. .. .. .. . .. .. Wolfgang Klose
DIGITAL ARTISTS . . .. .. .. .. .. .. . .. .. .. .. .. .. . .. .. .. .. .. .. . .. .. .. Bleick Bleicken
.. . .. .. .. .. . .. .. .. .. .. .. . .. .. .. .. .. .. .. . .. .. .. . Carsten Eckhardt
.. . .. .. .. .. . .. .. .. .. .. .. . .. .. .. .. .. .. .. . .. .. .. . Andreas Jupe
.. . .. .. .. .. . .. .. .. .. .. .. . .. .. .. .. .. .. .. . .. .. .. . Valentin Koch
.. . .. .. .. .. . .. .. .. .. .. .. . .. .. .. .. .. .. .. . .. .. .. . Jost Schweinfurther
ADDITIONAL GRAPHICS .. .. .. .. . .. .. .. .. .. .. . .. .. .. .. .. .. . .. . Jens Baumgardt
. . .. .. .. .. .. .. . .. .. .. .. .. .. . .. .. .. .. .. Dirk Reiermann
GAME DESIGNER . . .. .. .. .. .. .. . .. .. .. .. .. .. .. . .. .. .. .. .. .. . .. .. Sebastian Bombera
.. . .. .. .. .. . .. .. .. .. .. .. . .. .. .. .. .. .. .. . .. .. .. . Andreas Reißner
ADDITIONAL GAME DESIGN . .. .. .. .. .. .. .. . .. .. .. .. .. .. . .. .. Björn Lilleike
. . .. .. .. .. .. .. .. . .. .. .. .. .. .. . .. . Wolfgang Siebert
GAME WRITER .. . .. .. .. .. .. . .. .. .. .. .. .. . .. .. .. .. .. .. .. . .. .. .. .. Karin Trost
LEVEL DESIGNER . .. .. . .. .. .. .. .. .. . .. .. .. .. .. .. . .. .. .. .. .. .. . .. Daniel Amend
.. . .. .. .. .. . .. .. .. .. .. .. . .. .. .. .. .. .. .. . .. .. .. . Sebastian Budig
.. . .. .. .. .. . .. .. .. .. .. .. . .. .. .. .. .. .. .. . .. .. .. . Dirk Kulla
.. . .. .. .. .. . .. .. .. .. .. .. . .. .. .. .. .. .. .. . .. .. .. . Stefan Petri
.. . .. .. .. .. . .. .. .. .. .. .. . .. .. .. .. .. .. .. . .. .. .. . Marcel Rebenstorf
.. . .. .. .. .. . .. .. .. .. .. .. . .. .. .. .. .. .. .. . .. .. .. . Volker Sassen
MAIN TESTER . . .. .. .. .. .. . .. .. .. .. .. .. . .. .. .. .. .. .. . .. .. .. .. .. .. Peter Angel
. .. . .. .. .. .. .. .. . .. .. .. .. .. .. . .. .. .. .. .. .. . .. .. .. .. Pascal Nehrkorn
TESTER . .. .. .. .. .. . .. .. .. .. .. .. . .. .. .. .. .. .. . .. .. .. .. .. .. .. . .. .. .. Dominik Doell
. .. .. . .. .. .. .. .. .. . .. .. .. .. .. .. . .. .. .. .. .. .. . .. .. .. .. .. .. .. Rolf Peter Krull
. .. .. . .. .. .. .. .. .. . .. .. .. .. .. .. . .. .. .. .. .. .. . .. .. .. .. .. .. .. Holger Adamiak
CONCEPT ARTIST . . .. .. .. .. .. . .. .. .. .. .. .. . .. .. .. .. .. .. . .. .. .. . Ulli Koller
. .. .. .. .. .. .. .. . .. .. .. .. .. .. . .. .. .. .. .. .. . .. .. Tobias Mannewitz
. .. .. .. .. .. .. .. . .. .. .. .. .. .. . .. .. .. .. .. .. . .. .. Stefan Speth
ADDITIONAL CONCEPT ARTIST .. .. . .. .. .. .. .. .. .. . .. .. .. .. . Ingolf Hetscher
. . .. .. .. .. .. .. .. . .. .. .. .. .. .. Kai Spannuth
. . .. .. .. .. .. .. .. . .. .. .. .. .. .. Oliver Specht
. . .. .. .. .. .. .. .. . .. .. .. .. .. .. Nicolas Klein
ASSISTANT TO THE MANAGING DIRECTOR . . .. .. .. .. .. .. . Svenja Büll
VIRGIN LANDS
INGAME GRAPHICS & CINEMATICS
PROJECT MANAGEMENT . . .. .. .. .. .. .. .. . .. .. .. .. .. .. . .. .. .. . Oliver Weirich
. .. .. .. .. .. . .. .. .. .. .. .. .. . .. .. .. .. .. Tobias Weingärtner
3D-ARTISTS BUILDINGS .. . .. .. .. .. .. .. . .. .. .. .. .. .. . .. .. .. .. .. Lars Wagner
.. . .. .. .. .. .. .. . .. .. .. .. .. .. . .. .. .. .. .. Stefan Spatz
.. . .. .. .. .. .. .. . .. .. .. .. .. .. . .. .. .. .. .. Marc von der Brüggen
.. . .. .. .. .. .. .. . .. .. .. .. .. .. . .. .. .. .. .. Holger Hemberger
.. . .. .. .. .. .. .. . .. .. .. .. .. .. . .. .. .. .. .. Christian Hotze
.. . .. .. .. .. .. .. . .. .. .. .. .. .. . .. .. .. .. .. Christian Rode
.. . .. .. .. .. .. .. . .. .. .. .. .. .. . .. .. .. .. .. Verena Binzenhöfer
.. . .. .. .. .. .. .. . .. .. .. .. .. .. . .. .. .. .. .. Tobias Weingärtner
3D-ARTISTS CHARACTERS . .. .. .. .. .. .. .. . .. .. .. .. .. .. .. . .. .. . Björn Harhausen
. . .. .. .. .. .. .. .. . .. .. .. .. .. .. . .. .. .. Vito Lamanna
. . .. .. .. .. .. .. .. . .. .. .. .. .. .. . .. .. .. Holger Hemberger
3D-ARTISTS CHARACTER ANIMATION . . .. .. .. .. .. . .. .. .. .. Alexey Danilkin
. . .. .. .. .. .. .. .. . .. .. Ralf Hüttinger
. . .. .. .. .. .. .. .. . .. .. Vito Lamanna
. . .. .. .. .. .. .. .. . .. .. Frank Hessefort
. . .. .. .. .. .. .. .. . .. .. Matthias Knappe
ORIGINAL SCRIPT . . .. .. .. .. .. .. .. . .. .. .. .. .. .. . .. .. .. .. .. .. . .. . Ralf Adam
TigerTeam-Productions
KEEN GAMES
CHARACTER PORTRAITS
MODELLING & TEXTURES . .. .. .. .. .. .. . .. .. .. .. .. .. . .. .. .. .. . Yu Chung Chen
CHARACTER ANIMATION .. .. . .. .. .. .. .. .. . .. .. .. .. .. .. . .. .. .. Dirk Baum
PRODUCER .. . .. .. .. .. .. .. . .. .. .. .. .. .. .. . .. .. .. .. .. .. . .. .. .. .. .. Pete Walentin
ART DIRECTOR .. . .. .. .. .. .. . .. .. .. .. .. .. . .. .. .. .. .. .. . .. .. .. .. . Antony Christoulakis
3D-IO
MAINMENUE GRAPHICS
3D-DESIGN . . .. .. .. .. .. .. .. . .. .. .. .. .. .. . .. .. .. .. .. .. . .. .. .. Igor Posavec
2D-DESIGN .. . .. .. .. .. .. . .. .. .. .. .. .. . .. .. .. .. .. .. . .. .. .. .. .. Jelena Kevic
DYNAMEDION
MUSIC & SOUND
AUDIO DIRECTION & ORIGINAL SOUND DESIGN . .. .. .. . Pierre Langer
ORIGINAL SCORE . .. .. .. .. .. .. .. . .. .. .. .. .. .. . .. .. .. .. .. .. . .. .. Tilman Sillescu
. .. .. .. .. .. .. .. . .. .. .. .. .. .. . .. .. .. .. .. .. . .. .. Pierre Langer
SCORE LAYOUT . .. .. .. .. . .. .. .. .. .. .. . .. .. .. .. .. .. . .. .. .. .. .. .. . Marco Jovic
Page 26

50
51
CreditsCredits
ORCHESTRA . .. . .. .. .. .. .. .. . .. .. .. .. .. .. . .. .. .. .. .. .. . .. .. .. .. . Brandenburgisches
Staatsorchester
Frankfurt/Oder
CONDUCTOR .. .. .. . .. .. .. .. .. .. . .. .. .. .. .. .. . .. .. .. .. .. .. . .. .. . Bernd Ruf
CHOIR . . .. .. .. .. .. .. .. . .. .. .. .. .. .. . .. .. .. .. .. .. . .. .. .. .. .. .. . .. . Artful Voices
Frankfurt/Main
Orchestra recorded, edited and mixed by . .. .. .. .. .. .. . .. .. .. .. .. .. . GENUIN
Musikproduktion Leipzig
4-REAL INTERMEDIA
VOICE RECORDING
RECORDING ENGINEER/PRODUCER .. . .. .. .. .. .. . .. .. .. .. . Holger Busse
SPEAKERS (English Dialogues) ........................................................ Sarah Crook
Jay Simon
Joe Grossi
David Westbrook
Philip Hurd-Wood
Fiona Egan
Andrew Wincott
Scott Worsfold
Robert Garrett
Joanna Swain
Mark Jeffries
Joe Cemmick
John Tearney
John Talbot
Wayne Forester
Cornelius Clark
Peter Marenker
James Ashton
Vashti McClaclan
CONSULTANTS
PRODUCTION CONSULTANT .. .. .. .. . .. .. .. .. .. .. . .. .. .. .. .. Maxwell Taylor
Rampant Lion Ent.
GAMESPY IMPLEMENTATION CONSULTANT . .. .. .. .. .. .. . Marco Keuthen
keuthen.net
MANUAL CONSULTANT .. .. . .. .. .. .. .. .. . .. .. .. .. .. .. . .. .. .. .. Detlef Richter
SUNFLOWERS
PRESIDENT . . .. .. .. .. .. .. .. . .. .. .. .. .. .. . .. .. .. .. .. .. . .. .. .. .. .. . Adi Boiko
CEO . .. .. . .. .. .. .. .. .. . .. .. .. .. .. .. .. . .. .. .. .. .. .. . .. .. .. .. .. .. . .. . Wilhelm Hamrozi
DEVELOPMENT DIRECTOR . . .. .. .. .. . .. .. .. .. .. .. .. . .. .. .. .. Erik Simon
PRODUCER .. . .. .. .. .. .. .. . .. .. .. .. .. .. .. . .. .. .. .. .. .. . .. .. .. .. .. Christian Braun
LEAD TESTER . . .. .. .. .. .. .. . .. .. .. .. .. .. . .. .. .. .. .. .. .. . .. .. .. .. Michael Backhaus
MANAGER NEW BUSINESS DEVELOPMENT,
CONSUMER RESEARCH & ANALYSIS . .. .. .. .. .. . .. .. .. .. .. .. Kay Bennemann
CONTENT MANAGER . .. . .. .. .. .. .. .. . .. .. .. .. .. .. .. . .. .. .. .. . Uwe Mathon
PR & MARKETING .. . .. .. .. .. .. .. . .. .. .. .. .. .. .. . .. .. .. .. .. .. . .. Carsten Bickhoff
. .. .. .. .. .. .. .. . .. .. .. .. .. .. . .. .. .. .. .. .. . .. .. Nadine Knobloch
. .. .. .. .. .. .. .. . .. .. .. .. .. .. . .. .. .. .. .. .. . .. .. André Bernhardt
. .. .. .. .. .. .. .. . .. .. .. .. .. .. . .. .. .. .. .. .. . .. .. Elke Müller
PR & MARKETING . . .. .. .. .. .. . .. .. .. .. .. .. . .. .. .. .. .. .. . .. .. .. . Andrea Reuth
. .. .. .. .. .. .. .. . .. .. .. .. .. .. . .. .. .. .. .. .. . .. .. Sabine Kaiser
QA MANAGER .. .. . .. .. .. .. .. .. . .. .. .. .. .. .. . .. .. .. .. .. .. . .. .. .. . Stephan Beier
ASSOCIATE QA MANAGER . . .. .. .. .. .. . .. .. .. .. .. .. . .. .. .. .. .. Alexander Brncic
ASSISTANT LEAD TESTER . .. .. .. .. .. . .. .. .. .. .. .. . .. .. .. .. .. .. Daniel Kociok
QA TESTER . .. .. .. .. .. .. .. . .. .. .. .. .. .. . .. .. .. .. .. .. . .. .. .. .. .. .. Michael Backhaus,
Erik Lindner, Alexander Köhler, Alexander Werner, Hamed Amlouka,
Andreas Bannach, Andreas Kaufmann, Andreas Noll, Andre Bernhard,
Patrick Boba, Daniela Gütling, Simon Dautert, Dennis Rupp, Dorina
Küster, Andi Lange, Fabian Müller, Felix Stirnberg, Felix Kitschke, Nicolai
Föller, Stefan Groetzschel, Sabrina Hahn, Jasmin Keskin, Jens Schneider,
Joannis omas, Johannes Euteneier, Johannes Hick, Johannes Zahn,
Alexander Joncic, Sulian Sommer, Kai Bender, Gerhard Schulze, Maik
Zimmer, Melanie Müller, Michael Graffi, Michael Juszczak, Michael Bach,
Michael Schwab, Markus Michel, Marius Prealle, Marcus Stamm, Nils
Dick, Oliver Landrock, Phillip Balluch, Christian Laubscher, Katrin Pügerl,
Sebastian Reimer, Sebastian Litzinger, Jasmin Sonnenberg, Stefan Müller,
omas Lehr, Torben Reis, Florian Turbanisch, Patrick Urankar, Kay Knecht
BETA TEST & FOCUS GROUP MANAGER . .. .. .. .. .. .. .. . .. .. Felicitas Marschik
JUNIOR ART DIRECTOR . .. .. .. .. .. . .. .. .. .. .. .. . .. .. .. .. .. .. . . Marc Vogt
WEBMASTER .. . .. .. .. .. .. .. . .. .. .. .. .. .. . .. .. .. .. .. .. . .. .. .. .. .. Ralf Praschak
ONLINE EDITOR . .. .. .. .. .. . .. .. .. .. .. .. . .. .. .. .. .. .. .. . .. .. .. . Bettina Korb
SCREEN DESIGNER . .. . .. .. .. .. .. .. . .. .. .. .. .. .. . .. .. .. .. .. .. . . Sebastian Budig
.. . .. .. .. .. .. . .. .. .. .. .. .. . .. .. .. .. .. .. . .. .. André Weckeiser
CONTENT SUPPORT .. .. .. .. . .. .. .. .. .. .. . .. .. .. .. .. .. . .. .. .. .. Alexandra Kohler
. . .. .. .. .. .. .. .. . .. .. .. .. .. .. . .. .. .. .. .. .. . Michael Bach
. . .. .. .. .. .. .. .. . .. .. .. .. .. .. . .. .. .. .. .. .. . Jens Schneider
CONSUMER RESEARCH GROUP COORDINATOR . . .. .. .. . Marion Deul
IT MANAGER . . .. .. .. .. .. .. . .. .. .. .. .. .. .. . .. .. .. .. .. .. . .. .. .. .. . Christoph Klempau
NETWORK & SYSTEMS ADMINISTRATOR .. .. .. .. .. . .. .. .. . Mario Knopf
. . .. .. .. .. .. .. .. . . Dirk Sachse
PERSONAL ASSISTANT TO THE PRESIDENT . .. .. .. .. .. . .. .. Lydia Brkic
PERSONAL ASSISTANT TO THE CEO .. . .. .. .. .. .. . .. .. .. .. .. . Ines Köhler
ASSISTANT TO THE CEO . . .. .. .. .. .. .. . .. .. .. .. .. .. . .. .. .. .. .. Judith Schulz-Häuser
ACCOUNTING .. .. .. .. .. . .. .. .. .. .. .. . .. .. .. .. .. .. .. . .. .. .. .. .. . Ute Ziegler
SPECIAL THANKS TO . .. .. .. .. . .. .. .. .. .. .. . .. .. .. .. .. .. . .. .. .. . Reinhard Döpfer
ASPYR MEDIA, INC.
EXECUTIVE PRODUCER .................................................... Blaine Christine
PRODUCER ........................................................................... Jay Gordon
ASSOCIATE PRODUCER ..................................................... Matt Scates
PRODUCTION COORDINATOR ............................................... Andrew Cook
SENIOR PROJECT MANAGER ...................................................Kelly Bates
PROJECT COORDINATOR ......................................................... Patrick Rogers
QUALITY ASSURANCE LEAD .................................................. Sean Vowels
QUALITY ASSURANCE TEAM LEAD ........................................Lance Givilancz
QUALITY ASSURANCE TESTERS ..............................................Owen Hopson
...............................................Tim Honker
...............................................Gregory Hodges
...............................................John Lopez
...............................................John Escobedo
...............................................Justin Dombrowski
...............................................Brittany Henry
Page 27

52
53
Credits Credits
COMPATIBILITY LAB TECHNICIANS: ....................................... Jessie Boyer
....................................... Andrew Horwitz
....................................... Pete Knaus
TECHNICAL SUPPORT:.................................................................. Jason McClure
.................................................................. Jennifer Becker
.................................................................. Haley Lumpkin
.................................................................. Joe Rinaldi
.................................................................. Tom Rees
.................................................................. Clint Parker
DIRECTOR OF MARKETING ........................................................ Leah Heck
MARKETING MANAGER ............................................................... Eric Duncan
CREATIVE MARKETING DIRECTOR .......................................... Zach Rener
DESIGNER ........................................................................................ Greg Althoff
PRODUCTION ARTIST .................................................................. Lance McIlhany
TECHNICAL MARKETING ASSISTANT ...................................... Jack Pattillo
DIRECTOR OF QUALITY ASSURANCE
AND TECHNICAL SUPPORT ........................................................ Tim Attuquayefio
QUALITY ASSURANCE SUPERVISORS ........................................ Steve Amacker
........................................ Bard Alexander
TECHNICAL SUPPORT/COMPATABILTY LAB MANAGER ........ Andy Brazell
SPECIAL THANKS….
............................................................................ David Hasselhoff
HERMETICODE
COPY PROTECTION .. . .. .. .. .. .. . .. .. .. .. .. .. . .. .. .. .. .. .. .. . .. .. .. Jürgen Schäpker
. .. . .. .. .. .. .. .. . .. .. .. .. .. .. . .. .. .. .. .. .. . .. .. Markus Stoller
....................................................................... Chance Copeland
1701 A.D. THE SUNKEN DRAGON CREDITS
RELATED DESIGNS
PRODUCTION DIRECTOR .. . .. .. .. .. .. . .. .. .. .. .. .. .. . .. .. .. .. omas Pottkämper
PROJECT MANAGER . . .. .. .. .. .. .. .. . .. .. .. .. .. .. . .. .. .. .. .. .. . . Olaf Klöppel
LEAD GAME PROGRAMMER.. .. . .. .. .. .. .. .. . .. .. .. .. .. .. . .. .. omas Stein
. . .. .. .. .. .. .. .. . .. .. .. .. .. .. . .. .. Kevin Zellner
LEAD RD3D-ENGINE PROGRAMMER.. .. . .. .. .. .. .. .. . .. .. .. . Burkhard Ratheiser
ART DIRECTOR.. .. .. .. .. .. . .. .. .. .. .. .. . .. .. .. .. .. .. . .. .. .. .. .. . Sebastian Steinberg
LEAD LEVEL DESIGNER.. . .. .. .. .. . .. .. .. .. .. .. .. . .. .. .. .. .. .. . Jessica Telwach
LEAD TESTER.. .. .. . .. .. .. .. .. .. . .. .. .. .. .. .. . .. .. .. .. .. .. . .. .. .. Jessica Telwach
GAME PROGRAMMING.. .. . .. .. .. .. .. .. . .. .. .. .. .. .. . .. .. .. .. . Ralf Brauchle
. . .. .. .. .. .. .. .. . .. .. .. .. .. .. . .. .. .. .. .. Torben Fugger
. . .. .. .. .. .. .. .. . .. .. .. .. .. .. . .. .. .. .. .. Tobias Hummrich
. . .. .. .. .. .. .. .. . .. .. .. .. .. .. . .. .. .. .. .. Martin Mais
. . .. .. .. .. .. .. .. . .. .. .. .. .. .. . .. .. .. .. .. Christian Rösch
. . .. .. .. .. .. .. .. . .. .. .. .. .. .. . .. .. .. .. .. Joachim Schaub
. . .. .. .. .. .. .. .. . .. .. .. .. .. .. . .. .. .. .. .. Jörg Treschau
RD3D-ENGINE PROGRAMMING.. .. . .. .. .. .. .. .. . .. .. .. .. .. .. Robert Eichhorn
. .. .. .. .. . .. .. .. .. .. .. . .. .. .. . Frank Hoffmann
. .. .. .. .. . .. .. .. .. .. .. . .. .. .. . Sven Janusch
. .. .. .. .. . .. .. .. .. .. .. . .. .. .. . Wolfgang Klose
DIGITAL ARTISTS. . .. .. .. .. .. .. . .. .. .. .. .. .. . .. .. .. .. .. .. . .. .. .. Carsten Eckhardt
.. . .. .. .. .. . .. .. .. .. .. .. . .. .. .. .. .. .. .. . .. .. .. . Andreas Jupe
.. . .. .. .. .. . .. .. .. .. .. .. . .. .. .. .. .. .. .. . .. .. .. . Valentin Koch
.. . .. .. .. .. . .. .. .. .. .. .. . .. .. .. .. .. .. .. . .. .. .. . Jost Schweinfurther
GAME DESIGNER. . .. .. .. .. .. .. .. . .. .. .. .. .. .. . .. .. .. .. .. .. . .. .. Sebastian Bombera
ADDITIONAL GAME DESIGN. . .. .. .. .. .. .. .. . .. .. .. .. .. .. . .. .. Björn Lilleike
................................. Philipp Klett
. . .. .. .. .. .. .. .. . .. .. .. .. .. .. . .. . Matthias Nock
. . .. .. .. .. .. .. .. . .. .. .. .. .. .. . .. . Dirk Riegert
. . .. .. .. .. .. .. .. . .. .. .. .. .. .. . .. . Guido Schmidt
GAME WRITER.. . .. .. .. .. .. . .. .. .. .. .. .. . .. .. .. .. .. .. . .. .. .. .. .. . Karin Trost
LEVEL DESIGNER.. . .. .. .. .. . .. .. .. .. .. .. .. . .. .. .. .. .. .. . .. .. .. .. Daniel Amend
.. . .. .. .. .. . .. .. .. .. .. .. . .. .. .. .. .. .. .. . .. .. .. . Dirk Kulla
.. . .. .. .. .. . .. .. .. .. .. .. . .. .. .. .. .. .. .. . .. .. .. . Stefan Petri
.. . .. .. .. .. . .. .. .. .. .. .. . .. .. .. .. .. .. .. . .. .. .. . Marcel Rebenstorf
.. . .. .. .. .. . .. .. .. .. .. .. . .. .. .. .. .. .. .. . .. .. .. . Volker Sassen
MAIN TESTER.. .. .. . .. .. .. .. .. .. . .. .. .. .. .. .. . .. .. .. .. .. .. . .. .. .. Peter Angel
.. .. .. .. .. .. .. .. . .. .. .. .. .. .. .. . .. .. .. .. .. .. . .. .. .. . Pascal Nehrkorn
TESTER. . .. .. .. .. .. .. .. . .. .. .. .. .. .. . .. .. .. .. .. .. . .. .. .. .. .. .. . .. . Jens Bernstorff
. .. .. . .. .. .. .. .. .. . .. .. .. .. .. .. . .. .. .. .. .. .. . .. .. .. .. .. .. .. Dominik Doell
CONCEPT ARTIST.. . .. .. .. .. .. .. .. . .. .. .. .. .. .. . .. .. .. .. .. .. . .. . Tobias Mannewitz
.. . .. .. .. .. . .. .. .. .. .. .. . .. .. .. .. .. .. .. . .. .. .. . Stefan Speth
ASSISTANT TO THE MANAGING DIRECTOR. .. .. .. .. .. .. .. . Svenja Büll
PRODUCTION ASSISTANT.. .. .. .. .. .. .. . .. .. .. .. .. .. . .. .. .. .. .. Nadin Koch
SPECIAL THANKS TO. . .. .. .. .. .. .. .. . .. .. .. .. .. .. . .. .. .. .. .. .. . . Gregor Eigner
. . .. .. .. .. .. .. .. . .. .. .. .. .. .. . .. .. .. .. .. .. . Martin Elsäßer
. . .. .. .. .. .. .. .. . .. .. .. .. .. .. . .. .. .. .. .. .. . Frank Schurad
Page 28

54
55
CreditsCredits
VIRGIN LANDS
3D OBJECTS, CHARACTERS AND ANIMATIONS
PROJECT MANAGEMENT . . .. .. .. .. .. .. .. . .. .. .. .. .. .. . .. .. .. .. Oliver Weirich
. . .. .. .. .. .. .. . .. .. .. .. .. .. . .. .. .. .. .. Tobias Weingärtner
3D-ARTISTS BUILDINGS.. .. .. .. .. . .. .. .. .. .. .. . .. .. .. .. .. .. . .. . Christian Hotze
. . .. .. .. .. .. .. .. . .. .. .. .. .. .. . .. .. .. .. .. Lars Wagner
. . .. .. .. .. .. .. .. . .. .. .. .. .. .. . .. .. .. .. .. Tobias Weingärtner
3D-ARTISTS ANIMATION. . .. .. .. .. .. .. . .. .. .. .. .. .. . .. .. .. .. .. . Volker Jäcklein
KEEN GAMES
CHARACTER PORTRAITS
MODELLING & TEXTURES.. .. .. . .. .. .. .. .. .. . .. .. .. .. .. .. . .. Yu Chung Chen
CHARACTER ANIMATION.. .. .. .. .. .. . .. .. .. .. .. .. . .. .. .. .. .. Dirk Baum
P R O DU CE R. .. .. .. .. . .. .. .. .. .. .. . .. .. .. .. .. .. . .. .. .. .. .. .. . .. Jan Jöckel
ART DIRECTOR............................................. Antony Christoulakis
DYNAMEDION
MUSIC & SOUND
AUDIO DIRECTION .. .. .. .. .. .. . .. .. .. .. .. .. . .. .. .. .. .. .. . .. .. . Pierre Langer
O R IG IN AL S CO RE . . .. .. .. .. .. . .. .. .. .. .. .. . .. .. .. .. .. .. . .. . Tilman Sillescu
.. . .. .. .. .. . .. .. .. .. .. .. . .. .. .. .. .. .. .. . .. Pierre Langer
SCORE LAYOUT.. .. .. .. . .. .. .. .. .. .. . .. .. .. .. .. .. . .. .. .. .. .. .. . .. Marco Jovic
ORCHESTRA . .. . .. .. .. .. .. .. . .. .. .. .. .. .. . .. .. .. .. .. .. . .. .. .. .. . Staatskapelle Halle
CONDUCTOR .. .. .. . .. .. .. .. .. .. . .. .. .. .. .. .. . .. .. .. .. .. .. . .. .. . Bernd Ruf
Orchestra recorded, edited and mixed by.. .. .. .. .. .. .. .. . .. .. .. .. .. . GENUIN
Musikproduktion Leipzig
RECORDING ENGINEER / PRODUCER .. .. . .. .. .. .. .. .. . .. .. Holger Busse
Original Sound Design & Sound Implementation by.. .. .. .. .. .. .. . Pierre Langer
. . .. .. .. .. .. .. . Michael Schwendler
. . .. .. .. .. .. .. . Axel Rohrbach
OUTSOURCE MEDIA Ltd
VOICE RECORDING (English Dialogues)
SPEAKERS (English Dialogs) .. . .. .. .. .. .. .. . .. .. .. .. .. .. . .. .. .. .. Holger Busse
. .. .. .. .. .. .. . .. .. .. .. .. .. . .. .. .. .. .. Gareth Armstrong
. .. .. .. .. .. .. . .. .. .. .. .. .. . .. .. .. .. .. Jo Swain
. .. . .. .. .. .. .. .. . .. .. .. .. .. .. . .. .. .. . Joe Grossi
. .. .. .. .. .. .. . .. .. .. .. .. .. . .. .. .. .. .. Jon Tearney
. .. .. .. .. .. .. . .. .. .. .. .. .. . .. .. .. .. .. Max Berendt
. .. .. .. .. .. .. . .. .. .. .. .. .. . .. .. .. .. .. Sarah Crook
. .. .. .. .. .. .. . .. .. .. .. .. .. . .. .. .. .. .. Scott Worsfold
. .. .. .. .. .. .. . .. .. .. .. .. .. . .. .. .. .. .. Terry Wilton
. .. .. .. .. .. .. . .. .. .. .. .. .. . .. .. .. .. .. Vashti McClaclan
. .. .. .. .. .. .. . .. .. .. .. .. .. . .. .. .. .. .. Wayne Forester
CONSULTANTS
ADDITIONAL GAME WRITING.. . .. . .. .. .. .. . .. .. .. .. . .. .. .. .. Oliver Graute
. .. .. .. .. .. .. . .. .. .. .. .. .. . .. .. . Oliver Hoffmann
. .. .. .. .. .. .. . .. .. .. .. .. .. . .. .. . Feder & Schwert
PROJECT MANAGEMENT CONSULTANT.. .. .. .. .. . .. .. .. .. . Oliver Staude-Müller
UBISOFT
GENERAL MANAGER UBISOFT .. .. .. .. .. .. .. . .. .. .. .. .. .. . .. . Ralf Wirsing
MANAGING DIRECTOR BLUE BYTE . .. .. .. . .. .. .. .. .. .. .. . . Odile Limpach
INTERNATIONAL BRAND MANAGER .. .. . .. .. .. .. .. .. . .. .. .. Ronald Kaulbach
JUNIOR INTERNATIONAL BRAND MANAGER .. .. .. .. .. . .. Conny Kroest
HEAD OF MARKETING .. .. . .. .. .. .. .. .. . .. .. .. .. .. .. . .. . Benedikt Schüler
HEAD OF PRODUCT MARKETING . . .. .. .. .. .. .. . .. .. .. .. .. .. . orsten Kapp
PRODUCT MANAGER . . .. .. .. .. .. .. .. . .. .. .. .. .. .. . .. .. .. .. .. .. . Timo Gerken
HEAD OF PR . .. .. .. .. .. . .. .. .. .. .. .. .. . .. .. .. .. .. .. . .. .. .. .. .. .. . . Niels Bogdan
SENIOR PR MANAGER . .. .. .. .. .. .. .. . .. .. .. .. .. .. . .. .. .. .. .. .. . Karsten Lehmann
PR MANAGER . .. .. .. .. .. .. .. . .. .. .. .. .. .. . .. .. .. .. .. .. . .. .. .. .. .. Norman Habakuck
ONLINE MARKETING MANAGER .. .. .. .. . .. .. .. .. .. .. .. . .. .. Marc Homayounpour
JUNIOR ONLINE MARKETING MANAGER .. . .. .. .. .. .. .. .. . Annick Vins
WEBMASTER .. . .. .. .. .. .. .. . .. .. .. .. .. .. . .. .. .. .. .. .. . .. .. .. .. .. Stephan Schädel
HEAD OF TRADE MARKETING . . .. .. .. .. .. . .. .. .. .. .. .. .. . .. . Elke Roß
TRADE MARKETING MANAGER . .. .. .. .. .. .. .. . .. .. .. .. .. .. . . Jörg Zimmermann
PR CONSULTANT / KEYFACTOR .. .. .. .. . .. .. .. .. .. .. . .. .. .. .. Sabine Kaiser
DEEP SILVER
PRODUCT MANAGEMENT.. .. . .. .. .. .. .. .. . .. .. .. .. .. .. . .. .. .. Mathias Boxleitner
MARKETING . .. .. .. . .. .. .. .. .. .. . .. .. .. .. .. .. .. . .. .. .. .. .. .. . .. . Georg Larch
PRESS .. .. .. .. .. .. .. . .. .. .. .. .. .. .. . .. .. .. .. .. .. . .. .. .. .. .. .. . .. .. . Ute Palmer
PRODUCTION . . .. .. .. .. .. .. . .. .. .. .. .. .. . .. .. .. .. .. .. . .. .. .. .. . Christian Moriz
POST-PRODUCTION . .. .. .. .. .. .. . .. .. .. .. .. .. . .. .. .. .. .. .. . .. .. Michael K. Schmidt
SUNFLOWERS
PRODUCER . . .. .. .. .. .. . .. .. .. .. .. .. . .. .. .. .. .. .. .. . .. .. .. .. .. .. . Christoph Knauz
LEAD TESTER . . .. .. .. .. .. .. .. . .. .. .. .. .. .. . .. .. .. .. .. .. . .. .. .. .. Felicitas Marschik
CONTENT MANAGER . .. .. .. .. .. .. .. . .. .. .. .. .. .. . .. .. .. .. .. .. Uwe Mathon
QA MANAGER . . .. .. .. .. .. . .. .. .. .. .. .. . .. .. .. .. .. .. .. . .. .. .. .. .. Stephan Beier
QA TESTER.. . .. .. .. .. .. . .. .. .. .. .. .. . .. .. .. .. .. .. .. . .. .. .. .. .. .. . Kay Knecht
....................................................... Alexander Joncic
........................................................Nils Dick
........................................................Stefan Grötschel
........................................................Christian Laubscher
........................................................Nicolai Föller
........................................................Patrick Urankar
........................................................Patrick Boba
........................................................Markus Michel
........................................................Simon Dautert
........................................................Kai Bender
........................................................Marcus Stamm
........................................................Maik Zimmer
Page 29

56
57
Credits License and Warranty
........................................................Kris Niewöhner
........................................................Ferdi Cam
........................................................Sabrina Hahn
........................................................Daniela Gültling
........................................................Michael Juszczak
........................................................Dorina Küster
........................................................Florian Turbanisch
CONSUMER RESEARCH GROUP COORDINATOR . .. .. Felicitas Marschik
. . .. .Alwin Mangundirjo
ASSISTANT TO THE CONTENT MANAGER ............. Alexandra Kohler
WEBMASTER .. . .. .. .. .. .. . .. .. .. .. .. .. . .. .. .. .. .. .. .. . .. .. .. .Ralf Praschak
ONLINE EDITOR .. .. .. . .. .. .. .. .. .. . .. .. .. .. .. .. .. . .. .. .. .. .Bettina Korb
COVER ARTWORK . .. .. .. .. .. .. .. . .. .. .. .. .. .. . .. .. .. .. .. .. . Tobias Mannewitz
SPECIAL THANKS TO .. . .. .. .. .. .. . .. .. .. .. .. .. .. . .. .. .. .. .. Reinhard Döpfer
HERMETICODE
COPY PROTECTION.. .. .. .. .. . .. .. .. .. .. .. . .. .. .. .. .. .. . .. .. .. .. .. .. . .. . Jürgen Schäpker
ASPYR MEDIA
EXECUTIVE PRODUCER . .. .. .. .. .. .. .. . .. .. .. .. .. .. . .. .. .. .. Jay Gordon
PRODUCTION COORDINATOR .. . .. .. .. .. .. .. . .. .. .. .. .. .. . Andrew Horwitz
SENIOR PROJECT MANAGER . .. .. . .. .. .. .. .. .. . .. .. .. .. .. .. . . Kelly Bates
DIRECTOR OF QUALITY ASSURANCE . .. .. .. .. .. .. . .. .. .. .. Andy Brazell
QUALITY ASSURANCE SUPERVISOR . .. .. .. .. .. .. . .. .. .. .. .. Steve Amacker
QUALITY ASSURANCE SUPERVISOR . .. .. .. .. .. .. . .. .. .. .. .. Bard Alexander
QUALITY ASSURANCE LEAD . .. .. . .. .. .. .. .. .. . .. .. .. .. .. .. . . Ryan Stocks
QUALITY ASSURANCE TESTERS . .. .. .. . .. .. .. .. .. .. . .. .. .. .. . Zeb West
. . .. .. .. .. .. .. .. . .. .. .. .. .. .. . Joe Gill
. . .. .. .. .. .. .. .. . .. .. .. .. .. .. . Brennan Muhs
. . .. .. .. .. .. .. .. . .. .. .. .. .. .. . Justin Van Loan
SENIOR COMPATIBILITY LAB/
CQC LEAD ANALYST .. .. .. .. .. .. .. . .. .. .. .. .. .. .. . .. .. .. .. .. .. . Dusty Coleman
COMPATIBILITY LAB TECHNICIAN 1 .. .. .. .. .. .. .. . .. .. .. .. Mike Greene
COMPATIBILITY LAB TECHNICIAN 1 .. .. .. .. .. .. .. . .. .. .. .. Pete Knaus
COMPATIBILITY LAB TESTERS . .. .. .. .. .. .. .. . .. .. .. .. .. .. . .. .Joseph Herda
. . .. .. .. .. .. .. .. . .. .. .. .. .. .. . David Killam
. . .. .. .. .. .. .. .. . .. .. .. .. .. .. . John Vitrano
. . .. .. .. .. .. .. .. . .. .. .. .. .. .. . Chad Brauneck
MARKETING MANAGER . . .. .. .. .. .. .. .. . .. .. .. .. .. .. . .. .. .. .. Eric Duncan
CREATIVE MARKETING LEAD .. .. .. .. .. .. .. . .. .. .. .. .. .. .. . . Devin Cox
CREATIVE VIDEO PRODUCER . . .. .. .. .. .. .. . .. .. .. .. .. .. . .. . Jack Pattillo
JR. DESIGNER .. .. .. .. .. .. . .. .. .. .. .. .. .. . .. .. .. .. .. .. . .. .. .. .. .. Clint Wells
MARKETING COORDINATOR . .. .. .. .. .. .. . .. .. .. .. .. .. . .. .. Jacob Sloan
CERTIFICATION SPECIALIST . . .. .. .. .. .. . .. .. .. .. .. .. . .. .. .. . Ty Myrick
CERTIFICATION SPECIALIST . . .. .. .. .. .. . .. .. .. .. .. .. . .. .. .. . Michael Cardona
CERTIFICATION SPECIALIST . . .. .. .. .. .. . .. .. .. .. .. .. . .. .. .. . Sean Vowels
CERTIFICATION TESTERS . .. .. . .. .. .. .. .. .. . .. .. .. .. .. .. . .. .. Alex urman
. . .. .. .. .. .. .. .. . .. .. .. .. .. .. . Jordan Koch
DEVELOPMENT MANAGER . .. .. .. . .. .. .. .. .. .. . .. .. .. .. .. .. . Mark Krenek
BUILD ENGINEER . . .. .. .. .. .. .. . .. .. .. .. .. .. .. . .. .. .. .. .. .. . .. . John Merrill
SOFTWARE LICENSE AGREEMENT
IMPORTANT - READ CAREFULLY: YOUR USE OF THIS SOFTWARE (THE “PROGRAM”) IS SUBJECT
TO THE SOFTWARE LICENSE TERMS SET FORTH BELOW. THE “PROGRAM” INCLUDES ALL
SOFTWARE INCLUDED WITH THIS AGREEMENT, THE ASSOCIATED MEDIA, ANY PRINTED
MATERIALS, AND ANY ON-LINE OR ELECTRONIC DOCUMENTATION, AND ANY AND ALL
COPIES OF SUCH SOFTWARE AND MATERIALS. BY OPENING THIS PACKAGE, INSTALLING,
AND/OR USING THE PROGRAM AND ANY SOFTWARE PROGRAMS INCLUDED WITHIN THE
PROGRAM, YOU ACCEPT THE TERMS OF THIS LICENSE WITH ASPYR. (“ASPYR”).
LIMITED WARRANTY:
Aspyr Media warrants the original purchaser that this disc is free from defects and materials and workmanship for a period of ninety (90) days from the date of purchase. Aspyr Media will, at its option, repair or
replace this disc, free of charge, postage paid with proof of date of purchase, at its offices. EXCEPT AS
SET FORTH ABOVE, THIS WARRANTY IS IN LIEU OF ALL OTHER WARRANTIES, WHETHER
ORAL OR WRITTEN, EXPRESS OR IMPLIED, INCLUDING ANY WARRANTY OF MERCHANTABILITY, FITNESS FOR A PARTICULAR PURPOSE OR NON-INFRINGEMENT, AND
NO OTHER REPRESENTATIONS OR CLAIMS OF ANY KIND SHALL BE BINDING ON OR
OBLIGATE ASPYR.
When returning the Program for warranty replacement please send the original product disks only in protective packaging and include: (1) a photocopy of your dated sales receipt; (2) your name and return address
typed or clearly printed; (3) a brief note describing the defect, the problem(s) you are encountered and
the system on which you are running the Program; (4) if you are returning the Program after the 90-day
warranty period, but within one year after the date of purchase, please include check or money order for $10
U.S. currency per CD replacement. Note: Certified mail recommended.
In the U.S. send to:
Warranty Replacements
Aspyr Media, Inc.
PO Box 5861
Austin, Texas 78763
Page 30

58
59
License and Warranty Copyrights
LIMITED USE LICENSE:
Subject to the conditions described below, Aspyr grants you the non-exclusive, non-transferable, limited
right and license to install and use one copy of the Program solely and exclusively for your personal use.
All rights not specifically granted under this Agreement are reserved by Aspyr and, as applicable, Aspyr’s
licensors. e Program is licensed, not sold, for your use. Your license confers no title or ownership in the
Program and should not be construed as a sale of any rights in the Program. All rights not specifically granted
under this Agreement are reserved by Aspyr and, as applicable, its licensors.
LICENSE CONDITIONS
You agree not to:
•Exploit the Program or any ofitspartscommercially,includingbutnotlimitedtouseata cyber cafe,
computer gaming center or any other location-based site. Aspyr may offer a separate Site License Agreement
to permit you to make the Program available for commercial use; see the contact information below.
• Sell, rent, lease, license, distribute or otherwise transfer this Program, or any copies of this Program,
without the express prior written consent of Aspyr.
•Usethe Program,or permituseof theProgram,inanetwork,multi-userarrangement orremoteaccess
arrangement, including any on-line use, except as otherwise specifically provided by the Program.
• Use the Program, or permit use of the Program,on morethan one computer, computer terminal, or
workstation at the same time.
• Make copies of the Program or any part thereof, or make copies of the materials accompanying the
Program.
•CopytheProgramontoaharddriveorotherstoragedevice;youmustruntheProgramfromtheincluded
DVD-ROM (although the Program itself may automatically copy a portion of the Program onto your hard
drive during installation in order to run more efficiently).
•Reverseengineer,derivesourcecode,modify,decompile,ordisassembletheProgram,inwholeorinpart.
•Remove,disableorcircumventanyproprietarynoticesorlabelscontainedonorwithintheProgram.
•Exportorre-exporttheProgramoranycopyoradaptationthereofinviolationofany applicablelawsor
regulations.
OWNERSHIP:
All title, ownership rights and intellectual property rights in and to the Program and any and all copies
thereof are owned by Aspyr. e Program is protected by the copyright laws of the United States, international copyright treaties and conventions and other laws. e Program contains certain licensed materials
and Aspyr may protect their rights in the event of any violation of this Agreement. You agree not to remove,
disable or circumvent any proprietary notices or labels contained on or within the Program.
Copyrights
USES MILES SOUND SYSTEM
Copyright (c) 1995-2008 by RAD Game Tools, Inc.
USES GRANNY ANIMATION
Copyright (c) 1999-2008 by RAD Game Tools, Inc.
USES BINK VIDEO Technology
Copyright (c) 1997-2008 by RAD Game Tools, Inc.
is product contains software technology licensed from GameSpy Industries, Inc.
© 1999-2008 GameSpy Industries, Inc. GameSpy and the „Powered by GameSpy“ design are
trademarks of GameSpy Industries, Inc. All rights reserved.
Page 31

60
61
NotesNotes
Page 32

© 2007 Ubisoft Entertainment. All Rights Reserved. Ubisoft, Ubi.com and the Ubisoft logo are trademarks of Ubisoft Entertainment in the U.S. and/or other countries. Anno, Sunflowers and Sunflowers logo are trademarks of Sunflowers GmbH in the U.S. and/or other countries. Sunflowers GmbH is a Ubisoft Entertainment
company. Developed by Related Designs GmbH. Published and distributed by Aspyr Media. Aspyr and the Aspyr “star” logo are federally registered trademarks of
Aspyr Media, Inc. All rights reserved. The ratings icon is a trademark of the Entertainment Software Association. All trademarks are the property of their respective
owners. The use of the game is subject to an end-user license agreement (EULA). Aspyr Media, Inc. PO Box 5861 Austin, Texas 78763. 11821-1MNASKA
 Loading...