

TV Ears Headset System User Manual

2.3 MHz System Installation Instructions
Step 1 - Contents
1 2 3 4
Remove items from box (1) Headset, (2) Transmitter, (3) A/C
Adapter, (4) Audio Cord.
Step 2 – PLUG IN A/C ADAPTER
Plug the A/C Adapter (3) into standard 110 volt electrical
outlet and plug the other end into the“12v” jack located on
the back of the transmitter (2). NOTE: System will not work
if unplugged from electrical outlet.
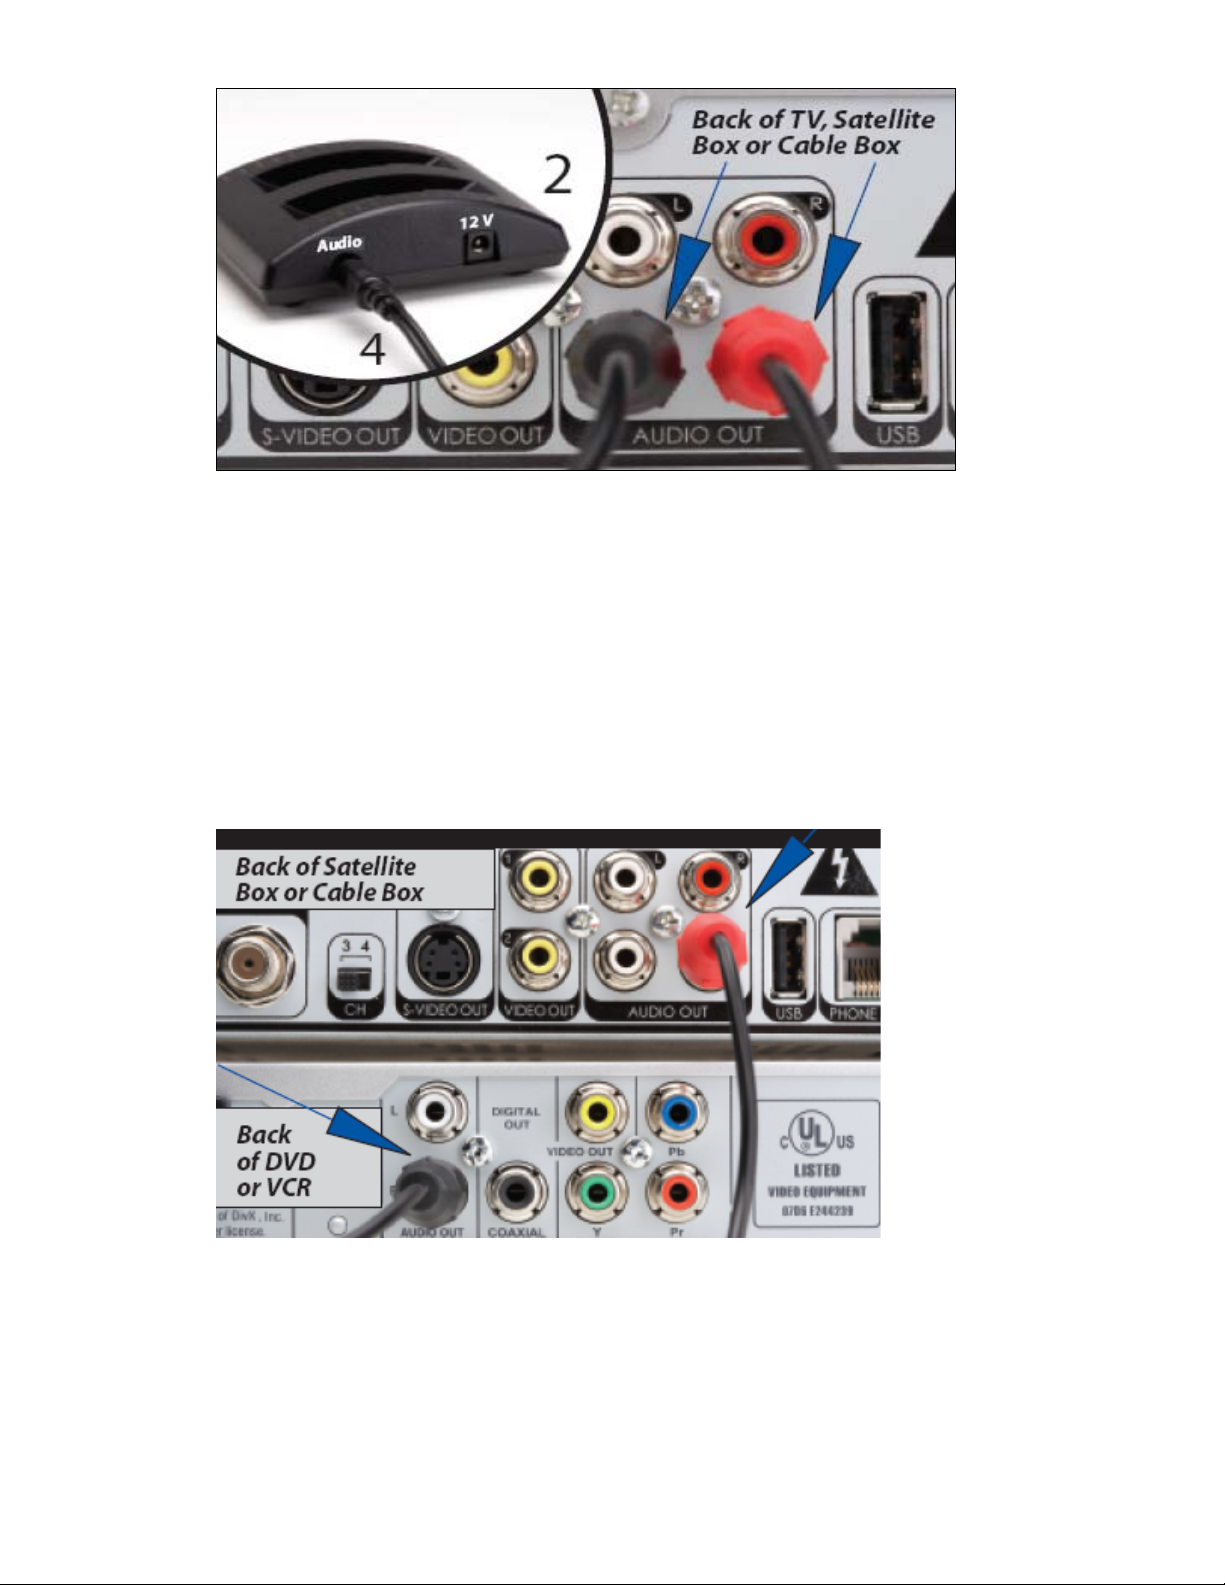
Step 3 – PLUG IN AUDIO CORD
Plug the single end of the Audio Cord (4) into the "Audio"
jack located on the back of the transmitter (2). Plug the
other end (RED & BLACK) into the "Audio Out" ports located
on the back of your television set, satellite box, or cable
box. Audio Out ports are labeled "Audio Out" or "Out".
Tips – PLUG IN AUDIO CORD
Tip 1
If you chose to plug the Audio Cord (4) into the back
of your TV, satellite box or cable box and you want TV Ears
to also work with your DVD or VCR, then plug the RED
wire of the Audio Cord (4) into the "Audio Out" of your
satellite or cable box and BLACK wire of the Audio Cord (4)
into the "Audio Out" port on the back of your DVD or VCR.
Tip 2
Tip 3
If you do not have an Audio Out port on the back of your
television set, satellite box, or cable box and therefore do
not have an Audio Out port anywhere, then purchase the
"Alternative Installation Kit". (See accessories).
This accessory is also helpful when traveling with TV Ears.
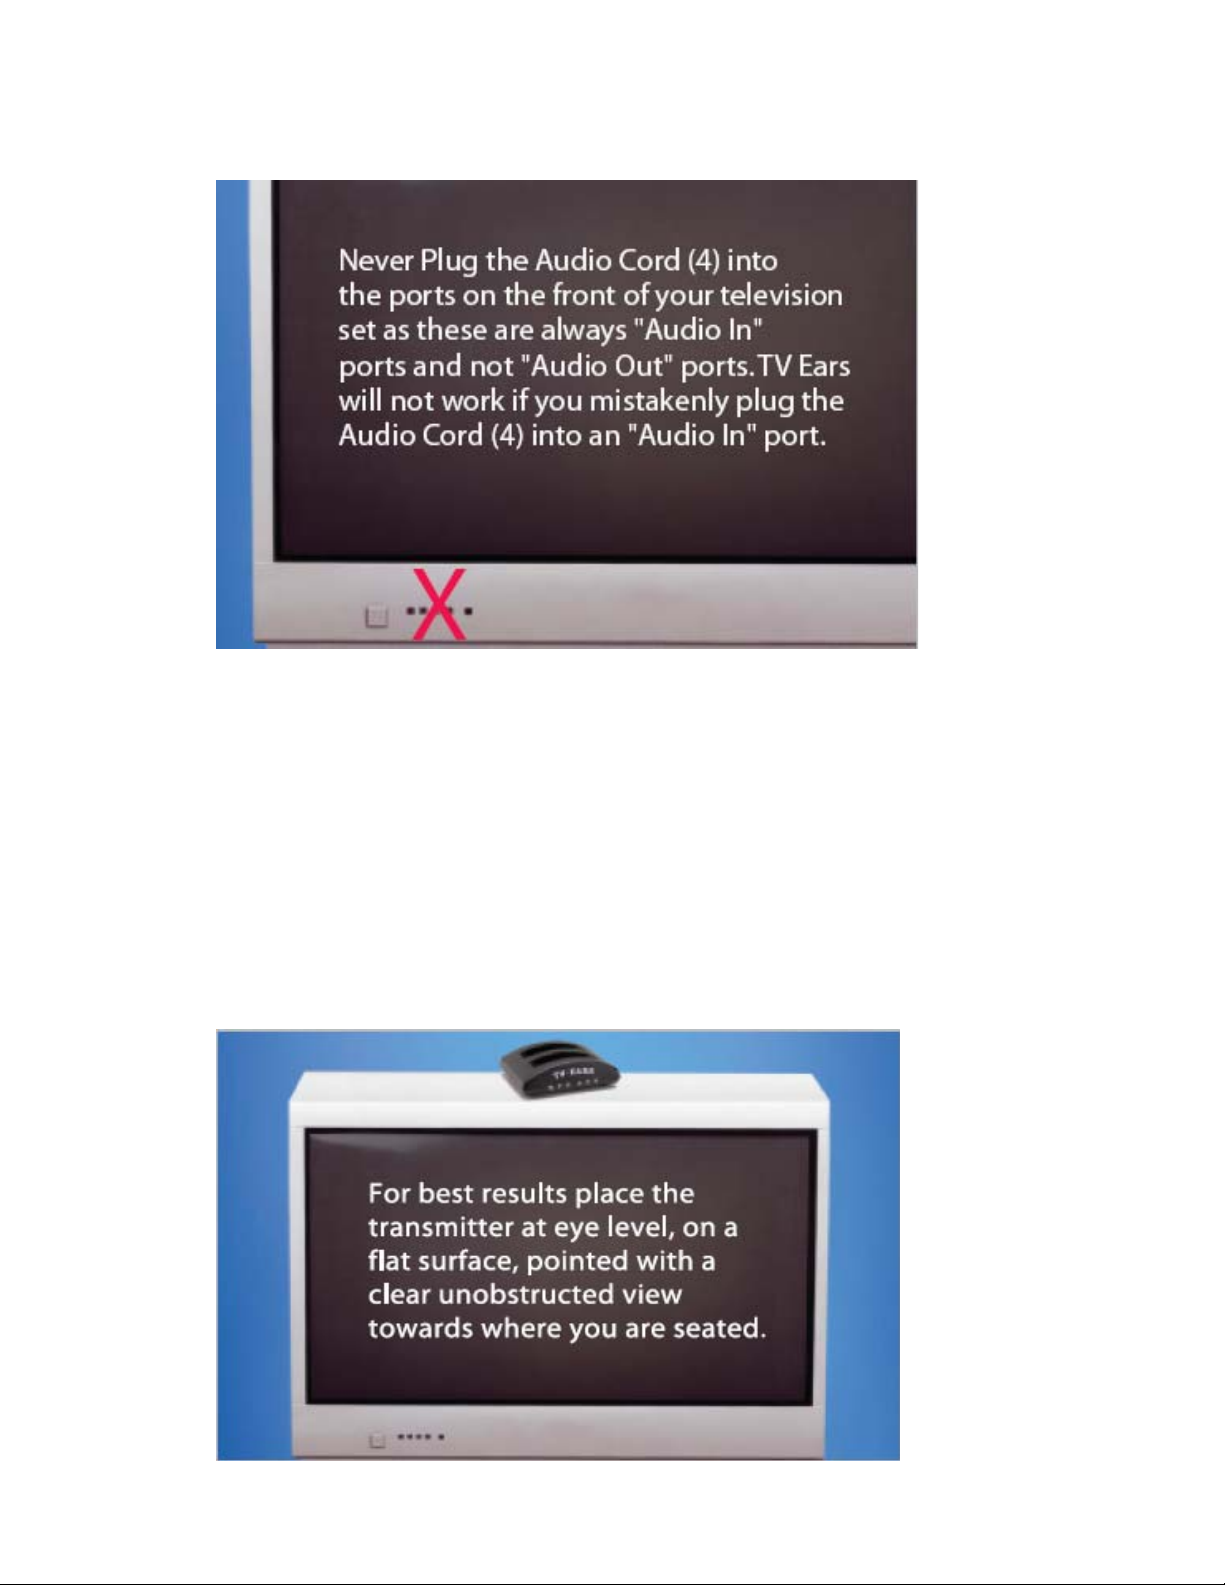
Step 4 – PLACING THE TRANSMITTER
 Loading...