

Page 1

TV Ears 5.0 Speaker
Quick Start Guide
Voice Clarifying Circuitry
®
Page 2
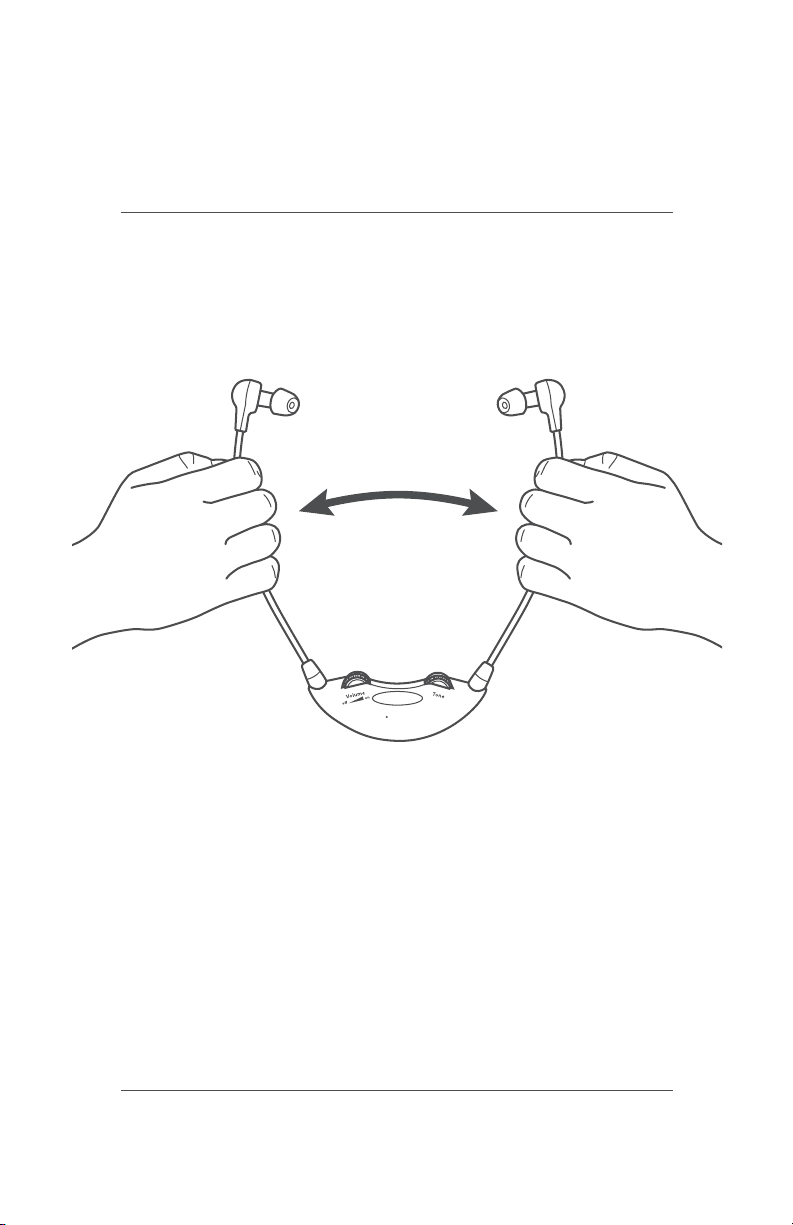
CUSTOM FIT YOUR
HEADSET
Follow these directions to adjust the width of the
headset for your comfort.
®
TV
EARS
All TV Ears headsets should be adjusted prior to rst use
to t the user comfortably.
• Hold the arm portion of each side and evenly pull
apart to stretch the arms into a more comfortable
position.
• Repeat this process as necessary.
Page 3
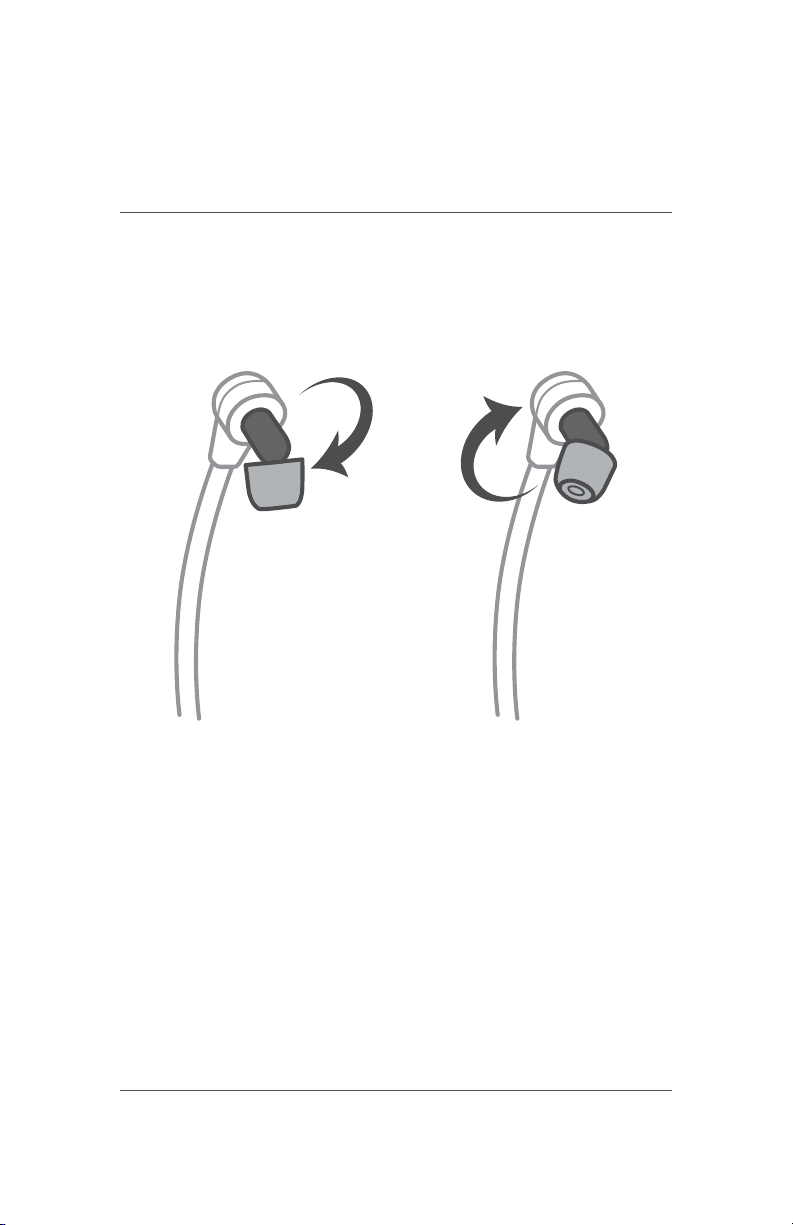
CUSTOM FIT YOUR
EAR TIPS
Follow these directions to adjust the angle of the
ear tips for your comfort.
All TV Ears headsets are shipped with the ear tips angled
straight down. For best audio quality, we recommend
that the ear tips are aligned with your ear canals, which
are typically angled down and forward.
• Grasp the dark plastic piece (pictured above) with
your thumb and forenger.
• Rotate the base of each ear tip individually.
• Repeat if necessary until comfortable.
Page 4

! Important Safety Information
English
TV Ears, Inc. asks that you read all instructions completely and heed all
warnings to ensure proper handling and prevent any injuries. Failure to
act in accordance with TV Ears, Inc.’s instructions can lead to physical
harm or injury.
For safety purposes, do not deface the prongs on the AC adapters. If the
provided plug does not t into your outlet, purchase the correct adapter
or consult an electrician for further assistance.
Only use attachments and accessories specied by TV Ears, Inc. with
your TV Ears system.
Warning: To prevent possible hearing loss, do not listen at high volume
levels for long periods of time.
Warning: To reduce the risk of re or electric shock, do not expose the
TV Ears product to rain or moisture. The TV Ears product should not be
exposed to dripping or splashing liquids. Do not place objects lled with
liquid such as vases on or near the TV Ears product.
Warning: Keep batteries out of reach of children. Discard the batteries
appropriately and carefully.
Warning: The magnetic eld emitted by the TV Ears speakers is minimal.
When used as indicated, TV Ears headsets should not cause magnetic
interference with pacemakers or internal debrillators. The magnetic
eld strength of the speakers is less than 1 Gauss when within 1 inch (3
cm) of the pacemaker or internal debrillator. It is recommended that
the user keep the ear tips at least 1 inch away from any pacemaker or
internal debrillator. If you have concerns, we recommend you contact
your physician.
1
Page 5
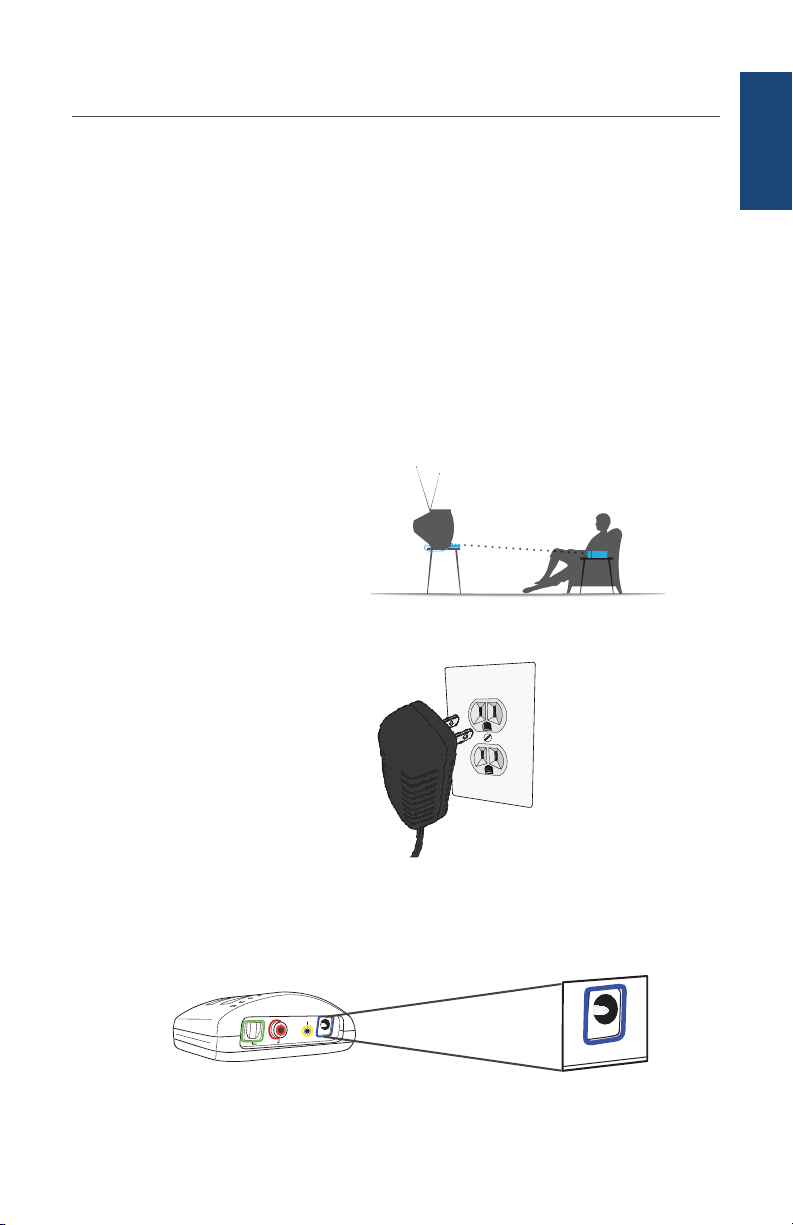
Step 1 - Place & Power the Transmitter
12v
Power Port
This step explains where to place the transmitter for the best
performance as well as how to power the transmitter.
The infrared diodes on the transmitter must be in direct line-ofsight with the headset when using the system for best performance.
There cannot be anything blocking the direct signal, otherwise there
will be no audio received and no sound heard.
Place the transmitter on a at surface that is 3 to 5 feet
1
(90-150 cm) above the ground. Be sure it is pointed to the
seating area where the headset will be used.
Plug the AC adapter into a standard electrical outlet or surge
2
protector.
English
3
border around it.
Plug the end of the AC adapter into the port labelled “12V”
on the back of the transmitter. The correct port has a blue
Analog Audio In
V
Digital Audio In
12
2
Page 6
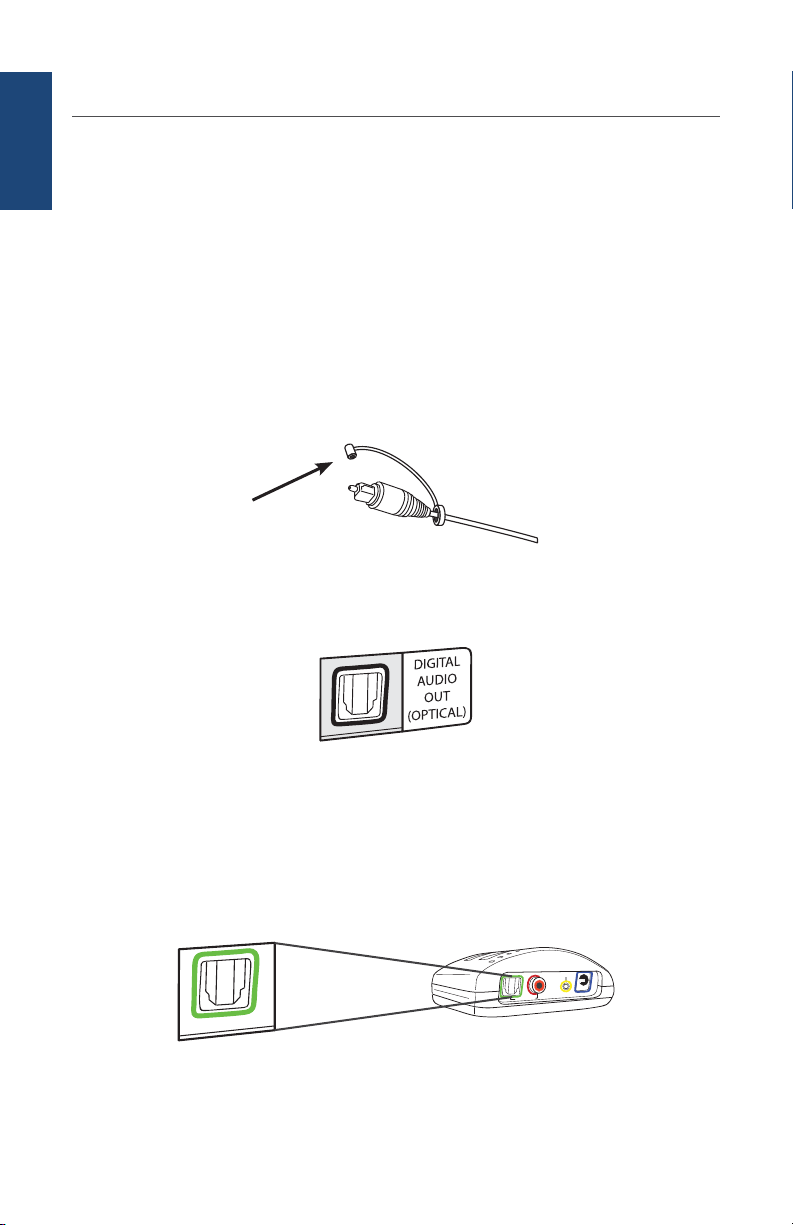
Step 2 - Optical Digital Installation
Optical
Digital Audio
English
This step will instruct you on how to connect the TV Ears
transmitter to your television, satellite, or cable box using an
optical digital audio cord.
• If you cannot get to the back of your TV, you can also use these
instructions to install the system to your cable or satellite box.
• Be aware that the “Audio” ports on the front of your television are
typically “Audio In” ports and will not send audio to your headset.
Remove the plastic caps from both ends of the optical digital
1
audio cord.
Plug either end of the optical audio cord into the “Digital
2
Audio Out (Optical)” port on the back of the TV.
Plug the other end of the optical digital audio cord into the
3
port on the back of the transmitter labelled “Digital Audio
In”. The correct port has a green border around it. You should
hear and feel a ‘click’ when it has been pushed in all the way.
Analog Audio In
V
Digital Audio In
12
3
Page 7
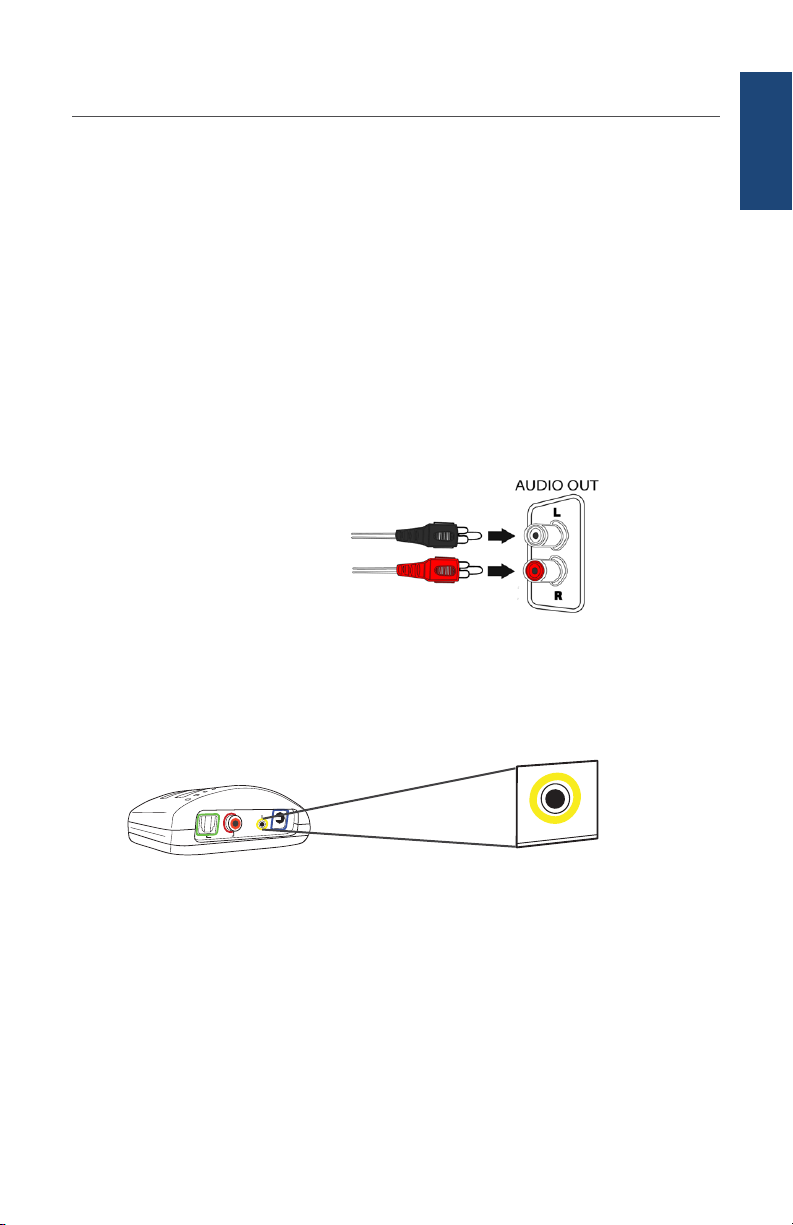
Step 2.1
RCA Analog Installation
This step is an alternative to Step 2 on page 3. This step will
explain how to connect the TV Ears transmitter to your television,
satellite, or cable box using an RCA analog audio cord.
• If you cannot get to the back of your TV, you can also use these
instructions to install the system to your cable or satellite box.
• Be aware that the “Audio” ports on the front of your television are
typically “Audio In” ports and will not send audio to your headset.
Plug the dual end of the audio cord (red and black ends) into
1
the analog “Audio Out” ports on the back of the television,
satellite, or cable box.
English
Plug the single end of the audio cord into the port labelled
2
“Analog Audio In” on the back of the transmitter. The correct
port has a yellow border around it.
Analog Audio
Analog Audio In
V
Digital Audio In
• TV Ears systems are mono systems. This means that you will still
hear sound through both the left and right earpieces even if you
only have the left or right audio connected.
• Your TV’s audio settings may be set to “variable” or “xed”. If you
want to be able to control your TV volume level separate from your
TV Ears volume level, you will need to make sure your TV is set to
“xed”. Contact your TV manufacturer for assistance.
12
3.5mm
4
Page 8
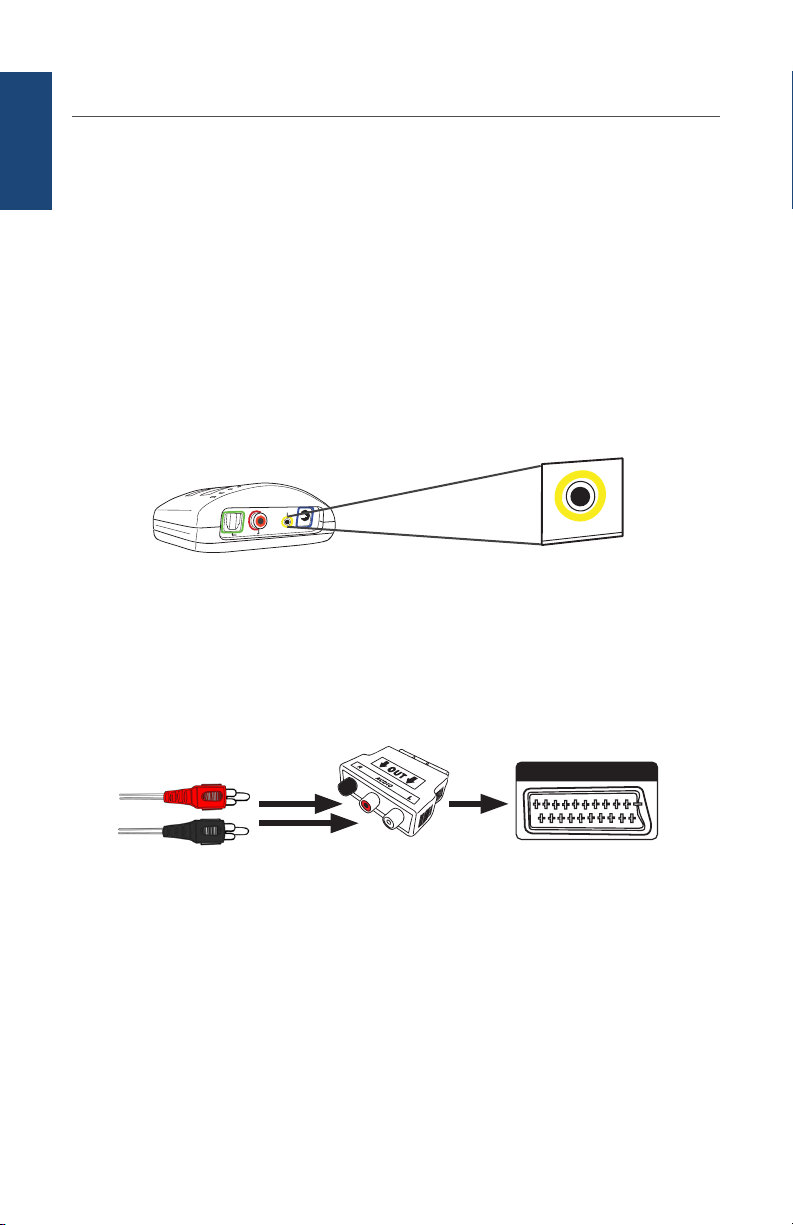
Step 2.2
English
This step is an alternative to Step 2 on page 3. This step will
SCART Adapter Analog Installation
explain how to connect the TV Ears transmitter to your television,
satellite, or cable box using a SCART adapter.
• If you cannot get to the back of your TV, you can also use these
instructions to install the system to your cable or satellite box.
Plug the single end of the audio cord into the port labelled
1
“Analog Audio In” on the back of the transmitter. The correct
port has a yellow border around it.
Analog Audio
Analog Audio In
V
Digital Audio In
Plug the dual end of the audio cord (red and black ends) into
2
the red and white ports on the SCART adapter. Then plug
12
3.5mm
the SCART adapter into the port labelled “SCART” back of the
television, satellite, or cable box.
SCART
• Your TV’s audio settings may be set to “variable” or “xed”. We
recommend that you set your audio settings to “xed” for better
audio quality when using this installation option. If you want to be
able to control your TV volume level separate from your TV Ears
volume level, you will need to make sure your TV is set to “xed”.
Contact your TV manufacturer for assistance.
5
Page 9
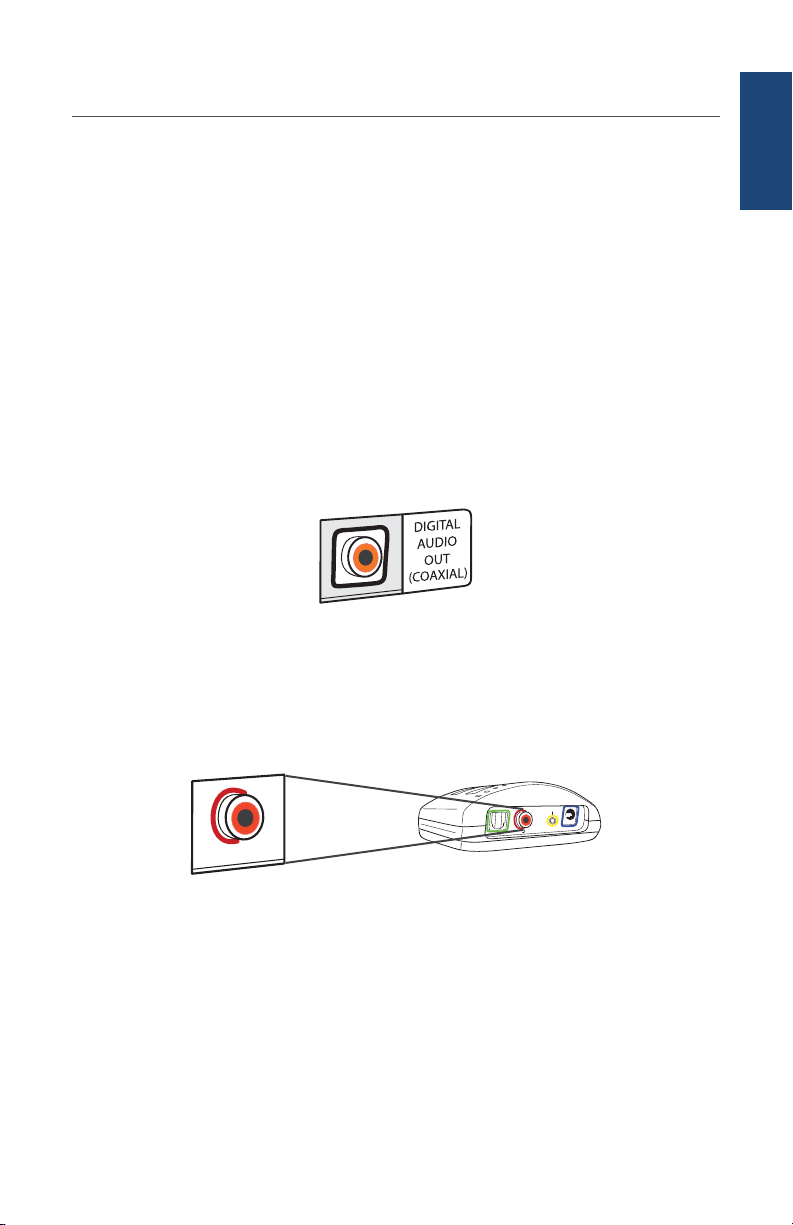
Step 2.3
Coaxial Digital Installation
This step is an alternative to Step 2 on page 3. This step will
explain how to connect the TV Ears transmitter to your television,
satellite, or cable box using an coaxial digital audio cord (not
included).
• If you cannot get to the back of your TV, you can also use these
instructions to install the system to your cable or satellite box.
• Be aware that the “Audio” ports on the front of your television are
typically “Audio In” ports and will not send audio to your headset.
Plug one end of the coaxial digital audio cord into the “Digital
1
Audio Out (Coaxial)” port on the back of the TV.
English
Plug the other end of the coaxial digital audio cord into the
2
port on the back of the transmitter labelled “Digital Audio
In”. The correct port has a red border around it.
Digital Audio
Analog Audio In
V
Digital Audio In
Coaxial
• Your TV’s audio settings may be set to “variable” or “xed”. If you
want to be able to control your TV volume level separate from your
TV Ears volume level, you will need to make sure your TV is set to
“xed”. Contact your TV manufacturer for assistance.
12
6
Page 10
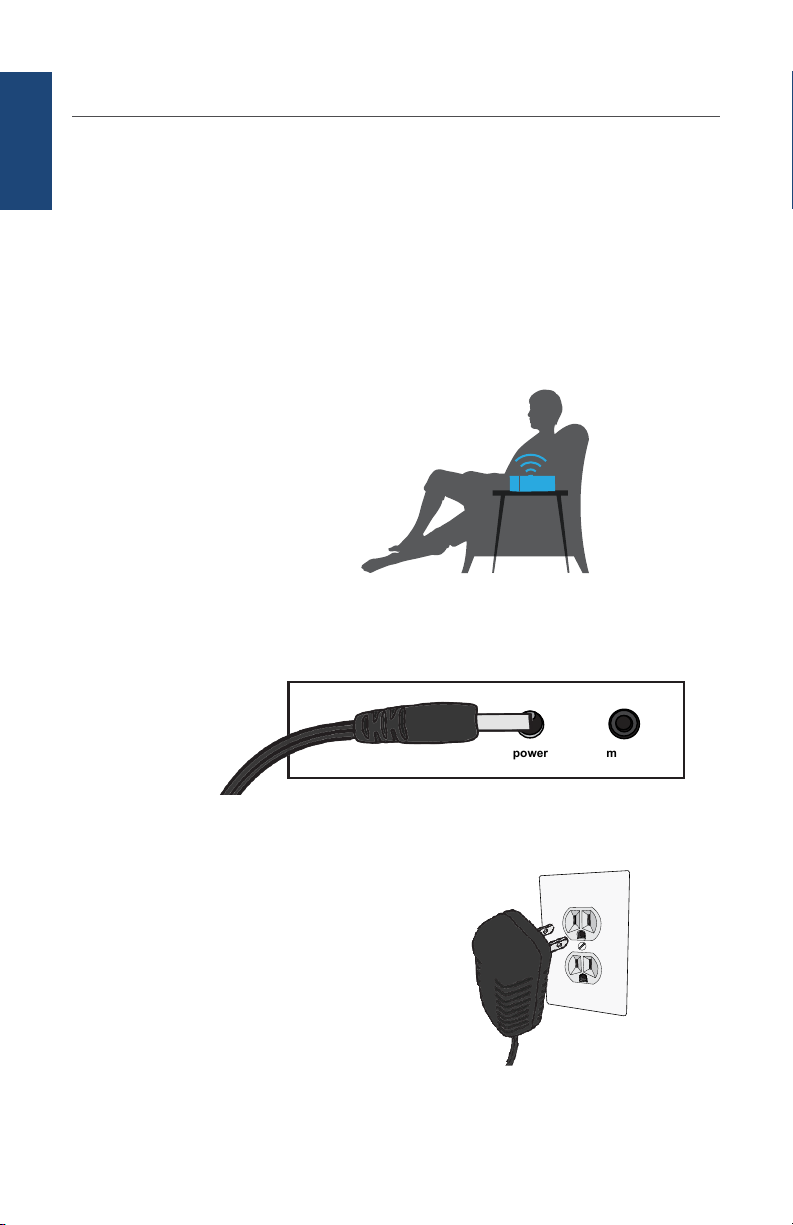
Step 3 - Place and Power the Speaker
English
This step will instruct you on how to power up the speaker.
• On the top of the 5.0 Speaker there is a 360º signal receiving dome
for strong audio reception wherever it is placed and regardless of
the direction it is facing.
For best audio performance, place the speaker next to
1
where you will be sitting while watching TV with the front of
the speaker directly facing you.
Plug the small end of the AC adapter into the port labelled
2
“power” on the back of the speaker.
power music
Plug the other end of the AC adapter into a standard
3
electrical outlet or surge protector.
7
Page 11

Warranty Information
2 Year Limited Warranty
This two year limited warranty will cover defects in manufacturing and
product failure for a period of two years after the original purchase
date. If your product fails or breaks due to a manufacturing defect
for up to two years after original purchase date, it will be replaced,
at no charge to the owner, with a new product of the same model.
If the model you purchased is discontinued you will receive a new or
similar model. Not covered under this warranty are bow arms of the
headset, shipping charges, or perishable items such as ear tips and
batteries. Proof of purchase is required at the time of return.
Repairs or alterations performed by non-authorized TV Ears
representatives will void the warranty and may damage the
equipment.
This warranty is provided at the discretion of TV Ears, Inc. and does
not cover cosmetic damage or damage due to acts of nature, accident,
misuse, abuse, negligence, commercial use, or modication of or to
any part of the product.
English
Manufacturer Declarations
CE Declaration of Conformity
TV Ears is in compliance with the essential safety
requirements and other relevant provisions of
Standard IEC 60065:2001 + Ammd 1:2005 / EN
60065:2002 and Directive 2004/108/EC; 2006/95/
EC, 89/336/EEC, 92/31/ EC, 93/68/EEC. Before
putting the device into operation, please observe the
respective country specic regulations.
8
Page 12

Email: [email protected] | Website: www.tvearseurope.com
 Loading...