

Page 1

Proctor Application
Version 1.0
tritondatacollectionsystem.com/triton-support
Page 2

Triton Data Collection System
© 2014 Turning Technologies, LLC. Portions Responsive Innovations, LLC, Microsoft Corporation
No part of this document may be reproduced or transmitted in any form or by any means, electronic or mechanical, for any purpose,
without the express written permission of Turning Technologies, LLC. All rights reserved.
Turning Technologies, LLC, 255 West Federal Street, Youngstown, OH 44503 USA.
TurningPoint® is a registered trademark of Turning Technologies, LLC. Other trademarked product names mentioned in this manual
are owned by their respective companies.
The following regulatory statements apply to radio frequency and infrared transmitters and receivers mentioned in this manual,
including the ResponseCard RF, ResponseCard RF LCD, ResponseCard IR, ResponseCard XR, ResponseCard NXT and their
respective receivers.
FCC Statement
This device complies with part 15 of the FCC Rules. Operation is subject to the following two conditions: (1) This device may not
cause harmful interference, and (2) this device must accept any interference received, including interference that may cause
undesired operation.
Changes or modifications not expressly approved by the party responsible for compliance could void the user’s authority to operate
the equipment.
IC Statement
This device complies with Industry Canada licence-exempt RSS standard(s). Operation is subject to the following two conditions: (1)
this device may not cause interference, and (2) this device must accept any interference, including interference that may cause
undesired operation of the device.
Le présent appareil est conforme aux CNR d'Industrie Canada applicables aux appareils radio exempts de licence. L'exploitation est
autorisée aux deux conditions suivantes : (1) l'appareil ne doit pas produire de brouillage, et (2) l'utilisateur de l'appareil doit accepter
tout brouillage radioélectrique subi, même si le brouillage est susceptible d'en compromettre le fonctionnement.
2
tritondatacollectionsystem.com/triton-support
Page 3

Triton Data Collection System
ABOUT THE TRITON PROCTOR APPLICATION . . . . . . . . . . . . . . . . . . 4
Technical Requirements . . . . . . . . . . . . . . . . . . . . . . . . . . . . . . . . . . . . . . . . . . . . . . . . . . . . . . . . . . . . . . . 4
System Requirements. . . . . . . . . . . . . . . . . . . . . . . . . . . . . . . . . . . . . . . . . . . . . . . . 4
Hardware Requirements. . . . . . . . . . . . . . . . . . . . . . . . . . . . . . . . . . . . . . . . . . . . . . 4
Getting Started . . . . . . . . . . . . . . . . . . . . . . . . . . . . . . . . . . . . . . . . . . . . . . . . . . . . . . . . . . . . . . . . . . . . . . 5
Activating a User Account. . . . . . . . . . . . . . . . . . . . . . . . . . . . . . . . . . . . . . . . . . . . . . . . . . . . . . . . . . 5
Logging Into the Application . . . . . . . . . . . . . . . . . . . . . . . . . . . . . . . . . . . . . . . . . . . . . . . . . . . . . . . . 5
Resetting a Password. . . . . . . . . . . . . . . . . . . . . . . . . . . . . . . . . . . . . . . . . . . . . . . . . . . . . . . . . . . . . 7
The Schedules Window. . . . . . . . . . . . . . . . . . . . . . . . . . . . . . . . . . . . . . . . . . . . . . . . . . . . . . . . . . . . . . . . 8
Starting a Schedule. . . . . . . . . . . . . . . . . . . . . . . . . . . . . . . . . . . . . . . . . . . . . . . . . . . . . . . . . . . . . . . 9
ADMINISTERING AN EXAM . . . . . . . . . . . . . . . . . . . . . . . . . . . . . . . . . . 10
The Exam Room . . . . . . . . . . . . . . . . . . . . . . . . . . . . . . . . . . . . . . . . . . . . . . . . . . . . . . . . . . . . . . . . . . . . 10
Administering an Exam . . . . . . . . . . . . . . . . . . . . . . . . . . . . . . . . . . . . . . . . . . . . . . . . . . . . . . . . . . . . . . . 12
Marking a Participant. . . . . . . . . . . . . . . . . . . . . . . . . . . . . . . . . . . . . . . . . . . . . . . . . . . . . . . . . . . . . . . . . 13
Adding a Participant . . . . . . . . . . . . . . . . . . . . . . . . . . . . . . . . . . . . . . . . . . . . . . . . . . . . . . . . . . . . . . . . . 13
Setting a Timer for an Un-timed Exam . . . . . . . . . . . . . . . . . . . . . . . . . . . . . . . . . . . . . . . . . . . . . . . . . . . 14
Adding Time to an Individual Participant. . . . . . . . . . . . . . . . . . . . . . . . . . . . . . . . . . . . . . . . . . . . . . . . . . 15
Exchanging a Participant Device. . . . . . . . . . . . . . . . . . . . . . . . . . . . . . . . . . . . . . . . . . . . . . . . . . . . . . . . 15
Using the Recovery Room. . . . . . . . . . . . . . . . . . . . . . . . . . . . . . . . . . . . . . . . . . . . . . . . . . . . . . . . . . . . . 16
3
BLUEPRINTS . . . . . . . . . . . . . . . . . . . . . . . . . . . . . . . . . . . . . . . . . . . . . . . 17
Viewing the Blueprint. . . . . . . . . . . . . . . . . . . . . . . . . . . . . . . . . . . . . . . . . . . . . . . . . . . . . . . . . . . . . . . . . 17
Understanding the Blueprint Overview. . . . . . . . . . . . . . . . . . . . . . . . . . . . . . . . . . . . . . . . . . . 17
MAKEUPS . . . . . . . . . . . . . . . . . . . . . . . . . . . . . . . . . . . . . . . . . . . . . . . . . 21
Administering a Makeup Created in the Application . . . . . . . . . . . . . . . . . . . . . . . . . . . . . . . . . . . . . . . . . 21
Administering a Makeup Created in the Web . . . . . . . . . . . . . . . . . . . . . . . . . . . . . . . . . . . . . . . . . . . . . . 22
CONTACT US . . . . . . . . . . . . . . . . . . . . . . . . . . . . . . . . . . . . . . . . . . . . . . 23
Online Assistance . . . . . . . . . . . . . . . . . . . . . . . . . . . . . . . . . . . . . . . . . . . . . . . . . . . . . . . . . . . . . . . . . . . 23
Customer Support . . . . . . . . . . . . . . . . . . . . . . . . . . . . . . . . . . . . . . . . . . . . . . . . . . . . . . . . . . . . . . . . . . . 23
FAQS . . . . . . . . . . . . . . . . . . . . . . . . . . . . . . . . . . . . . . . . . . . . . . . . . . . . . 24
Triton Web. . . . . . . . . . . . . . . . . . . . . . . . . . . . . . . . . . . . . . . . . . . . . . . . . . . . . . . . . . . . . . . . . . . . . . . . . 24
Triton Proctor Application . . . . . . . . . . . . . . . . . . . . . . . . . . . . . . . . . . . . . . . . . . . . . . . . . . . . . . . . . . . . . 24
Hardware. . . . . . . . . . . . . . . . . . . . . . . . . . . . . . . . . . . . . . . . . . . . . . . . . . . . . . . . . . . . . . . . . . . . . . . . . . 25
tritondatacollectionsystem.com/triton-support
Page 4

Triton Data Collection System
ABOUT THE TRITON PROCTOR APPLICATION
This chapter covers the following topics:
• Technical Requirements
• Getting Started
• The Schedules Window
Technical Requirements
The following hardware and system specifications are required before using the Triton Proctor Application.
System Requirements
• Microsoft Windows 32 or 64-bit XP, Vista, 7 or 8
• Mac 64-bit processor with OS 10.6 or higher
4
• Intel or AMD 3. 0 GHz class processor
• 2 GB RAM
• 1 GB hard disk space
• 1024 x 768 resolution at 32-bit color or higher
• Standard USB 2.0 port (for USB-based hardware devices)
• Ethernet or 802.11 compatible wireless network card
• Internet connectivity
• Java Runtime Environment 1.6.0_43 or newer
Hardware Requirements
• ResponseCard NXT with firmware version 2.0.0 or higher
• Proctor Receiver (RRRF-03-P)
tritondatacollectionsystem.com/triton-support
Page 5

Triton Data Collection System
Getting Started
The Getting Started section instructs a Proctor how to log into the application and provides an overview of the Schedules
window.
This section covers the following topics:
• Activating a User Account
• Logging Into the Application
• Resetting a Password
ACTIVATING A USER ACCOUNT
Users will receive an account activation email from TritonDCS@TurningTechnolgies.com.
5
WARNING
The account activation email is valid for seven days. If the email has
expired go to TritonDCS.com and click Resend Invite below the Password
field. Enter your Email address and click Resend Invite.
How to activate a user account...
1 Click the link provided in the email from TritonDCS@TurningTechnologies.com.
You will be taken to the Activate Account page in Triton Web.
2 Enter a New Password in the box provided.
3 Confirm Password in the box provided.
4 Click Save.
A message appears that the account has been successfully activated and the Triton Web login page is displayed.
LOGGING INTO THE APPLICATION
You must be set up as a Proctor within Triton Web.
TIP
Click Training to enter the application for practice. The training section
does not require a user to log in.
tritondatacollectionsystem.com/triton-support
Page 6
Triton Data Collection System
How to login to the application...
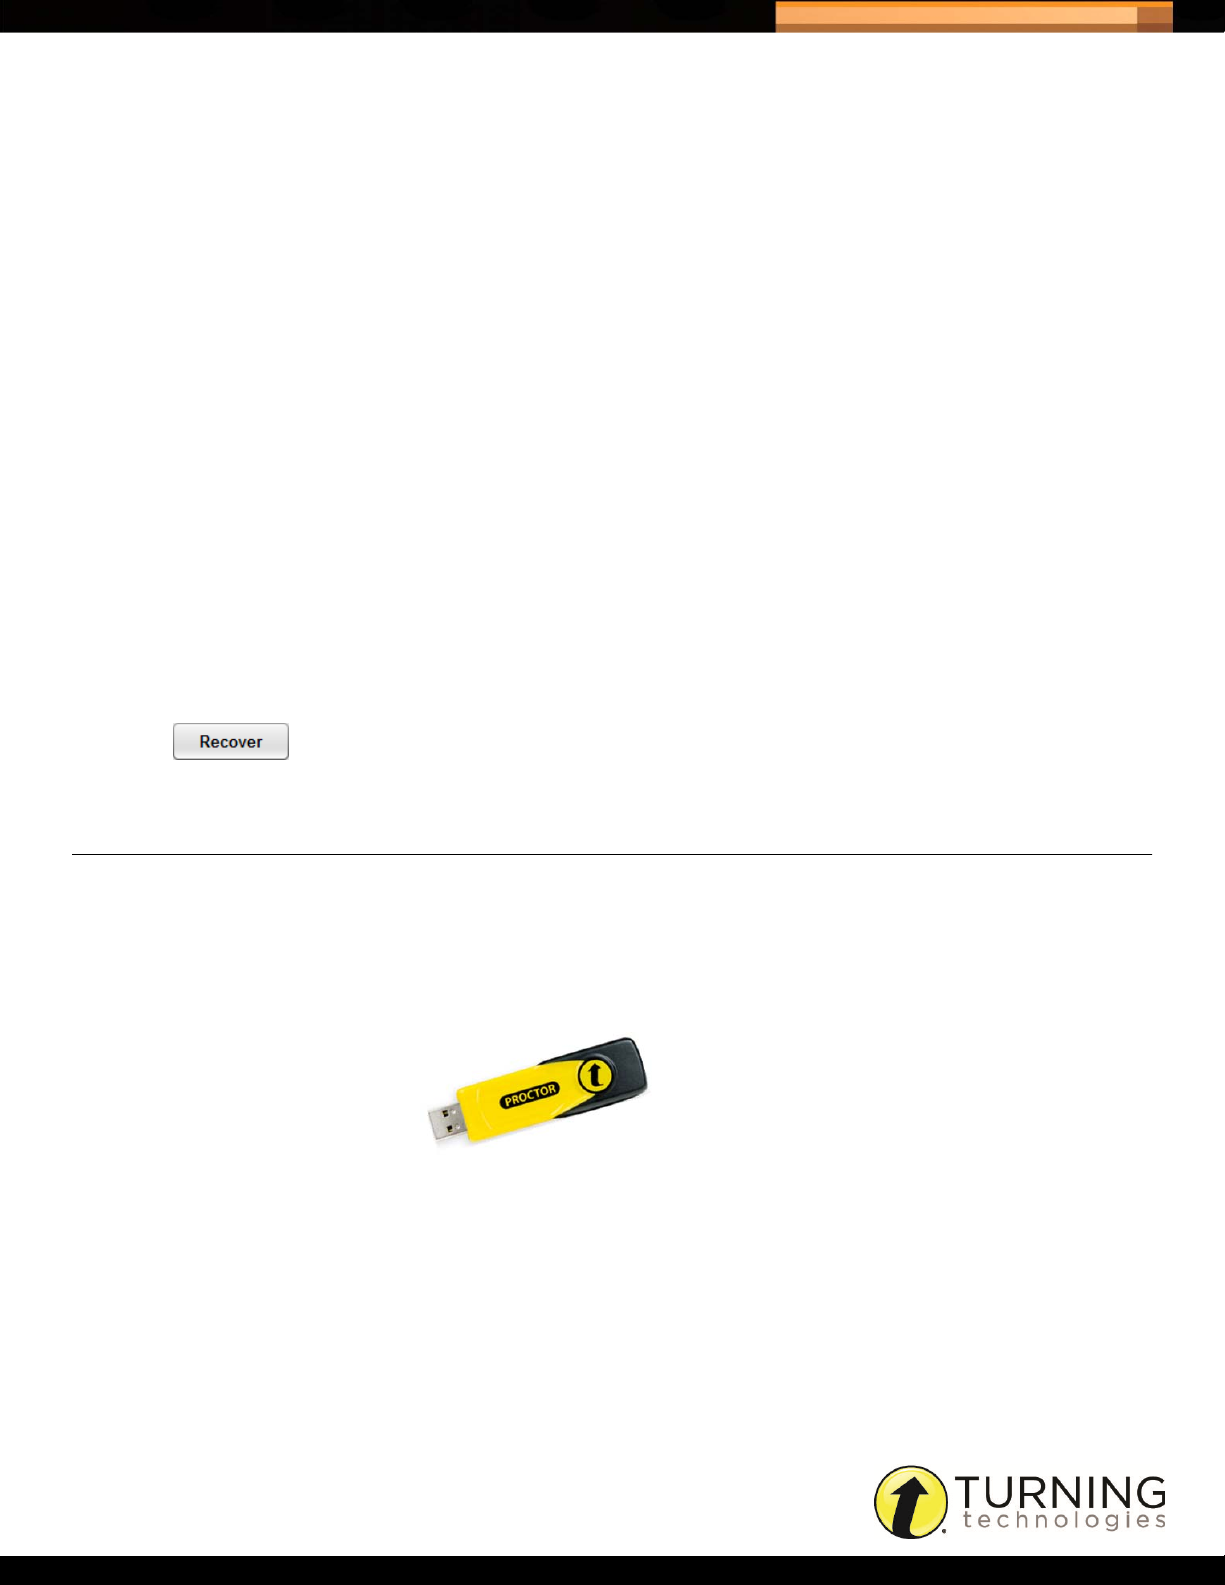
1 Plug in the Proctor Receiver.
Proctor Receiver
2 Open the application.
On a PC: Open My Computer and navigate to the Removable Disk. Open the Removable Disk and double-click
TritonLauncher.exe.
On a Mac: Open Devices and navigate to the Removable Disk and double-click TritonLauncher.
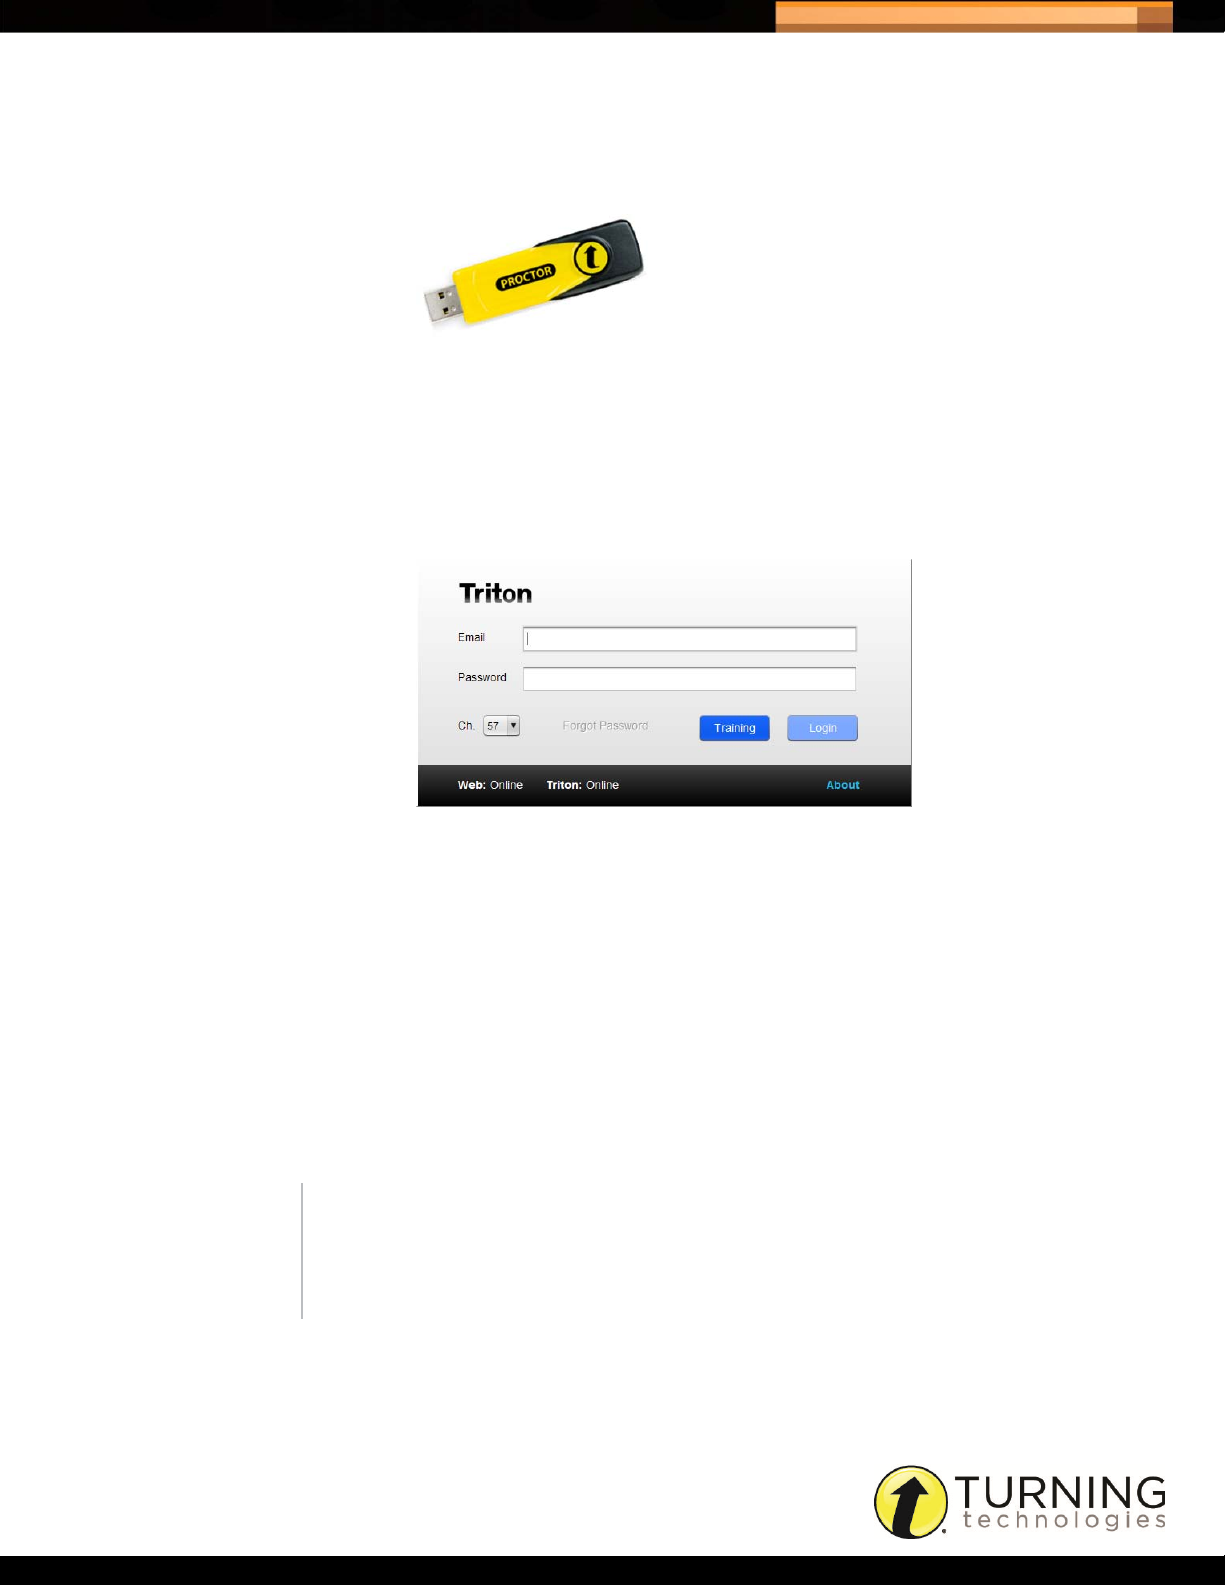
The login window is displayed.
Triton Login Window
6
• Web: The web status can be Offline or Online. Offline indicates that the Triton Proctor Application is unable to locate
an internet connection.
• Triton: The Triton status can be Offline or Online.
• The Triton status must be Online to download the exam files and send the results to Triton Web.
• If the exam file has been downloaded beforehand it is not necessary to be Online for testing.
• If the status is Offline but a Web connection is present, your network may be restricting access to Turning
Technologies’ servers. Contact your network or IT administrator.
3 Enter the Email and Password.
4 Verify the correct channel number is displayed.
NOTE
To change the channel number, click the drop-down menu and select the
desired channel. ResponseCards need to be on the same channel as the
Proctor receiver.
5 Click Login.
A list of Ready Schedules is displayed.
tritondatacollectionsystem.com/triton-support
Page 7

Triton Data Collection System
RESETTING A PASSWORD
In the event that a password is forgotten, it may be reset.
IMPORTANT
You must be online to reset a password.
How to reset a password...
1 Enter the Email address on the Triton Proctor Application login window.
2 Click Forgot Password.
If the Triton status is Online, the default web browser opens to the Triton Web Forgot Password page.
3 Enter the Email address in the box provided and click Reset Password.
A password recovery email is sent from TritonDCS@TurningTechnologies.com.
NOTE
The reset password link expires after six hours.
7
4 Click the link provided in the email.
You will be taken to the Reset Password page in Triton Web.
5 Enter a New Password in the box provided.
6 Confirm Password in the box provided.
7 Click Save.
A message appears that the password has been reset successfully and the Triton Web login page is displayed.
tritondatacollectionsystem.com/triton-support
Page 8

Triton Data Collection System
The Schedules Window
8
Ready The Ready tab displays a list of Schedules that are available for administration.
In Progress The In Progress tab displays Schedules that have been started.
Training The Training tab contains the Practice Test that can be used to familiarize yourself with
the Triton Proctor Application.
Start Schedule Opens the Exam Room for the selected Schedule.
Blueprint
Overview
Associated Files Displays the Associated Files for the selected Schedule.
Participant List
Status Report
Displays the Blueprint Overview for the selected Schedule. For more information, see
Blueprints.
Displays the Participant List Status Report for the selected Schedule.
tritondatacollectionsystem.com/triton-support
Page 9
Triton Data Collection System
State Displays the status of the Schedule. There are six Schedule states:
• Ready - The Schedule is available for testing.
• Recovery - A Schedule may be in a state of recovery if one of these conditions exist:
• Makeup - One or more Participants are in a Makeup state in the application.
• In Progress - A Schedule is in progress when an Answer Document has been
• Saved - The session has been saved but not uploaded to Triton Web.
• Uploaded - The session has been successfully saved to Triton Web.
Name The name of the Schedule.
Participant List The name of the Participant List associated to the Schedule.
Site The name of the Site.
Begin Date The date at which the Schedule becomes available for administration.
Makeup Date The makeup date is a reminder that makeups should be started near this date. Makeup
dates are typically halfway between the begin and end dates.
9
one or more cards has started a exam but has not done a final send or the Proctor has
not done a final save on at least one Answer Document.
administered and finalized, but not all Answer Documents in the Schedule have been
finalized.
End Date The date after which the Schedule is no longer available for administration.
Recovery Room Opens the Recovery Room. For more information, see Using the Recovery Room on
page 16.
STARTING A SCHEDULE
A Schedule must be started to enter the Exam Room.
How to start a Schedule...
1 Plug in the Proctor receiver.
Proctor Receiver
2 Open and log into the Triton Proctor Application.
A list of available Schedules is displayed.
3 Locate the desired Schedule, select the Schedule and click the Start Schedule icon.
The Exam Room is displayed.
Next Steps
Now that a Schedule has been started it is time to administer the exam. For more information, see Administering an
Exam on page 12.
tritondatacollectionsystem.com/triton-support
Page 10

Triton Data Collection System
ADMINISTERING AN EXAM
This chapter covers the following topics:
10
• The Exam Room
• Administering an Exam
• Marking a Participant
• Adding a Participant
The Exam Room
The Exam Room cannot be resized, only minimized.
• Setting a Timer for an Un-timed Exam
• Adding Time to an Individual Participant
• Exchanging a Participant Device
• Using the Recovery Room
Displays the Blueprint Overview, the list of Associated Files, Answer Documents and their associated time limits.
Open, Start, Stop and Save buttons.
The Participant State menu.
Add a Participant. This button only appears if Add Participant is enabled in the Blueprint. For more information,
see Understanding the Blueprint Overview on page 17.
tritondatacollectionsystem.com/triton-support
Page 11

Triton Data Collection System
Login States
• Ready - Upon entering the Exam Room the Participants are marked as “Ready.”
• Confirming Name - A Participant has entered their User ID on the ResponseCard.
• Confirming Test + Version - The Participant will confirm their version number on the ResponseCard.
• Test Data Sent - The ResponseCard has received the exam information from the application.
• Waiting to Start - The ResponseCard has received all of the exam information. The progress bar is displayed.
• Active - The Participant is taking the exam.
• Not Testing - A Participant will not take the exam and will not be eligible for Makeups for the current Answer
Document.
• Not Present - A Participant has been marked as ‘Not Present.’ If makeups are allowed, a ‘Not Present’
Participant will be available for Makeups.
• Final Send Complete - The Participant has finished the exam and it has been successfully sent to the Triton
Proctor Application.
• Resuming - A Participant has done a final send and they are logging back into the exam.
• New Device - A Participant’s ResponseCard is being swapped out for a new one. The Participant’s responses
will be downloaded to the new device.
• Complete - The results gathered by the Triton Proctor Application will be used for the Participant’s score.
• Rejoin - A Participant will finish taking the exam at a later date. Participant responses will be downloaded to
their ResponseCard when they rejoin the exam.
• Recovery - A Participant has started the exam but did not finish. The data from the ResponseCard will need to
be recovered by the Triton Proctor Application to be sent to Triton Web.
11
The Current Time is displayed along with the Estimated End time and the Time Remaining.
The progress bar displays the number of questions a Participant has answered out of the total number of
questions.
Add Proctor notes.
Add extra minutes to a Participant exam time by entering the amount of time to be added. This feature is only
available for timed exams.
tritondatacollectionsystem.com/triton-support
Page 12

Triton Data Collection System
ADMINISTERING AN EXAM
A Schedule must be started to enter the Exam Room. For more information, see Starting a Schedule on page 9.
How to administer an exam...
1 Click Open.
The Participants may now log in on the ResponseCard.
2 Take attendance.
NOTE
Taking attendance is only necessary if ‘Enforce Attendance = Yes.’ This
option can be found in the Blueprint Overview. For more information, see
Understanding the Blueprint Overview on page 17.
• To mark a Participant as absent, right-click the Participant name and select Mark ‘Not Present.’ For more
information, see Marking a Participant.
• To mark all Participants that have not logged in as absent, click the Participant group button and select Mark
Inactives ‘Not Present.’
12
Participant Group Button
3 Click Start to start the exam.
The timer starts, if applicable, and the progress bar displays the individual Participant progress.
4 Click Stop to stop the exam.
The ResponseCard requires Participants to send their results to the Triton Proctor Application. The results must be
sent before clicking Save.
NOTE
Timed exams stop automatically. Timed Self-Paced exams DO NOT stop
automatically.
5 Click Save to save the exam session results.
tritondatacollectionsystem.com/triton-support
Page 13

Triton Data Collection System
MARKING A PARTICIPANT
A Proctor can manually set the Login State while in the Exam Room. The available options for Login States vary based
on the status of the exam. For more information about the various states, see Login States on page 13.
• Upon entering the Exam Room and/or clicking Open, you can mark a Participant as Not Testing or Not Present.
• When a Proctor clicks Start, a Participant can be marked as Rejoin or New Device.
NOTE
When the Participant logs in with the New Device, they should review all of
the responses that were downloaded match what was entered on the
previous device. Since a Final Send was not completed from the previous
card, any responses entered or changed on the ResponseCard NXT that
were not received by the Proctor Application will not be downloaded to the
New Device.
• When a Proctor clicks Stop, a Participant can be marked as Recovery or Complete.
NOTE
Marking a Participant Complete will use existing responses received by
the Triton Proctor Application as the Participant's final responses. Any
responses entered or changed on the ResponseCard NXT that were not
received by the Proctor Application will not be in the final results set. For
the most accurate responses, Participants should always complete a Final
Send from the ResponseCard NXT.
13
How to mark a Participant...
1 Right-click on the Participant name.
2 Select the Login State from the menu.
ADDING A PARTICIPANT
A Participant can only be added if ‘Add Participant Allowed = Yes.’ This option can be found in the Blueprint Overview.
The Blueprint Overview will also determine if a new Participant can be added after the exam has already started. For
more information, see Understanding the Blueprint Overview on page 17.
How to add a Participant...
1 While in the Exam Room, click Add Participant.
Add Participant
tritondatacollectionsystem.com/triton-support
Page 14

Triton Data Collection System
The Add Participant window is displayed.
Add Participant Window
2 Enter the Participant information in the boxes provided.
3 Click Add.
The new Participant is displayed in the Participant List.
SETTING A TIMER FOR AN UN-TIMED EXAM
14
A timer may be added to an un-timed exam so that a Proctor does not lose track of time. The added time is not sent to
the ResponseCard. The exam will NOT stop automatically once the timer has reached zero.
NOTE
Time can only be added before the first Answer Document is started.
How to set a timer for an un-timed exam...
1 While in the Exam Room, double-click the box next to the answer document.
Setting a Timer for an Un-timed Exam
2 Enter the time (in minutes) in the box provided and press the Enter key on the keyboard.
For Example
If 45 minutes was added to an Answer Document, the Time Remaining displays 45 minutes and the Estimated End time
is calculated and displayed on the clock.
Adding Time to an Un-timed Exam
tritondatacollectionsystem.com/triton-support
Page 15

Triton Data Collection System
ADDING TIME TO AN INDIVIDUAL PARTICIPANT
Time can be added to an individual Participant.
NOTE
This feature is only available on timed exams.
How to add time to an individual Participant...
1 While in the Exam Room, double-click the box next to the Participant in the Extra Minutes column.
Adding Time to an Individual Participant
2 Enter the time (in minutes) to be added in the box provided and press the Enter key on the keyboard.
Once a Participant sends a final exam, the application checks to determine if extra time has been added. When the
timer reaches zero any time added will be applied to the ResponseCard.
15
NOTE
The extra time is added only if there is no remaining time on the
ResponseCard. If a Participant does a manual final send, the extra time
will not be applied.
EXCHANGING A PARTICIPANT DEVICE
A Participant’s ResponseCard may be exchanged for a new one in the event that the original ResponseCard
malfunctions.
How to exchange a Participant device...
1 Click the Login State menu and select New Device.
2 The Participant logs into the exam with the new ResponseCard.
Any responses entered on the old ResponseCard are downloaded to the new ResponseCard and the Participant may
continue with the exam.
tritondatacollectionsystem.com/triton-support
Page 16

Triton Data Collection System
USING THE RECOVERY ROOM
The Recovery Room is used in the event that the Triton Proctor Application does not have a ‘Final Send Complete’ from
Participants. Participants must be marked as ‘Recovery’ in the Exam Room in order for their results to be recovered. For
instructions on how to mark a Participant, see Marking a Participant on page 13.
How to use the Recovery Room...
1 Plug in the Proctor receiver.
Proctor Receiver
2 Open and log into the Triton Proctor Application.
3 Click the In Progress tab.
Schedules that are eligible for the Recovery Room have ‘Recovery’ listed as the State.
16
4 Select the appropriate Schedule and click Recover located in the bottom right corner of the window.
WARNING
Clicking Start Schedule does not open the Recovery Room. You must click
Recover.
5 Select the Answer Document from the left panel and click Recover.
NOTE
Answer Documents must be recovered one at a time.
6 The Participant(s) must press a button on their ResponseCard.
The ResponseCard automatically uploads the stored results to the Triton Proctor Application.
7 Click Stop when all of the Participant Login States are ‘Final Send Complete.’
NOTE
At this time, Participants that are unable to finish the exam may be marked
as ‘Rejoin.’ A Makeup Schedule may be administered to allow the
Participants to finish the exam.
8 Click Save to save the exam session results.
9 Click Exit to close the Recovery Room and click Yes to confirm.
tritondatacollectionsystem.com/triton-support
Page 17

Triton Data Collection System
BLUEPRINTS
Any Staff member may create a Blueprint. The Blueprint determines how exams are administered. Blueprints are
created by the Organization Manager or Site Manager through Triton Web. A Proctor may also create a Blueprint
through Triton Web, however that Blueprint will only be accessible to that Proctor.
This chapter covers the following topics:
• Viewing the Blueprint
• Understanding the Blueprint Overview
VIEWING THE BLUEPRINT
The Blueprint can be viewed from the Schedules window or while in the Exam Room. When viewed from the Schedules
window, the Blueprint Overview may be printed. When in the Exam Room, the Blueprint may only be viewed.
17
How to view the exam Blueprint from...
1 Plug in the Proctor Receiver.
Proctor Receiver
2 Open and log into the Triton Proctor Application.
A list of available Schedules is displayed.
3 Locate the desired Schedule, select the Schedule and click the Blueprint Overview icon.
The Blueprint Overview is displayed.
NOTE
The Blueprint Overview icon is located in the upper left corner of the Exam
Room. While viewing the Blueprint in the Exam Room the print option is
not available.
4 Click Print to print a hard copy of the Blueprint Overview or click Cancel to return to the Exam Room.
Understanding the Blueprint Overview
The Blueprint determines how exams are administered, if and when a Participant can be added, acceptable attendance
states and if makeups are available.
tritondatacollectionsystem.com/triton-support
Page 18

Triton Data Collection System
Blueprint Bundle
If more than one Answer Document is associated with the Blueprint, a set of rules determines how multiple answer
documents are administered.
18
Enforce Bundle
• Yes, requires the Answer Documents to be administered in a single session.
• No, Answer Documents may be administered in different sessions.
Enforce Order
• Yes, the order in which the Answer Document appears will be the order the exams must
be in for administration.
• No, the Proctor may change the order of the Answer Documents.
Self Paced
• Yes, allows the Participants to finish the first Answer Document and move onto the
second without waiting for all Participants to finish.
• No, Participants must wait for the Proctor to start each Answer Document.
Single Login
• Yes, Name, ID and exam verification will be necessary.
• No, Participants must enter their ID log in for each Answer Document.
Associated Files
Files that were attached to the Schedule are listed under Associated Files.
Answer Documents
The Answer Document section displays information regarding the Answer Documents associated with the Blueprint. An
Answer Document determines what type of exam is being administered (Test or Evaluation), the reporting and timer
options and number of versions.
• Test - A test contains correct answers.
• Evaluation - An evaluation does not contain correct answers or points.
Add Participant
The Add Participant section determines whether or not a Participant may be added to the Schedule.
Allowed
• Yes, Participants not included in the associated Participant List may be added by the
Proctor prior to starting the exam.
• No, Participants that are not in the associated Participant List are unable to login to the
exam.
Allowed Post Start
• Yes, Participants may be added by the Proctor AFTER the exam has started.
• No, Participants may not be added after the exam has started.
tritondatacollectionsystem.com/triton-support
Page 19

Triton Data Collection System
Attendance
The Attendance section determines when the exam can start based on the Participants’ login states.
19
Anonymous
• Yes, allows the application to generate a ‘Participant ID’ all Participants use to log into
the ResponseCard. The device ID is not viewable and there is no way to associate a
Participant with a specific response string.
• No, Participants must log into ResponseCard with their assigned device ID.
Enforce
• Yes, the exam can only be started when all the Participants are logged in or marked as
‘Not Present.’
• No, the exam may be started when the Participants are in any state of login.
Late Entry
• Yes, Participants may log in AFTER the exam has started.
• No, Participants may not log in once the exam has started.
See the table below for different variations of the Enforce and Late Entry Rules.
Enforce = Yes Late
Entry = Yes
Enforce = No Late
Entry = Yes
The Proctor cannot start the exam until all Participants are marked ‘Not Present’ or they are
‘Waiting to Start...’
Participants that were ‘Not Present’ when the exam was started are able to log into the
exam at any time after the exam has started. The Proctor does not need to mark the
Participant as ‘Present.’
The Proctor can start the exam with the Participant in any state.
Participants that were ‘Not Present’ when the exam was started are able to log into the
exam at any time after the exam has started. The Proctor does not need to mark the
Participant as ‘Present.’
Enforce = Yes Late
Entry = No
Enforce = No Late
Entry = No
The Proctor cannot start the exam until all Participants are marked ‘Not Present’ or they are
‘Waiting to Start...’
Participants that were ‘Not Present’ when the exam was started are not able to log into the
exam after the exam has started. The Proctor cannot mark the Participants ‘Present.’
The Proctor can start the exam with the Participant in any state.
Participants that were ‘Not Present’ when the exam was started are not able to log into the
exam after the exam has started. The Proctor cannot mark the Participants ‘Present.’
tritondatacollectionsystem.com/triton-support
Page 20

Triton Data Collection System
Makeups
The Makeups section determines whether or not makeups are allowed, how they are administered, and if a Participant
may rejoin a session at a later time.
20
Allowed
Create In
Rejoin
• Yes, Participants not present at the time of the exam CAN makeup the exam at a later
time.
• No, Participants not present at the time of the exam CANNOT makeup the exam at a
later time.
• Desktop Application - The Proctor administers makeup exams through the T riton Proctor
Application.
• Web - The makeup exams are scheduled through Triton Web and downloaded as a new
Participant List in the Schedule.
• Yes, if an exam is started, and is NOT finished in the original session, a Participant can
rejoin the session at a later time to finish.
• No, if an exam is started it must be finished in that session.
tritondatacollectionsystem.com/triton-support
Page 21

Triton Data Collection System
MAKEUPS
Participants who were not present at the time of the exam or did not finish the exam within the allotted time frame, may
be eligible to rejoin or makeup the exam. Makeups are only available if it was specified in the Blueprint. For more
information on Blueprints, see Understanding the Blueprint Overview on page 17.
NOTE
If ‘Enforce Bundle = Yes’ in the Blueprint, a Participant will only be
available for a Makeup if they were marked ‘Not Present’ for all of the
Answer Documents included in the Bundle.
This chapter covers the following topics:
• Administering a Makeup Created in the Application
• Administering a Makeup Created in the Web
ADMINISTERING A MAKEUP CREATED IN THE APPLICATION
21
Check the Blueprint to determine if the makeup was created in the Triton Proctor Application. Only Participants that were
marked as ‘Not Present’ or were in a ‘Rejoin’ state will appear in the list of Participants eligible to take a Makeup exam.
How to administer a makeup created in the Triton Proctor Application...
1 Plug in the Proctor Receiver.
Proctor Receiver
2 Open and log into the Triton Proctor Application.
A list of available Schedules is displayed.
3 Select the In Progress tab.
4 Locate the desired Schedule, select the Schedule and click the Start Schedule icon.
The following window appears if at least one Answer Document has been administered in a Schedule that contains
multiple Answer Documents and ‘Enforce Bundle = No’ in the Blueprint.
tritondatacollectionsystem.com/triton-support
Page 22

Triton Data Collection System
5 Click Continue Testing or Administer Makeups.
• Continue Testing - The Exam Room opens and Participants may continue the exam with the next available Answer
Document.
• Administer Makeups - The Exam Room opens and Makeups for previously administered Answer Documents are
available for Participants who were ‘Not Present’ or ‘Rejoin’ during initial administration. Answer Documents in the
Schedule which have not yet been administered may be continued later.
Next Steps
Administer the exam as normal. For more information, see Administering an Exam on page 12.
ADMINISTERING A MAKEUP CREATED IN THE WEB
Check the Blueprint to determine if the makeup was created in Triton W eb. A Makeup Schedule appears with a prefix of
‘Makeup - [SCHEDULE NAME].’ Only Participants that were marked as ‘Not Present’ will appear in the list of
Participants eligible to take a Makeup exam.
How to administer a makeup created in Triton Web...
1 Plug in the Proctor Receiver.
22
Proctor Receiver
2 Open and log into the Triton Proctor Application.
A list of available Schedules is displayed.
3 Locate the desired Schedule ‘Makeup - [SCHEDULE NAME],’ select the Schedule and click the Start Schedule icon.
The Exam Room is displayed.
Next Steps
Administer the exam as normal. For more information, see Administering an Exam on page 12.
tritondatacollectionsystem.com/triton-support
Page 23

Triton Data Collection System
CONTACT US
If you have questions or concerns, additional resources are available online or by calling a Turning Technologies
representative.
Online Assistance
Turning Technologies offers online assistance through its website at www.turningtechnologies.com.
Go to the Support tab on the website to find more information about using TurningPoint, such as support guides and
manuals, online tutorials and product training.
Customer Support
Turning Technologies’ Customer Service Department offers first class technical support second to none.
Technical Support is available Monday - Friday, 7:00 a.m. - 9:00 p.m. EST.
For your convenience we offer several methods of communication for technical support. From within the contiguous
United States, you can reach Customer Service toll-free by calling 1.866.746.3015.
23
If calling from outside the United States please call +1.330.746.3015.
Customer Service may also be reached via e-mail at support@turningtechnologies.com.
Mailing Address:
Turning Technologies
255 West Federal Street
Youngstown, Ohio 44503
tritondatacollectionsystem.com/triton-support
Page 24

Triton Data Collection System
FAQS
Triton Web
• Can a user have multiple roles within Triton DCS?
No. Once an email address is associated to a role, it cannot be associated to another role. However, Site Managers
and Organization Managers may be given Proctor permissions.
• Can more than one Proctor share a Participant List?
No. Multiple Proctors cannot be assigned to a single Participant List.
• What is the maximum number of participants allowed in a participant list?
A single Participant List can contain up to 1,000 Participants.
• What is the largest Blueprint a user can create?
The largest Blueprint can include up to: 10 Answer Documents with 10 versions a piece, with 250 questions in each
version.
24
• I deleted my associated files. Now I need them.
Triton DCS does not recover deleted files. Be sure to download the files to your computer prior to deletion (should you
need them in the future).
• Why do I receive the following message when uploading my template files? “The file you chose is invalid.”
Triton Web only allows you to upload CSV files. Verify that the file you are trying to upload has an extension of CSV.
For example Programs.csv.
• I am administering exams across time zones and my Schedule is available a day earlier than expected.
The Schedule activation date, begin date, makeup date and end date are based on the time zone selected when the
Schedule was created. The Schedule becomes active, begins, and ends at midnight on the selected days. For
instance, a Schedule was created by a user on the east coast and a Proctor is going to be administering the Schedule
on the west coast. The Schedule becomes active, begins and ends on midnight of the selected days on the east coast.
However, on the west coast the Schedule becomes active, begins and ends at 9 p.m. the day before the specified
dates when the Schedule was created.
Triton Proctor Application
• Is ResponseWare compatible with Triton DCS?
Triton DCS is only compatible with the ResponseCard NXT.
tritondatacollectionsystem.com/triton-support
Page 25

Triton Data Collection System
Hardware
• Which ResponseCards are compatible with Triton DCS?
Triton DCS only works with ResponseCard NXT with firmware version 2.0 or higher.
• I cannot login. What is wrong?
The firmware on the ResponseCard NXT must be 2.0 or higher. To find the firmware, press the softkey below the
wrench > press the right arrow until you see Device Info > press Enter > press the right arrow.
• The channel number is blank on the Triton Proctor Application login screen.
Triton DCS only works with the Proctor Receiver. If the Proctor Receiver is plugged in and the channel number is
blank, unplug the receiver and plug it into a different USB port.
• ResponseCard NXT displays the message: “Incorrect Test: Restarting.”
This occurs when a Participant starts the login process for Answer Document A but never completely enters the exam.
The Proctor then starts Answer Document B, however the Participant’s ResponseCard is still in the log in process for
Answer Document A. The Participant will be taken to the Welcome screen on the ResponseCard and must login again
to continue the exam.
25
• ResponseCard NXT displays the message: “Memory Exception Seek New Device.”
This happens if the ResponseCard’s memory becomes corrupt and is unable to properly store exams. The Participant
will need to replace the ResponseCard with a replacement device to continue testing.
tritondatacollectionsystem.com/triton-support
Page 26

Triton Data Collection System
Glossary
The following is a list of terms you will find within the Triton Data Collection System.
Activation Date
The Activation Date is the day a Schedule becomes locked and no longer editable except to extend the end date.
Schedules are activated at midnight on the specified day or immediately if the activation date is the current day. If
necessary, the Schedule end date may be extended.
Active Schedules
Active Schedules are Schedules that have reached their begin date but have not been finalized.
Add Participant
An Administration Rule that determines whether or not a Proctor may add a Participant in the Triton Proctor Application
that is not in the Participant List.
• Yes, Participants not included in the associated Participant List may be added by the Proctor prior to starting the exam.
• No, Participants that are not in the associated Participant List are unable to log into the exam.
26
Administration Rules
Administration Rules determine what functionality is available while administering an exam. One set of Administration
Rules is applied to all Answer Documents within a Blueprint.
Alerts
Alerts are Schedules that have passed their end date and have not been finalized.
Allowed Post Start
An Administration Rule that determines whether or not a Proctor may add a Participant to the Participant List in the
Triton Proctor Application after the examination has begun.
• Yes, Participants may be added by the Proctor AFTER the exam has started.
• No, Participants may not be added once the exam has started.
Anonymous
An Administration Rule that determines whether or not Participants must log into an exam with their assigned Participant
ID.
• Yes, allows the application to generate a ‘Participant ID’ that all Participants use to log into the ResponseCard. The
device ID is not viewable and there is no way to associate a Participant with a specific response string.
• No, Participants must use their Participant ID to log in with a ResponseCard.
tritondatacollectionsystem.com/triton-support
Page 27

Triton Data Collection System
Answer Document
An Answer Document defines the type of exam (Test or Evaluation), the number of questions and answer options.
Associated File
An associated file must be a PDF document that will be accessible to those users who have access to the Blueprint. This
may include administration procedures, question booklets, definition or equation reference pages, etc.
Begin Date
The begin date is the day the Schedule becomes available for the Proctor to administer.
Blueprint
A Blueprint is comprised of one set of Administration Rules with at least one or more (up to 10) Answer Documents. The
Blueprint determines how tests are administered, if and when a Participant can be added, acceptable attendance states
and if makeups are available.
Bundle
27
If more than one Answer Document is associated with the Blueprint, a set of Bundle Administration Rules determines
how multiple Answer Documents are administered. The rules that makeup a Blueprint bundle are: Enforce Bundle,
Enforce Order, Self-Paced and Single Login.
Discrimination Index
The discrimination index for a particular question is based on the point biserial correlation coefficient. Item discrimination
is a measure describing how well a question differentiates between students that did well on the overall test and those
that did not.
End Date
The end date is the last day the exam can be administered. After this date, the Schedule is removed from the Triton
Proctor Application, unless it is in the Recovery state.
Enforce (Attendance)
An Administration Rule which determines if an exam may be started if all the Participants are not logged into the exam.
• Yes, the exam can only be started when all the Participants are logged in or marked as ‘Not Present.’
• No, the exam may be started when the Participants are in any state of login.
Enforce Bundle
Enforce Bundle determines how the Answer Documents are delivered during the examination.
• Yes, requires the Answer Documents to be administered in a single session.
• No, Answer Documents may be administered in different sessions.
tritondatacollectionsystem.com/triton-support
Page 28

Triton Data Collection System
Enforce Order
Enforce Order determines the order in which the Answer Documents are delivered during the examination.
• Yes, the order in which the Answer Document appears will be the order the exams must be in for administration.
• No, the Proctor may change the order of the Answer Documents. Participants that have not begun the log in process
will automatically be marked as ‘Not Present.’
Evaluation
An Answer Document that does not allow for correct answers or points to be defined. (e.g. a survey or questionnaire)
Exam
Exam is the general term used when referring to an Answer Document and can be either a test or an evaluation.
Exam Room
The Exam Room is the window in the Triton Proctor Application through which an exam is administered.
28
Late Entry
An Administration Rule that determines whether or not a Participant may log into an exam after the exam has started.
• Yes, Participants may log in AFTER the exam has started.
• No, Participants may not log in once the exam has started.
Makeups
An Administration Rule that determines whether a Participant that was not present at the time of the exam can makeup
the exam at a later time.
• Yes, Participants not present at the time of the exam CAN makeup the exam at a later time.
• No, Participants not present at the time of the exam CANNOT makeup the exam at a later time.
Makeups Created In
A Schedule setting that determines whether a makeup exam is administered through the Triton Proctor Application or in
Triton Web.
• Desktop Application - The Proctor administers makeup exams through the Triton Proctor Application.
• Web - The makeup exams are Scheduled through Triton Web and downloaded as a new Participant List in the
Schedule.
Makeup Date
The makeup date is used as a reference for a time period when Makeups should begin.
tritondatacollectionsystem.com/triton-support
Page 29

Triton Data Collection System
Organization Manager
An Organization Manager is a user that will have all administration rights to the Organization. They will have edit and
read access to the Organization, Staff, Sites and all other components. This login type is responsible for imports and can
create Blueprints that are shared across the Organization.
Participants
Individuals taking an exam are referred to as Participants.
Participant List
A Participant List is analogous to a class of students and their Proctor.
Proctor
A Proctor is a user that will be administering a scheduled Blueprint. A Proctor will also be able to log into Triton Web and
create exams for their own use.
Proctor Receiver
29
A receiver specifically designed for use with the Triton Data Collection System, the Proctor Receiver is a yellow receiver
with the part number RRRF-03-P.
Program
A Program can also be referred to as a course, which includes grouping terminology that will be used when associating
Staff and Participants for exams.
Reliability Coefficient (KR20)
KR20 relates to the consistency of test items from one testing date to the next, or reliability. The same students taking
the same test at two different times would have similar scores on a highly reliable test. A reliable test would typically
have a KR20 of .70 or higher.
Rejoin
An Administration Rule that determines whether a Participant must finish an exam in the original session.
• Yes, if an exam is started, and is NOT finished in the original session, a Participant can rejoin the session at a later
time to finish. On rejoin, all previously recorded responses will be downloaded to the ResponseCard at login.
• No, if an exam is started it must be finished in that session.
Resume
An Answer Document setting that determines if participants are allowed to resume an exam after completing a final
send.
tritondatacollectionsystem.com/triton-support
Page 30

Triton Data Collection System
Schedule
A Schedule is comprised of a Blueprint, at least one Participant List and the date range when the exams can be
administered. Schedules are administered through the Triton Proctor Application.
Self-Paced
Self-Paced is a Bundle Rule that determines whether or not a Participant must wait for all Participants to finish an
Answer Document before moving on the next exam.
• Yes, allows the Participants to finish the first Answer Document and move onto the second without waiting for all
Participants to finish.
• No, Participants must wait for the Proctor to start each Answer Document.
Session
A session contains the Schedule information and Participant responses.
Single Login
30
Single Login is a Bundle Rule and determines whether or not Participants must enter their Participant ID for each
Answer Document in the exam.
• Yes, Participants are required to enter their Participant ID for the first Answer Document. Name, Participant ID and
exam verification will be necessary for additional Answer Documents.
• No, Participants must enter their Participant ID log in for each Answer Document.
Site
A Site is a management structure analogous to a school building, department, client or other such organizational
structure.
Site Manager
A Site Manager is a user that manages the Site through the creation, editing and scheduling of Blueprints, and any other
functions permitted by the Organization Manager.
Staff
The users within Triton Data Collection System are referred to as Staff. These users can have the role of Organization
Managers, Site Managers or Proctors.
Test
An Answer Document that allows for correct answers to be defined.
tritondatacollectionsystem.com/triton-support
 Loading...