

Page 1

Triton Data Collection System
QUICK START GUIDE - ORGANIZATION MANAGER
Triton Data Collection System (DCS) is a simple, secure and reliable data collection system made up of Triton Web and
the Triton Proctor Application. As an Organization Manager you have all administrative rights to the Organization.
Organization Managers have the ability to create and manage Sites, Staff, Participants, Programs, Participant Lists,
Blueprints and Schedules. You will also be able to generate reports and export results data.
This Quick Start Guide will walk you through the following tasks:
• Activating Your Account
• Setting Up the Organization
• Importing the Organization Information
• Creating a Blueprint
• Creating a Schedule
1
ACTIVATING YOUR ACCOUNT
You will receive an account activation email from TritonDCS@TurningTechnolgies.com.
How to activate your account...
1 Click the link provided in the email from TritonDCS@TurningTechnologies.com.
You will be taken to the Activate Account page in Triton Web.
2 Enter a New Password in the box provided.
3 Confirm Password in the box provided.
4 Click Save.
A message appears that the account has been successfully activated and the Triton Web login page is displayed.
http://www.tritondatacollectionsystem.com/triton-support
Page 2
Triton Data Collection System
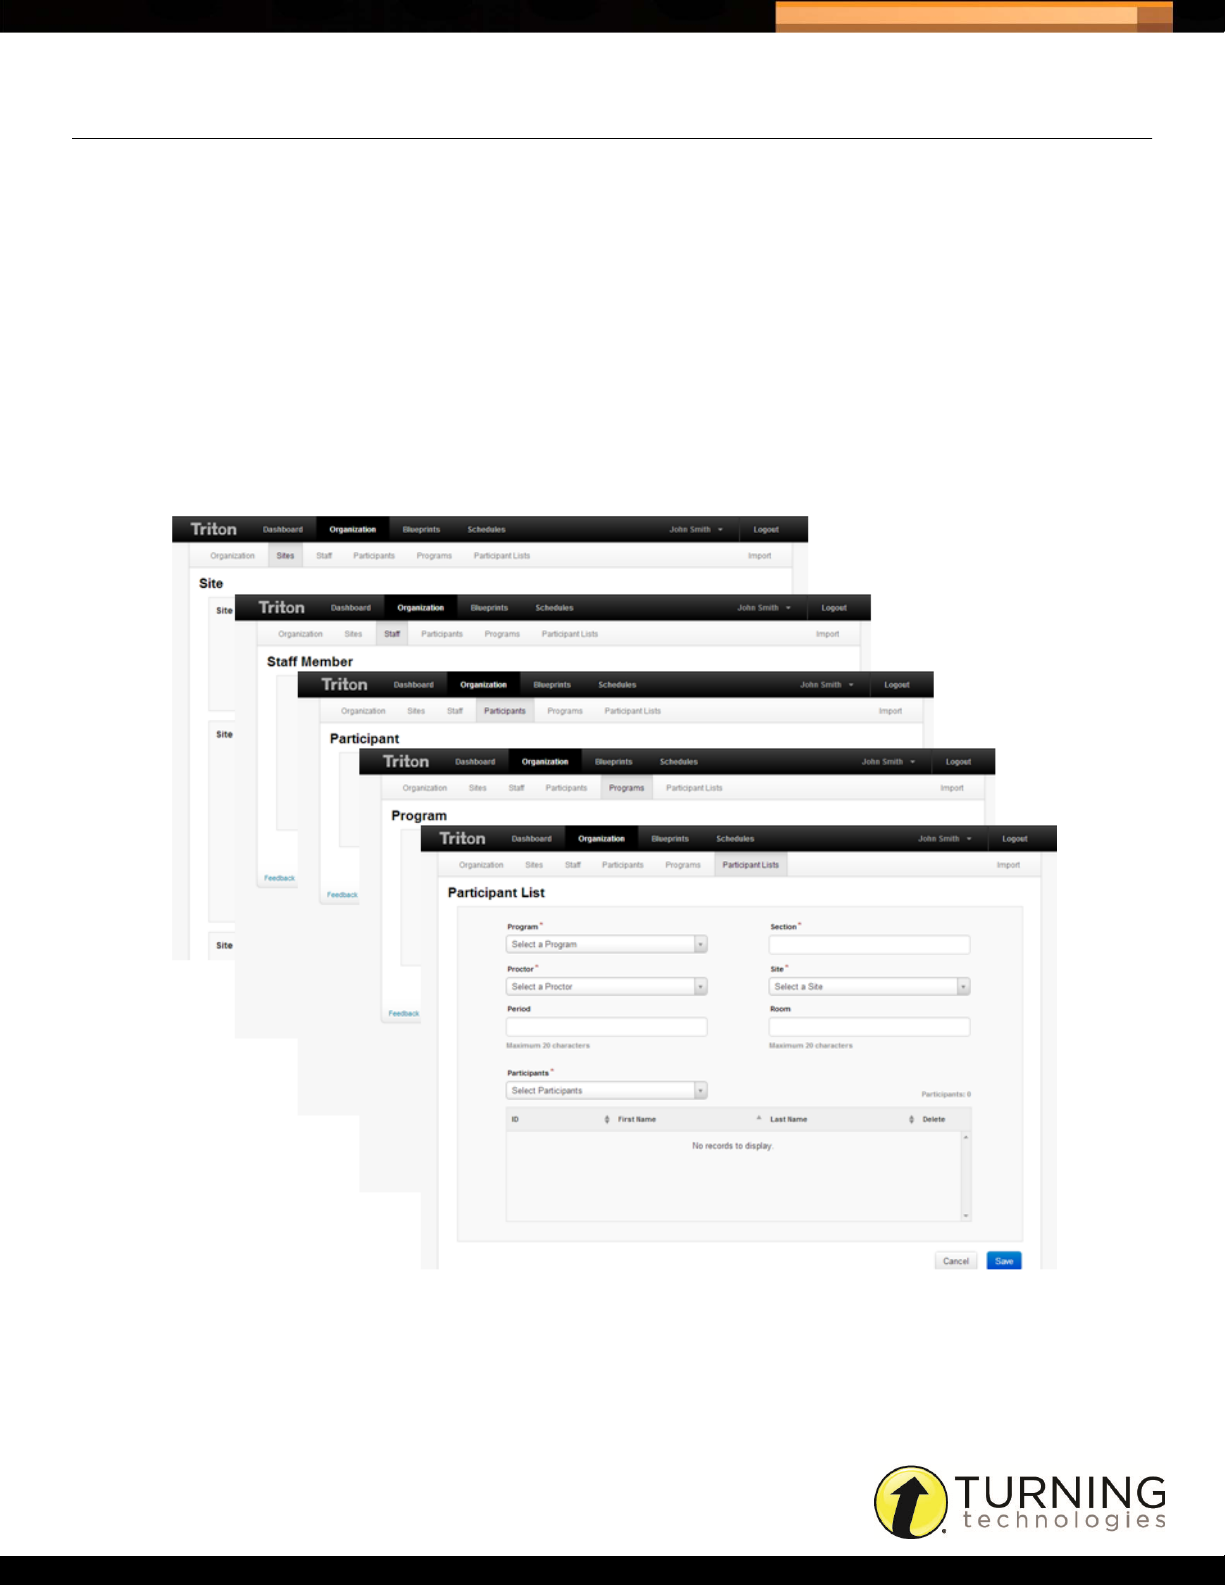
SETTING UP THE ORGANIZATION
Sites, Staff, Participants, Programs and Participant Lists can be created manually or imported, in bulk, using the
templates provided in Triton Web. For more information on Importing, see Importing the Organization Information on
page 3. Sites, Staff, Participants and Programs must be created before creating a Participant List.
How to set up the Organization...
1 Go to TritonDCS.com and log in with your Email and Password.
2 Click Organization from the navigation bar.
3 Select the Sites, Staff, Participants, Programs or Participant List tab.
4 Click Create, enter the required information and click Save.
2
http://www.tritondatacollectionsystem.com/triton-support
Page 3

Triton Data Collection System
IMPORTING THE ORGANIZATION INFORMATION
Import templates assist in the creation of Sites, Staff, Participants, Programs and Participant Lists.
How to import the Organization information...
1 Click Organization from the navigation bar and select the Import tab.
2 Download the template file.
The template file opens in a CSV format in Microsoft Excel.
3 Enter the information under the correct column header.
4 Save the file in a CSV format.
5 Select the type of information being imported from the Option drop-down menu.
6 Click Browse.
7 Select the import file and click Open.
8 Click Import.
3
9 Repeat steps 2- 8as necessary.
CREATING A BLUEPRINT
A Blueprint is a set of Administration Rules with at least one Answer Document. A Blueprint is scheduled with an
associated Participant List for examination purposes.
How to create a Blueprint...
1 Click Blueprints from the navigation bar.
2 Create Administration Rules.
a Click the Administration Rules tab.
b Click Create.
c Enter a Name for the rule set.
d Set the rules in each section and click Save when finished.
3 Create Answer Documents.
a Click the Answer Documents tab.
b Click Create.
c Enter a Name for the Answer Document.
d Set the options and click the Questions tab when finished.
e Click the Versions icon to denote a version(s) and question type(s).
f Set question and answer options, correct answers and point values (if applicable) as necessary.
g Click Save.
http://www.tritondatacollectionsystem.com/triton-support
Page 4

Triton Data Collection System
4 Create the Blueprint and set Bundle Administration rules for Blueprints with more than one Answer Document (a
Bundle).
a Click the Blueprints tab.
b Click Create.
c Name the Blueprint.
d Select the Administration Rule and Answer Document(s).
e Select Bundle Administration rules.
5 If applicable, attach associated files.
6 Click Save.
CREATING A SCHEDULE
A Schedule is comprised of a Blueprint and at least one Participant List. Schedules are administered through the Triton
Proctor Application for exam administration.
How to create a Schedule...
1 Click Schedules from the navigation
bar.
4
2 Click Create.
3 Enter a name for the Schedule in the
box provided.
4 Select a Blueprint from the drop-down
menu.
5 Set the Makeups Created In option.
The default is set to Desktop.
6 Set the activation date, begin date,
makeup date and the end date.
7 Select the Time Zone from the
drop-down menu.
8 Add the Participant Lists to be scheduled.
a Click + Participant Lists.
b Select the Program(s) and the Site(s).
c Check the box next to the Participant List(s).
d Click Add.
http://www.tritondatacollectionsystem.com/triton-support
 Loading...