

Page 1
ResponseCard® XR
User Guide
Organization Owned
Page 2

CHANGING THE CHANNEL
1. Press MENU.
2. Highlight Change Channel (use the YES button for down and the NO
button for up).
3. Press ENTER.
The next screen displays the current channel. Use the keypad to enter a new
channel. Ex: 05.
4. Press ENTER.
Presentation mode is automatically displayed on the screen.
THE SETUP MENU
The Setup Menu has four options:
• User Data
• Contrast
• Unit ID
• Version
User Data - Allows users to view, edit and send user information.
Contrast - From this sub-menu, users can adjust the contrast. Use the YES
button to make the screen lighter, and the NO button to make the screen darker.
Unit ID - Displays the six-digit Device ID.
Version - Displays the current rmware version of the ResponseCard XR.
CREATING A TEST/HOMEWORK ASSESSMENT
1. Press MENU.
2. Highlight Test/Homework.
3. Press ENTER.
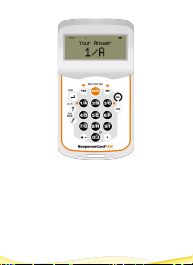
4. Select 1/A for New Test.
5. Use the keypad to enter a version number and press ENTER.
6. Select YES to verify the information. You are now in the Test/Homework
screen.
7. Enter the corresponding answer to the question. You will receive
conrmation that your answer is stored.
8. Repeat step 7 until all of the questions are answered.
The maximum number of answers that can be stored is 100.
Page 3

CREATING A TEST/HOMEWORK ASSESSMENT (CONTINUED)
9. Press MENU when you have completed the assessment.
10. Select YES to leave Test/Homework mode.
11. Press 1/A to save the assessment and send to the host computer.
Press 2/B to save the assessment and send at a later time.
EDITING A TEST/HOMEWORK ASSESSMENT
1. Press MENU.
2. Highlight Test/Homework (use the YES button for
down and the NO button for up).
3. Press ENTER.
4. Press 2/B for Manage Test.
5. Use the YES button to scroll down to select the test.
6. Press ENTER.
7. Select 3/C to Edit Test.
8. Press YES to conrm the test.
9. Use the YES and NO buttons to scroll through the test.
The Go To button can also be used:
a. Press Go To.
b. Enter the three-digit question number. Ex: 004
10. To change the answer for the selected question, press a button on the
ResponseCard that corresponds to the new answer choice.
11. Press MENU once all of the edits are made.
12. Select YES to leave Test/Homework mode.
13. Press 1/A to save the assessment and send to the host computer.
Press 2/B to save the assessment and send at a later time.
SUBMITTING A SAVED TEST/HOMEWORK ASSESSMENT
1. Press MENU.
2. Highlight Test/Homework.
3. Press ENTER.
4. Press 2/B for Manage Test.
5. Use the YES button to scroll down to select the test.
6. Press ENTER.
7. Press 1/A to send the test.
You will receive conrmation that your test has been submitted.
Page 4

CONTACT US
Toll Free.....................................................................................866.746.3015
International..........................................................................+1.330.746.3015
Support......................................................................................866.746.3015
Support.....................................................support@turningtechnologies.com
Training.....................................................training@turningtechnologies.com
Technical Support is available M - F from 7 a.m. to 9 p.m. EST.
Visit Turningtechnologies.com/technical-support for more information.
FCC Statement
This device complies with part 15 of the FCC Rules. Operation is subject to the following two conditions: (1) This device
may not cause harmful interference, and (2) this device must accept any interference received, including interference
that may cause undesired operation.
IC Statement
This device complies with Industry Canada licence-exempt RSS standard(s). Operation is subject to the following two
conditions: (1) this device may not cause interference, and (2) this device must accept any interference, including
interference that may cause undesired operation of the device.
 Loading...