


RACKDP-50
QUICK REFERENCE GUIDE
PLEASE DOWNLOAD PRESETS
FOR THIS PRODUCT
from www.turbosound.com
Turbosound Ltd
Star Road, Partridge Green
West Sussex RH13 8RY
tel: +44 (0)1403 7101447 fax: +44 (0)1403 710155
www.turbosound.com
Version 1.0

user guide
RACKDP-50
Introduction
This guide covers the initial setup instructions for the RACKDP-50 powered management
system and the associated TurboDrive software and BvNet drivers. Please read this guide
thoroughly before trying to install software or connect devices.
Support
If, after consulting this manual, you're still thwarted, stuck or otherwise bamboozled by a
problem, our support people are ready and willing to assist. Just email
techsupport@turbosound.com to bring them to your rescue.
BvNet
BvNet is a way of networking multiple devices using the RS485 standard, carried over a
CAT5 cable. A single device can connect to your PC via the in-built USB; multiple devices
simply daisy-chain from the first device, and for distances greater than 3 metres you should
always use a BvNet interface to connect to the amplifier(s).
System requirements
TurboDrive requires a PC running a 32-bit operating system such as Windows NT, Windows
2000, Windows XP, Windows Vista, Windows 7.
DotNet Framework
TurboDrive has been developed using modern software engineering techniques, using an
up-to-date language and development tools. It runs on the Microsoft .NET Framework V2.0
with service pack 2, one of which must be installed on the computer which is to run
PodWare. Most versions of Microsoft Windows come with .NET as standard. When
installing PodWare on a computer, the installation process will check if a suitable .NET
Framework is on the machine. In the event that you do not have the .NET Framework
installed on your computer, you will be prompted to do so by TurboDrive’s installer.
Version 2.0 of the Microsoft .NET framework is included on the CD that came with your
BvNet box. It is recommended that you check for and install any available updates using
Microsoft Update.
The .NET Framework V2.0 is available for free download
from:http://www.microsoft.com/downloads/details.aspx?familyid=0856EACB-4362-4B0D-
8EDD-AAB15C5E04F5&displaylang=en
Installing the software
When you plug the USB connection of the RACKDP-50 amplifier into your PC for the first
time the ‘Found New Hardware’ will prompt you to install drivers. Two drivers will be
installed: one for the USB port itself, and one for the Virtual Com Port (VCP). Note that both
of these drivers may report that they have ‘Not Passed Windows Logo Testing’. You should
select ‘Continue Anyway’. If the driver software has been supplied to you on a CD-ROM,
RACKDP-50 user guide v1.0
Page 2
user guide
RACKDP-50
place this in your CD-ROM drive, or alternatively download the drivers from the Turbosound
website.
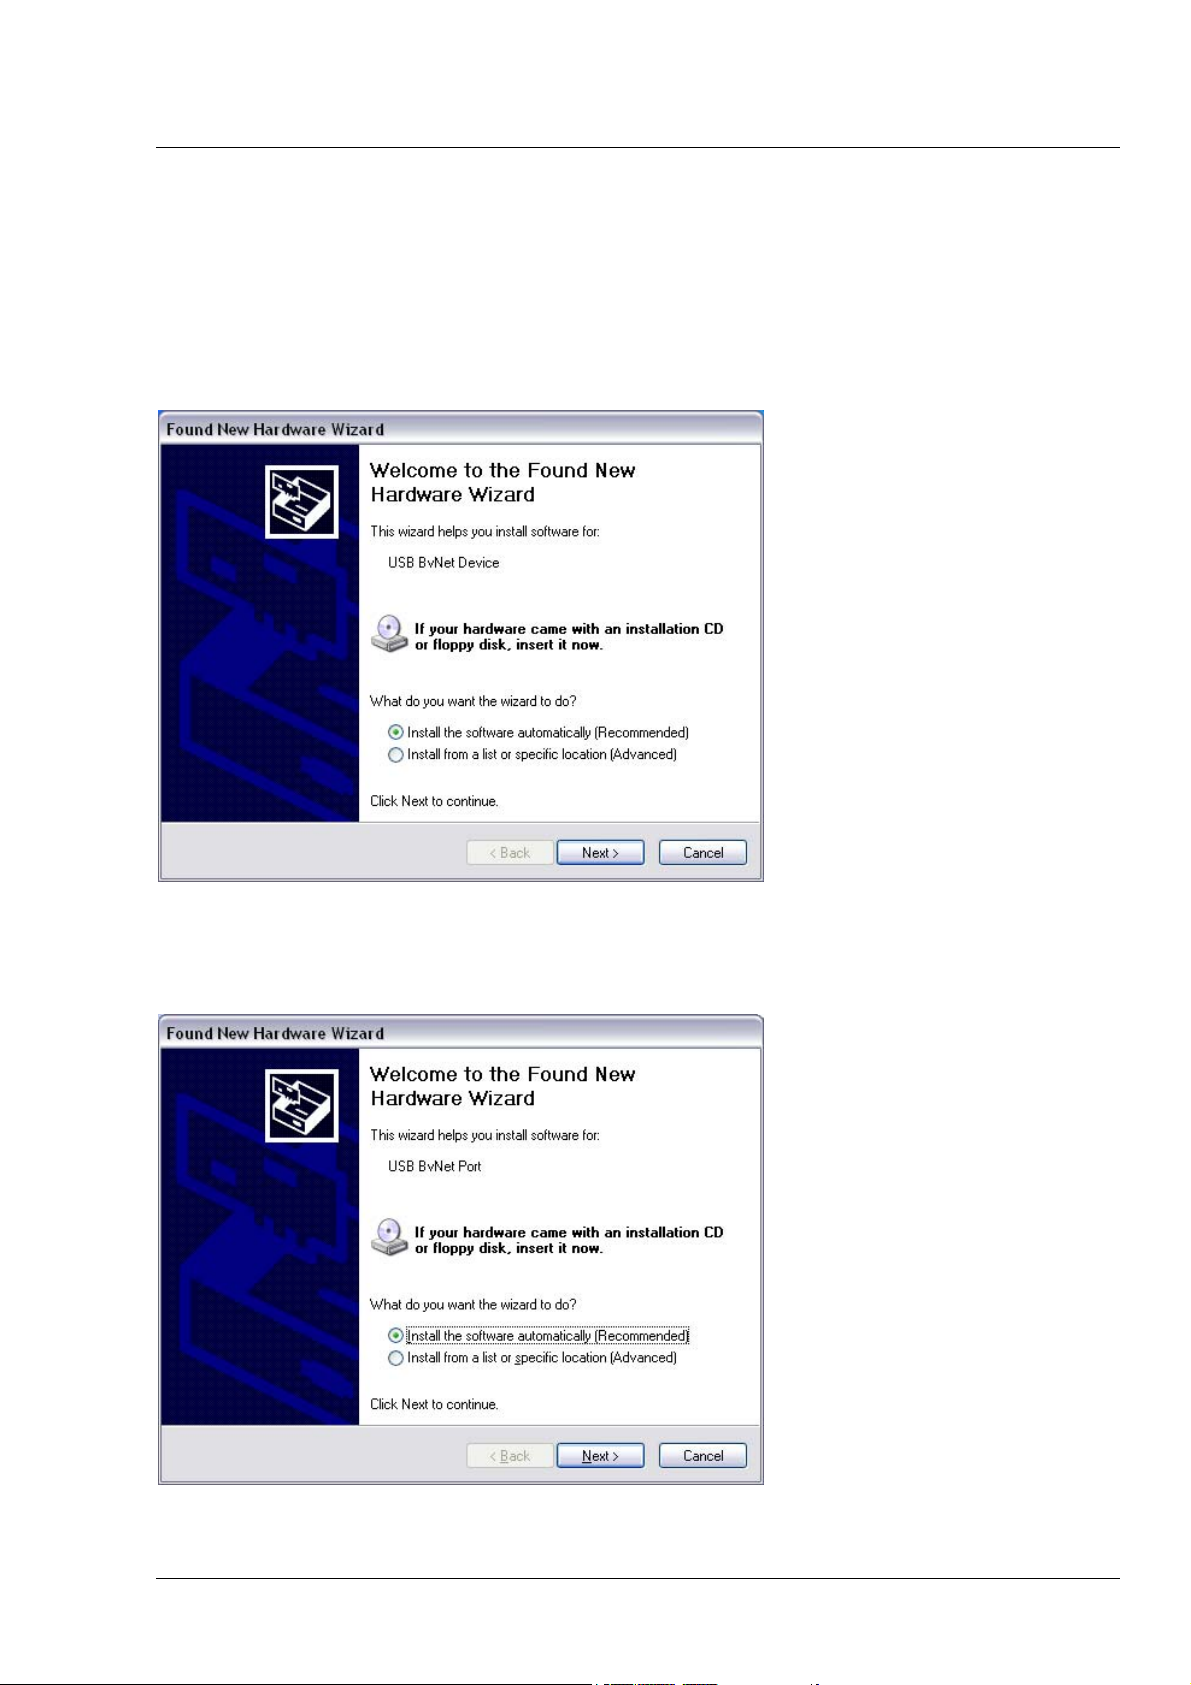
Windows XP driver installation
Connect a USB cable from your computer to the BvNet interface or USB connector of the
RACKDP-50. The connection brings up the ‘Found New Hardware’ Wizard.
Insert the CD and Click ‘Next’. Once the USB BvNet Device has finished installing you will be
prompted to install the USB BvNet Port. Click ‘Next’.
RACKDP-50 user guide v1.0
Page 3

user guide
RACKDP-50
COM Port
The TurboDrive application uses a COM port to communicate with the connected devices.
The driver software causes a ‘Virtual COM port’ (VCP) to be created. This will appear to
TurboDrive as just another COM port, and can be selected using Network > Com Port.
out the COM port which BvNet is using, select Start > Control Panel > System > Hardware > Device
Manager > Ports.
Against this will be the COM port number.
If you wish to change this to a different COM port number, right-click on the existing COM
port tree node; select Properties > Port Settings > Advanced.
selector. Do not change it to a COM port that is already in use.
Install the TurboDrive Software
Download the TurboDrive software from the Turbosound website and follow the download
and installation instructions. Launch the TurboDrive installer. Select a suitable installation
directory and click ‘Next’. Then view and agree to the software license and click ‘Next’. You
should then see the ‘Installation Complete’ screen. TurboDrive is now ready for you to use.
To find
Here you should see an entry in the tree for an item called ‘USB BvNet Port’.
There you will see a COM port
Connect your Amplifier
Connect the RACKDP amplifier(s) to your PC either via USB, or at distances greater than 3
metres via a BvNet interface. To connect additional devices simply link the BvNet LINK
socket on the first amplifier to the BvNet IN socket of the next device, and so on. The order
in which the devices are connected is not important. The LINK socket of the last device in
the ‘chain’ need not be connected. The ‘Ethercon’ connectors are fully compatible with
standard RJ45 Ethernet patch cables which may be used to make these connections. If
additional ruggedness is required, we recommend using the Neutrik Ethercon locking type
of connector.
You're now ready to run TurboDrive for the first time...
FIRST USE OF TURBODRIVE
Authorisation Code
When TurboDrive is launched for the first time, or is installed into a different directory, you
will be asked you to enter an Authorisation code: PJLUWZ. This code can also be found as a
text file with your download.
Enter the code and click Done.
RACKDP-50 user guide v1.0
Page 4

user guide
RACKDP-50
Go Online
Press the Go Online button
The software then searches the network for any connected devices. During the data transfer
process, the loading bar in the bottom-right corner of the screen will display progress.
Once online, the triangle in the button turns green and all connected devices are displayed
in the network window.
Wink
The wink button can help you test communications and find your way through a large
network of devices. Select a device in the sidebar by clicking on its name once. Clicking the
Wink button will cause the selected device’s ONLINE indicator to flash for a few seconds in
order to identify itself.
RACKDP-50 user guide v1.0
Page 5

user guide
RACKDP-50
IN USE
To begin controlling a device, double click its icon in the network window. This will open a
Monicon, a quick display showing monitor levels and mute status.
Monicons are ideal for keeping an eye on systems with multiple devices, as the critical
elements of a system can be viewed on a single screen. The Monicon is purely a display
window and does not allow you to control parameters. To alter the parameters of a device,
press the Expand button. The control panel will now expand showing a number of
tabs for each of the available control pages. To shrink the full panel back to a Monicon,
press the Contract button.
Load Factory Settings
To load presets into your amplifier, go to File > Load Factory Settings.. and navigate to the
location where you have saved the downloaded .dfa preset file for your loudspeaker model.
The selected preset name will now be displayed in the left panel and at the top of each
device’s main window.
RACKDP-50 user guide v1.0
Page 6

user guide
RACKDP-50
Grouping
The grouping function offers a powerful way of organising multiple devices into groups,
whose parameters can then be controlled together.
To create a group, left-click the first device, shift-left-click the last device, right-click any of
the selected devices and select ‘Create new Device Group’. You can name your new group
in the left panel.
Now, when a chosen parameter is altered, the value for all the devices in that group change
together.
Device Firmware
Firmware is a set of instructions which runs inside the device, designed to inform your
processor of its purpose and functions. As part of our programme of continuing
improvement, firmware updates may be released from time to time, and when you launch a
panel for a device it may recommend that you update the firmware. You can use
TurboDrive to update the firmware in an attached device.
Firmware files can be identified by the .dfw (device firmware) extension. The file name will
contain the device model number (before the V) and firmware version (after the V) number
as shown below. So, in the above example, the firmware is for Model 1169 ( -4) and its
version number is 1.234. You should always use the same model as the one you are
updating, and always update to a newer firmware version – never revert to an earlier
version.
RACKDP-50 user guide v1.0
Page 7

user guide
RACKDP-50
Updating Device Firmware
To update an attached device’s firmware, go to Device > Update Firmware, then locate the
required firmware file (.dfw). Check www.turbosound.com for the latest versions.
During the firmware updating process, the progress bar in the bottom-right corner of the
screen will turn red. DO NOT disturb the update process during this time.
Turbosound Limited
Star Road
Partridge Green
RACKDP-50 user guide v1.0
Page 8
West Sussex RH13 8RY
United Kingdom
 Loading...