

Trinity TBFZ-2702, TBFPBR-2702 Owner's Manual
OWNER’S MANUAL
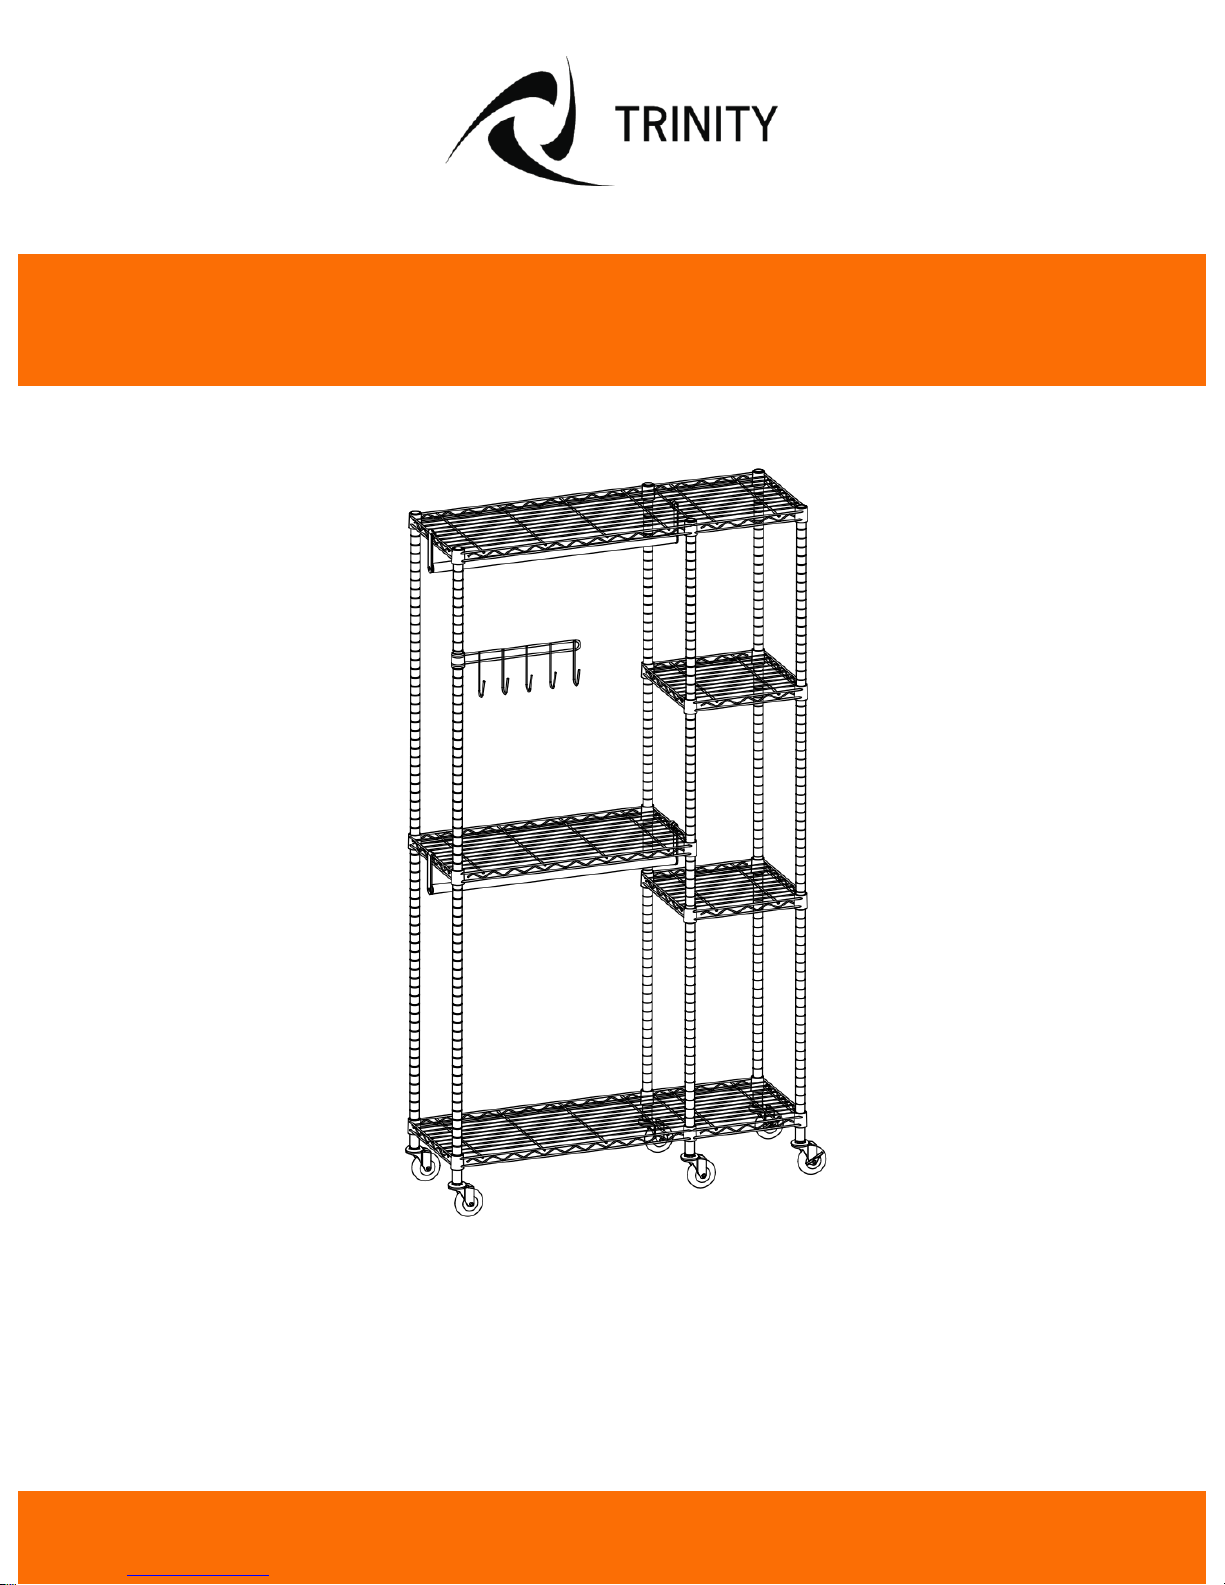
TRINITY MOBILE CLOSET ORGANIZER
Model # TBFZ-2702 / TBFPBR-2702
Everything in its place.
®

© 2016 TRINITY - 800.985.5506
1
Your TRINITY Mobile Closet Organizer should include the following parts. Please inspect box
contents to ensure you have received all components.
If you are missing any parts, need assistance with assembly or have questions, please contact
TRINITY Customer Service: 800.985.5506 or customerservice@trinityii.com. Parts can also be
requested online at www.trinityii.com (Help & More, Contact Us).
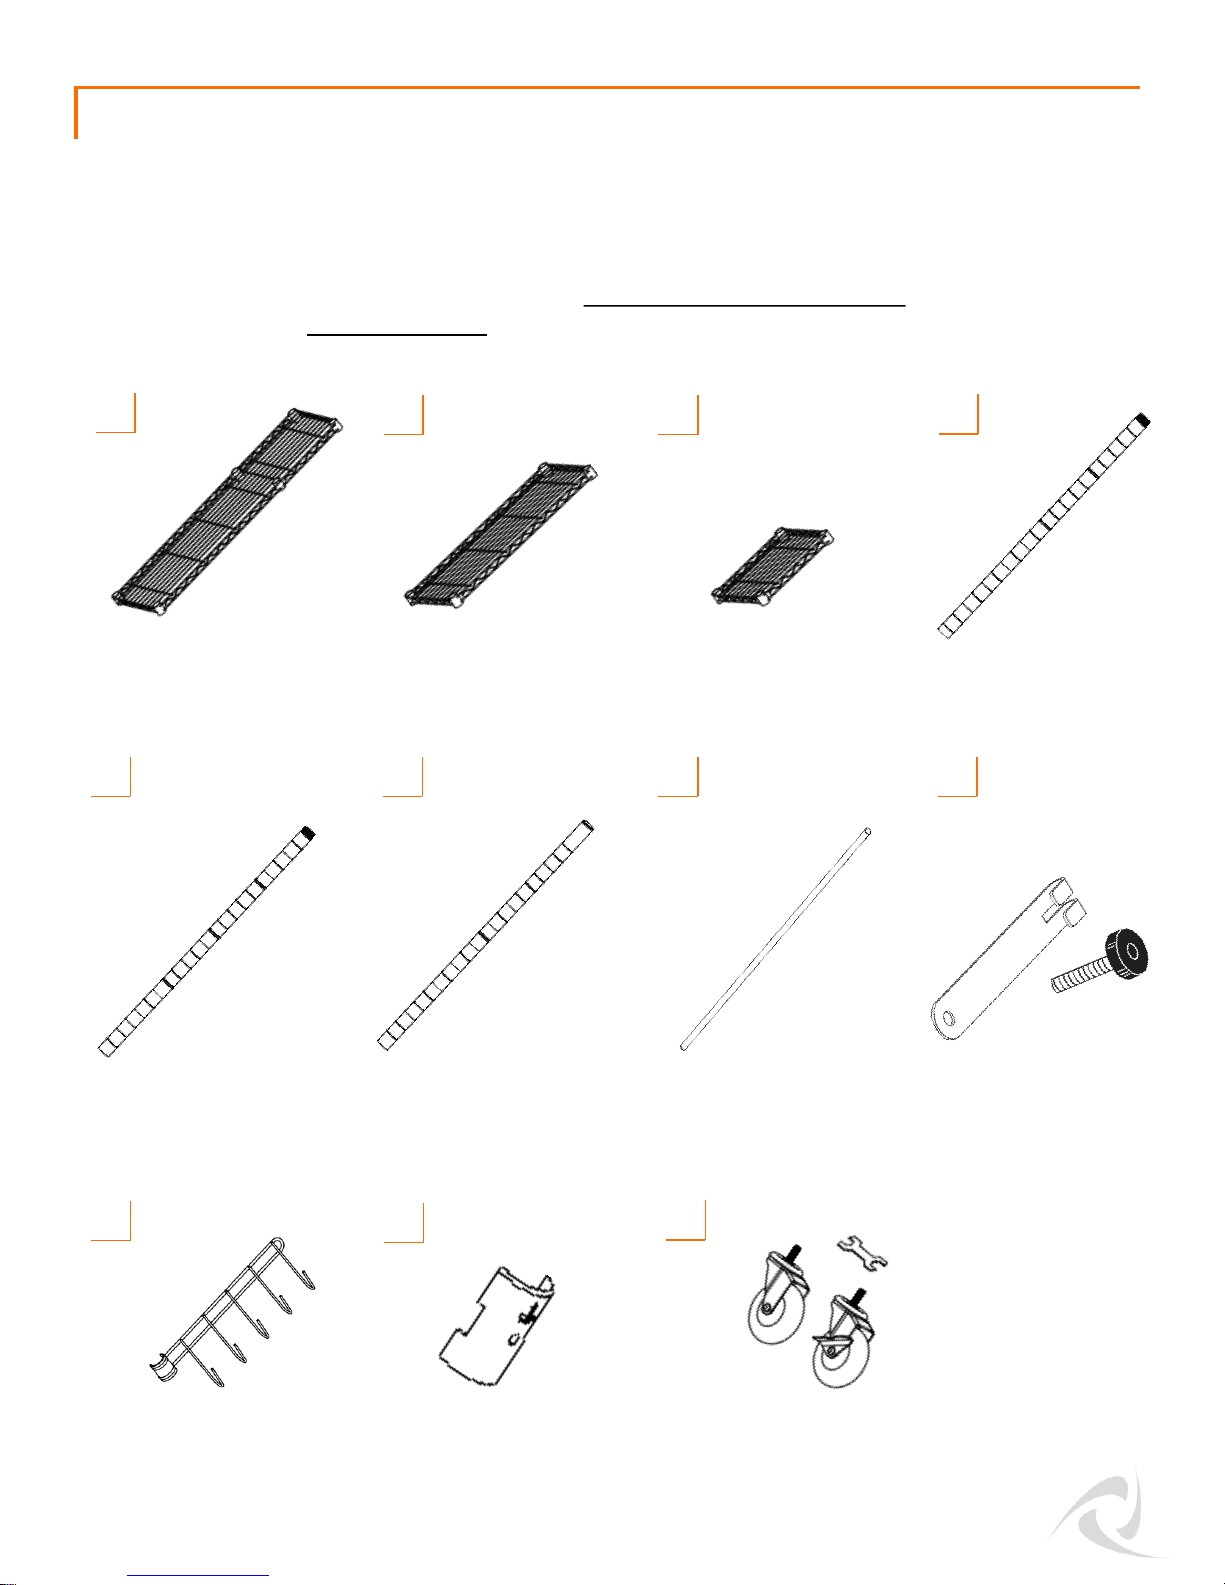
PARTS LIST
© 2016 TRINITY - 800.985.5506
2
MEDIUM SHELF (1)
A
SMALL SHELF (2)
B
TOP POLE (6)
End Cap and Pole Connector
are pre-installed
C
SIDEBAR
W/ HOOKS (1)
D
E
SLIP SLEEVE
(50) + (4) extra
F
I
BOTTOM POLE (6)
J
K
MIDDLE POLE (6)
Pole Connector is
pre-installed
HANGING ROD (2)
G
HANGING BRACKET
& SCREW (4)
H
CASTER
(2) locking, (4) non-locking
LARGE SHELF (2)
ASSEMBLY INSTRUCTIONS
For easiest assembly, do not attach the TOP (D),
MIDDLE (E) and BOTTOM (F) POLES until
instructed. Once connected, these will be the posts
for the Organizer.
Note that each POLE (D+E+F) has slight horizontal
line indentations at 1” intervals. Each SLIP SLEEVE
(J) has raised horizontal lines inside designed to
lock them in place on the POLE (D+E+F).
On all (6) BOTTOM POLES (F) place 1 pair of SLIP
SLEEVES (J) at the lowest position, position closest
to the CASTERS (K). Please make sure the arrow
faces up and that the word “TOP” is right side up.
Slide the pair of SLIP SLEEVES (J) until you hear a
click to confirm the pair is locked onto the BOTTOM
POLE (F). DO NOT place more than one pair on
each POLE (F) at a time.
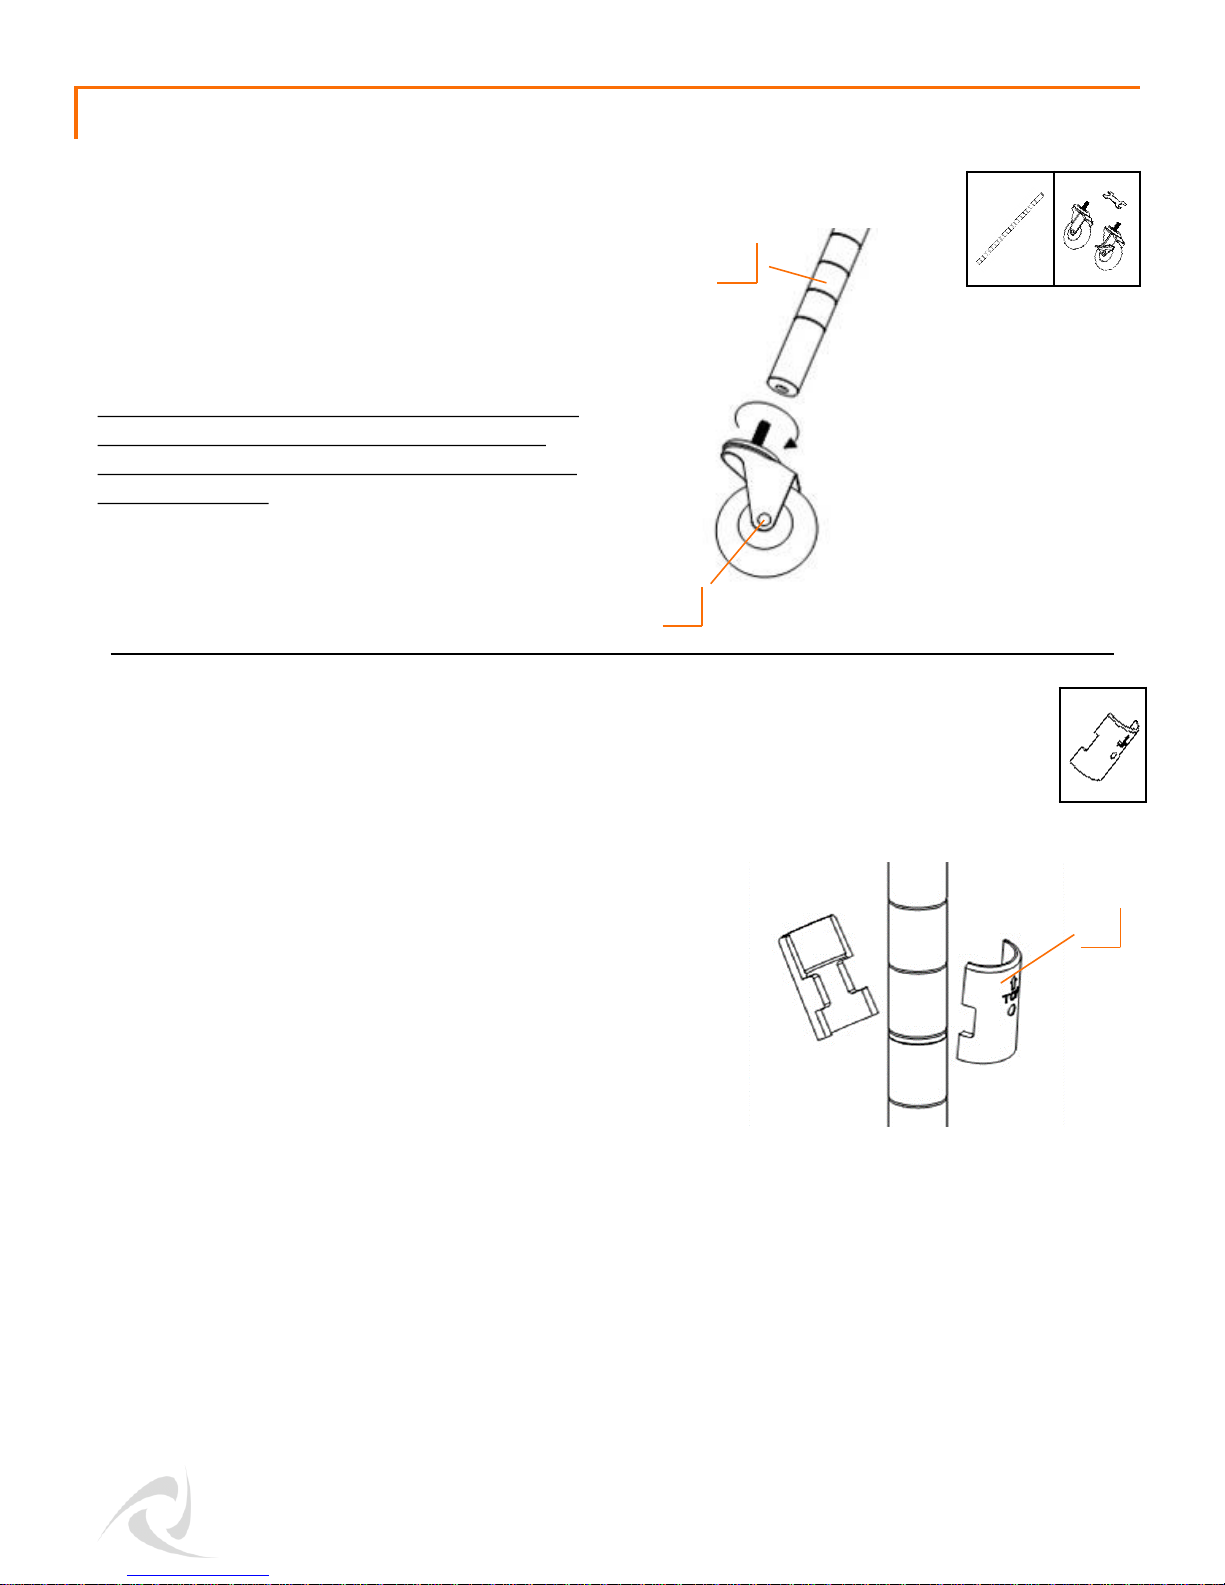
Screw each CASTER (K) into the bottom of
each BOTTOM POLE (F). Turn clockwise to
screw in place.
Tighten the CASTER (K) completely using
the included Caster Wrench. Failure to
do as instructed could result in the caster
stem breaking.
STEP 1
STEP 2
F (6) K (6)
F
K
J
J (12)
© 2016 TRINITY - 800.985.5506
3
* Note: There will be a very small gap in-between the SLIP SLEEVES (J)—this is normal.
ASSEMBLY INSTRUCTIONS
Place the LARGE SHELF (A) on its side and
slide the (6) BOTTOM POLES (F) through the
holes in the LARGE SHELF (A). Make sure
that the LARGE SHELF (A) corner cylinders
are positioned over the SLIP SLEEVES (J).
Stand the unit upright.
*Note: The level side of the LARGE SHELF (A)
is the TOP side (the TRINITY logo on the
corner cylinders should be right-side up.)
**Use a rubber mallet, if needed, to secure the
LARGE SHELF (A).
STEP 3
A (1)
A
© 2016 TRINITY - 800.985.5506
4
***For convenience, place BOTTOM POLES (F) with Locking Casters on the long side of the
shelf if the organizer will be pushed against a wall OR if the organizer is frequently rolled around
like a cart, place BOTTOM POLES (F) with Locking Casters on the side being pushed or pulled.
Screw the MIDDLE POLES (E) into the
BOTTOM POLES (F).
STEP 4
E (6)
E
 Loading...