

Trinity TBFLWH-1402, TBFLWH-1403 Owner's Manual

Everything in its place.
®
OWNER’S MANUAL
TBFLWH-1402 TBFLWH-1403
TRINITY WOOD KITCHEN CART - WHITE
Model # TBFLWH-1402
TBFLWH-1403 (w/ tray)
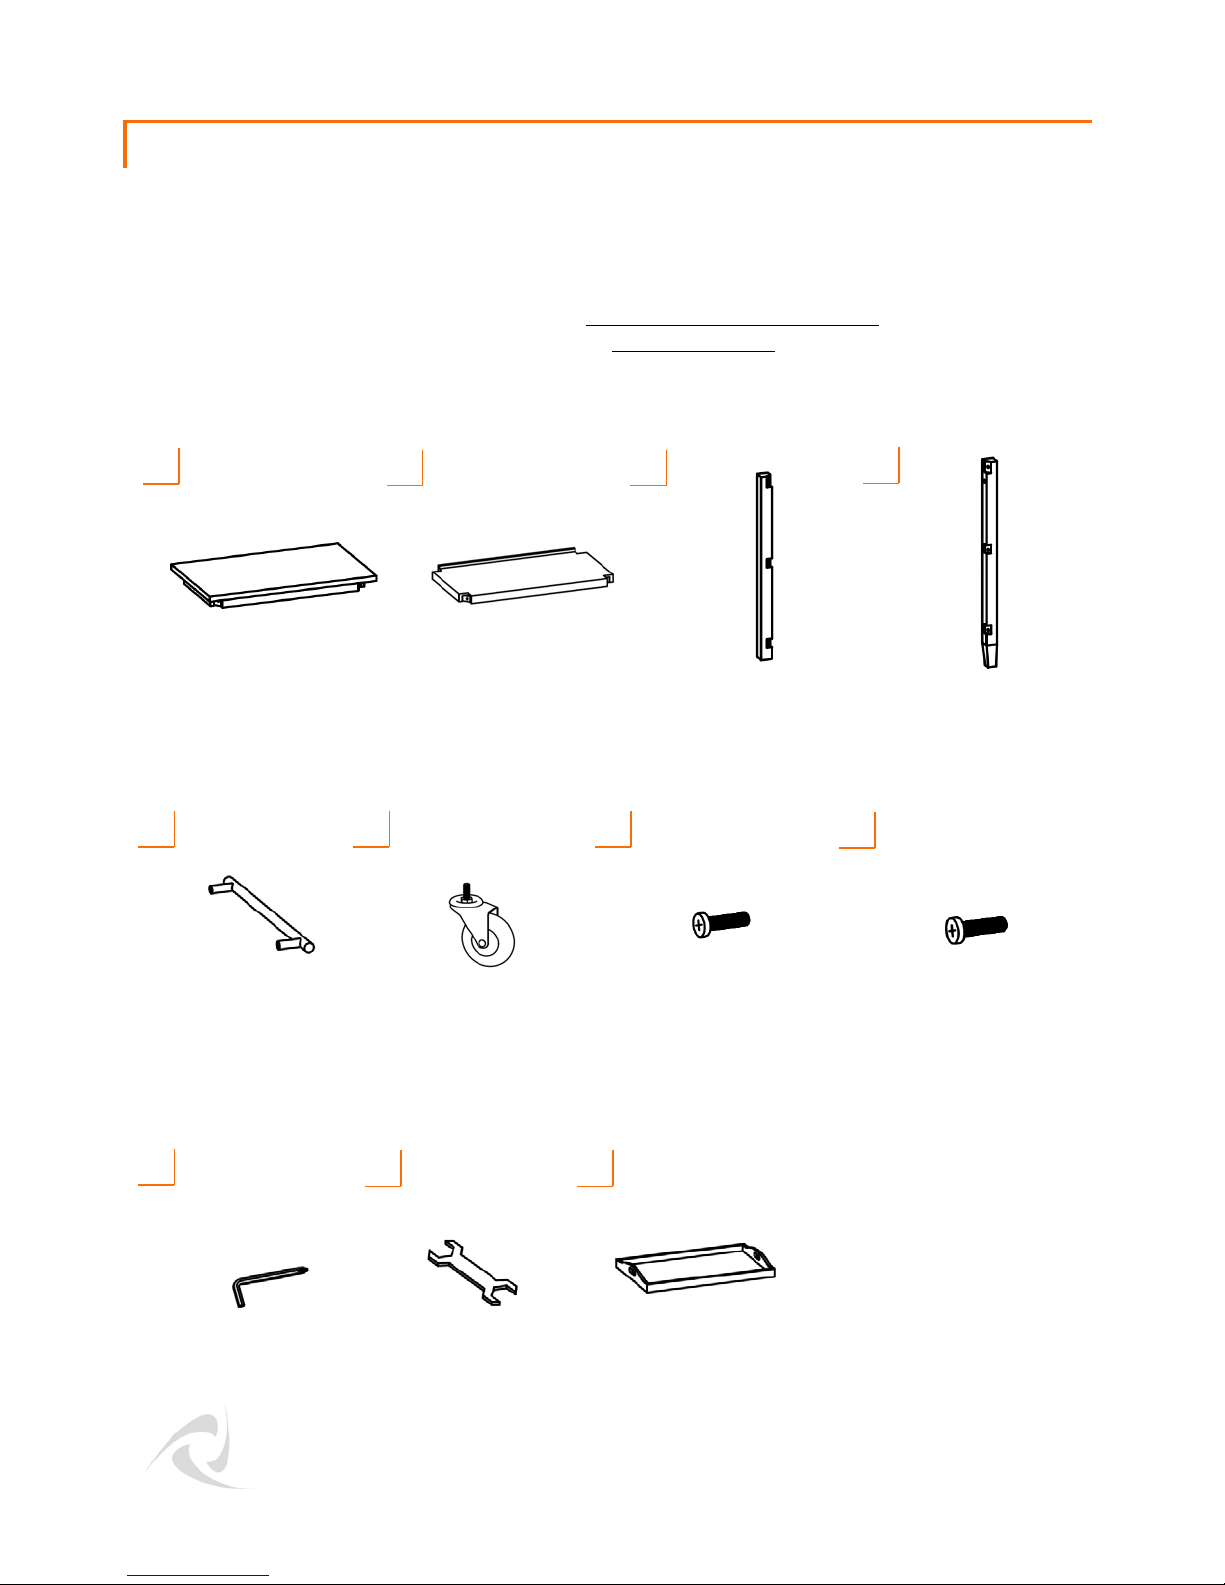
PARTS LIST
Your TRINITY Wood Kitchen Cart should include the following parts. Please inspect box
contents to ensure you have received all components.
If you are missing any parts, need assistance with assembly or have questions, please contact
TRINITY Customer Service: 800.985.5506 or customerservice@trinityii.com. Parts can also be
requested online via our “Contact Us” section at www.trinityii.com.
You may use a power screwdriver for easier assembly.
A
WOOD TOP FRAME (1)
E
HANDLE (1)
F
B C
SHELF (2)
G
CASTER (2)
LEG SCREW (12)
CASTER LEG (2)
Black
D
HANDLE LEG (2)
H
HANDLE SCREW (2)
Silver
I
SCREWDRIVER (1)
J
1
WRENCH (1)
K
TRAY (1)
TBFLWH-1403 only
© 2016 TRINITY - 800.985.5506
ASSEMBLY INSTRUCTIONS
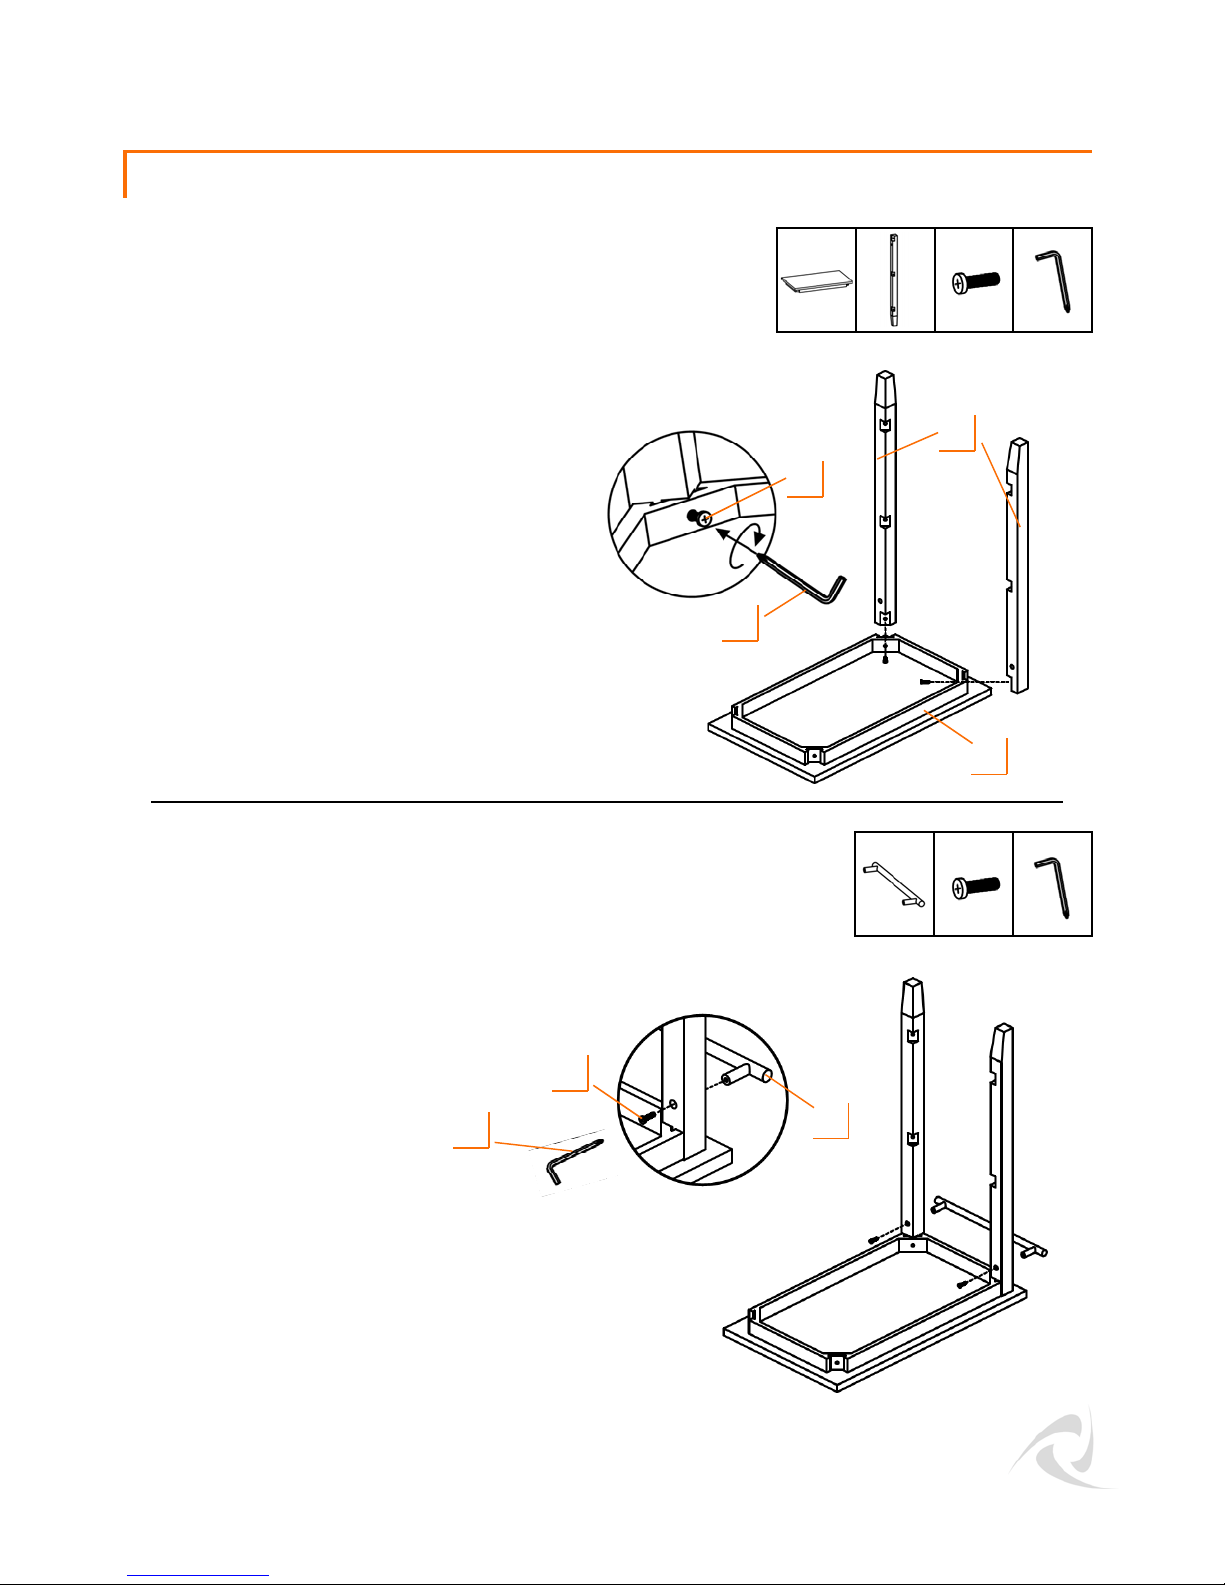
STEP 1
Lay WOOD TOP FRAME (A) on a clean
surface to prevent scratching the top
surface. Take HANDLE LEG (D) and
orient it in the proper position by aligning
the hole for mounting the handle along
the long edge of the WOOD TOP FRAME
(A)
Place LEG SCREW (G) through hole in
WOOD TOP FRAME (A) and tighten it
with SCREWDRIVER (I) to the top nut in
HANDLE LEG (D).
Repeat for the other HANDLE LEG (D).
Please note that the HANDLE LEG (D) has a
FOOT PAD on the bottom.
STEP 2
A (1) D (2)
G (2) I (1)
D
G
I
A
Place HANDLE SCREW (H) through hole
in the HANDLE LEG (D) and tighten it
with SCREWDRIVER (I) to the nut in the
HANDLE (E).
Repeat for the other side.
I
© 2016 TRINITY - 800.985.5506
H
E
E(1)
H (2) I (1)
2
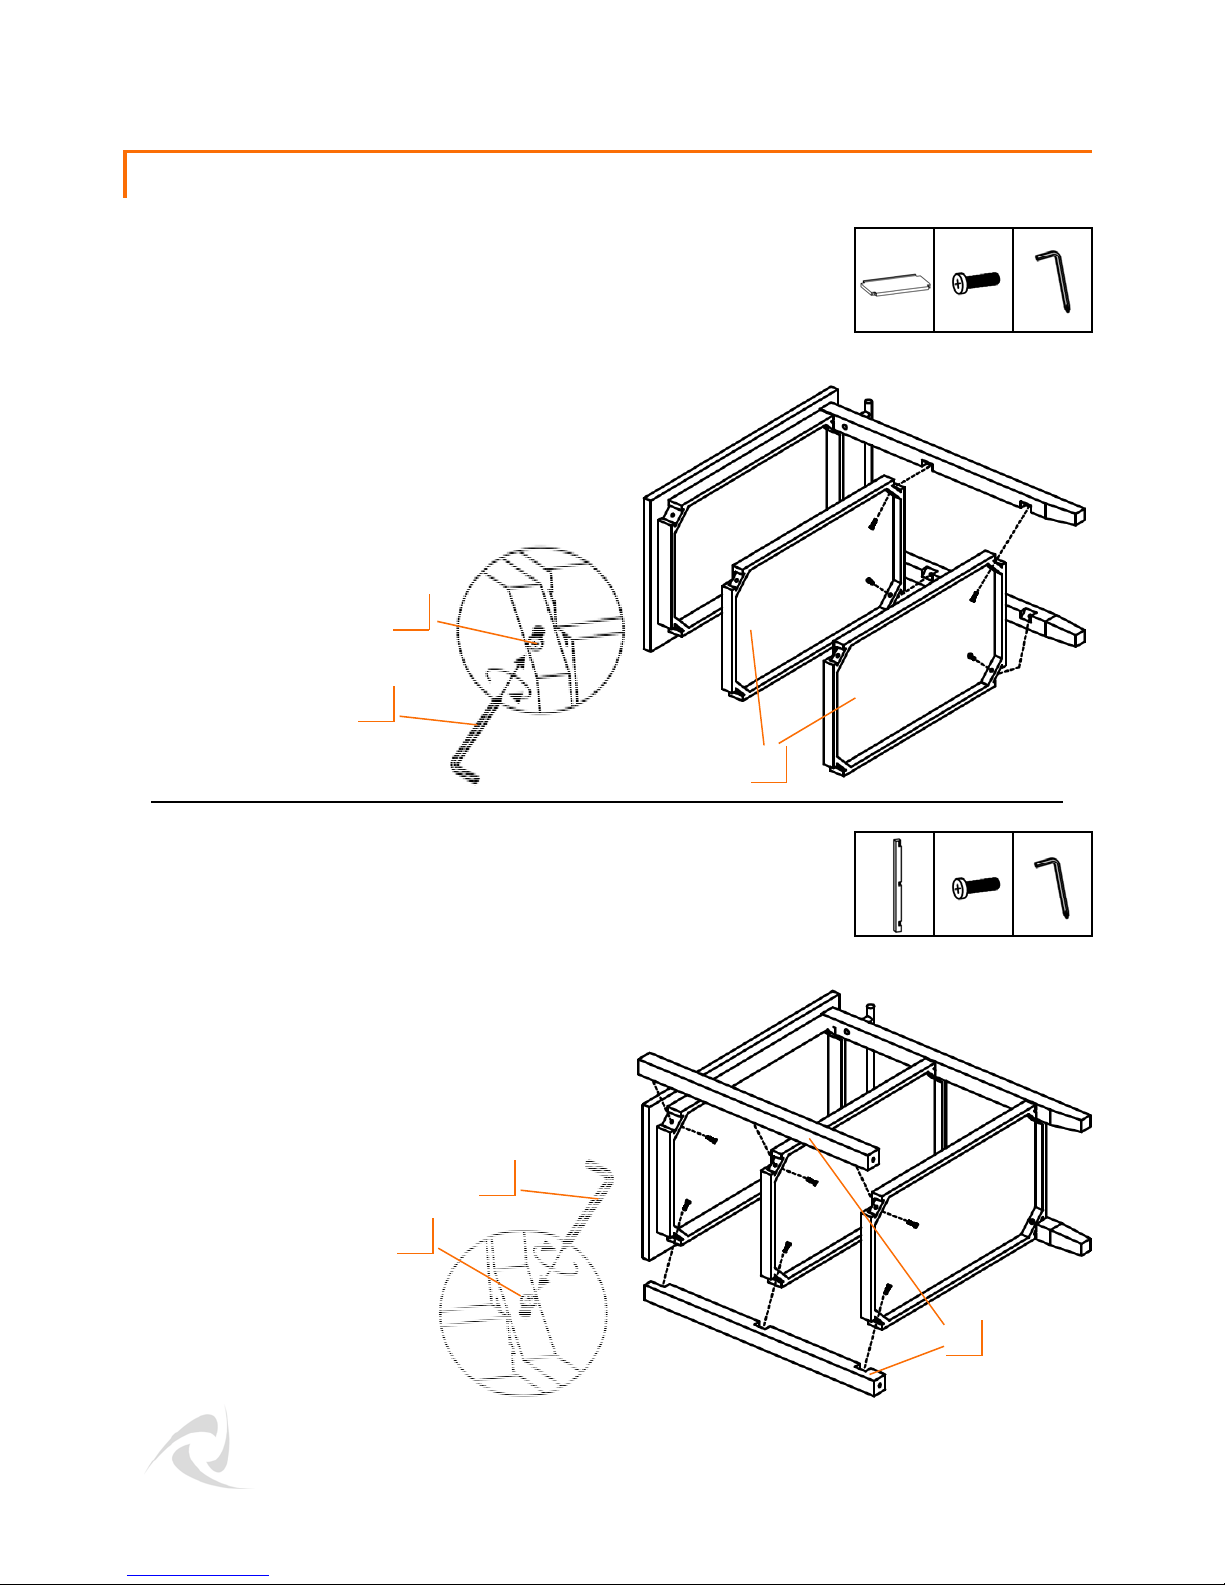
ASSEMBLY INSTRUCTIONS
STEP 3
Lay kitchen cart on its side so it is leaning
on the side of WOOD TOP FRAME (A)
and (1) HANDLE LEG (D). Orient SHELF
(B) so the flat surface faces WOOD TOP
FRAME (A) and the raised edge of the 2
shelves are on the same side. Place LEG
SCREW (G) though the hole in the
SHELF (B) and tighten it with
SCREWDRIVER (I) to the nut in the
HANDLE LEG (D).
Repeat for the other side and for
nd
shelf.
2
G
I
B(2)
G (4) I (1)
STEP 4
Place LEG SCREW (G) through hole in
the WOOD TOP (A) or HANDLE LEG (D)
and tighten it with SCREWDRIVER (I) to
nut in CASTER LEG (C).
Repeat until all 6 LEG SCREWS (G) have
been installed.
I
G
B
C(2)
G (6) I (1)
C
3
© 2016 TRINITY - 800.985.5506
 Loading...