

Trinity TBFC-2208 Owner's Manual

OWNER’S MANUAL
TRINITY SLIDING POT ORGANIZER
Model # TBFC-2208

© 2018 TRINITY - 800.985.5506
Your TRINITY Sliding Pot Organizer should include the following parts. Please inspect box contents to
ensure you have received all components.
If you are missing any parts, need assistance with assembly or have questions, please contact TRINITY
Customer Service: 800.985.5506 or customerservice@trinityii.com. Parts can also be requested online
at our customer center at www.trinityii.com.
You will need a Phillips screwdriver for assembly. A rubber mallet is also recommended.
Note: There are two options for installation:
1) In cabinet – go to page 2-3
2) On wire rack – go to page 4-5
PARTS LIST
POT ORGANIZER (1)
A
LEFT SLIDE (1) RIGHT SLIDE (1)
1
H
I
B C
SHORT DIVIDER (4) TALL DIVIDER (4)
D
F
PLATE
SCREW (4)
G
CABINET
SCREW (4)
CABINET MOUNTING
TEMPLATE (1)
RACK PLATE (4)
E
Used when installing in cabinet
Used when installing on wire rack
INSTALLATION INSTRUCTIONS – In Cabinet
Cabinet must be at least 20”W x 20”D.
Place CABINET MOUNTING TEMPLATE (G) inside your
cabinet. Using a pencil, mark the location where you plan
to install the CABINET SCREWS (F).
• To ease installation you can pre-drill small holes at the
marked locations.
Identify LEFT (B) and RIGHT (C) SLIDES.
• Note that the BACK end of each SLIDE (B & C) has a black tip
and the FRONT end does NOT.
Place LEFT (B) RIGHT (C) SLIDES in their proper orientation and
desired position inside the cabinet.
B (1) C (1) F (4)
G (1)
© 2018 TRINITY - 800.985.5506
2
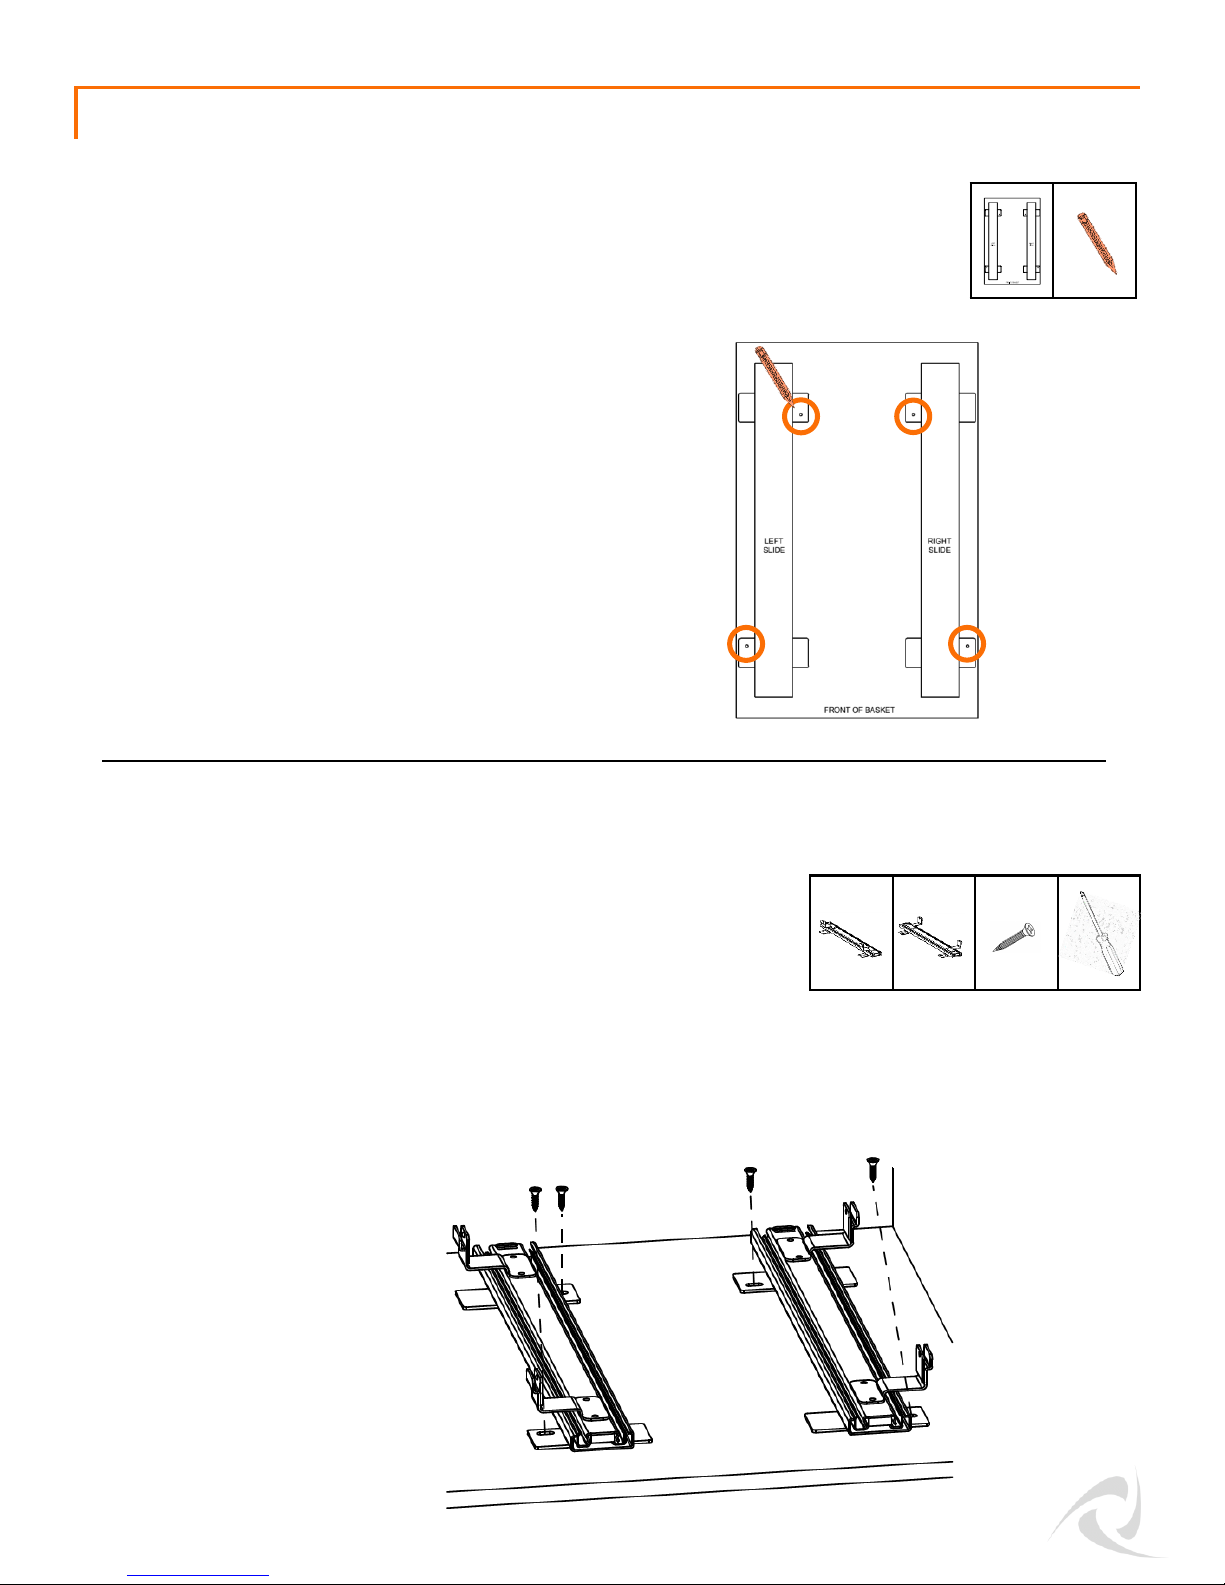
STEP 1
STEP 2
Extend the SLIDES (B) & (C) slightly and align the center of the oval slots to your marking in the cabinet.
Use the self-tapping CABINET SCREWS (F) to fasten the LEFT (B) and RIGHT (C) SLIDES in your cabinet.
FRONT
BACK
© 2018 TRINITY - 800.985.5506
INSTALLATION INSTRUCTIONS – In Cabinet
3
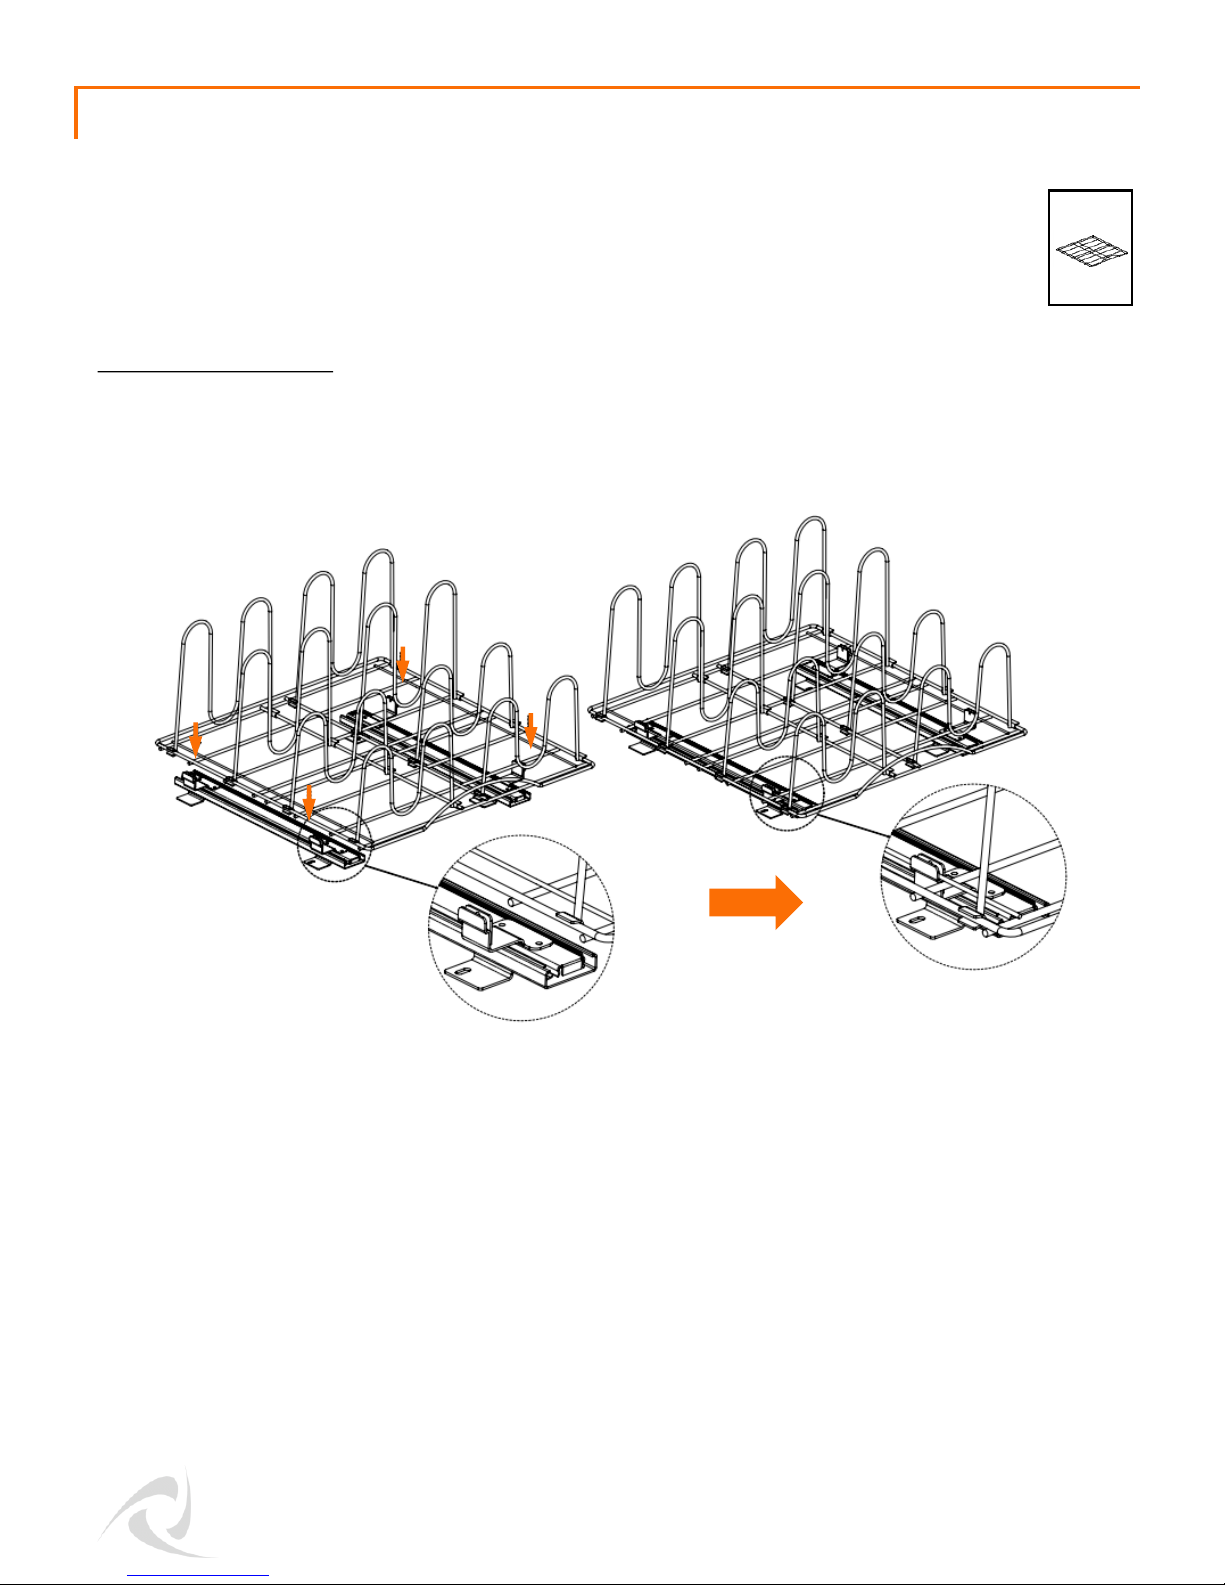
Align POT ORGANIZER (A) at the marked location and push it into the Clips of the LEFT
(B) RIGHT (C) SLIDES
Installation Suggestion: With the POT ORGANIZER (A) resting on top of the Clips,
brace the top of the POT ORGANIZER (A) with one hand and, with a rubber mallet,
lightly tap each bottom corner of the POT ORGANIZER (A) to secure the POT
ORGANIZER (A) into the Clips.
A (1)
STEP 3
 Loading...