

Trinity ECOSTORAGE THBAB-3108, ECOSTORAGE THBBR-3108, ECOSTORAGE THBGR-3108 Owner's Manual

OWNER’S MANUAL
TRINITY ECOSTORAGE
TM
70 GALLON DECK BOX
Model # THBAB-3108 / THBBR-3108 / THBGR-3108
Everything in its place.
®
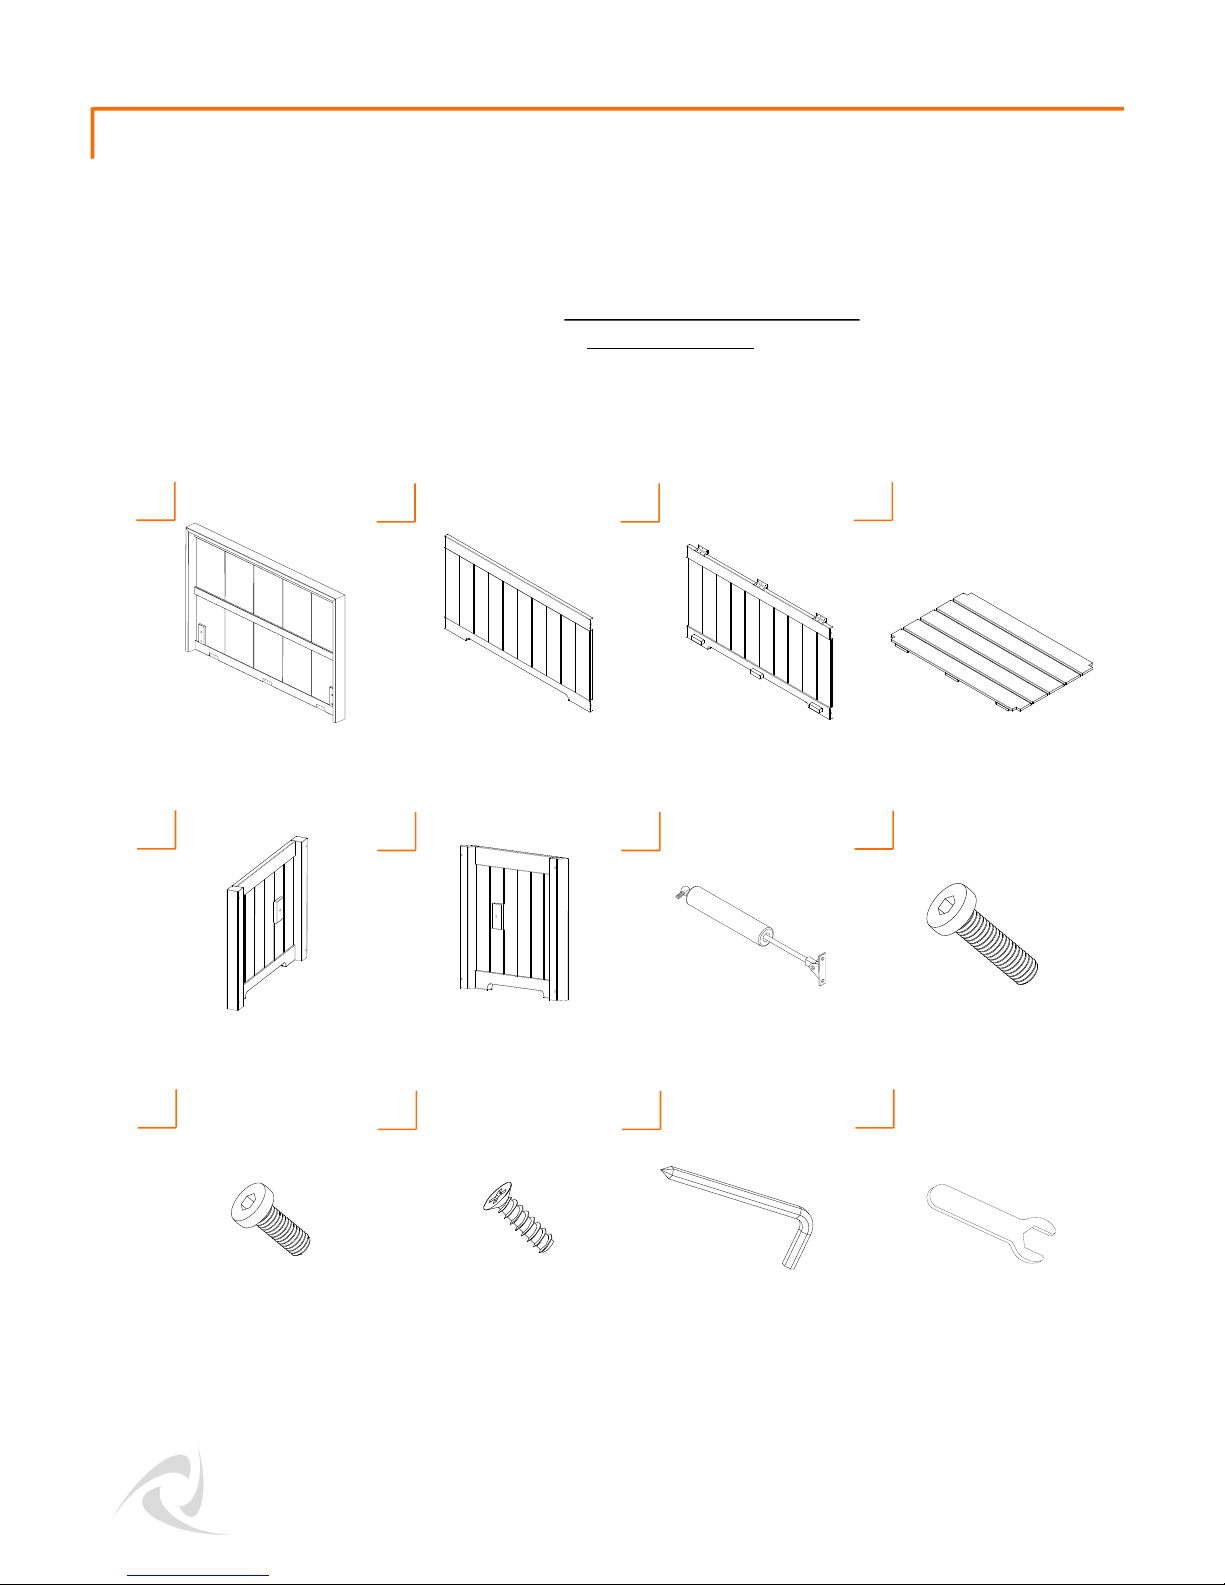
Your TRINITY EcoStorageTMDeck Box should include the following parts. Please inspect box contents
to ensure you have received all components.
If you are missing any parts, need assistance with assembly or have questions, please contact
TRINITY Customer Service: 800.985.5506 or customerservice@trinityii.com. Parts can also be
requested online via our “Contact Us” section at www.trinityii.com.
Two people and a Phillips head screwdriver is recommended.
LID (1)
A
B
C
BOTTOM (1)
D
FRONT PANEL (1)
BACK PANEL (1)
W/ HINGES
PARTS LIST
LEFT SIDE
PANEL (1)
E
F
G
SIDE PANEL
SCREW (8)
M6x35mm
H
RIGHT SIDE
PANEL (1)
GAS LIFT (2)
GAS LIFT
SCREW (4)
M6x20mm
I
J
K
WRENCH (1)
L
HINGE
SCREW (9)
M4x20mm FLAT HEAD
HEX KEY (1)
© 2017 TRINITY - 800.985.5506
!
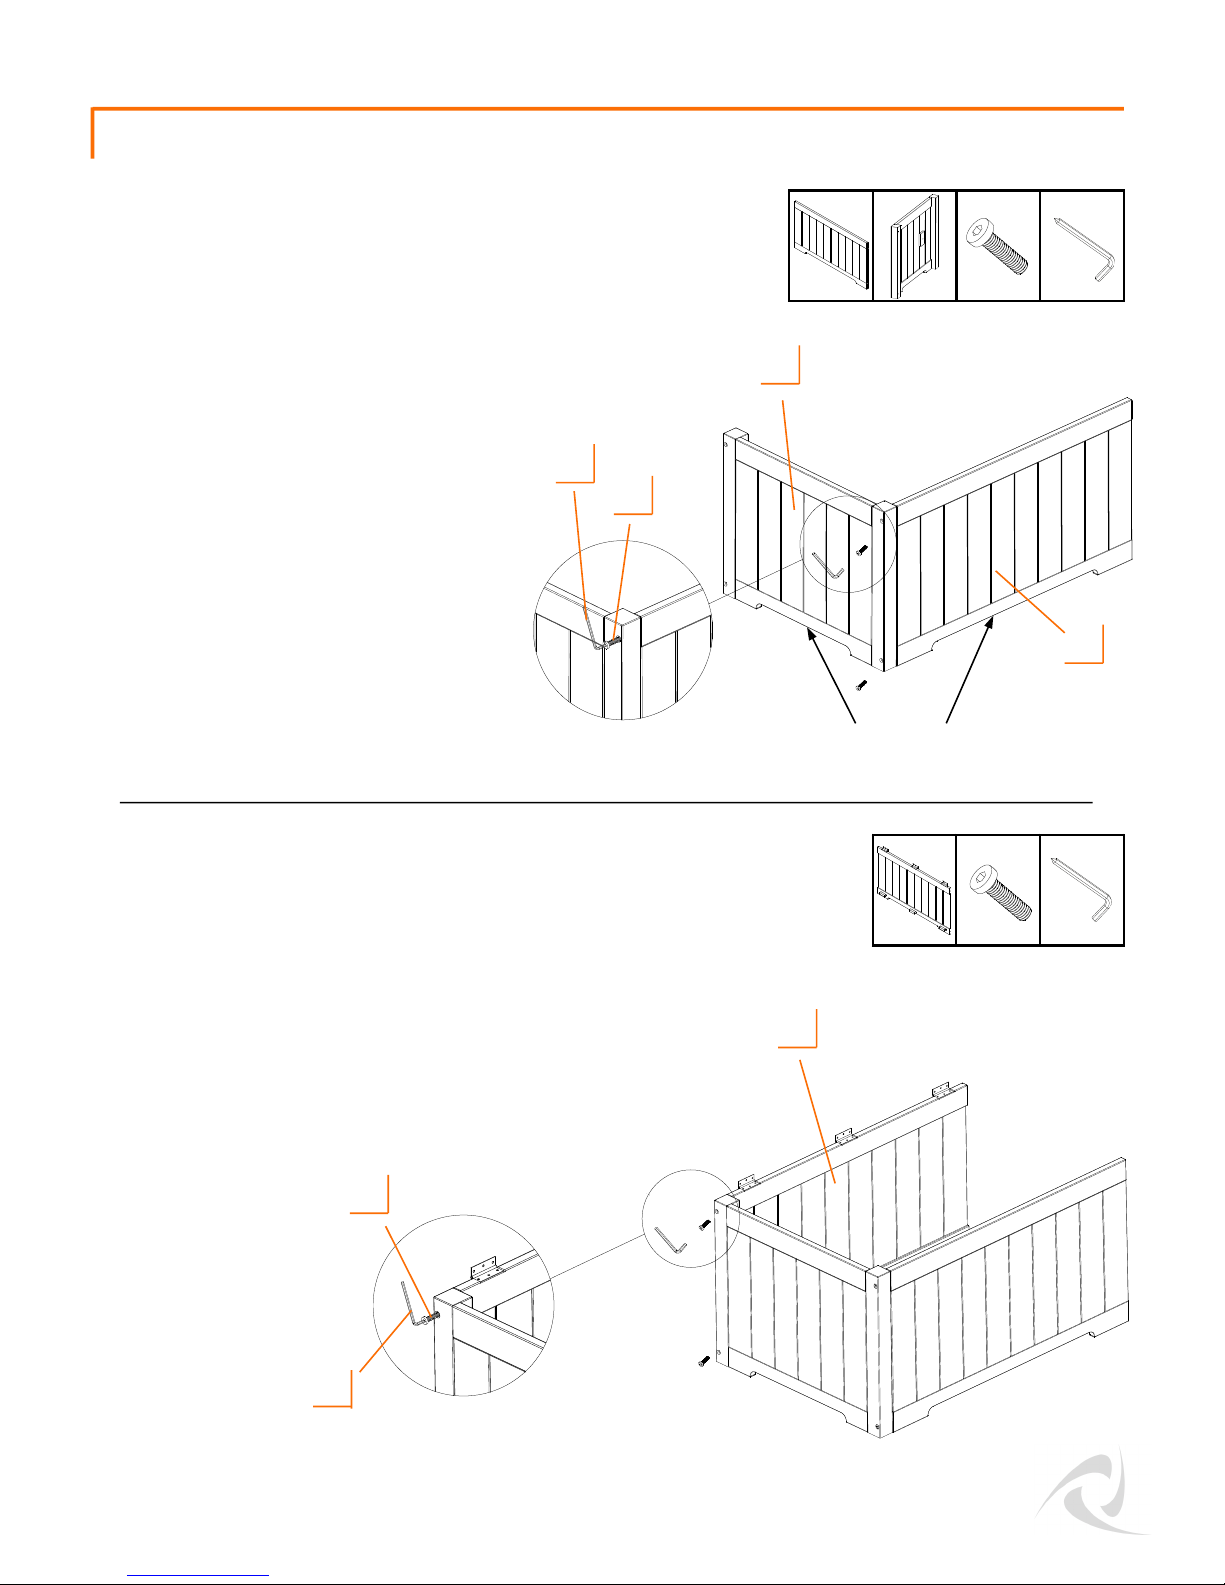
ASSEMBLY INSTRUCTIONS
Orient BACK PANEL (C) with hinges facing
up. Make sure that the side with blocks is
facing in. Align with LEFT SIDE PANEL
(E).
Insert SIDE PANEL SCREWS (H) through
LEFT SIDE PANEL (E) and fasten them
tightly to BACK PANEL (C) with short end
of HEX KEY (K).
Align FRONT PANEL (B) with LEFT SIDE
PANEL (E). Make sure notched edges are
down and the LEFT SIDE PANEL (E) is
positioned with the blocks facing in.
Insert SIDE PANEL SCREWS (H) through
LEFT SIDE PANEL (E) and fasten them
tightly to FRONT PANEL (B) with short end
of HEX KEY (K).
Note: For ease of assembly, we
recommended one person hold the
FRONT PANEL (B) while a second person
holds the LEFT SIDE PANEL (E).
STEP 1
STEP 2
H (2) K (1)
E (1)
B (1)
K (1)
© 2017 TRINITY - 800.985.5506
"
#
$
%
&
H (2)
C (1)
&
'
$
Notched
Edges
ASSEMBLY INSTRUCTIONS
Orient the RIGHT SIDE PANEL (F) with
notched edge down and side with block
facing in.
Insert SIDE PANEL SCREWS (H) through
RIGHT SIDE PANEL (F) and fasten them
tightly to FRONT PANEL (B) and BACK
PANEL (C) with short end of HEX KEY (K).
STEP 3
K (1)
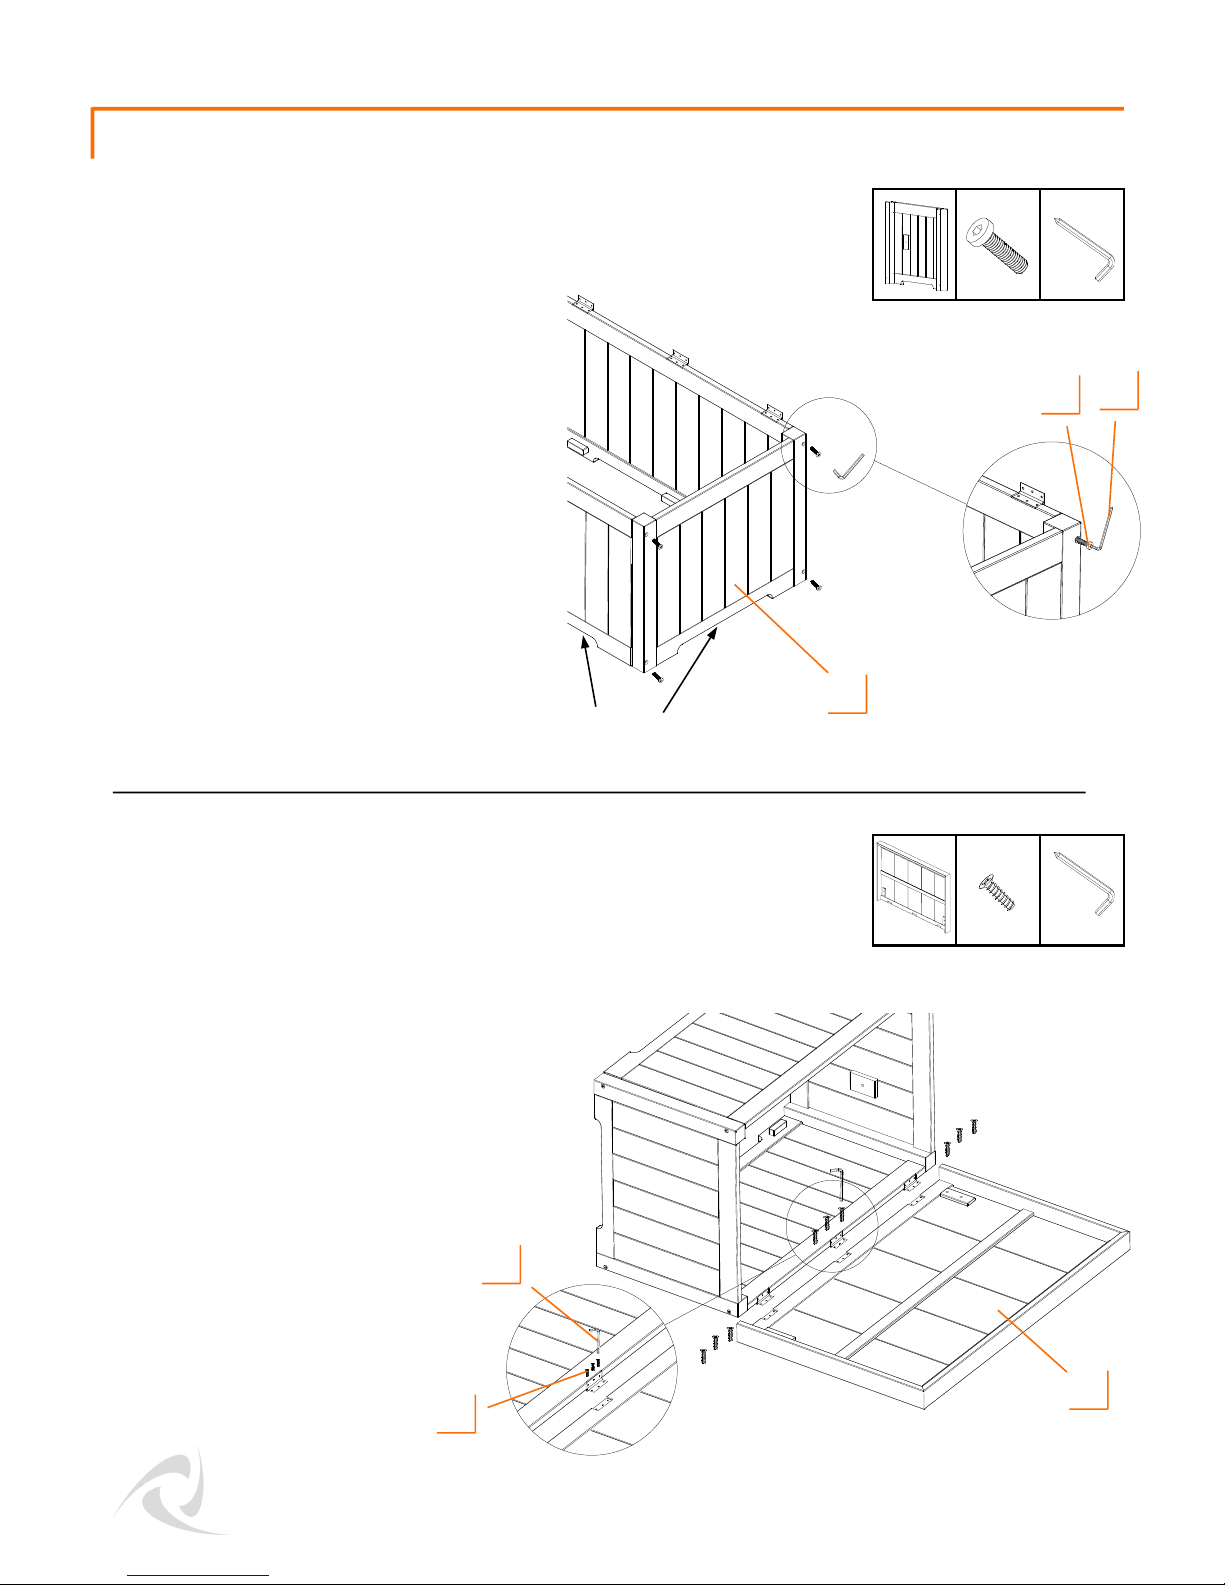
Lay LID (A) on a clean surface with lip
facing up. Carefully tip box to lay on
BACK PANEL (C).
Align hinges with notches in LID (A).
Insert HINGE SCREWS (J) through
hinges and fasten them tightly to LID
(A) with long end of HEX KEY (K).
Note: For ease of assembly, we
recommend that one person lift the
LID (A) so that the other person can
align hinges on the LID (A) to the box
to fasten the HINGE SCREWS (J).
STEP 4
© 2017 TRINITY - 800.985.5506
(
H (4)
F (1)
&
)
$
K (1)
J (9)
A (1)
*
&
+
Notched
Edges
 Loading...