

Page 1

Trimble® CU (Model 3)
User Guide
F
Part Number 57059010
Version 2.0
November 2010
Page 2

Contact Information
Trimble Navigation Limited
Geomatics and Engineering Division
5475 Kellenburger Road
Dayton, Ohio 45424-1099
USA
800-538-7800 (toll free in USA)
+1-937-245-5600 Phone
+1-937-233-9004 Fax
www.trimble.com
Copyright and Trademarks
© 2010, Trimble Navigation Limited. All rights
reserved.
Trimble and the Globe & Triangle logo are trademarks
of Trimble Navigation Limited, registered in the United
States Patent and Trademark Office and other countries.
The Bluetooth word mark and logos are owned by the
Bluetooth SIG, Inc. and any use of such marks by
Trimble Navigation Limited is under license. Microsoft,
ActiveSync, Windows Vista, Windows Mobile and
Windows are either registered trade mar ks or tr adema rks
of Microsoft Corporation in the United States and/or
other countries.All other trademarks are the property of
their respective owners.
Release Notice
This is the November 2010 release of the Trimble CU
(Model 3) User Guide, part number 57059010 version
2.0. It applies to the Trimble CU (Model 3) controller.
The following limited warranties give you specific legal
rights. You may have others, which vary from
state/jurisdiction to state/jurisdiction.
Hardware Limited Warranty
Trimble Navigation Limited warrants that this hardware
product (the “Product”) will perform substantially in
accordance with published specifications and be
substantially free of defects in material and
workmanship for a period of one (1) year starting from
the date of delivery. The warranty set forth in this
paragraph shall not apply to software products.
Software License, Limited Warranty
This Trimble software product, whether provided as a
stand-alone computer software product, built into
hardware circuitry as firmware, embedded in flash
memory, or stored on magnetic or other media, (the
“Software”) is licensed and not sold, and its use is
governed by the terms of the relevant End User License
Agreement (“EULA”) included with the Software. In the
absence of a separate EULA included with the Software
providing different limited warranty terms, exclusions
and limitations, the following terms and conditions shall
apply. Trimble warrants that this Trimble Software
product will substantially conform to Trimble’s
applicable published specifications for the Software for
a period of one (1) year, starting from the date of
delivery.
Warranty Remedies
Trimble's sole liability and your exclusive remedy under
the warranties set forth above shall be, at Trimble’s
option, to repair or replace any Product or Software that
fails to conform to such warranty ("Nonconforming
Product") or refund the purchase price paid by you for
any such Nonconforming Product, upon your return of
any Nonconforming Product to Trimble in accordance
with Trimble’s standard return material authorization
procedures.
Warranty Exclusions and Disclaimer
These warranties shall be applied only in the event and
to the extent that (i) the Products and Software are
properly and correctly installed, configured, interfaced,
maintained, stored, and operated in accordance with
Trimble's relevant operator's manual and specifications,
and; (ii) the Products and Software are not modified or
misused. The preceding warranties shall not apply to,
and Trimble shall not be responsible for defects or
performance problems resulting from (i) the
combination or utilization of the Product or Software
with hardware or software products, information, data,
systems, interfaces or devices not made, supplied or
specified by Trimble; (ii) the operation of the Product or
Software under any specification other than, or in
addition to, Trimble's standard specifications for its
products; (iii) the unauthorized, installation,
modification, or use of the Product or Software; (iv)
damage caused by accident, lightning or other electrical
discharge, fresh or salt water immersion or spray; or (v)
normal wear and tear on consumable parts (e.g.,
batteries). Trimble does not warrant or guarantee the
results obtained through the use of the Product.
THE WARRANTIES ABOVE STATE TRIMBLE'S ENTIRE
LIABILITY, AND YOUR EXCLUSIVE REMEDIES,
RELATING TO PERFORMANCE OF THE PRODUCTS
AND SOFTWARE. EXCEPT AS OTHERWISE
EXPRESSLY PROVIDED HEREIN, THE PRODUCTS,
SOFTWARE, AND ACCOMPANYING
DOCUMENTATION AND MATERIALS ARE PROVIDED
“
AS-IS” AND WITHOUT EXPRESS OR IMPLIED
WARRANTY OF ANY KIND BY EITHER TRIMBLE
NAVIGATION LIMITED OR ANYONE WHO HAS BEEN
INVOLVED IN ITS CREATION, PRODUCTION,
INSTALLATION, OR DISTRIBUTION INCLUDING, BUT
NOT LIMITED TO, THE IMPLIED WARRANTIES OF
MERCHANTABILITY AND FITNESS FOR A
PARTICULAR PURPOSE, TITLE, AND
NONINFRINGEMENT. THE STATED EXPRESS
WARRANTIES ARE IN LIEU OF ALL OBLIGATIONS OR
LIABILITIES ON THE PART OF TRIMBLE ARISING
OUT OF, OR IN CONNECTION WITH, ANY PRODUCTS
OR SOFTWARE. SOME STATES AND JURISDICTIONS
DO NOT ALLOW LIMITATIONS ON DURATION OR
THE EXCLUSION OF AN IMPLIED WARRANTY, SO
THE ABOVE LIMITATION MAY NOT APPLY TO YOU.
TRIMBLE NAVIGATION LIMITED IS NOT
RESPONSIBLE FOR THE OPERATION OR FAILURE OF
OPERATION OF GPS SATELLITES OR THE
AVAILABILITY OF GPS SATELLITE SIGNALS.
Page 3

Limitation of Liability
N 324
TRIMBLE’S ENTIRE LIABILITY UNDER ANY
PROVISION HEREIN SHALL BE LIMITED TO THE
AMOUNT PAID BY YOU FOR THE PRODUCT OR
SOFTWARE LICENSE. TO THE MAXIMUM EXTENT
PERMITTED BY APPLICABLE LAW, IN NO EVENT
SHALL TRIMBLE OR ITS SUPPLIERS BE LIABLE FOR
ANY INDIRECT, SPECIAL, INCIDENTAL OR
CONSEQUENTIAL DAMAGES WHATSOEVER UNDER
ANY CIRCUMSTANCE OR LEGAL THEORY RELATING
IN ANY WAY TO THE PRODUCTS, SOFTWARE AND
ACCOMPANYING DOCUMENTATION AND
MATERIALS, (INCLUDING, WITHOUT LIMITATION,
DAMAGES FOR LOSS OF BUSINESS PROFITS,
BUSINESS INTERRUPTION, LOSS OF BUSINESS
INFORMATION, OR ANY OTHER PECUNIARY LOSS),
REGARDLESS WHETHER TRIMBLE HAS BEEN
ADVISED OF THE POSSIBILITY OF ANY SUCH LOSS
AND REGARDLESS OF THE COURSE OF DEALING
WHICH DEVELOPS OR HAS DEVELOPED BETWEEN
YOU AND TRIMBLE. BECAUSE SOME STATES AND
JURISDICTIONS DO NOT ALLOW THE EXCLUSION OR
LIMITATION OF LIABILITY FOR CONSEQUENTIAL OR
INCIDENTAL DAMAGES, THE ABOVE LIMITATION
MAY NOT APPLY TO YOU.
NOTE: THE ABOVE LIMITED WARRANTY
PROVISIONS MAY NOT APPLY TO PRODUCTS OR
SOFTWARE PURCHASED IN THE EUROPEAN UNION.
PLEASE CONTACT YOUR TRIMBLE DEALER FOR
APPLICABLE WARRANTY INFORMATION.
Notices
Australia and New Zealand
This product conforms with the
regulatory requirements of the
Australian Communications
Authority (ACA) EMC framework, thus satisfying the
requirements for C-Tick Marking and sale within
Australia and New Zealand.
Canada
This Class B digital apparatus complies with Canadian
ICES-003
This digital apparatus does not exceed the Class B limits
for radio noise emissions from digital apparatus as set
out in the radio interference regulations of the Canadian
Department of Communications.
Le présent appareil numérique n’émet pas de bruits
radioélectriques dépassant les limites app lic a ble s aux
appareils numériques de Classe B prescrites dans le
règlement sur le brouillage radioélectrique édicté par le
Ministère des Communications du Canada.
This device has been designed to operate with an
antenna having a maximum gain of 2.0 dBi. Antennas
having a higher gain are strictly prohibited per
regulations of Industry Canada. The required antenna
impedance is 50 ohms. To reduce potential radio
interference to other users, the antenna type and its gain
should be so chosen that the equivalent isotropically
radiated power (EIRP) is not more than that required for
successful communication.
Operation is subject to the following conditions: (1) This
device may not cause harmful interference, and (2) this
device must accept any interference received, including
interference that may cause undesired operation.
Trimble CU (Model 3) part number 58055010 contains a
Bluetooth device, BTunit03. Certification No.4399ANT0003.
Docking station 58252019 with power supply 78600019
and cable Hirose 6P-PC USB 73840019 (ferrite core
cables) are included in the package with the host.
The accessories complies with the FCC/IC regulations,
operated with the host. Use of others than the listed
cables and accessories could void the user's authority to
operate the equipment.
Europe
This product has been tested and found to
comply with the requirements for a Class B
device pursuant to European Council
Directive 2004/108/EC on EMC, thereby satisfying the
requirements for CE Marking and sale within the
European Economic Area (EEA). These requirements
are designed to provide reasonable protection against
harmful interference when the equipment is operated in
a residential or commercial environment.
Trimble CU (Model 3) part number 58055010
contains a Bluetooth device that applies to the
R&TTED 1999/5/EC and are intended to be
used in all European Community member states.
The compliance to the applicable requirements is
detailed in the official Declaration of Conformity
document, which is filed at Trimble.
For product recycling instructions and more
information, please go to www.trimble.com/ev.shtml.
Recycling in Europe: To recycle Trimble
WEEE (Waste Electrical and Electronic
Equipment, products that run on electrical
power.), Call +31 497 53 24 30, and ask for the
"WEEE Associate". Or, mail a request for
recycling instructions to:
Trimble Europe BV
c/o Menlo Worldwide Logistics
Meerheide 45
5521 DZ Eersel, NL
Japan
Trimble CU (Model 3) part number 58055010 contains a
radio module with certificate number: 011WWA10005.
USA
Class B Statement – Notice to Users.
NOTE: This equipment has been tested and found to
comply with the limits for a Class B digital device,
pursuant to part 15 of the FCC Rules. These limits are
designed to provide reasonable protection against
harmful interference in a residential installation. This
equipment generates uses and can radiate radio
frequency energy and, if not installed and used in
accordance with the instructions, may cause harmful
Page 4
interference to radio communications. However, there is
no guarantee that interference will not occur in a
particular installation. If this equipment does cause
harmful interference to radio or television reception,
which can be determined by turning the equipment off
and on, the user is encouraged to try to correct the
interference by one or more of the following measures:
- Reorient or relocate the receiving antenna.
- Increase the separation between the equipment and
receiver.
- Connect the equipment into an outlet on a circuit
different from that to which the receiver is connected.
- Consult the dealer or an experienced radio/TV
technician for help.
The changes or modifications not expressly approved by
the party responsible for compliance could void the
user’s authority to operate the device.
The antenna used for this transmitter must be installed to
provide a separation distance of at least 20 cm from all
persons and must not be co-located or operated in
conjunction with any other antenna or transmitter.
Trimble CU (Model 3) part number 58055010 contains a
Bluetooth device, BTunit03. FCC ID: QKVNT0003.
Docking station 58252019 with power supply 78600019
and cable Hirose 6P-PC USB 73840019 (ferrite core
cables) are included in the package with the host.
The accessories complies with the FCC/IC regulations,
operated with the host. Use of others than the listed
cables and accessories could void the user's authority to
operate the equipment.
Taiwan
Battery Recycling Requirements
The product contains a removable Lithium-ion
battery. Taiwanese regulations require that
waste batteries are recycled.
Page 5
Important Information 2
Environmental Information 2.1
NOTICE FOR TRIMBLE'S EUROPEAN UNION CUSTOMERS
Trimble is pleased to announce a new recycling program for
our European Union customers. At Trimble, we recognize the
importance of minimizing the environmental impacts of our
products. We endeavor to meet your needs, not only when you
purchase and use our products, but also when you are ready to
dispose of them. That is why Trimble is actively pursuing, and
will continue to pursue, the expanded use of environmentally
friendly materials in all its products, and why we have
established a convenient and environmentally friendly
recycling program.
As Trimble makes additional recycling facilities available for
your use, we will post their locations and contact information
to our Recycling Instructions web page.
For product recycling instructions and more information,
please go to
www.trimble.com/environment/summary.html
Recycling in Europe:
To recycle Trimble WEEE,
Call +31 497 53 2430, and ask for the “WEEE Associate”
Or
Mail a request for recycling instructions to:
Trimble Europe BV
c/o Menlo Worldwide Logistics
Meerheide 45
5521 DZ Eersel, NL
Trimble CU (Model 3) User Guide
Page 6

Trimble CU (Model 3) User Guide
Page 7
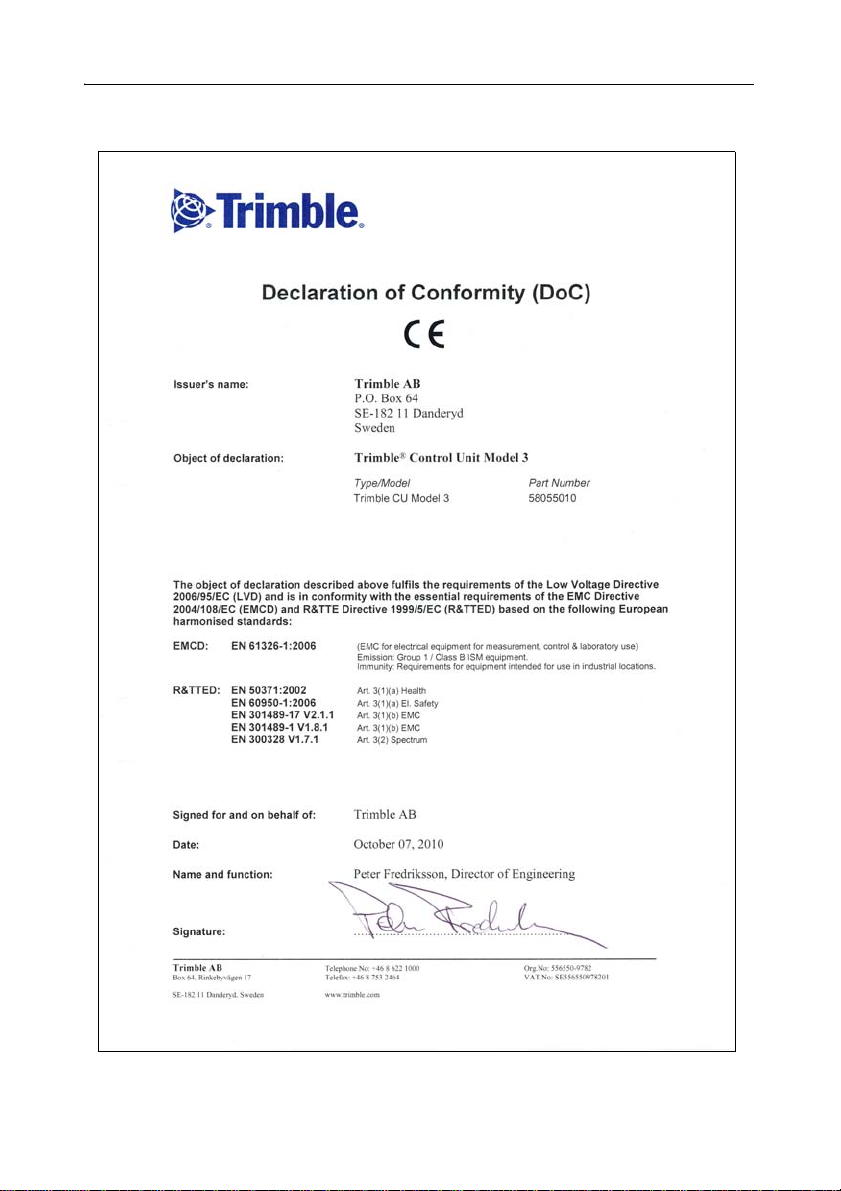
Declaration of Conformity 3.2
Trimble CU (Model 3) User Guide
Page 8

Trimble CU (Model 3) User Guide
Page 9

Content s
Declaration of Conformity . . . . . . . . . . . . . . . . . . . . . . . . vii
1 Introduction. . . . . . . . . . . . . . . . . . . . . . . . 1
Welcome . . . . . . . . . . . . . . . . . . . . . . . . . . . . . . . . . 2
Related Information . . . . . . . . . . . . . . . . . . . . . . . . . . . . 2
Technical Assistance . . . . . . . . . . . . . . . . . . . . . . . . . . . . 2
Your Comments . . . . . . . . . . . . . . . . . . . . . . . . . . . . . . 2
Registration . . . . . . . . . . . . . . . . . . . . . . . . . . . . . . . . 2
2 Unpacking and Inspection. . . . . . . . . . . . . . . . . 3
Inspection . . . . . . . . . . . . . . . . . . . . . . . . . . . . . . . . . 4
What’s in the box? . . . . . . . . . . . . . . . . . . . . . . . . . . . . . 4
3 The Trimble CU (Model 3) . . . . . . . . . . . . . . . . . 5
Introduction . . . . . . . . . . . . . . . . . . . . . . . . . . . . . . . . 6
Attaching and Detaching the Controller. . . . . . . . . . . . . . . . . . . . 6
The Keyboard . . . . . . . . . . . . . . . . . . . . . . . . . . . . . . . 8
Control functions . . . . . . . . . . . . . . . . . . . . . . 8
Entering Information. . . . . . . . . . . . . . . . . . . . . 8
Entering text using the Input Panel keyboard . . . . . . . . . . . 8
Entering text using the Trimble keypad keyboard . . . . . . . . .11
Power Management . . . . . . . . . . . . . . . . . . . . . . . . . . . .13
Trimble CU (Model 3) AC adaptor . . . . . . . . . . . . . . . 13
AC adaptor safety . . . . . . . . . . . . . . . . . . . . . . .13
Turn the Controller On . . . . . . . . . . . . . . . . . . . . 13
Turn the Controller Off . . . . . . . . . . . . . . . . . . . . 14
Suspend Mode . . . . . . . . . . . . . . . . . . . . . . . 14
Restart . . . . . . . . . . . . . . . . . . . . . . . . . . 14
Select
Yes to restart the controller. . . . . . . . . . . . . . . . 16
Touch Screen . . . . . . . . . . . . . . . . . . . . . . . . . . . . . . .17
Calibrating the touch screen . . . . . . . . . . . . . . . . . . 17
Disabling the touch screen . . . . . . . . . . . . . . . . . . 17
Display light . . . . . . . . . . . . . . . . . . . . . . . . 17
Setting the time and date . . . . . . . . . . . . . . . . . . . . . . . . . .18
Operating System . . . . . . . . . . . . . . . . . . . . . . . . . . . . .19
Data Storage . . . . . . . . . . . . . . . . . . . . . . . . . . . . . . .19
Connecting the Controller to an Office Computer . . . . . . . . . . . . . . .19
Transferring data or files . . . . . . . . . . . . . . . . . . . . . . . . . .19
With Microsoft ActiveSync Technology . . . . . . . . . . . . . 20
Connecting . . . . . . . . . . . . . . . . . . . . . . . . . .20
With Microsoft Windows Mobile Device Center . . . . . . . . . . 21
Trimble CU (Model 3) User Guide v
Page 10

Connecting . . . . . . . . . . . . . . . . . . . . . . . . . .21
Bluetooth Wireless Technology . . . . . . . . . . . . . . . . . . . . . . .23
Modifying your Bluetooth Wireless Technology settings. . . . . . . 23
4 Caring for the Trimble CU (Model 3) . . . . . . . . . . . . 25
Maintenance . . . . . . . . . . . . . . . . . . . . . . . . . . . . . . . .26
vi Trimble CU (Model 3) User Guide
Page 11

CHAPTER
1
Introduction 1
In this chapter:
Q Welcome
Q Related Information
Q Technical Assistance
Q Yo u r C o m men t s
Q Registration
Trimble CU (Model 3) User Guide 1
Page 12

1 Introduction
Welcome 1.1
This manual describes the features of the Trimble® CU (Model 3) and how to operate it.
Even if you have previous experience of earlier Trimble controllers, Trimble recommends
that you spend some time reading this manual to learn about the special features of this
product.
In this user guide the Trimble CU (Model 3) is also refered to as the controller.
Related Information 1.2
Sources of related information include the following:
• Help – the application software has built-in, context sensitive help that lets you quickly
find the information you need. The Help is also available on the software CD.
Technical Assistance 1.3
If you have a problem and cannot find the information you need in the product
documentation, contact your local Distributor. Alternatively, do one of the following:
• Request technical support using the Trimble website at
www.trimble.com/support/support.htm
• Send an e-mail to trimble_support@trimble.com.
You r Co mment s 1.4
Your feedback about the supporting documentation helps us to improve it with each revision.
E-mail your comments to ReaderFeedback@trimble.com.
Registration 1.5
To receive information regarding updates and new products please register on the Trimble
web site.
www.trimble.com/register
Trimble CU (Model 3) User Guide
2
Page 13

CHAPTER
2
Unpacking and Inspection 2
In this chapter:
Q Inspection
Q What’s in the box?
Trimble CU (Model 3) User Guide 3
Page 14

2 Unpacking and Inspection
Inspection 2.1
Inspect the shipping container. If it is received in poor condition, examine the equipment for
visible damage. If damage is found, immediately notify the carrier and the Trimble sales
representative. Keep the container and packing material for the carrier’s inspection.
Also make sure that all parts listed in the table below are included in the shipment.
What’s in the box? 2.2
The contents in the box might vary depending on what has been ordered. The table below is
an example.
Part Connection/Use
Trimble CU (Model 3)
Controller
Docking Station For connecting the controller to an
office computer
Application Software CD Software and User Guide
Docking Station Power
Supply
Docking Station
connection cable
USB adapter cable 6-pin Hirose/USB 0.18m
Power cable 6-pin Hirose/Car cigarette lighter
Pack of 10 screen
protectors
Folding A4 card Getting started, short form information
Mains power to Docking Station, 12V
2A
6-pin Hirose/PC USB 2.5m
Trimble CU (Model 3) User Guide
4
Page 15

CHAPTER
3
The Trimble CU (Model 3) 3
In this chapter:
Q Introduction
Q Attaching and Detaching the Controller
Q The Keyboard
Q Power Management
Q Touch Screen
Q Setting the time and date
Q Operating System
Q Data Storage
Q Connecting the Controller to an Office Computer
Q Transferring data or files
Q Bluetooth Wireless Technology
Trimble CU (Model 3) User Guide 5
Page 16

3 The Trimble CU (Model 3)
Lock/release button
Loudspeaker
Introduction 3.1
This chapter describes the Trimble® CU (Model 3) controller and its most common features.
Figure 3.1 The Trimble CU (Model 3) controller
Attaching and Detaching the Controller 3.2
The procedures for attaching/detaching the controller to a total station applies to the Docking
Station, the Robotic Holder, and the GPS Holder.
To attach the controller
1. Hook the top of the controller over the top of the panel attachment. Figure 3.2.
Figure 3.2 Attaching the controller
2. Push the controller toward the panel attachment until it locks into place with a click.
Figure 3.3.
Trimble CU (Model 3) User Guide
6
Page 17

The Trimble CU (Model 3) 3
Figure 3.3 Locking the controller onto the panel attachement
To detach the controller:
1. To turn off the power, press the green power button.
2. Push the lock release button at the bottom of the controller and then lift the bottom of the
controller away from the instrument. Figure 3.4.
Figure 3.4 Unlocking the controller from the instrument
3. Unhook the top of the controller from the top edge of the panel attachment and remove it
from the instrument. Figure 3.5.
Figure 3.5 Removing the controller from the instrument
Trimble CU (Model 3) User Guide 7
Page 18

3 The Trimble CU (Model 3)
The Keyboard 3.1
Data entry on the controller keyboard is similar to that of a cell phone. The “α” button
scrolls between three different states of data entry: 123, ABC, and abc. Multiple presses on
one key scroll through the letters on that key depending on which state you’re in.
The Trimble CU (Model 3) also offers the standard Microsoft® Windows® functions of cut
(Ctrl+X), copy (Ctrl+C), and paste (Ctrl+V).
Control functions 31.1
In addition to data entry and the standard Window functions, the controller has a number of
control functions that are Trimble specific. These functions are described in the table below.
Tab le 3 .1
Key Control function
Ctrl + α Toggle the backlight on/off
Ctrl + Trimble Toggle the touch screen on/off
Ctrl + 7 Toggle the touch screen keyboard on/off
Ctrl + Enter Display help. Corresponds to F1 on a computer.
Ctrl + ESC Pop up the the Widows taskbar
Ctrl + ., Enter a “-” or a “+” symbol
Ctrl + Back space Delete
Ctrl + Spider key up Print screen
Entering Information 31.2
Entering text using the Input Panel keyboard
To display the Input panel keyboard press Ctrl + 7. Ctrl + 7 will toggle the input panel or
Trimble keypad keyboard on or off depending on which keyboard that has been selected. The
Trimble keypad is the default keyboard. To change to input panel keyboard follow the steps
below:
Trimble CU (Model 3) User Guide
8
Page 19

The Trimble CU (Model 3) 3
1. Tap once on the Keyboard icon that is located in the Windows taskbar. In the image below
the icon is identified by a circle.
Figure 3.6 The keyboard icon
2. Tap once on Keyboard to select the input panel keyboard.
Trimble CU (Model 3) User Guide 9
Page 20

3 The Trimble CU (Model 3)
Figure 3.7 Selecting the input panel keyboard
The Input Panel keyboard allows you to input data as if you were typing on a physical
keyboard. To change the keyboard to international symbols, tap the [áü] key, identified with a
circle in the figure below. To access additional symbols, tap [Shift]:
Figure 3.8 The input panel keyboard
To hide the input panel keyboard:
Trimble CU (Model 3) User Guide
10
Page 21

The Trimble CU (Model 3) 3
1. Tap once on the keyboard icon that is located in the Windows taskbar. See figure 3.6
2. Tap once on Hide Input Panel.
or:
1. Press Ctrl + 7.
Figure 3.9 Hide input panel
Entering text using the Trimble keypad keyboard
Trimble has developed a keyboard similar to the Input Panel keyboard, but with larger keys.
To display the Trimble keypad keyboard press Ctrl + 7. Ctrl + 7 will toggle the input panel or
Trimble keypad keyboard on or off depending on which keyboard that has been selected. The
Trimble keypad is the default keyboard. To change keyboard to Trimble Keypad follow the
steps below:
1. Tap once on the keyboard icon. See figure 3.6
2. Tap once on Trimble Keypad.
Trimble CU (Model 3) User Guide 11
Page 22

3 The Trimble CU (Model 3)
Figure 3.10 Selecting the Trimble keypad
The Trimble Keypad allows you to input data as if you were typing on a physical keyboard.
Figure 3.11 Trimble keypad keyboard
To hide the Trimble keypad keyboard:
Trimble CU (Model 3) User Guide
12
Page 23

The Trimble CU (Model 3) 3
1. Tap once on the keyboard icon that is located in the Windows taskbar. See figure 3.6
2. Tap once on Hide Input Panel. See figure 3.9
or:
1. Tap once on the top right blue key, identified with a circle in the figure. See figure 3.11
or:
1. Press Ctrl + 7.
Power Management 3.1
The Trimble CU (Model 3) is powered from an external power source, such as a total station,
Robotic Holder, GPS Holder, or a docking station.
The controller is equipped with an internal power source that enables you to remove the
controller from one power source and attach it to another within a period of 0 - 30 minutes.
Note – It is important that you put the controller in suspend mode before you remove it from
its power source. Otherwise the controller has to reboot when it restarts.
Note – Trimble does not guarantee that the actual suspend time will always be 30 minutes.
The suspend time can be less than 30 minutes in colder temperatures.
Trimble CU (Model 3) AC adaptor 31.1
International and US AC adaptor: This unit is a wall mount unit that does not require an
additional power cord. The adaptor is supplied with replac ea ble socket adaptors. Use the
adaptor that match the plug and voltage requirement of your local area. When traveling to
another country bring the adaptor for that country.
Rated Voltage: 100-240 / V AC 50-60 Hz / 700mA
AC adaptor safety
• Use only the AC adaptor intended for the Trimble CU (Model 3).
• Using another AC adaptor can damage your product and may void your warranty.
• AC adaptors are designed for “INDOOR USE ONLY”. Avoid using the AC adaptor in
wet outdoor areas.
• Unplug the AC adaptor from power when not in use.
• Do not short the output connector.
• Do not attempt to repair a defective unit. There are no repairable parts inside the unit.
Turn the Controller On 31.2
Press the power key to turn on the controller. The controller will also turn on if it is attached
to a powered docking station or instrument.
Trimble CU (Model 3) User Guide 13
Page 24

3 The Trimble CU (Model 3)
Turn the Controller Off 31.3
To turn off the controller press the power key or instrument trigger key if attached to an
instrument until the power key window is displayed.
The power key window will be displayed.
Figure 3.12 Power key window
Select Shutdown to turn off the controller.
Suspend Mode 31.4
If not used for a pre set period of time the controller will go to Suspend mode. The function
and time is set in the operating system, select /settings/control panel/power/power off.
To go to suspend mode press the power key or instrument trigger key if attached to an
instrument. The power key window will be displayed, select Suspend.
To turn the controller on press the power key or instrument trigger key if attached to an
instrument. The controller will also turn on if attached to a powered docking station or
instrument.
If the controller is attached to an instrument, the instrument and controller will stay in
suspend mode for 2 hours. After this the instrument and controller will be turned off.
If the controller is attached to a docking station, the controller will stay in suspend mode until
power is removed.
Restart 31.5
To restart the controller press the power key. The power key window will be displayed, select
Options.
The power option window will be displayed.
Trimble CU (Model 3) User Guide
14
Page 25

The Trimble CU (Model 3) 3
Figure 3.13 Power option window
Select Reset.
Trimble CU (Model 3) User Guide 15
Page 26

3 The Trimble CU (Model 3)
Figure 3.14 Restart controller.
Select Ye s to restart the controller. 31.6
Trimble CU (Model 3) User Guide
16
Page 27

The Trimble CU (Model 3) 3
Touch Screen 3.2
The Trimble CU (Model 3) LCD screen can be viewed easily both in direct sunlight and in
overcast conditions. It also incorporates a touch interface for navigation. Tap elements on the
screen with a stylus or your finger.
Calibrating the touch screen 32.1
If the touch screen does not respond properly when you tap it, recalibrate it as follows:
1. Tap the Start menu and select Settings/Control Panel/Stylus.
The Stylus Properties appears.
2. To recalibrate, tap Recalibrate in the Calibration tab.
3. Follow the prompts on the screen.
or:
1. Press the power key until the power key window is displayed.
2. Select Options.
3. To recalibrate, select Align Touch Screen.
Disabling the touch screen 30.1
To clean the touch screen during a survey, press [Ctrl] + [Trimble] to disable it. To enable the
touch screen again, press [Ctrl] + [Trimble].
or:
1. Press the power key until the power key window is displayed.
2. Select Options.
3. To disable touch screen, select Clean Touch Screen.
Display light 30.1
The display light is active by default and can be toggled on/off by pressing Ctrl + α.
or:
1. Press the power key until the power key window is displayed.
2. Select Options.
3. Select Backlight On/Off.
To change the default display light settings:
1. Tap the Start menu and then select Settings/ Control Panel/ Display.
2. Select Display light and then make your changes.
3. Tap OK.
Trimble CU (Model 3) User Guide 17
Page 28

3 The Trimble CU (Model 3)
Setting the time and date 3.1
1. Tap the Start menu and then select Settings/Control Panel/Date/Time.
The Date/Time properties dialogue appears.
2. Change the date and time as required.
3. To accept the new settings, tap OK. To cancel, tap ESC.
Trimble CU (Model 3) User Guide
18
Page 29

The Trimble CU (Model 3) 3
+12 V Com
Operating System 3.1
The Trimble CU (Model 3) runs the Windows Embedded CE 6.0 R3 operating system.
Data Storage 3.2
The Trimble CU (Model 3) has: a 1 GB NAND flash storage memory. The NAND flash
storage memory is non-volatile, and protects valuable data and software against memory loss.
It uses a robust file system to protect against data loss when power is remove unexpectedly.
Connecting the Controller to an Office Computer 3.3
Use the docking station to connect the controller to an office computer:
1. Attach the controller to the docking station.
2. Connect the docking station power supply to power the controller. Figure 3.15
3. Use the docking station connection cable to connect the controller to the computer
through the docking station comm port and the computer USB port.
Figure 3.15 Docking Station +12 V power and com ports
Transferring data or files 3.1
To be able to establish a communication between a device like the controller and an office
computer, a software that provides a way for this communication must be installed on the
office computer.
For office computers with Windows XP or older Windows operating systems, Microsoft
Active Sync is used to provide communication.
For office computers with Microsoft Windows Vista
systems, Microsoft Windows Mobile
®
Device Manager is used to provide communication.
®
or Mictrosoft Windows 7 operating
Trimble CU (Model 3) User Guide 19
Page 30

3 The Trimble CU (Model 3)
With Microsoft ActiveSync Technology 31.1
Microsoft ActiveSync® technology provides a way for devices such as the Trimble CU
(Model 3) to communicate with desktop computers and laptops that run on Windows XP or
older Windows operating systems. ActiveSync technology is already integrated into the
operating system on the controller. However, you must install ActiveSync technology on the
computer or laptop. You can install the software from the CD that was shipped with the
Trimble CU (Model 3) or you can download the current version of ActiveSync Technology
from:
http://www.microsoft.com
Connecting
Microsoft Active Sync technology will automatically establish communication when the
controller is connected to the office computer via the docking station.
As default the controller will be connected as a guest.
Figure 3.16 Microsoft ActiveSync Technology
To browse the files on the controller double click on Explore.
Trimble CU (Model 3) User Guide
20
Page 31

The Trimble CU (Model 3) 3
Figure 3.17 Mobile device in Explorer
For more information about ActiveSync Technology, refer to the help or visit the Microsoft
website.
With Microsoft Windows Mobile Device Center 31.2
The Windows Mobile Device Center provides a way for devices such as the Trimble CU
(Model 3) to communicate with desktop computers and laptops that run on Windows Vista or
Windows 7 operating systems. However, you must install the Windows Mobile Device Center
on the computer or laptop. You can download the current version of the Windows Mobile
Device Center from:
http://www.microsoft.com
Connecting
The Windows Mobile Device Center will acknowledge when a Trimble CU (Model 3) is
connected to the office computer via the docking station. The user will be prompted if
communication is to be established.
Select Connect without setting up your device
Trimble CU (Model 3) User Guide 21
Page 32

3 The Trimble CU (Model 3)
Figure 3.18 The Windows Mobile Device Center
To browse the files on the controller select File Management, Browse the content of your
device or use the explorer directly.
Figure 3.19 Browse the contents of your device
Trimble CU (Model 3) User Guide
22
Page 33

The Trimble CU (Model 3) 3
Figure 3.20 Mobile device in Explorer
For more information about the Windows Mobile Device Center, refer to the help or visit the
Microsoft website.
Bluetooth Wireless Technology 3.2
The Trimble CU (Model 3) is equipped with Bluetooth® wireless technology. The function is
enabled by default and makes wireless communication with most other devices that have
Bluetooth wireless technology possible. Uses for Bluetooth wireless technology include:
• File transfer application in the Start menu to transfer data to and from other Trimble CU
Controllers.
• Browse and transfer files to and from your controller.
• Connect to the Internet through a cellphone equipped with Bluetooth wireless
technology.
Modifying your Bluetooth Wireless Technology settings 32.1
To modify your Bluetooth Wireless Technology settings:
1. Tap the Start Menu and then select Settings/Control Panel/Bluetooth Device Properties.
2. Make your changes.
3. Tap OK.
Trimble CU (Model 3) User Guide 23
Page 34

3 The Trimble CU (Model 3)
Trimble CU (Model 3) User Guide
24
Page 35

CHAPTER
4
Caring for the Trimble CU (Model 3) 4
In this chapter:
Q Maintenance
Trimble CU (Model 3) User Guide 25
Page 36

4 Caring for the Trimble CU (Model 3)
Maintenance 4.1
Trimble recommends the following to maintain the Trimble CU (Model 3) during everyday
use, and to prevent potential physical damage and data loss.
Operating
temperature
Storage
temperature
Shock The Trimble CU (Model 3) is designed and tested to withstand a drop
Environment The Trimble CU (Model 3) has been tested to meet the requirements
Cleaning the case Clean the controller with a soft cloth dampened with clean water or
Care of the touch
screen
Applying a screen
protector
-30° C to + 55° C.
-40° C to + 70° C.
from a height of 1 meter onto plastic carpet on a concrete floor.
of IP55 and EN 60529:1991 IP55, for water and dust. This means that
the unit can be cleaned under running water and that dust will not
affect its performance.
with water containing a mild detergent. If the keyboard has dirt or
grime on it, use compressed air, a vacuum cleaner, or rinse under
clean water.
Clean the screen with a soft cloth dampened with clean water or glass
cleaner. Do not apply any cleaner directly on the screen. Apply the
cleaner to the cloth and gently wipe the screen.
Note – Do not use abrasive cleaners.
Use the screen protectors included with the unit to keep the
touchscreen clean and protected. To apply a screen protector, first
clean the display thoroughly. Peel the backing from the screen
protector. Align the edge, and then drop the remainder onto the
display. Use a credit card, if necessary, to squeeze the air from
underneath the screen protector.
Trimble CU (Model 3) User Guide
26
 Loading...